

Reese’s Fudge isn’t just a dessert; it’s a nostalgic journey wrapped in creamy layers of rich peanut butter and smooth milk chocolate. This incredibly simple, no-fail recipe allows you to whip up a batch of decadent, homemade fudge right on your stovetop in under 30 minutes, with no candy thermometer required! Forget complicated techniques – this recipe delivers irresistibly delicious, perfectly set fudge every single time, making it an ideal treat for holidays, special occasions, or simply satisfying that intense chocolate-peanut butter craving. Prepare to be amazed by how easily you can create this iconic flavor combination in a melt-in-your-mouth fudge form.
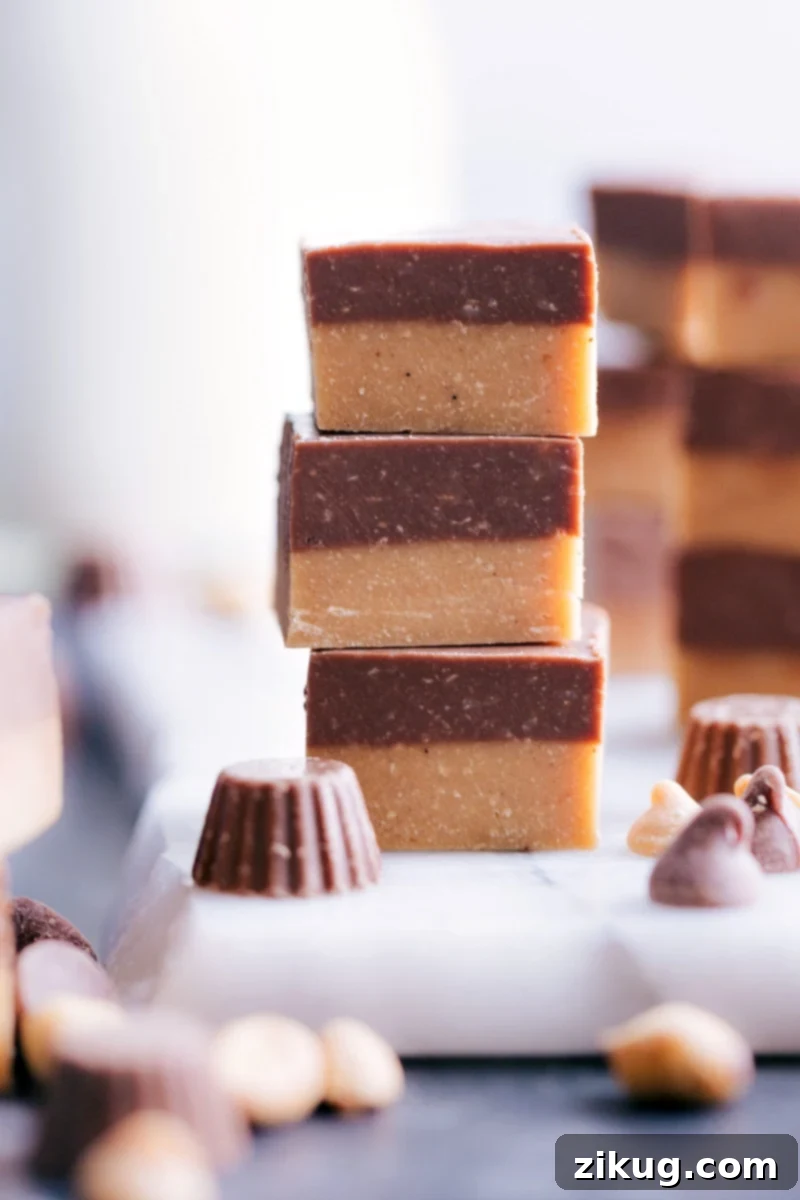
The Irresistible Allure of Reese’s Fudge
There’s an undeniable magic that happens when chocolate and peanut butter come together. It’s a flavor pairing that transcends generations, evoking comfort and pure bliss with every bite. From classic Peanut Butter Meltaways to indulgent Buttercrunch Candy, and even savory-sweet combinations like Chocolate Peanut Butter Snack Mix, these two ingredients are truly a match made in dessert heaven. This exquisite Reese’s Fudge recipe perfectly captures that harmonious blend, delivering a confection that is profoundly creamy, wonderfully smooth, and luxuriously rich.
Inspired by the world-famous Reese’s® Peanut Butter Cups, this homemade fudge elevates the experience by crafting distinct, velvety layers. The bottom layer bursts with intense peanut butter flavor, providing a delightful foundation, while the top layer offers a luscious blanket of milk chocolate. The contrast in textures and the seamless integration of flavors make this fudge an absolute showstopper. It has consistently been a monumental hit with everyone who has had the pleasure of tasting it, proving that some classics are just meant to be reimagined. If you consider yourself a fan of Reese’s candies, prepare for a new obsession; this fudge is guaranteed to become your go-to treat for any occasion. Its simplicity combined with its incredible flavor profile makes it perfect for holiday platters, bake sales, or simply a luxurious evening indulgence.
Essential Ingredients for Decadent Fudge
Crafting perfect fudge requires just a few key ingredients, each playing a vital role in achieving that sought-after creamy texture and rich flavor. Here’s a closer look at what you’ll need and why:
- Unsalted Butter: This foundational ingredient is crucial for adding unparalleled richness and contributing to the incredibly smooth, melt-in-your-mouth consistency of the fudge. Using unsalted butter allows you to control the overall saltiness of the dessert, which is important given the salt content of peanut butter chips. Cut into tablespoon-sized pieces for easier and more even melting.
- Peanut Butter Baking Chips: These chips are the star of our peanut butter layer, providing that iconic, robust peanut butter flavor and a wonderfully creamy texture when melted. Unlike regular peanut butter spreads, baking chips are specifically formulated to melt smoothly and integrate seamlessly into the fudge, ensuring a consistent and delicious base.
- Sweetened Condensed Milk: This is the magic ingredient that makes this fudge a “no-thermometer” recipe! Sweetened condensed milk is a thick, syrupy dairy product that provides both intense sweetness and the necessary binding agent, allowing the fudge to set without requiring precise temperature monitoring. It’s essential for achieving the dense, creamy, and non-gritty texture. You’ll need to divide the can evenly for each layer, and a food scale can be a handy tool for precision, ensuring both layers have consistent richness and set properly.
- Fine Sea Salt: While it might seem counterintuitive to add salt to a sweet dessert, a tiny pinch of fine sea salt makes an enormous difference. It beautifully balances the intense sweetness of the chocolate and peanut butter, enhancing their individual flavors and preventing the fudge from being overly cloying. This small addition truly elevates the overall taste experience.
- Vanilla Extract: Added at the end of the cooking process, vanilla extract imparts a warm, aromatic depth that complements both the chocolate and peanut butter wonderfully. To preserve its full, delicate flavor and ensure it doesn’t evaporate, it’s always stirred in after the pot has been removed from the heat.
- Milk Chocolate Chips: For the indulgent top layer, high-quality milk chocolate chips are a must. They melt into a silky-smooth coating that perfectly contrasts with the rich peanut butter base. While milk chocolate provides a classic, sweet flavor that echoes traditional Reese’s cups, you can easily opt for semi-sweet or even dark chocolate chips for a less sweet, more intense chocolate experience, catering to different preferences. Always choose good-quality chips for the best flavor and melting consistency. If you happen to have leftover baking chips, they’re fantastic in pancake or muffin batter, or even stirred into delicious chocolate cookies.
Your Step-by-Step Guide to Perfect Reese’s Fudge
Making this layered Reese’s Fudge is surprisingly straightforward, proving that homemade candy can be both simple and spectacularly delicious. Follow these detailed steps for a flawless, two-toned treat that everyone will adore:
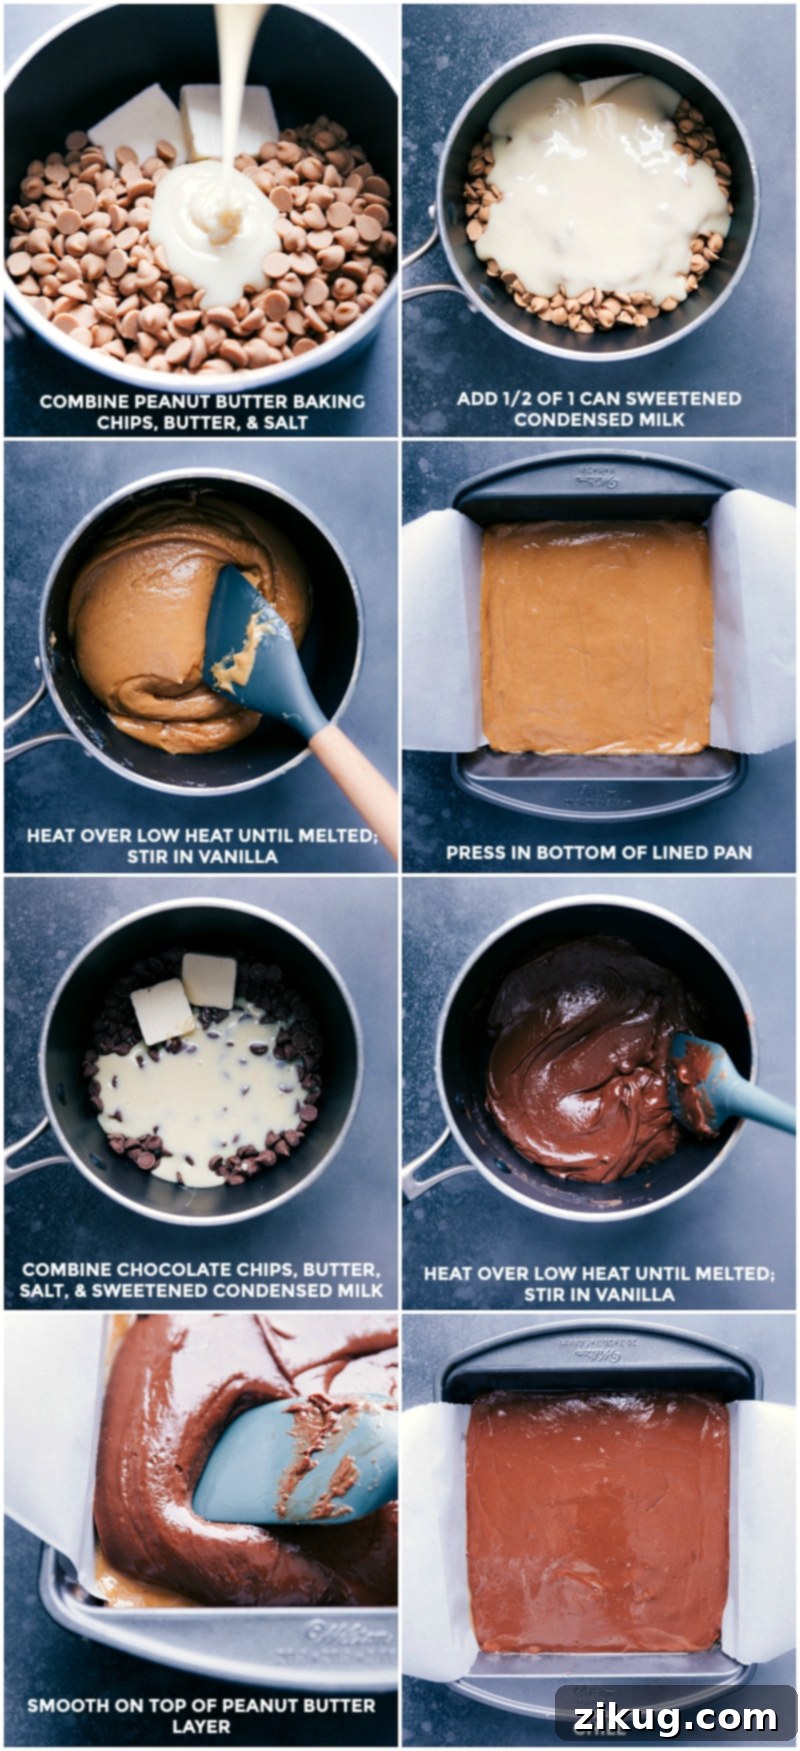
- Prepare Your Baking Pan: Begin by lining an 8×8-inch baking pan with either parchment paper or aluminum foil. It’s crucial to ensure that the paper or foil extends over the edges of the pan, creating a convenient “overhang” or “sling.” This thoughtful preparation will be your best friend when it comes time to easily lift the firm fudge out of the pan, guaranteeing a clean and effortless removal without any sticking or damage to the beautiful layers. Once your pan is ready, cut your measured unsalted butter into 1-tablespoon-sized pieces; this makes the melting process smoother and more even.
- Craft the Peanut Butter Layer Foundation: In a sturdy, thick-bottomed nonstick pot – essential for even heat distribution and preventing sticking – combine half of your pre-cut unsalted butter (2 tablespoons), all of the specified Reese’s peanut butter baking chips, half of the sweetened condensed milk (aim for approximately 198 grams, which is half of a standard 14-ounce can; a food scale offers precision here), and a delicate pinch of fine sea salt (1/8 teaspoon). Place this pot over very low heat.
- Melt and Achieve Peanut Butter Smoothness: With a heat-resistant spatula, begin to stir the mixture constantly. Be diligent in scraping the sides and bottom of the pot frequently to ensure that all ingredients melt uniformly and to prevent any part of the mixture from scorching. Patience is a virtue in fudge making; resist the strong urge to increase the heat, as a low and slow melt is absolutely key to achieving the smoothest, most lump-free peanut butter fudge texture. Continue stirring until all the peanut butter chips are fully melted and the mixture is perfectly smooth and uniform in consistency.
- Add Vanilla and Spread the First Layer: As soon as the peanut butter mixture reaches that desired smooth and melted state, promptly remove the pot from the heat. Stir in 1 teaspoon of vanilla extract until it is thoroughly incorporated throughout the fudge base. Immediately pour this warm, creamy peanut butter fudge into your already prepared 8×8-inch pan. Use your spatula to gently smooth and press it into an even, flat layer across the entire bottom of the pan. Once evenly spread, place the pan in the refrigerator to chill and begin to set while you move on to preparing the next layer.
- Prepare the Luxurious Chocolate Layer: Quickly clean and, more importantly, thoroughly dry your nonstick pot. Any residual moisture, even a tiny drop, can cause chocolate to seize and become grainy or stiff. Once sparkling clean and bone dry, combine the remaining 2 tablespoons of unsalted butter, the milk chocolate chips, the remaining half of the sweetened condensed milk, and the remaining 1/8 teaspoon of fine sea salt in the clean pot. Place this pot back over very low heat.
- Melt and Perfect the Chocolate: Just like with the peanut butter layer, stir the chocolate mixture constantly with your heat-resistant spatula, diligently scraping the sides and bottom. Continue this gentle stirring over low heat until the milk chocolate chips are completely melted and the mixture is beautifully smooth and glossy. Again, patience with low heat will yield the best, silkiest results for your chocolate layer.
- Layer and Begin Final Chill: Once the chocolate mixture is smooth, remove the pot from the heat. Stir in the remaining 1 teaspoon of vanilla extract until it’s perfectly well combined and fragrant. Retrieve your pan with the now-chilled and partially set peanut butter layer from the refrigerator. Carefully pour the warm milk chocolate fudge over the peanut butter layer. Use your spatula to gently and evenly spread the chocolate, ensuring it completely covers the bottom layer without disturbing it or allowing the colors to mix too much. Cover the pan with plastic wrap or foil and return it to the refrigerator. Allow the fudge to chill for a minimum of 4 to 8 hours, or ideally overnight, until both layers are completely firm and set through. This extensive chilling period is absolutely crucial for the fudge to achieve its proper texture and hold its shape perfectly when cut.
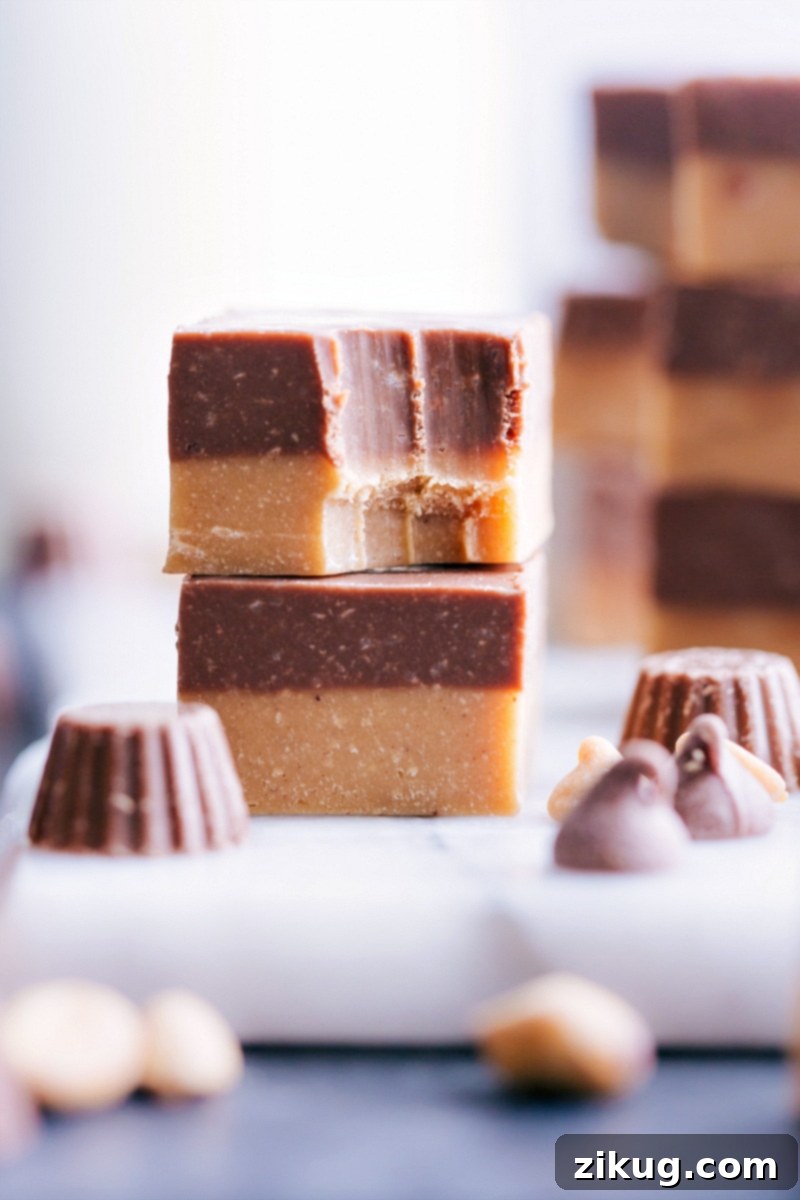
- Slice and Revel in Your Creation: Once the fudge is completely firm, remove it from the pan by carefully lifting the parchment paper overhang. For impeccably clean, sharp cuts that showcase the beautiful layers, use a very sharp knife. For best results, run your knife under hot water, wipe it thoroughly dry, and then make quick, decisive cuts. Repeat this warming and drying process for each cut. Because this Reese’s Fudge is exceptionally rich and decadent, we highly recommend cutting it into small, bite-sized squares (around 1-inch pieces) for serving. This makes it easier to enjoy and share. Serve your delightful homemade Reese’s Fudge straight from the fridge and savor every perfectly layered bite!
Mastering Your Fudge: Expert Tips for Flawless Results
Achieving perfectly smooth, firm, and flavorful fudge is simple with a few insider tricks. Here are some expert tips to ensure your homemade Reese’s Fudge turns out flawlessly every time, delighting all who taste it:
- The Absolute Necessity of Lining Your Pan: Seriously, never skip this step! Lining your 8×8-inch pan with either parchment paper or aluminum foil is non-negotiable. This creates a convenient “sling” that allows you to effortlessly lift the entire slab of firm fudge out of the pan without sticking or crumbling. Make sure the paper or foil extends generously over all sides of the pan for an easy grip. Without this crucial step, removing your beautiful, intact fudge will be an unnecessary challenge.
- Precision with Sweetened Condensed Milk: While it might be tempting to eyeball the division of sweetened condensed milk, using a food scale to precisely split the can between the two layers is highly recommended. Each layer ideally needs 198 grams (or half of a 14-ounce can) of condensed milk. This small act of precision ensures a consistent texture and sweetness for both the peanut butter and chocolate portions, contributing significantly to the overall balance and uniformity of your perfectly layered fudge.
- Reuse, but Clean Your Pot Meticulously: It’s perfectly fine, and even encouraged, to use the same nonstick pot for melting both the peanut butter and chocolate layers. However, after preparing the peanut butter layer, it’s absolutely critical to thoroughly wash the pot and then completely dry it before starting on the chocolate. Even a tiny drop of water can cause chocolate to seize, turning it grainy, lumpy, and unworkable. A completely dry pot is paramount for achieving a silky-smooth chocolate layer.
- Consistent and Diligent Stirring is Your Best Friend: When melting your fudge ingredients over low heat, constant stirring is non-negotiable. A sturdy, heat-resistant silicone spatula is your best tool for this. Make sure to continuously scrape the bottom and sides of the pot to prevent any ingredients from sticking, scorching, or clumping. This diligent stirring ensures an even melt and a beautifully smooth, lump-free fudge consistency throughout both layers. Once poured into the pan, use the same spatula to gently smooth each fudge layer into a perfectly flat, even surface for that professional, layered look.
- Patience with Low Heat Pays Dividends: The ultimate secret to smooth, creamy, and perfectly set fudge without the need for a candy thermometer lies in using consistently low heat and exercising patience. High heat can easily scorch the delicate ingredients (especially the chocolate), or it can cause the fudge to become grainy or crystallize. Allow the ingredients to melt slowly and steadily, stirring continuously, and you will be handsomely rewarded with a superior texture and flavor profile.
- Achieving the Perfect, Clean Cut: Once your fudge is completely firm and chilled, the way you cut it makes a significant difference in its presentation. For crisp, clean edges that proudly display the distinct layers, use a very sharp knife. For an even smoother cut, run your knife under hot water for a few seconds, wipe it thoroughly dry, and then make quick, decisive cuts. Repeat this warming and drying process for each slice. Since Reese’s Fudge is wonderfully rich and decadent, cutting it into small, bite-sized squares (around 1-inch pieces) is highly recommended, making it an ideal treat for sharing and enjoying without being overwhelming.
- The Value of Quality Ingredients: Remember, the exceptional flavor and texture of your fudge are only as good as the ingredients you use. Opt for high-quality peanut butter baking chips and milk chocolate chips. Better quality chocolate, for instance, not only melts more smoothly but also offers a richer, more nuanced flavor that truly elevates the entire fudge experience. Investing in good ingredients makes a noticeable difference.
Storage Solutions for Your Reese’s Fudge
Nothing quite compares to enjoying Reese’s Fudge straight from the refrigerator – the chilled texture enhances its creaminess, firmness, and overall delightful chewiness. To ensure your delicious homemade fudge stays fresh, vibrant, and delightful for as long as possible, proper storage is absolutely essential.
Always store your Reese’s Fudge in an airtight container. Exposure to cold, circulating air in the refrigerator can quickly dry out the fudge, causing it to lose its smooth, creamy texture and become crumbly. When stored correctly in an airtight container in the fridge, your fudge will maintain its optimal freshness, luscious texture, and incredible taste for up to 3 weeks. For even longer preservation, individual pieces of fudge can be frozen. Simply place them in an airtight freezer-safe container or a heavy-duty freezer bag for up to 3 months. To enjoy, thaw the frozen fudge slowly in the refrigerator before serving.
Explore More Irresistible Dessert Creations
If you have a sweet tooth and thoroughly enjoyed crafting and tasting this delightful Reese’s Fudge, you’ll undoubtedly love exploring these other irresistible dessert recipes from our collection:
- Peanut Butter Brownie Bites: Quick and easy, decadent treats made with a convenient brownie mix, perfect for satisfying cravings or serving at parties.
- Brown Sugar Cookies: Exceptionally soft, wonderfully chewy, and delicately sweet cookies that promise to melt in your mouth with every bite.
- Muddy Buddies: A fun, classic, and utterly addictive peanut butter and chocolate snack mix, perfect for movie nights or casual gatherings.
- Oreo Balls: Decadent, no-bake treats crafted from crushed Oreo cookies and cream cheese, elegantly covered in a layer of smooth chocolate.
- Turtle Candy: A sophisticated blend of rich chocolate, crunchy pecans, and gooey caramel candy, offering a luxurious homemade confection.

Print Recipe
Reese’s Fudge
Video
Equipment
-
8 x 8-inch baking pan
-
Parchment paper
-
Medium nonstick pot
-
Heat-resistant spatula
Ingredients
- 4 tablespoons unsalted butter divided for two layers
- 1-1/2 cups peanut butter baking chips
- 1 (14-ounce) can sweetened condensed milk divided evenly for each layer (approx. 198g per layer)
- 1/4 teaspoon fine sea salt divided (1/8 tsp per layer)
- 2 teaspoons vanilla extract divided (1 tsp per layer)
- 1-1/2 cups milk chocolate chips for a less sweet fudge, use semi-sweet or dark chocolate chips
Instructions
-
1. Prepare Pan: Line an 8×8-inch baking pan with parchment paper, ensuring there’s an overhang on all sides for easy removal of the fudge. This step is crucial for effortlessly lifting the set fudge. Cut your unsalted butter into 1-tablespoon-sized pieces to facilitate even melting.
-
2. Create Peanut Butter Layer: In a sturdy, thick-bottomed nonstick pot, combine 2 tablespoons of the unsalted butter, all of the Reese’s peanut butter baking chips, half of the sweetened condensed milk (approximately 198g, using a food scale if available), and 1/8 teaspoon of the fine sea salt. Place the pot over low heat.
-
3. Melt and Smooth: Using a heat-resistant spatula, stir the mixture continuously, making sure to scrape the sides and bottom of the pot frequently to prevent sticking or scorching. Maintain low heat and be patient; a slow melt ensures a perfectly smooth and uniform fudge. Continue stirring until all the peanut butter chips are completely melted and the mixture is silky smooth.
-
4. Vanilla and Chill First Layer: Immediately remove the pot from the heat. Stir in 1 teaspoon of the vanilla extract until it’s fully incorporated. Pour the warm peanut butter fudge into your prepared 8×8-inch pan. Use the spatula to gently smooth and press the fudge into an even, flat layer across the bottom. Transfer the pan to the refrigerator to chill while you prepare the chocolate layer.
-
5. Prepare Chocolate Layer: Thoroughly clean and dry the nonstick pot. Even a tiny amount of moisture can cause chocolate to seize. In the clean pot, combine the remaining 2 tablespoons of unsalted butter, the milk chocolate chips, the remaining half of the sweetened condensed milk, and the remaining 1/8 teaspoon of fine sea salt. Place over low heat.
-
6. Melt Chocolate: Stir the mixture constantly with your heat-resistant spatula, scraping the sides and bottom. Continue stirring over low heat until the milk chocolate chips are completely melted and the mixture is smooth and glossy.
-
7. Layer and Chill: Remove the pot from the heat and stir in the remaining 1 teaspoon of vanilla extract until well combined. Retrieve the pan with the chilled peanut butter layer from the refrigerator. Carefully pour the warm milk chocolate fudge over the set peanut butter layer. Use your spatula to gently spread the chocolate evenly to fully cover the bottom layer without disturbing it. Cover the pan and refrigerate for 4 to 8 hours, or ideally overnight, until the fudge is completely firm.
-
8. Slice and Serve: Once the fudge is firm, lift it from the pan using the parchment paper overhang. For impeccably clean cuts, use a very sharp knife that has been run under hot water and then thoroughly dried. Make quick, decisive cuts. As this fudge is very rich, we recommend cutting it into small, bite-sized squares for serving. Enjoy your homemade Reese’s Fudge!
Recipe Notes
Storage: Reese’s Fudge is best served chilled, directly from the refrigerator, where its layers are perfectly firm. To maintain its creamy texture and prevent it from drying out, store the fudge in an airtight container in the refrigerator. It will stay fresh for up to 3 weeks. For longer storage, individual pieces can be frozen in an airtight container or freezer bag for up to 3 months; simply thaw in the refrigerator before enjoying.
Nutrition
|
Carbohydrates: 5g
|
Protein: 2g
|
Fat: 4g
|
Saturated Fat: 3g
|
Cholesterol: 6mg
|
Sodium: 36mg
|
Fiber: 1g
|
Sugar: 4g
|
Vitamin A: 41IU
|
Calcium: 1mg
|
Iron: 1mg
Nutrition information is automatically calculated, so should only be used as an approximation.
Like this? Leave a comment below!