
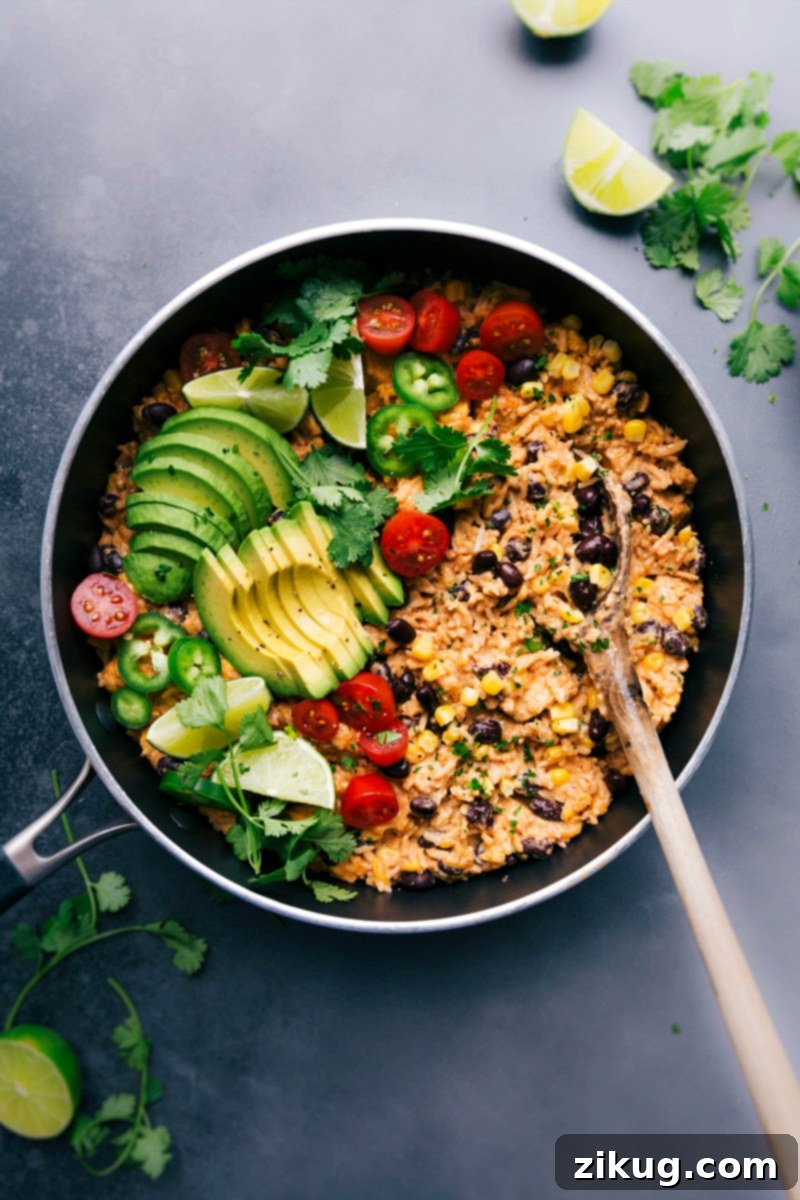
Unleash a fiesta of flavor with this incredible **One-Skillet Mexican Chicken and Rice**. It’s the ultimate easy, cheesy, and deeply satisfying meal that brings vibrant Mexican-inspired tastes right to your dinner table. Forget the endless pile of dishes; this recipe is crafted for maximum flavor with minimal cleanup, making it a perfect choice for busy weeknights or whenever you crave a hearty, flavorful dish. Every spoonful is packed with tender chicken, fluffy rice, and a rich, creamy sauce, all brought together with a generous helping of melted cheese. It’s truly everything you desire in one harmonious bite.
Elevate your meal by pairing this delightful dish with a refreshing corn salad, a light and vibrant fruit salad, or simply some crisp tortilla chips and a dollop of guacamole. Your family will be begging for seconds!
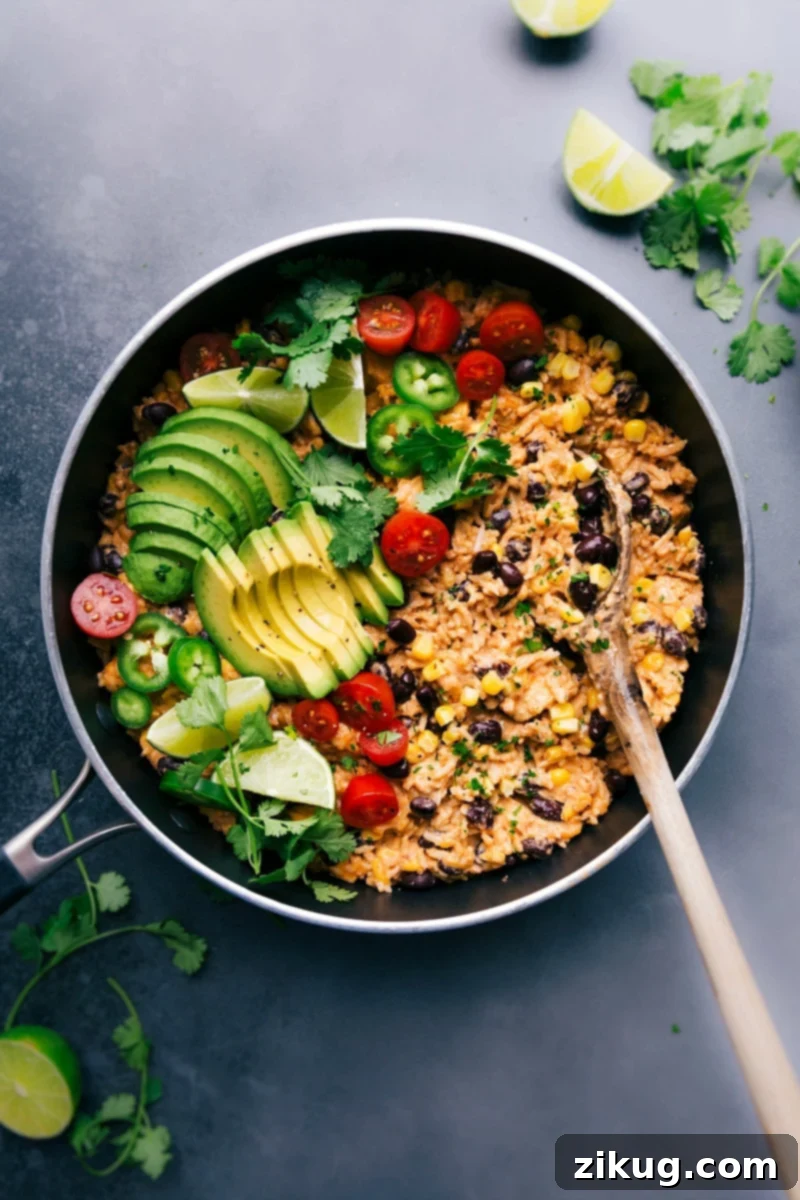

from the author
Why You’ll Fall in Love with This One-Skillet Dinner!
As a passionate home cook, I’m constantly searching for recipes that deliver big on flavor without creating a mountain of dishes. That’s why one-skillet meals are a game-changer in my kitchen! There’s something inherently satisfying about preparing a complete, delicious meal in a single pan, knowing that cleanup will be a breeze. When I set out to create a new family favorite, I knew it had to be Mexican-inspired. Our household is absolutely obsessed with the vibrant flavors of dishes like my Sweet Potato Burrito Bowls, so I channeled that love for bold spices and savory goodness into this ultimate creamy, cheesy skillet chicken and rice.
This recipe truly hits all the right notes: it’s rich, wonderfully flavorful, and loaded with that irresistible melty cheese everyone adores. Seriously, it’s one of those dinners that disappears in record time. Be prepared for everyone to ask for seconds (and possibly thirds!). It’s not just a meal; it’s an experience that brings comfort and joy to the dinner table with minimal fuss.
Essential Ingredients for Mexican Chicken and Rice
Crafting this flavorful one-skillet dish relies on a few key ingredients, each playing a crucial role in delivering that authentic Mexican-inspired taste. Here’s a deeper dive into what you’ll need and why each component shines:
- Chicken: Boneless, skinless chicken breasts, cut into bite-sized pieces, are ideal for quick cooking and even distribution throughout the dish. You can also use chicken thighs for an even juicier result.
- Rice: For the best fluffy, non-sticky results, **Basmati rice** is highly recommended. Its long grains cook up perfectly, absorbing the rich flavors without becoming mushy. While other white rice varieties can work, Basmati truly elevates the texture.
- Taco Seasoning: This is where much of the Mexican flavor comes from. For ultimate control over spice and sodium, I highly recommend using a homemade blend if you have time. Otherwise, a good quality store-bought taco seasoning works wonderfully, making this dish even quicker.
- Cream Cheese: The secret to the incredible creaminess and richness of this dish! Full-fat cream cheese melts beautifully, creating a luscious texture that coats every grain of rice and piece of chicken.
- Salsa: Choose your favorite salsa – mild, medium, or hot – to customize the spice level. A good quality salsa adds fresh, zesty flavor.
- Taco Sauce: Using a store-bought taco sauce adds depth and a savory tang that perfectly complements the salsa, keeping the prep quick and easy.
- Chicken Broth: Essential for cooking the rice and infusing it with savory flavor. Low-sodium broth allows you to control the overall saltiness.
- Black Beans & Corn: Canned black beans (drained and rinsed) and frozen corn add texture, color, and a wholesome touch. They are classic Mexican-inspired ingredients that complete the dish.
- Cheddar Cheese: Freshly shredded sharp Cheddar cheese melts beautifully and adds a fantastic cheesy pull and tangy flavor. Pre-shredded cheese can also be used in a pinch, but fresh always melts smoother.
- Olive Oil: For sautéing the chicken and toasting the rice.
- Toppings: Don’t skimp on the toppings! My favorites include creamy avocado (cubed or sliced), a dollop of sour cream or Greek yogurt, a squeeze of fresh lime juice, and a sprinkle of fresh cilantro. These additions brighten the dish and add layers of flavor and texture.
Quick Tip: Pan Selection is Key!
To ensure your rice cooks perfectly without sticking to the bottom of the pan, it’s absolutely essential to **use a large, good quality non-stick pan** with a tight-fitting lid. This will prevent scorching and allow for even cooking.
Mastering Your One-Skillet Mexican Chicken and Rice: Step-by-Step
Creating this delicious one-skillet meal is surprisingly straightforward. Follow these helpful tips and detailed steps to achieve perfect results every time. (For the full, printable recipe card, scroll down further.)
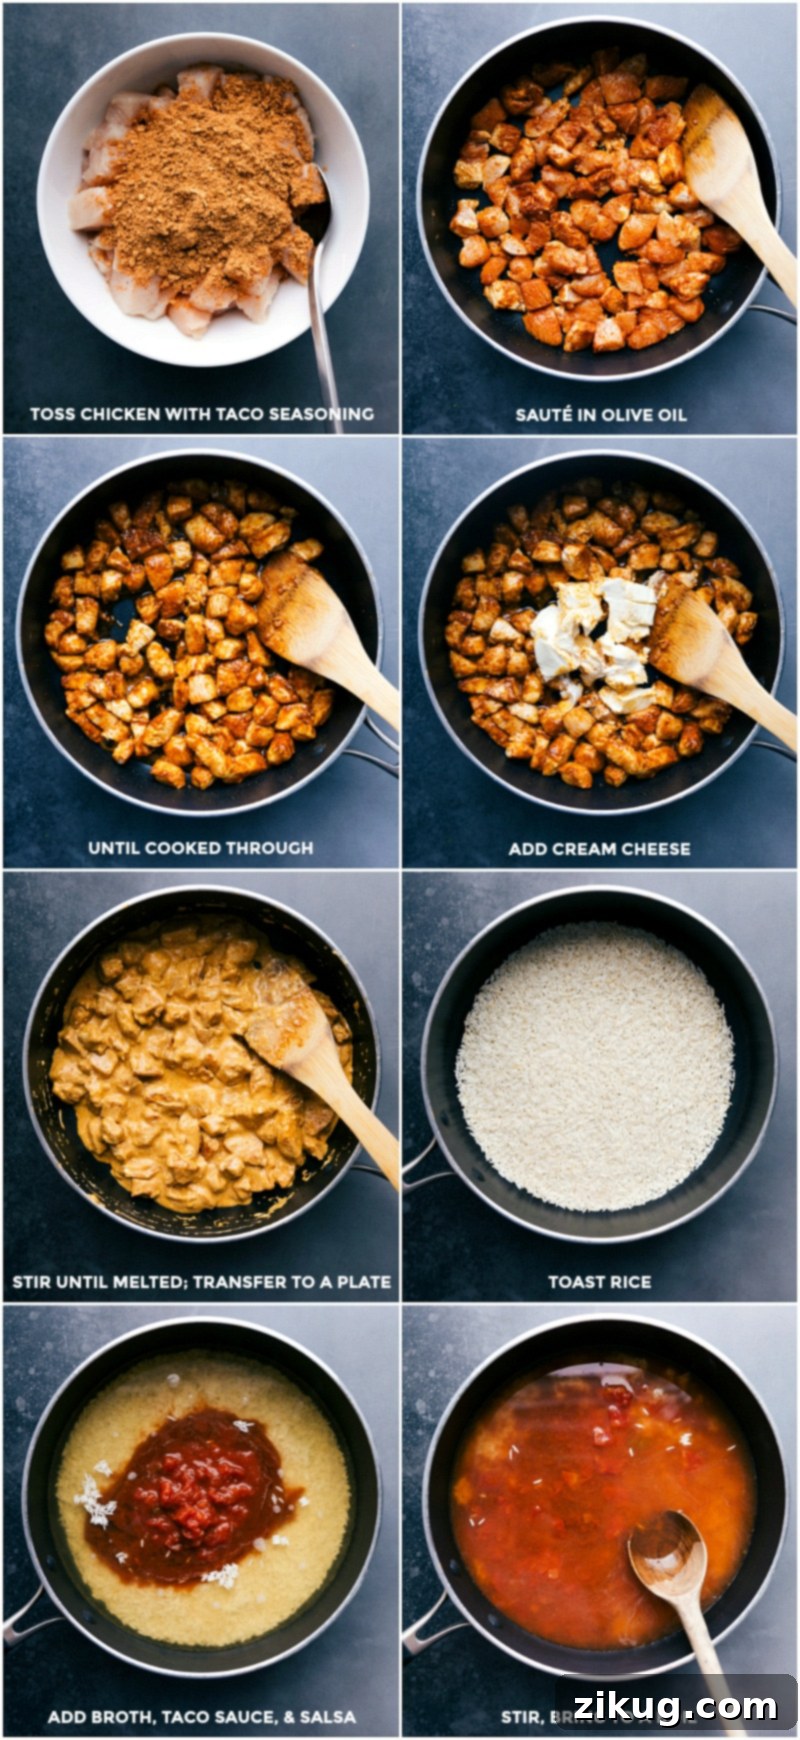
- **Prepare the Chicken**: Start by patting your chicken pieces dry with paper towels. This crucial step helps them brown beautifully and develop a richer flavor when sautéed. Chop the chicken into even, bite-sized pieces for consistent cooking. Then, generously sprinkle your preferred amount of taco seasoning over the chicken, tossing gently to ensure every piece is thoroughly coated.
- **Sauté the Seasoned Chicken**: Heat olive oil in your large, nonstick skillet over medium heat. Add the seasoned chicken and cook for about 5-7 minutes, stirring occasionally, until it’s mostly cooked through and lightly browned on the outside. Avoid overcooking at this stage, as it will continue to cook later.
- **Incorporate Cream Cheese**: While the chicken cooks, cube your softened cream cheese into smaller pieces. This helps it melt faster and more evenly. Once the chicken is mostly cooked, add the cream cheese directly into the pan. Stir continuously until the cream cheese is fully melted and forms a smooth, creamy sauce around the chicken. It might look a little greasy at first, but keep stirring, and it will emulsify. Transfer this chicken-cream cheese mixture to a plate and cover it loosely with foil to keep warm.
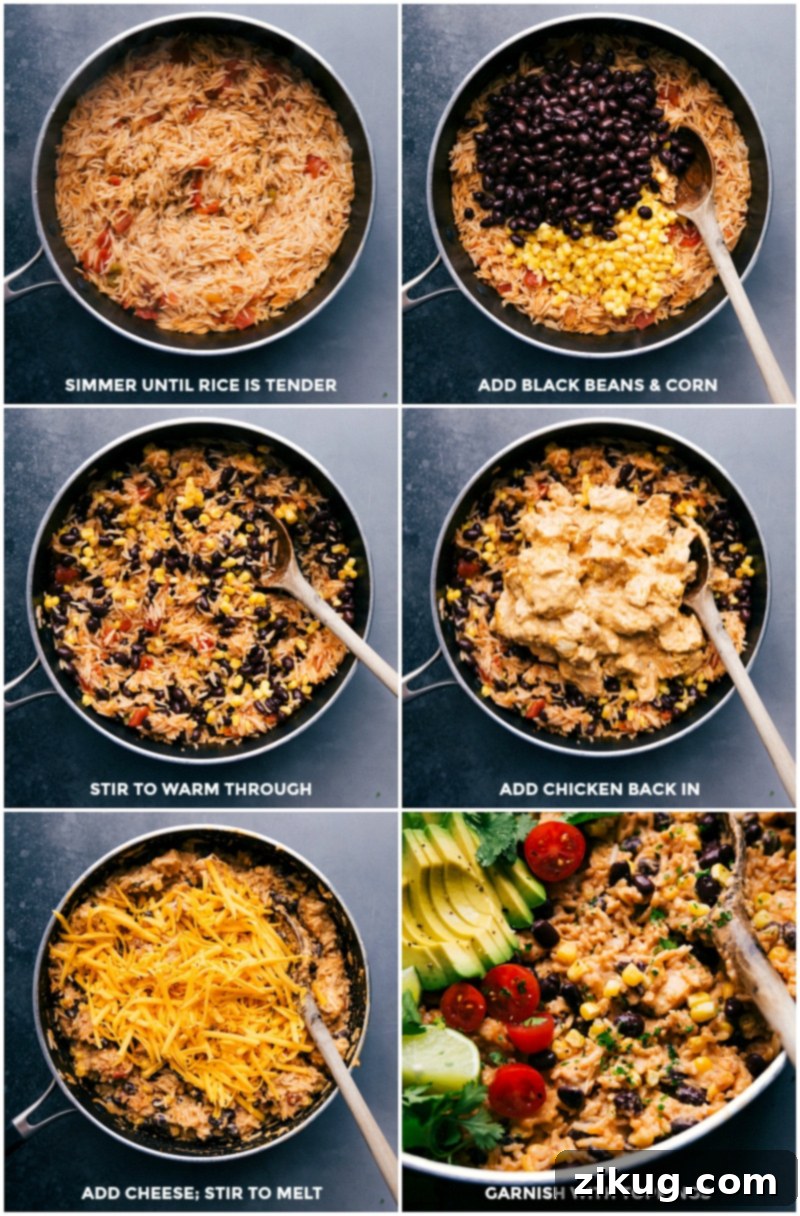
- **Cook the Flavorful Rice**: Using the same pan (no need to clean it!), add the uncooked Basmati rice. Toast the rice over medium heat for about 1 minute, stirring constantly, until it’s lightly golden and fragrant. This step adds a wonderful nutty depth. Then, pour in the salsa, taco sauce, and chicken broth. Bring the mixture to a gentle boil, then reduce the heat to low or medium-low, cover the pan tightly, and simmer. Stir occasionally (every 7-8 minutes) to prevent sticking and ensure even cooking. The rice should be tender in about 15-20 minutes. Once cooked, remove the pan from the heat, but keep it covered for another 3-4 minutes to allow the rice to steam, ensuring maximum fluffiness.
- **Adjusting Rice Consistency**: If your rice cooks too quickly and absorbs all the liquid before becoming tender, add a splash more broth (a quarter cup at a time) and continue to simmer. If it’s too wet and not cooking fast enough, slightly increase the heat, ensuring it doesn’t boil aggressively. The ideal cooking time is usually 15-20 minutes. Taste the rice and adjust seasoning with salt and pepper as needed.
- **Combine and Finish**: Return the pan with the tender rice to low heat. Add the rinsed and drained black beans along with the frozen corn, stirring gently until warmed through. Carefully fold in the reserved cream cheese-chicken mixture, distributing it evenly throughout the rice. Finally, remove the pan from the heat and stir in the freshly shredded Cheddar cheese until it melts into gooey perfection.
- **Season and Serve**: Taste the finished dish and add any additional salt and pepper if desired. Garnish generously with your favorite toppings like fresh avocado, cilantro, and a squeeze of lime juice. Serve hot and enjoy this incredibly satisfying one-skillet meal!
Storage and Meal Prep Tips
Store any leftover Mexican Chicken and Rice in an airtight container in the refrigerator for up to 3 days. It reheats beautifully in the microwave or on the stovetop with a splash of broth. This dish is fantastic for meal prepping lunches throughout the week!
More Incredible One-Pot Recipes to Love
Dinner
One Pot Cabbage, Potatoes, and Sausage
Dinner
Enchilada Pasta (ONE Skillet!)
Dinner
Chicken and Butternut Squash
Dinner
Meatballs and Rice (One Pot!)
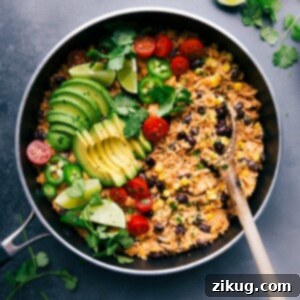
Mexican Chicken and Rice
Equipment
-
Large nonstick pan 3-quart, 10-inch, with lid
Ingredients
- 2 to 3 tablespoons taco seasoning
- 3/4 pound boneless, skinless chicken breasts cut into bite-sized pieces
- 2 tablespoons olive oil
- 4 ounces cream cheese full-fat, softened
- 1 cup uncooked white rice I recommend Basmati
- 1/2 cup mild salsa
- 1/2 cup mild taco sauce see note 1
- 1-3/4 cups chicken broth
- 1 (15.25-ounce) can black beans drained and rinsed
- 1 cup frozen corn
- 1 cup sharp Cheddar cheese freshly shredded, optional
- 1 large ripe avocado
- Serving suggestions see note 2
Instructions
-
Pat chicken dry with paper towels to ensure better browning, then trim any excess fat. Chop the chicken into uniform bite-sized pieces. Sprinkle generously with taco seasoning (adjust to your preference; I find about 2-1/2 tablespoons to be perfect). Toss gently until the chicken is thoroughly coated in the seasoning.
-
In a large, high-quality non-stick pan, add the olive oil (see note 3 below for pan selection). Add the seasoned chicken to the hot pan and cook over medium heat for approximately 5–7 minutes, stirring occasionally, until it is mostly cooked through and golden brown.
-
Meanwhile, cut the cream cheese into smaller cubes to help it soften quickly. Gently warm it in the microwave for a few seconds if needed. Add the softened cream cheese to the skillet with the chicken. Stir continuously until the cream cheese fully melts and blends into a smooth, creamy sauce. Don’t worry if it looks a bit oily initially; keep stirring, and it will become wonderfully smooth. Once the chicken is fully cooked and the cream cheese is perfectly melted, transfer the entire chicken mixture to a plate and cover it with foil to keep it warm.
-
Add the uncooked rice to the empty pan (no need to clean it; the residual flavors are a bonus!). Toast the rice for about 1 minute over medium heat until it’s slightly fragrant and has a nutty aroma. Then, pour in the salsa, taco sauce, and chicken broth. Bring the liquid to a boil, then immediately reduce the heat to low or medium-low, cover the pan tightly, and simmer. Stir the rice occasionally (every 7–8 minutes) to prevent sticking and ensure even cooking. Continue cooking until the rice is tender, which typically takes about 15–20 minutes. Once cooked, remove the pan from the heat, keep it covered, and let it steam for an additional 3–4 minutes for maximum fluffiness.
-
If the rice absorbs all the liquid too quickly and isn’t tender, add a small amount of extra broth (1/4 cup at a time). If the rice is too wet or not cooking fast enough, slightly increase the heat, ensuring it remains a gentle simmer. The total cooking time for the rice should be approximately 15–20 minutes. Taste the rice and season with additional salt and pepper if needed.
-
Once the rice is tender and perfectly cooked, return the pan to low heat. Add the rinsed and drained black beans and the frozen corn, stirring gently until they are warmed through. Carefully fold in the reserved cream cheese-chicken mixture, distributing it evenly throughout the rice. Remove the pan from the heat and stir in the freshly shredded Cheddar cheese until it is completely melted and creates a deliciously cheesy blend.
-
Taste the finished dish and adjust seasoning with any additional salt and pepper as needed. Garnish generously with your desired toppings (refer to note 2 for ideas) and serve hot. Enjoy this incredibly satisfying and easy one-skillet meal!
Recipe Notes
Note 2 – Optional Toppings for Extra Flavor and Texture: Elevate your Mexican Chicken and Rice with a variety of fresh and flavorful toppings. Consider adding: sliced green onions, extra fresh cilantro, diced cherry tomatoes, chopped sweet bell peppers, extra jalapeños (fresh or pickled), additional chopped green chilies, a squeeze of fresh lime juice for brightness, a dollop of sour cream or Greek yogurt, or even a sprinkle of crumbled cotija cheese. These additions not only enhance the visual appeal but also add wonderful layers of taste and texture to each bite.
Note 3 – The Importance of a Non-Stick Pan: For best results, it is absolutely crucial that you use a good quality non-stick pan for this recipe. This prevents the rice from sticking to the bottom during cooking, ensuring it becomes perfectly fluffy and tender without scorching. A 3-quart, 10-inch non-stick skillet with a tight-fitting lid is ideal.
Storage: Store any leftover Mexican Chicken and Rice in an airtight container in the refrigerator for up to 3 days. It makes for excellent packed lunches! Reheat gently on the stovetop over low heat with a splash of water or broth, or in the microwave until warmed through.
Nutrition
Nutrition information is automatically calculated, so should only be used as an approximation.