
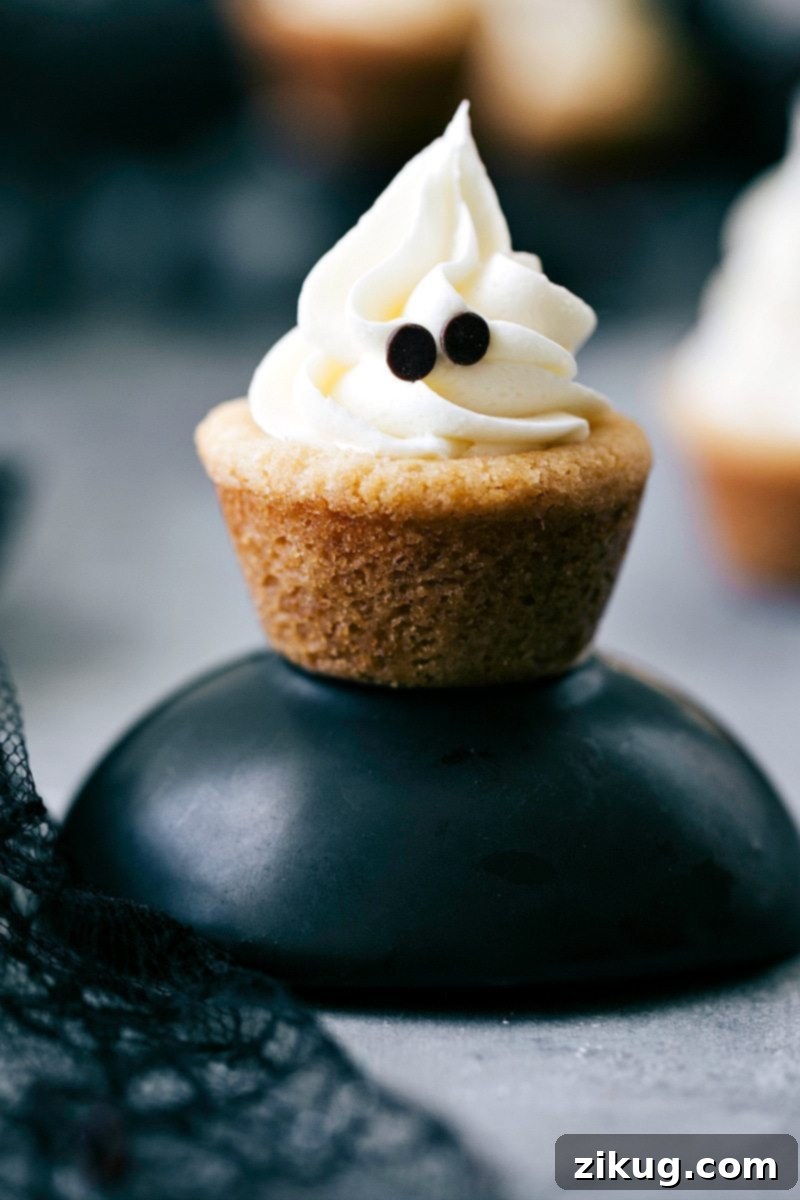
Spooktacularly Simple Ghost Cookies: Your Ultimate Guide to Easy Halloween Treats
Get ready to conjure up some magic this Halloween with these irresistibly cute and easy Ghost Cookies! Crafted from convenient sugar cookie mix shaped into delightful cups and filled with creamy frosting, then adorned with miniature chocolate chip eyes, these treats are a festive and fun addition to any Halloween celebration. Whether you’re hosting a ghoulish gathering or simply want a quick, adorable snack, our ghost cookies promise smiles and spooky delight with minimal effort.
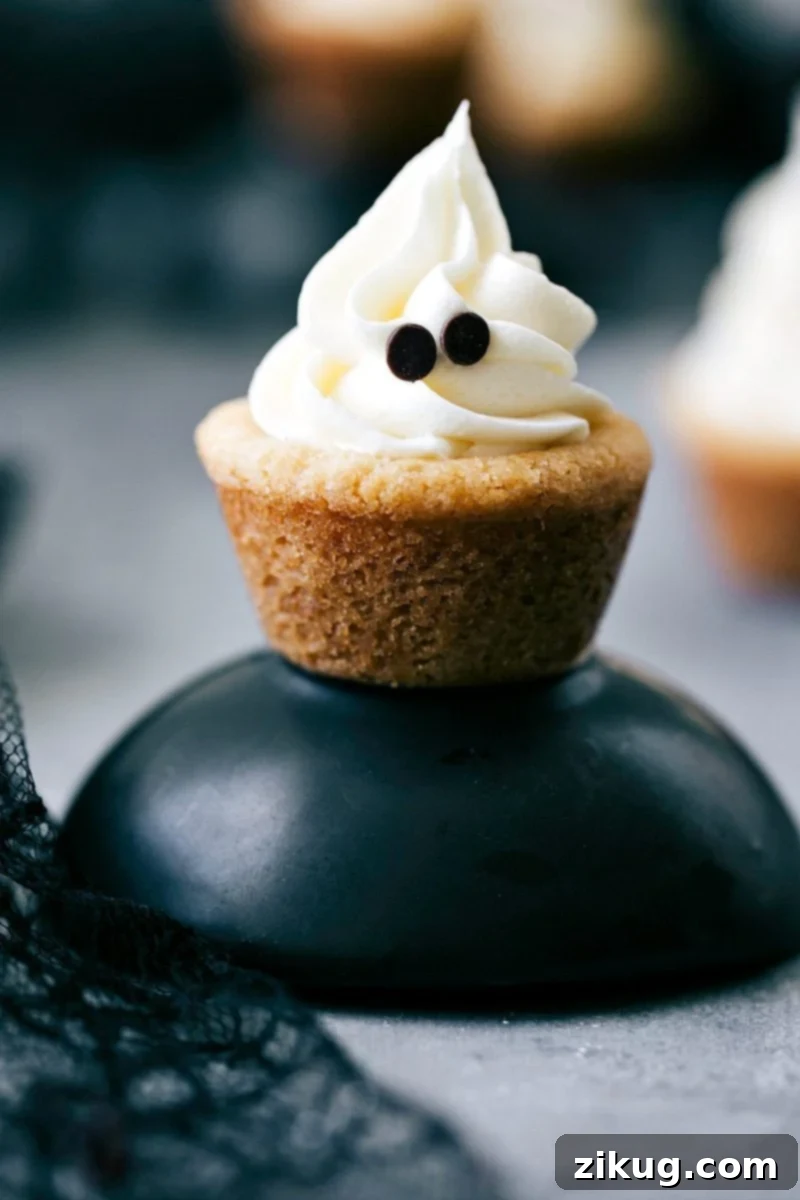
About These Adorable Ghost Cookies
Are you on the hunt for a last-minute Halloween treat that doesn’t compromise on charm or taste? Look no further! These adorable Ghost Cookies are your perfect solution. Designed for busy schedules, they require just a handful of ingredients and minimal hands-on time, making them ideal for any Halloween event, from school parties to office potlucks, or simply a fun family activity.
While the option to bake your sugar cookies and whip up homemade frosting from scratch is always there for the baking enthusiasts, this recipe focuses on speed and simplicity. We’ll show you how to create these delightful ghostly treats in under 30 minutes by leveraging the convenience of a good quality sugar cookie mix and your favorite store-bought frosting. This approach ensures a delicious outcome without the extensive prep, allowing you more time to enjoy the Halloween festivities!
Why You’ll Adore Our Easy Halloween Ghost Cookies
- Effortlessly Simple: With just a few basic ingredients and straightforward steps, even novice bakers can create these impressive treats.
- Time-Saving: Utilizing a sugar cookie mix and pre-made frosting drastically cuts down on preparation and baking time, perfect for last-minute needs.
- Festive & Fun: The ghost design is undeniably charming and brings a playful, spooky vibe to any Halloween gathering.
- Customizable: Easily adapt the cookie base, frosting flavor, or decorations to suit your taste and dietary preferences.
- Kid-Friendly: A fantastic recipe for involving children in the kitchen, especially during the decorating phase!
- Perfect Party Treat: These bite-sized cookie cups are easy to serve and delightful for guests of all ages.
Essential Ingredients for Your Spooky Ghost Cookies
Crafting these delightful Halloween Ghost Cookies requires a short and sweet list of ingredients. Focus on quality for the best flavor, even when using convenience products!
- Sugar Cookie Mix: A 17.5-ounce package (such as Betty Crocker) is ideal. Remember to include any additional ingredients the mix calls for, like eggs, butter, or oil. This mix forms the sturdy and delicious base of your cookie cups, providing that classic sugar cookie flavor and texture without the fuss of measuring flour and sugar from scratch. For an even quicker 3-ingredient treat, opt for a package of refrigerated sugar cookie dough.
- Whipped Cream Cheese or Vanilla Frosting: One 12-ounce container of pre-made frosting is perfect. You can choose between a tangy cream cheese frosting for a richer flavor or a classic vanilla frosting for pure sweetness. If you’re feeling ambitious, a homemade vanilla or cream cheese frosting will undoubtedly elevate these treats further. This creamy filling is essential for creating the ghost’s body and adds a delightful contrast to the cookie cup.
- Mini Chocolate Chips or Black Pearl Sprinkles: These small, dark embellishments are crucial for bringing your ghosts to life! Mini chocolate chips add a subtle chocolatey crunch and are easy to find. Black pearl sprinkles offer a smoother, more uniform eye shape for a truly polished look. You’ll need enough to give each ghost two eyes – maybe even a tiny mouth for extra personality!
Quick Tip for Frosting
Don’t have a piping bag or specialized decorating tips at home? No problem! Many brands offer cans of prepared frosting that come with their own disposable decorating tips. These are excellent for achieving that perfect ghostly swirl without any extra equipment investment. Alternatively, you can snip a tiny corner off a Ziploc bag and use it as a makeshift piping bag.
Essential Equipment for Ghost Cookie Success
Having the right tools can make all the difference in the kitchen, especially when crafting delicate treats like these ghost cookie cups. Here’s what you’ll need to gather:
- Mini Muffin Pan: This is indispensable for creating the perfectly sized cookie cups that will hold your ghostly frosting. A good quality non-stick pan will make removal much easier.
- Mixing Bowl & Spatula/Spoon: For preparing your cookie dough according to the package instructions.
- Measuring Spoons: Specifically, a 1 tablespoon measuring spoon for portioning dough and a 1/2 teaspoon measuring spoon for pressing down the centers of the baked cookies.
- Piping Bag with an Open Star Piping Tip (e.g., Wilton 1M Swirl Tip): While optional, a piping bag with a star tip will give your ghosts that classic, elegant swirl, making them look professionally decorated. If you don’t have one, the quick tip above provides alternatives!
- Cooling Rack: Essential for allowing your cookie cups to cool completely and evenly, preventing them from becoming soggy and ensuring the frosting adheres properly.
- Table Knife or Butter Knife: Useful for gently loosening the edges of the cookie cups from the muffin pan.
- Fork or Small Spoon: To assist in carefully coaxing the delicate cookie cups out of the pan.
Step-by-Step Guide: Crafting Your Adorable Ghost Cookies
Follow these detailed steps to create your own batch of delightful Ghost Cookies. Precision and patience, especially during cooling, are key to perfect results!
-
Prepare and Bake the Cookie Cups:
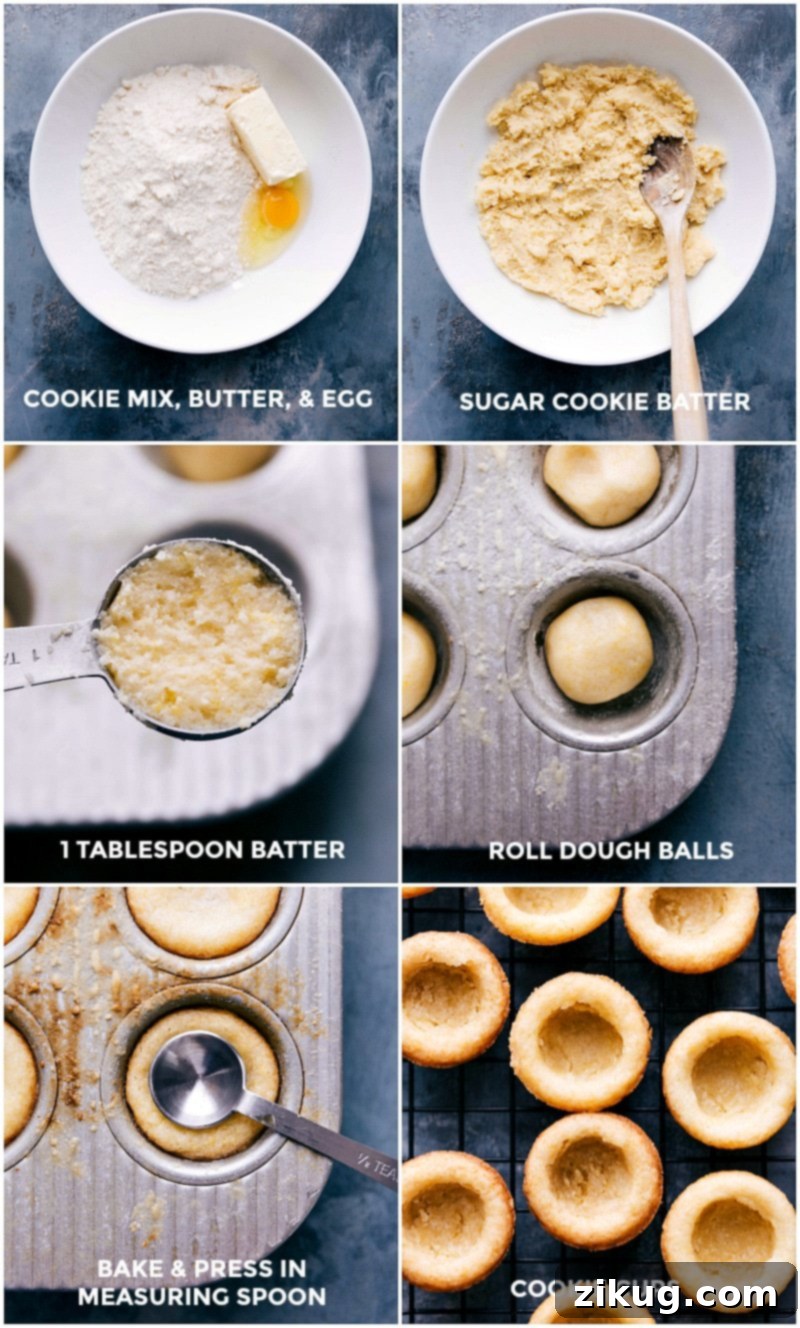
Begin by preheating your oven to 350°F (175°C). Lightly grease a mini muffin pan to prevent sticking. Prepare your sugar cookie dough according to the package directions for drop cookies. Using a 1 tablespoon measuring spoon filled almost completely, scoop out portions of dough. Roll each portion into a small ball and gently press it into each cavity of the mini muffin pan, filling it about halfway. Once the dough is in place, use your finger or thumb to create a slight indentation in the center of each cookie ball. This initial press will help form the “cup” shape during baking.
-
Bake to Perfection & Shape the Cups:
Bake the cookie cups for approximately 7-10 minutes. Keep a close eye on them; you want the tops to be very lightly browned, and the edges should no longer appear glossy. Avoid overbaking at all costs, as this will result in hard, crumbly cookies rather than tender cups. As soon as you remove the muffin pan from the oven, immediately take the back of a 1/2 teaspoon measuring spoon and gently but firmly press down the centers of each warm cookie. This creates a deeper, well-defined cup for your frosting.
-
Cool Properly for Easy Removal:
Allow the cookies to cool in the muffin pan for just a few minutes, typically 3-5 minutes. This brief cooling period helps them firm up slightly, making removal easier. Do NOT let them cool completely in the pan, as they will stick and become difficult to extract without breaking. After a few minutes, gently coax them out. You can use a table knife to trace around the edges of each cookie cup, then use a fork or small spoon to carefully lift them out. Alternatively, you can delicately pinch the edges of the cookie and slowly twist it up and out. Once removed, transfer the cookie cups to a wire cooling rack and let them cool completely. Further press down the centers if desired while they are still slightly warm.
-
Frost Your Ghosts:
Once the cookie cups are completely cool (this is vital for the frosting to set correctly), prepare your frosting. Fit a piping bag with an open star piping tip (like a Wilton 1M Swirl Tip) for a classic ghostly swirl. If you don’t have one, use a Ziploc bag with a snipped corner or a can of frosting with an attached tip. Fill the piping bag with your chosen frosting (cream cheese or vanilla). Carefully pipe a swirl of white frosting into the center of each cookie cup, building it up slightly to form the body of your ghost. The goal is a smooth, even, and appealing swirl.
-
Bring Them to Life with Eyes:
Now for the fun part – decorating! Gently place two mini chocolate chips into the frosting of each cookie cup to create the ghost’s eyes. Position them with the flat, round side facing outwards for the best effect. You can also add a third mini chocolate chip below the eyes for a tiny mouth, or use black pearl sprinkles for a different look. Arrange them artfully to give each ghost a unique personality.
-
Set and Serve:
Once all your ghost cookies are frosted and decorated, allow them to sit at room temperature or chill them briefly in the refrigerator until the frosting is firm to the touch. This crucial step ensures that your delicious creations hold their shape perfectly and that the decorative eyes stay firmly in place, ready for serving. Enjoy your spooky treats!
Pro Tips for Perfectly Spooky Ghost Cookies
- Don’t Overbake: Sugar cookies can dry out quickly. Remove them from the oven as soon as the edges show a very light golden brown. The centers might still seem soft, but they will firm up as they cool.
- Immediate Indentation: The moment cookies come out of the oven, they are pliable. Pressing the centers immediately ensures a deep, well-formed cup. If you wait too long, they’ll harden and crack.
- Gentle Removal: As mentioned in the instructions, don’t let them cool completely in the pan. A butter knife around the edges and a small spoon or fork to lift them out will prevent breakage.
- Cool Completely: Frosting warm cookies will cause the frosting to melt and slide off, creating a mess. Ensure your cookie cups are fully cooled before piping.
- Piping Bag Technique: If using a piping bag, fill it no more than two-thirds full to make it easier to handle. Twist the top to seal and apply steady, even pressure from the top.
- Creative Eyes: Beyond mini chocolate chips or black pearls, consider edible marker dots or tiny pieces of black licorice for different eye expressions.
Ghost Cookie Variations & Customizations
These Ghost Cookies are wonderfully versatile! Here are some ideas to put your own spin on this classic Halloween treat:
- Different Cookie Bases: Instead of sugar cookies, try using chocolate chip cookie mix, peanut butter cookie mix, or even a brownie mix (baked in mini muffin tins for brownie bites!) for a different flavor profile.
- Flavorful Frostings: While vanilla or cream cheese frosting is traditional, don’t limit yourself! Use chocolate frosting, orange-flavored frosting (with a touch of food coloring), or even a vibrant green lime frosting for a monster twist.
- Add a Filling: Before piping the ghost frosting, you can add a tiny dab of jam (raspberry or strawberry for “blood”), lemon curd, or even a mini peanut butter cup to the bottom of the cookie cup for a surprise filling.
- Food Coloring Fun: Add a few drops of gel food coloring to white frosting to create vibrant, spooky ghosts (purple, green, or orange) instead of traditional white.
- Sprinkle Magic: Beyond eyes, you can add Halloween-themed sprinkles around the base of the ghost or even mix them into the cookie dough for extra festivity.
- Edible Markers: For more detailed faces, use edible food markers to draw intricate eyes, eyebrows, or even stitches on your ghosts once the frosting has set.
Storage and Make-Ahead Tips
To keep your Ghost Cookies fresh and delicious, proper storage is key:
- Best Enjoyed Fresh: These cookies are truly at their peak the same day they are made. The cookies are soft, and the frosting is perfectly creamy.
- Short-Term Storage: If you have leftovers or need to store them for a day or two, place them in an airtight container at room temperature. After the first day, the cookies and frosting may begin to firm up slightly.
- Refrigeration: If your frosting is cream cheese-based or if your kitchen is particularly warm, you may refrigerate the cookies in an airtight container for up to 3-4 days. Allow them to come to room temperature for about 15-20 minutes before serving for the best texture.
- Freezing (Unfrosted): For make-ahead convenience, you can bake the cookie cups and freeze them unfrosted in an airtight container for up to 3 months. Thaw them at room temperature, then frost and decorate just before serving.
- Freezing (Frosted – Not Recommended): Freezing frosted cookies can sometimes affect the texture of the frosting, making it watery or crumbly upon thawing. It’s best to frost them fresh if possible.
More Spooktacular Halloween Treat Ideas
If you’re looking to expand your Halloween treat repertoire, these recipes are sure to be a hit alongside your Ghost Cookies:
- Monster Eyeballs: Creepy, gooey, and delicious, these are always a crowd-pleaser.
- Halloween Oreo Balls: Simple, decadent, and incredibly festive.
- Mummy Cookies: Transform store-bought cookies into adorable mummies with white chocolate.
- Halloween Donuts: Quick and creative ways to dress up your favorite donuts.
- Mummy Bark: A delightful and easy-to-make chocolate bark with a spooky design.
Ghost Cookies Recipe Card
These charming Ghost Cookies are the ultimate fun and festive Halloween treat! Incredibly easy to make, they feature delicate sugar cookie cups, generously filled with creamy frosting, and brought to life with adorable mini chocolate chip “eyes.” Perfect for parties or a delightful baking session with kids, these spooky yet simple cookies are guaranteed to be a hit!
Author: Chelsea Lords
Prep Time: 10 minutes
Cook Time: 7 minutes
Total Time: 17 minutes
Yields: 40 cookie cups
Equipment Needed
- Mini muffin pan
- Piping bag with an open star piping tip (such as a 1M Wilton Swirl Tip)
- Mixing bowl & spatula/spoon
- Measuring spoons (1 tbsp, 1/2 tsp)
- Cooling rack
- Table knife or butter knife
- Fork or small spoon
Ingredients
- 1 (17.5-ounce) package sugar cookie mix (e.g., Betty Crocker), plus ingredients called for on package; OR 1 package refrigerated sugar cookie dough (for a true 3-ingredient treat)
- 1 (12-ounce) container cream cheese frosting or vanilla frosting (store-bought or homemade)
- Mini chocolate chips (for eyes)
Instructions
- Preheat & Prepare: Preheat your oven to 350°F (175°C). Lightly grease a mini muffin pan. Prepare the sugar cookie dough according to package directions for drop cookies.
- Form Cookie Cups: Roll dough balls, each about 1 tablespoon in size, and place them into the greased mini muffin pan cavities, filling them approximately halfway. Use your finger to gently indent the center of each dough ball.
- Bake & Indent: Bake for 7-10 minutes, or until the tops are very lightly browned and the edges are no longer glossy. Immediately remove from the oven and, using the back of a 1/2 teaspoon measuring spoon, press down the centers of the warm cookies to deepen the cup shape.
- Cool Gently: Let the cookie cups cool in the pan for a few minutes (3-5 minutes), then gently coax them out. Use a table knife to loosen the edges and a fork or small spoon to ease them out. Transfer to a cooling rack to cool completely.
- Frost: Once completely cool, fit a piping bag with an open star piping tip (such as a 1M Wilton Swirl Tip) and fill with your chosen frosting. Pipe a swirl of white frosting into the center of each cookie cup, forming the ghost’s body.
- Decorate: Place two mini chocolate chips into the frosting of each cookie cup to create eyes, ensuring the flat, round side faces outwards.
- Set & Serve: Allow the frosted ghost cookies to sit until the frosting is firm to the touch, or chill briefly. Serve and enjoy your adorable Halloween treats!
Recipe Notes
- Note on Cooling: It’s critical not to let the cookie cups cool entirely in the muffin tin, as they will become very difficult to remove. A few minutes in the pan, then transfer to a cooling rack, is ideal. Work the edges with a butter knife and gently lift them out.
- Nutrition Information: Calories for this recipe are an approximation and can vary based on specific brands and exact measurements. For instance, using whipped cream cheese filling might result in approximately 86 kcal per cookie cup, while a standard vanilla frosting might be around 125 kcal.
- Storage: These delightful cookies are best enjoyed on the day they are made when both the cookie and frosting are at their softest and creamiest. While they can be stored in an airtight container for a day or two, the cookies and frosting will tend to harden slightly over time.
Nutrition Information (Approximate)
Serving: 1 cookie cup
Calories: 86-125 kcal (depending on frosting type)
Carbohydrates: 16g
Protein: 1g
Fat: 2g
Saturated Fat: 1g
Cholesterol: 4mg
Sodium: 55mg
Potassium: 8mg
Sugar: 11g
Vitamin A: 11IU
Calcium: 4mg
Iron: 1mg
Nutrition information is automatically calculated and should be used as an approximation. Actual values may vary based on ingredients used.
Enjoyed This Recipe?
We’d love to hear from you! If you tried making these Ghost Cookies or have any tips to share, please leave a comment below. Your feedback helps us create even more delicious content for you!
Leave a comment below!