
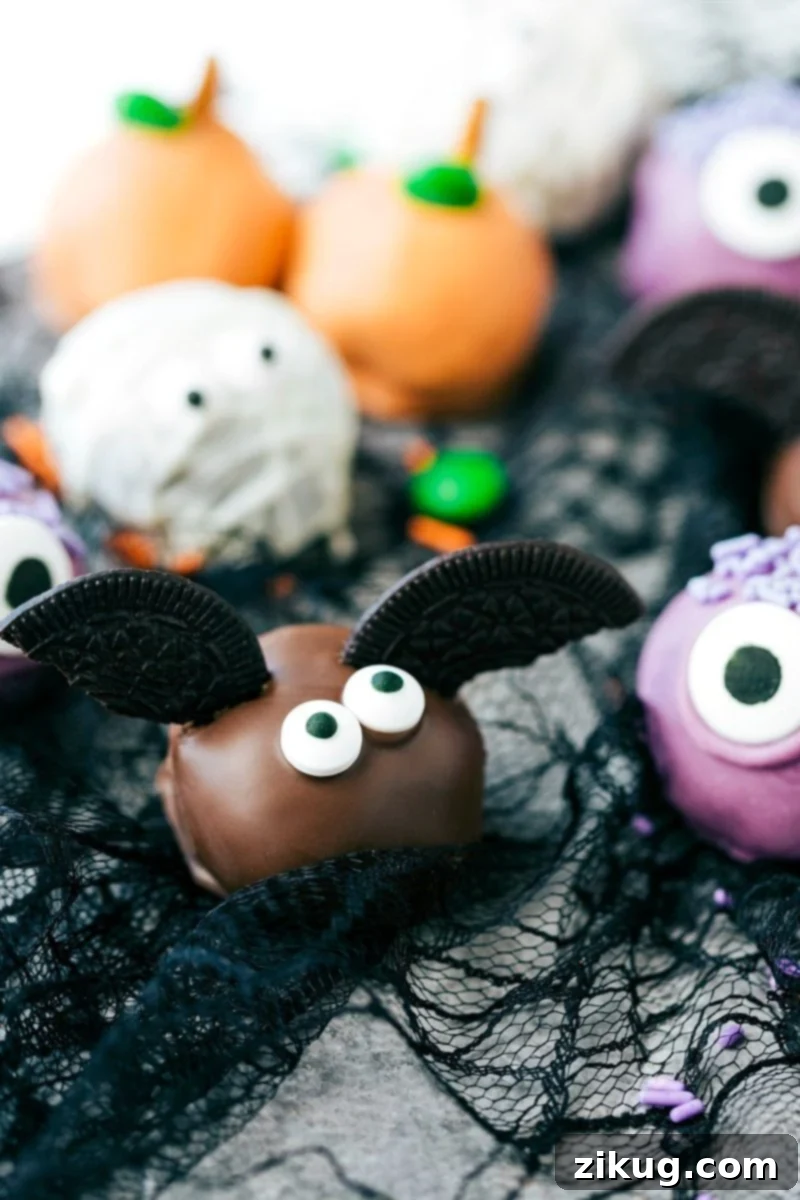
Unleash the Spooky Fun: Ultimate Guide to Halloween Oreo Balls
Get ready to enchant your taste buds and impress your guests with these utterly adorable and incredibly easy-to-make Halloween Oreo Balls! Perfect for parties, trick-or-treaters, or just a fun family activity, these no-bake Oreo truffles are a festive delight. We’ve transformed the classic Oreo cookie ball into eight distinct Halloween characters: monstrous creatures, grinning pumpkins, mysterious bats, eerie mummies, wicked witches, creepy spiders, Frankenstein’s monsters, and wise owls. Each design is crafted with simplicity in mind, requiring minimal ingredients and offering maximum spooky charm. Dive into our comprehensive guide to create these bite-sized masterpieces that are as delicious as they are delightful!
Why These Halloween Oreo Truffles Are a Must-Make
When it comes to Halloween treats, there’s a delicate balance between spooky and delicious, and these Oreo balls strike it perfectly! Here’s why they should be at the top of your baking (or rather, no-baking) list this season:
- Effortlessly Easy: No baking required! The base recipe involves just two simple ingredients, making them ideal for even the most novice confectioners or busy parents.
- Kid-Friendly Fun: The decorating possibilities are endless and perfectly suited for little hands. Let your children unleash their creativity in crafting their favorite Halloween characters, from funny monsters to eerie mummies.
- Crowd-Pleasing Flavors: Who doesn’t love Oreos? Combined with rich cream cheese and a sweet coating, these truffles are an undeniable hit with both kids and adults, disappearing almost as fast as you can make them!
- Perfect for Parties: Their bite-sized nature makes them ideal party food. Arrange an assortment on a platter for a vibrant, eye-catching dessert display that will be the talk of your Halloween gathering.
- Customizable Designs: Our guide features eight unique and enchanting designs, but feel free to mix and match elements or invent your own spooky creations! The possibilities for personalization are endless.
The Essential Base: Classic Oreo Cookie Balls
Every fantastic Halloween Oreo truffle starts with a simple yet decadent base. This core recipe is the foundation for all our spooky variations, ensuring a consistently creamy and chocolatey center for each decorated treat. It’s incredibly easy and requires only two main ingredients, plus your chosen coating.
Equipment You’ll Need:
- Food processor or a sturdy blender (for crushing Oreos)
- Hand mixer (optional, but helpful for smoother, quicker mixing)
- Large mixing bowl
- Baking sheet lined with parchment paper or wax paper
- Microwave-safe bowls or a double boiler for melting chocolate/candy melts
- Forks or specialized dipping tools
Ingredients for the Base Oreo Balls (Yields approximately 35 truffles):
- 1 (14-ounce) package Oreos (any flavor you like, but classic chocolate sandwich cookies work best for these versatile designs)
- 1 (8-ounce) package cream cheese, fully softened to room temperature
- 1 (12-ounce) bag candy melts or chocolate chips (your choice of color, as specified for each design below)
- Optional: A tiny bit of vegetable oil or coconut oil (about ½ to 1 teaspoon) to thin candy melts if needed for a smoother dip.
Step-by-Step Instructions for the Base:
- Crush the Oreos: Place the entire package of Oreos (including the cream filling) into a food processor. Pulse the cookies until they are finely ground into uniform crumbs. The finer the crumbs, the smoother your truffle mixture will be. If you don’t have a food processor, you can place the Oreos in a sturdy zip-top bag and crush them thoroughly with a rolling pin.
- Combine with Cream Cheese: Transfer the finely crushed Oreo crumbs to a large mixing bowl. Add the softened cream cheese to the bowl. Using a hand mixer on medium speed (or a strong spatula), beat the Oreo crumbs and cream cheese together until they are thoroughly combined and form a dense, pliable dough. Ensure there are no visible streaks of cream cheese remaining.
- Roll the Balls: Take small portions of the mixture (about a tablespoon each) and roll them into uniform, bite-sized balls, approximately 1-inch in diameter. Place the rolled balls onto the parchment-lined baking sheet, leaving a small space between each.
- Chill Thoroughly: This step is absolutely crucial for the success of your Oreo balls! Place the baking sheet with the rolled Oreo balls into the refrigerator for at least 1 hour, or until they are firm to the touch. Chilling prevents them from falling apart or melting into the warm coating during the dipping process and helps the coating set properly.
- Prepare for Dipping: Once chilled, your Oreo balls are ready for their festive makeovers! Melt your chosen candy melts or chocolate chips according to package directions. This can be done in a microwave in 30-second intervals, stirring well after each, or over a double boiler. If the melted coating appears too thick for smooth dipping, stir in a very small amount (half a teaspoon at a time) of vegetable oil or coconut oil until it reaches a smooth, pourable, dippable consistency.
Spooktacular Decorating Ideas: Transforming Your Oreo Balls
Now for the most exciting part – bringing your Halloween Oreo balls to life with creative decorations! Here’s how to craft each unique design, transforming your simple truffles into festive and unforgettable treats. Remember to work quickly once your truffles are dipped, as candy melts set fast.
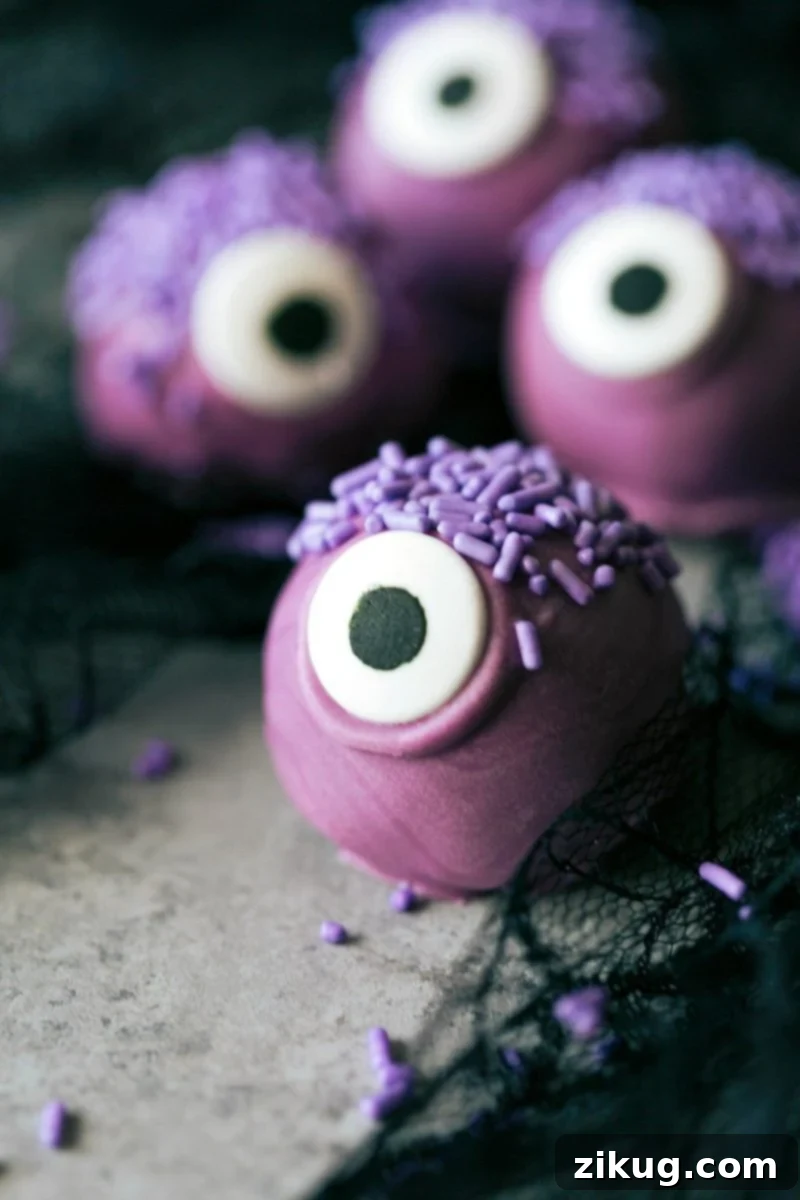
1. Adorable Monster Truffles
These Monster Truffles are undoubtedly a favorite, bringing a playful and cartoonish charm reminiscent of beloved animated monsters. Their single, large eye and whimsical sprinkles make them incredibly easy to create and a guaranteed hit with kids of all ages. They were certainly my top pick!
Ingredients for Monster Decoration:
- Lavender Candy Melts (or any vibrant color like green, blue, or pink for different monsters)
- Wilton Edible Sugar Candy Eyeballs (large size recommended for that classic monster look)
- Lavender Sprinkles (matching or contrasting colors for extra flair)
How to Decorate Monster Truffles:
- Dip each chilled Oreo ball into the melted lavender candy melts, ensuring it’s fully coated. Gently tap the fork against the side of the bowl to remove any excess coating.
- Immediately after dipping, while the candy melt is still wet and tacky, sprinkle the top generously with lavender sprinkles.
- Carefully press one large edible sugar candy eyeball into the center of the truffle. The wet candy melt will act as a perfect adhesive.
- Place the decorated truffle on parchment paper to dry completely.
Pro Tip: Edible eyes are commonly found in the cake decorating or baking aisle of most grocery stores, especially during the Halloween season. Craft stores are also an excellent resource for a wide variety of candy melts and sprinkles in every imaginable color. If you are local to the SLC area, Orson Gygi is a fantastic spot to find decorating supplies at a great deal.
2. Cheerful Pumpkin Truffles
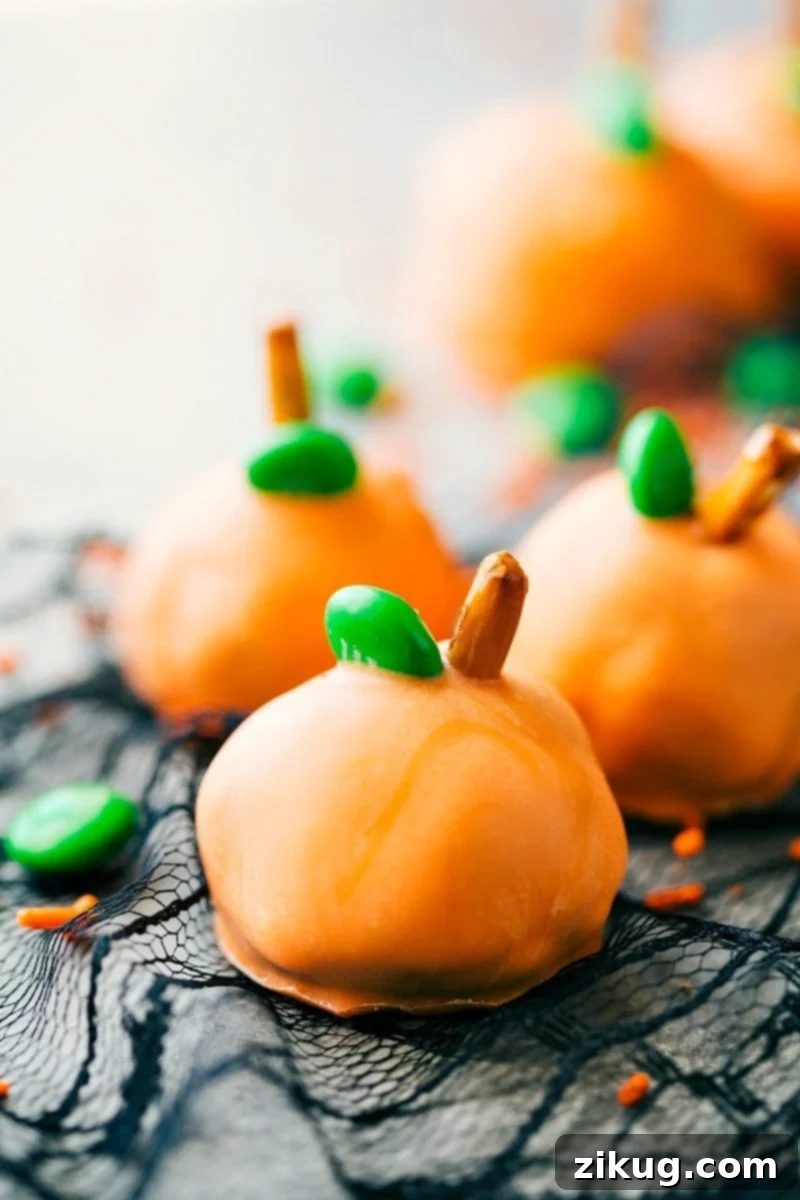
Pumpkins are synonymous with Halloween and autumn, and these charming Pumpkin Truffles capture the spirit perfectly. When I brainstormed ideas, these were a unanimous favorite among my sisters, proving that classic designs often resonate the most. Their simple, iconic design makes them a delightful and easily recognizable addition to any Halloween spread.
Ingredients for Pumpkin Decoration:
- Wilton Orange Candy Melts
- Mini green M&M’s (for leaves)
- Small pretzel pieces (for stems)
How to Decorate Pumpkin Truffles:
- Dip each chilled Oreo ball into the melted orange candy melts, allowing any excess to drip off thoroughly.
- While the coating is still wet, gently press a small pretzel piece into the very top center of the truffle to create a rustic stem.
- Next, place a mini green M&M next to the pretzel stem, pressing lightly to secure it as a vibrant leaf.
- Let them dry on parchment paper until completely set.
Pro Tip: Orange candy melts are usually widely available in grocery stores and craft shops during the Halloween season. If you have trouble finding mini green M&M’s, you can sort a regular bag of M&M’s or use small green leaf-shaped sprinkles for a similar effect.
3. Spooky Bat Truffles
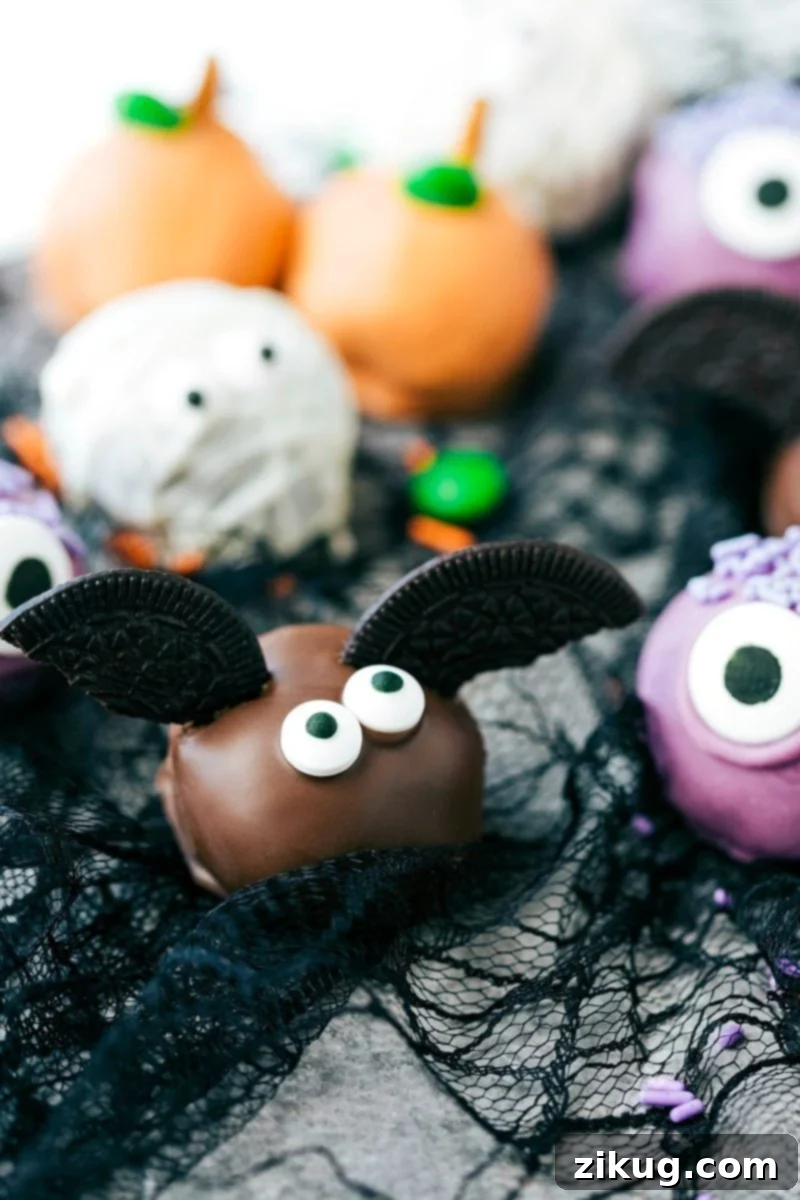
These Bat Truffles are perhaps the easiest to assemble, requiring only a few readily available ingredients to transform them into adorable flying creatures of the night. Their classic chocolate coating and iconic Oreo “wings” are a delightful combination that brings a touch of spooky elegance to your dessert table.
Ingredients for Bat Decoration:
- Regular milk chocolate, dark chocolate, or semi-sweet chocolate chips (whatever you prefer for a rich, dark base)
- Thin Oreos (for wings; regular Oreos can also work if you don’t want to buy two types, but might need a little shaping)
- Candy Edible Eyeballs (standard size)
How to Decorate Bat Truffles:
- Dip each chilled Oreo ball into the melted chocolate, ensuring a smooth, even coat.
- Carefully break thin Oreos in half to create two distinct “wing” shapes. While the chocolate coating is still wet, gently press two Oreo halves into the sides of the truffle to form the wings, pointing upwards.
- Attach two edible candy eyeballs to the front of the truffle, just above the wings, pressing them into the wet chocolate to secure.
- Allow to dry completely on parchment paper until the chocolate is firm.
Pro Tip: Using thin Oreos for the wings helps them stand up better and provides a lighter, more delicate look. If using regular Oreos, you might need to scrape off some of the cream filling for a flatter wing, and they may be slightly heavier.
4. Eerie Mummy Truffles
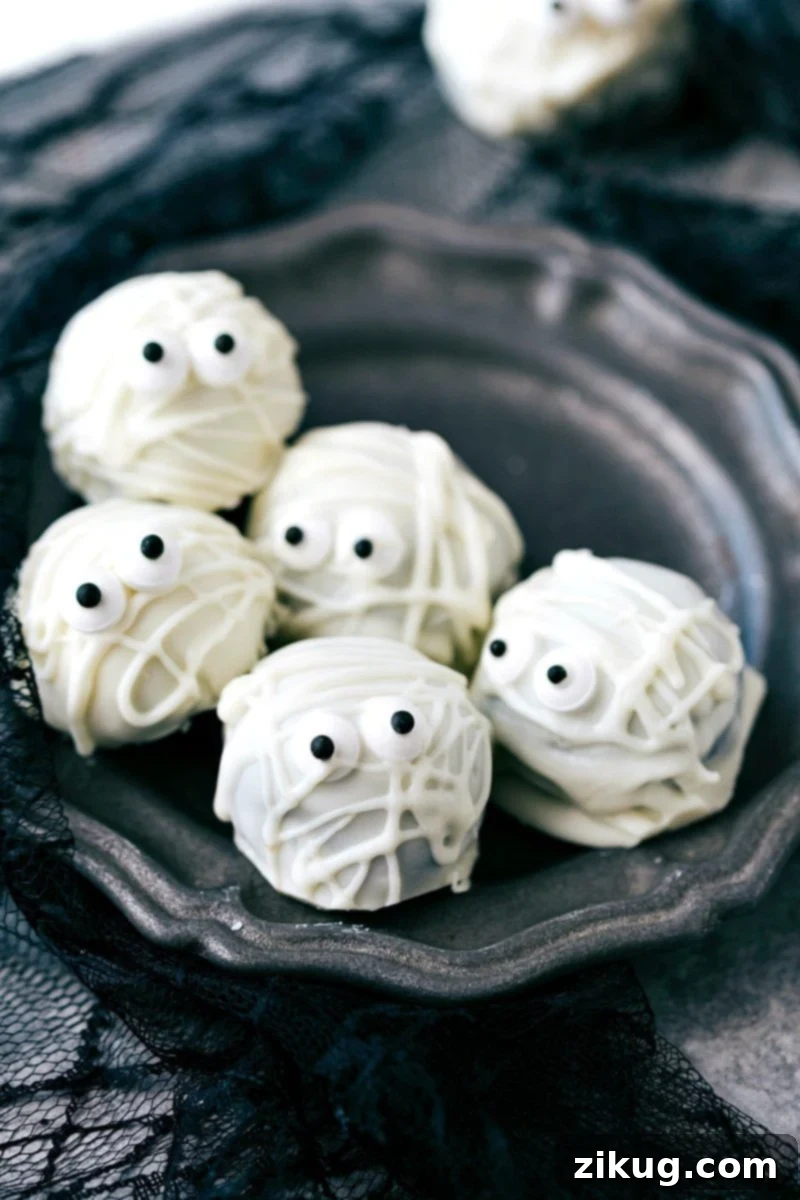
While the concept of mummies might be inherently creepy, translating them into food is always a fun and artistic endeavor! These Mummy Truffles are elegantly simple yet incredibly effective in their spooky appearance, reminiscent of other favorite mummy treats like chewy mummy bark and delicious mummy milanos. They are a fantastic way to showcase your creative side.
Ingredients for Mummy Decoration:
- White chocolate chips or white candy melts
- Candy Edible Eyeballs (standard size) or mini chocolate chips
How to Decorate Mummy Truffles:
- Dip each chilled Oreo ball into the melted white chocolate, ensuring a smooth, full coating. Let them dry completely on parchment paper until the chocolate is firm. This base layer creates the “body” of the mummy.
- Once the first layer is completely firm, transfer some remaining melted white chocolate into a piping bag or a sturdy zip-top bag with a tiny corner snipped off (creating a small hole).
- Drizzle the white chocolate back and forth over the dried truffles in a crisscross pattern to create the appearance of mummy bandages.
- While the “bandages” are still wet, gently press two edible candy eyeballs onto the front of the truffle. For an extra eerie effect, you can also pipe a small amount of chocolate over the eyes to give them a “peeking out” look, making them seem more encased.
- Allow to dry completely until all chocolate is set.
Pro Tip: For an alternative to edible eyes, simply press two mini chocolate chips (upside down) into the truffle before the second drizzle layer dries. Ensure the first layer of white chocolate is absolutely completely dry before piping the bandages; otherwise, the delicate lines will blend and lose their definition.
5. Bewitching Witch Truffles
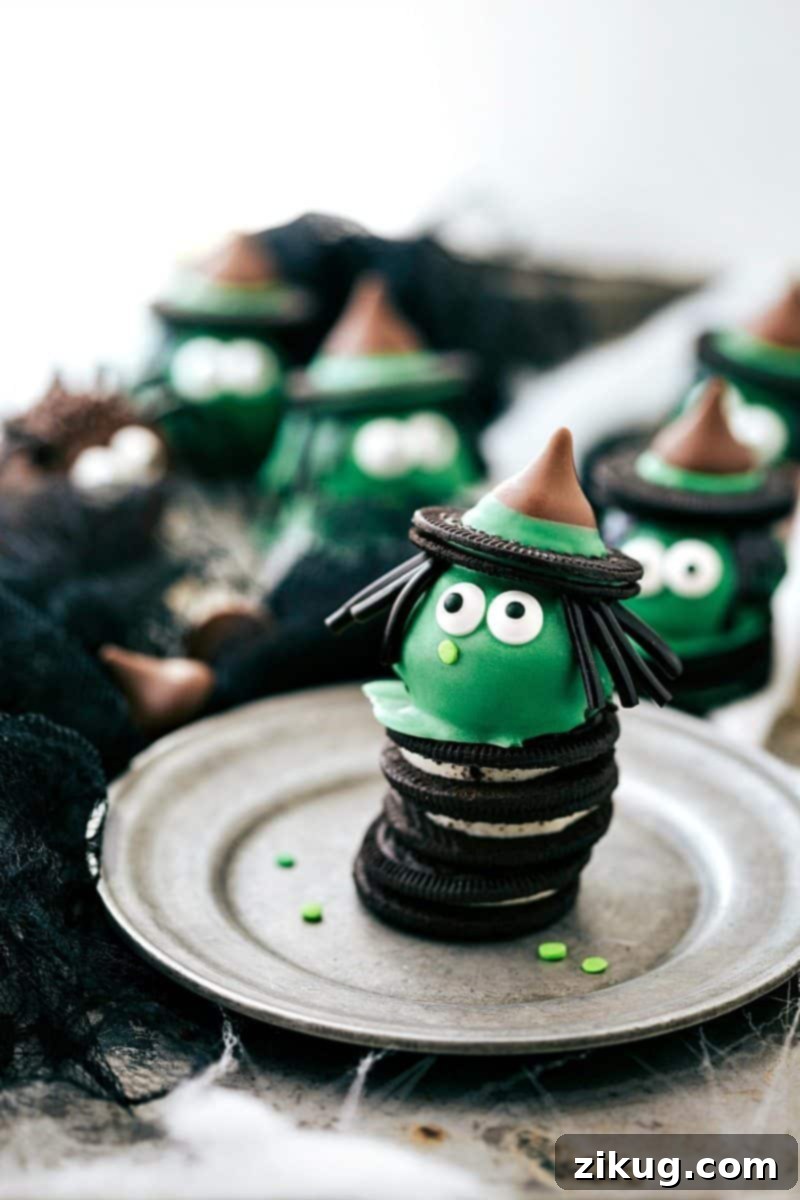
Cast a delicious spell on your Halloween guests with these enchanting Witch Truffles! These treats are not only visually striking with their vibrant green hue and iconic accessories but also surprisingly easy to assemble, making them a fun and engaging project for all ages.
Ingredients for Witch Decoration:
- Dark Green Candy Melts (for the witch’s skin tone)
- Candy Edible Eyeballs
- Black Licorice Laces (for hair) OR Black Sparkle Gel (for drawing details)
- Thin Oreos (for the hat brim)
- Hershey’s Kisses (for the hat cone)
- Optional: Small green flat sprinkle (for a fun “wart” detail)
How to Decorate Witch Truffles:
- Dip each chilled Oreo ball into the melted dark green candy melts, letting any excess drip off thoroughly.
- While the coating is still wet, attach several small strands of black licorice laces to the top and sides of the truffle to create the witch’s hair.
- To create the witch hat: Use a tiny dot of melted chocolate to “glue” the base of a Hershey’s Kiss onto the center of a thin Oreo cookie (the flat side). Once the green coating on the truffle is firm, use another dab of melted chocolate to attach the completed hat to the very top of the truffle.
- Attach two edible candy eyeballs to the face area.
- If desired, add a small green flat sprinkle to the face for a fun “wart” detail, securing it with a tiny bit of melted candy.
- Allow to dry completely.
Pro Tip: Black licorice laces can sometimes be tricky to find. Look in the “gourmet” or individually wrapped candy sections of grocery stores, or specialty candy shops. Black sparkle gel can be used to draw on a mouth, eyebrows, or other facial features if preferred, or as an alternative to licorice hair.
6. Creepy-Crawly Spider Truffles
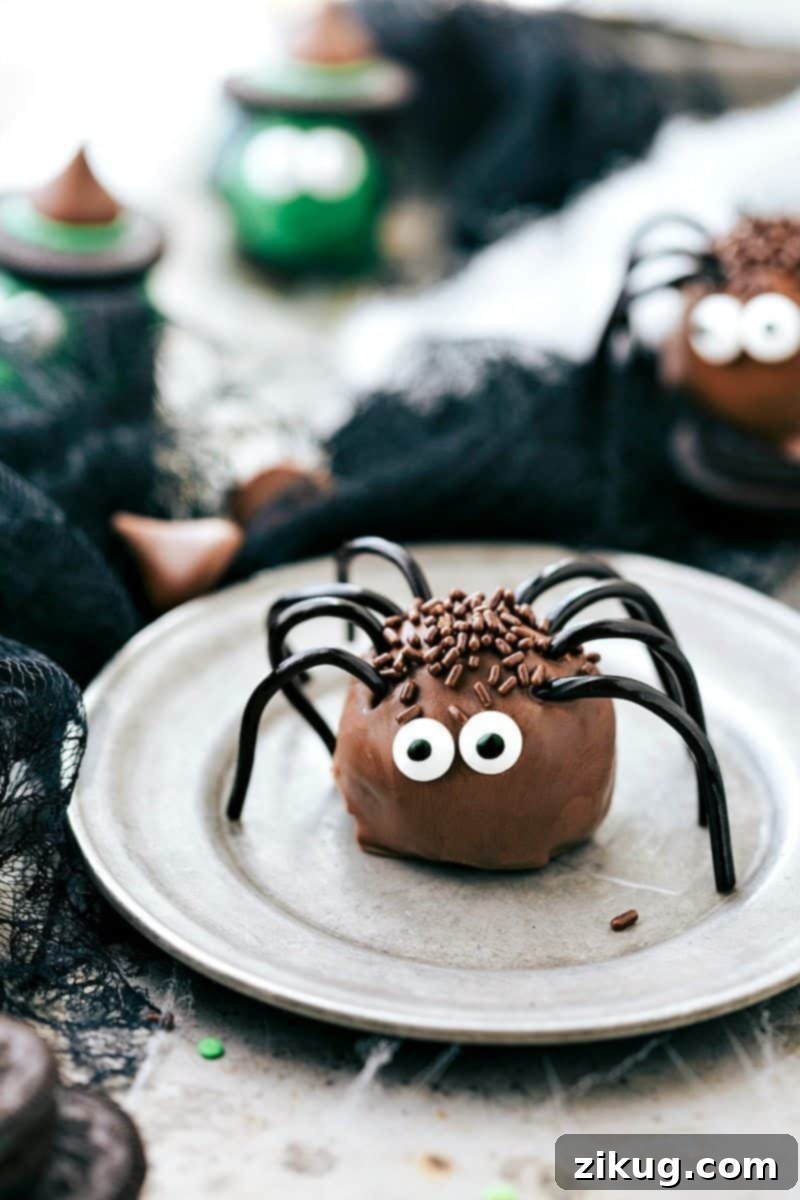
These Spider Truffles, a popular repeat from last year, are a must-have for any Halloween celebration! Their classic chocolate base paired with the striking licorice legs and beady eyes makes them undeniably spooky yet delicious, a perfect blend of creepy and sweet.
Ingredients for Spider Decoration:
- Milk chocolate chips (or dark/semi-sweet chocolate for a darker spider)
- Candy Edible Eyeballs
- Black licorice laces (for legs)
- Brown Jimmies Sprinkles (for a hairy texture)
How to Decorate Spider Truffles:
- Dip each chilled Oreo ball into the melted milk chocolate, ensuring full, even coverage.
- While the chocolate is still wet and workable, carefully attach eight short pieces of black licorice laces around the sides of the truffle to form the spider’s legs. Position four on each side, bending them slightly to mimic spider legs.
- Press two edible candy eyeballs onto the front of the truffle to give your spider its distinct gaze.
- Sprinkle brown jimmies sprinkles generously over the top of the truffle to give it a slightly “hairy,” textured look, completing the spider’s appearance.
- Allow to dry completely on parchment paper.
Pro Tip: Finding black licorice laces can sometimes be a bit of a scavenger hunt! Check the candy aisle with gourmet or individually wrapped candies. Gas stations occasionally carry them, and of course, online retailers are always a reliable source. For extra creepy legs, use thicker black string licorice if you can find it.
7. Quirky Frankenstein Truffles
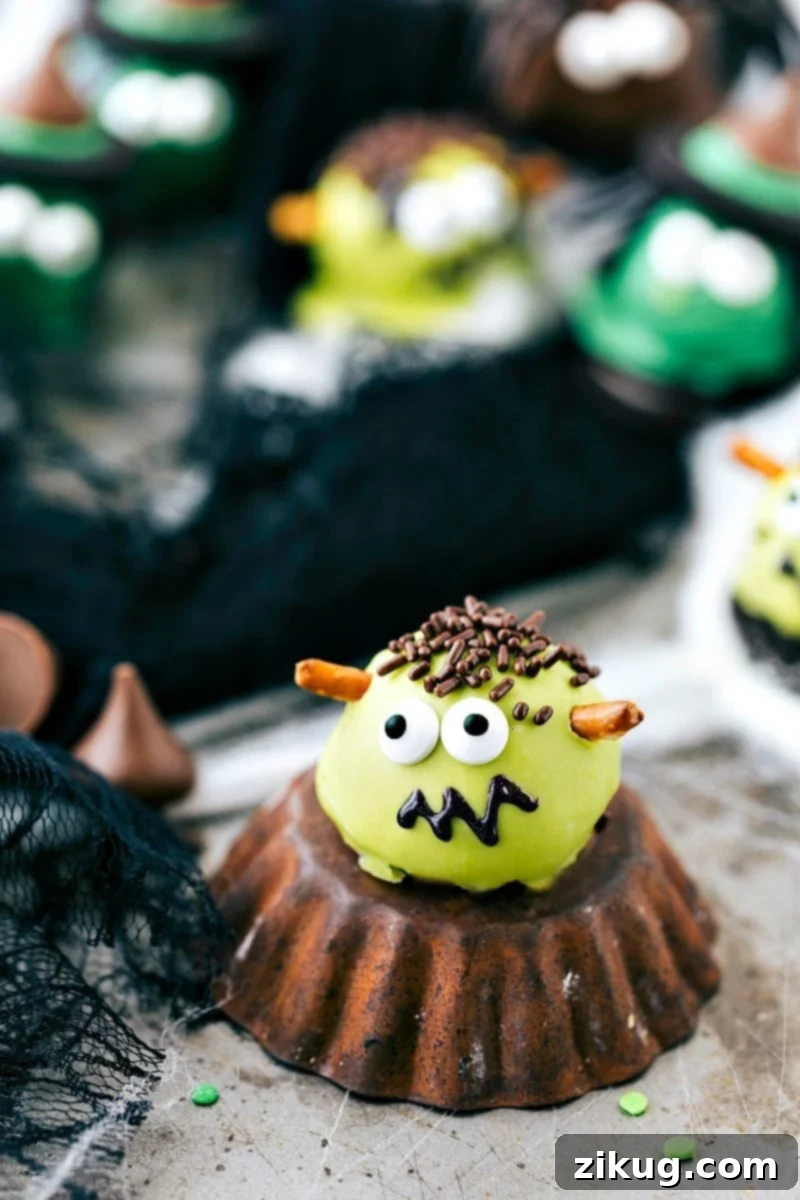
These Frankenstein Truffles are delightfully cute and remarkably simple to bring to life! Their iconic green hue, “bolts,” and distinct facial features make them an instant Halloween favorite that will surely get a chuckle from your guests. They are perfect for adding a touch of classic monster charm to your dessert table.
Ingredients for Frankenstein Decoration:
- Vibrant Green Candy Melts (or the same dark green used for witches if making an assortment of truffles)
- Small pretzel pieces (for neck bolts)
- Candy Edible Eyeballs
- Black Sparkle Gel (for drawing mouth and stitches)
- Brown Jimmies Sprinkles (for hair)
How to Decorate Frankenstein Truffles:
- Dip each chilled Oreo ball into the melted green candy melts, ensuring a smooth, even coating.
- While the coating is still wet, gently press two small pretzel pieces into each side of the truffle, just below the “head” area, to create Frankenstein’s iconic neck bolts.
- Attach two edible candy eyeballs to the front of the truffle, positioning them as Frankenstein’s eyes.
- Once the green coating has set slightly, use black sparkle gel to carefully draw a stitched mouth across the face.
- Sprinkle brown jimmies sprinkles generously on the top of the truffle to simulate Frankenstein’s hair.
- Allow to dry completely on parchment paper.
Pro Tip: Any shade of green candy melt will work beautifully for Frankenstein, so feel free to use leftover melts from other projects to minimize waste and maximize creativity!
8. Wise Owl Truffles
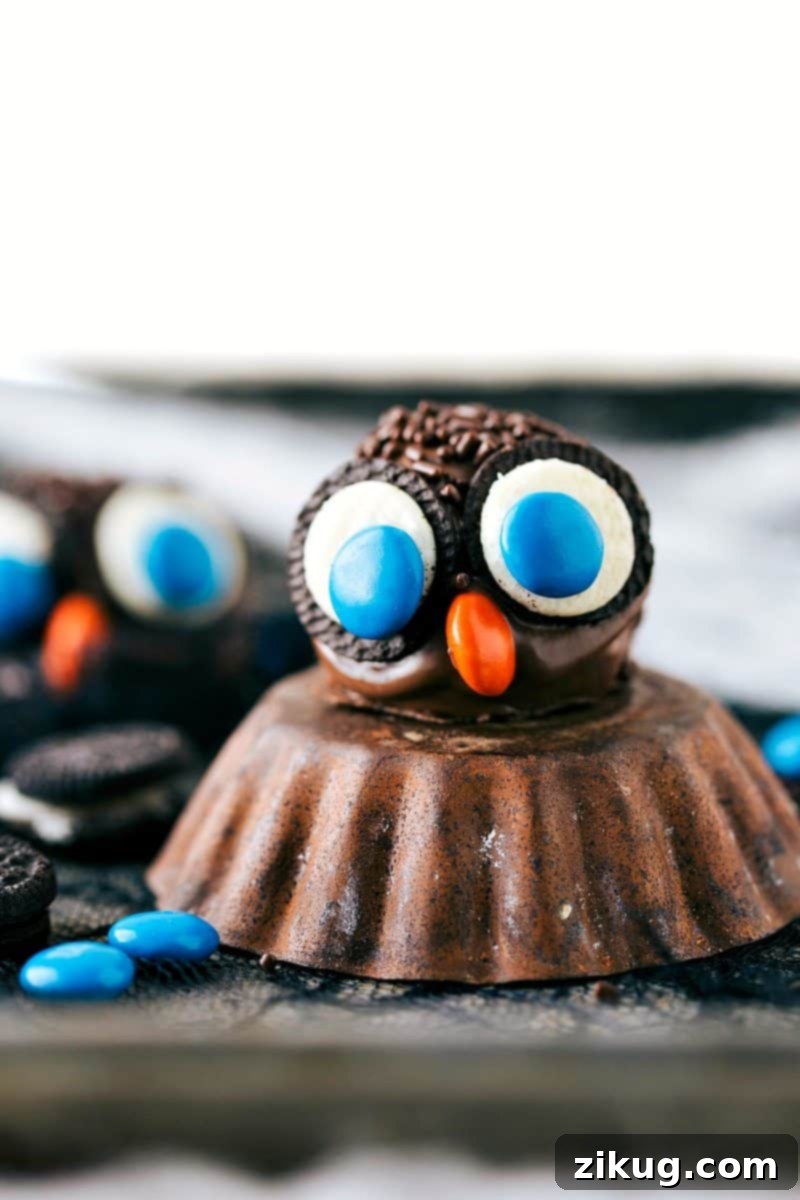
Rounding out our collection are these clever Owl Truffles, which were a blast to design! They are arguably the easiest of the bunch to make, relying on readily available candies and mini Oreos for their distinct features. Their simplicity makes them perfect for a quick and adorable Halloween treat that will charm everyone.
Ingredients for Owl Decoration:
- Milk chocolate chips (or dark/semi-sweet chocolate for the owl’s body)
- Mini Oreos (pulled apart, for the large white part of the eyes)
- Mini M&M’s (blue, green, or brown for the pupils)
- Orange M&M’s (for the beak)
- Chocolate Jimmies Sprinkles (for “feathers” and texture)
How to Decorate Owl Truffles:
- Dip each chilled Oreo ball into the melted milk chocolate, ensuring a full and even coating.
- While the chocolate is still wet, take two mini Oreo halves (the side without cream is usually flatter and easier to use) and press them onto the upper front of the truffle to create the large owl eyes.
- Immediately press a mini M&M into the center of each mini Oreo half to form the pupils.
- Place an orange M&M (upside down or right side up, depending on the desired look) below the eyes to form the owl’s triangular beak.
- Sprinkle chocolate jimmies sprinkles generously over the top and sides of the truffle to mimic the appearance of feathers.
- Allow to dry completely on parchment paper until set.
Pro Tip: The beauty of these owls is their incredible simplicity and use of common ingredients. If you can’t find mini Oreos, you can use large edible eyes or even white chocolate wafers with a dot of melted chocolate for the pupils.
Important Notes and Tips for Perfect Halloween Oreo Balls
To ensure your Halloween Oreo balls turn out perfectly spooky and delicious every time, keep these essential tips in mind. A little attention to detail goes a long way in creating professional-looking treats:
- Achieving the Right Consistency: When combining the crushed Oreos and cream cheese, aim for a firm, moldable dough that holds its shape without being sticky. If your mixture feels too sticky, try adding a tiny bit more finely crushed Oreos. If it seems too dry or crumbly, ensure your cream cheese was fully softened.
- The Power of Chilling: Do not skip the chilling steps! Chilling the Oreo balls before dipping is absolutely critical. It helps them hold their shape and prevents them from falling apart or melting into the warm candy melts. Chilling after dipping ensures the coating sets quickly and firmly, preventing smudges.
- Mastering Candy Melts: Always melt candy melts or chocolate chips slowly. Use a microwave in short 30-second bursts, stirring thoroughly after each, or melt them gently over a double boiler. Overheating can cause candy melts to seize (become thick and clumpy) or burn. If your melted coating is too thick for smooth dipping, a very small amount of vegetable oil or coconut oil (start with ½ teaspoon, add more if needed) can thin it out. Avoid adding water, as it will seize chocolate.
- Efficient Dipping Technique: For best results, use a fork or a specialized candy dipping tool. Dip the ball completely into the melted coating, then gently tap the fork against the side of the bowl to remove any excess. This ensures a thin, even coat. Quickly slide the coated ball onto parchment paper. Work efficiently, especially with intricate decorations, as candy melts set fast.
- Scaling Recipes for Assortments: The base recipe yields approximately 35 truffles. If you want to make an assortment of different Halloween characters, prepare one full batch of the base Oreo balls. Then, scale down the decoration ingredients (candy melts, sprinkles, edible eyes, etc.) for each specific character to match the exact number of truffles you wish to dedicate to that design. This helps prevent waste and ensures you have enough for all your spooky creations!
Storage and Nutrition Information
Storage:
Due to their cream cheese content, these Halloween Oreo Balls *must* be refrigerated to maintain freshness and food safety. Store them in an airtight container, separated by layers of parchment or wax paper to prevent sticking and preserve their intricate decorations. They will stay fresh and delicious in the refrigerator for up to 2 weeks, making them perfect for preparing ahead of your Halloween festivities or enjoying over an extended period.
Nutrition:
Please note that the following nutrition information is an approximation and can vary significantly based on specific brands of Oreos, cream cheese, candy melts, and exact quantities of ingredients used. This estimate is provided for general guidance and should not be considered dietary advice.
- Serving Size: 1 truffle
- Calories: Approximately 149 kcal
- Carbohydrates: Approximately 19.4 g
- Protein: Approximately 2.3 g
- Fat: Approximately 7.1 g
- Cholesterol: Approximately 3.3 mg
- Sodium: Approximately 119 mg
- Sugar: Approximately 14.1 g
This information is automatically calculated and should only be used as an approximation. Consult a professional nutritionist for precise dietary information.
Get Creative This Halloween!
Whether you choose to craft an army of quirky monsters, a patch of smiling pumpkins, a flight of mysterious bats, or a parliament of wise owls, these Halloween Oreo Balls are guaranteed to bring smiles, deliciousness, and a touch of spooky fun to your celebration. They’re a testament to how simple ingredients and a little imagination can create truly memorable treats that are almost too cute to eat. So gather your ingredients, call your friends or family, and embark on a fun-filled journey of creating the most spectacular Halloween truffles! Don’t forget to share your creations and tell us which design was your favorite – we’d love to hear about your spooky masterpieces!
Happy Halloween and happy “no-baking”!