

Unlock the magic of Halloween with incredibly easy and festive treat bags! Our collection of FREE printable Halloween treat bag toppers makes creating memorable handouts a breeze. Simply fill snack-size resealable bags with your favorite candies or homemade goodies, then staple on these charming toppers for a professional and delightful finish. Whether you’re preparing for a spooky party, welcoming trick-or-treaters, or sending treats to school, these DIY Halloween bag toppers add a personalized touch that everyone will adore.
Looking for even more enchanting designs? Explore our second set of complimentary Halloween bag toppers here, and double the fun!
Effortless & Eye-Catching Halloween Treat Bag Toppers
Halloween is a time for creativity, spooky fun, and of course, delicious treats! While store-bought candy is convenient, presenting it in specially decorated bags elevates the experience and shows a little extra thought. Our free printable Halloween treat bag toppers are designed to make this process as simple and enjoyable as possible. No elaborate crafting skills required – just print, cut, fill, and staple! This guide will walk you through creating several unique Halloween treat bags, including a fantastic recipe for homemade “Monster Munch” that will have everyone asking for more.
Essential Tips for Crafting Your Halloween Treat Bags
Before diving into the individual treat ideas, here are some invaluable tips to ensure your Halloween treat bags turn out perfectly and look professionally made:
- Print What You Need: Each unique bag topper design is provided on its own printable page. This means you only print the specific designs you plan to use, saving paper and ink. This flexibility allows you to mix and match designs or create a large batch of your favorite.
- For Superior Quality, Choose Glossy Cardstock: To achieve the best possible results and make your treat bags truly stand out, we highly recommend printing the bag toppers on glossy cardstock. This type of paper not only provides a sturdier structure but also gives the colors a vibrant, professional sheen. If you don’t have a high-quality printer at home, don’t worry! You can easily email the PDF files to local print shops like Staples or Office Max for professional printing services. They’ll ensure crisp, high-resolution prints that make your free Halloween treat toppers look absolutely fantastic.
- Precision Cutting and Folding: For clean, straight cuts and perfectly crisp folds, invest in a few basic crafting tools. A paper cutter will ensure straight edges quickly and efficiently, far surpassing what scissors can achieve for repetitive cuts. A scoring board is equally important for creating sharp, clean folds without cracking the paper, which is especially beneficial when working with thicker cardstock. These tools will save you time and greatly improve the overall appearance of your finished toppers.
- Choosing the Right Snack-Size Bags: While various brands offer snack-size resealable bags, we’ve found that Zip-loc bags generally provide the best quality and seal. However, any brand of snack-size plastic bag will work perfectly for containing your treats. The key is to ensure they are small enough to fit comfortably under the folded topper.
- Important: Save Before Printing: Always remember to save the printable PDF file to your computer *before* attempting to print. Printing directly from a website or browser can sometimes lead to formatting issues or incomplete prints. If you encounter any problems during printing, try using a different web browser or simply email us for assistance! We’re here to help ensure your Halloween crafting is smooth and successful.
- Pre-Printed & Shipped Options: Short on time or prefer a completely ready-to-assemble solution? You can have these adorable toppers printed, precisely cut, neatly scored, and conveniently shipped directly to your door. Click here to shop and make your Halloween preparations even easier!
Spooktacular Treat Bag Ideas with Free Printables
Get ready to enchant your friends, family, and trick-or-treaters with these delightfully themed Halloween treat bags. Each idea comes with its own unique charm and, of course, a free printable topper!
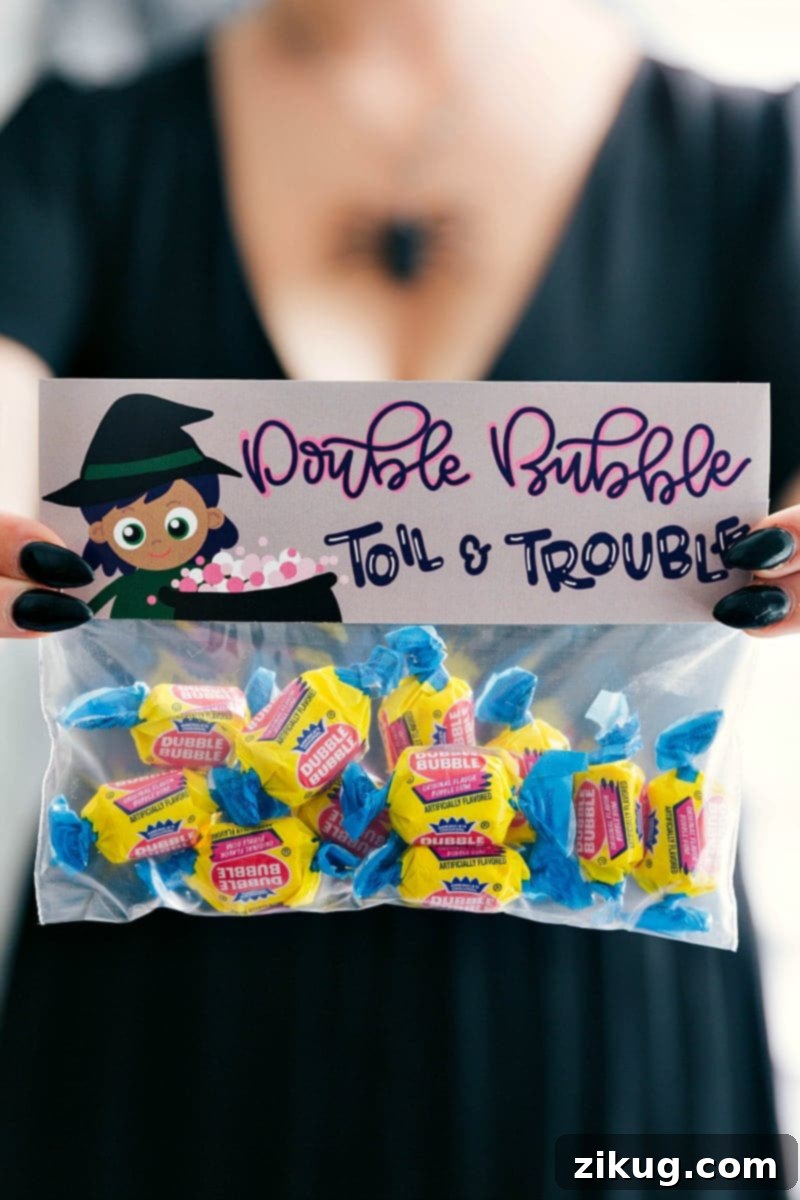
“Double Bubble Toil And Trouble” Treat Bags
Embrace the classic witchy chant with these fun “Double Bubble Toil and Trouble” themed treat bags. They’re perfect for a nostalgic nod to Halloween lore and are incredibly simple to put together.
Supplies:
- Snack Sized Resealable Bags
- Free Printable Topper: Click Here to download your free “Double Bubble Toil and Trouble” Halloween treat bag topper.
- Stapler
- Double Bubble Gum (classic pink or assorted flavors)
Assembly Instructions:
Simply fill each snack-sized resealable bag with several pieces of Double Bubble gum, then securely seal the bag. Next, take your printed topper, carefully cut it out using your paper cutter, score it down the middle, and fold it over the top of the candy-filled bag. Finish by stapling each side of the topper to the bag, ensuring it’s firmly attached. These whimsical bags are now ready to be gifted and bring a smile to anyone’s face!
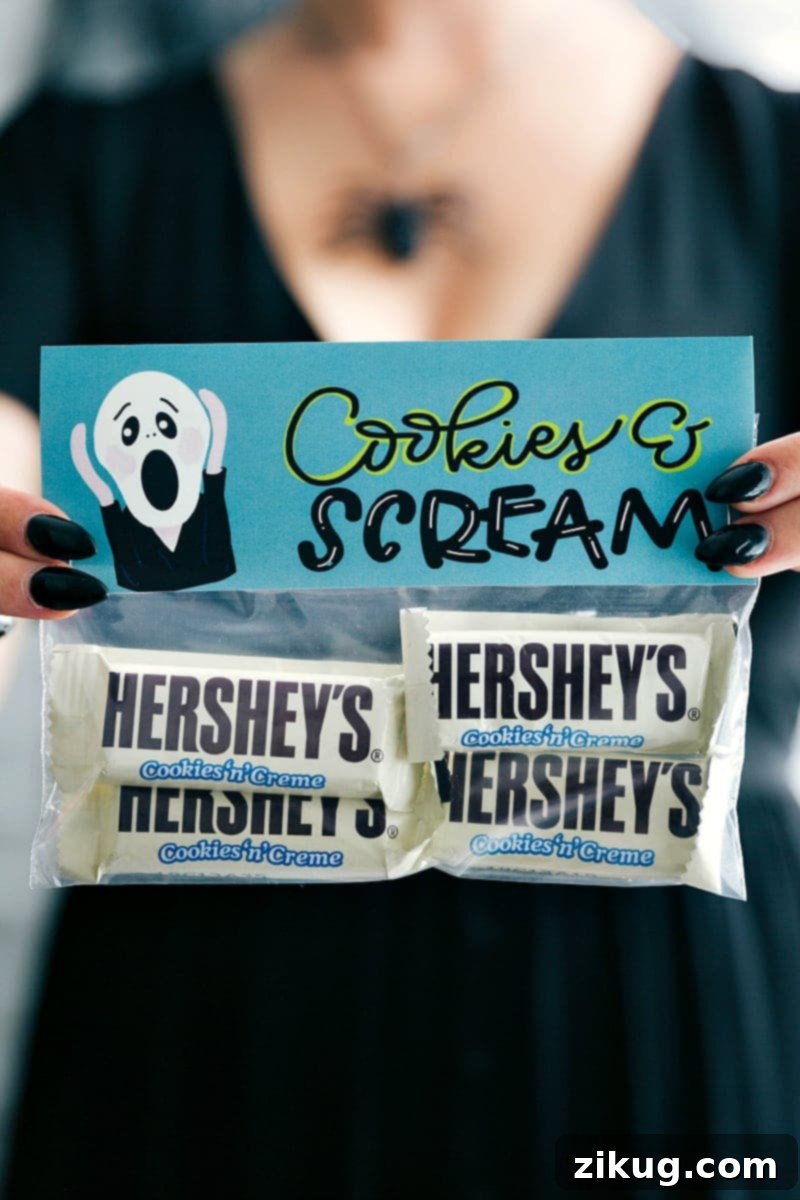
“Cookies And Scream” Treat Bags
A clever play on words and a delicious treat, “Cookies and Scream” bags are sure to be a hit. These are ideal for handing out individually wrapped fun-size candy bars.
Supplies:
- Snack Sized Resealable Bags
- Free Printable Topper: Click Here to get your “Cookies and Scream” bag topper.
- Stapler
- Cookies ‘n’ Creme Fun Size Bars (or similar cookie-flavored candies)
Assembly Instructions:
Fill each snack-sized bag with 3-4 fun-sized Cookies ‘n’ Creme candy bars, or enough to make the bag look substantial. Seal the bag securely. Then, cut out your “Cookies and Scream” printable topper, score and fold it over the top of the filled bag. Staple both sides firmly in place. These delightful treat bags are now perfectly packaged and ready for distribution!
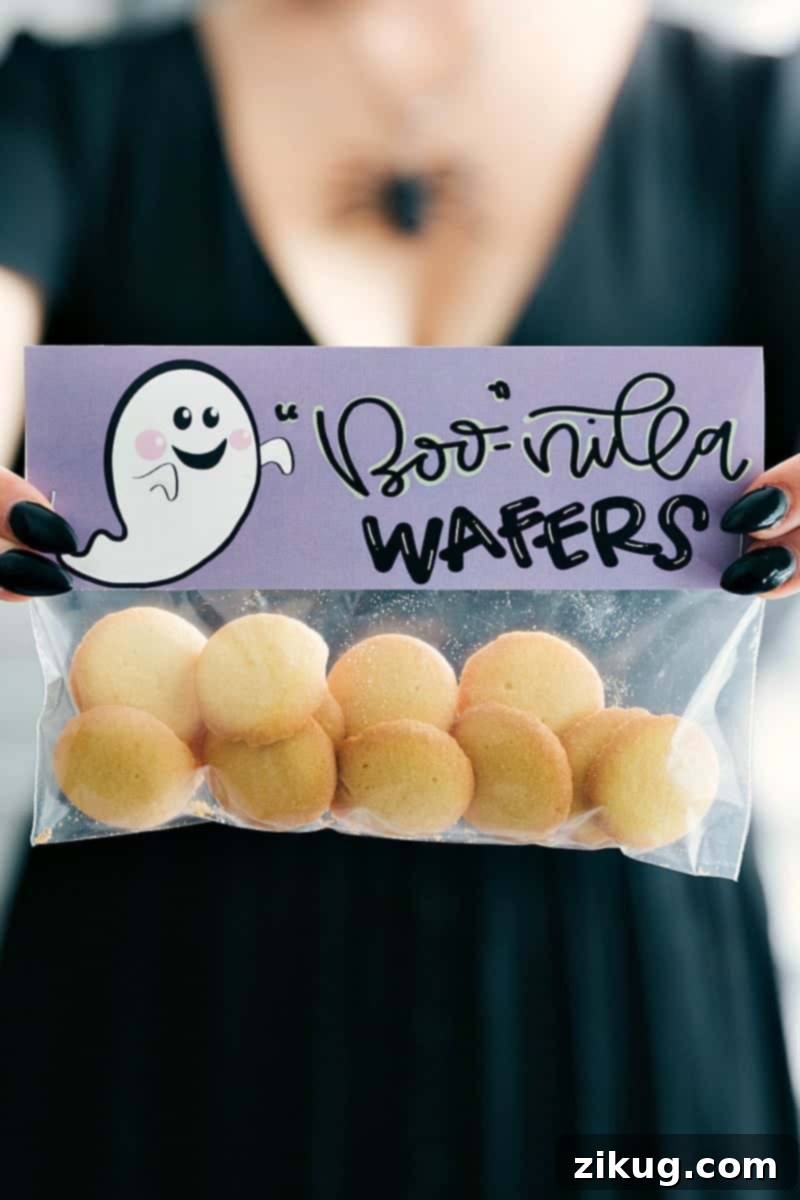
“Boonilla Wafers” Treat Bags
Offering a slightly different option from pure candy, “Boonilla Wafers” bags are a charming and delicious choice. These are especially great for those who prefer cookies or a less sugary treat.
Supplies:
- Snack Sized Resealable Bags
- Free Printable Topper: Click Here to download your “Boonilla Wafers” bag topper.
- Stapler
- Miniature Vanilla Wafers
Assembly Instructions:
Carefully fill each snack-sized bag with miniature vanilla wafers, ensuring not to crush them. Seal the bag. Take your pre-cut “Boonilla Wafers” topper, score and fold it over the top of the filled bag, then secure it by stapling each side. These free Halloween bag toppers truly complete the look!
*Important Freshness Note: Even though the bags are sealed, vanilla wafers can lose their crispness over time. For maximum freshness, we recommend packaging these particular treat bags no more than 1-2 days before you plan to gift them.
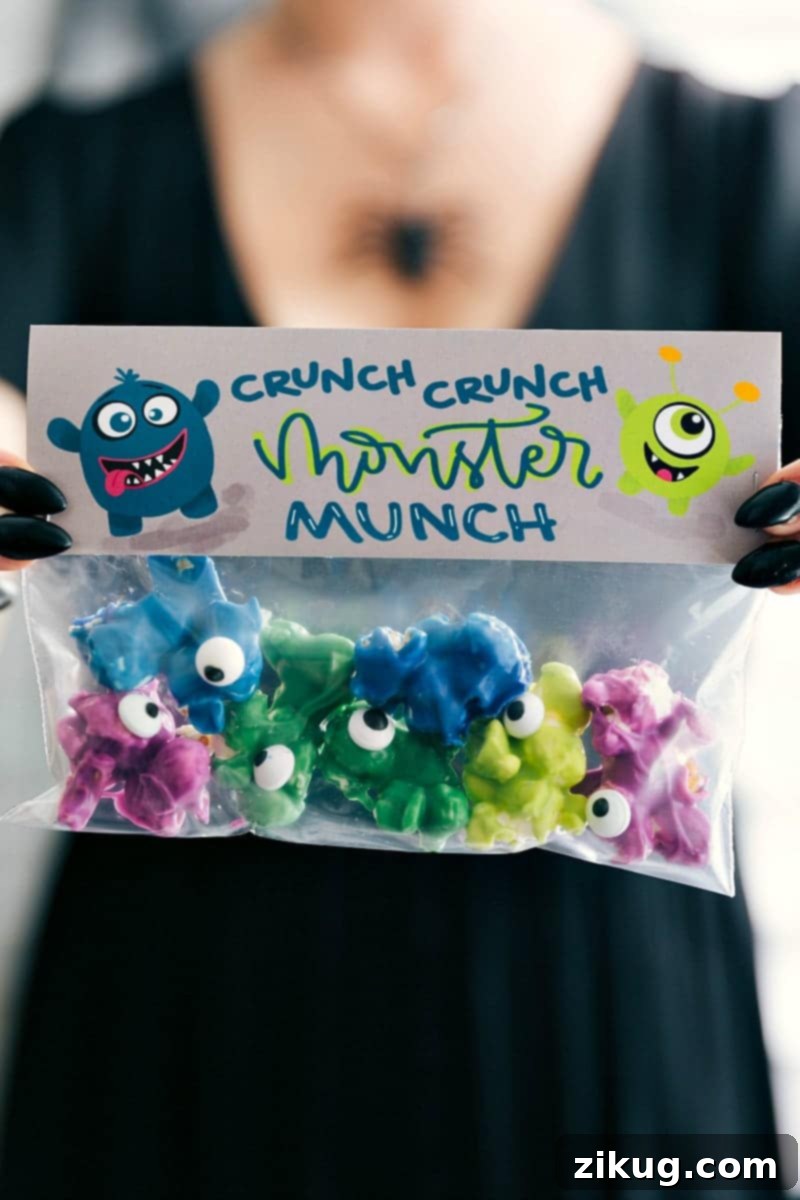
“Crunch, Crunch Monster Munch” Treat Bags
For a truly personalized and homemade touch, these “Crunch, Crunch Monster Munch” treat bags are a fantastic option. Not only do they come with an adorable free printable topper, but they also include a recipe for a colorful, crunchy, and irresistible snack mix that everyone will adore. This recipe is designed to be easy and fun, making it a wonderful activity to do with kids as part of your Halloween preparations.
Supplies:
- Snack Sized Resealable Bags
- Free Printable Topper: Click Here to get your “Crunch, Crunch Monster Munch” topper.
- Stapler
- Monster Munch (recipe provided below!)
Assembly Instructions:
Once your “Monster Munch” is prepared and cooled, fill each snack-sized resealable bag with a generous portion. Seal the bag securely. Take your pre-cut, scored, and folded printable topper and position it over the top of the filled bag. Staple each side to secure. These free Halloween treat bag toppers perfectly complement the homemade goodness within!
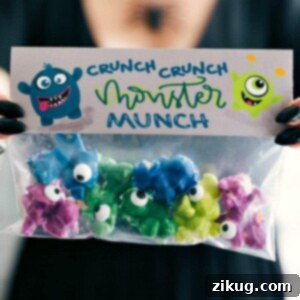
Crunch Crunch Monster Munch
By
Chelsea Lords
Get festive with these 6 easy Halloween treat bags! Just fill snack-sized resealable plastic bags with goodies and top them off with FREE printable bag toppers. This “Monster Munch” recipe is a delightful, colorful addition to your holiday spread.
Prep Time:
5 minutes
Dry Time:
15 minutes
Total Time:
20 minutes
Servings:
12 servings
Equipment
-
Sheet pan (15″ x 10″)
-
Parchment paper
-
Resealable plastic bag snack-sized
Ingredients
- 3/4 cup purple candy melts
- 3/4 cup blue candy melts
- 3/4 cup dark green candy melts
- 3/4 cup light green candy melts or as many colors as desired
- 4 teaspoons shortening or vegetable oil, divided
- 5 cups popped popcorn no butter added; just air popped
- 1/2 teaspoon salt
- 1/4 cup candy eyeballs
Instructions
-
Place each color of candy melts into separate microwave-safe bowls. Add 1 teaspoon of shortening or vegetable oil into each bowl. Microwave the candy melts in short bursts of 20 seconds, stirring thoroughly for about 15 seconds between each burst. Continue this process until the candy melts are completely smooth and free of lumps. Patience is key here to prevent the chocolate from burning, which can happen quickly.
-
Once your candy melts are perfectly smooth, divide the popped popcorn into four separate large bowls (one for each color). Carefully pour one color of melted candy melts into each bowl of popcorn. Stir quickly and gently to ensure that all the popcorn is evenly coated with the colorful candy mixture. Immediately after coating, pour the colored popcorn mixtures onto parchment-lined sheet pan(s), keeping the colors somewhat separated if you wish, or mixing them for a true “monster munch” effect. Spread the popcorn out into a single, even layer. While the candy coating is still wet, evenly press the candy eyeballs into the popcorn. This step is crucial before the chocolate hardens.
-
Allow the candy-coated popcorn to stand undisturbed for 5–10 minutes, or until the chocolate has fully hardened and set. Once firm, gently break the “Monster Munch” into smaller, snack-sized pieces. These delightful, crunchy, and colorful treats are now ready to be placed into your snack-sized bags, perfect for gifting!
Recipe Notes
Storage: Any leftover chocolate-covered popcorn can be stored in an airtight container at room temperature for up to 1 week. To maintain its quality, keep it in a cool, dry spot, away from direct sunlight or heat, to prevent the chocolate from melting or becoming sticky.
Conclusion: Your Ultimate Halloween Gifting Solution
Creating memorable Halloween treats doesn’t have to be complicated or expensive. With our free printable treat bag toppers and these simple instructions, you can easily craft delightful, personalized favors that will bring joy to every ghoul and goblin. From the whimsical “Double Bubble Toil and Trouble” to the homemade goodness of “Crunch Crunch Monster Munch,” each option offers a unique way to celebrate the season. These DIY Halloween treat bags are perfect for school parties, neighborhood trick-or-treating, or as thoughtful gifts for friends and family. They’re a fantastic way to add a personal, handmade touch to your Halloween festivities without breaking the bank or spending hours on intricate crafts.
We hope you enjoy crafting these spooky and sweet treats as much as we enjoyed putting these ideas together. Don’t forget to utilize our handy tips for best results, like printing on glossy cardstock and using a paper cutter for those clean edges. Embrace the spirit of Halloween and make this year’s treat distribution extra special!
Loved these ideas? Share your creations and let us know your favorite treat bag topper in the comments below!