
This post may contain affiliate links. Please read my disclosure policy.
Simple Halloween Oreo Pops: Spooky & Sweet Treats!
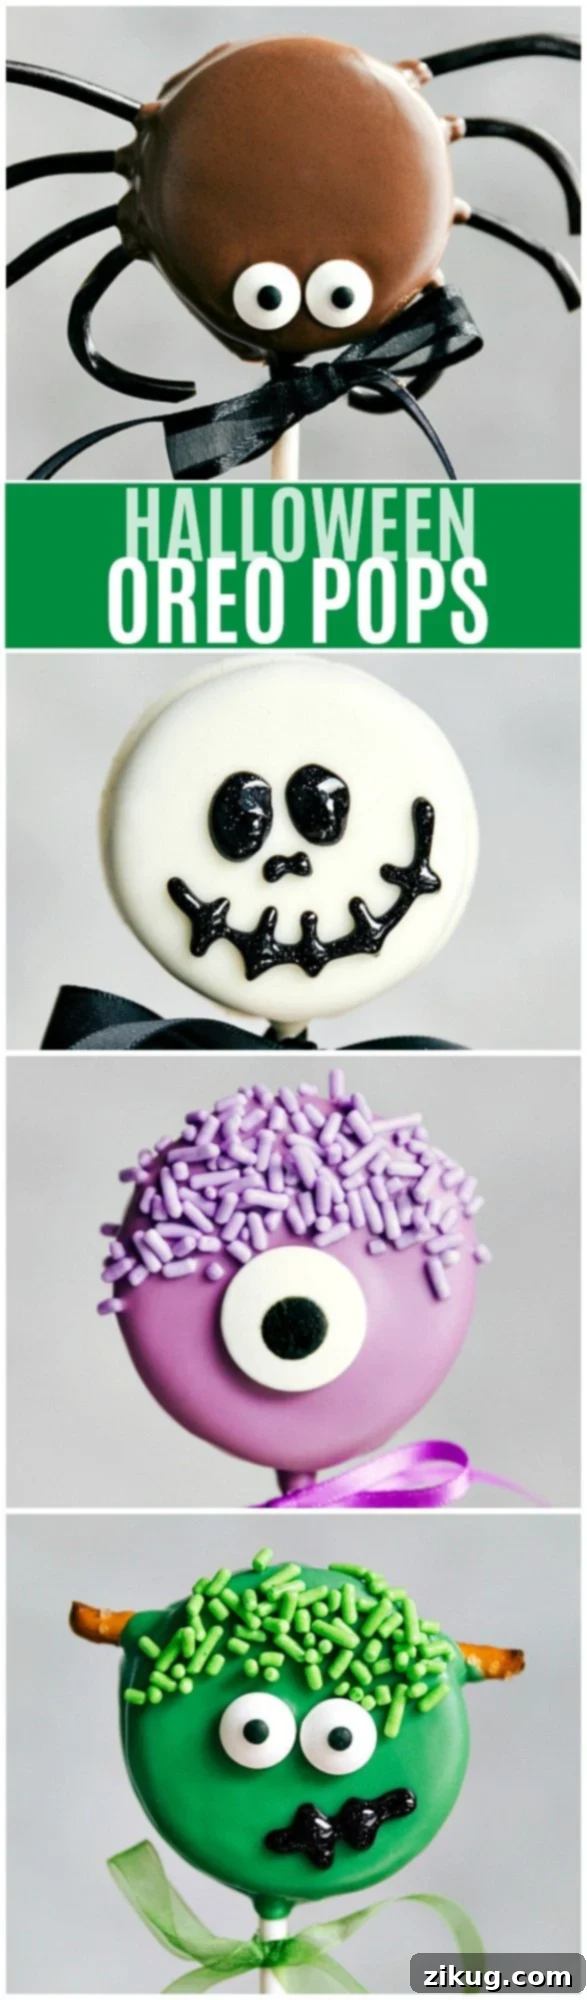
Transform classic Oreos into delightful Halloween characters with these incredibly simple recipes for Spider Oreo Pops, Skeleton Oreo Pops, Frankenstein Oreo Pops, and Monster Oreo Pops.
Get ready to unleash your creativity this Halloween with these fantastic Oreo pop recipes! Whether you’re planning a spooky party, looking for a fun activity with the kids, or simply craving a festive treat, these no-bake Halloween Oreo pops are sure to be a monstrous hit. They’re not only adorably themed for the season but also incredibly easy to make, requiring minimal ingredients and effort. You’ll be amazed at how quickly you can create a whole collection of ghoulishly good desserts.
Below, you’ll find detailed instructions for each of these Halloween Oreo pop variations. Each recipe yields approximately 20-25 pops, making them perfect for sharing. If you’re aiming to create a mixed assortment, consider halving or quartering each individual recipe to manage your quantities. These treats are designed to be both fun to prepare and delicious to devour, bringing a touch of homemade charm to your Halloween festivities.
For best results and easy handling, I highly recommend using a cake pop holder for these Halloween Oreo Pops, similar to the one demonstrated in many tutorials. It provides a stable base for decorating and allowing the pops to set. Additionally, having parchment paper on hand is essential. It ensures your finished Halloween Oreo pops harden without sticking, making them effortless to remove and serve.
Creepy-Crawly Spider Oreo Pops
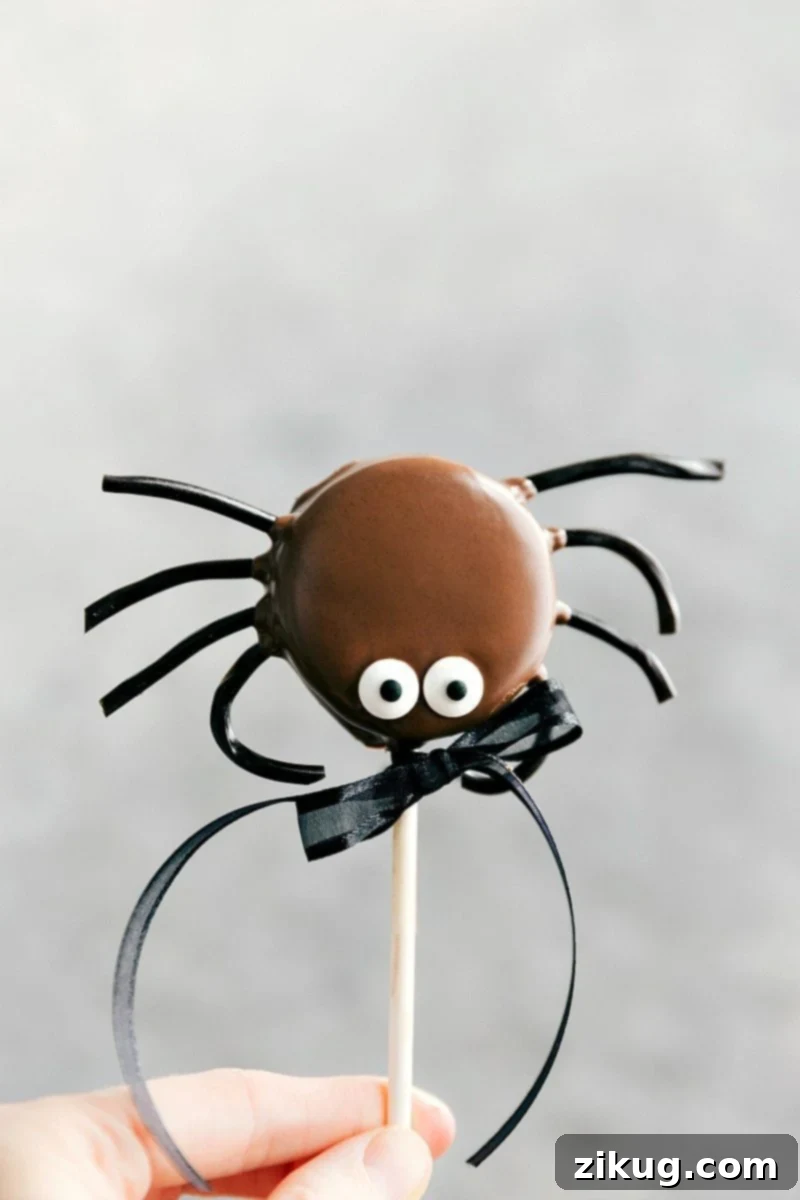
These Spider Oreo Pops are an absolute delight for Halloween! With their eight licorice legs and watchful candy eyes, they’re designed to be spooky and fun without being too scary for little ones. They combine the classic taste of Oreos with a playful, creepy aesthetic, making them a perfect addition to any Halloween spread.
If you prefer the convenience of shopping online, you can easily purchase the ingredients for these charming spider treats by clicking the links below:
- Parchment Paper
- Lollipop Sticks
- Candy Eyeballs (large, small, or bundle)
- Black Licorice Laces
- Black Ribbon (for decoration)
Spider Oreo Pops
Equipment
-
Large sheet pan (approximately 15″ x 21″)
-
Parchment paper
Ingredients
- 1 package Oreos (choose your favorite flavor!)
- 1 (12-ounce) bag milk chocolate chips
- 48 candy eyeballs
- 1 bag string black licorice laces
- 1-1/2 teaspoons vegetable oil (or shortening; optional, makes the chocolate smoother and easier to work with)
- Lollipop sticks
Instructions
-
Begin by preparing your workspace. Line a large sheet pan with parchment paper and set it aside. This will be crucial for the finished pops to harden without sticking. Gently separate each Oreo cookie by slowly twisting the two halves apart. While some breakage is inevitable, try to be as gentle as possible to keep the cream filling intact on one side.
-
Divide your milk chocolate chips into three separate, microwave-safe bowls. This method helps prevent the chocolate from hardening prematurely as you work on decorating your pops.
-
To each bowl of chocolate chips, optionally add about 1/2 teaspoon of vegetable oil or shortening. This step is highly recommended as it thins the melted chocolate slightly, making it smoother and easier to dip and coat the Oreos. Add a bit more if you feel the chocolate is still too thick.
-
Melt the chocolate in the microwave using 20-second intervals. After each burst, remove the bowl and stir the chocolate thoroughly for 20 seconds. This patient approach is key to achieving a smooth, evenly melted consistency and preventing the chocolate from burning. Repeat until fully melted and smooth.
-
Take a lollipop stick and dip one end into the melted chocolate. Immediately press this chocolate-coated end into the cream filling side of an Oreo. Cut the black licorice laces into even pieces, about an inch long, to form the spider’s legs. Press four of these cut licorice laces into the cream on the right side of the Oreo, and another four into the cream on the left side.
-
Carefully place the other half of the Oreo cookie on top of the cream-filled side with the stick and licorice legs. Gently press and hold the two halves together for a few seconds to ensure they adhere well. Allow this assembled pop to harden slightly before proceeding.
-
Once the Oreo structure is stable, gently spoon the melted chocolate over the top of the entire Oreo. Take care to coat it evenly while trying to avoid getting too much chocolate on the licorice legs. A little chocolate on the legs is perfectly fine and adds to the rustic spider look.
-
While the chocolate is still wet and pliable, gently place two candy eyes onto the freshly coated Oreo. Position them towards the top center to give your spider its characteristic look. Immediately transfer the finished (but still wet) Oreo pop onto your prepared sheet tray lined with parchment paper. This parchment paper is essential for easy removal once hardened.
-
Allow the spider Oreo pops to harden completely at room temperature. For faster setting, you can place them in the refrigerator for about 10-15 minutes, but room temperature works perfectly if you have the time.
Recipe Notes
Nutrition
Nutrition information is automatically calculated, so should only be used as an approximation.
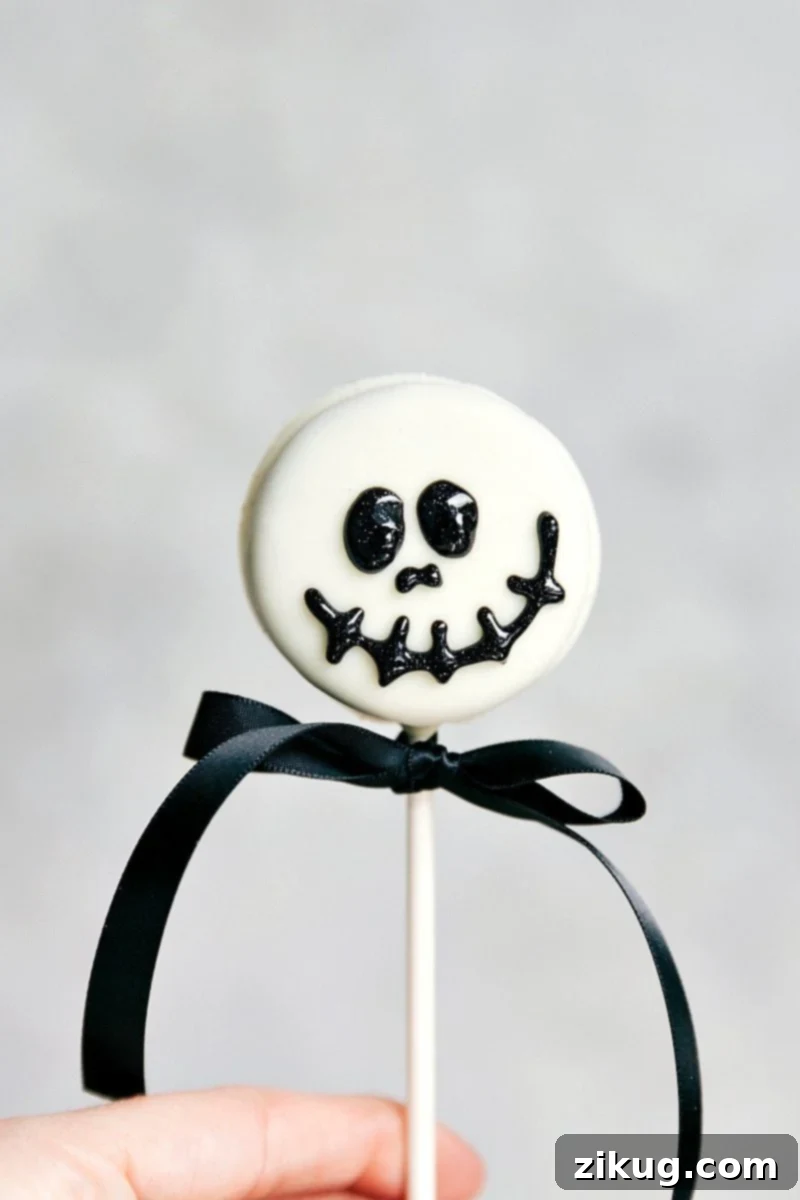
Spine-Chilling Skeleton Oreo Pops
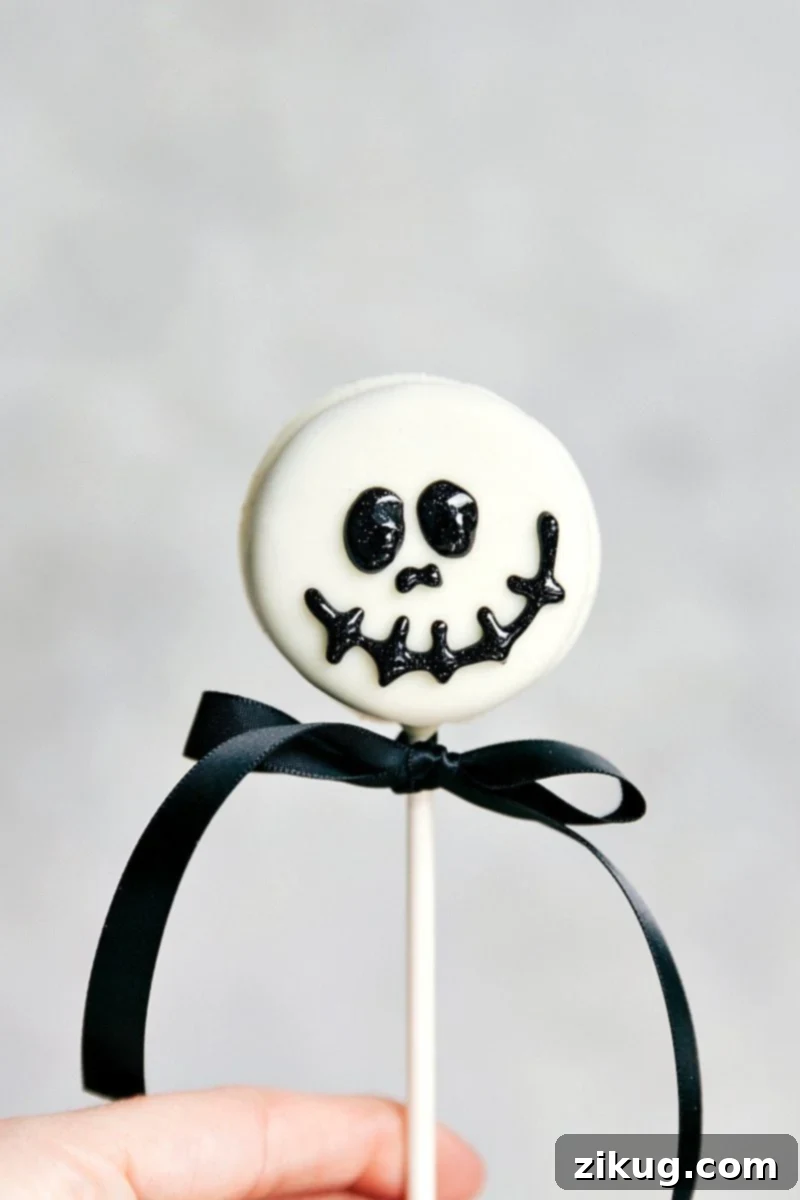
These Skeleton Oreo Pops are a wonderfully eerie addition to your Halloween dessert table! Coated in smooth white chocolate and adorned with haunting black sparkle gel faces, they perfectly capture the spirit of spooky season. They are simple to prepare and offer a stark, artistic contrast that will grab attention at any gathering. Kids and adults alike will love these playful yet spooky treats.
For your convenience, all the necessary ingredients to create these bone-chilling delights are available online:
- Parchment Paper
- Lollipop Sticks
- Black Sparkle Gel
- Black Ribbon (for decoration)
Skeleton Oreo Pops
Equipment
-
Large sheet pan (approximately 15″ x 21″)
-
Parchment paper
Ingredients
- 1 package Oreos (use your favorite flavor!)
- 1 (12-ounce) bag white chocolate chips
- Black decorating gel
- 1-1/2 teaspoons vegetable oil (or shortening; optional, makes the chocolate easier to work with)
- Lollipop sticks
Instructions
-
Prepare your work area by lining a large sheet pan with parchment paper, then set it aside. Carefully separate each Oreo cookie by slowly twisting the two halves apart. Aim to keep the cream filling mostly on one side. Don’t worry if a few break, it happens!
-
Divide your white chocolate chips into three separate microwave-safe bowls. This practice helps prevent the chocolate from seizing or hardening too quickly as you decorate your Oreo pops.
-
Optionally, add about 1/2 teaspoon of vegetable oil or shortening to each bowl of chocolate chips. This is a helpful tip to thin the chocolate, making it smoother and easier to achieve an even coating. Adjust the amount as needed for desired consistency.
-
Melt the white chocolate in the microwave in 20-second bursts. After each burst, stir the chocolate thoroughly for 20 seconds. Patience is key when melting white chocolate; stirring slowly helps prevent it from burning or clumping. Continue until completely smooth.
-
Dip one end of a lollipop stick into the melted white chocolate and gently press that end into the cream filling of one Oreo half. Then, place the other half of the Oreo on top and gently press to secure the stick and create a whole Oreo pop. Allow it to set slightly.
-
Using a spoon, evenly coat the entire Oreo pop with the melted white chocolate. Gently tap the lollipop stick against the edge of the bowl to remove excess chocolate and help it spread smoothly. For a perfectly opaque white finish, you might want to apply a second thin coat after the first layer has set slightly.
-
Place the freshly coated white chocolate Oreo pops onto the prepared parchment-lined tray. Allow them to harden completely at room temperature. This step is crucial for the decorations to adhere properly.
-
Once the white chocolate has fully hardened, it’s time to bring your skeletons to life! Use the black sparkle gel to draw two large, round eye sockets at the top of the Oreo. Below the eyes, create two small lines for the “nose,” and then draw a half-moon shape for the mouth. Add small vertical lines across the half-moon to create the teeth, as shown in the picture or video.
-
To ensure the gel decorations set firmly, place the finished Skeleton Oreo Pops in the fridge or freezer for a few minutes. Once hardened, they are ready to be displayed in an Oreo pop stand or served.
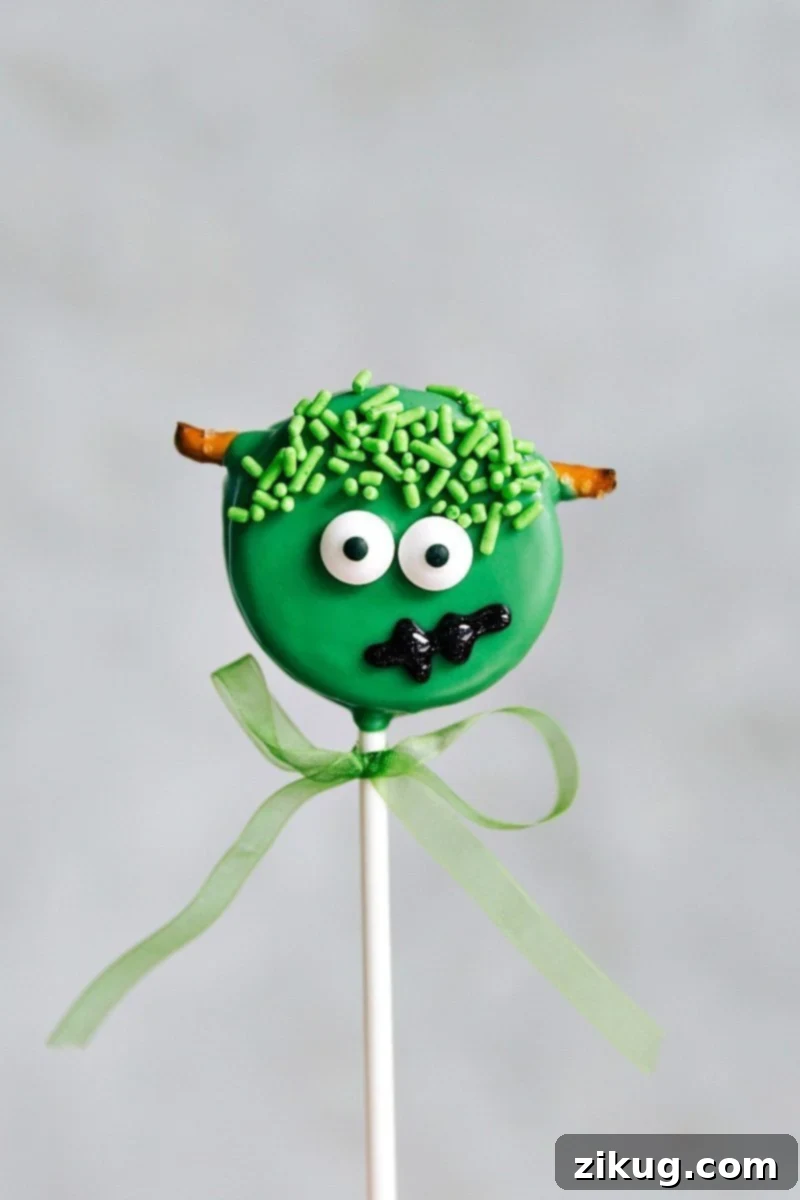
Ghoulish Frankenstein Oreo Pops
Bring Frankenstein’s monster to life in dessert form with these quirky Frankenstein Oreo Pops! Dipped in vibrant green candy melts and adorned with pretzel bolt necks, candy eyes, and a stitched smile, these treats are both spooky and adorable. They’re incredibly fun to assemble, making them a fantastic activity for Halloween parties or a festive snack that’s sure to be a monster hit with everyone.
For your convenience, you can easily purchase all the ingredients needed for these delightful Frankenstein treats online:
- Parchment Paper
- Lollipop Sticks
- Candy Eyeballs (small)
- Dark Green Candy Melts
- Green Sprinkles (Jimmies style works best)
- Black Sparkle Gel (for details)
- Green Ribbon (for decoration)

Frankenstein Oreo Pops
Equipment
-
Large sheet pan (approximately 15″ x 21″)
-
Parchment paper
Ingredients
- 1 package Oreos (use your favorite flavor!)
- 1 (12-ounce) bag green candy melts
- 24 pretzel sticks
- 48 candy eyeballs
- Green jimmies sprinkles
- 1-1/2 to 3 teaspoons vegetable oil (or shortening; optional, makes the candy melts easier to work with)
- Lollipop sticks
Instructions
-
Line a large sheet pan with parchment paper and set it aside. This will be your drying rack for the finished pops. Gently separate your Oreo cookies by slowly twisting them apart, trying to keep the cream filling intact on one side.
-
Divide the green candy melts into three separate microwave-safe bowls. This method helps maintain a good working consistency and prevents the melts from hardening too quickly.
-
To each bowl of candy melts, you can optionally add about 1/2 to 1 full teaspoon of vegetable oil or shortening. This will thin the melts, making them smoother for dipping and easier to achieve an even coat. Adjust the amount to reach your desired consistency.
-
Melt the candy melts in the microwave in 20-second bursts. Stir well for 20 seconds between each burst. Be patient and stir thoroughly to ensure a smooth, even consistency and to prevent the melts from scorching.
-
Dip one end of a lollipop stick into the melted green candy melts and press it firmly into the cream side of an Oreo half. Next, gently press a pretzel stick into the top edge of the cream filling on the same Oreo half, positioning it to mimic Frankenstein’s neck bolts.
-
Carefully place the other half of the Oreo on top, gently pressing and holding it in place until it adheres to the cream and the pretzel stick. Allow the assembled pop to harden slightly before coating.
-
Spoon the melted green candy melts evenly over the entire Oreo pop, being mindful to avoid the pretzel stick. Gently tap the lollipop stick against the edge of the bowl to smooth out the coating and remove any excess.
-
Immediately press two candy eyes into the still-wet green candy melts. Then, sprinkle green jimmies sprinkles above the eyes to create Frankenstein’s iconic hair.
-
Transfer the decorated Oreo pops to the prepared parchment-lined sheet pan. Allow them to harden completely at room temperature, which helps all the elements set properly.
-
Once the candy melts are completely hardened, use the black edible gel to draw a crooked “smile” onto Frankenstein’s face, adding a few small vertical lines for stitches. For the gel to fully set, place the pops in the fridge or freezer briefly before handling or placing them into a decorative stand.
Recipe Notes
Nutrition
Nutrition information is automatically calculated, so should only be used as an approximation.
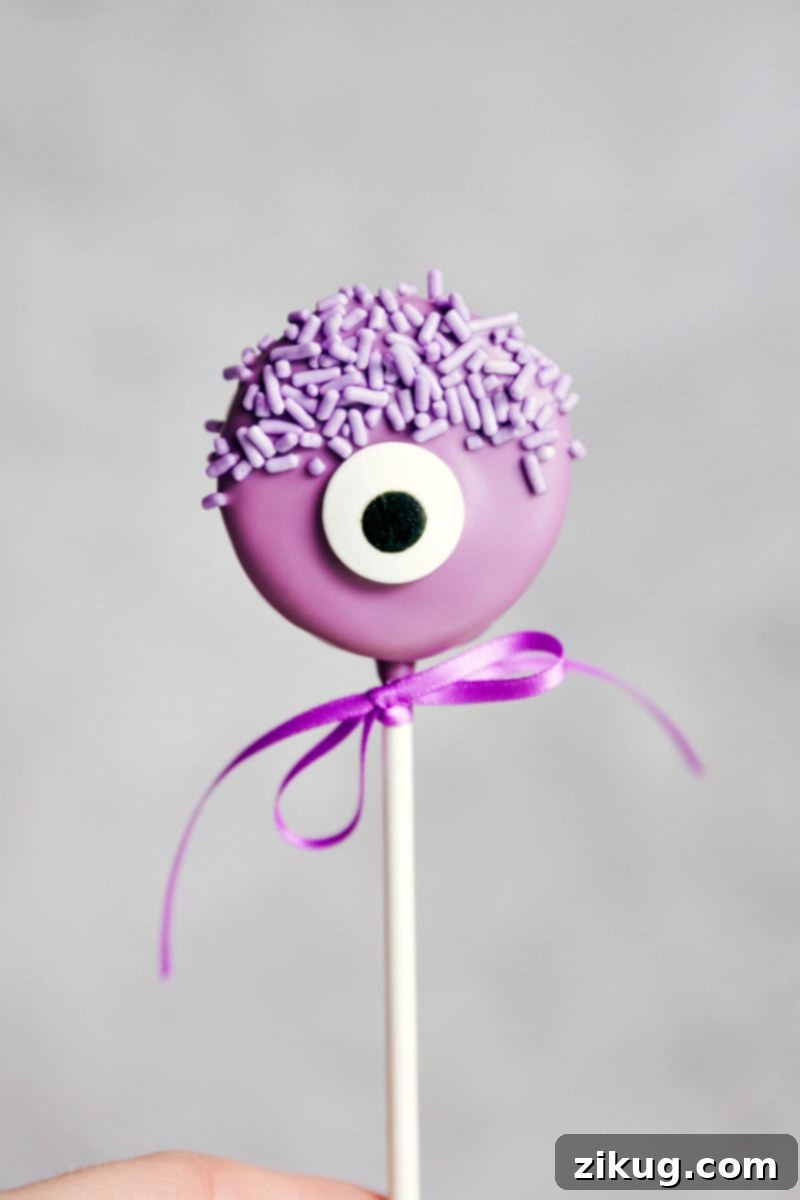
Playful Monster Oreo Pops
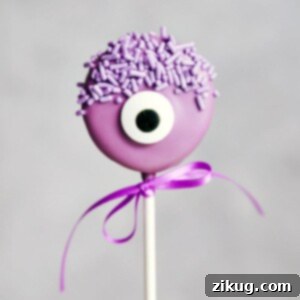
Get ready for some monstrously good fun with these vibrant Monster Oreo Pops! Dipped in striking purple candy melts and adorned with an assortment of candy eyes and sprinkles, these treats are all about celebrating the playful side of Halloween. Each pop can be uniquely decorated, allowing for endless creativity and making them a favorite at any Halloween party or as a delightfully spooky snack.
All the ingredients you need to create these eye-catching monster treats are conveniently available for online purchase:
- Parchment Paper
- Lollipop Sticks
- Candy Eyeballs (large, or an assortment of small edible eyes for variety)
- Purple Candy Melts
- Purple Sprinkles (Jimmies or similar)
- Purple Ribbon (for decoration)
Monster Oreo Pops
Equipment
-
Large sheet pan (approximately 15″ x 21″)
-
Parchment paper
Ingredients
- 1 package Oreos (use your favorite flavor!)
- 1 (12-ounce) bag purple candy melts
- 24 Large candy eyeballs (or an assortment of small edible eyes—get creative!)
- Purple jimmies sprinkles
- 1-1/2 to 3 teaspoons vegetable oil (or shortening; optional, makes the candy melts easier to work with)
- Lollipop sticks
Instructions
-
Prepare your working surface by lining a large sheet pan with parchment paper. Set it aside for later use. Gently separate each Oreo cookie by slowly twisting the two halves apart. Take care to keep the cream filling mostly intact on one side.
-
Divide your purple candy melts into three separate microwave-safe bowls. This prevents the entire batch from hardening while you are busy decorating.
-
Optionally, add about 1/2 to 1 full teaspoon of vegetable oil or shortening to each bowl of candy melts. This helps to thin the melts, ensuring a smoother and easier coating process. Adjust the quantity to achieve your desired consistency.
-
Melt the candy melts in the microwave using 20-second bursts. After each interval, stir the melts thoroughly for 20 seconds. This slow and steady approach is crucial to prevent burning and achieve a perfectly smooth, consistent texture.
-
Dip one end of a lollipop stick into the melted purple candy melts. Press this coated end into the cream side of an Oreo half. Place the other half of the Oreo on top and gently press both halves together, ensuring the stick is securely in place. Allow it to set slightly.
-
Spoon the melted purple candy melts evenly over the entire Oreo pop. Gently tap the lollipop stick against the edge of the bowl. This technique helps the candy melts spread smoothly and evenly over the Oreo, creating a beautiful, uniform coating.
-
While the candy melts are still wet, immediately press one large edible eye into the center of the Oreo pop. Alternatively, you can use an assortment of smaller edible eyes to create a multi-eyed monster, fostering a more playful and unique look.
-
Generously sprinkle purple jimmies sprinkles over and around the edible eye(s) for added texture and a fun, furry monster effect.
-
Transfer the decorated Monster Oreo Pops to your prepared parchment-lined sheet pan. Allow them to harden completely at room temperature before handling or serving.
Recipe Notes
Nutrition
Nutrition information is automatically calculated, so should only be used as an approximation.
More Halloween Fun: Easy Spooky Treats!
If you’ve enjoyed making these delightful Halloween Oreo Pops, you’re in for a treat! There are countless other easy and fun Halloween-themed desserts that require minimal effort but deliver maximum spooky cheer. From no-bake truffles to clever cookie transformations, these ideas are perfect for adding more magic to your holiday celebrations. Explore these fantastic recipes to expand your repertoire of eerie edibles and make your Halloween spread truly unforgettable!
Halloween Oreo Truffles (Just 5 Ingredients!)
Mummy Milanos: Spooky, Simple, and Sweet!
Quick 3-Ingredient Halloween Treats: Monster Eyeballs, Witches Hats, Brooms, & Bat Bites
No-Bake Brownie Batter Mummy Bark (Only 5 Ingredients!)