
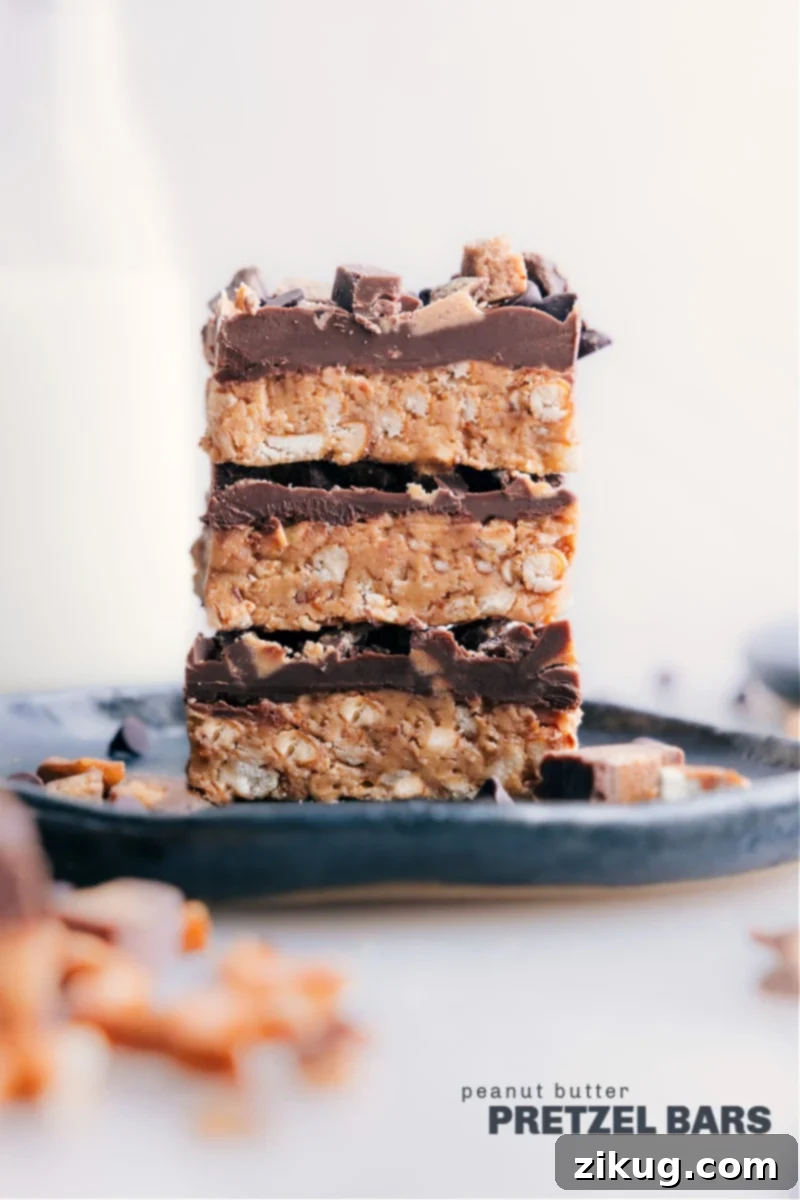
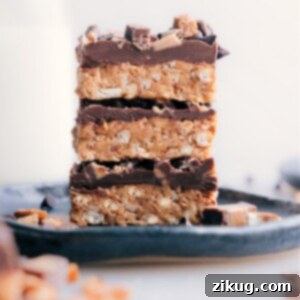
Peanut Butter Pretzel Bars are a truly delightful creation, expertly blending the rich creaminess of peanut butter with the satisfying crunch of pretzels, all enveloped in smooth, decadent chocolate. Crowned with a generous sprinkle of coarsely chopped peanut butter cups and mini chocolate chips, these bars offer a symphony of flavors and textures that make them an absolute sensation. Perfect for any gathering, these no-bake bars are incredibly easy to make and guaranteed to disappear fast!
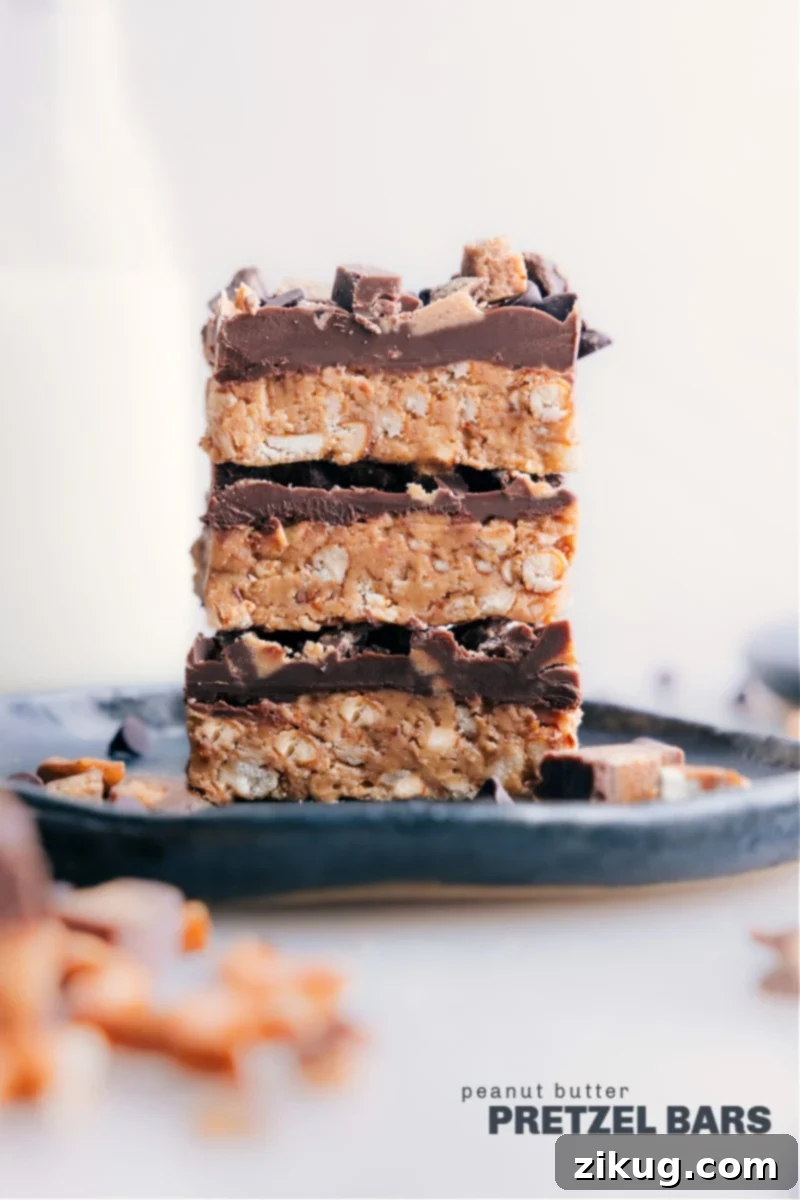
Irresistible No-Bake Peanut Butter Pretzel Bars: The Ultimate Salty-Sweet Dessert
Prepare to fall in love with these incredibly rich and utterly delicious Peanut Butter Pretzel Bars! They effortlessly achieve that coveted perfect balance of sweet and salty, showcasing the timeless and irresistible combination of peanut butter and chocolate. What makes these bars even more appealing is their simplicity: they are remarkably easy to whip up, requiring absolutely no baking whatsoever. This makes them a fantastic option for busy days, impromptu get-togethers, or when you just want a quick, satisfying treat without heating up the kitchen. We guarantee these bars will be a massive hit with everyone who tries them – they’re truly a guaranteed crowd-pleaser!
Given their impressive richness, especially if you opt for luscious milk chocolate instead of semi-sweet, we highly recommend cutting these bars into smaller, bite-sized squares. This serving suggestion is similar to how one might enjoy a rich fudge, ensuring everyone can savor the decadent flavors without feeling overwhelmed. Each small square delivers a powerful punch of flavor and texture, making every bite a memorable experience. Whether you’re a fan of classic sweet treats or crave that delightful salty contrast, these bars tick all the boxes for a truly satisfying dessert.
Quick Tip: Achieving Your Preferred Bar Thickness
When it comes to the perfect thickness for your bars, we have a preference for a more substantial, thicker treat, which is why we suggest using a 9×9-inch baking pan. This size yields a wonderfully dense and satisfying bar. However, if your taste leans towards a thinner, more delicate bar, simply adjust the recipe to a 9×13-inch pan. Both options deliver an equally tasty and delightful dessert, just with a slightly different profile. The choice is yours to customize your perfect batch of Peanut Butter Pretzel Bars!
Crafting the Perfect Peanut Butter Pretzel Bars: Essential Ingredients
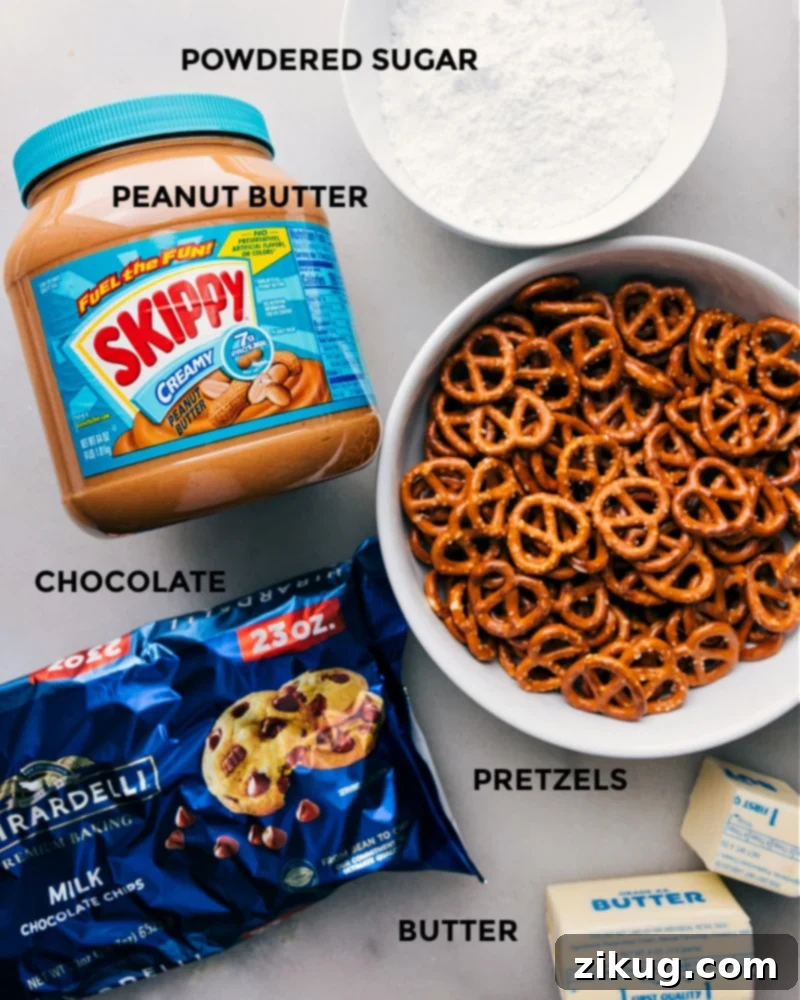
The magic of these no-bake Peanut Butter Pretzel Bars lies in a few simple, yet carefully chosen, ingredients that combine to create an extraordinary flavor and texture experience. Here’s a breakdown of what you’ll need and why each component is crucial:
- Crushed Pretzels: The Crunchy Foundation
Any type of pretzel works wonderfully for this recipe, whether they are sticks, twists, or nuggets. The key is to crush them finely *before* measuring. This ensures a consistent and sturdy base for your bars. You can use a food processor for a quick, even crumble, or a Ziploc bag and a rolling pin for a more rustic, varied texture. The pretzels provide that essential salty crunch that perfectly complements the sweet layers. - Unsalted Butter: For Controlled Richness
We recommend using unsalted butter to give you complete control over the overall saltiness of the bars. Since pretzels are inherently salty, starting with unsalted butter allows you to perfectly balance the flavors without making the dessert excessively savory. The melted butter binds the pretzel crust together, creating a firm and delicious foundation. - Powdered Sugar: The Secret to Smoothness
Powdered sugar, also known as confectioners’ sugar, is indispensable for creating an incredibly smooth and sweet peanut butter layer. Unlike granulated sugar, powdered sugar dissolves seamlessly, preventing any gritty texture and ensuring a wonderfully creamy consistency that melts in your mouth. It sweetens the peanut butter without altering its creamy character. - Creamy Peanut Butter: The Heart of the Bar
The quality of your peanut butter significantly impacts the final taste and texture of these bars. Choose a creamy peanut butter that you absolutely love, as its flavor will shine through. It’s crucial to avoid natural peanut butter that requires stirring, as these varieties tend to be oilier and can prevent the bars from setting properly, resulting in a less firm and potentially messy treat. A classic, smooth peanut butter like Skippy® Creamy Peanut Butter (not sponsored, but highly recommended!) works best for its consistent texture and rich flavor. - Chocolate Chips: Your Flavor Canvas
This is where you can truly customize your bars! Use whatever flavor of chocolate chips you enjoy the most. Semi-sweet chocolate chips offer a balanced sweetness that beautifully complements the peanut butter without overpowering it, providing a classic flavor profile. For an even sweeter, more decadent, almost fudge-like bar, opt for milk chocolate chips. Dark chocolate chips will add a deeper, slightly bitter contrast that can be incredibly satisfying for those who prefer less sweetness.
Optional Toppings: Elevate Your Peanut Butter Pretzel Bars
While the core recipe for these Peanut Butter Pretzel Bars is incredibly satisfying on its own, adding optional toppings can introduce an exciting new dimension of flavor and texture. These additions are not just decorative; they enhance the overall sensory experience, making each bite even more delightful.
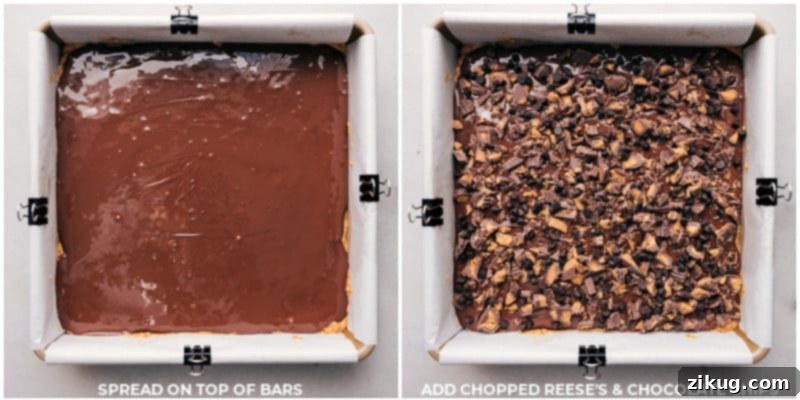
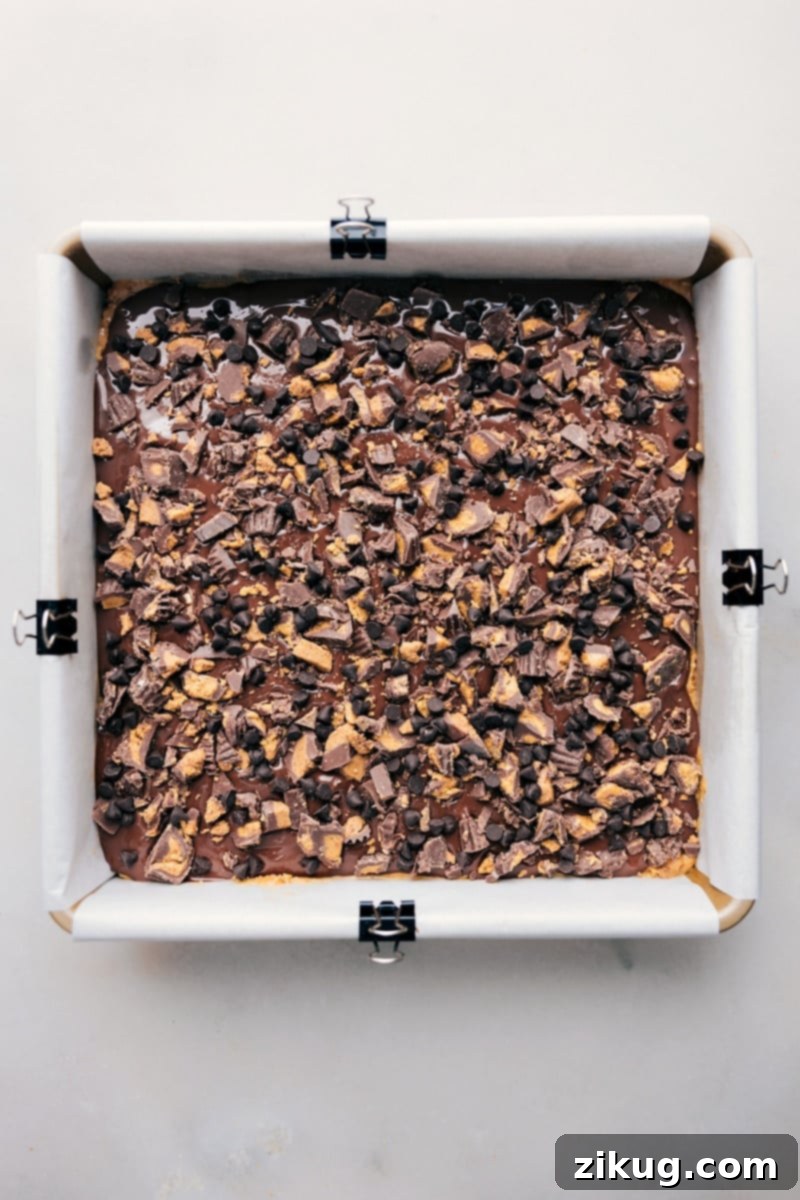
Mini peanut butter cups and mini chocolate chips are our go-to choices for an extra layer of decadence. The mini peanut butter cups provide an additional burst of creamy peanut butter flavor and a chewy texture, while the mini chocolate chips add another layer of chocolatey goodness and a delightful crunch.
Here are some helpful tips and creative ideas for your toppings:
- Coarsely Chop for Even Distribution: For mini peanut butter cups, make sure to coarsely chop them. This ensures they are evenly distributed across the bars, allowing you to enjoy a piece of peanut butter cup in almost every bite. This also prevents large chunks that might make cutting difficult. Reese’s® Minis are an excellent choice, as they often come unwrapped, saving you valuable prep time and making them super convenient to use.
- Get Creative with Your Toppings: Don’t hesitate to experiment and personalize your bars! Beyond peanut butter cups and chocolate chips, consider these tasty alternatives:
- Crushed Peanuts: For an intensified nutty flavor and extra crunch, sprinkle some finely chopped roasted peanuts on top.
- Additional Pretzels: If you love that salty crunch, add more finely crushed pretzels to the chocolate layer for a boost in texture.
- A Dash of Sea Salt: A light sprinkling of flaky sea salt can enhance the sweet and savory notes, creating a gourmet touch.
- Chopped Candy Bars: Get wild with your favorite candy bars, chopped into small pieces. Think caramel, toffee, or even more chocolate!
- White Chocolate Drizzle: For a visually appealing and extra sweet touch, drizzle melted white chocolate over the finished bars.
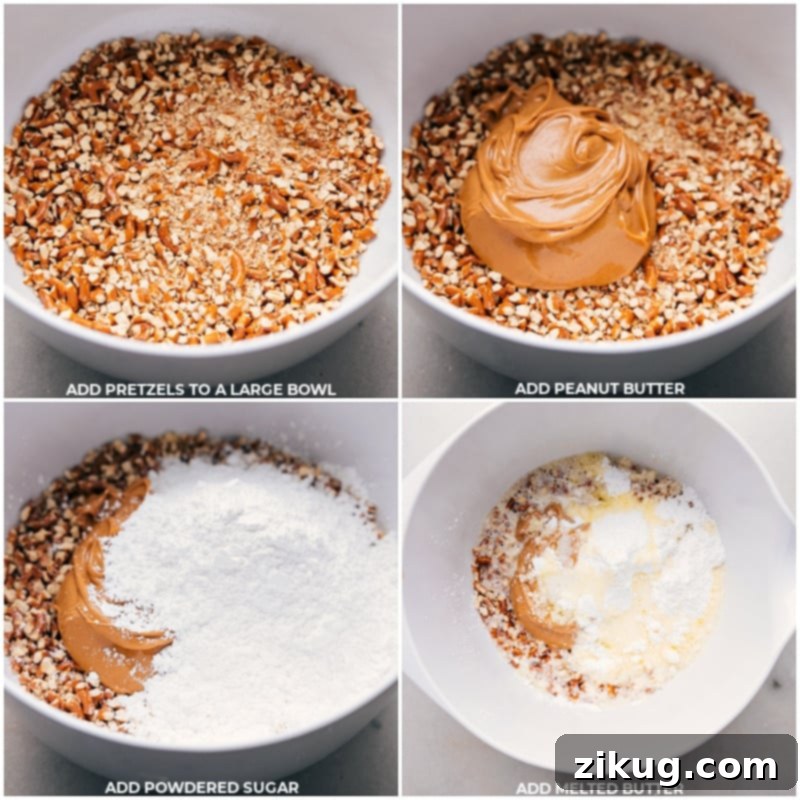
How To Make No-Bake Peanut Butter Pretzel Bars: Essential Tips for Success
Making these no-bake Peanut Butter Pretzel Bars is straightforward, but a few key tips will ensure your dessert turns out perfectly every time. Follow these guidelines for a smooth and delicious process:
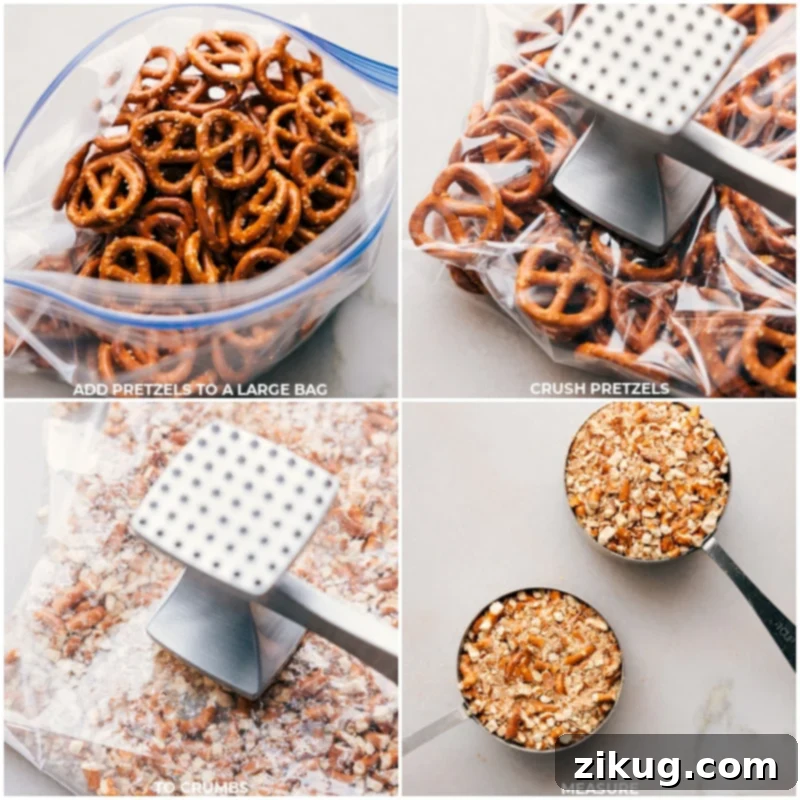
- Perfectly Crushed Pretzels for a Uniform Crust: The consistency of your pretzel crust is vital. To achieve an even texture that holds together beautifully, ensure your pretzels are thoroughly and uniformly crushed. A food processor is your best friend here, as it makes this step incredibly quick and yields consistent crumbs. If you don’t have one, no worries! A sturdy plastic bag and a meat mallet or rolling pin will also do the trick, providing a satisfying way to release some stress while preparing your ingredients. Aim for mostly fine crumbs with a few small, delightful pretzel pieces remaining for extra crunch.
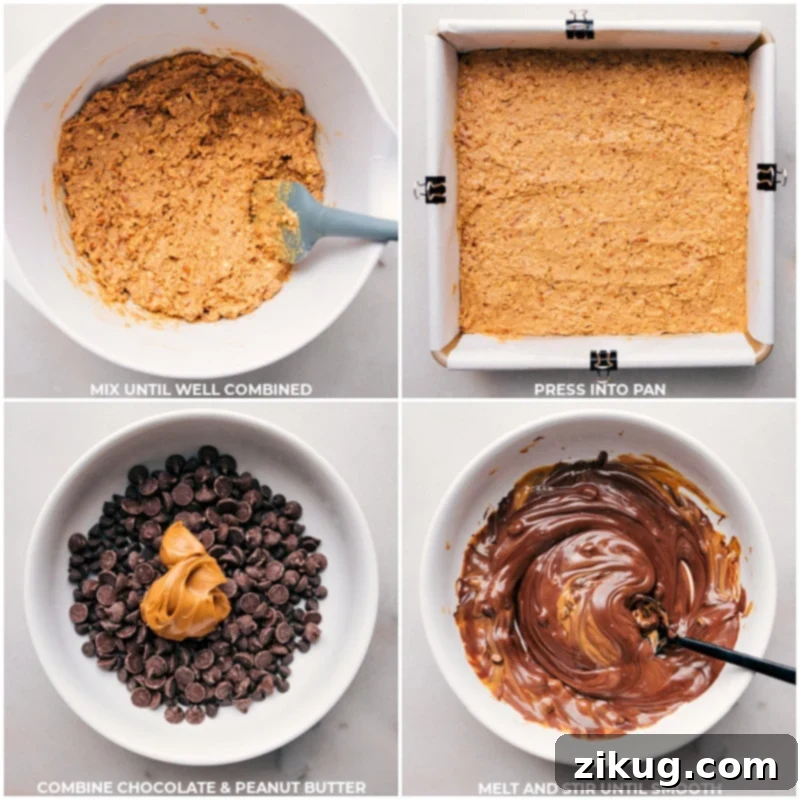
- Thorough Mixing for a Solid Base Layer: When combining the crushed pretzels, melted butter, powdered sugar, and creamy peanut butter for the base layer, take your time to mix these ingredients thoroughly. This isn’t a step to rush. Proper mixing ensures that all components are well-integrated, which is crucial for the base layer to set firmly and hold its shape once the bars are cut. A well-mixed base prevents crumbling and ensures each bite is perfectly structured.
- Gentle Melting of the Chocolate Topping: The chocolate and peanut butter topping needs a smooth, glossy finish. Be extremely careful not to overheat the chocolate when melting it with the peanut butter. Overheating chocolate can cause it to “seize” – becoming thick, grainy, and unmanageable. The best method is to use short intervals in the microwave, typically 30-second bursts. After each burst, remove the bowl and stir the mixture thoroughly, even if it doesn’t look fully melted. The residual heat will continue to melt the chocolate as you stir, resulting in a perfectly smooth and luscious topping.
- The Critical Chilling Step: Don’t Rush It! This is perhaps the most important step for any no-bake bar recipe. Do not skip or rush the chilling process! Allowing the bars to set properly in the refrigerator is essential for them to firm up completely and maintain their shape when you cut and serve them. Rushing this step will result in soft, messy bars that don’t hold together well. Plan for at least 1 hour of chilling time, or even longer if your kitchen is warm.
- Serving Suggestion: Small Squares for Optimal Enjoyment: As mentioned, these Peanut Butter Pretzel Bars are incredibly rich and decadent. To allow everyone to fully appreciate their intense flavors without feeling overwhelmed, consider cutting them into smaller squares for serving. This also makes them ideal for dessert platters or as a delightful treat alongside coffee or tea.
Recommended Tools for Effortless No-Bake Dessert Preparation
Preparing these delicious no-bake Pretzel Peanut Butter Bars requires only a few basic kitchen tools, most of which you likely already have on hand. Having the right equipment makes the process even smoother and more enjoyable:
- 9×9-inch Baking Pan (or 9×13-inch for Thinner Bars): This is your primary vessel for creating the bars. For thicker, more substantial bars, a 9×9-inch pan is ideal. If you prefer a thinner profile, a 9×13-inch pan works perfectly. Our absolute favorite 9×9-inch pan ensures even setting and easy release.
- Parchment Paper: Your Non-Stick Secret Weapon: Lining your baking pan with parchment paper is a game-changer. It prevents sticking, makes lifting the entire batch of bars out of the pan incredibly easy, and simplifies cleanup afterward. We highly recommend using pre-cut sheets of parchment paper for convenience. To keep the parchment securely in place while you press in the crust, these handy binder clips are a lifesaver.
- Spatula or Wooden Spoon: For Mixing and Spreading: A sturdy spatula or a wooden spoon will be indispensable for thoroughly mixing the ingredients for your pretzel crust and for evenly spreading both the crust and the chocolate topping into the pan.
- Rolling Pin or Meat Mallet: For Crushing Perfection: To achieve that ideal crushed pretzel consistency, a rolling pin or a meat mallet will be incredibly useful. Place your pretzels in a sturdy bag and crush away until you reach your desired texture.
- Sharp Chef’s Knife: For Clean Cuts: Once your bars are perfectly chilled and set, a sharp chef’s knife is essential for making clean, precise cuts. For the neatest slices, a chef’s knife is generally better than a smaller paring knife, offering superior leverage. For truly pristine edges, a pro tip is to run your knife under hot water, dry it completely, and then make each decisive cut. Repeat this process for every few cuts to maintain a clean blade and prevent sticking.
(The above links are affiliate links, which means we may earn a small commission if you make a purchase through them, at no extra cost to you.)
Storing Your Delicious Pretzel Peanut Butter Bars
Keeping Your Bars Fresh and Flavorful
To maintain their optimal flavor, texture, and freshness, it’s crucial to store your Pretzel Peanut Butter Bars correctly. If you’re not planning to serve them immediately, transfer the cooled and set bars to an airtight container. Place the container in the refrigerator; this helps keep the chocolate firm and prevents the peanut butter layer from becoming too soft.
Properly stored in the fridge, these delectable bars will remain fresh for about a week. However, for the very best experience – with that perfect balance of crunch, creaminess, and firm chocolate – we highly recommend enjoying them within the first few days of preparation. They tend to be at their absolute peak during this time. For longer storage, you can also freeze individual bars in an airtight container for up to 2-3 months. Just thaw in the refrigerator before serving.
More Irresistible Chocolate and Peanut Butter Treats You’ll Love
If you’re a fan of the classic chocolate and peanut butter combination, you’re in for a treat! We’ve curated a list of other delightful recipes that celebrate this iconic duo, perfect for satisfying any craving:
- Decadent Chocolate Peanut Butter Pie with a crunchy Oreo cookie crust
- Addictive Peanut Butter Puppy Chow featuring rich chocolate-peanut butter cups
- Delicious Chocolate Peanut Butter Muffins made entirely without flour
- Soft and chewy Peanut Butter Chocolate Chip Cookies, a timeless classic
- Nostalgic Lunch Lady Peanut Butter Bars topped with a luscious chocolate frosting
This recipe for Peanut Butter Pretzel Bars was originally adapted from a beloved creation by Taste of Home, and further refined by Chelsea’s Messy Apron to bring you the best possible version.
Peanut Butter Pretzel Bars
Chelsea Lords
25 minutes
1 hour
1 hour
25 minutes
16 bars
Equipment
-
9 x 9-inch baking pan or 9 x 13-inch, see note 1
-
Parchment paper
Ingredients
- 2 cups crushed pretzels measured after crushing
- 12 tablespoons unsalted butter melted, but not hot
- 1-1/2 cups powdered sugar
- 1-1/4 cups creamy peanut butter divided, see note 2
- 1-1/2 cups chocolate chips semi-sweet or milk, see note 3
- Toppings as desired see note 4
Instructions
-
Prepare a 9×9-inch baking pan by lining it with parchment paper, leaving an overhang for easy removal.
-
Crush the pretzels by placing them in a large plastic bag and using a rolling pin or meat mallet until they’re mostly crumbs, with some small pretzel pieces remaining.
-
In a large bowl, combine the crushed pretzels, melted butter, powdered sugar, and 1 cup of the peanut butter. Stir until well combined. Transfer the mixture into the prepared baking pan and press it into an even layer.
-
Add the chocolate chips and the remaining 1/4 cup peanut butter into a microwave-safe, medium bowl. Melt in the microwave, using 30-second bursts until mostly melted. Stir the mixture until it’s fully melted and smooth.
-
Pour the chocolate and peanut butter topping over the pretzel layer, spreading it into an even layer.
-
If desired, coarsely chop some mini peanut butter cups and gently press them into the chocolate layer. You can also sprinkle some mini chocolate chips on top for additional texture and flavor. Refrigerate the dessert for at least 1 hour to allow the bars to set.
-
Use the overhang to pull the bars from the pan and place on a cutting board. Before cutting, run a very sharp knife under hot water, dry it off, then make decisive cuts to form the bars. Enjoy!
Recipe Notes
Note 2: I love and highly recommend Skippy® Creamy Peanut Butter (not sponsored). I don’t recommend natural peanut butter that needs stirring since it tends to be oilier and may result in a less firm set.
Note 3: Your choice of chocolate chips depends on how sweet you want your bars. Semi-sweet chips offers a balanced sweetness that won’t overpower the peanut butter, while milk chocolate chips makes the bars sweeter and almost fudge-like.
Note 4: Optional toppings include: Reese’s minis (coarsely chopped) and 2 tablespoons mini chocolate chips.
Storage: Keep Pretzel Peanut Butter Bars in an airtight container in the fridge for about 1 week, but they are best enjoyed within the first few days.
Nutrition
|
Calories: 375 kcal
|
Carbohydrates: 33 g
|
Protein: 7 g
|
Fat: 26 g
|
Saturated Fat: 11 g
|
Polyunsaturated Fat: 3 g
|
Monounsaturated Fat: 9 g
|
Trans Fat: 0.4 g
|
Cholesterol: 24 mg
|
Sodium: 214 mg
|
Potassium: 234 mg
|
Fiber: 3 g
|
Sugar: 20 g
|
Vitamin A: 271 IU
|
Vitamin C: 0.2 mg
|
Calcium: 26 mg
|
Iron: 2 mg
Nutrition information is automatically calculated, so should only be used as an approximation.