

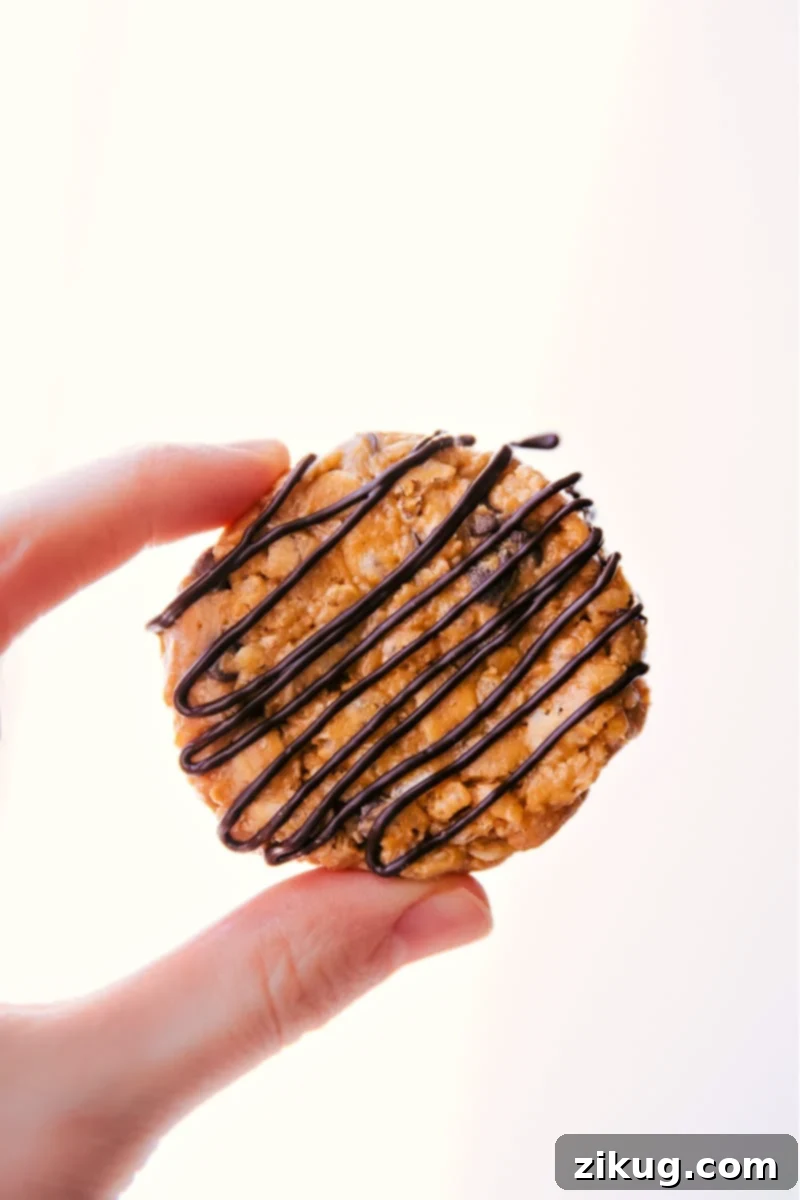
No-Bake Healthy Breakfast Cookies are your ultimate solution for quick, satisfying, and wholesome mornings. Crafted with just a handful of simple, everyday ingredients, these delightful cookies are designed to power your day or provide a perfect afternoon pick-me-up. For an extra special touch that elevates their deliciousness, consider adding a luscious chocolate drizzle on top – it’s a game-changer!

Author’s Note
Cookies for Breakfast? Absolutely!
As someone who wholeheartedly embraces sweet breakfasts, I completely understand the joy a delicious morning treat can bring. Whether it’s a stack of fluffy homemade pancakes, golden French toast, or perfectly crispy banana waffles, a touch of sweetness sets the tone for a happy day. So, when the concept of breakfast cookies first crossed my path, I was instantly intrigued and knew I had to explore this delightful idea. Could a cookie truly be a wholesome and convenient breakfast option? The answer, I quickly discovered, was a resounding yes!
These No-Bake Healthy Breakfast Cookies quickly became a staple in my routine. They are simply perfect for those bustling mornings when time is of the essence, before an energizing hike, or whenever I need a quick and satisfying bite to fuel my day. Beyond breakfast, they’ve also earned a permanent spot as one of my favorite afternoon pick-me-ups, providing a gentle boost without the dreaded sugar crash often associated with sweet treats.
What makes these cookies truly exceptional is their simplicity and accessibility. Made exclusively with common pantry staples, they require no baking, which means no oven preheating or long waits. This also eliminates the need for extra trips to the grocery store, making them an ideal last-minute creation. The process is straightforward, allowing you to whip up a batch with minimal fuss and maximum flavor.
And let’s talk about the texture – it’s absolutely everything. Imagine a delightful combination of crunchy crisp rice cereal, chewy old-fashioned oats, the nutty richness of peanut butter, and just the right amount of sweetness. Each bite offers a satisfying medley of sensations. And if you dare to take it to the next level with a generous drizzle of melted chocolate on top? Well, prepare for pure bliss. It’s a simple addition that transforms these already incredible cookies into an irresistible indulgence.
These cookies offer a fantastic way to enjoy a “dessert” for breakfast while still providing the sustained energy and nutrients you need. They are versatile, customizable, and always a crowd-pleaser, whether you’re serving them to family or enjoying a quiet moment to yourself. Get ready to redefine your breakfast experience with these effortlessly delicious, no-bake wonders.
Essential No-Bake Healthy Breakfast Cookie Ingredients
Crafting these delectable no-bake breakfast cookies relies on a few key ingredients, each playing an important role in achieving the perfect balance of flavor and texture. Here’s a closer look at what you’ll need and why:
| Ingredient | Why It’s Essential / Pro Tip |
|---|---|
| Peanut Butter | This is the foundation of our cookies, providing rich flavor and crucial binding. Choose a creamy variety you genuinely love eating straight from the jar. A slow-roasted and lightly salted peanut butter will contribute a deeper, more complex flavor profile, elevating the overall taste of your cookies. Natural peanut butter (without added sugar or oils) works best for a healthier option. |
| Honey | Beyond adding natural sweetness, honey acts as a vital adhesive, helping all the ingredients stick together and creating that wonderfully chewy texture. Maple syrup can be a suitable alternative if you prefer, offering a slightly different flavor. |
| Vanilla Extract | A touch of pure vanilla extract is a flavor booster, adding warmth and depth that complements the nutty peanut butter and sweet honey beautifully. Don’t skip this for a well-rounded taste. |
| Salt | Just a pinch of salt is crucial. It doesn’t make the cookies salty; rather, it subtly enhances and balances all the other flavors, making the sweetness and nuttiness pop. |
| Old-Fashioned Oats | These provide the primary bulk and the signature chewy texture of our breakfast cookies. Old-fashioned (rolled) oats are ideal because they hold their shape and chewiness without becoming mushy. Avoid steel-cut oats, which are too hard for no-bake recipes, and quick oats, which can lead to a softer, less desirable texture. |
| Crisp Rice Cereal | Think Rice Krispies® or any similar crispy rice cereal. This ingredient is the secret to adding an irresistible crunch, creating a fantastic textural contrast to the chewiness of the oats. It lightens the cookie and adds an enjoyable snap. |
| Oat Flour | Oat flour helps absorb moisture and binds the ingredients further, preventing the cookies from being too sticky. It’s simply finely ground oats! You can easily make your own by blending old-fashioned oats in a blender or food processor until a fine flour forms. This also keeps the cookies gluten-free if using certified gluten-free oats. |
Expert Tips for Perfect No-Bake Healthy Breakfast Cookies
While this recipe is incredibly forgiving, a few expert tips can help you achieve the perfect batch of healthy breakfast cookies every time. Customization is key to making these cookies truly your own!
- Adjust Consistency as Needed: The mixture’s texture can vary slightly depending on your peanut butter and ambient humidity. If your cookie mixture feels too sticky and hard to handle, gradually add a little more old-fashioned oats or oat flour, one tablespoon at a time, until it reaches a manageable consistency. Conversely, if the mixture appears too crumbly and isn’t holding together well, incorporate an extra teaspoon of nut butter or honey to add more binding moisture.
- Customize with Wholesome Add-ins: This easy recipe is incredibly versatile and can be modified with a variety of basic ingredients to boost nutrition and flavor. Consider adding 1-2 tablespoons of flaxseed meal, chia seeds, protein powder, or hemp hearts. When incorporating these, you might need to slightly reduce the amount of oats or oat flour to maintain the desired consistency. These additions can significantly increase the fiber, omega-3s, and protein content, making your cookies even healthier.
- Explore Flavor Variations: While the chocolate drizzle is fantastic, don’t be afraid to experiment with other flavor boosters! Instead of the chocolate, or in addition to it, mix in 2-3 tablespoons of small, finely diced add-ins before shaping your cookies. Think chopped dried cranberries, golden raisins, shredded coconut, or even a sprinkle of mini chocolate chips for an internal burst of flavor. Ensure any larger add-ins are finely chopped for even distribution and easier shaping.
- Achieve Uniformity with a Cookie Scoop: For perfectly even and consistently sized cookies, a 1-1/2 tablespoon cookie scoop is an invaluable tool. It ensures that each portion is the same size, which helps them set uniformly. After scooping, firmly compress the mixture into a ball, then gently flatten it in your hands or against the parchment paper to form a traditional cookie shape.
- Mastering the Chocolate Drizzle: If you opt for the optional chocolate drizzle, melting it correctly is key. Always use microwave-safe bowls and heat the chocolate chips in short bursts (e.g., 15-20 seconds). Stir thoroughly after each burst, even if the chocolate doesn’t look fully melted. The residual heat will continue to melt the chocolate. This prevents scorching and ensures a smooth, luscious drizzle. A small Ziploc bag with a tiny corner snipped off makes for a perfect homemade piping bag!
Featured Comment
“I have made these a few times now. My boys love them. I have one with an egg allergy and it is so hard to find breakfast foods he can eat that are healthy. I left out one tablespoon of the honey and they are still sweet. Thanks so much for this recipe. It’s a family favorite.”
– Shelly
Storage Solutions
Keeping Your Delicious Cookies Fresh
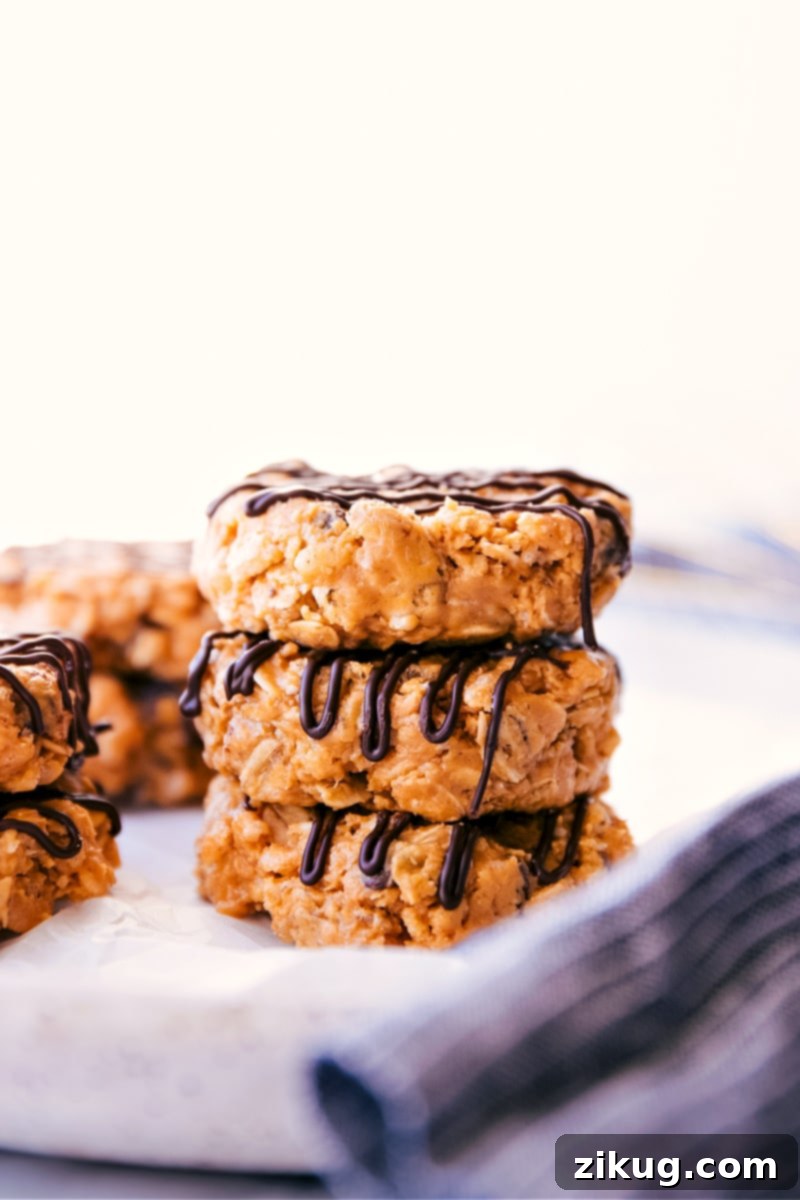
One of the best features of these no-bake healthy breakfast cookies is how well they store, making them perfect for meal prepping or having a convenient snack ready whenever hunger strikes. For optimal freshness and texture, store your finished cookies in an airtight container at room temperature for up to 2-3 days. However, I personally prefer keeping mine in the refrigerator, which helps maintain their firm texture and extends their freshness significantly, typically for 4-5 days.
If you’re looking to extend their shelf life even further, these cookies freeze beautifully! Arrange them in a single layer on a parchment-lined baking sheet and flash freeze them for about an hour until solid. Then, transfer the frozen cookies to a freezer-safe airtight container or a heavy-duty freezer bag, separating layers with parchment paper to prevent sticking. They will stay fresh in the freezer for up to 3 months. When you’re ready to enjoy one, simply pull it out of the freezer and let it thaw at room temperature for a few minutes, or grab it for a truly refreshing, chilled treat. This makes them an excellent make-ahead option for busy weeks!
Discover More Easy No-Bake Recipes:
If you loved the simplicity and deliciousness of these No-Bake Healthy Breakfast Cookies, you’re in for a treat! Our collection of no-bake recipes is designed to save you time in the kitchen without compromising on flavor or health. Explore these other fantastic options that are perfect for quick snacks, wholesome breakfasts, or guilt-free desserts – all without ever turning on your oven.
Snacks
No-Bake Energy Bites (4 Ingredients)
Snacks
Granola Bars
Breakfast
Yogurt Parfait Recipe
Snacks
Trail Mix

No-Bake Healthy Breakfast Cookies
Chelsea Lords
20 minutes
20 minutes
11
cookies (1-1/2 tablespoon in size)
Video
Watch how to make these delicious No-Bake Healthy Breakfast Cookies!
Equipment
You’ll only need a few basic kitchen tools to make these easy no-bake cookies:
-
Sheet Pan (15″ x 10″) – Essential for arranging your formed cookies.
-
Parchment Paper – Prevents sticking and makes cleanup a breeze.
-
Large Mixing Bowl
– For combining all your delicious ingredients.
-
Spatula or Sturdy Spoon
– To mix the ingredients thoroughly.
-
Cookie Scoop (1-1/2 tablespoon)
– For perfectly portioned cookies.
Ingredients
These cookies come together with a few simple, wholesome ingredients. Make sure to choose high-quality components for the best flavor!
- 1/2 cup creamy peanut butter (see Note 1 for choosing the best kind)
- 2 tablespoons honey
- 1 teaspoon vanilla extract
- 1/4 teaspoon salt
- 1/2 cup Rice Krispies cereal
- 1/4 cup oat flour (or ground flax seeds; see Note 2 for making your own oat flour)
- 1/2 cup old-fashioned oats (do not use quick or steel-cut oats for this recipe)
- 3 tablespoons chocolate chips (milk or dark chocolate, for drizzling or mixing in)
- Optional additions (see Note 3 for creative ideas to personalize your cookies)
Instructions
-
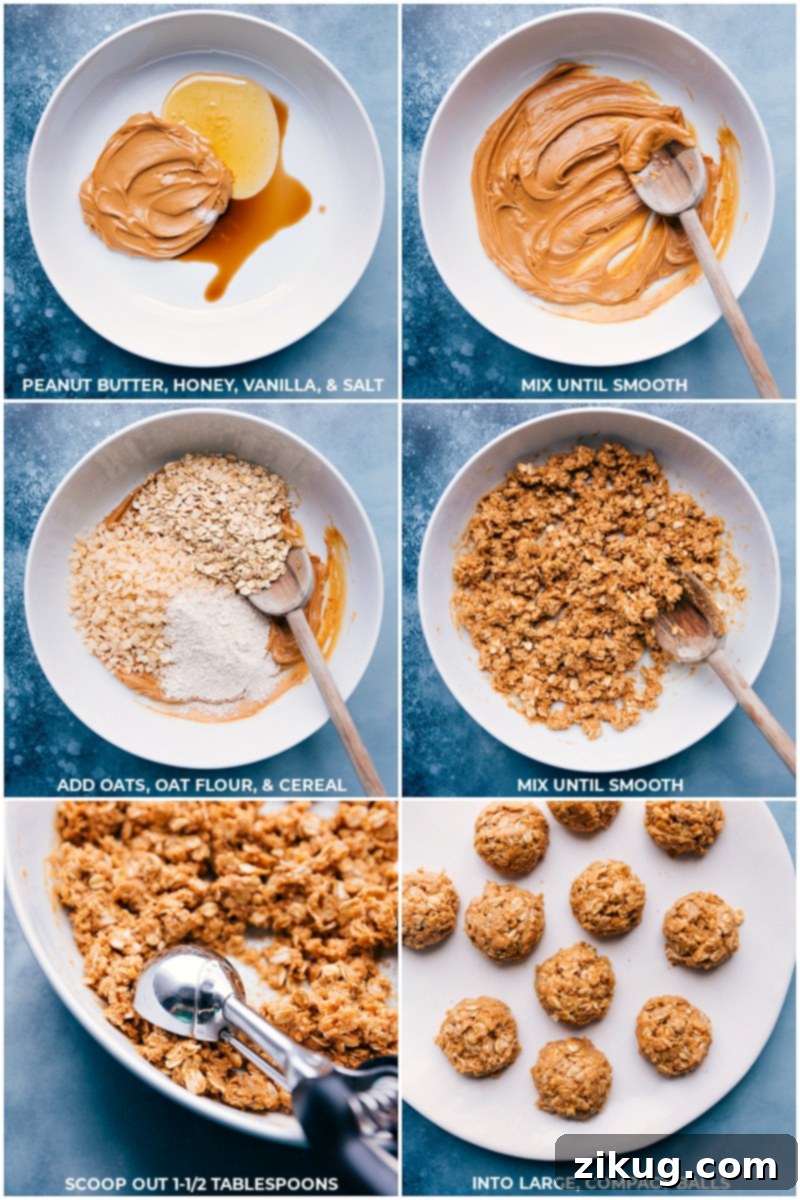
Prepare the Wet Ingredients: In a large, microwave-safe bowl, combine the creamy peanut butter, honey, vanilla extract, and salt. Place the bowl in the microwave and heat for 20-30 seconds. The goal is to soften the ingredients just enough to make them easy to stir and combine smoothly. After heating, stir the mixture vigorously until all ingredients are thoroughly combined and create a uniform, slightly runny paste.
Incorporate Dry Ingredients: To the same bowl, add the crisp Rice Krispies cereal, oat flour (or flaxseed meal), and old-fashioned oats. Begin stirring this mixture. It might feel a bit tricky and stiff at first, but persist in mixing until all the dry ingredients are fully coated and integrated into the wet mixture. The texture should be cohesive and sticky enough to hold together when pressed. If the mixture seems too wet or loose, add an additional teaspoon of oat flour. If it’s too dry and crumbly, add an extra teaspoon of peanut butter or honey until the desired consistency is achieved. -
Optional Mix-ins: If you’re using any optional add-ins (like chopped nuts, dried fruit, or mini chocolate chips as detailed in Note 3), now is the time to fold them into the mixture. Add about 2 tablespoons of your chosen mix-ins and stir them gently until they are evenly distributed throughout the cookie dough. Ensure any larger items are finely diced before adding them.
-
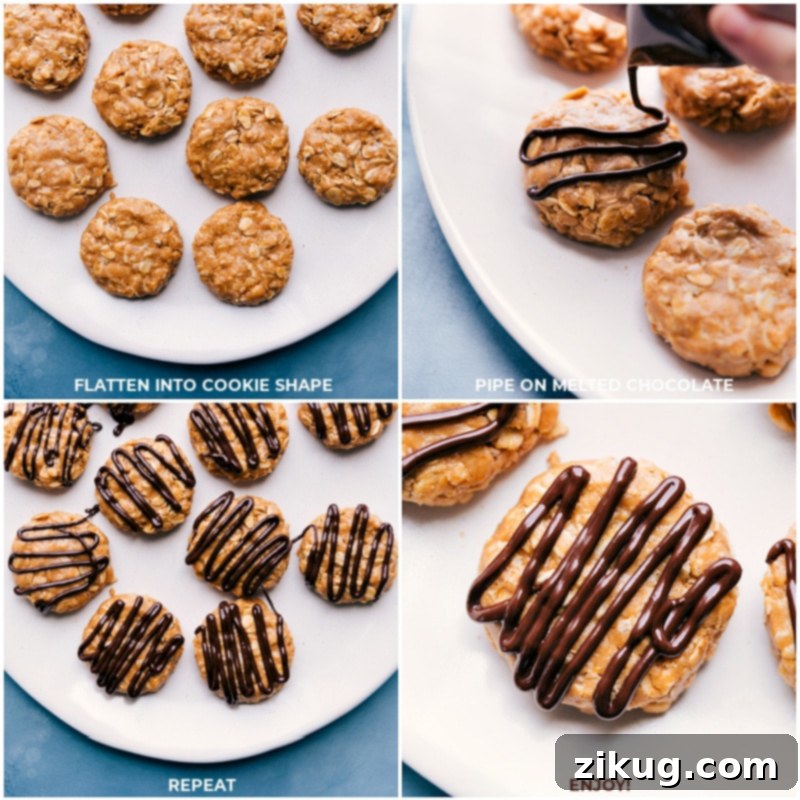
Shape the Cookies: Line a large baking sheet with parchment paper. Using a 1-1/2 tablespoon cookie scoop (roughly the size of a golf ball), tightly scoop out a portion of the mixture. Firmly compress the mixture within the scoop to ensure it holds its shape, then release the ball onto the prepared sheet pan. Repeat this process with the remaining mixture, spacing the balls evenly. Once all the mixture has been scooped, take each ball and gently flatten it with the palm of your hand to create a classic cookie shape, about 1/2 inch thick.
-
Optional Chocolate Drizzle (Recommended!): If you desire a luscious chocolate topping, melt 3 tablespoons of chocolate chips in a microwave-safe bowl. Heat in short intervals of 10-15 seconds, stirring well after each burst. Continue until the chocolate is smooth and fully melted, being careful not to overheat it. Transfer the melted chocolate into a small plastic bag (like a Ziploc snack bag) and snip a tiny corner off the tip of the bag to create a makeshift piping tool. Drizzle the chocolate decoratively across the tops of your shaped cookies. Allow the chocolate to set and harden at room temperature or by placing the sheet pan in the refrigerator for about 10-15 minutes. Once set, your No-Bake Healthy Breakfast Cookies are ready to enjoy!
Recipe Notes
Note 2: Making Your Own Oat Flour: Don’t have oat flour on hand? No problem! It’s incredibly simple to make your own. Just take some old-fashioned oats and place them in a high-speed blender or food processor. Pulse them repeatedly until they break down into a fine, powdery consistency resembling traditional flour. It’s crucial to measure the oat flour *after* blending, not before, as the volume will change once ground. This homemade oat flour helps keep the recipe gluten-free (if using certified gluten-free oats) and adds a wholesome touch.
Note 3: Creative Optional Add-ins: Elevate your breakfast cookies with a variety of delicious and nutritious add-ins. For best integration, aim for about 2 tablespoons of total additions. Popular choices include:
- Raisins or Dried Cranberries: For a burst of natural sweetness and chewiness.
- Chopped Nuts: Almonds, walnuts, or pecans add extra crunch and healthy fats. Ensure they are finely chopped.
- Mini Chocolate Chips: While a drizzle is optional, mixing in mini chocolate chips adds pockets of chocolatey goodness throughout the cookie.
- Shredded Coconut: Provides a tropical hint and additional texture.
- Spices: A pinch of cinnamon or nutmeg can add a warm, inviting flavor.
Remember to finely chop any larger add-ins to ensure they blend well into the cookie mixture and don’t make the cookies too crumbly.
Nutritional Note: Please be aware that the provided nutrition information is an approximation. It is calculated automatically and does not include the optional chocolate drizzle or any additional mix-ins you might choose to add. Adding these ingredients will alter the nutritional values.
Storage: Best Practices: Store your no-bake healthy breakfast cookies in an airtight container to maintain their freshness. They will keep well at room temperature for 2-3 days, but for extended freshness and a firmer texture, I highly recommend storing them in the refrigerator for up to 4-5 days. For longer storage, these cookies can be frozen for up to 3 months. To freeze, arrange them in a single layer on a baking sheet until firm, then transfer them to a freezer-safe bag or container, separating layers with parchment paper. Thaw at room temperature for a quick snack or enjoy them chilled straight from the fridge or freezer.
Nutrition
Serving:
1
serving
|
Calories:
176
kcal
|
Carbohydrates:
24
g
|
Protein:
6
g
|
Fat:
7
g
|
Saturated Fat:
1
g
|
Sodium:
161
mg
|
Potassium:
144
mg
|
Fiber:
2
g
|
Sugar:
4
g
|
Vitamin A:
715
IU
|
Vitamin C:
7
mg
|
Calcium:
14
mg
|
Iron:
4
mg
Nutrition information is automatically calculated and should only be used as an approximation. It does not account for optional ingredients or variations.
Like this? Leave a comment below!