
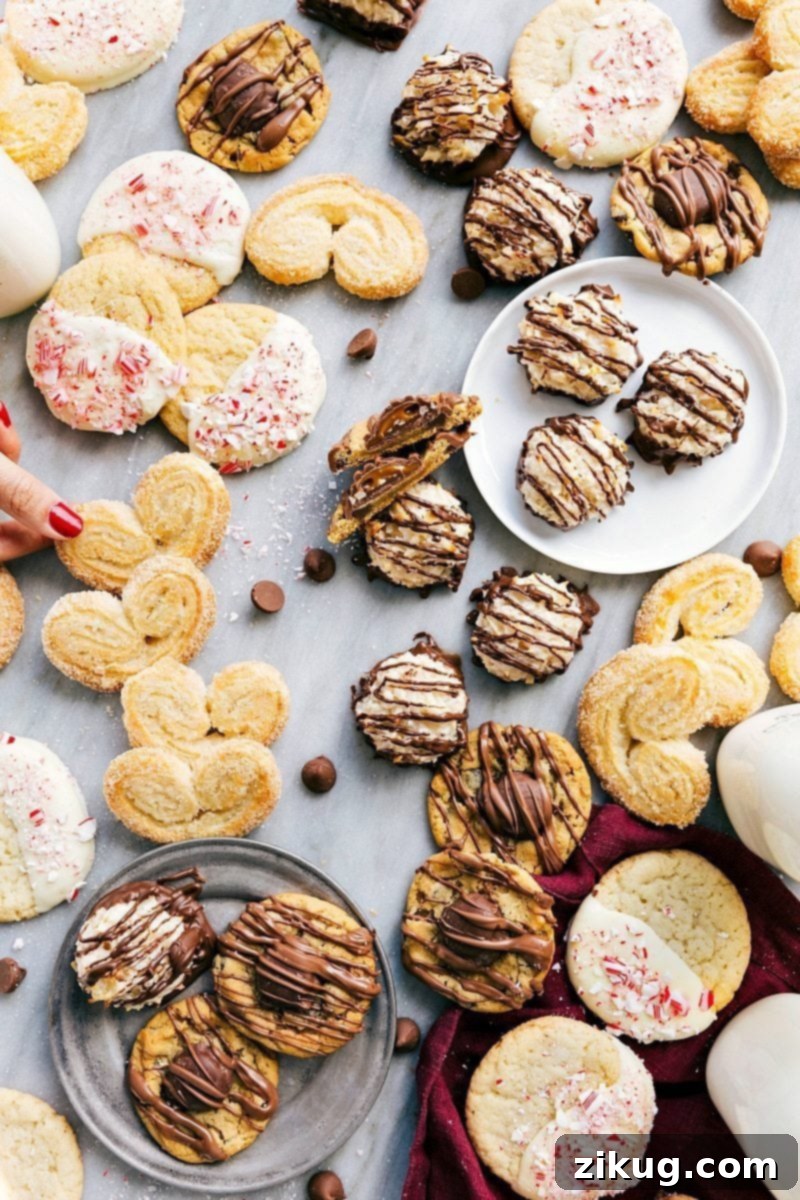
Christmas cookies don’t have to be complicated to be absolutely delicious! This holiday season, we’re simplifying your baking with four incredible cookie recipes, each requiring only three core ingredients. Yes, you read that right – just three ingredients stand between you and a batch of festive, homemade treats! Whether you’re a seasoned baker or just starting out, these simple recipes are designed to save you time and stress, leaving more room for holiday cheer. Plus, as a special gift, we’ve included two free printables to help you package these delightful cookies in truly memorable, festive ways.
Looking for more festive cookie inspiration? Don’t miss these other holiday favorites: Melted Snowman Cookies for a whimsical touch, refreshing Peppermint Sugar Cookies, or classic Gingersnap Cookies.
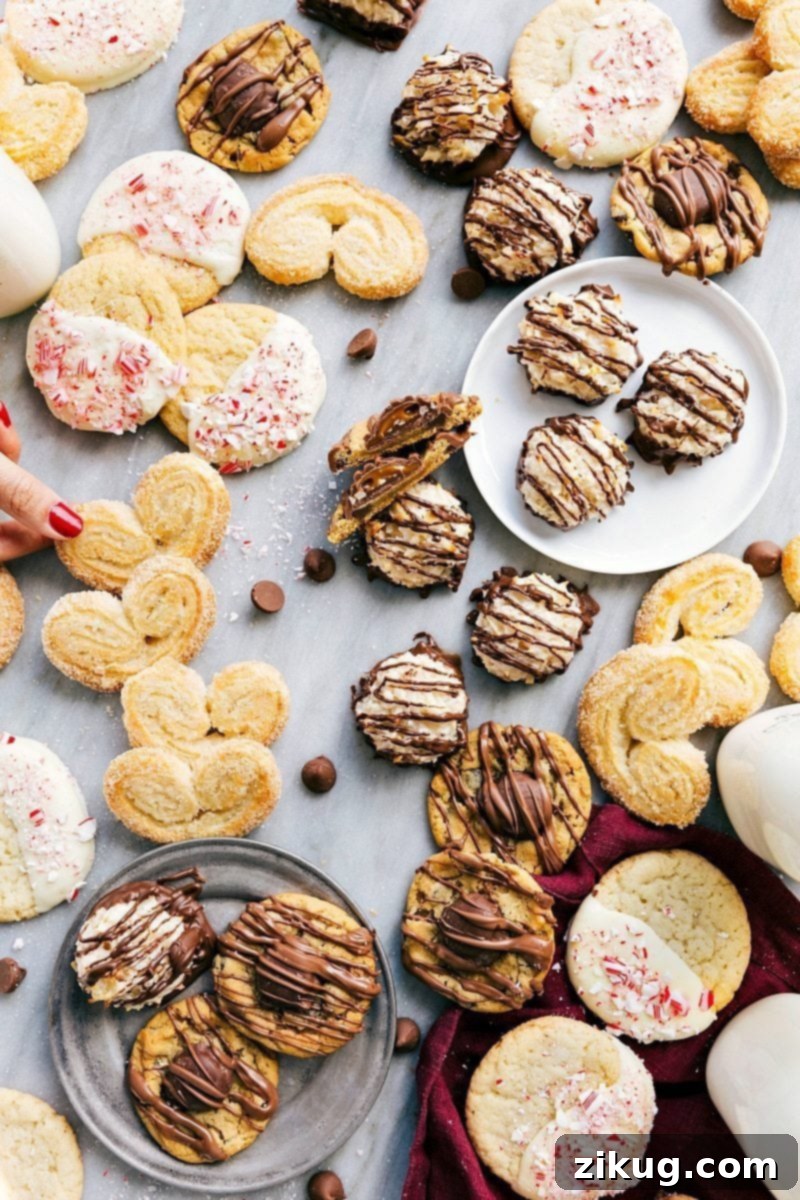
Easy 3-Ingredient Christmas Cookie Recipes for Stress-Free Holiday Baking
The holiday season is a time for joy, celebration, and of course, delicious treats! But let’s be honest, it can also be incredibly busy. That’s why these **four easy 3-ingredient cookie recipes** are an absolute game-changer for your holiday baking. They prove that you don’t need a long list of fancy ingredients or complex techniques to create impressive and incredibly tasty cookies. These recipes are not only simple to whip up but also wonderfully versatile, allowing you to easily customize them with your favorite festive add-ins and decorations.
Whether you find yourself short on time amidst holiday preparations, are expecting unexpected guests, or simply have a sudden craving for a quick, comforting treat, these recipes are your ultimate solution. Each cookie offers a unique flavor profile and texture, ensuring there’s something for everyone to love. And to make your holiday gifting even easier, don’t forget to check out our fun packaging ideas and two fantastic free printables at the end of this guide! Get ready to embrace the magic of holiday baking without the fuss.
Decadent Chocolate Drizzled Turtle Cookies (3 Ingredients!)
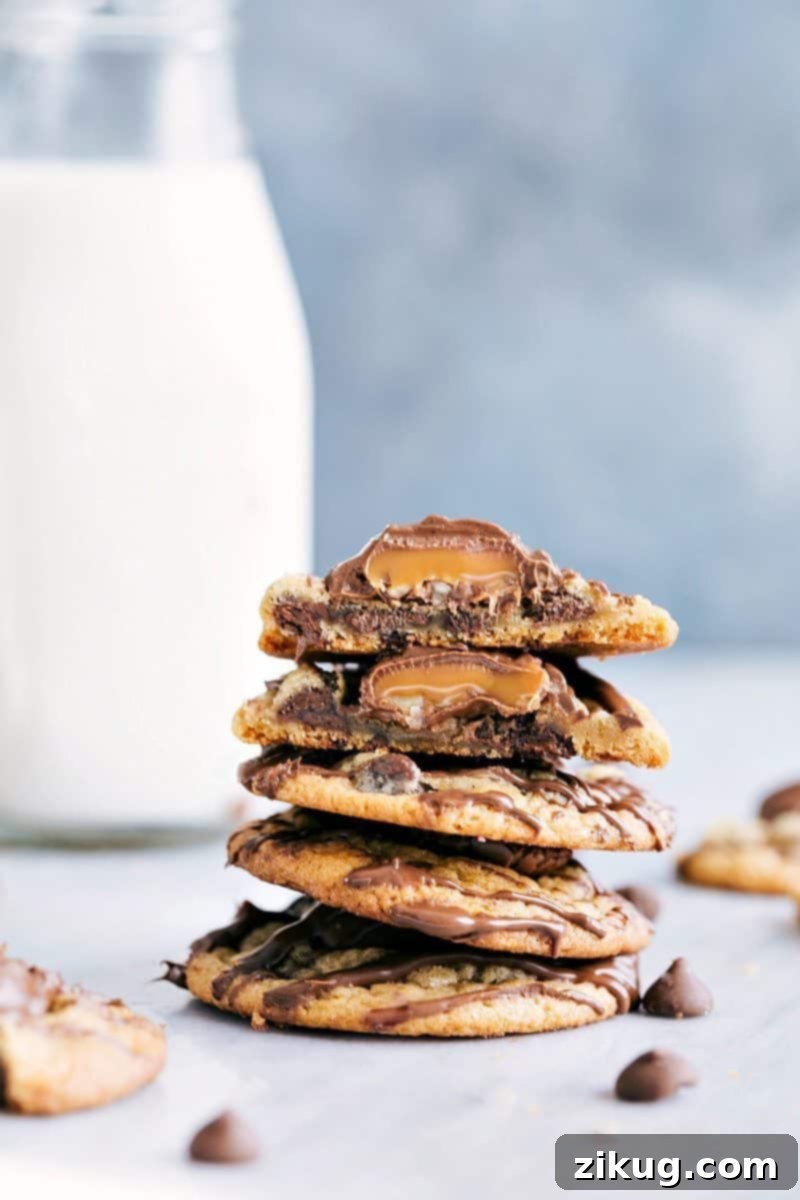
Indulge in the rich, nutty, and caramel flavors of classic turtle candies, transformed into an irresistible cookie with minimal effort. These Chocolate Drizzled Turtle Cookies are a holiday showstopper that will impress everyone, yet they come together with just a few simple steps. The combination of chewy cookie, gooey caramel, crunchy pecans (from the turtle candies!), and smooth chocolate drizzle creates a truly heavenly bite.
Ingredients for Chocolate Drizzled Turtle Cookies:
- Chocolate-Chip Cookie Dough: This is your foundation! For ultimate convenience, grab a store-bought ready-to-bake package. For a truly homemade touch and an even richer flavor, consider using your favorite homemade chocolate chip cookie dough recipe. Either way, ensure it’s chilled and ready for baking.
- Turtle Candies: The star of the show! These iconic candies bring together luscious caramel and crunchy pecans, which will melt beautifully into your warm cookies. Look for classic varieties like DeMet’s Original Turtles for the best flavor and texture.
- Chocolate Chips: Essential for that elegant, glossy drizzle. You can choose dark chocolate, milk chocolate, or semi-sweet chocolate chips based on your preference. A good quality chocolate will give you the best melting and drizzling consistency.
- Shortening (Optional): A small amount of shortening can be added to your melted chocolate chips. This helps to thin the chocolate slightly, making it easier to drizzle smoothly and achieve a beautiful, glossy finish that hardens nicely without becoming too brittle.
How To Make Turtle Christmas Cookies:
Making these delightful turtle cookies is a breeze. Follow these simple steps for perfect results every time:
- Prepare and Bake Cookies: Begin by preheating your oven according to the directions on your chosen cookie dough package. Line a baking sheet with parchment paper or a silicone baking mat to prevent sticking and ensure even baking. Place your cookie dough portions onto the prepared sheet.
- Add Turtle Candies: As soon as the cookies come out of the oven, while they are still warm and soft, gently press one turtle candy into the center of each cookie. The residual heat from the cookies will slightly melt the caramel and chocolate, allowing them to nestle perfectly. Let the cookies cool on the baking sheet for about 2-3 minutes before transferring them carefully to a wire cooling rack. Allow them to cool completely, which typically takes around 30 minutes, to ensure the turtles set properly.
- Drizzle Chocolate: Once the cookies are completely cooled, it’s time for the chocolate drizzle. Place your chocolate chips (and shortening, if using) in a microwave-safe bowl. Microwave in short bursts, typically 15 seconds at a time, stirring thoroughly for 10 seconds between each burst. Continue this process until the chocolate is fully melted and smooth. Be careful not to overheat the chocolate, as this can cause it to seize.
- Set and Enjoy: Using a spoon or a piping bag with a small hole, drizzle the melted chocolate over each cookie in an attractive pattern. Allow the chocolate to harden at room temperature. This will create a firm, delicious topping. Once set, your amazing turtle cookies are ready to be enjoyed! They are best savored within 2-3 days, stored in an airtight container.
Tips for Perfect Turtle Cookies:
- Cookie Dough Choice: While store-bought dough saves time, a high-quality homemade chocolate chip cookie dough can elevate the flavor significantly.
- Cooling is Key: Don’t rush the cooling process before drizzling the chocolate. If the cookies are still warm, the drizzle won’t set properly.
- Chocolate Tempering (Optional): For a professional, shiny finish and snap, you can temper your chocolate, but for these easy cookies, simply melting it is perfectly fine.
Nutritional Information (Approximate, per serving):
Serving: 1 cookie | Calories: 121kcal | Carbohydrates: 16g | Protein: 1g | Fat: 5g | Cholesterol: 6mg | Sodium: 89mg | Fiber: 0.9g | Sugar: 10g
Nutrition information is automatically calculated and should only be used as an approximation.
Festive White Chocolate Peppermint Cookies (3 Ingredients!)
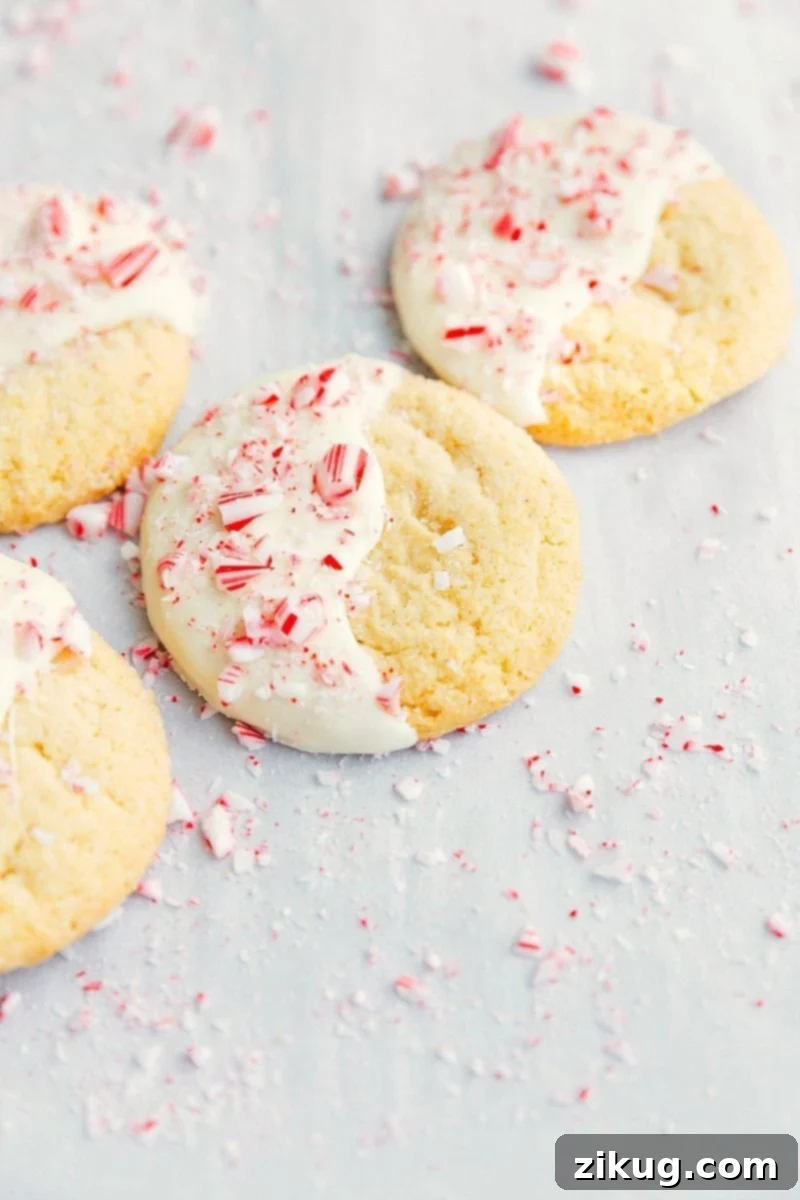
Nothing quite captures the spirit of Christmas like the refreshing combination of peppermint and white chocolate. These festive cookies are a delightful blend of sweet, minty, and creamy, offering a perfect balance of flavors and textures. The soft sugar cookie base dipped in smooth white chocolate and topped with crunchy crushed candy canes makes for a visually stunning and delicious treat that’s ideal for holiday parties, cookie exchanges, or a cozy evening by the fire. And the best part? They are incredibly easy to make with just three main components!
Ingredients for White Chocolate Peppermint Cookies:
- Sugar Cookies: For maximum ease, you can buy pre-made, ready-to-bake sugar cookie dough from your grocery store. Alternatively, if you prefer a from-scratch experience or want to bake ahead, use already baked sugar cookies from a local bakery, or follow a trusted sugar cookie recipe.
- White Chocolate Chips: These will create a smooth, sweet coating for your cookies. When melting, it’s crucial to microwave them in short bursts and stir frequently to prevent burning and achieve a silky consistency. Quality white chocolate will yield the best flavor.
- Shortening (Optional): Just like with milk/dark chocolate, a touch of shortening can significantly improve the texture of your melted white chocolate. Add it only if you find the chocolate too thick or clumpy after melting; it helps achieve a smoother, more dip-friendly consistency.
- Crushed Candy Canes: The quintessential peppermint crunch! For this, simply unwrap several candy canes, place them in a sealed plastic bag, and gently but firmly crush them with a rolling pin or the back of a spoon until you have small, festive pieces.
How To Make Peppermint Christmas Cookies:
These cookies are assembled in a few straightforward steps, perfect for a quick holiday project.
- Bake and Cool Cookies: Preheat your oven and bake the sugar cookies according to the package directions (or your chosen recipe). Once baked, let them cool completely on wire cooling racks. This is essential for the white chocolate dip to adhere properly. While they cool, line a large sheet pan with parchment paper for placing the dipped cookies.
- Prepare Toppings: While cookies are cooling, prepare your candy cane crunch. Place unwrapped candy canes in a sturdy plastic bag and crush them using a rolling pin until you have fine or chunky bits, as desired. Then, melt your white chocolate. Add white chocolate chips and shortening (if using) to a microwave-safe bowl. Microwave in 15-second bursts, stirring for 10 seconds between each burst until the chocolate is fully melted and smooth.
- Dip and Decorate: Once the cookies are entirely cool, dip half of each cookie into the melted white chocolate mixture. Gently tap the bottom of the cookie against the edge of the bowl to remove any excess chocolate, ensuring a neat finish. Immediately transfer the dipped cookie to your parchment-lined sheet pan. Before the chocolate sets, liberally sprinkle the crushed candy canes over the wet white chocolate.
- Set and Serve: Allow the cookies to harden completely at room temperature. This will ensure the chocolate sets firmly and the candy canes are securely attached. Once set, your beautiful and delicious White Chocolate Peppermint Cookies are ready to be shared and enjoyed!
Storage and Make-Ahead Tips:
- Storage: Store these cookies in an airtight container at room temperature for up to 5 days. For slightly longer enjoyment, keep them in the fridge for up to a week.
- Freezing: For extended storage, these cookies freeze beautifully for up to 3 months. Simply layer them between sheets of parchment paper in a freezer-safe bag or container.
- Homemade Dough: If using a homemade sugar cookie base, you can also consider making this peppermint cookie recipe for an extra minty kick!
Nutritional Information (Approximate, per serving):
Serving: 1 cookie | Calories: 179kcal | Carbohydrates: 21g | Protein: 1.7g | Fat: 10g | Cholesterol: 9mg | Sodium: 81mg | Fiber: 0.2g | Sugar: 16g
Nutrition information is automatically calculated and should only be used as an approximation.
Elegant Palmiers: French-Inspired Christmas Cookies (3 Ingredients!)
For a touch of French elegance on your Christmas cookie platter, look no further than these incredibly simple yet sophisticated Palmiers. Also known as “elephant ears” or “palm heart cookies,” these flaky, buttery pastries are caramelized to golden perfection with just two main ingredients and a pinch of salt. They look impressive but are astonishingly easy to make, using store-bought puff pastry. Their delicate crispness and sweet, caramelized edges make them an irresistible treat that disappears quickly.
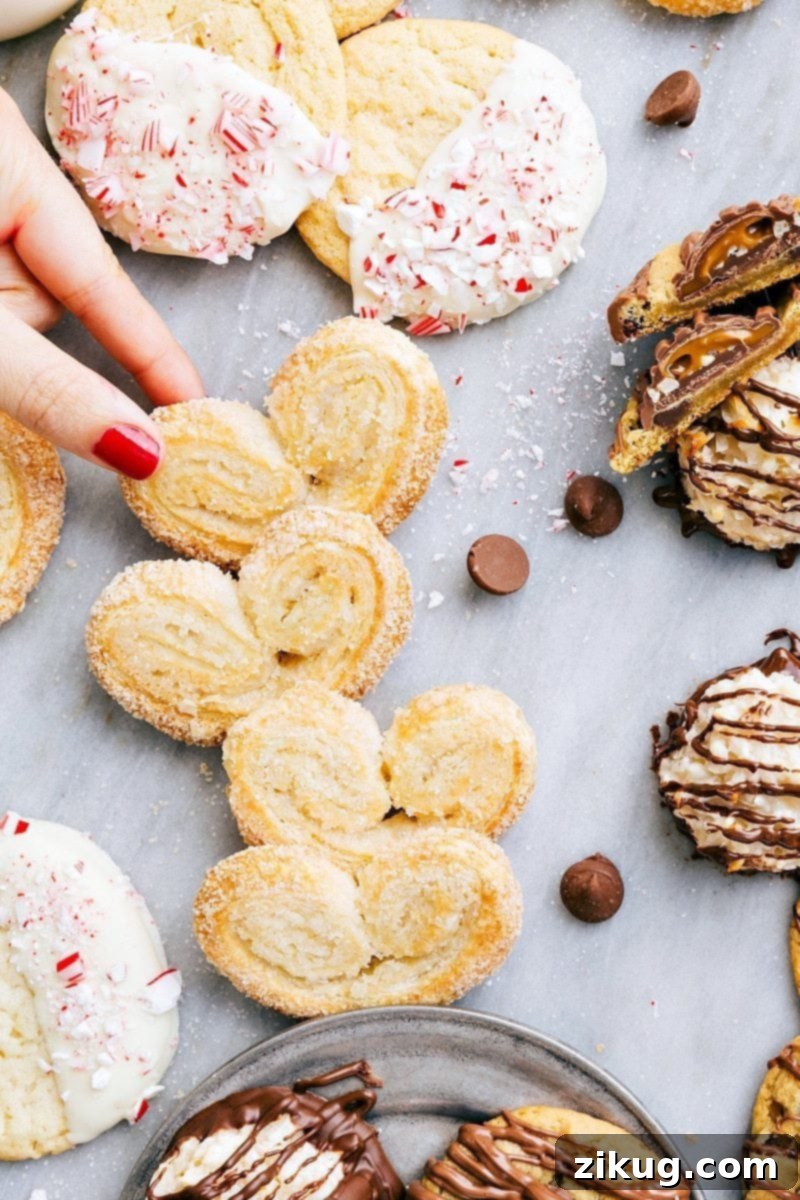
Ingredients for Palmiers:
- Cane Sugar: This is critical for creating the beautiful caramelized crust and sweet flavor. Press the sugar firmly into the puff pastry sheets to ensure it adheres well and doesn’t fall off during the rolling and baking process. The larger granules of cane sugar give a superior texture and shine compared to regular granulated sugar.
- Kosher Salt: A small amount of kosher salt is added to the sugar. This isn’t just for flavor; it cleverly balances the intense sweetness of the caramelized sugar and enhances the overall deliciousness of the cookies. Don’t skip it!
- Puff Pastry: The foundation of these elegant cookies. You’ll need two sheets of high-quality, defrosted puff pastry. You can typically find these in the frozen dessert aisle of your grocery store, often near frozen pies or pie crusts. Make sure to thaw the pastry in the refrigerator overnight or at room temperature for about 30-40 minutes until it’s pliable and easy to unfold and work with, but still cool.
How To Make Palmiers Christmas Cookies:
Creating these charming French pastries is simpler than you might imagine!
- Preheat and Prep Baking Sheet: Begin by preheating your oven to 425°F (220°C). Line a large sheet pan with parchment paper; this is crucial for preventing sticking and allowing the caramel to form properly without fusing to your pan. Set the prepared pan aside.
- Combine Sugar and Salt, Roll Pastry: In a small bowl, combine the cane sugar and kosher salt thoroughly. Spread about 1/4 of this sugar mixture evenly over a clean, flat work surface. Carefully unfold one sheet of thawed puff pastry and lay it directly onto the sugared surface. Sprinkle another 1/4 of the sugar mixture evenly over the top of the pastry.
- Press and Roll: Using a rolling pin, gently roll the dough. The goal is to roll it into approximately a 13×13 inch square, ensuring that the sugar is firmly pressed into both the top and bottom surfaces of the puff pastry. This helps create the lovely caramelized exterior.
- Fold the Pastry: Now for the signature palmier shape! Take the two longer sides of the square and fold them inwards towards the center, so they meet exactly in the middle of the dough. Then, fold the dough once more, bringing those two halves together to form a tight, multi-layered log.
- Slice and Arrange: Using a sharp knife, slice the dough log into individual cookies, each about 3/8-inch thick. Arrange these slices on your prepared sheet pan, leaving some space between each one to allow for expansion during baking. Sprinkle any remaining sugar mixture over the tops of the sliced cookies for extra sparkle and crunch.
- Repeat for Second Sheet: Repeat steps 2-5 with the second sheet of puff pastry and the remaining sugar mixture.
- Bake to Golden Perfection: Bake the cookies for 6-8 minutes, or until the bottoms are beautifully caramelized and golden brown. Keep a close eye on them, as sugar can burn quickly. Carefully flip each cookie over with a spatula and bake for an additional 5-7 minutes, until the other side is also deeply golden and caramelized.
- Cool and Serve: Once baked, transfer the hot palmiers immediately to a wire cooling rack. Allow them to cool completely. As they cool, the caramelized sugar will harden, creating that delightful crispness. Enjoy your elegant, homemade Palmiers!
Storage and Reheating Tips:
- Storage: Palmiers are best enjoyed fresh, within 1-2 days of baking, stored in an airtight container at room temperature.
- Reheating: If they lose some crispness, you can easily revive them. Briefly reheat leftover Palmiers in a preheated oven at 300°F (150°C) for a few minutes until they regain their signature crunch.
Nutritional Information (Approximate, per serving):
Serving: 1 cookie | Calories: 83kcal | Carbohydrates: 15g | Protein: 0.7g | Fat: 2.9g | Saturated Fat: 0.85g | Polyunsaturated Fat: 0.5g | Monounsaturated Fat: 0.85g | Cholesterol: 1.2mg | Sodium: 52.8mg | Potassium: 30.6mg | Fiber: 0.1g | Sugar: 10.1g | Iron: -1mg
Nutrition information is automatically calculated and should only be used as an approximation.
Chewy and Simple Easy Coconut Macaroons (3 Ingredients!)
These Easy Coconut Macaroons are a dream come true for coconut lovers! With their delightfully chewy texture and rich, sweet coconut flavor, they are a simple yet satisfying treat. These particular macaroons are a wonderful choice for holiday baking because they require minimal ingredients and effort, yet yield a sophisticated result. My mom even made these for my sister’s wedding a few years ago, and they were a huge hit, proving their crowd-pleasing appeal! While delicious on their own, a decadent chocolate dip or drizzle takes them to an even higher level of indulgence – and you know I’ll always choose to add chocolate!
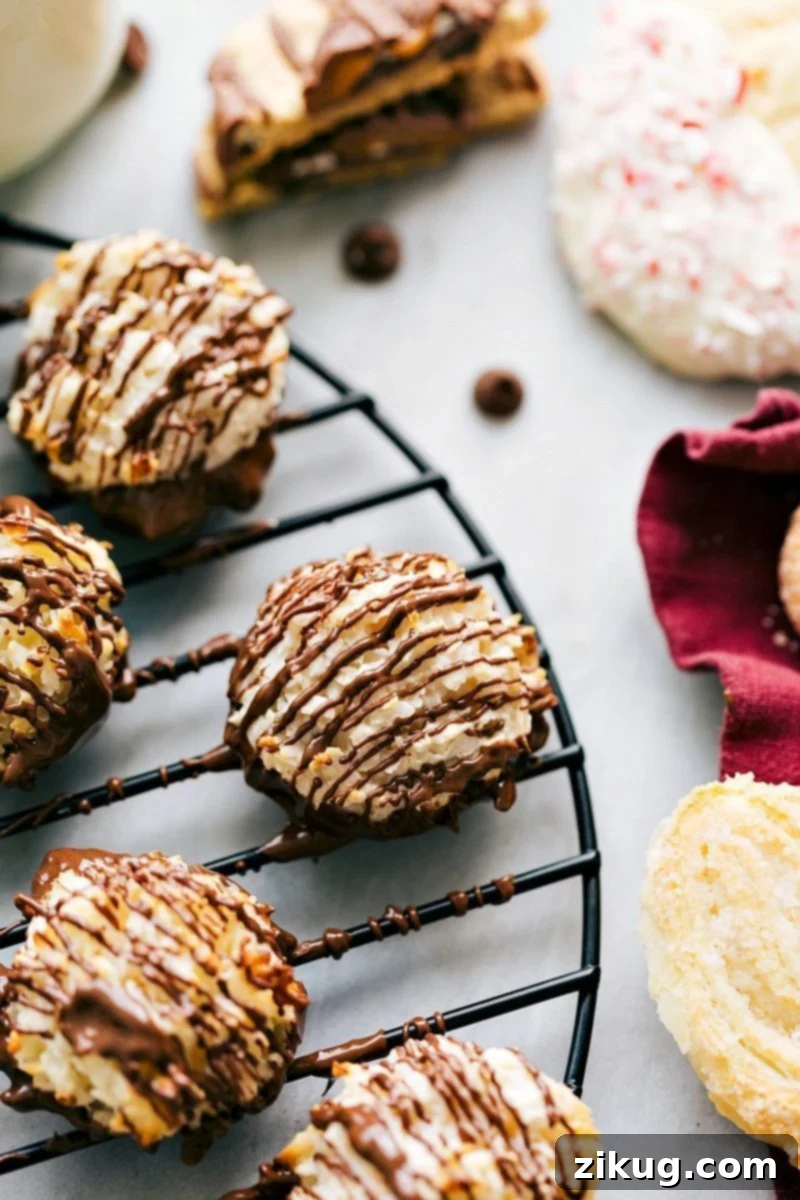
Ingredients for Easy Coconut Macaroons:
- All-Purpose Flour: A small amount of all-purpose flour is used here to help bind all the ingredients together. It provides essential structure to the macaroons, ensuring they hold their shape and have that perfect chewy interior without being overly dense.
- Sweetened Flaked Coconut: This is the primary ingredient and gives the macaroons their signature flavor and texture. Opt for sweetened flaked coconut as it cuts down on the need to add extra sugar, simplifying the recipe even further. The flakes toast beautifully in the oven, adding another layer of flavor.
- Sweetened Condensed Milk: The magical binder and sweetener for these macaroons. It provides moisture, sweetness, and helps create the wonderfully chewy consistency. For the best results and richest flavor, always use full-fat sweetened condensed milk, not evaporated milk, as they are not interchangeable in this recipe.
- Salt (Optional): A pinch of salt, like kosher salt, can enhance the flavors and balance the sweetness of the macaroons.
- Vanilla Extract (Optional): Half a tablespoon of vanilla extract can add a warm, aromatic depth to the macaroons.
- Milk Chocolate Chips (Optional): For dipping or drizzling, melted milk chocolate chips provide a delightful contrast and extra layer of indulgence.
How To Make Macaroon Christmas Cookies:
These macaroons are incredibly straightforward, from mixing to baking.
- Prepare Baking Sheets and Mix Dry Ingredients: Preheat your oven to 350°F (175°C). Line two large sheet pans with parchment paper or silicone baking mats to prevent sticking. In a large mixing bowl, stir together the all-purpose flour, sweetened flaked coconut, and optional salt until well combined.
- Add Wet Ingredients and Form Cookies: Pour in the sweetened condensed milk (and optional vanilla extract). Using your hands, mix until all the ingredients are thoroughly combined and you have a cohesive, sticky dough. Be careful not to overmix; just combine until uniform. Using an ice cream scoop (about 1.5-2 tablespoons per scoop), portion out golf-ball-sized amounts of the mixture and place them onto your prepared sheet pans, leaving a little space between each.
- Bake to Golden Perfection: Bake the macaroons for 11-14 minutes. Keep an eye on them; they are ready when the coconut tips are lightly toasted and golden brown, and the edges are set. Remove from the oven and allow them to cool completely on the baking sheet.
- Optional Chocolate Dip & Drizzle: If you desire to add a chocolate coating, place your milk chocolate chips in a microwave-safe bowl. Microwave in short 15-second bursts, stirring for 10 seconds between each burst until the chocolate is perfectly melted and smooth.
- Dip and Set: Once the macaroons are completely cooled, dip the bases of the cookies into the melted milk chocolate. Place the chocolate-dipped macaroons back onto a parchment-paper-lined tray. For an extra touch, use a spoon to drizzle any remaining melted chocolate over the tops of the macaroons.
- Allow to Set: Let the chocolate-coated macaroons set at room temperature until the chocolate has hardened. This will give them a lovely, firm chocolate bottom and drizzle.
Storage and Freezing Macaroons:
- Storage: These delightful cookies are best enjoyed within 1-2 days of baking. Store them in an airtight container at room temperature to maintain their freshness and chewiness.
- Freezing: Coconut macaroons freeze and defrost exceptionally well, especially without the chocolate coating! For longer storage, freeze them in an airtight container for up to 3 months. When ready to enjoy, simply thaw at room temperature.
Nutritional Information (Approximate, per serving):
Serving: 1 serving | Calories: 88kcal | Carbohydrates: 13g | Protein: 1g | Fat: 3g | Saturated Fat: 2g | Polyunsaturated Fat: 0.02g | Monounsaturated Fat: 0.08g | Cholesterol: 3.54mg | Sodium: 29.46mg | Potassium: 29.96mg | Fiber: 0.42g | Sugar: 9.29g | Vitamin A: 8.33IU | Calcium: 11.92mg | Iron: 0.17mg
Nutrition information is automatically calculated and should only be used as an approximation.
Essential Holiday Baking Tips for 3-Ingredient Cookies
Making these easy 3-ingredient Christmas cookies is already straightforward, but a few extra tips can ensure your holiday baking is even more successful and enjoyable:
- Quality Ingredients Matter: Even with only three ingredients, the quality of each component makes a big difference. Use good quality chocolate, fresh puff pastry, and the best sweetened condensed milk you can find for superior flavor.
- Read the Recipe First: Before you start, take a moment to read through the entire recipe. This helps you understand the steps, gather all necessary equipment, and avoid any surprises.
- Measure Accurately: Baking is a science, and precise measurements are key, especially when dealing with minimal ingredients where each plays a crucial role.
- Don’t Rush Cooling: Patience is a virtue in baking, particularly when cookies need to cool completely before decorating. This ensures toppings set properly and prevents a messy outcome.
- Get Creative with Customization: These recipes are a fantastic base for creativity! Consider adding sprinkles, different types of nuts, a pinch of cinnamon, or other extracts to match your family’s tastes.
- Batch Baking for Big Events: All these recipes are easily scalable. If you’re hosting a large party or preparing gifts, feel free to double or triple the batches.
- Involve the Family: These simple recipes are perfect for getting kids involved in the kitchen. Let them help with crushing candy canes, drizzling chocolate, or placing candies.
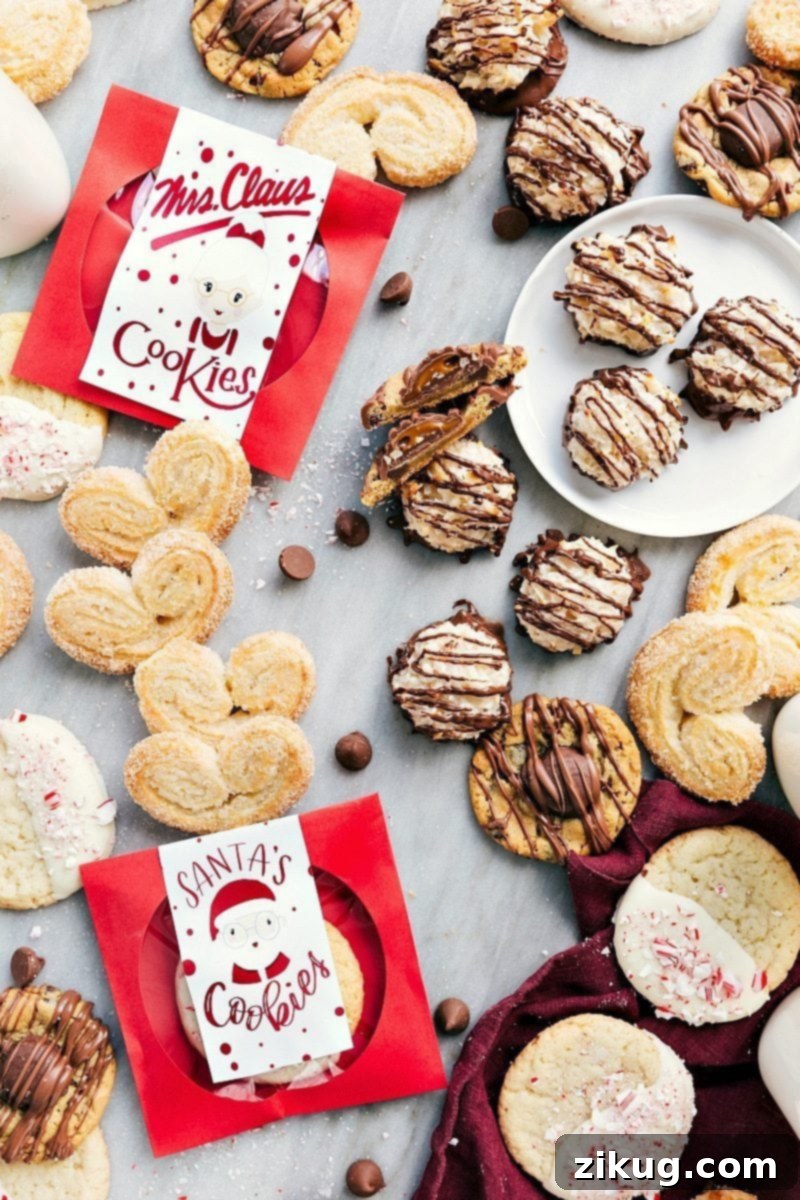
Free Printable Cookie Covers: Your Secret to Festive Gifting!
What’s better than delicious homemade Christmas cookies? Delicious homemade Christmas cookies beautifully packaged! We believe that presentation is half the magic, especially during the holidays. That’s why we’ve created two charming, free printable cookie covers that will instantly elevate your cookie gifts and trays. These printables are designed to add a personal and festive touch, making your homemade treats even more special for friends, family, neighbors, and teachers.
Imagine presenting a box of freshly baked Palmiers or White Chocolate Peppermint Cookies adorned with these adorable labels. They are perfect for cookie exchanges, holiday parties, or as thoughtful host/hostess gifts. Simply click on the links below to download and save them to your computer, then print them out on cardstock or sturdy paper. Cut them out, and attach them to your cookie bags, boxes, or jars with a pretty ribbon. It’s an easy way to add that extra sparkle to your holiday treats without any extra fuss!
Mrs. Claus’s Cookies Printable
Santa’s Cookies Printable
Make Your Holiday Baking Unforgettable and Easy!
This holiday season, embrace the joy of baking without the overwhelm. These four incredibly simple, 3-ingredient Christmas cookie recipes offer a perfect blend of convenience, customization, and irresistible flavor. From the rich indulgence of Chocolate Drizzled Turtle Cookies to the refreshing zest of White Chocolate Peppermint Cookies, the elegant crispness of Palmiers, and the tropical chewiness of Easy Coconut Macaroons, there’s a quick and delightful treat for every palate.
With these recipes in your arsenal, you’ll be able to whip up festive batches in no time, leaving you more moments to spend with loved ones. Don’t forget to utilize our free printable cookie covers to add that extra special touch to your gifts. Happy baking, and may your holidays be filled with sweet moments and cherished memories!
Tried one of these delicious recipes? We’d love to hear from you! Leave a comment below and share your baking success or favorite customization.