
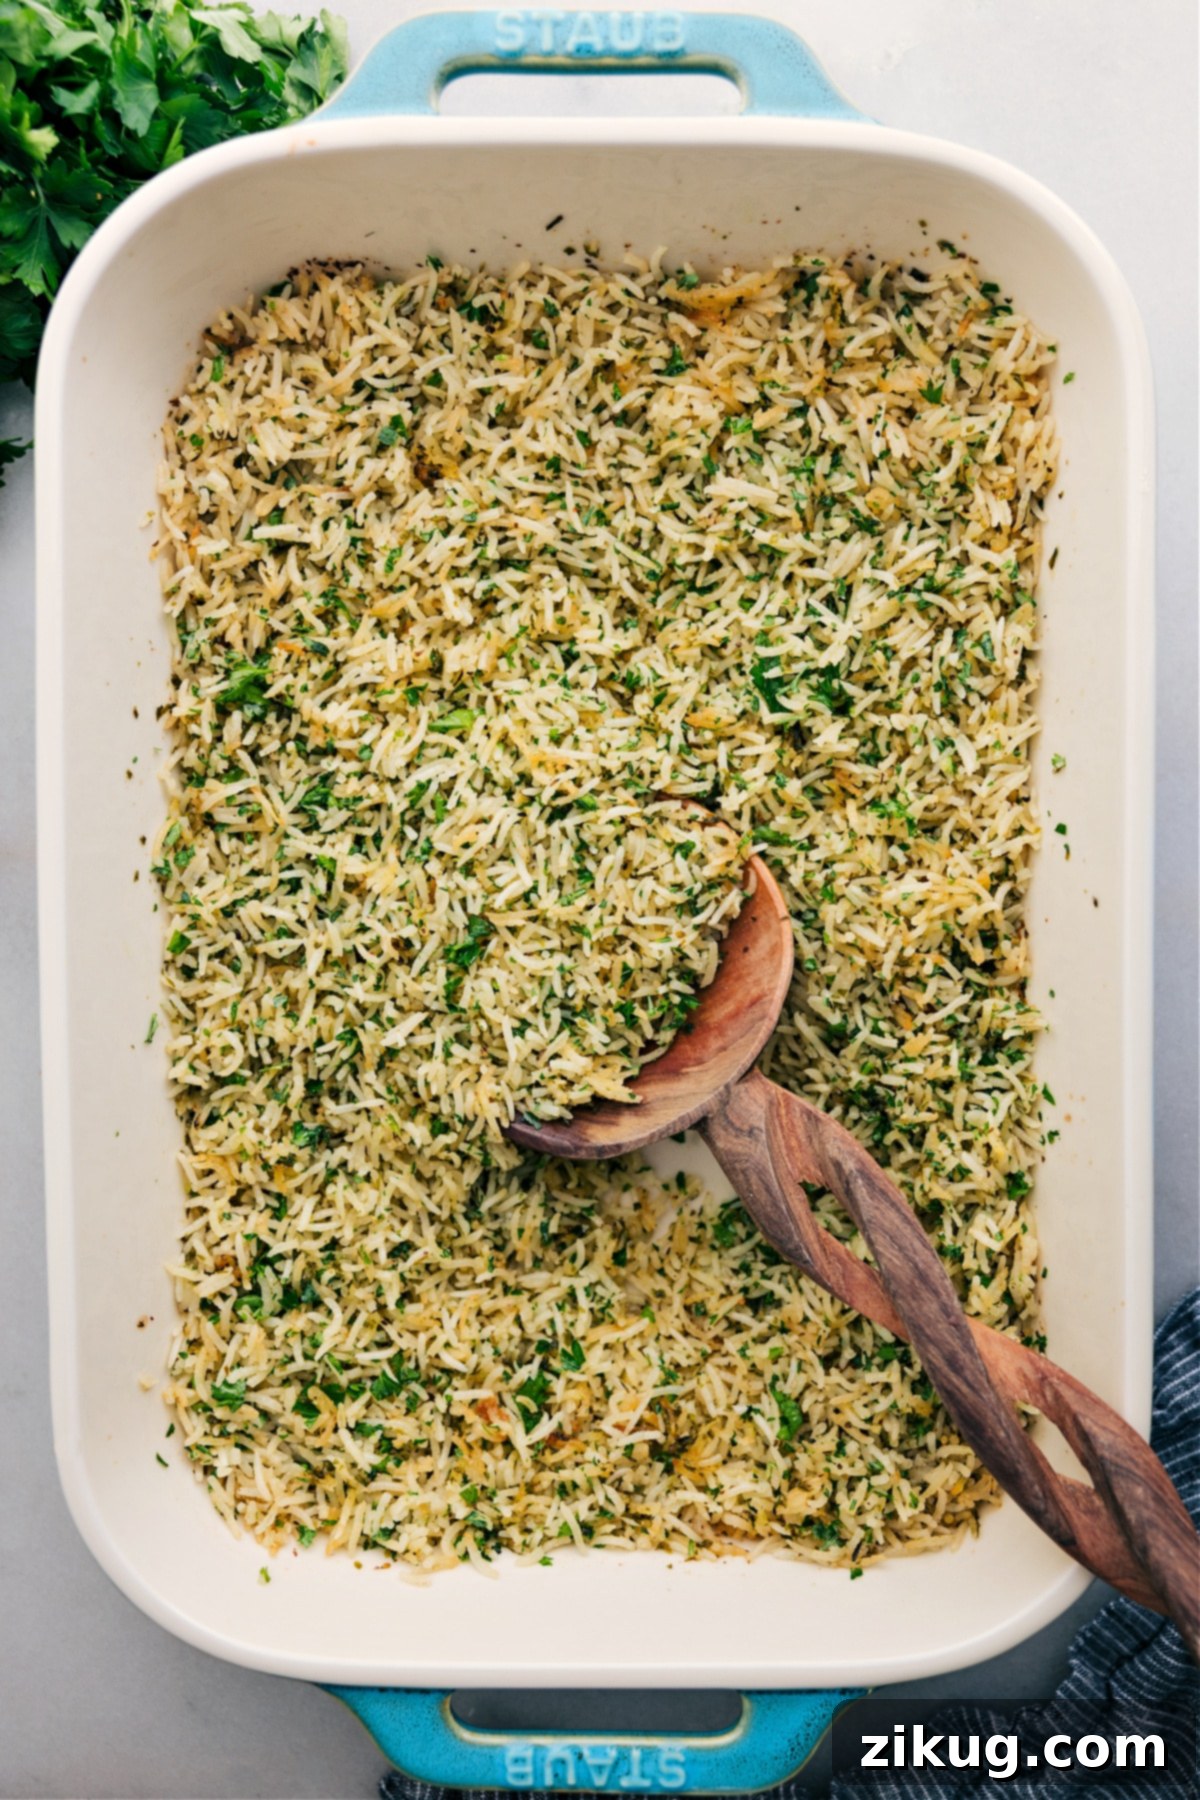
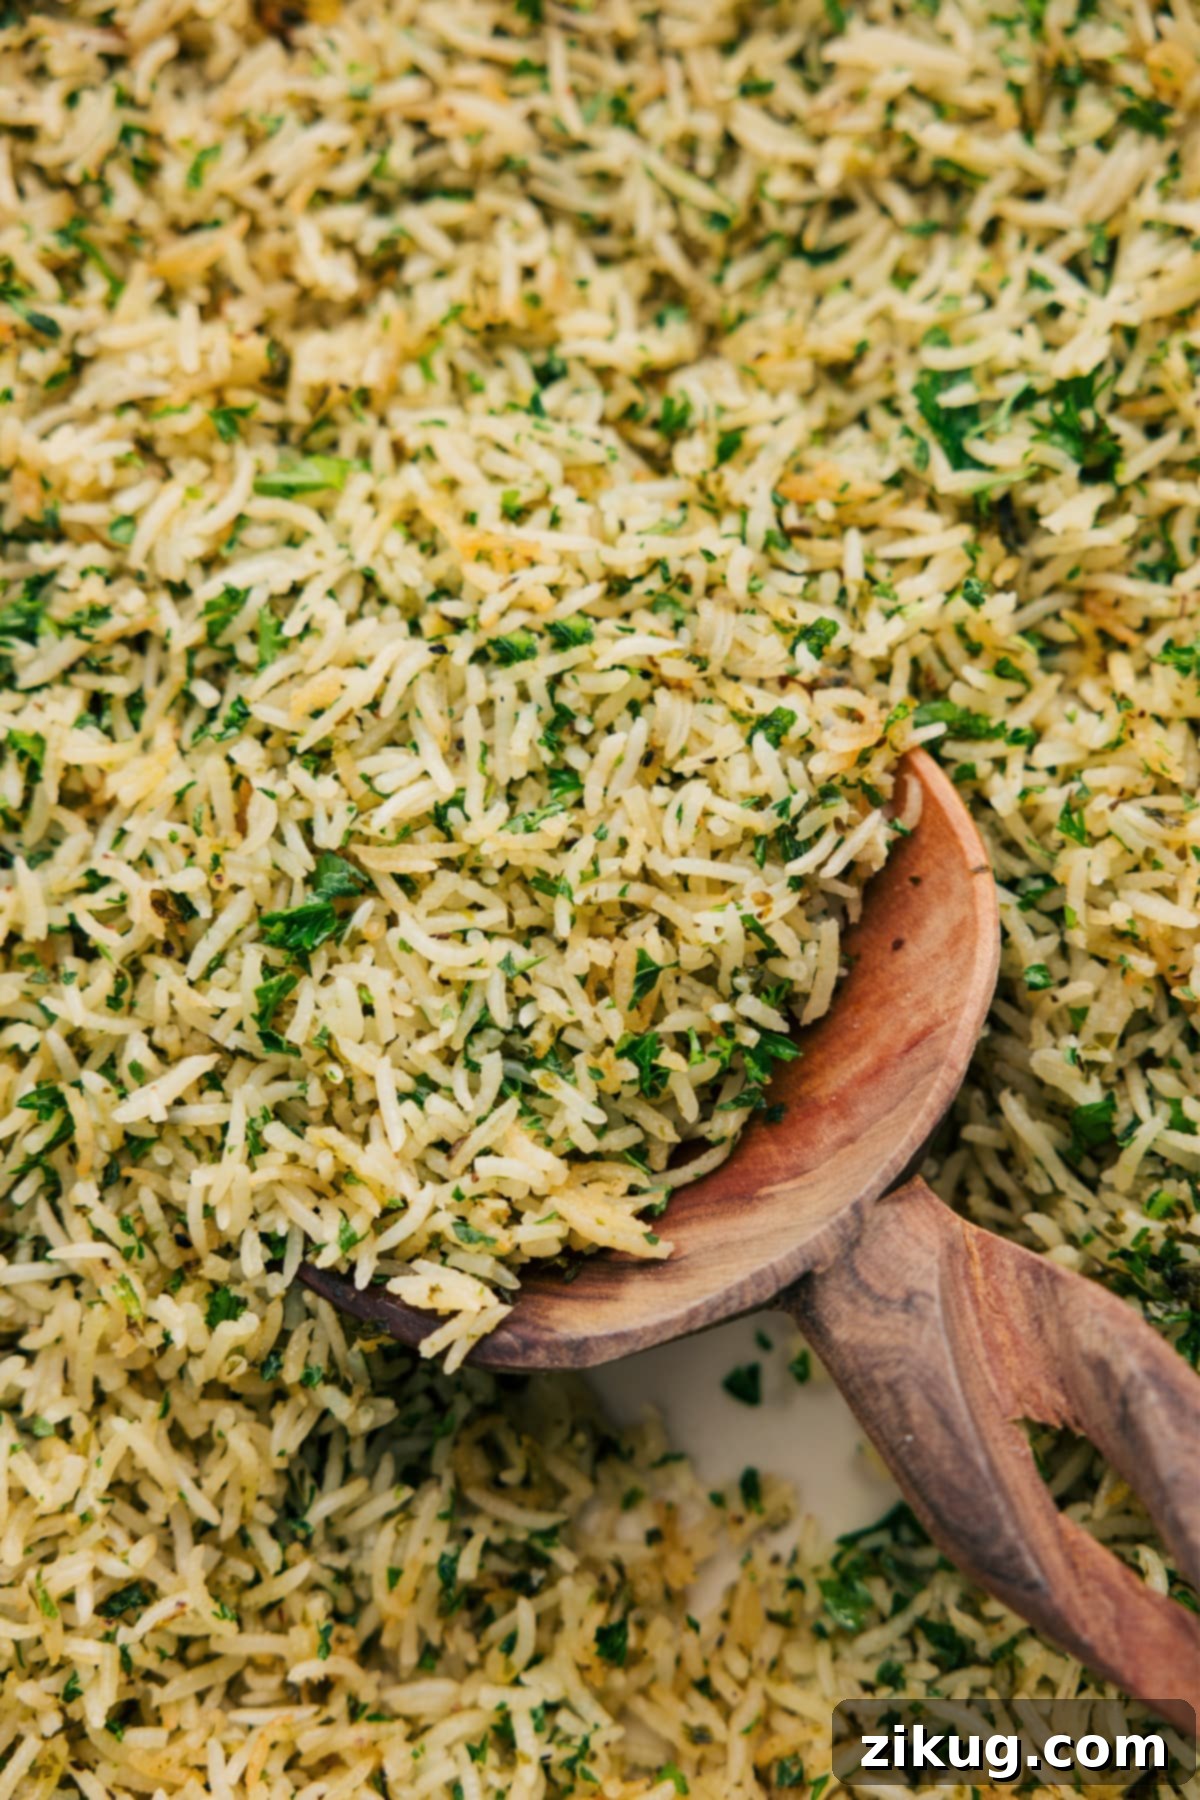
Herb Rice is the ultimate effortless side dish, transforming simple ingredients into a spectacularly fluffy and tender experience. Imagine: you combine uncooked rice with a handful of aromatic herbs and rich butter, bake it in a single dish, and let your oven work its magic. The result? Perfectly cooked, flavorful rice that elevates any meal without any fuss or constant monitoring.
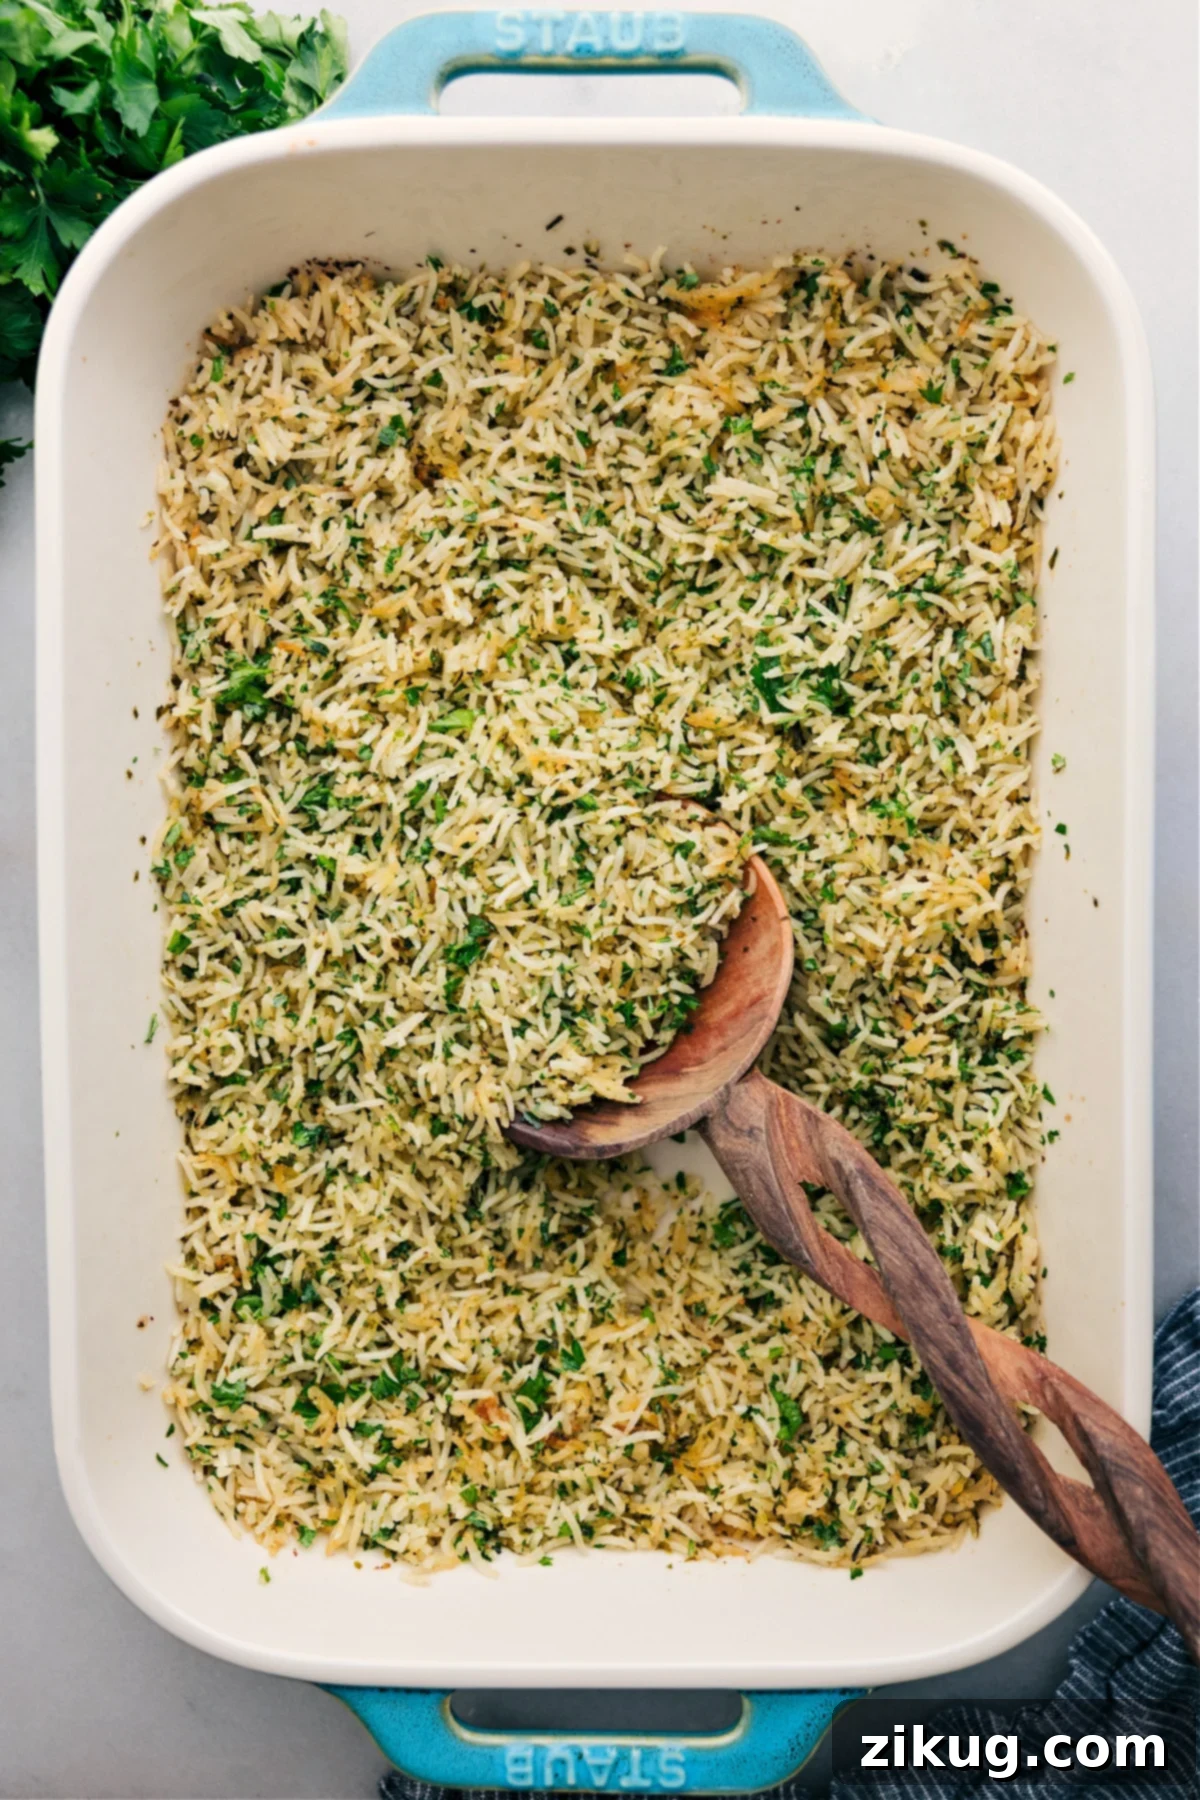
Effortlessly Delicious: Your Go-To Easy Herb Rice Recipe
In the culinary world, some recipes are so simple they almost feel like a secret shortcut. This Herb Rice recipe is precisely that. We’re talking about a genuine “dump it and bake” method that frees you from hovering over a stovetop or needing specialized appliances like a slow cooker or rice cooker. It’s truly a game-changer for busy weeknights or when you need a reliable, crowd-pleasing side.
The beauty of this technique lies in its simplicity and the consistent, outstanding results it delivers. Every grain emerges perfectly tender, infused with savory, aromatic herbs, ready to complement a wide array of main courses. This hands-off approach makes it a fantastic choice for meal prep, allowing you to whip up a large batch that will serve you throughout the week. Once you master this method, you’ll find yourself applying it to various rice dishes. I’ve personally used it for baking fluffy white rice, perfecting tender brown rice, and creating my absolute favorite aromatic curry rice. This method also forms the foundation for popular dishes like vibrant yellow rice, which is always a huge hit in my home!
Say goodbye to unevenly cooked rice or dreaded pot-scrubbing. This one-pan baked Herb Rice promises a hassle-free cooking experience and a side dish that’s rich in flavor and wonderfully light.
Gather Your Ingredients: The Core of Our Flavorful Herb Rice
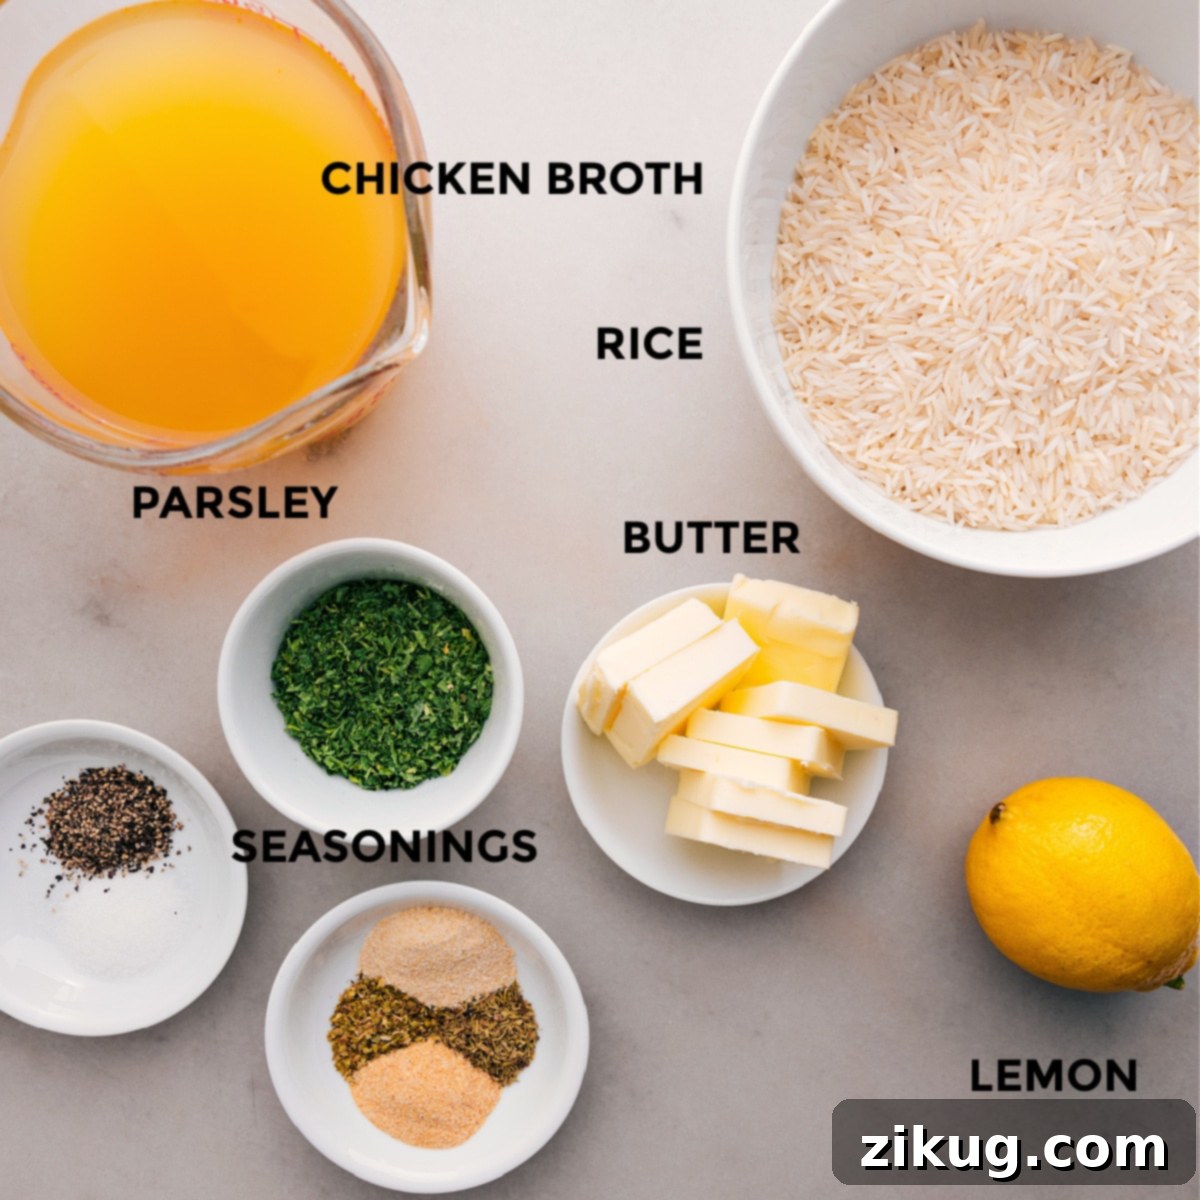
Creating this flavorful Herb Rice starts with a selection of readily available ingredients. Each component plays a crucial role in achieving the perfect texture and a symphony of savory, fresh flavors. Here’s a detailed look at what you’ll need:
- Basmati Rice: This long-grain rice variety is truly the star. Its delicate, aromatic grains cook up incredibly light and separate, ensuring fluffy, tender results every time. While other long-grain white rices can work, basmati consistently delivers superior texture and absorption of flavors. Avoid short-grain or sticky rice varieties, as they will yield a very different, often mushier, outcome with this baking method.
- Chicken Broth: The foundation of our flavor. Using a high-quality chicken broth or stock is paramount, as the rice absorbs its essence entirely. A rich broth like Swanson’s® adds incredible depth, making the rice taste slow-simmered. For a vegetarian or vegan option, a good quality vegetable broth works just as beautifully, providing a savory base without the meat.
- Garlic Powder and Onion Powder: These pantry staples infuse the rice with a foundational savory aroma without the need for chopping or sautéing fresh aromatics. They provide a mild, consistent flavor that complements the herbs without overpowering them, ensuring every bite is perfectly balanced.
- Thyme, Parsley, and Oregano (Dried): This classic trio of dried herbs brings earthy, slightly peppery, and subtly pungent notes to the dish. Dried herbs are convenient and readily available, offering concentrated flavor. If you prefer fresh herbs, remember that their flavor is often milder, so you might need to use about three times the amount of fresh herbs compared to dried. For this baked dish, dried herbs are highly recommended for ease and even distribution.
- Salt & Pepper: Essential for seasoning. Always adjust these to your taste preferences and consider the sodium content of your broth. It’s wise to start with a smaller amount and add more after the rice has cooked and you’ve had a chance to taste it.
- Unsalted Butter: The secret to rich, even cooking. Butter not only adds a luxurious, creamy depth to the rice but also helps prevent the grains from sticking together, contributing to that desirable fluffy texture. Using unsalted butter allows you to control the overall saltiness of your dish precisely.
- Fresh Parsley & Lemon: These are optional but highly recommended garnishes that add a vibrant burst of freshness and brightness. A sprinkle of freshly chopped parsley introduces a beautiful color and a clean, herbaceous finish, while a squeeze of lemon juice provides a zesty counterpoint, lifting all the flavors in the dish. Don’t skip these if you want to take your Herb Rice to the next level!
Crafting Culinary Magic: Step-by-Step Guide to Baked Herb Rice
Preparing this incredibly simple yet satisfying Herb Rice is a straightforward process, requiring minimal effort for maximum flavor. Follow these easy steps to achieve perfectly fluffy and aromatic rice:
- Prepare Your Oven and Dish: Begin by preheating your oven to a precise 400°F (200°C). This ensures the oven is at the optimal temperature for even cooking from the moment your dish goes in. Next, generously spray a 9×13-inch ceramic or glass baking pan with cooking spray. This crucial step prevents the rice from sticking to the bottom and sides, making cleanup a breeze. A good non-stick surface is key for perfect results.
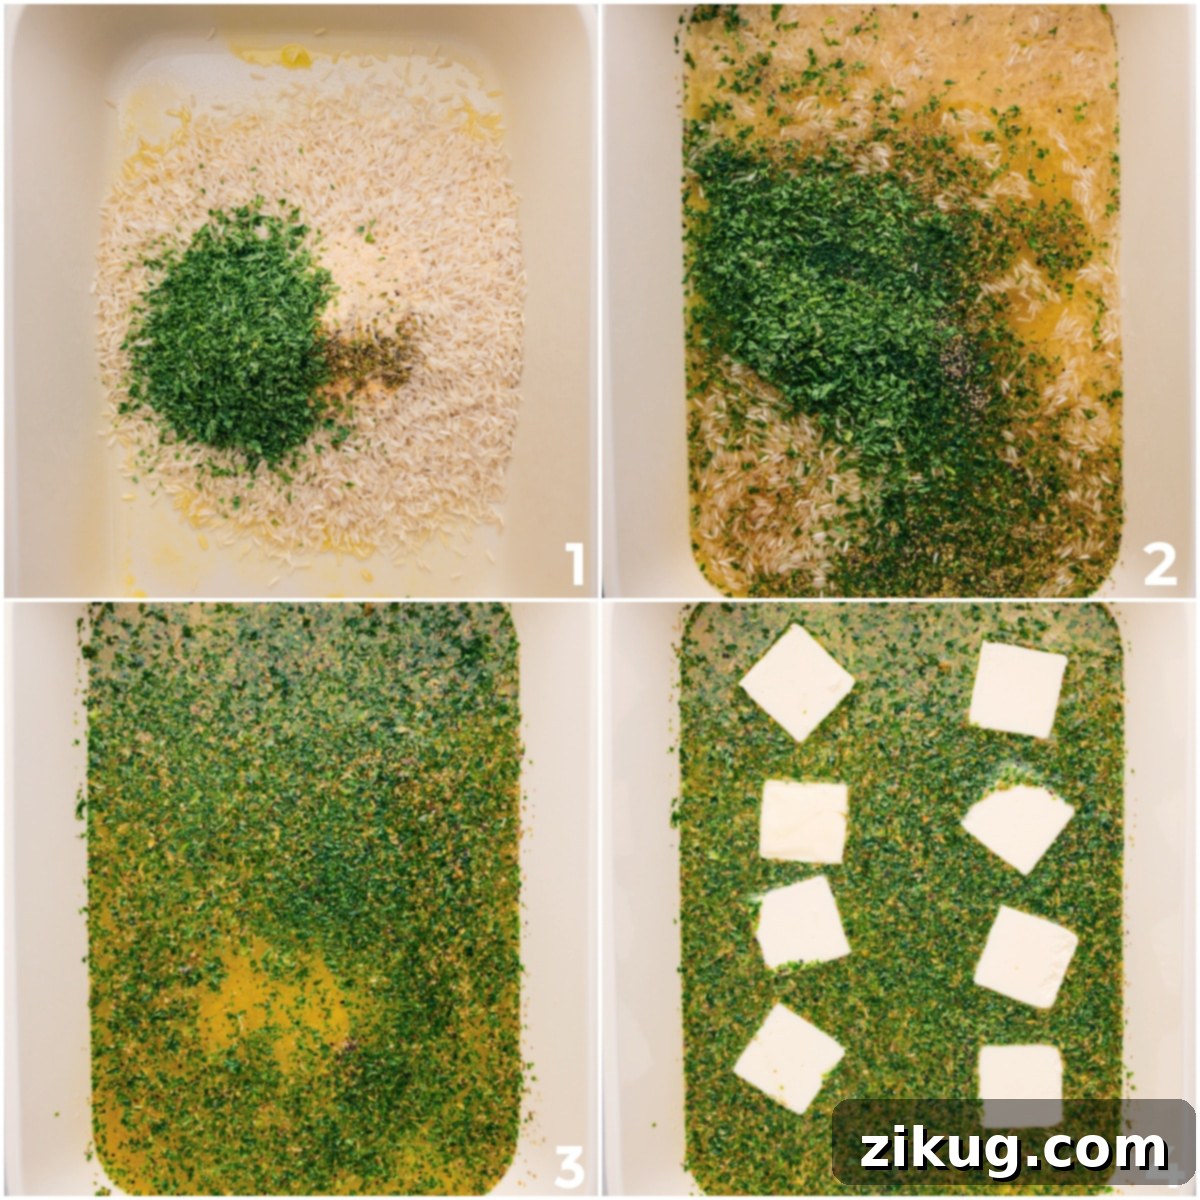
- Combine Ingredients: In the prepared baking pan, add your uncooked basmati rice, chicken broth (or vegetable broth for a vegetarian option), garlic powder, onion powder, dried thyme, dried oregano, dried parsley, and your initial measurements of salt and pepper (I recommend starting with about 1/2 teaspoon of each). Give everything a good stir to ensure the rice is evenly coated and the seasonings are well distributed throughout the broth. This ensures every grain will be infused with flavor. Finally, dot the surface of the mixture with the pieces of unsalted butter, spacing them out evenly. This helps the butter melt and distribute throughout the rice as it bakes, adding richness and promoting even cooking.
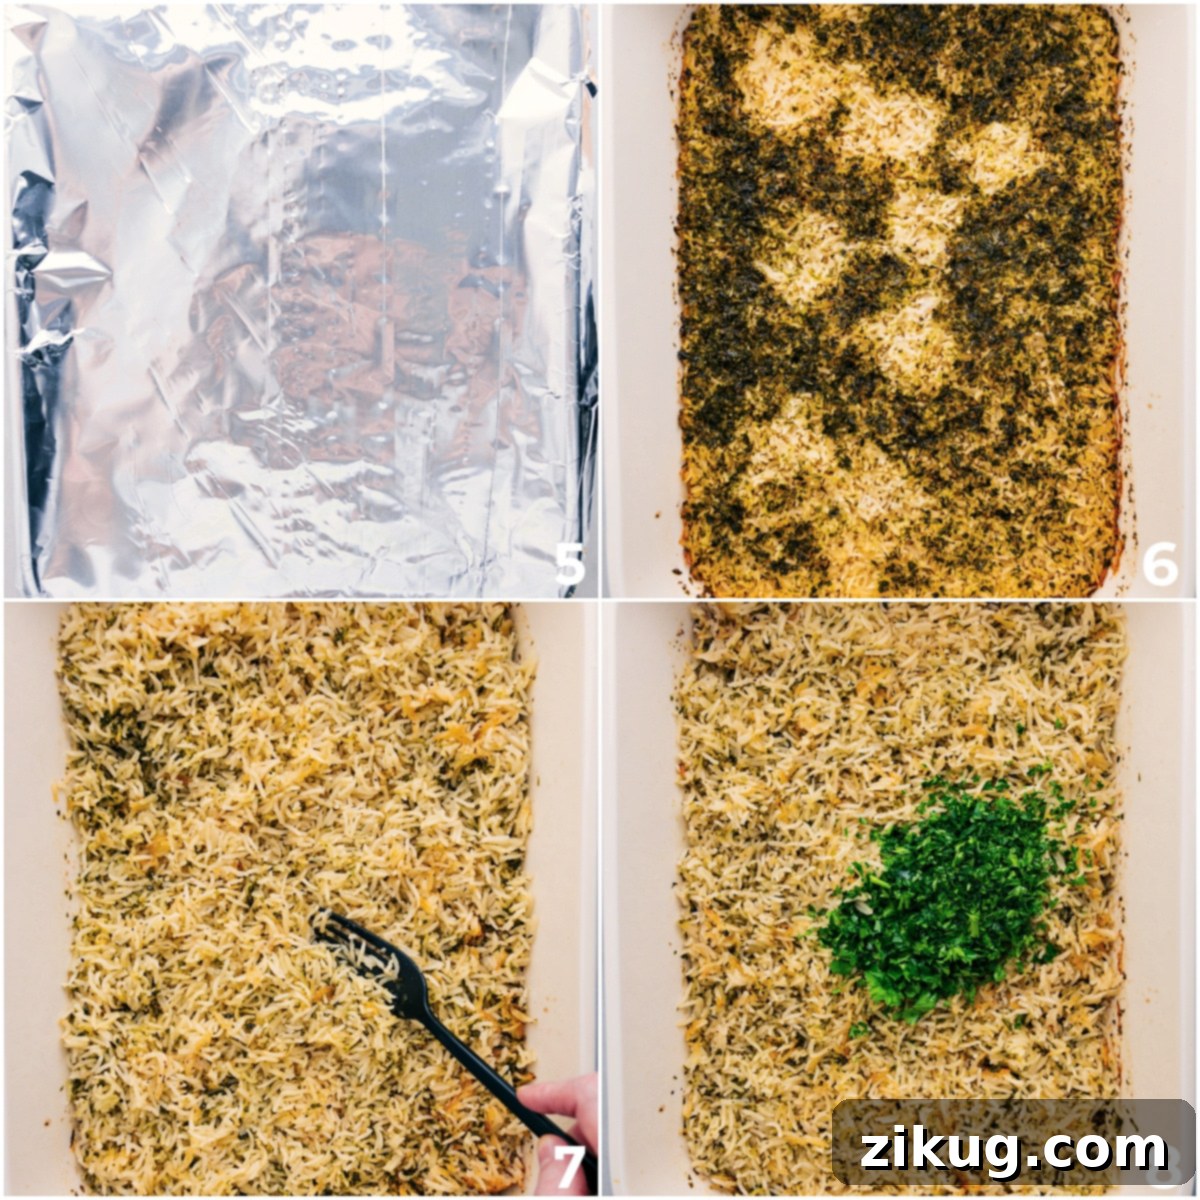
- Bake Covered: Once all ingredients are in the pan, cover it tightly with aluminum foil. The key word here is “tightly” – a good seal traps all the steam, which is essential for cooking the rice perfectly. Place the covered pan into your preheated oven and bake for 40 minutes. Resist the urge to peek during this phase, as opening the foil releases vital steam.
- Bake Uncovered: After the initial 40 minutes, carefully remove the pan from the oven and take off the foil, setting it aside. Return the uncovered pan to the oven and continue baking for another 15 minutes. This allows any excess moisture to evaporate, giving the rice a slightly drier, fluffier texture and preventing it from becoming mushy. The top grains will also start to develop a slight, pleasant crust.
- The Crucial Resting Period: Once the rice has finished its uncovered baking, remove the pan from the oven. Immediately cover the pan again with the foil you set aside earlier. Let the rice rest undisturbed at room temperature for a minimum of 10 minutes. This resting step is absolutely critical! It allows the rice grains to absorb any remaining moisture, steam thoroughly, and firm up, resulting in that coveted fluffy, separate texture. Skipping this step often leads to mushy or gummy rice.
- Fluff and Serve: After resting, remove the foil. Using a fork, gently fluff the rice from the edges towards the center. This separates the grains and evenly distributes any remaining butter and herbs. If desired, now is the perfect time to stir in the fresh parsley and a squeeze of lemon juice (2-3 tablespoons usually does the trick for a bright finish). Taste the rice and adjust the seasoning with additional salt or pepper if needed. Your perfectly baked Herb Rice is now ready to be served and enjoyed!
Customizing Your Herb Rice: Delicious Variations to Explore!
While the classic Herb Rice recipe is a winner on its own, it also serves as a fantastic canvas for culinary creativity. Don’t hesitate to experiment with different herbs, spices, and additions to tailor it to your taste or the meal you’re serving. Here are some delightful ways to change things up:
- Mediterranean Herb Rice: Transport your taste buds to the sunny coasts of the Mediterranean. Increase the amount of dried oregano for a more pronounced Greek flavor. Introduce fresh dill, finely chopped, either stirred in with the other herbs or as a garnish. Finish the dish with a generous squeeze of fresh lemon juice and a sprinkle of lemon zest for bright, tangy notes that truly capture the essence of Mediterranean cuisine. A touch of crumbled feta cheese added at the end wouldn’t hurt either!
- Garlic Lover’s Herb Rice: If you’re a fan of robust garlic flavor, this variation is for you. Beyond the garlic powder, add 1-2 teaspoons of garlic paste directly into the rice mixture before baking. For an even more intense aroma, you can sauté 2-3 cloves of minced fresh garlic in a little olive oil before adding it to the uncooked rice and broth. This will create a rich, savory garlic-infused rice that’s irresistible.
- Italian Herb Rice: Give your rice an Italian trattoria twist. Instead of individual dried herbs, use 2-3 teaspoons of a high-quality Italian seasoning blend, which typically includes oregano, basil, thyme, and rosemary. Once the rice is fluffed, stir in freshly chopped basil for a vibrant, fragrant finish. A sprinkle of grated Parmesan cheese right before serving will add a delicious umami kick.
- Vibrant Veggie Herb Rice: Easily boost the nutritional value and color of your Herb Rice with vegetables. During the 10-minute resting period, when the rice is covered, simply sprinkle 1/2 to 1 cup of frozen peas, corn, or a mix of both over the hot rice. The residual heat and steam will gently warm them through perfectly, adding a lovely sweetness and texture without becoming overcooked.
- Spicy Southwest Herb Rice: For those who enjoy a little heat, add 1/2 teaspoon of smoked paprika and a pinch of cayenne pepper (or more, to taste) to the dry seasonings. You can also stir in 1/4 cup of finely diced jalapeño (seeds removed for less heat) with the rice. Serve with a squeeze of lime and fresh cilantro.
- Mushroom and Herb Rice: Sauté 1 cup of sliced mushrooms (cremini or button) with a tablespoon of olive oil until golden brown and tender. Stir these cooked mushrooms into the rice mixture before baking for an earthy, umami-rich variation that pairs wonderfully with roasted meats.
Perfect Pairings: How to Serve Your Delicious Herb Rice
The beauty of this Herb Rice lies in its incredible versatility. It’s a fantastic standalone side dish, but it also shines when paired with a variety of main courses. Its savory, herbaceous notes complement both rich and light proteins, making it a go-to for any meal. Here are some of my favorite ways to serve it:
- Classic Chicken Dinners: This Herb Rice is a natural companion to almost any chicken dish. Try it alongside my intensely flavorful grilled chicken with a vibrant marinade for a balanced and satisfying meal. It also pairs wonderfully with juicy, succulent baked chicken thighs, absorbing their delicious pan juices.
- With Flavorful Tacos: Forget plain rice! Serve this Herb Rice as the base or a side for baked chicken tacos. Its herbaceous profile adds an unexpected depth that enhances the savory fillings. A simple cilantro-lime sauce or crema on top will tie all the flavors together beautifully.
- Lemon Garlic Shrimp: Create a harmonious meal by serving Herb Rice with lemon garlic shrimp. The overlapping flavors of garlic, parsley, and lemon create a cohesive and incredibly delicious pairing, making each bite bright and satisfying. The rice is perfect for soaking up all the delectable pan sauce from the shrimp.
- Twist on Chicken Stroganoff: For a delightful and lighter take on a classic, swap out traditional pasta and serve this Herb Rice with my Crockpot Chicken Stroganoff. The creamy, savory stroganoff sauce finds a perfect bed in the fluffy, herbed rice, offering a comforting and uniquely flavorful experience.
- Mediterranean Delight with Greek Chicken: Embrace a full Mediterranean feast by serving the Herb Rice alongside tender Greek chicken. Complete the experience with a generous spoonful of cool, refreshing Tzatziki sauce. The bright herbs in the rice perfectly complement the tangy and savory notes of the Greek-inspired chicken.
- Roasted Vegetables: For a simple, wholesome vegetarian meal, serve Herb Rice with a medley of roasted seasonal vegetables like broccoli, bell peppers, or zucchini. The rice provides a comforting and flavorful foundation.
Maximizing Freshness: Storage and Reheating Tips for Herb Rice
One of the many benefits of this one-pan baked Herb Rice is how wonderfully it stores, making it an ideal candidate for meal prepping throughout the week. Properly storing and reheating your leftovers will ensure that every serving is as delicious as the first.
- Storing Leftovers: After baking, allow the Herb Rice to cool completely at room temperature. This is crucial to prevent condensation, which can lead to soggy rice or promote bacterial growth. Once fully cooled, transfer the rice to an airtight container. Stored this way, it will maintain its freshness and flavor in the refrigerator for 4–6 days.
- Reheating Leftovers:
- Microwave: For quick reheating, place a serving of rice in a microwave-safe bowl. Add a tablespoon or two of water or broth and cover it loosely with a damp paper towel or microwave-safe lid. Heat on high for 1-2 minutes, stirring halfway through, until thoroughly warmed. The added liquid and damp towel help rehydrate the rice and prevent it from drying out.
- Stovetop: Transfer the cooled rice to a saucepan with a splash of water or broth. Cover and heat over low to medium heat, stirring occasionally, until hot. This method is excellent for re-fluffing the grains gently.
- Oven: For larger quantities or if you prefer a slightly crispier texture, spread the rice evenly in an oven-safe dish. Add a few tablespoons of water or broth, cover with foil, and bake at 300°F (150°C) for 15-20 minutes, or until heated through.
- Freezing for Long-Term Storage: Herb Rice freezes exceptionally well, offering a convenient option for future meals. Once the rice has cooled completely, transfer it into freezer-safe containers or heavy-duty freezer bags. Ensure the containers are sealed tightly to prevent freezer burn. It can be stored in the freezer for up to 6 months.
- Reheating from Frozen: When ready to enjoy, you can reheat the frozen rice directly in the microwave. Place the frozen rice in a microwave-safe bowl, add a tablespoon or two of water or broth, and cover it with a damp paper towel. Microwave on a defrost setting or at 50% power for a few minutes, then switch to high power, stirring frequently, until completely thawed and hot. Add more water if it appears dry during reheating.
Explore More Easy Side Dish Recipes
If you loved the simplicity and flavor of this Herb Rice, you’ll be thrilled to discover more easy and delicious side dish recipes to complement your meals. Here are some of our other favorites:
- Brown Sugar Roasted Carrots with a hint of warming cinnamon.
- Fresh and zesty Cilantro Lime Rice, perfectly made on the stovetop.
- Sweet and savory Roasted Sweet Potatoes featuring our best seasoning blend.
- Crisp Green Beans with Bacon and toasted lemon almonds.
- Tropical and aromatic Coconut Rice, brightened with fresh lime.
Frequently Asked Questions (FAQs) About Baked Herb Rice
Here are answers to some common questions about making perfect Herb Rice:
- Do I need to rinse the rice before baking? While some recipes call for rinsing, for this baked method with basmati or long-grain white rice, it’s not strictly necessary. The amount of starch in these varieties generally doesn’t cause clumping when baked this way. If you prefer to rinse, it won’t harm the recipe, but ensure good drainage.
- Can I use brown rice in this recipe? For best results with this specific recipe, stick to long-grain white or basmati rice as specified in Note 1. Brown rice requires a different liquid-to-rice ratio and a longer baking time due to its tougher outer bran layer. If you want to bake brown rice, I recommend checking out a dedicated baked brown rice recipe for proper guidance.
- What if my rice is too wet or too dry? If your rice is too wet, it might not have rested long enough, or your foil seal wasn’t tight enough, allowing steam to escape. For future attempts, ensure a very tight foil seal and always allow the full resting time. If it’s too dry, your oven might run hot, or the foil wasn’t tight enough. You can try adding an extra splash of broth next time. For a quick fix, add a tablespoon or two of hot broth, cover, and let it steam for another 5 minutes.
- Can I add fresh herbs instead of dried? Yes, absolutely! Fresh herbs offer a brighter, more vibrant flavor. If using fresh herbs like parsley, thyme, or oregano, you’ll need to use approximately three times the amount of dried herbs specified. Add them in with the other ingredients before baking. For more delicate herbs like fresh basil or dill, it’s best to stir them in after the rice has cooked and been fluffed, just before serving, to preserve their delicate flavor and color.
- Is this recipe gluten-free? Yes, this Herb Rice recipe is naturally gluten-free, assuming your chicken broth (or vegetable broth) is certified gluten-free. Always check the labels of your broth and seasonings to ensure no hidden gluten-containing ingredients.
Herb Rice
Herb Rice is so easy—just mix uncooked rice with a few ingredients in a baking dish, bake, and enjoy perfectly fluffy and tender rice!
Equipment
- 9 x 13-inch ceramic baking pan
- Aluminum foil
Ingredients
- Cooking spray
- 1-1/2 cups uncooked rice (basmati preferred, see note 1)
- 2-1/2 cups chicken broth (or stock, see note 2)
- 1 teaspoon garlic powder
- 1 teaspoon onion powder
- 1/2 teaspoon dried thyme
- 1/2 teaspoon dried oregano
- 2 tablespoons dried parsley
- Salt and pepper (see note 3)
- 8 tablespoons unsalted butter
- 3 tablespoons finely chopped fresh parsley (optional, for serving)
- 1 large lemon (optional, for serving)
Instructions
- Set oven to 400°F (200°C). Generously spray a glass or ceramic 9×13-inch pan with cooking spray.
- Add uncooked rice, chicken broth, garlic powder, onion powder, thyme, oregano, parsley, salt, and pepper (start with 1/2 teaspoon each) directly into the prepared pan. Stir well to combine. Add the butter pieces evenly across the mixture. Cover the pan tightly with aluminum foil.
- Bake covered for 40 minutes. Carefully remove the foil and set it aside, then return the uncovered pan to the oven and bake for 15 more minutes.
- Remove from the oven and cover the pan again with the foil. Let the rice rest at room temperature for 10 minutes—this essential step prevents mushy rice.
- Remove foil and gently fluff the rice with a fork. If desired, stir in fresh parsley and lemon juice (I typically add 2–3 tablespoons). Taste and adjust salt or pepper if needed before serving.
Recipe Notes
Note 1: Rice Type Stick to long-grain white or basmati rice for the best results. Basmati is highly recommended for its fluffy texture in this recipe. Other rice types may not cook properly or yield the same desired texture using this method.
Note 2: Broth Quality High-quality chicken broth, such as Swanson’s®, provides the richest flavor. For a delicious vegetarian option, a good quality vegetable broth works equally well.
Note 3: Seasoning Adjustments The amount of salt needed can vary based on the brand of broth and the type of salt used. It’s always best to start with less salt initially and adjust to taste after the rice has cooked.
Storage: Cool leftovers completely and store in an airtight container for 4–6 days in the refrigerator. For freezing, transfer cooled rice to freezer-safe containers and freeze for up to 6 months. To reheat from frozen, microwave with a damp paper towel, stirring occasionally, and add a little water or broth if it seems dry.
Nutrition
Serving: 1 serving | Calories: 223kcal | Carbohydrates: 18g | Protein: 3g | Fat: 16g | Saturated Fat: 10g | Polyunsaturated Fat: 1g | Monounsaturated Fat: 4g | Trans Fat: 1g | Cholesterol: 41mg | Sodium: 63mg | Potassium: 90mg | Fiber: 1g | Sugar: 1g | Vitamin A: 482IU | Vitamin C: 1mg | Calcium: 20mg | Iron: 1mg
Nutrition information is automatically calculated, so should only be used as an approximation.
Love this recipe? Leave a comment below and share your thoughts!