
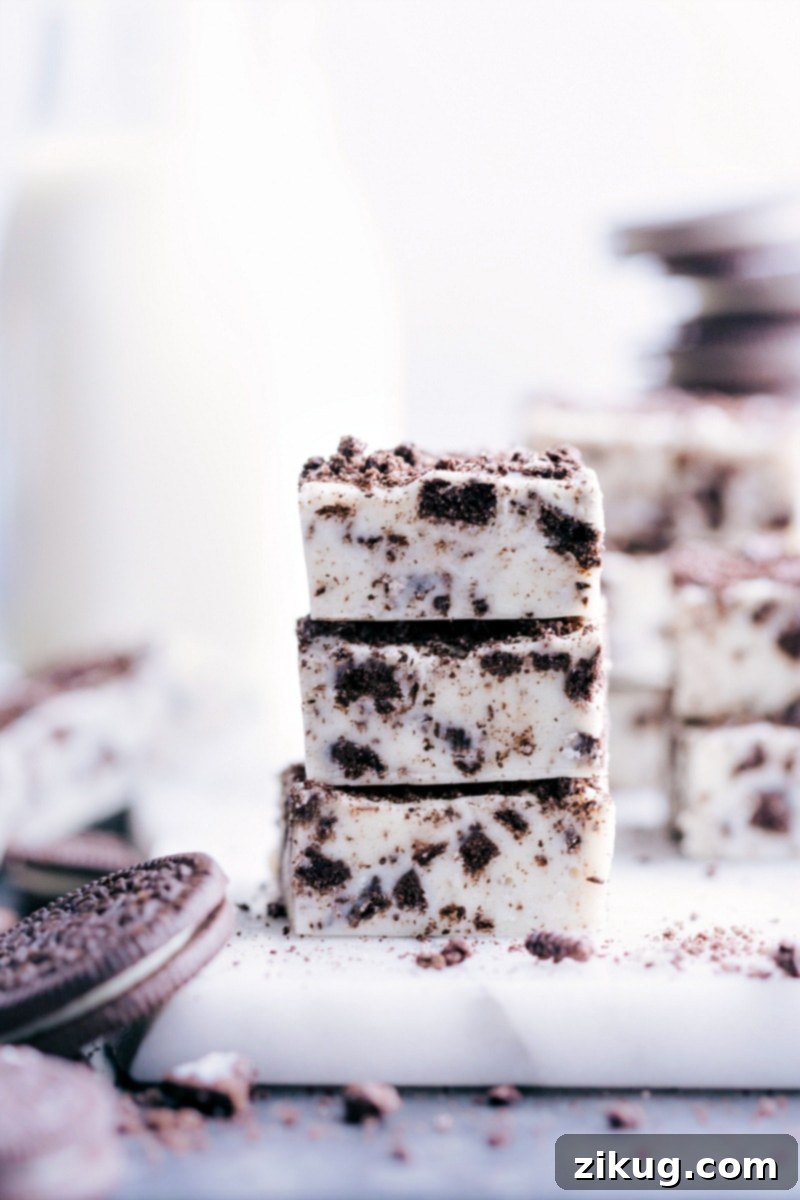
Easy & Creamy No-Bake Oreo Fudge: Your Ultimate Oreo Experience
For every true Oreo lover who believes the creamy center is the absolute best part, this **Oreo Fudge** recipe is a dream come true. Imagine that iconic vanilla cream flavor, amplified, infused with rich white chocolate, and studded with perfectly crushed Oreo cookies. This isn’t just fudge; it’s a celebration of that irresistible cookies-and-cream magic, crafted into a simple, melt-in-your-mouth treat.
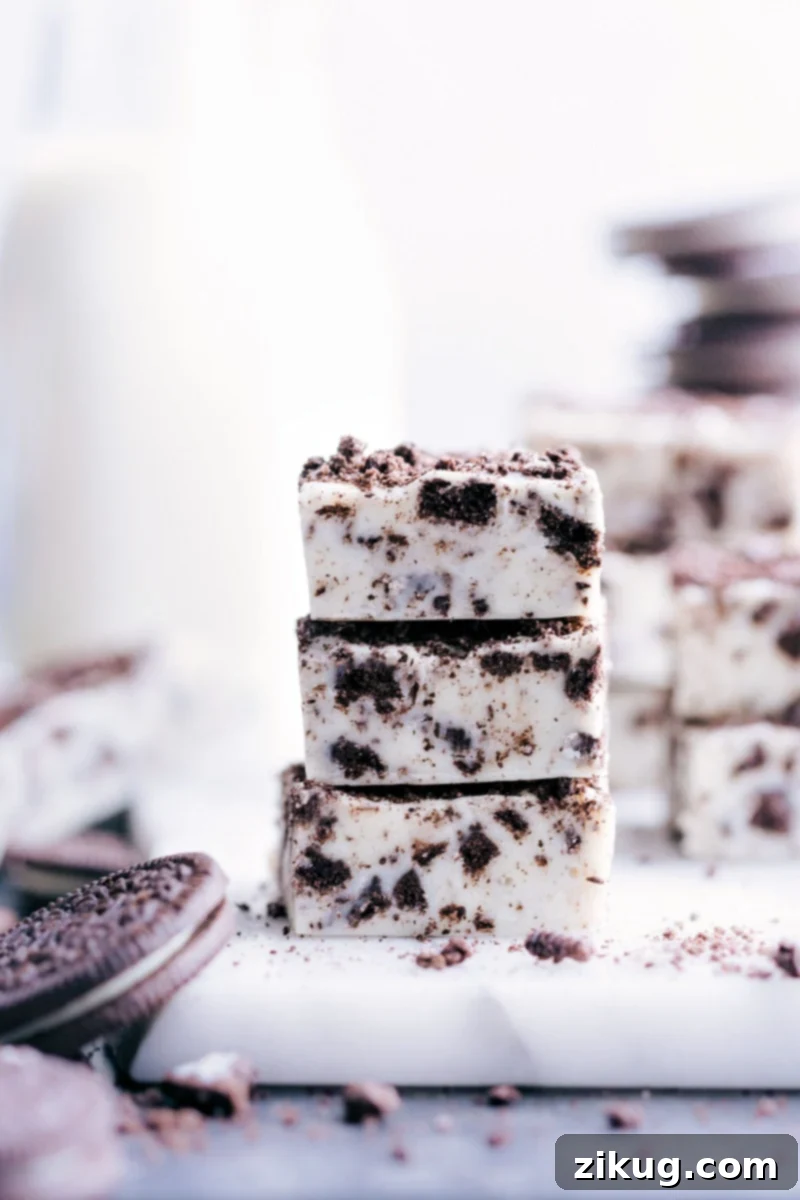
Why This is the Best Oreo Fudge You’ll Ever Make
If you’re anything like me, the first thing you do with an Oreo is twist it open to savor that glorious creamy filling. Double Stuffed still isn’t quite enough to satisfy that craving for luscious creaminess, is it? This Oreo Fudge recipe solves that problem, delivering an unparalleled concentration of that beloved flavor. It perfectly balances the sweetness of white chocolate with the distinct crunch and cocoa notes of crushed Oreo cookies, creating a texture and taste sensation that is simply divine.
Beyond its incredible flavor, this fudge stands out for its remarkable ease of preparation. It’s a fantastic no-bake dessert, requiring minimal effort and common pantry staples. Whether you’re preparing for a festive holiday gathering, looking for a thoughtful homemade gift for friends and family, or simply craving a decadent treat, this Oreo Fudge is the ideal choice. Its impressive appearance belies how truly simple it is to make, making you look like a culinary wizard with hardly any fuss!
Why You’ll Fall in Love with This Oreo Fudge:
- Effortlessly Simple: With just a handful of ingredients and one pan, this recipe is incredibly straightforward, perfect for beginners and seasoned bakers alike.
- No-Bake Wonder: Skip the oven! This fudge sets beautifully in the refrigerator, making it a perfect year-round dessert, especially on hot days.
- Decadently Creamy: The combination of quality white chocolate and sweetened condensed milk creates a smooth, rich texture that melts in your mouth.
- Irresistible Oreo Flavor: We pack in generous amounts of crushed Oreos, ensuring every bite is bursting with that classic cookies-and-cream taste.
- Crowd-Pleaser: This fudge is universally loved! It’s an instant hit at parties, potlucks, and family gatherings, appealing to all ages.
- Perfect for Gifting: Homemade fudge makes a thoughtful and delicious present during the holidays or for any special occasion.
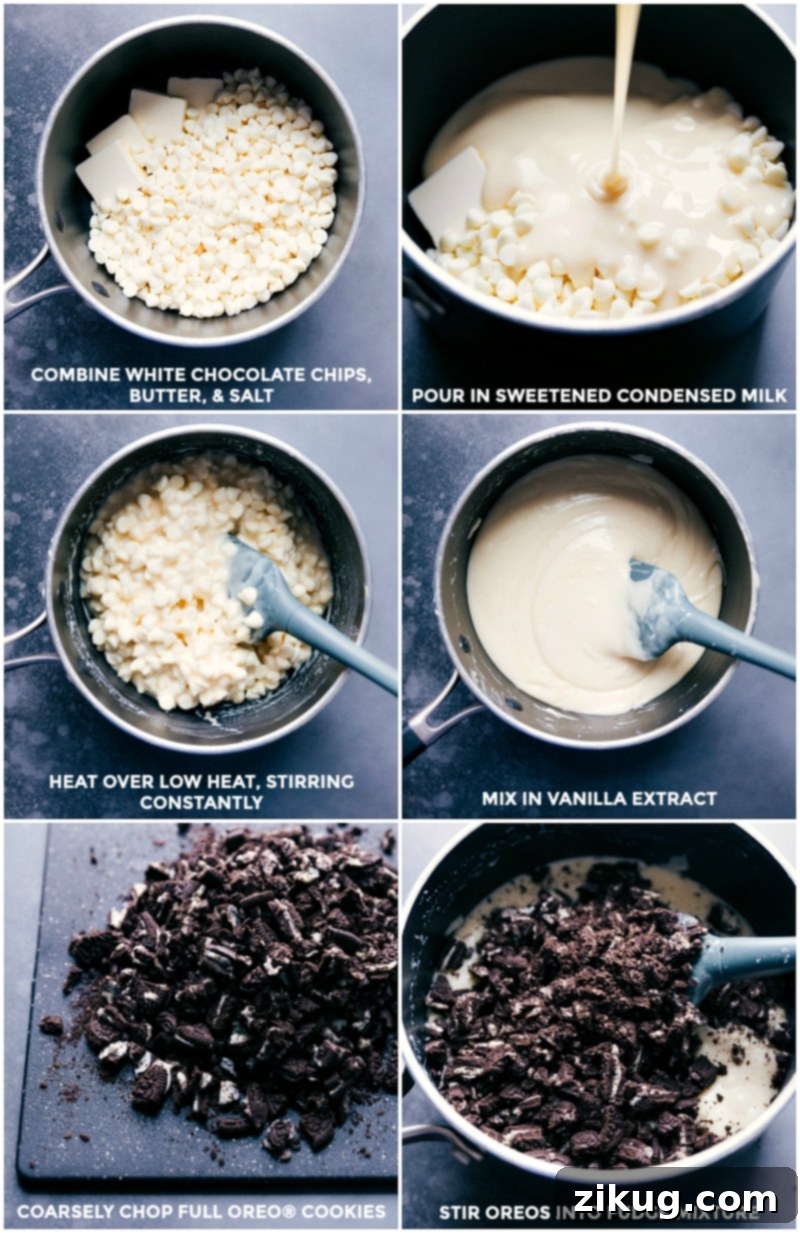
Essential Oreo Fudge Ingredients
The beauty of this Oreo Fudge lies in its simplicity and the quality of its core ingredients. Using good quality components will elevate your fudge from delicious to absolutely unforgettable. Here’s a closer look at what you’ll need:
- White Chocolate Chips: The foundation of our creamy fudge. For the best flavor and smoothest melt, opt for high-quality white chocolate chips. Brands like Ghirardelli or Guittard are excellent choices, offering a superior taste profile compared to cheaper alternatives. Avoid using “white baking chips” or “candy melts” as they often contain less cocoa butter and can result in a waxier texture.
- Unsalted Butter: Butter adds richness and helps create that luxurious, smooth texture. Using unsalted butter allows you to control the overall saltiness of your fudge, ensuring a perfect balance with the sweetness. Cut it into tablespoons for easier melting.
- Salt: A small pinch of salt is vital! It acts as a flavor enhancer, cutting through the sweetness of the chocolate and condensed milk, and truly bringing out the depth of the Oreo flavor.
- Sweetened Condensed Milk: This is the magic ingredient that gives fudge its signature soft, chewy, and melt-in-your-mouth consistency. It’s crucial to use full-fat sweetened condensed milk, not evaporated milk, as they are not interchangeable. The fat and sugar content of condensed milk are essential for the fudge to set correctly.
- Vanilla Extract: A teaspoon of good quality vanilla extract enhances all the other flavors, adding a warm, aromatic depth that complements the white chocolate and Oreos beautifully.
- Oreo Cookies: The star of the show! You’ll need about 16 full Oreos for the fudge mixture, plus a couple more if you like extra crunch on top. Don’t worry about removing the cream filling – it contributes to the overall flavor and creaminess! While classic Oreos are fantastic, feel free to experiment with off-brand chocolate sandwich cookies for a similar effect.
Quick Tip for Oreo Preparation
For adding the Oreo cookies, there is absolutely no need to remove the cream filling! This creamy center adds to the overall flavor and texture of your fudge. Coarsely chop the Oreos into varying sizes for the best textural contrast – some larger chunks for a satisfying bite, and smaller crumbs to disperse throughout the fudge.
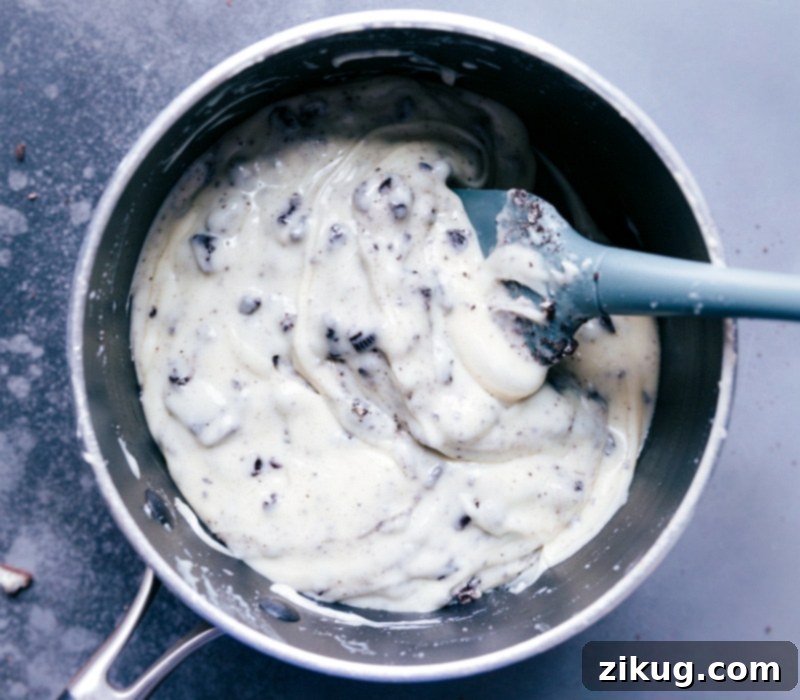
How To Make Easy One-Pan Oreo Fudge
Making this delightful Oreo Fudge is surprisingly simple. Follow these steps for a perfectly creamy, irresistible batch every time:
- Prepare Your Pan and Oreos: Begin by lining a 9×9-inch (for thinner fudge) or 8×8-inch (for thicker fudge) square baking pan with parchment paper or aluminum foil. Make sure to leave an overhang on the sides – this will act as “handles” for easy removal of the fudge once it’s set. Next, coarsely chop your Oreo cookies, including the cream filling. Aim for varied sizes, from crumbs to small chunks.
- Gently Melt the Base: In a heavy-bottomed, nonstick saucepan, combine the unsalted butter (cut into tablespoons), white chocolate chips, salt, and sweetened condensed milk. Place the pan over the **lowest heat setting** possible. The key here is patience! Constantly stir the mixture with a heat-resistant spatula, ensuring you scrape the sides and bottom of the pan frequently to prevent any burning or sticking. Do not be tempted to increase the heat, as this can cause the chocolate to seize or the milk to scorch, resulting in a grainy fudge. Continue to stir until all ingredients are fully melted and the mixture is smooth and cohesive.
- Incorporate Flavor & Oreos: Once the base mixture is perfectly melted and smooth, remove the pan from the heat. Stir in the vanilla extract until fully combined. Then, gently fold in the majority of your coarsely chopped Oreos. You want them evenly distributed throughout the rich, creamy fudge mixture.
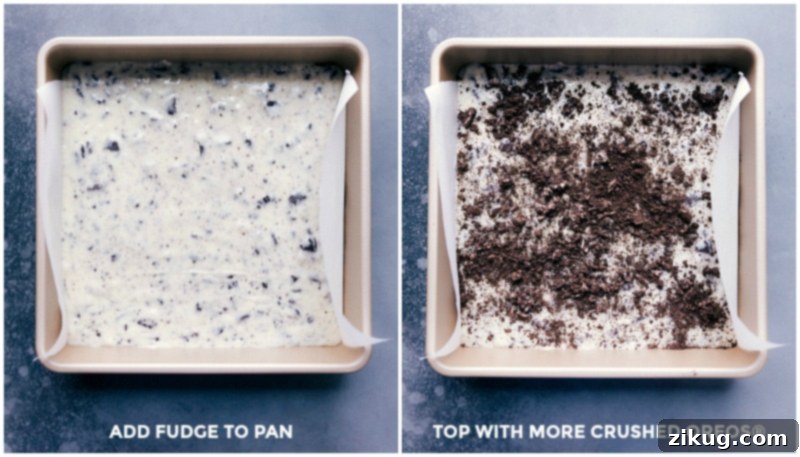
- Pour, Top, and Chill: Quickly pour the warm fudge mixture into your prepared pan. Using a spatula lightly sprayed with cooking spray (to prevent sticking), spread the fudge evenly into a smooth layer. If desired, crush the remaining 2 Oreos and sprinkle them over the top, gently pressing them into the surface of the fudge for an attractive finish and extra crunch. Cover the pan loosely with plastic wrap and refrigerate for a minimum of 3-5 hours, or until the fudge is completely set and firm to the touch.
- Cut and Serve: Once the fudge is thoroughly chilled and firm, use the parchment paper overhang to carefully lift the entire slab of fudge out of the pan and onto a cutting board. For clean, neat slices, use a hot, sharp knife. Run your knife under hot water for a few seconds, then wipe it dry before each cut. This will prevent the fudge from sticking and dragging. Cut the fudge into small, bite-sized pieces (about 1-inch squares are ideal for 36 servings). Serve chilled or at room temperature.
Expert Tips for Perfect Oreo Fudge Every Time
Achieving perfectly smooth, creamy, and flavorful Oreo Fudge is easy with a few insider tips:
- Invest in a Quality Pan: Use a heavy-bottomed nonstick pan. This is crucial for distributing heat evenly and preventing the mixture from scorching, especially when working with delicate ingredients like white chocolate and condensed milk on low heat.
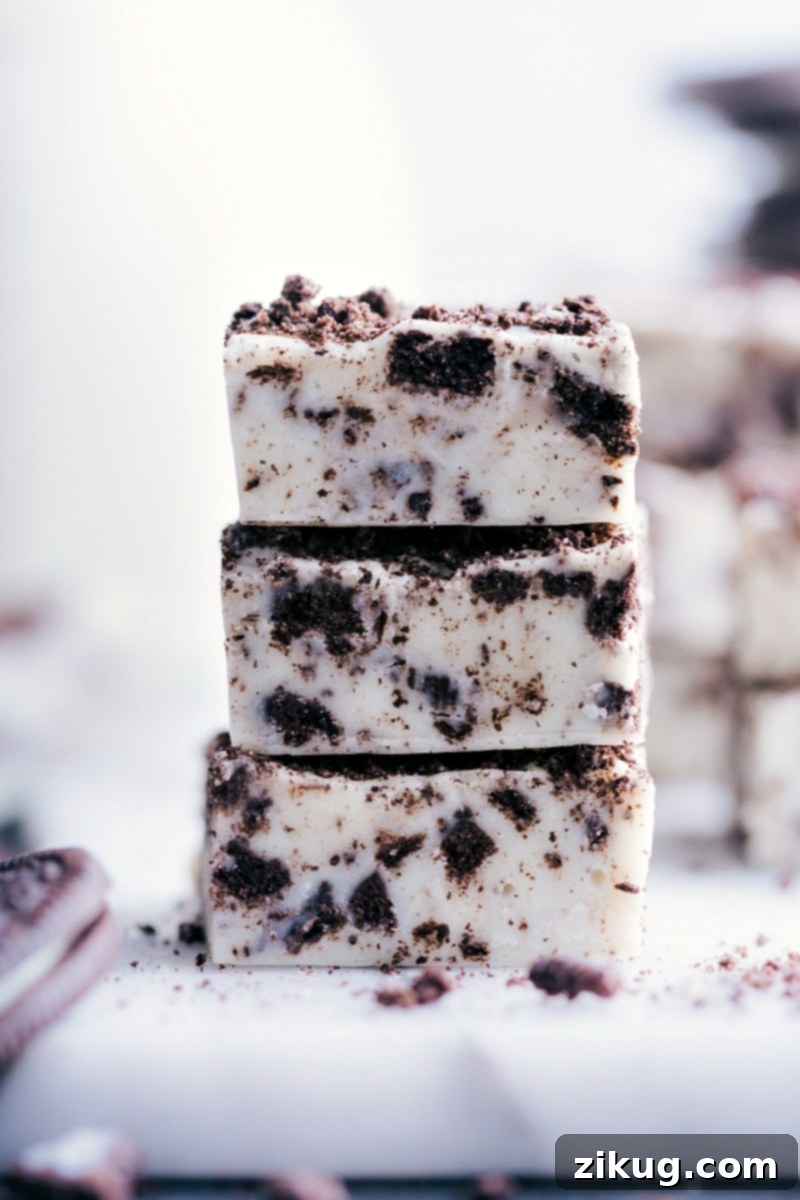
- Prepare Your Pan Thoughtfully: The size of your pan affects the thickness of your fudge. Choose an 8×8-inch pan for thicker, more substantial pieces, or a 9×9-inch pan for thinner slices (as shown in most of the photos in this post). Always line your pan with parchment paper or aluminum foil, leaving an overhang on all sides. This creates convenient “handles” that make lifting the set fudge out of the pan incredibly easy and mess-free.
- Patience with Melting: Never rush the melting process. Keep the heat on its lowest setting and stir continuously. White chocolate can seize or burn easily if overheated. A slow, steady melt ensures a silky-smooth fudge base. If you’re nervous, a double boiler method (placing a heatproof bowl over a pot of simmering water) can also be used, ensuring no water gets into the chocolate.
- Crush Oreos to Perfection: Coarsely chop your Oreo cookies. You want a mix of fine crumbs and larger chunks. The crumbs will infuse the fudge with flavor, while the chunks provide satisfying textural contrast. Don’t pulverize them into a powder!
- Add Extra Toppings: For an extra visual appeal and a delightful crunch, sprinkle additional crushed Oreos on top of the fudge immediately after pouring it into the pan. Gently press them into the surface to ensure they adhere once chilled.
- Thorough Chilling is Key: Don’t underestimate the chilling time. Allow the fudge to refrigerate for the full 3-5 hours, or even overnight, to ensure it sets completely. This will make it much easier to cut into clean, firm pieces.
- Achieve Clean Cuts: For perfectly neat squares, use a sharp knife and run it under hot water, then dry it thoroughly before each cut. The heat from the knife will help slice through the fudge cleanly without sticking. Repeat this process for every cut.
Delicious Flavor Variations
While the classic Oreo Fudge is amazing on its own, it’s also a fantastic canvas for creative flavor twists:
- Mint Oreo Fudge: For a refreshing twist, substitute regular Oreos with Mint Oreos. You can also add a 1/2 teaspoon of peppermint extract to the melted mixture along with the vanilla for an extra burst of minty flavor, similar to this Peppermint Fudge.
- Peanut Butter Oreo Fudge: Swirl in 1/4 to 1/2 cup of creamy peanut butter with the white chocolate mixture for a decadent peanut butter-chocolate fusion.
- Holiday Oreos: Use seasonal Oreos, like red-filled Valentine’s Day Oreos or green-filled Halloween Oreos, to match your holiday theme.
- Dark Chocolate Drizzle: Once the fudge is set, melt some dark chocolate and drizzle it decoratively over the top for an elegant touch and deeper chocolate flavor.
- Sprinkle Fun: Add some festive sprinkles to the top of the fudge along with the crushed Oreos before chilling for an extra pop of color, especially for birthdays or celebrations.
Storage Guidelines for Freshness
Proper storage ensures your Oreo Fudge remains fresh and delicious for longer. It’s best enjoyed cold, straight from the fridge!
- Room Temperature: While possible, it’s generally not recommended for extended periods due to the creamy nature of the fudge. If stored in an airtight container at cool room temperature (below 70°F/21°C), it will last up to 1 week, but the texture might soften.
- Refrigerate: This is the ideal storage method. Keep your Oreo Fudge in an airtight container in the refrigerator. For the best texture and flavor, enjoy within 2 weeks. The cold temperature helps maintain its firm, yet creamy, consistency and prevents it from drying out or becoming too soft.
- Freeze: For longer storage, Oreo Fudge freezes beautifully. Wrap individual pieces or the entire slab tightly in plastic wrap, then wrap again in aluminum foil. Place the wrapped fudge in an airtight freezer-safe container or bag. It can be frozen for up to 3 months. Thaw frozen fudge in the refrigerator overnight before serving.
Remember to always keep your fudge in an airtight container to prevent it from absorbing odors or drying out.
More Irresistible Oreo Recipes to Try
Can’t get enough of Oreos? Here are some other fantastic recipes that celebrate everyone’s favorite cookie:
- Oreo Ice Cream Cake
- Oreo Balls (Oreo Truffles)
- No-Bake Oreo Icebox Cake
- Creamy Oreo Fluff Dip
- Mini Oreo Cheesecakes
Oreo Fudge
Equipment
-
9 x 9-inch baking pan (or 8×8 for thicker fudge)
-
Parchment paper or aluminum foil
-
Medium saucepan thick-bottomed, nonstick
Ingredients
- 4 tablespoons unsalted butter
- 3 cups white chocolate chips (see Note 1)
- 1/4 teaspoon salt
- 1 (14-ounce) can sweetened condensed milk (see Note 2)
- 1 teaspoon vanilla extract
- 2 cups coarsely chopped Oreos (approximately 16 full Oreos, plus 2 additional Oreos for topping if desired)
Instructions
-
Line a 9×9-inch baking pan (or 8×8-inch for thicker fudge) with parchment paper or aluminum foil, leaving an overhang on the sides for easy removal later. Cut the unsalted butter into tablespoons. Coarsely chop the Oreo cookies, including their cream filling.
-
In a thick-bottomed, nonstick saucepan, combine the butter, white chocolate chips, salt, and sweetened condensed milk. Place the pan over the lowest heat setting. Continuously stir the mixture with a heat-resistant spatula, making sure to scrape the sides and bottom of the pan. Maintain low heat and patience to ensure a smooth, lump-free mixture without scorching.
-
Once all the ingredients are fully melted and the mixture is smooth, remove the pan from the heat. Stir in the vanilla extract until well combined. Gently fold in the majority of the coarsely chopped Oreos until they are evenly distributed throughout the fudge mixture.
-
Pour the fudge mixture into your prepared pan. Using a spatula lightly sprayed with cooking spray (to prevent sticking), smooth the fudge into an even layer. If desired, crush the remaining 2 Oreos and sprinkle them over the top of the fudge, gently pressing them into the surface. Cover the pan and refrigerate for 3–5 hours, or until the fudge is completely set and firm.
-
Once set, use the parchment-paper overhang to lift the fudge out of the pan and onto a cutting board. For clean cuts, use a hot, sharp knife (run the knife under hot water and wipe it dry before each cut). Cut the fudge into small pieces and serve.
Recipe Notes
Note 1: For the best Oreo Fudge taste and texture, use high-quality white chocolate chips. Recommended brands include Ghirardelli® and Guittard® (not sponsored), as they melt smoothly and have superior flavor.
Note 2: Ensure you use full-fat sweetened condensed milk, not evaporated milk. Evaporated milk will not allow the fudge to set correctly.
Note 3: For a thicker fudge, use an 8×8-inch pan. The photos in this post generally show fudge made in a 9×9-inch pan, which yields slightly thinner pieces.
Storage: Store Oreo Fudge in an airtight container in the refrigerator for up to 2 weeks. It is best enjoyed cold within 2-3 days for optimal texture and freshness. Avoid leaving it out at room temperature for extended periods to prevent it from drying out or becoming too soft.
Nutrition
Calories: 183kcal | Carbohydrates: 21g | Protein: 2g | Fat: 10g | Saturated Fat: 6g | Cholesterol: 8mg | Sodium: 98mg | Potassium: 86mg | Fiber: 1g | Sugar: 17g | Vitamin A: 47IU | Vitamin C: 1mg | Calcium: 43mg | Iron: 1mg
Nutrition information is automatically calculated, so should only be used as an approximation.