
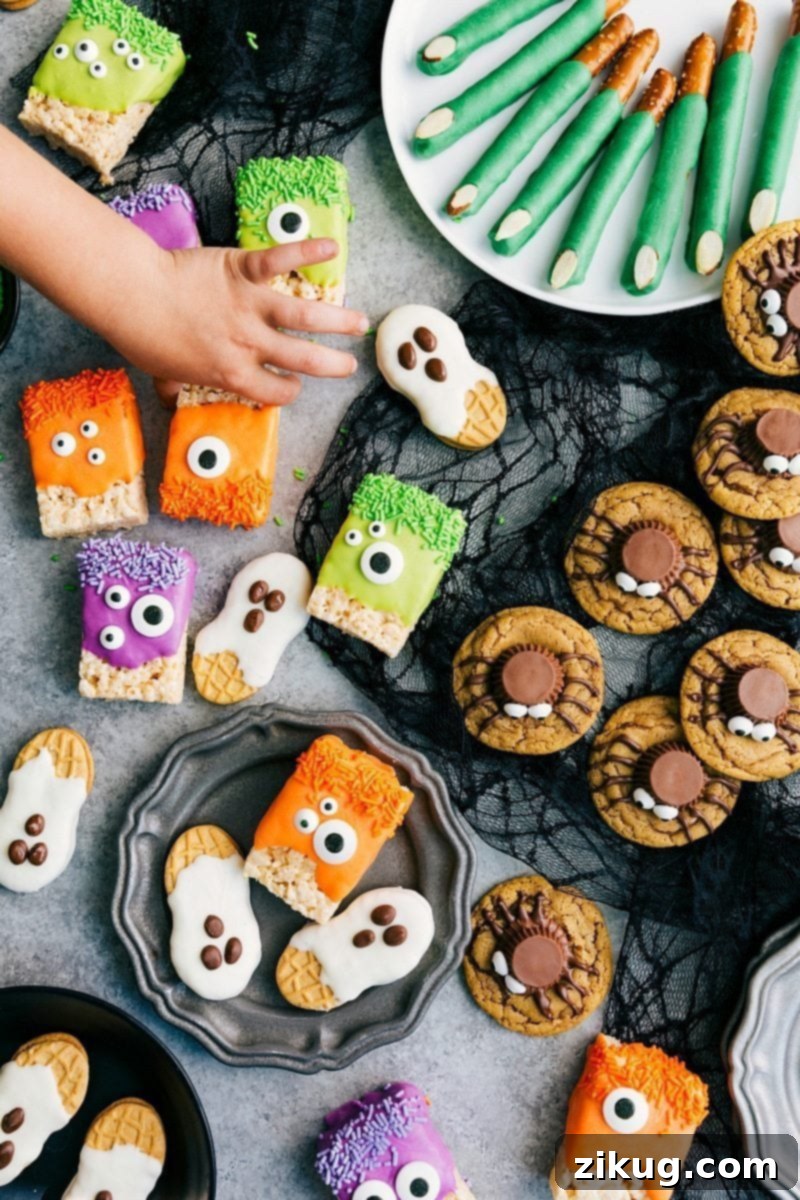
Transform your Halloween celebrations with these incredibly easy 3-ingredient treats! From adorable Monster Rice Krispies and spooky Peanut Butter Spider Cookies to charming Nutter Butter Ghosts and deliciously creepy Witch Finger Pretzels, you’ll find the perfect quick Halloween dessert to delight everyone. These simple recipes are ideal for busy parents, party hosts, and anyone looking for fun, homemade Halloween candy without the fuss.
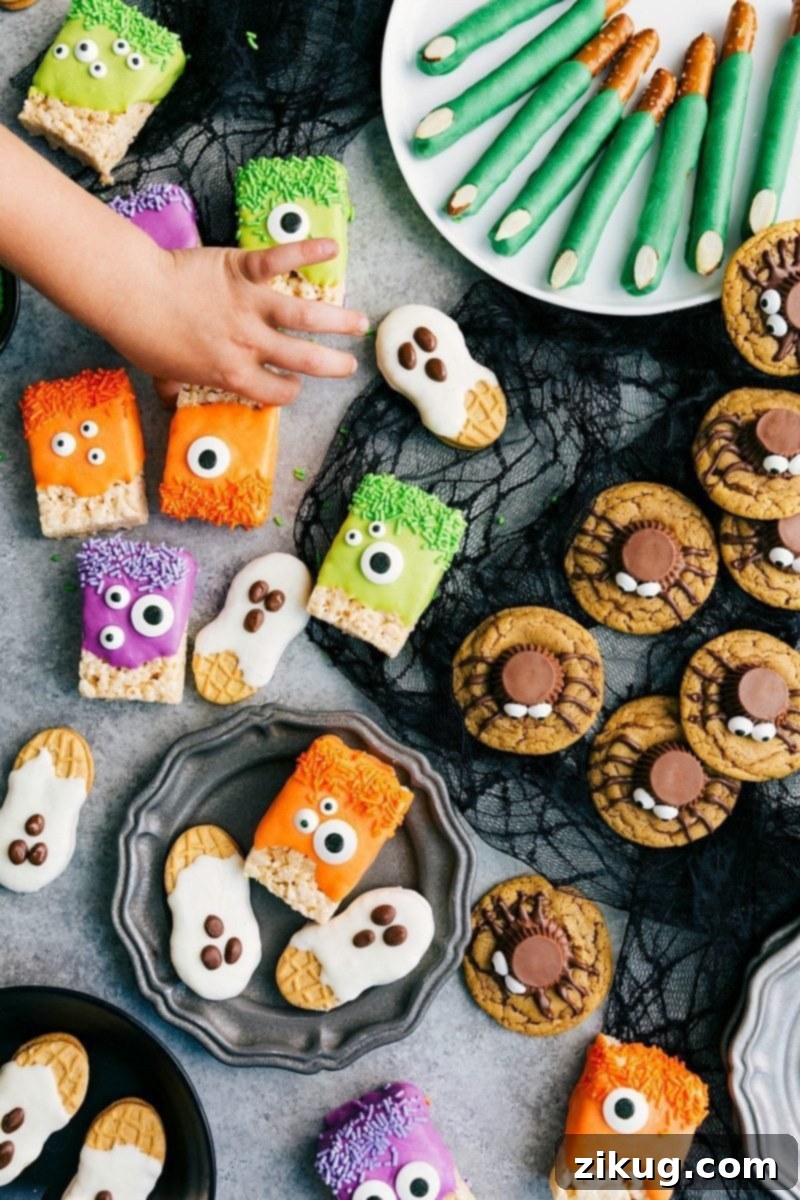
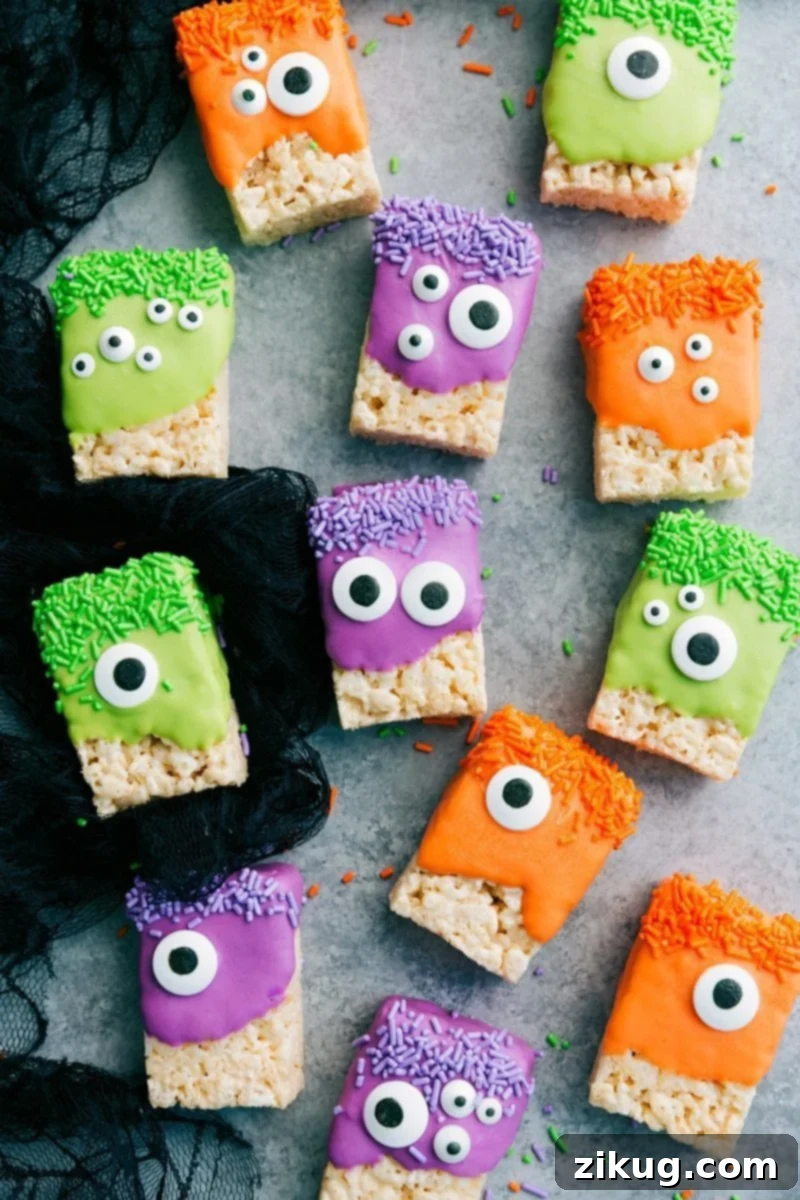
Spooky Fun with 3-Ingredient Monster Rice Krispies Treats
Get ready to unleash your inner mad scientist with these whimsical Monster Rice Krispies Treats! This classic snack gets a delightful Halloween makeover, offering a fantastic opportunity for creativity with minimal ingredients. While you can certainly add more embellishments if you wish, our “minimalist” approach focuses on just three core items to create surprisingly cute and delicious monsters that are perfect for any Halloween party or simply as a fun after-school snack. These easy Halloween treats are always a crowd-pleaser and fantastic for kids to help decorate.
For these spooky Rice Krispies, I opted for a vibrant variety of colored candy melts, utilizing about one-third of each 12-ounce bag. If you prefer a single color, a whole bag will likely be sufficient to coat all your treats. The beauty of these monster treats lies in their versatility. You can choose an assortment of candy eyeballs for diverse expressions or stick to one shape and size for a more uniform look. Don’t be afraid to experiment with different sprinkle colors to match your monster’s personality!
To make your shopping experience as convenient as possible, here are direct links to purchase the essential ingredients online:
- Parchment Paper: Essential for easy cleanup and preventing sticking.
- Candy Eyeballs: Available in various sizes – large, small, or an economical bundle pack.
- Candy Melts: Choose your favorite monstrous hues – bright green, spooky orange, or mysterious purple.
- Pre-made Rice Krispies Treats: Save time with store-bought, or use your cherished homemade recipe.
- Sprinkles (optional, but highly recommended for extra flair): Discover a range of colors like ghastly green, pumpkin orange, or lavender purple.
Rice Krispies Treat Monsters
Video Tutorial
Equipment Needed
-
Large Sheet Pan (approximately 15″ x 10″)
Ingredients
- 1 (12-ounce) bag candy melts in your favorite color, or use a variety of colors for different monsters.
- 1 (16-pack) box individually wrapped Rice Krispies Treats or your favorite homemade recipe (ensure they are cooled and firm).
- Candy eyeballs: Various sizes add character!
- 3 teaspoons Shortening or vegetable oil, optional (helps thin the candy melts for smoother dipping).
- Colored sprinkles optional (for extra texture and pizzazz).
Step-by-Step Instructions
-
Prepare your workspace: Line a large sheet pan with parchment paper. This will ensure your monster treats don’t stick and make cleanup a breeze. Set it aside for later.
-
Melt the candy: Divide your candy melts into microwave-safe bowls. If using just one color, split the bag into three equal portions to prevent overheating. For multiple colors, place about 1/3 of each color into separate bowls. Optionally, add 1 teaspoon of shortening or vegetable oil to each bowl of 1/3 chocolate candy melts. This step helps create a smoother, more fluid consistency, making it easier to coat the treats and achieve that perfectly ragged monster look.
-
Microwave with care: Microwave each bowl in short, 20-second bursts. After each burst, stir the candy melts vigorously for 10 seconds. Continue this process until the chocolate is completely melted and beautifully smooth. Be patient, as over-microwaving can cause the candy melts to seize.
-
Unwrap your canvas: Carefully unwrap each of the pre-made Rice Krispies Treats. If you’re using homemade treats, ensure they are fully cooled and set before proceeding.
-
Dip and spread: Once your chocolate is perfectly smooth, dip each Rice Krispie Treat into the melted candy. Use a spoon to gently spread the melted chocolate over the top, creating an uneven, ragged edge that gives it that authentic “monster” appearance. Don’t aim for perfection – the messier, the better for these fun creatures!
-
Decorate quickly: Work swiftly, as melted candy melts harden rather fast. Immediately after dipping, press on your candy eyeballs and scatter sprinkles (if using) onto the chocolate. Let your imagination run wild – create one-eyed monsters, multi-eyed beasts, or anything in between!
-
Set and enjoy: Transfer your decorated monster treats to the prepared sheet pan. Allow the chocolate to set completely at room temperature. For the best flavor and texture, these delightful spooky treats are best enjoyed the same day they are made, though they can be stored in an airtight container for a day or two.
Recipe Notes & Tips
Nutrition Information
Nutrition information is automatically calculated, so should only be used as an approximation.
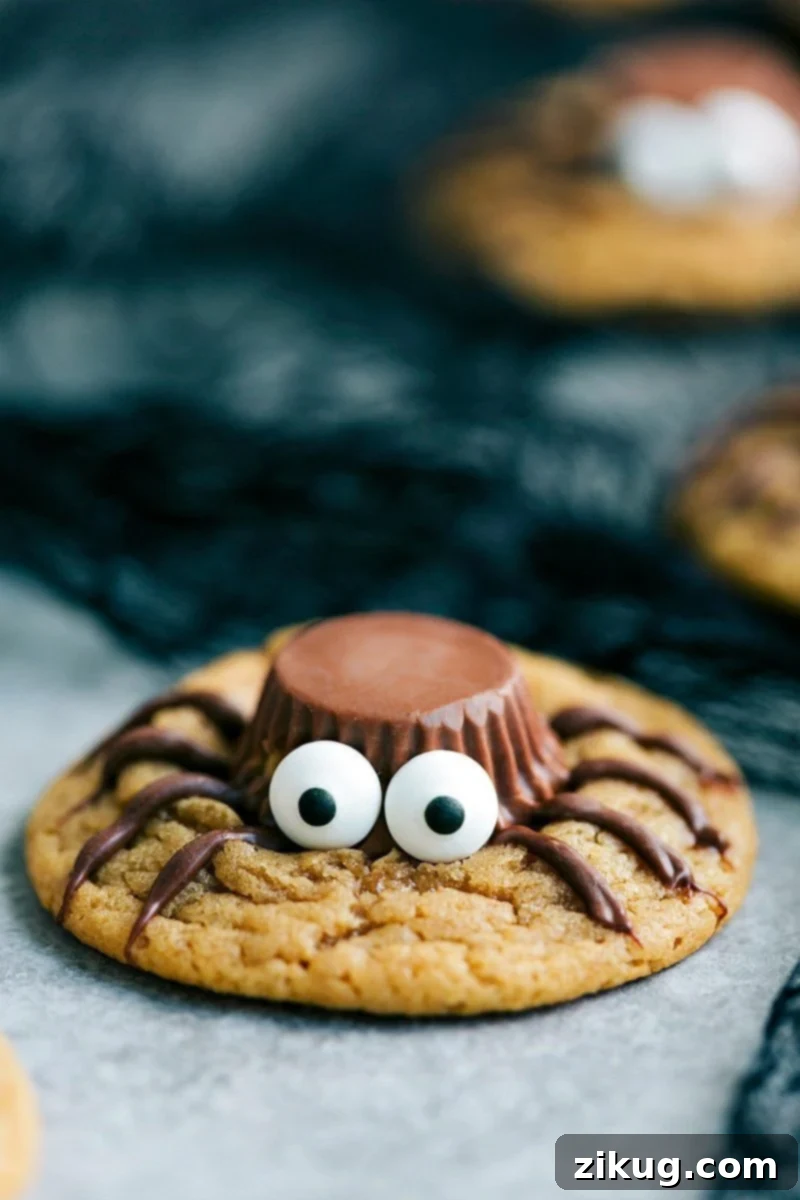
Creepy-Crawly Goodness: Easy 3-Ingredient Peanut Butter Spider Cookies
These Peanut Butter Spider Cookies are not just a simple and tasty Halloween treat idea; they’re an adorable addition to any spooky celebration! They capture the fun spirit of Halloween with minimal effort, making them a go-to for quick Halloween desserts. The best part? You can easily stick to a three-ingredient wonder by using refrigerated peanut butter cookie dough. If you prefer to bake from scratch, simply use your favorite homemade peanut butter cookie recipe and remember to skip the traditional fork-press in the center – we need a smooth surface for our spider bodies!
The addition of candy eyeballs is entirely optional, but they certainly elevate the fun factor, giving your spiders a charmingly spooky gaze. If you can’t find them or prefer an alternative, miniature chocolate chips or piped melted chocolate dots work just as well for eyes. The key to these kid-friendly Halloween treats is their simplicity and the joy of assembly, making them perfect for little hands to help with.
To conveniently gather your ingredients for these delightful creepy-crawlies, click on the links below for online shopping:
- Parchment Paper: Your essential non-stick surface for baking and setting.
- Miniature Peanut Butter Cups: These form the perfect body for our friendly spiders.
- Candy Eyeballs (optional, but highly recommended for character): Find them in large, small, or in a convenient bundle.
Peanut Butter Spider Cookies
Equipment Needed
-
Sheet pan (15″ x 10″)
-
Resealable plastic bag (for piping chocolate)
Ingredients
- 1 (16.5-ounce) tube peanut butter cookie dough or your favorite homemade peanut butter cookie recipe (for homemade, skip the fork press).
- 20 to 24 Miniature Reese’s Peanut Butter Cups: One for each spider body!
- 1 cup milk chocolate chips: For melting and piping the spider legs.
- Candy eyeballs optional, but adds a fun, spooky touch.
- 1/2 teaspoon shortening or vegetable oil, optional (to make chocolate smoother).
Step-by-Step Instructions
-
Bake the cookies: Prepare the peanut butter cookies according to package directions (or your homemade recipe). Ensure you do not press the centers with a fork. Once baked, remove them from the oven and carefully transfer them to a cooling rack to cool slightly.
-
Add the spider bodies: While the cookies are still warm but firm enough to handle, unwrap the miniature Reese’s Peanut Butter Cups. Gently press one into the center of each cookie. The residual warmth will help it adhere slightly. Allow them to harden and fully cool.
-
Melt the chocolate for legs: In a microwave-safe bowl, combine the milk chocolate chips and, if desired, the 1/2 teaspoon of vegetable oil or shortening. The shortening helps make the chocolate a bit thinner and easier to pipe, resulting in smoother spider legs.
-
Microwave and prepare for piping: Microwave the chocolate mixture in short 15-second bursts, stirring thoroughly for 10 seconds between each burst until the chocolate is completely melted and smooth. Transfer the melted chocolate to a resealable plastic bag. Snip off just the very tip of one corner of the bag to create a fine piping hole – a tiny cut is best for delicate spider legs.
-
Pipe the spider legs: Now for the fun part! Gently pipe eight “spider legs” onto each cookie, starting from the edge of the Reese’s cup and extending outward onto the cookie. You can make them wiggly or straight, whatever suits your spider’s personality!
-
Add the eyes (optional): If you’re using edible candy eyeballs, pipe a tiny dot of melted chocolate onto the back of each eyeball. Press two eyeballs onto the Reese’s cup to give your spider its adorable (or creepy!) gaze. Allow the chocolate to set completely before serving.
Nutrition Information
Nutrition information is automatically calculated, so should only be used as an approximation.
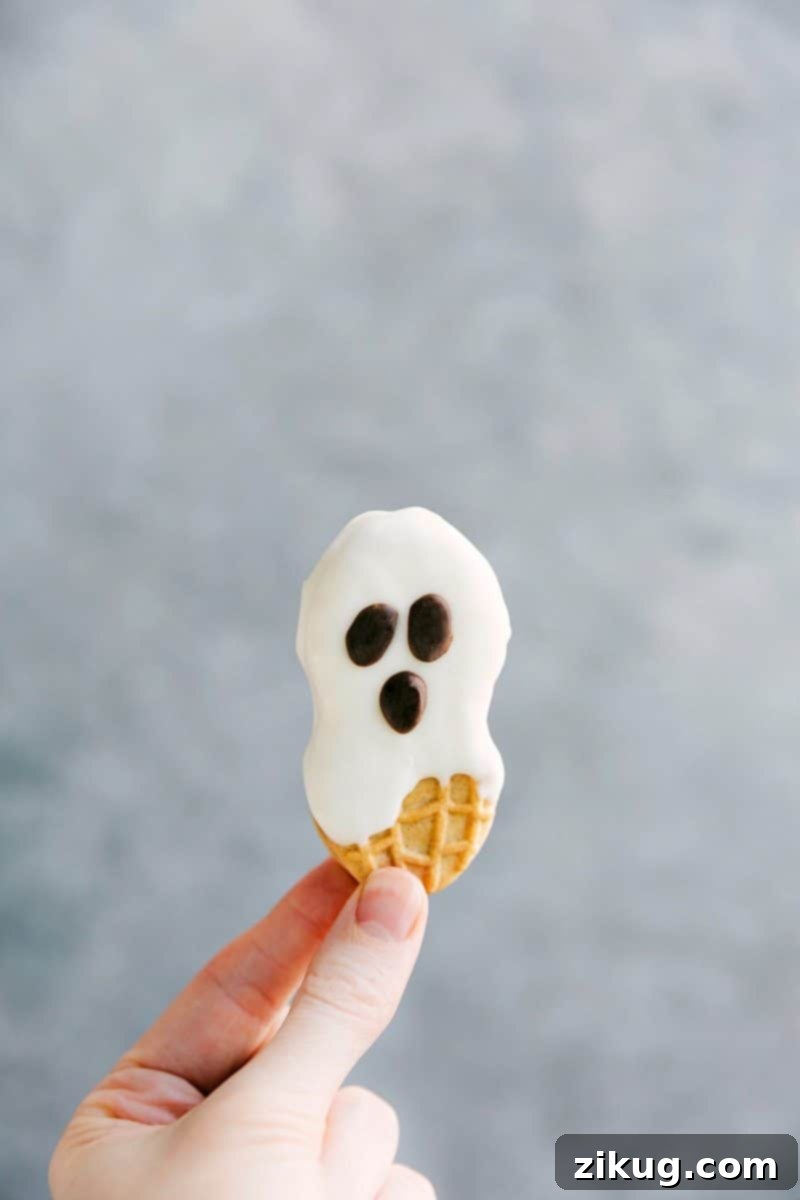
Friendly Phantoms: Quick & Easy 3-Ingredient Nutter Butter Ghosts
Who knew ghosts could be so charming and delicious? These Nutter Butter Ghosts are a fantastic addition to your collection of easy Halloween treat ideas. A few years ago, I fell in love with making Mummy Cookies using Milano cookies. We enjoyed them so much that they became an annual tradition! This year, I decided to shake things up and create a few different versions, and Nutter Butter Ghosts were the first spooky vision that came to mind. The best part is, with very similar ingredients, you can easily make both these delightful ghosts and the classic mummies simultaneously, doubling your Halloween fun with minimal extra effort.
For an even simpler approach to creating the ghostly eyeballs and mouths, instead of melting additional chocolate, you can use un-melted miniature chocolate chips. Just press them gently into the still-wet white chocolate for instant faces! These quick Halloween desserts are not only incredibly simple but also provide a wonderful opportunity for creativity, allowing you to give each ghost a unique, expressive face. They are perfect for last-minute Halloween treats or for getting kids involved in the kitchen.
For your convenience, here are links to purchase the necessary ingredients online:
- Parchment Paper: Essential for a mess-free dipping and setting process.
- Nutter Butter Cookies: The perfect peanut-shaped base for our friendly specters.
Nutter Butter Ghost Cookies
Equipment Needed
-
Sheet pan (15″ x 10″)
-
Resealable plastic bag (for piping chocolate faces)
Ingredients
- 1 (12-ounce) bag white chocolate chips: Or white candy melts, for dipping.
- 1 (16-ounce) package Nutter Butter cookies: The base of our adorable ghosts.
- 1/4 cup milk chocolate chips: For creating the ghost faces.
- 1/2 teaspoon vegetable oil or shortening, optional (for smoother dipping and piping).
Step-by-Step Instructions
-
Prepare your sheet pan: Line a large sheet pan with parchment paper. This will serve as a non-stick surface for your dipped cookies as they set, ensuring easy removal.
-
Melt the white chocolate: Divide the white chocolate chips into 3 microwave-safe bowls. Optionally, add 1/2 teaspoon of vegetable oil or shortening to each bowl. While not essential, this makes the chocolate a bit thinner and easier to coat the cookies smoothly. Melt one bowl of chocolate at a time in the microwave using 15-second bursts, stirring for 10 seconds vigorously between each burst, until the chocolate is completely melted and smooth.
-
Dip the Nutter Butters: Dip each Nutter Butter cookie into the melted white chocolate, ensuring it’s fully coated. As you remove it, gently use a spoon or the edge of the bowl to create a slightly ragged, flowing shape near the bottom of each cookie, mimicking a ghostly tail. Lightly tap and shake off any excess chocolate to get a smooth finish.
-
Let them set: Transfer the dipped cookies to the prepared sheet pan. Allow them to set completely at room temperature. For faster setting, you can place the sheet pan in the refrigerator for about 10-15 minutes.
-
Create the ghost faces: Once the white chocolate is fully set, melt the milk chocolate chips in a separate microwave-safe bowl (again, with optional shortening for smoother piping). Transfer the melted milk chocolate to a small resealable plastic bag and snip off the very tip of one corner. Carefully pipe two small dots for eyes and a spooky, irregular “O” shape for a mouth onto each ghost cookie.
-
Final touches and enjoy: Let the piped chocolate harden completely. Once set, your charming Nutter Butter Ghost Cookies are ready to be served! These quick Halloween desserts are best enjoyed within 1-2 days for optimal freshness.
Nutrition Information
Nutrition information is automatically calculated, so should only be used as an approximation.
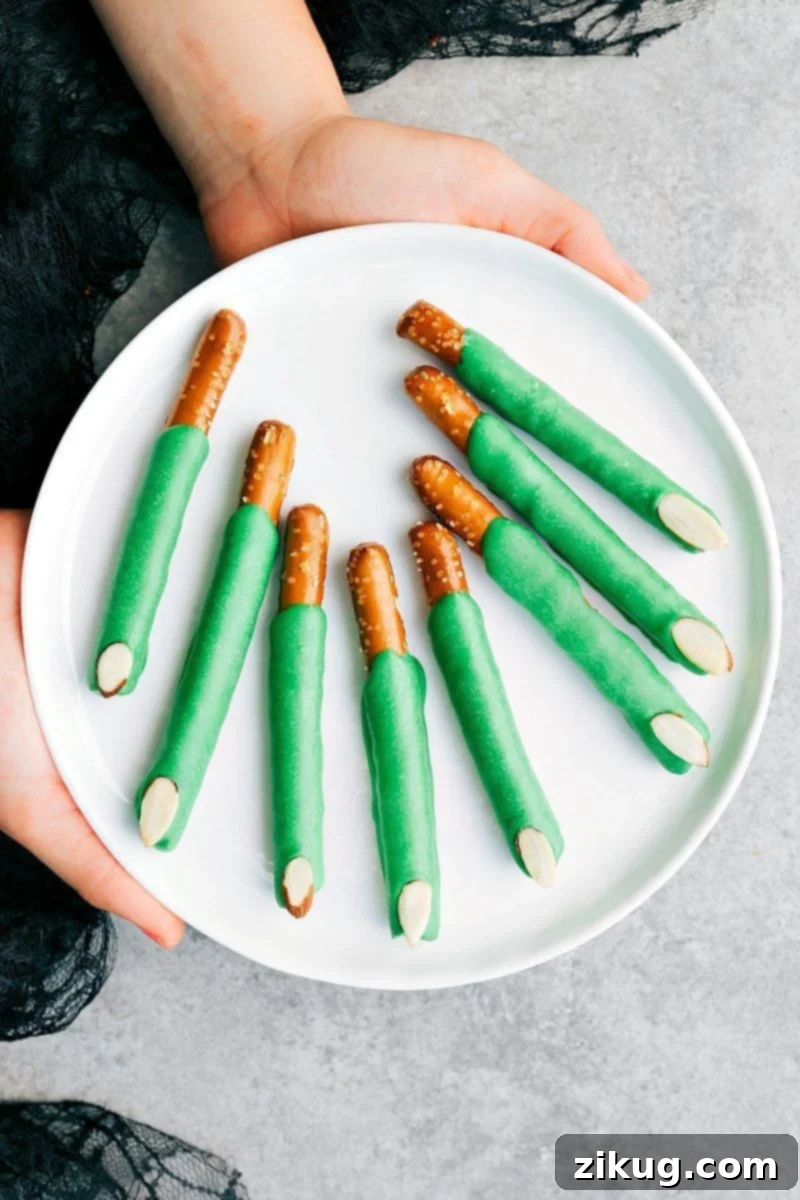
Bewitchingly Delicious: Easy 3-Ingredient Witch Finger Pretzels
Prepare for some ghoulishly good fun with these Witch Finger Pretzels! These slightly creepy, utterly delightful treats are simply too enjoyable not to make for your Halloween festivities. They are the epitome of easy Halloween treats, requiring minimal ingredients and delivering maximum impact. The combination of salty pretzel and sweet candy coating is always a winner, and the spooky aesthetic makes them a perfect addition to any Halloween spread or trick-or-treat bag.
For a different twist, consider using bright lime green candy melts instead of the darker green I chose – it will give them an even more vibrant, classic witchy look! Another creative idea is to dye the sliced almonds black with a touch of black gel food coloring to create truly menacing fingernails. No matter how you choose to personalize them, these Witch Finger Pretzels pair wonderfully with other spooky snacks, such as adorable Witch Oreo Truffles, creating a cohesive and enchanting Halloween dessert table. These are truly versatile and fun Halloween treat ideas!
To effortlessly gather your ingredients for these wickedly good pretzels, you can purchase them online by clicking the links below:
- Parchment Paper: Crucial for preventing sticking and simplifying cleanup.
- Pretzel Rods: The sturdy base for our witchy digits.
- Dark Green Candy Melts: Or opt for a vibrant lime green for a different look!
“Witch Finger” Pretzels
Equipment Needed
-
Sheet pan (15″ x 10″)
Ingredients
- 17 to 18 pretzel rods: Enough for each spooky finger.
- 1 (12-ounce) bag dark green candy melts: Or any green shade you prefer for a witchy hue.
- 17 to 18 sliced almonds: These will be our eerie fingernails.
- 1/2 teaspoon vegetable oil or shortening, optional (for smoother candy melt consistency).
Step-by-Step Instructions
-
Prepare your pretzels: Line a large sheet pan with parchment paper and set it aside. Carefully break approximately 1/4th off one end of each pretzel rod. This creates a “ragged” break that will resemble the knobby joint of a witch’s finger. Don’t worry about perfect breaks – imperfections add to the spooky charm! Feel free to snack on the broken pieces as you work!
-
Melt the green candy: Separate your green candy melts into 3 microwave-safe bowls. Optionally, add about 1/2 teaspoon of vegetable oil or shortening to each bowl. This step is not strictly necessary but can help achieve a smoother, more liquid consistency, which makes coating the pretzels easier and more even. Melt one bowl of chocolate at a time in the microwave using 15-second bursts, stirring vigorously for 10 seconds between bursts, until the candy melts are completely smooth and free of lumps.
-
Dip the pretzels: Hold a pretzel rod by the intact end. Dip the ragged, broken end of the pretzel into the melted green chocolate, coating about 3/4ths of the way down the rod. Use a spoon to help spread the chocolate evenly and create some texture that resembles witchy skin.
-
Smooth and place: Gently tap and shake the pretzel rod to smooth out the chocolate and remove any excess drips. Place each coated rod onto your prepared sheet pan, leaving a little space between each.
-
Add the fingernail and set: While the chocolate is still wet, carefully press one sliced almond onto the very tip of the chocolate-dipped end of each pretzel rod, mimicking a witch’s long fingernail. Allow the pretzel rods to harden completely at room temperature. For quicker setting, you can place them in the refrigerator for about 10-15 minutes. Once set, your bewitching Witch Finger Pretzels are ready to spook and delight!
Nutrition Information
Nutrition information is automatically calculated, so should only be used as an approximation.