
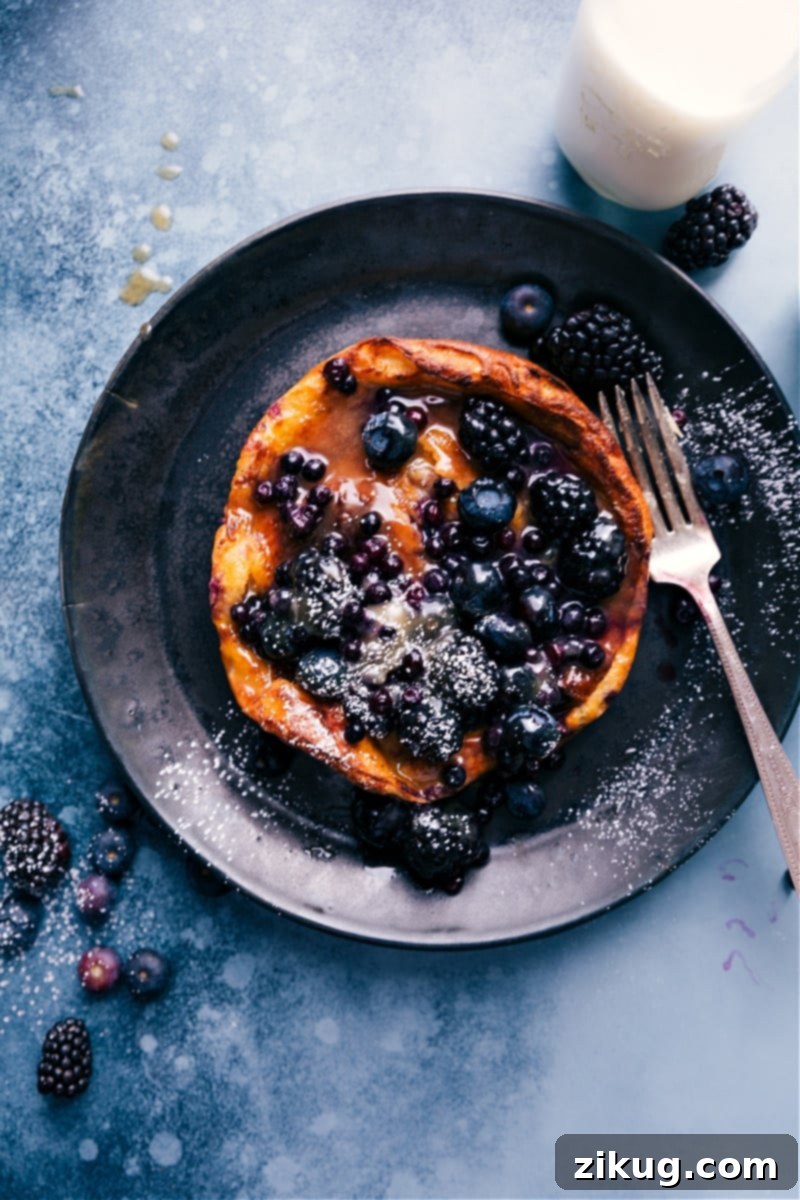
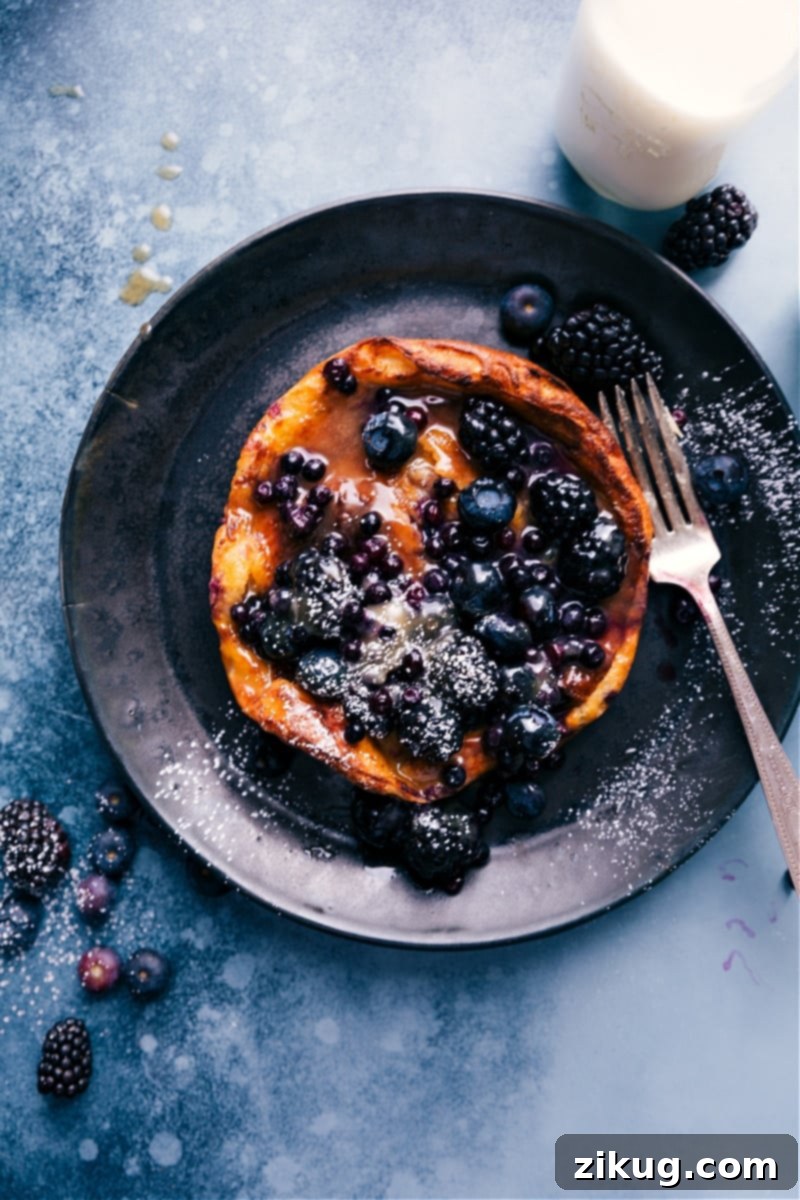
This **Air Fryer Dutch Baby** revolutionizes your breakfast routine, starting with an incredibly easy blender batter. Simply combine all ingredients in a blender, pour into a cake pan, and let your air fryer do the magic. No traditional cake pan? No problem! We’ve also perfected this recipe using a simple DIY foil pan. Crown your golden, puffed Dutch Baby with your favorite toppings – we especially love a medley of fresh berries and our homemade quick vanilla sauce.
For those who love classic preparations, explore our original Dutch Baby recipe. Eager to expand your air fryer culinary skills? Dive into our extensive archives of air fryer recipes. If you’re new to the world of air frying or need a refresher, our comprehensive Air Fryer Guide is an excellent resource.
Effortless Air Fryer Dutch Baby: The Ultimate Quick Breakfast Treat
Breakfast holds a special place in my family’s heart. It’s more than just a meal; it’s a cherished ritual. We dedicate one evening a week to a lavish breakfast-for-dinner spread, and our Saturdays and Sundays are usually marked by an elaborate morning feast. Our traditional spread always features crispy toast, savory bacon, fluffy eggs, vibrant fresh fruit, and a choice between light waffles, classic pancakes, or a warm, puffy Dutch Baby. Hands down, the Dutch Baby is the most frequently requested star of our breakfast table.
Developing and perfecting this Dutch Baby recipe for sharing took considerable time and effort, but every moment was truly worthwhile. It has become one of the most beloved and frequently prepared recipes in my home, and I’ve heard similar stories of adoration from so many of you. However, one common feedback point, and indeed a personal frustration, has always been the baking time! Between preheating a conventional oven and baking the Dutch Baby to its golden perfection, the entire process can easily stretch to 45 minutes. With hungry little ones (and grown-ups!) eagerly awaiting their morning treat, such a wait often leads to what we affectionately call “hangry” moments.
One day, inspired by a desire for speed and convenience, I decided to experiment with making our beloved Dutch Baby in the air fryer. While I approached the endeavor with cautious optimism, my children, ever the skeptics, were convinced it wouldn’t work. (Thanks for the encouragement, kids!) Yet, to my delight and their utter surprise, the results were nothing short of spectacular. This air fryer version was every bit as delicious as our traditional oven-baked Dutch Baby, and perhaps even superior, boasting extra-crispy edges that are my absolute favorite part. The best part? This incredible Air Fryer Dutch Baby can be ready to serve in about 25 minutes or less, thanks to the remarkable efficiency of the air fryer. It’s truly a game-changer for busy mornings!
Mastering Your Air Fryer Dutch Baby: Essential Tips & Tricks
Creating the perfect Air Fryer Dutch Baby is surprisingly simple, but a few key techniques can elevate your results from good to absolutely outstanding. Follow these expert tips to ensure a beautifully puffed, golden, and delicious Dutch Baby every time:
- Effortlessly Blend the Batter: The foundation of a great Dutch Baby lies in its smooth batter. Using a blender is not only incredibly convenient but also ensures a lump-free mixture where all ingredients are thoroughly combined. This process helps to aerate the batter slightly, which contributes to the pancake’s characteristic puff. Plus, with the batter already in the blender, pouring it neatly into the hot cake pan becomes an effortless task, minimizing spills and mess.
- Swirl for Superior Texture and Structure: When you pour the batter into the pan, don’t just dump it in. Instead, swirl the batter gently in a circular pattern from the center outwards. This seemingly small step plays a significant role in shaping the final pancake, helping to create those iconic peaks and valleys around the edges. These structural elements not only make for a more visually appealing Dutch Baby but also provide a delightful variation in texture, from crispy edges to a softer, custardy center.
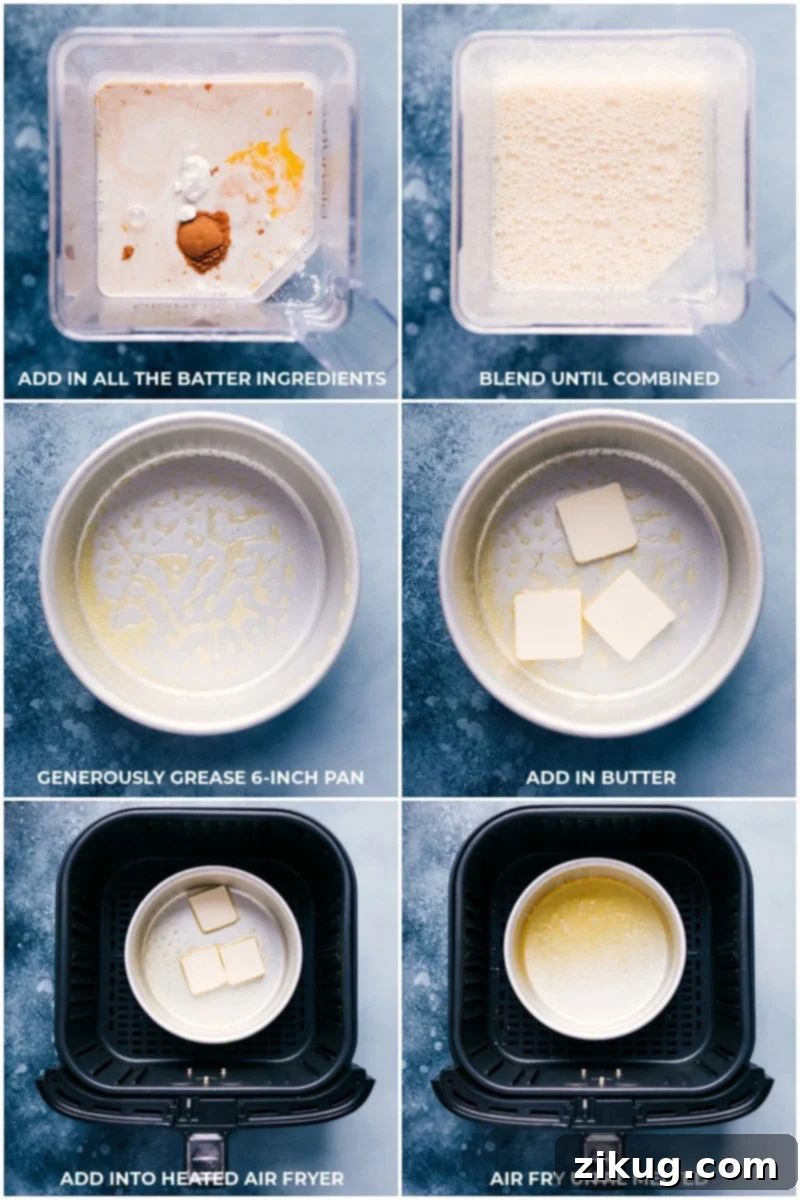
- Preheat the Pan for Maximum Puff and Caramelization: This tip is crucial for achieving that dramatic, impressive puff and those coveted caramelized edges. Adding your empty cake pan to the air fryer and preheating it before introducing the batter ensures the pan is piping hot. When the batter hits the hot surface, it immediately starts to cook and rise rapidly, creating a beautiful, airy structure. This initial thermal shock is key to preventing a dense or flat pancake and encourages those delicious, slightly browned edges.
- Monitor Closely for Perfect Doneness: Air fryers, much like traditional ovens, can vary in their cooking performance from one model to another. Factors such as wattage, basket size, and even the type of pan you use (or if you’re using a homemade foil pan) can influence cooking times. Therefore, it’s essential to watch your Dutch Baby carefully, especially during the last few minutes of cooking. Keep an eye on the color and puff; you want a golden-brown finish with fully puffed edges, but avoid any signs of burning. A quick check can prevent overcooking and ensure a perfect outcome.
Elevating Your Air Fryer Dutch Baby: Creative Topping Ideas
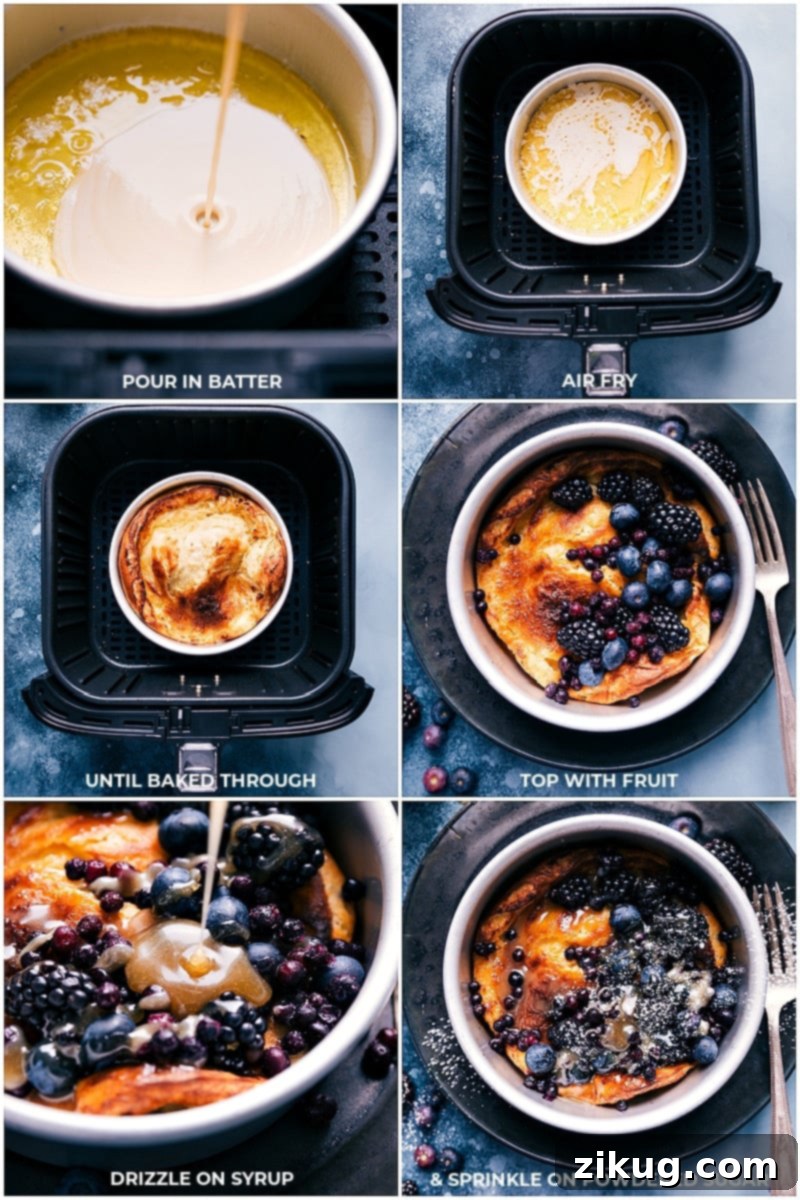
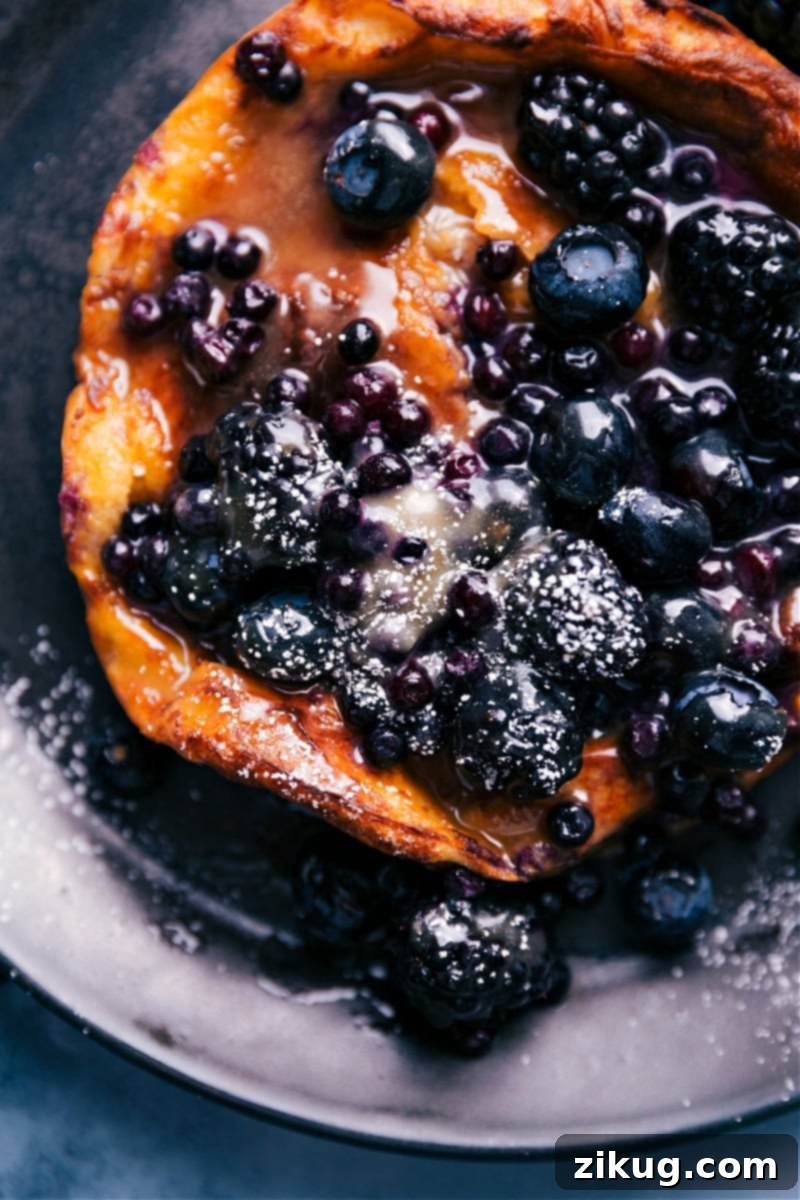
While an Air Fryer Dutch Baby is delightful on its own, it truly shines when adorned with a thoughtful array of toppings. Our absolute favorite way to crown this breakfast masterpiece is with a generous scattering of fresh **berries**, a delicate dusting of **powdered sugar**, and a decadent drizzle of our homemade **vanilla** or rich **buttermilk syrup**. The combination of tart fruit, subtle sweetness, and creamy syrup creates a harmonious balance of flavors and textures. But the possibilities are endless! Here are even more inspiring ideas to personalize your fun breakfast:
- A classic and refreshing pairing: a squeeze of fresh **lemon juice** and a simple sprinkle of **powdered sugar**. The citrus zest brightens every bite.
- For a comforting, autumnal feel: warm **maple syrup** generously poured over with a scattering of fresh **berries** for contrast.
- Indulge in a cloud of freshness: a dollop of fresh **whipped cream** paired with more delightful **berries**. (Learn how to make perfect whipped cream here.)
- A tropical and caramel twist: beautifully **sliced bananas** complemented by a rich **caramel sauce** or creamy **dulce de leche**.
- Simple yet satisfying: a dusting of aromatic **cinnamon sugar** paired with a swirl of light **whipped cream**.
- For lemon lovers: a spoonful of tangy **lemon curd**, elevated with bursts of fresh **blueberries** or succulent **blackberries**.
- A nutty, decadent touch: a warm drizzle of melted **Nutella®**, smooth **peanut butter**, or wholesome **almond butter** for a rich finish.
Quick Tip for Presentation
Achieve a professional, light, and even dusting of powdered sugar on your Dutch Baby by using a fine-mesh sieve. This ensures a delicate finish without clumps.
Essential Tools for Your Air Fryer Dutch Baby Adventure
While the beauty of this recipe lies in its simplicity, having the right tools can make the process even smoother and more enjoyable. Here are the key pieces of equipment that will help you achieve Dutch Baby perfection in your air fryer:
- Air Fryer: This is, of course, the star of the show! I personally use, enthusiastically love, and confidently recommend this air fryer (affiliate link) for its consistent performance. Remember that air fryers can vary in wattage and cooking nuances from one brand to another. So, while our recipe provides precise timings, you might need to make slight adjustments to the cooking duration based on your specific air fryer model to achieve the ideal golden-brown finish and impressive puff.
- Cake Pans: After extensive testing, I’ve found that a 6-inch cake pan (affiliate link) is the absolute perfect size for baking these individual Dutch Babies. It allows for an ideal rise and fits beautifully within most air fryer baskets. This recipe yields enough batter for three 6-inch Dutch Babies. You have a couple of options here: either use multiple 6-inch pans if your air fryer can accommodate them, or simply cook one Dutch Baby at a time, transferring it to a plate before re-using the pan for the next batch. For those who prefer a disposable option or don’t have suitable cake pans, creating your own foil pan is a fantastic alternative – see the next point for details!
- Aluminum Foil (for DIY Pans): If you don’t own a 6-inch cake pan or simply prefer a disposable solution, you can easily DIY your own foil pan. I’ve successfully tested this recipe using homemade foil pans, and the results are excellent. To create one, take two sheets of heavy-duty aluminum foil and stack them together for extra sturdiness. Mold them into a round “pan” shape, aiming for approximately 6-7 inches in width and about 2 inches tall. The height is crucial, as it prevents the Dutch Baby batter from spilling over as it vigorously puffs up during cooking. Generously grease the interior of your foil pan with cooking spray before use, and keep a closer eye on the bake time; Dutch Babies cooked in foil pans tend to require an additional 1-3 minutes in my air fryer, due to potential variations in heat distribution.
- Cooking Spray: A good quality non-stick cooking spray is your best friend here. To ensure your Dutch Baby slides out of the pan effortlessly and doesn’t stick to the bottom or sides, it’s absolutely vital to generously grease your chosen pan (whether a traditional cake pan or a DIY foil pan) before adding the butter to melt. This creates a non-stick barrier that guarantees a beautiful release every time.
Explore More Delicious Air Fryer Recipes to Love:
The air fryer is a remarkably versatile kitchen appliance, perfect for whipping up everything from savory dinners to sweet desserts. If you’ve enjoyed the speed and efficiency of making this Dutch Baby, you’ll be thrilled to discover what else your air fryer can do. Here are a few more fantastic air fryer recipes that our readers adore:
Dinner
Southwest Egg Rolls (Air Fryer Recipe!)
Dinner
Vegetarian Gyros
Desserts
Air Fryer Pizookie
Dinner
Air Fryer Chicken Tenders Recipe
Pin Recipe
Print Recipe
Air Fryer Dutch Baby
Chelsea Lords
10
14
24
3 6-inch Dutch Babies
Equipment
-
Air fryer
-
Cake pan 6 x 2-inch, see note 1
-
Blender
Ingredients
- 7-1/2 tablespoons unsalted butter divided
- Cooking spray
- 1-1/3 cups whole milk
- 1 cup flour
- 3 large eggs
- 1 large egg yolk
- 1/2 teaspoon salt
- 1 teaspoon vanilla extract
- 3 tablespoons granulated sugar optional
- 1/4 teaspoon ground cinnamon optional
- 1/4 cup unsalted butter
- 1/4 cup light brown sugar
- 1/4 cup granulated sugar
- 1/4 cup heavy cream
- 1 teaspoon vanilla extract
- 1/8 teaspoon salt
- Fresh berries optional
Instructions
-
In a blender, combine all the batter ingredients in the order they’re listed (milk, flour, eggs, egg yolk, salt, vanilla extract, granulated sugar (optional), and ground cinnamon (optional)). Blend until the mixture is completely smooth and free of any lumps.
-
Preheat your air fryer to 400℉ (200°C). Place the empty cake pan (refer to Note 1 if using a DIY foil pan) inside the air fryer basket and heat for 4 minutes to ensure it gets intensely hot. Carefully remove the hot pan using tongs. Generously grease the hot cake pan with cooking spray. Cut 2-1/2 tablespoons of butter into 3 equal pieces and place them evenly in the bottom of the cake pan. Carefully use tongs to lower the pan back into the air fryer basket. Cook for 1–2 minutes, or just until the butter is completely melted and slightly browned.
-
Remove the pan from the air fryer and immediately pour 1 cup of the prepared batter into the pan in a circular motion, swirling it to cover the bottom evenly. Quickly return the pan to the air fryer and cook at 400℉ (200°C) for 7–10 minutes. In my air fryer, 8 minutes is typically perfect for a beautifully puffed and golden Dutch Baby.
-
Using tongs, carefully remove the cake pan from the air fryer. Transfer the freshly cooked Dutch Baby to a serving plate. Repeat this process with the remaining 2 cups of batter, making two more individual Dutch Babies. You may need to quickly wipe out the pan between batches.
-
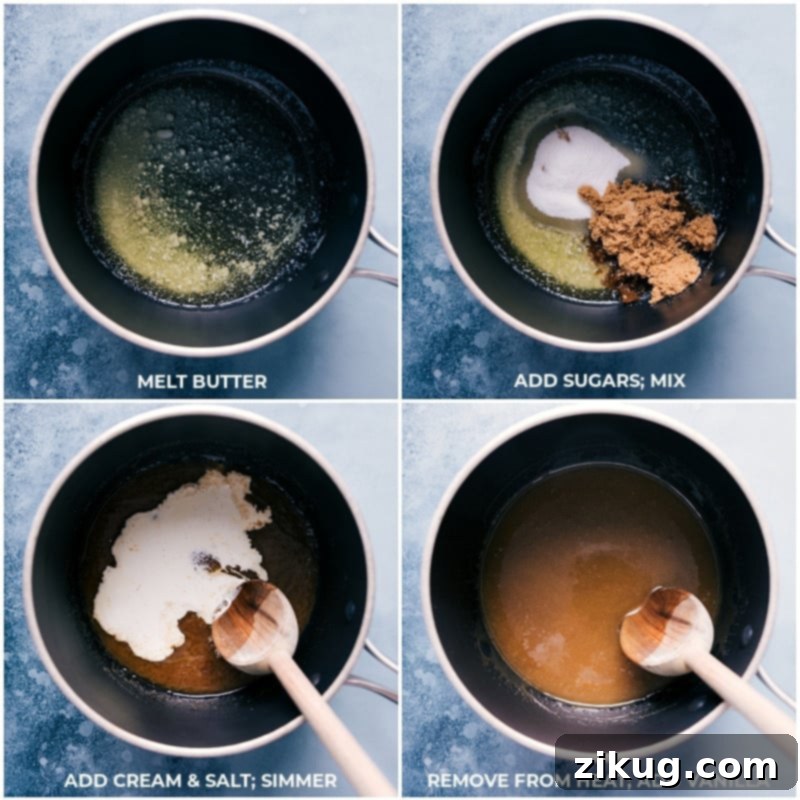
For the optional Vanilla Syrup: Melt 1/4 cup of butter in a medium pot over medium heat. Once melted, add in both the light brown sugar and granulated sugar. Stir continuously until the sugars are fully combined and dissolved. Pour in the heavy cream and reduce the heat to low. Allow the syrup to simmer gently, stirring occasionally, for 5 minutes until it thickens slightly. Remove the pot from the heat and stir in the vanilla extract and salt.
-
Serve your warm Air Fryer Dutch Babies immediately. Top each one generously with fresh berries and a drizzle of the homemade vanilla syrup (if using), or your favorite toppings as suggested above. Enjoy!
Recipe Notes
Storage Tips: The blender batter can be prepared in advance and stored in an airtight container in the refrigerator overnight. However, Dutch Babies are truly best enjoyed immediately after they are made, while they are still warm, puffy, and crispy. Leftovers tend to lose their signature texture.
Nutrition Information Disclaimer: The provided nutrition information is an approximation and will vary depending on the specific ingredients used, their brands, and especially the quantity of any optional toppings or syrup added. Please use it as a general guide.
Nutrition
Nutrition information is automatically calculated, so should only be used as an approximation.
Love this recipe? Leave a comment below!