
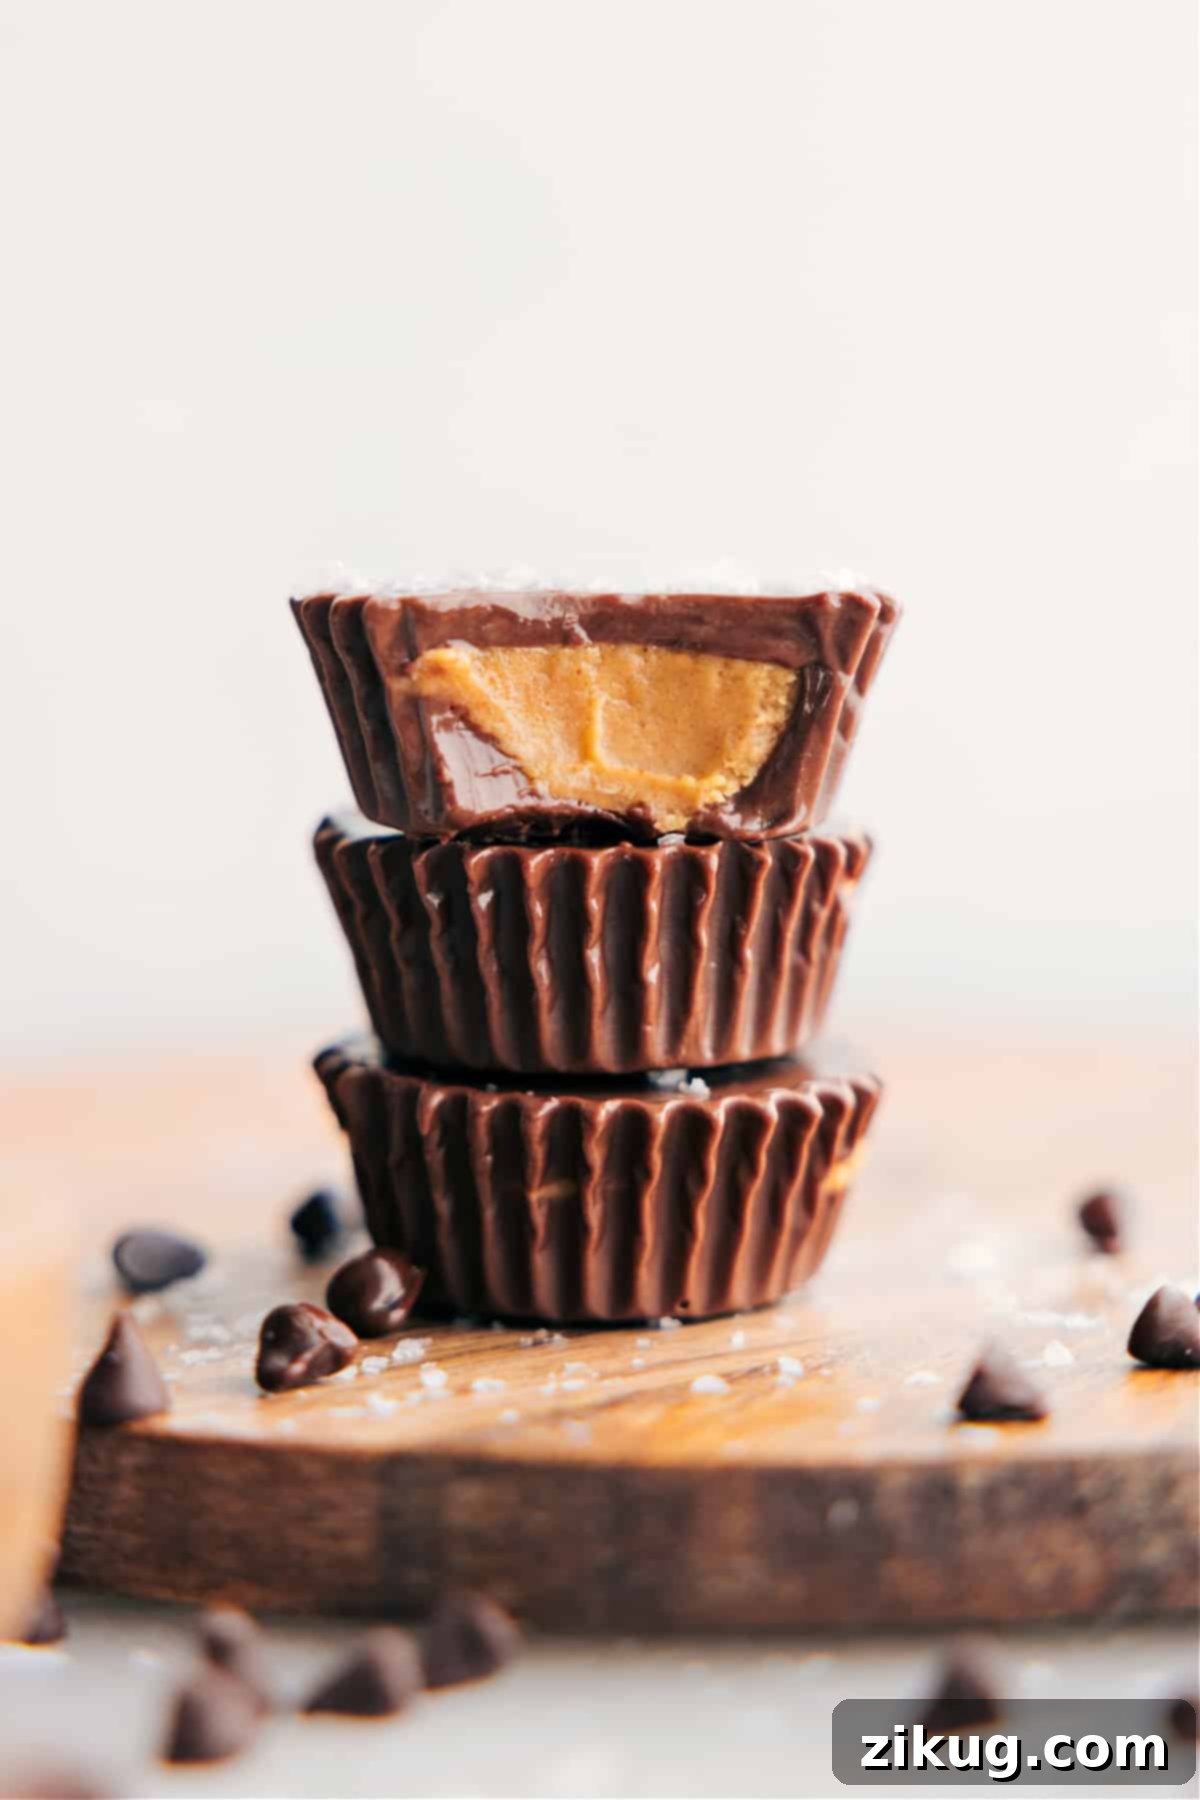
Indulge in the Best Homemade Peanut Butter Cups – A Recipe That Outshines Reese’s!
Prepare to be amazed and delighted! These **Homemade Peanut Butter Cups** aren’t just good; they are truly exceptional, designed to surpass even your most beloved store-bought varieties, including the iconic Reese’s. Imagine a lusciously creamy peanut butter filling, perfectly balanced with sweetness and a hint of salt, all enrobed in a generous, thick layer of rich, smooth chocolate. This recipe promises an irresistible treat that is both surprisingly simple to make and wonderfully customizable. Get ready to create a dessert that will undoubtedly become a new family favorite and your go-to whenever a chocolate peanut butter craving strikes!
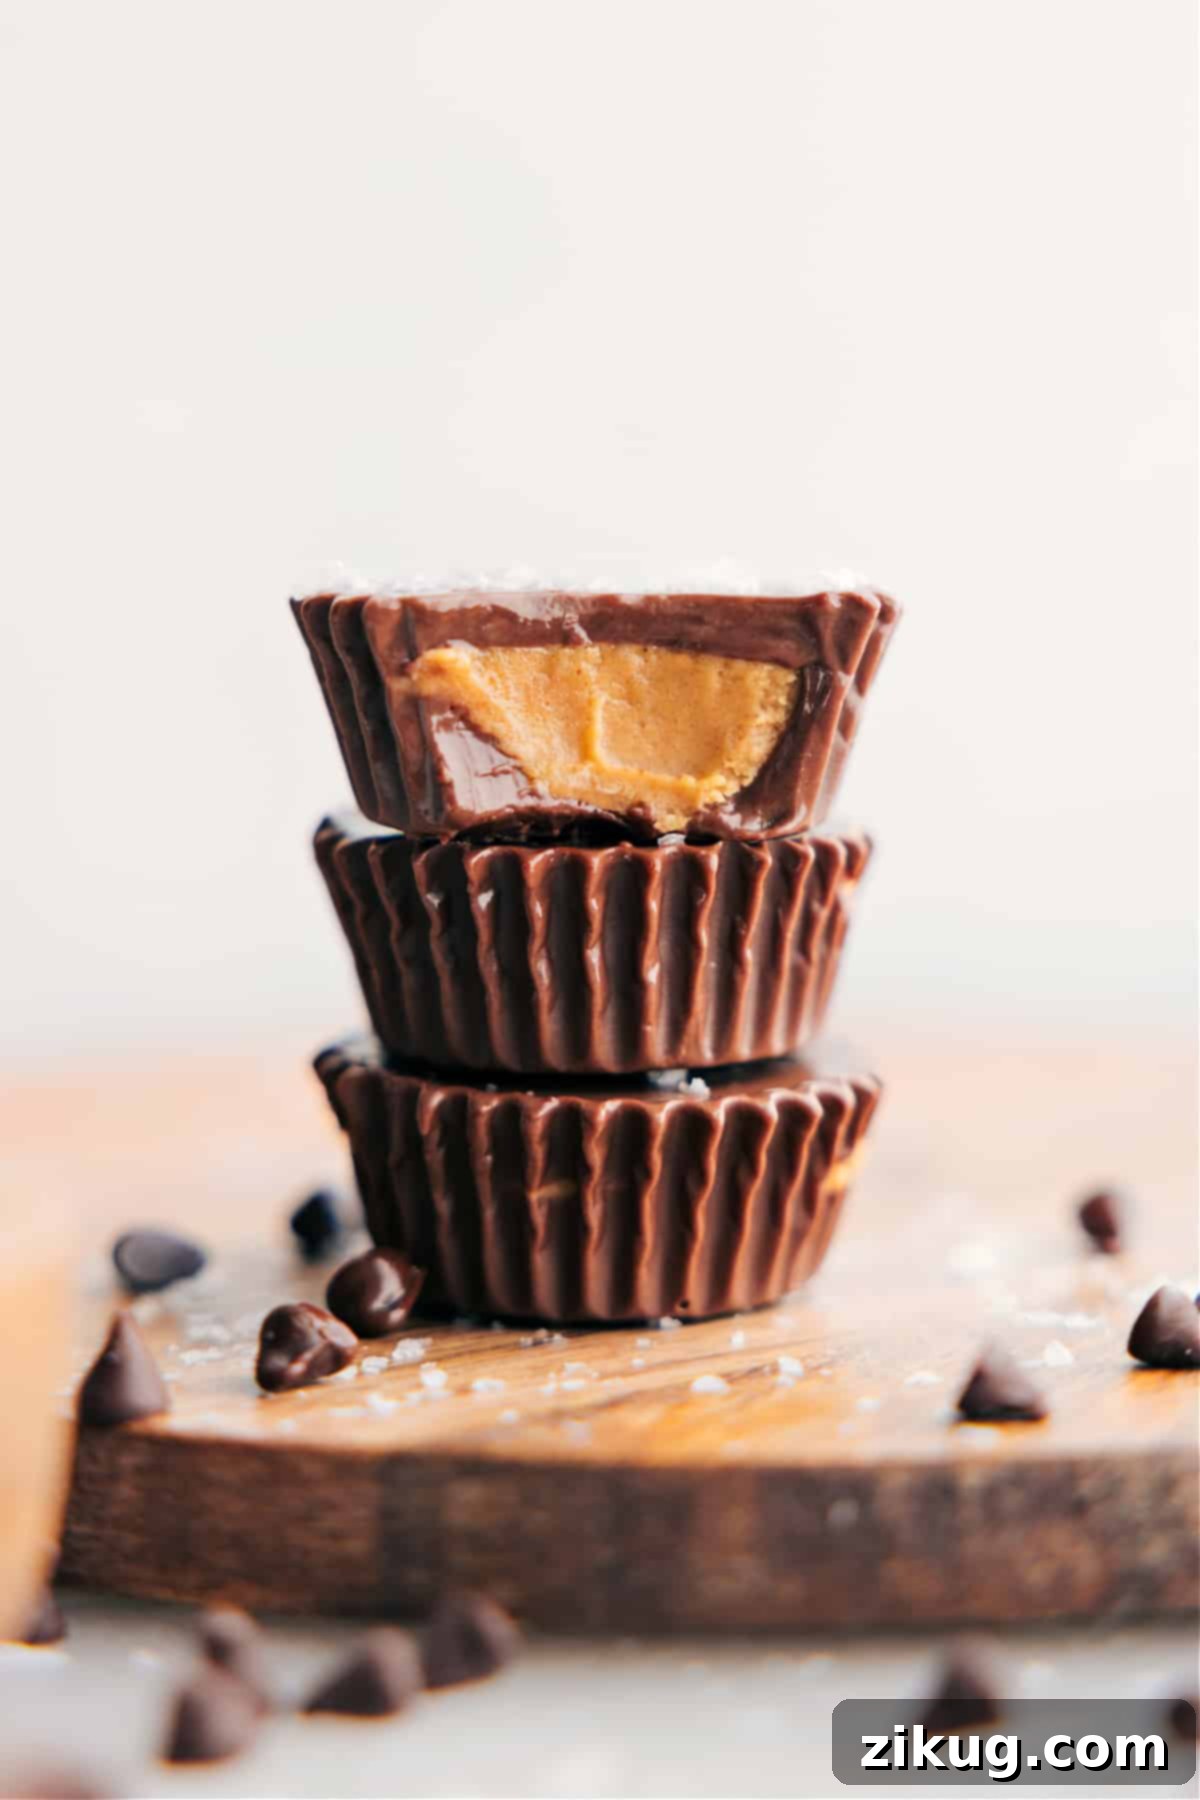

Why My Kids and I Can’t Get Enough of These Homemade Peanut Butter Cups!
As a lifelong and utterly devoted fan of the classic chocolate and peanut butter combination, I can confidently declare it my ultimate indulgence! My entire website, in fact, serves as a testament to this delicious obsession, featuring an array of chocolate peanut butter delights from my comforting chocolate peanut butter muffins to my unbelievably rich chocolate peanut butter pie. Every Halloween, my kids know the drill by heart: I patiently wait for them to finish their trick-or-treating rounds, then swiftly claim at least one of their precious Reese’s cups as my annual treat. However, after years of savoring both the nostalgia of store-bought versions and the unparalleled joy of homemade creations, I’m here to emphatically tell you that nothing, absolutely nothing, compares to crafting your own. Homemade peanut butter cups offer a superior taste, a more satisfying texture, and a freshness that simply cannot be replicated by mass-produced candies.
The true magic of making your own peanut butter cups lies in the complete and utter creative control you gain. You have the freedom to handpick high-quality chocolate, ensuring a rich, luxurious, and perfectly tempered coating. You can meticulously adjust the peanut butter-to-chocolate ratio to perfectly suit your personal preference – whether you crave a thick, wonderfully creamy peanut butter core or a more delicate, balanced bite where chocolate and peanut butter share the spotlight. Beyond the basics, the options for customization are truly endless: a delicate sprinkle of flaky sea salt for that ultimate salty-sweet contrast, or an elegant drizzle of white chocolate not only for added visual appeal but also for an extra layer of flavor complexity. These thoughtful, small touches elevate a simple, beloved candy to a gourmet-level confection.
My children are absolutely captivated by these homemade treats. Their enthusiasm is not just heartwarming, it’s hilarious; they even proudly declare to their friends, “Guess what? My mom makes Reese’s that are even better!” It’s moments like these – seeing their faces light up with pride and joy – that make all the effort worthwhile. This recipe isn’t merely about making candy; it’s about creating cherished family memories, indulging in a truly superior chocolate peanut butter experience, and enjoying the simple pleasure of a perfectly crafted treat, all made right in your own kitchen. Prepare to witness them disappear faster than you can say “peanut butter cup”!
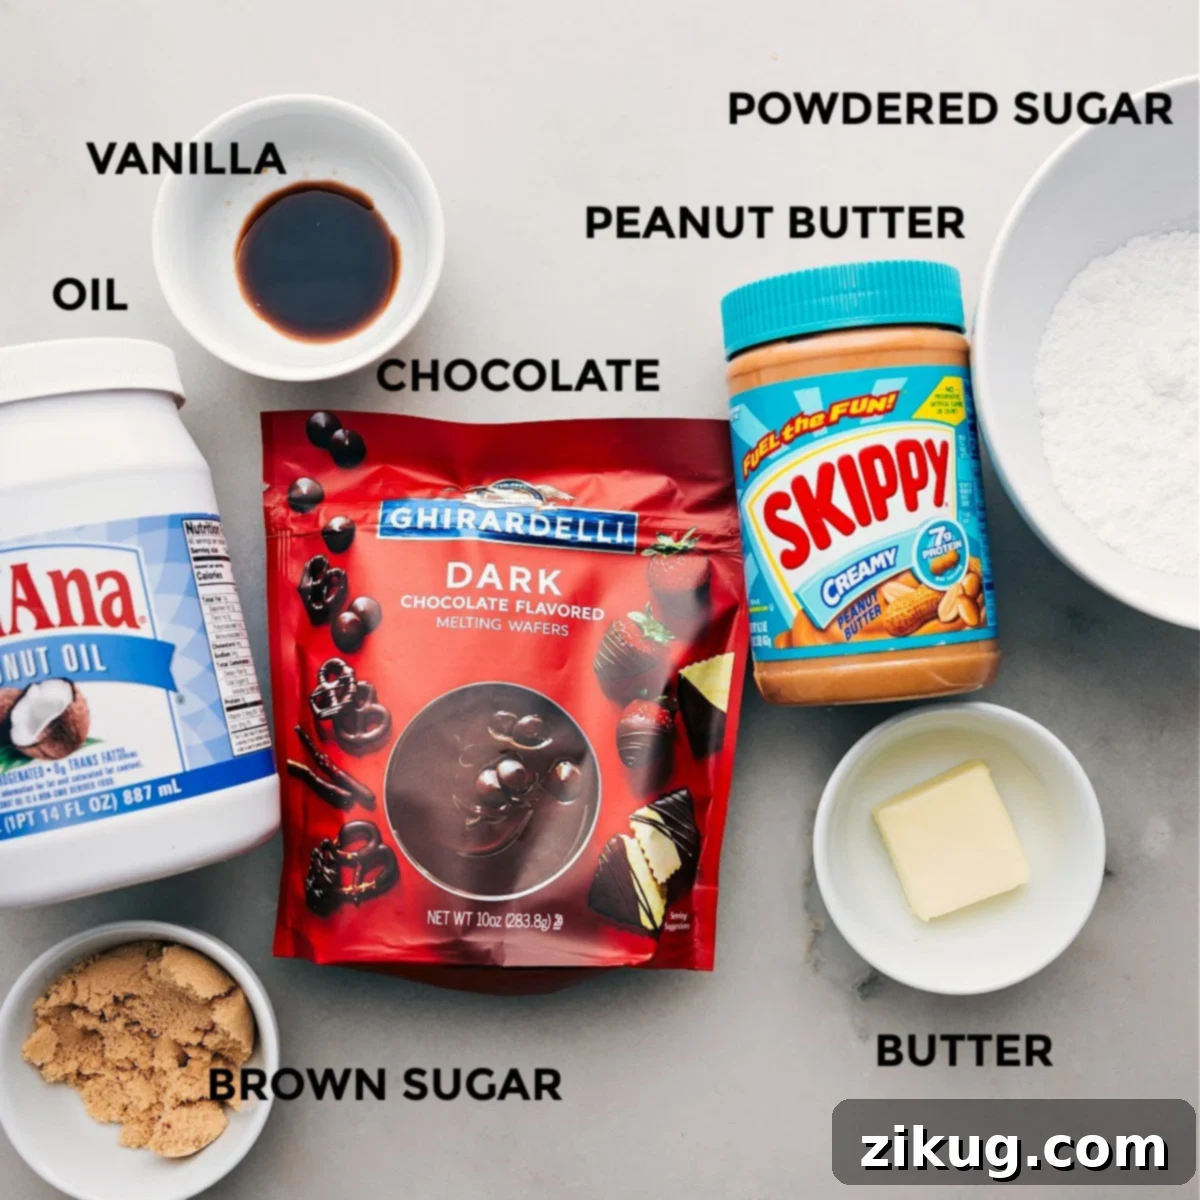
Key Ingredients for Crafting Your Perfect Homemade Peanut Butter Cups
Crafting the ultimate peanut butter cup begins with a careful selection of fresh, high-quality ingredients. Each component plays a pivotal role in achieving that irresistible balance of a creamy, rich filling and a satisfyingly snappy chocolate shell. Here’s a detailed breakdown of what you’ll need and why each ingredient is essential for a truly exceptional result:
- Creamy Peanut Butter: For a flawlessly smooth, melt-in-your-mouth filling, it’s best to opt for a creamy, processed peanut butter (brands like Skippy or Jif work wonderfully). These types of peanut butter provide a consistent texture and reliable flavor. If you choose to use natural peanut butter, be absolutely certain to stir it exceptionally well, mixing any separated oil back into the solids, to prevent an overly dry or excessively oily filling, which can affect the final texture of your cups.
- Unsalted Butter: Using unsalted butter is crucial because it grants you complete control over the salt content in your recipe. Beyond that, butter adds a delightful richness and contributes significantly to creating that desirable, fudgy texture in the peanut butter filling, preventing it from tasting or feeling too dry or crumbly.
- Light Brown Sugar: This ingredient is much more than just a sweetener. Light brown sugar contributes a subtle, warm molasses flavor that deepens the complexity of the filling, and importantly, it helps keep the peanut butter mixture moist, pliable, and incredibly tender. Always make sure to pack the brown sugar firmly into your measuring cup to ensure you get the exact amount needed for optimal flavor and texture.
- Salt: A small but absolutely crucial pinch of fine salt acts as a secret weapon in this recipe. It doesn’t merely add a savory note; it brilliantly enhances and balances the intense sweetness from both the brown sugar and the chocolate, making the distinct flavor of the peanut butter truly pop and creating that perfect salty-sweet dynamic. Do not skip this essential ingredient!
- Vanilla Extract: A splash of good-quality pure vanilla extract profoundly deepens the overall flavor profile of the peanut butter filling. It introduces a warm, aromatic note that beautifully complements both the rich peanut butter and the decadent chocolate, elevating the taste beyond basic sweetness to something truly special.
- Powdered Sugar: Also widely known as confectioners’ sugar, this finely milled sugar is the key to achieving a velvety smooth, lump-free texture in your peanut butter filling. Its fine consistency ensures a silky mouthfeel. If your powdered sugar tends to be lumpy from storage, a quick sift through a fine-mesh strainer before adding it to the mixture will guarantee a perfectly smooth and uniform result.
- Chocolate Melting Wafers: The quality of your chocolate makes an enormous difference in the finished product! We highly recommend using good-quality chocolate melting wafers (such as Ghirardelli, Wilton, or Guittard melting wafers). These are specifically engineered to melt smoothly, temper easily, and set with a beautiful glossy finish and a satisfying snap, providing the best possible chocolate coating for your homemade cups. While standard chocolate chips can be used in a pinch, wafers offer a vastly superior finish and taste.
- Coconut Oil: Just a small amount of virgin or refined coconut oil is added to the melting chocolate. Its purpose is twofold: it significantly helps the chocolate melt more smoothly, creating a thinner, more pourable consistency that’s easier to work with, and it contributes to a creamier, more appealing texture once the chocolate sets. It also helps to prevent the chocolate from becoming overly hard or brittle, giving your cups a pleasant bite.
Creative Variations to Elevate Your Peanut Butter Cups
Switch It Up: Explore Endless Customization Possibilities
While the classic homemade peanut butter cup is an undeniable masterpiece in its own right, don’t hesitate to unleash your inner chef and experiment with these exciting variations. They’ll help you create your very own signature treats, perfectly tailored to your taste buds:
- Use a Different Nut Butter: Why limit yourself to just peanuts? Almond butter offers a slightly sweeter, milder, and more sophisticated flavor profile, while rich cashew butter creates an incredibly decadent and buttery filling (for inspiration, check out this fantastic cashew butter recipe). For those with nut allergies or sensitivities, sunflower seed butter (often marketed as SunButter) is an excellent, safe, and equally delicious alternative, maintaining that satisfying nutty taste without the allergens. Just ensure your chosen nut butter has a creamy, well-stirred consistency.
- Change the Chocolate Coating: The type of chocolate you select can entirely transform the flavor experience. Try using rich dark chocolate (60% cocoa or higher) for a more intense, sophisticated, and slightly bitter bite that beautifully balances the sweetness of the peanut butter. Smooth milk chocolate provides that familiar, comforting, and classic sweetness that many adore, while creamy white chocolate offers a delightful, vanilla-infused contrast, reminiscent of these delightful peanut butter meltaways. You can even get creative by combining different chocolates for a visually stunning marbled effect or a two-tone cup.
- Add Flaky Sea Salt: For an absolutely irresistible salty-sweet combo that truly awakens the palate, generously sprinkle a tiny pinch of flaky sea salt (such as Maldon sea salt) on top of the chocolate layer just before it fully sets. The coarse texture and burst of savory salt crystals provide a wonderful, sophisticated contrast to the smooth, sweet chocolate and creamy peanut butter, making every single bite a memorable experience.
- Exciting Mix-ins for the Filling: Don’t be afraid to enhance your peanut butter filling with creative mix-ins. Stir in mini chocolate chips for an extra cocoa burst, finely chopped pretzels for a delightful salty crunch and texture, or even a dash of cinnamon or espresso powder to the peanut butter mixture for an unexpected and intriguing layer of flavor complexity.
- Garnish with Decorative Drizzles: Once your cups are completely set and firm, consider adding an extra touch of elegance. Drizzle them with a contrasting type of chocolate (e.g., white chocolate over milk chocolate cups or vice-versa) or a thin stripe of melted peanut butter for an attractive finish and an additional hint of flavor.
- Boost the Vanilla: If you’re a big fan of vanilla, consider adding an extra half teaspoon of vanilla extract to the peanut butter filling. It will intensify the aromatic notes and complement the chocolate even further.
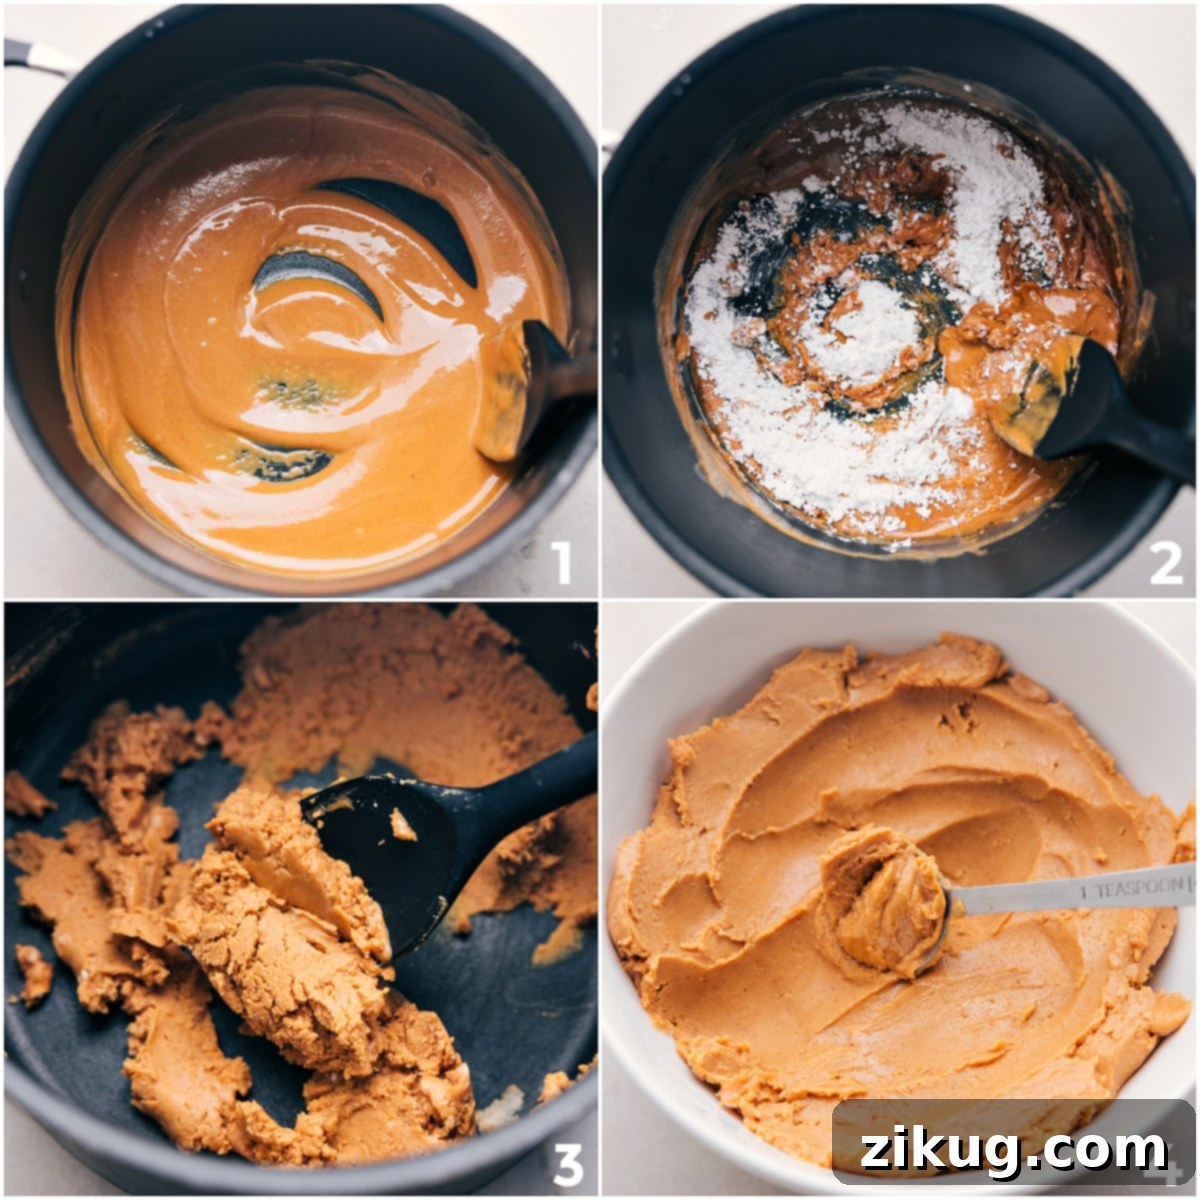
Step-by-Step Guide: How To Make The Best Homemade Peanut Butter Cups
Making these decadent and delightful peanut butter cups at home is a wonderfully straightforward process that yields incredibly rewarding results. Each step is designed to be simple and easy to follow, ensuring you create perfectly crafted peanut butter cups every single time. Let’s get started:
- 1. Prepare Your Muffin Tin for Assembly: Begin by lining a mini muffin tin (ideally one with 24 cavities) with paper cupcake liners. These liners are essential as they will make it incredibly easy to remove your finished peanut butter cups without any sticking, and they also provide a neat, professional presentation. Double-check that all cavities are lined, then set the prepared tin aside, ready for action.
- 2. Create the Creamy Peanut Butter Filling: In a small saucepan, combine your chosen creamy peanut butter, unsalted butter, light brown sugar, and that crucial pinch of salt. Place the pot over medium heat, stirring constantly with a spatula or a whisk. Continue to stir until the mixture is fully melted, beautifully smooth, and just begins to bubble gently around the edges. This gentle heating process helps to thoroughly combine all the ingredients and slightly cook the sugar, preventing a gritty texture. Immediately remove the pot from the heat and stir in the vanilla extract until it’s well incorporated. Next, gradually add the powdered sugar, stirring very vigorously until it is completely incorporated and the entire filling mixture becomes smooth and uniform. If you notice any small lumps from the powdered sugar, use your spatula to press them out against the side of the pot until the filling is perfectly silky. Transfer this warm, delicious filling to a separate, clean bowl and place it into the refrigerator to chill thoroughly. Chilling is an absolutely essential step as it makes the filling firm enough to handle, scoop, and shape easily without being sticky or melting.
- 3. Prepare the First Chocolate Layer: Take half of your chocolate melting wafers and half of the coconut oil. Place these together in a microwave-safe bowl. Microwave on high power in short, controlled intervals, typically 30-second bursts, stirring thoroughly with a spoon or spatula after each interval. Continue this process until the chocolate is completely melted and beautifully smooth, with no lingering lumps. It’s crucial to be careful not to overheat the chocolate, as this can cause it to seize (become thick and clumpy) or even burn, spoiling its texture and taste.
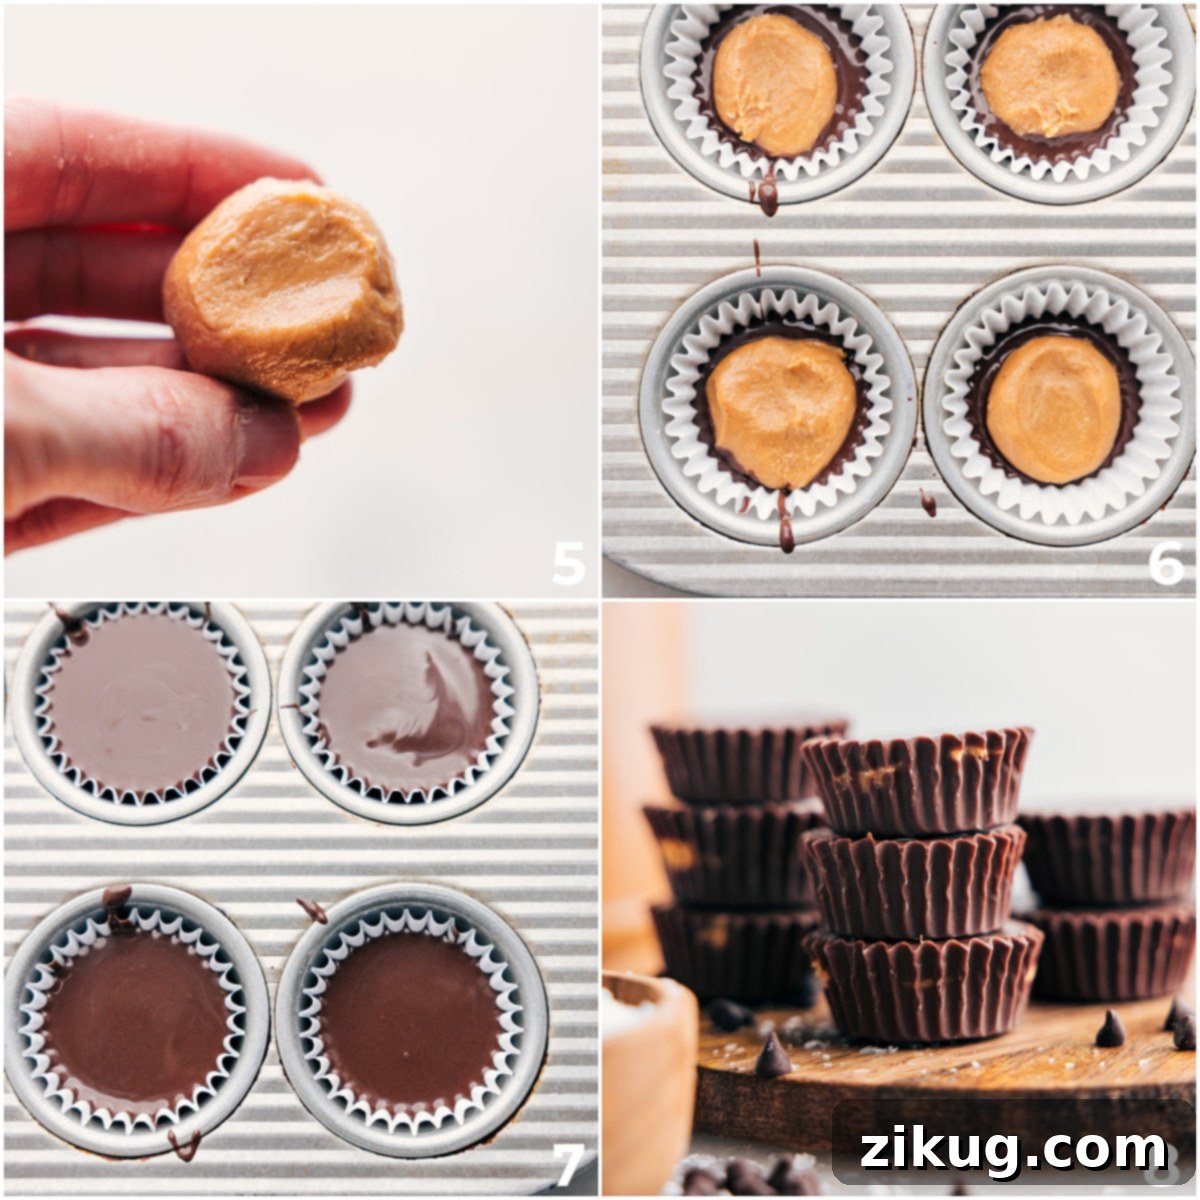
- 4. Expertly Assemble Your Peanut Butter Cups: Now for the most enjoyable part – assembling your homemade masterpieces! Spoon approximately 1 teaspoon of the freshly melted chocolate into the bottom of each prepared paper liner in your muffin tin, just enough to form a thin, even base layer. Gently tap the muffin pan on your counter a few times; this simple but effective action helps the chocolate spread evenly across the bottom and releases any tiny, trapped air bubbles, ensuring a smooth, flawless finish. Next, retrieve your thoroughly chilled and firm peanut butter filling. Scoop about 1 teaspoon of the filling, roll it into a neat, uniform ball between your palms, and then gently flatten it into a disc. This disc should be slightly smaller in diameter than the muffin cup cavity. Carefully place each peanut butter disc into the exact center of each liner, directly on top of the chocolate base. Repeat this process until all the filling has been used. Finally, pour approximately 1.5 teaspoons of the remaining melted chocolate over each peanut butter disc, ensuring it’s completely covered and sealed. Tap the pan gently once more to settle the chocolate and create a smooth, appealing top layer. If you find yourself running low on melted chocolate during this step, simply melt the remaining chocolate wafers and coconut oil using the same microwave method described in step 3.
- 5. Chill Until Set & Indulge: Once all your cups are meticulously assembled, carefully place the muffin tin back into the refrigerator. Allow the homemade peanut butter cups to chill for at least 30 minutes, or longer if needed, until the chocolate is completely set and firm to the touch. This chilling process ensures the chocolate has a nice snap and the peanut butter filling holds its shape. Once solidified, carefully remove the paper liners from the cups. Your exquisite, perfectly crafted homemade peanut butter cups are now ready to be savored! Enjoy them immediately or store them for later.
Expert Recipe Tips for Flawless Homemade Peanut Butter Cups Every Time
Achieving bakery-quality peanut butter cups in your own kitchen is much easier than you might think, especially when you follow these expert insider tips. Paying close attention to these small details will ensure your homemade treats turn out perfectly, looking and tasting incredible every single time:
- Thoroughly Chill the Filling: This is arguably the most crucial step and is non-negotiable for success! Ensuring your peanut butter mixture is fully and completely chilled (ideally for at least 30 minutes, or even longer if your kitchen is warm) makes it firm, much less sticky, and significantly easier to scoop, roll, and shape into neat, uniform discs. A warm or overly soft filling will be incredibly sticky, challenging to work with, and will likely result in messy, misshapen cups. Patience here pays off!
- Tap the Pan for Perfection: After you’ve spooned in each layer of chocolate (both the base and the top layer), gently but firmly tap the muffin tin against your counter a few times. This simple yet highly effective action serves multiple purposes: it helps the melted chocolate spread evenly across the bottom and top surfaces, creating a smooth, professional-looking finish. Furthermore, it helps to release any tiny air bubbles that might be trapped within the chocolate, preventing unsightly imperfections and ensuring a dense, flawless coating.
- Invest in Quality Chocolate: The overall taste and texture of your finished peanut butter cups will largely depend on the quality of the chocolate you use. Opt for good-quality chocolate melting wafers or a premium chocolate bar that you genuinely enjoy eating on its own. High-quality chocolate melts more smoothly, sets beautifully with a satisfying snap, and delivers a superior, richer, and more complex flavor that truly elevates the entire treat. Avoid cheap compound chocolates as they often lack flavor and texture.
- Avoid Overheating the Chocolate: When melting chocolate, patience and a gentle approach are paramount. Always heat the chocolate in short, controlled bursts (e.g., 30-second intervals) in the microwave. Stir thoroughly after *each* interval, even if the chocolate doesn’t appear fully melted. Chocolate retains heat, and overcooking it can cause it to “seize” (meaning it becomes thick, grainy, and clumpy) or even burn, which imparts a bitter, unpleasant taste. Low and slow heating is always the safest and most effective method.
- Aim for Even Layers: For the iconic peanut butter cup look and a perfectly balanced flavor in every bite, strive for relatively even layers of chocolate and peanut butter. Don’t be tempted to overload the peanut butter filling; ensure you leave enough space for a substantial and appealing chocolate topping layer. Consistent layering ensures a harmonious taste and texture.
- Experiment with Toppings: While the basic cup is fantastic, don’t stop there! Beyond a sprinkle of flaky sea salt, consider other creative toppings. A small scattering of mini chocolate chips, finely chopped nuts (like peanuts, almonds, or walnuts), or even a delicate dusting of cocoa powder or powdered sugar before the chocolate fully sets can add extra texture, visual appeal, and an additional layer of flavor.
Storage Solutions for Your Homemade Peanut Butter Cups
Proper storage is key to ensuring your delicious homemade peanut butter cups remain fresh, delightful, and perfectly textured for as long as possible. Here’s how to best preserve your sweet creations:
Once your peanut butter cups are fully set, store them in an airtight container. Keep this container in the **refrigerator** for optimal freshness. They will maintain their quality and deliciousness for up to 2-3 weeks. The cool temperature helps maintain the chocolate’s firm, snappy texture and prevents the creamy peanut butter filling from becoming too soft or oily. For the best flavor and texture experience, many find it beneficial to let them sit at room temperature for about 5-10 minutes before indulging, allowing the chocolate to soften ever so slightly and the flavors to fully bloom.
For an even longer shelf life, you have the excellent option to **freeze them**. To prevent them from sticking together, place the peanut butter cups in an airtight freezer-safe container, layering them neatly between sheets of parchment paper. They can be safely frozen for up to 3 months without compromising flavor or texture. When you’re ready to enjoy a frozen treat, simply grab one from the freezer and allow it to thaw slightly in the refrigerator for a few minutes, or even at room temperature for a quick snack. Interestingly, many people absolutely love enjoying these homemade peanut butter cups straight from the freezer for a harder, chewier, and uniquely satisfying texture – a fantastic option on a warm day!
These homemade peanut butter cups are truly more than just a simple dessert; they are an experience in pure indulgence. They embody the perfect blend of sweet and salty, the ideal contrast between creamy filling and firm chocolate, making every bite a moment of blissful satisfaction. Whether you’re making them for a special celebration, assembling a thoughtful homemade gift, or simply treating yourself to satisfy a deep-seated craving, this recipe is guaranteed to impress everyone who tastes them. Don’t be surprised if they disappear from your countertop faster than you can make them!
Craving More Peanut Butter Delights? Explore These Related Recipes:
Desserts
Peanut Butter Rice Krispie Treats
Pies
Peanut Butter Pie
Desserts
Peanut Butter Cup Brownies
Print Recipe
Homemade Peanut Butter Cups Recipe
Chelsea Lords
20 minutes
30 minutes
50 minutes
20 peanut butter cups
Recipe Video Guide
Watch a step-by-step video guide on how to make these irresistible homemade peanut butter cups:
Equipment You’ll Need
-
Mini muffin pan
-
Mini cupcake liners
-
Small pot or saucepan
-
Spatula or whisk
-
Microwave-safe bowl
Ingredients for Homemade Peanut Butter Cups
Below are the ingredients, precisely measured for approximately 20 delightful servings. You can easily adjust these quantities proportionally if you wish to scale this recipe up or down.
- 1/2 cup creamy peanut butter (like Skippy or Jif)
- 2 tablespoons unsalted butter
- 2 tablespoons light brown sugar (firmly packed)
- 1/8 teaspoon salt
- 1/2 teaspoon vanilla extract
- 1/2 cup powdered sugar (sifted if lumpy for best results)
- 2 cups chocolate melting wafers (divided for melting stages)
- 1 teaspoon coconut oil (divided for melting stages)
Detailed Instructions for Homemade Peanut Butter Cups:
-
1. Prepare Muffin Tin: Line a mini muffin pan (24 cavities) with paper liners. This preparation is key for easy removal of your finished peanut butter cups and for a clean presentation. Set the prepared pan aside, ready for the next steps.
-
2. Make Peanut Butter Filling: In a small saucepan, combine the creamy peanut butter, unsalted butter, light brown sugar, and the pinch of salt. Place the pot over medium heat, stirring continuously with a spatula or whisk. Continue stirring until the mixture is fully melted, smooth, and just begins to bubble gently around the edges. This gentle heat helps to combine the ingredients thoroughly and ensures a smooth consistency. Immediately remove the pot from the heat and stir in the vanilla extract until it’s well incorporated. Next, gradually add the powdered sugar, stirring very vigorously until it is completely incorporated and the entire filling mixture becomes smooth and uniform. If any small lumps from the powdered sugar remain, use your spatula to press them out against the side of the pot until the filling is perfectly silky. Transfer this warm, aromatic filling to a separate, clean bowl and place it into the refrigerator to chill thoroughly for at least 30 minutes, or until it becomes firm enough to handle easily without being overly sticky.
-
3. Melt First Chocolate Layer: In a microwave-safe bowl, combine exactly half of the chocolate melting wafers with half of the coconut oil. Microwave on high power in short, controlled intervals, typically 30-second bursts, ensuring you stir thoroughly with a spoon or spatula after each interval. Continue this process until the chocolate is completely melted and beautifully smooth, with no lingering lumps or un-melted bits. Exercise caution not to overheat the chocolate, as this can cause it to “seize” (become thick and clumpy) or even burn, which will negatively impact its texture and flavor.
-
4. Expertly Assemble the Cups: Now comes the satisfying part – assembling your homemade masterpieces! Spoon approximately 1 teaspoon of the freshly melted chocolate into the bottom of each prepared paper liner in your muffin tin, using just enough to form a thin, even base layer. Gently tap the muffin pan on your counter a few times; this simple yet highly effective action helps the chocolate spread evenly across the bottom and releases any tiny, trapped air bubbles, ensuring a smooth, flawless finish. Next, retrieve your thoroughly chilled and firm peanut butter filling. Scoop about 1 teaspoon of the filling, roll it into a neat, uniform ball between your palms, and then gently flatten it into a disc. This disc should be slightly smaller in diameter than the muffin cup cavity to allow for the chocolate border. Carefully place each peanut butter disc into the exact center of each liner, directly on top of the chocolate base. Repeat this process until all the filling has been expertly placed. Finally, pour approximately 1.5 teaspoons of the remaining melted chocolate over each peanut butter disc, ensuring it’s completely covered and sealed. Tap the pan gently once more to settle the chocolate and create a smooth, appealing top layer. If you find yourself running low on melted chocolate during this step, simply melt the remaining chocolate wafers and coconut oil using the same method described in step 3.
-
5. Chill Until Set & Indulge: Once all your cups are meticulously assembled and beautifully layered, carefully place the muffin tin back into the refrigerator. Allow the homemade peanut butter cups to chill for at least 30 minutes, or longer if needed, until the chocolate is firm and fully set to the touch. This chilling process ensures the chocolate has a nice, satisfying snap and the peanut butter filling holds its shape perfectly. Once solidified, carefully remove the paper liners from the cups. Your exquisite, perfectly crafted homemade peanut butter cups are now ready to be savored! Enjoy them immediately, or store them as directed for later enjoyment.
Recipe Notes & Storage Advice:
For an even longer shelf life, you have the excellent option to **freeze them**. To prevent them from sticking together during freezing, place the peanut butter cups in an airtight freezer-safe container, carefully layering them neatly between sheets of parchment paper. They will keep exceptionally well in the freezer for up to 3 months without any significant compromise to their flavor or texture. When you’re ready to enjoy a frozen treat, simply grab one from the freezer and allow it to thaw slightly in the refrigerator for a few minutes, or even at room temperature for a quick snack. Interestingly, many people absolutely love enjoying these homemade peanut butter cups straight from the freezer for a firmer, chewier, and uniquely satisfying texture – a fantastic and refreshing option on a warm day or when you crave a more substantial bite!
Nutrition Information (Approximate Values)
Calories: 153kcal |
Carbohydrates: 14.2g |
Protein: 2.4g |
Fat: 10.1g |
Cholesterol: 6.4mg |
Sodium: 57.8mg |
Fiber: 0.4g |
Sugar: 13.4g
Please note: Nutrition information provided is automatically calculated and should be considered an approximation. Actual values may vary based on specific brands of ingredients used, precise measurements, and preparation methods.
Loved this recipe? Share your thoughts below!