
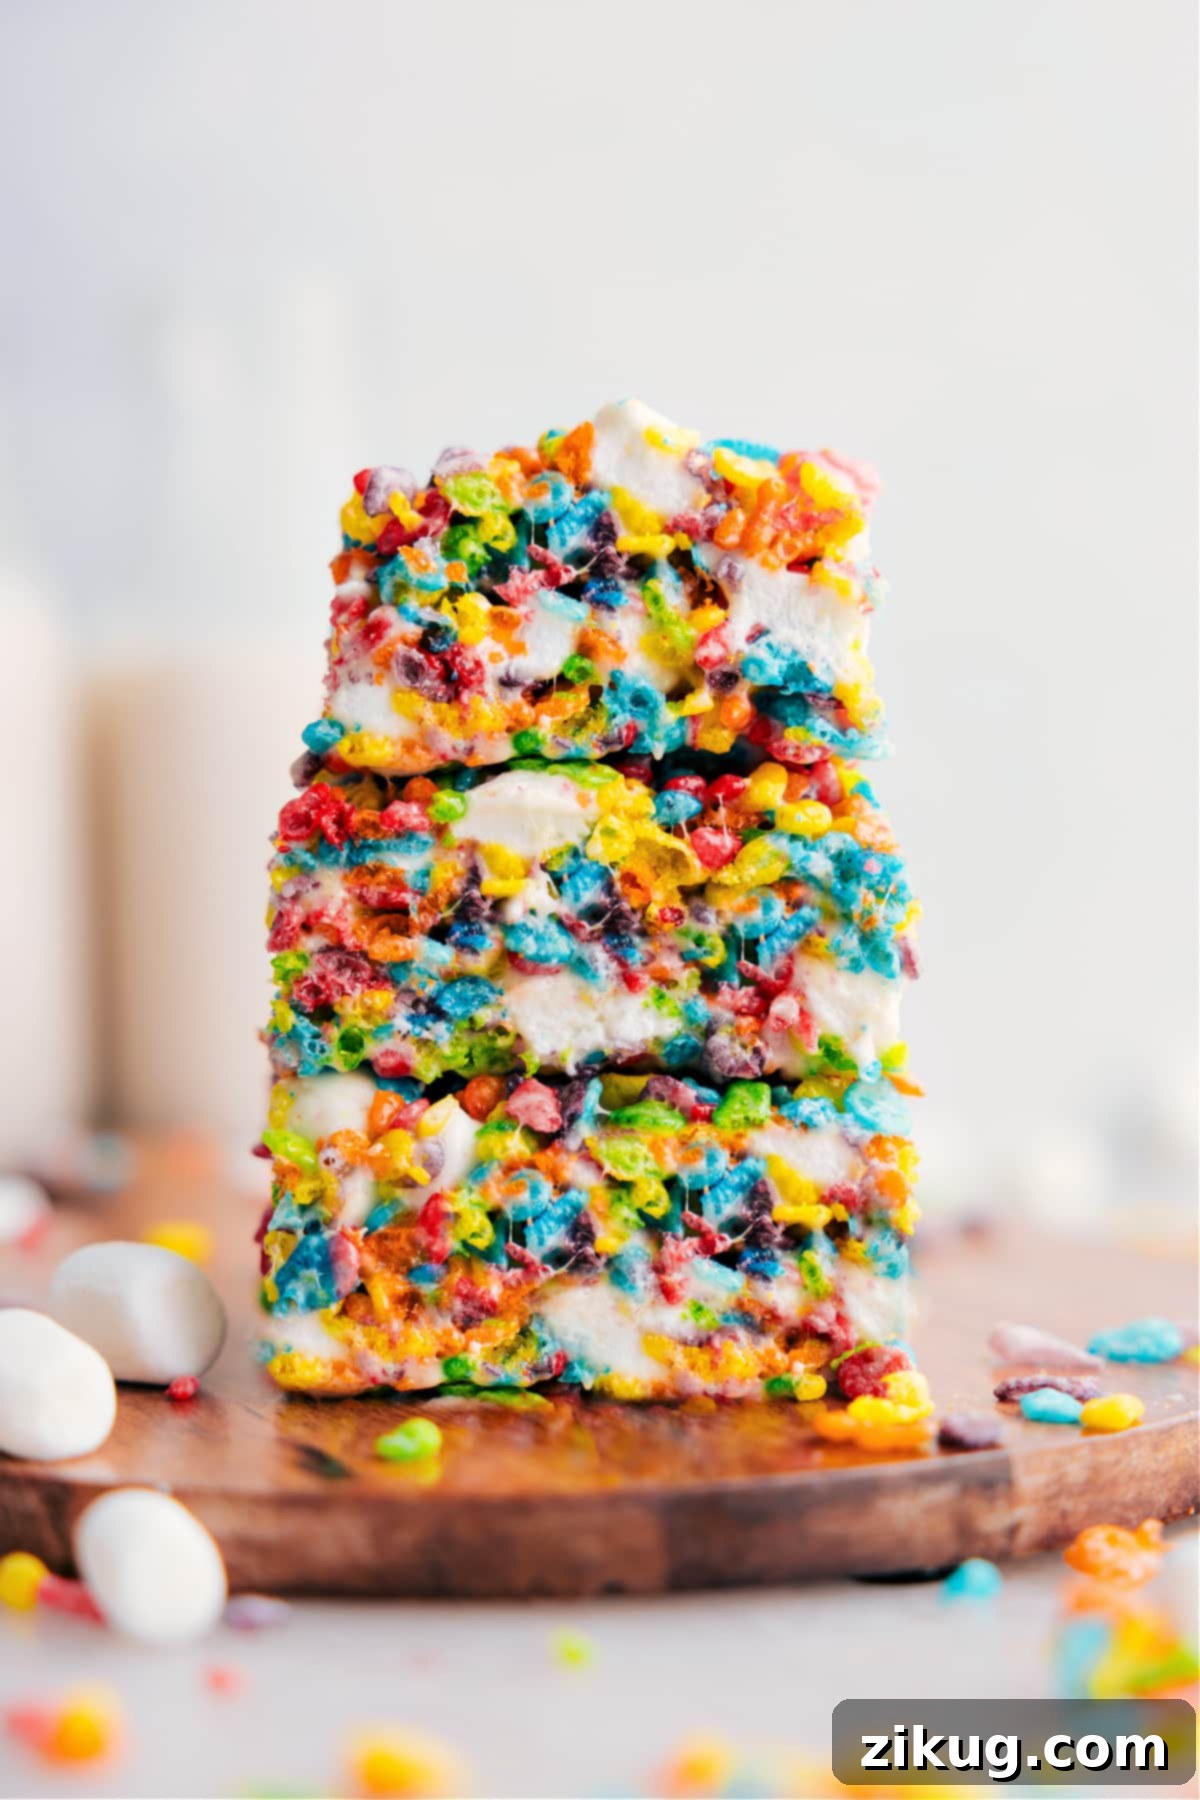
Fruity Pebble Rice Krispies Treats are an explosion of color and flavor, a nostalgic no-bake dessert that’s incredibly simple to make. Requiring just six basic ingredients and under 10 minutes of active prep time, these vibrant treats are guaranteed to be a hit at any gathering, from birthday parties to casual potlucks, or simply as a delightful snack for the family.
If you find yourself with extra Fruity Pebbles cereal, don’t let them go to waste! You can also whip up this equally delightful Fruity Pebble Crunch Candy for another burst of fruity goodness.
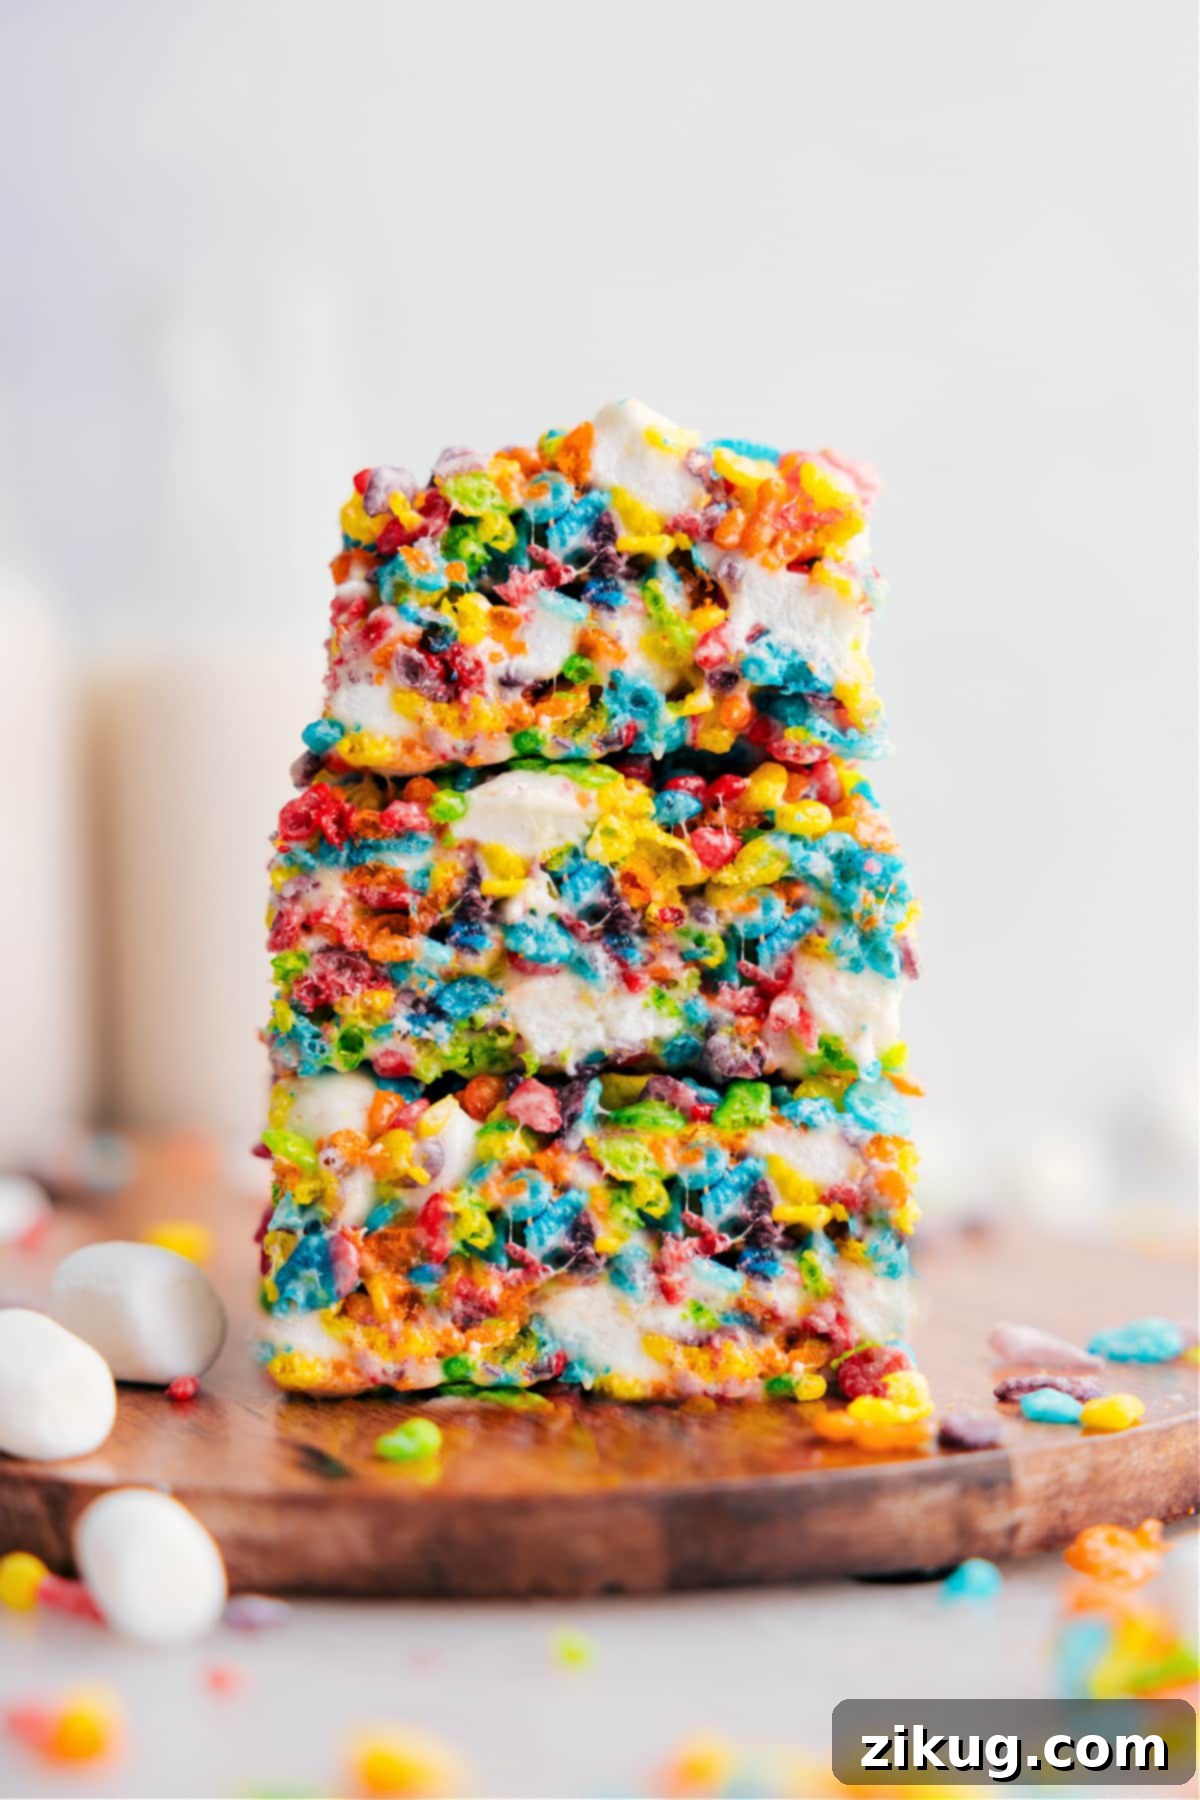
The Ultimate Guide to Fruity Pebbles Rice Krispies Treats
Few desserts evoke the same sense of playful joy and nostalgia as classic Rice Krispies Treats. But imagine taking that beloved, chewy foundation and infusing it with a kaleidoscope of color and an irresistible fruity burst! That’s exactly what you get with these incredible Fruity Pebbles Rice Krispies Treats. While my family already adores traditional variations like Chocolate Rice Krispie Treats and festive Peppermint Rice Krispie Treats, the Fruity Pebbles version consistently ranks as their absolute favorite. The vibrant hues alone make them feel extra special and fun, instantly brightening any table.
This recipe builds upon my tried-and-true original Rice Krispie Treat formula, a recipe that has been cherished by countless readers for years due to its perfect balance of chewiness and sweetness. By simply swapping out the plain cereal for a delightful blend that includes Fruity Pebbles, we transform a classic into an extraordinary, visually stunning dessert. The result is a treat that’s just as quick and effortless to prepare – truly a no-bake wonder that comes together in less than 10 minutes of active time. You’ll love the vibrant, fruity twist that makes these treats an instant crowd-pleaser for all ages.
Why These Fruity Pebbles Treats Are A Must-Try
Beyond their dazzling appearance, these Fruity Pebbles Rice Krispies Treats offer several compelling reasons to make them your next go-to dessert:
- Unforgettable Flavor: The distinct, sweet, and tangy fruitiness of Fruity Pebbles cereal perfectly complements the buttery, gooey marshmallow base, creating a taste experience that’s unique and utterly delicious.
- Visually Stunning: Their vibrant, rainbow-like colors make them incredibly appealing, especially for parties, school events, or any occasion where you want to impress with minimal effort. They truly stand out!
- Effortlessly Easy: With no baking required and minimal steps, this recipe is perfect for beginner bakers, kids, or anyone looking for a quick dessert solution. You’ll be amazed at how fast they come together.
- Crowd-Pleaser Guaranteed: From children to adults, almost everyone falls in love with the playful charm and delicious taste of these treats. They disappear quickly wherever they are served!
- Perfectly Chewy Texture: Following our tips ensures your treats are perfectly soft and chewy, never hard or crumbly, offering that ideal marshmallow stretch with every bite.
Simple Ingredients for Irresistible Treats
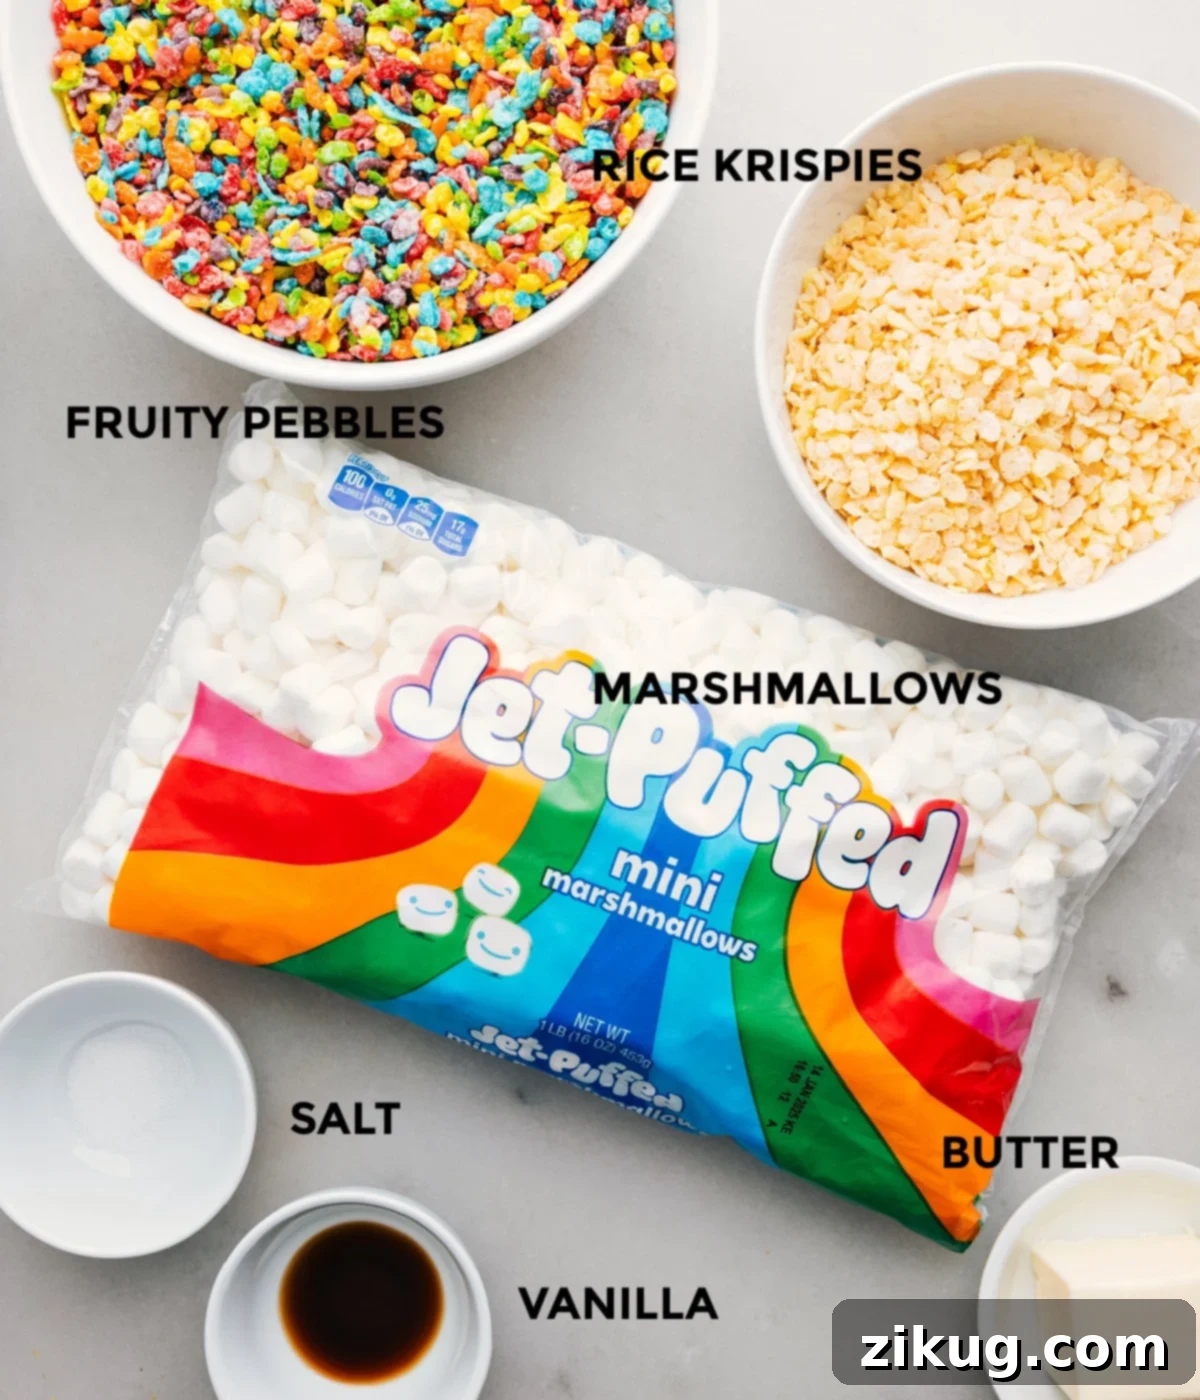
Creating these magical Fruity Pebbles Rice Krispies Treats requires just a handful of easily accessible ingredients. Each plays a crucial role in achieving the perfect balance of flavor, texture, and visual appeal:
- Unsalted Butter: The foundation of our gooey base. Using unsalted butter allows you to precisely control the overall saltiness of your treats. For the best flavor, opt for a good quality butter, as its taste truly shines through.
- Miniature Marshmallows: These are the heart of the “gooey” factor! Always reach for fresh, soft miniature marshmallows. Fresher marshmallows melt more smoothly and consistently, ensuring your treats remain wonderfully soft and chewy, not tough or hard.
- Salt: A small but mighty ingredient. Just a pinch of salt is essential to balance the sweetness from the marshmallows and cereal, enhancing all the flavors without making the treats taste salty. Don’t be tempted to skip it!
- Vanilla Extract: Real vanilla extract elevates the flavor profile, adding a warm, aromatic depth that complements the fruity notes of the cereal. Artificial vanilla won’t give you the same rich taste.
- Fruity Pebbles Cereal: The star of the show! Fruity Pebbles provide the signature vibrant colors, a delightful fruity crunch, and a wonderful sweetness that sets these treats apart.
- Rice Krispies Cereal (Optional, but Recommended): I like to include a small amount of plain Rice Krispies cereal. This addition helps to subtly balance the intense sweetness of the Fruity Pebbles, resulting in a treat that’s enjoyable without being overwhelmingly sugary. However, if you prefer an even sweeter treat and a full Fruity Pebbles experience, you can absolutely use all Fruity Pebbles cereal.
Quick Tip: Avoid Stickiness!
When it comes to spreading the warm, sticky mixture into your pan, preparation is key to a mess-free experience. Lightly spray your fingertips with nonstick baking spray or cooking oil. This simple trick prevents the mixture from sticking to your hands, allowing you to press it into an even layer with ease. Alternatively, you can use the empty butter wrapper (butter-side down) to gently press the mixture, which also helps prevent sticking and adds a bit of extra butter flavor!
Step-by-Step: Crafting Your Fruity Pebbles Rice Krispies Treats
Making these colorful treats is incredibly straightforward and takes very little time. Follow these simple steps for perfect results every time:
- Prepare Your Pan: Begin by lightly spraying a 9×9-inch baking pan with cooking spray. Then, line the pan with parchment paper, leaving a slight overhang on two sides. This overhang will act as handles, making it incredibly easy to lift the entire batch of treats out once they’ve set. A sturdy 9×9-inch Cake Pan works perfectly.
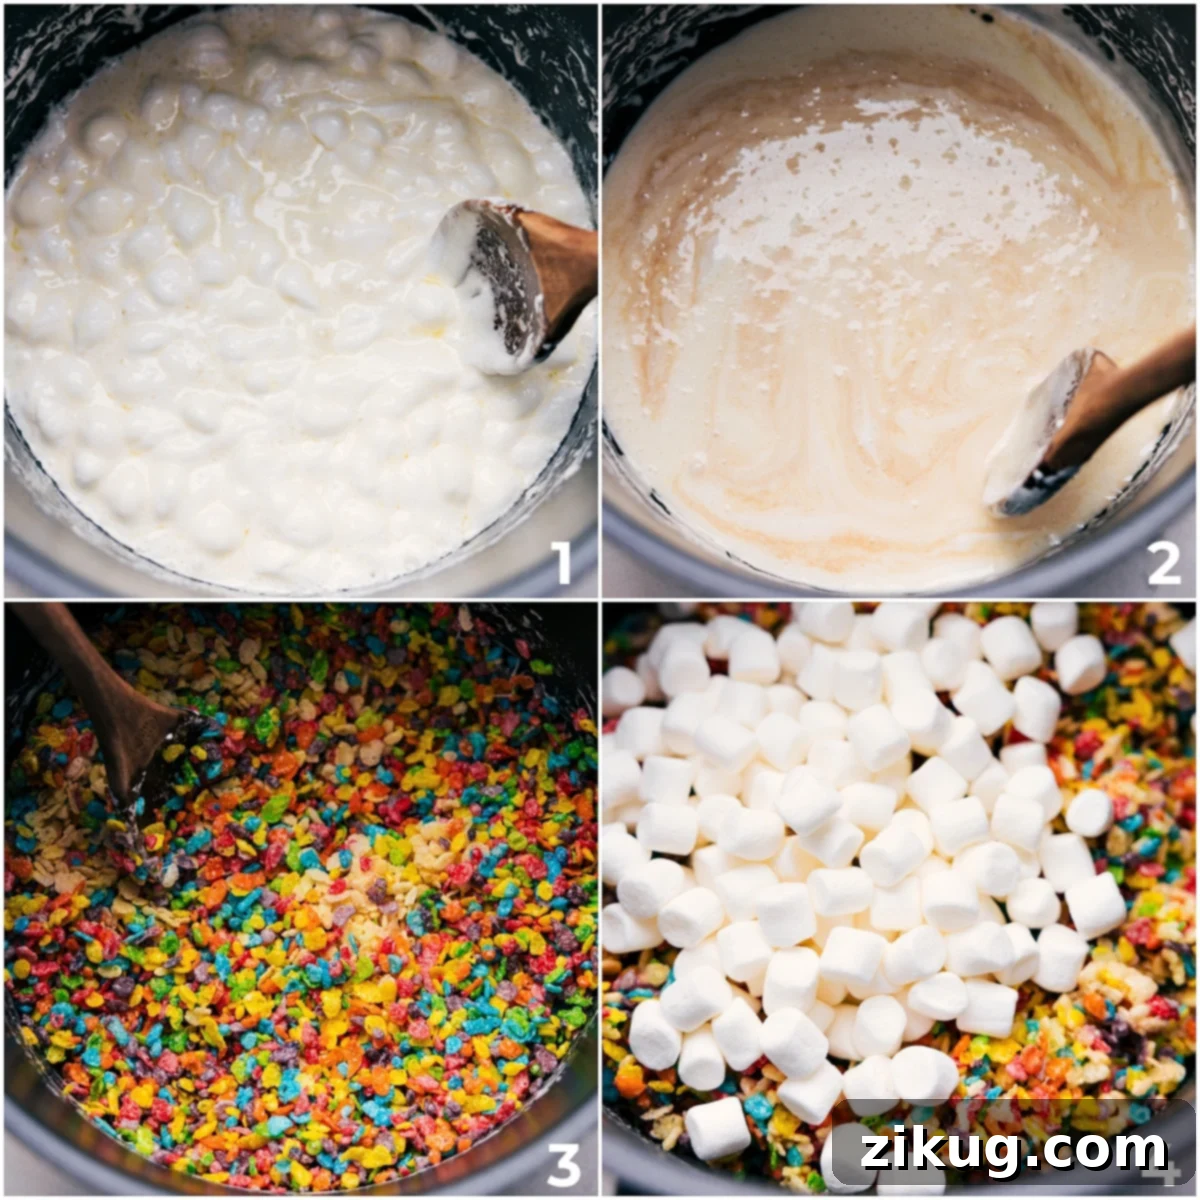
- Melt the Marshmallow Base: In a large, nonstick pot, melt the unsalted butter over very low heat. Once the butter has completely melted, add the majority of your miniature marshmallows (reserving about 2.5 cups for later). Continue stirring constantly over low heat until the marshmallows are fully melted and form a smooth, gooey mixture. It’s crucial to use low heat to prevent the marshmallows from becoming hard or brittle.
- Infuse with Flavor: Once the marshmallows are melted, immediately remove the pot from the heat. Stir in the salt and real vanilla extract until they are thoroughly combined into the marshmallow mixture.
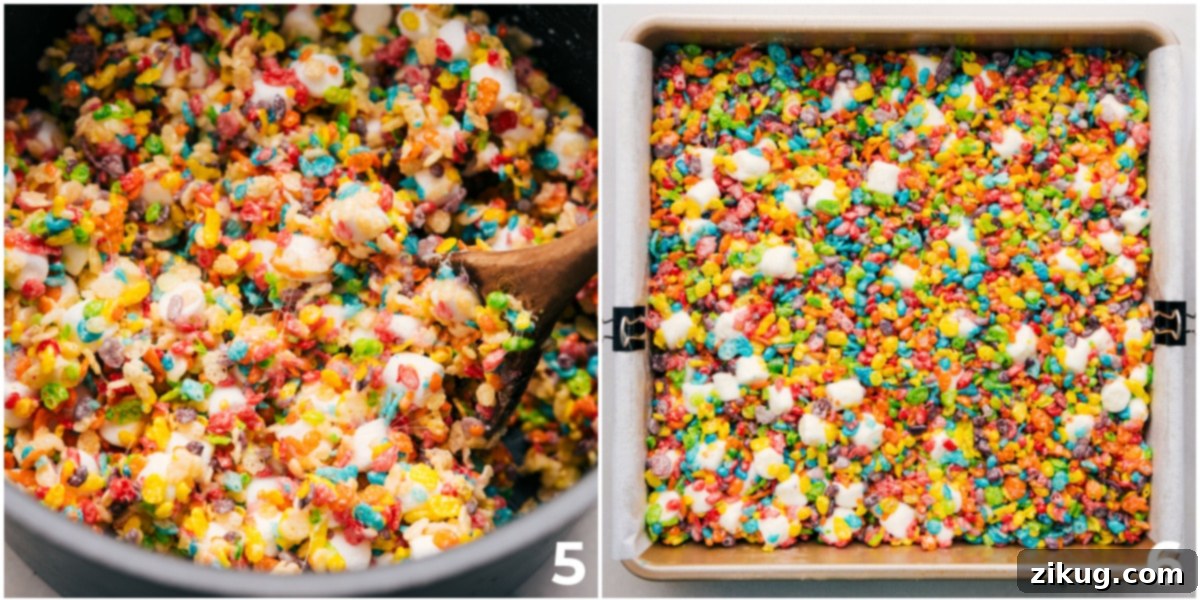
- Gently Mix Cereals: Now, it’s time to incorporate the cereals. Gently fold in both the Fruity Pebbles and Rice Krispies cereals. Add the reserved 2.5 cups of miniature marshmallows and continue to stir until all the cereal pieces are well coated with the marshmallow mixture and the reserved marshmallows are just starting to soften and spread their chewiness throughout. Be careful not to mash the cereal, which can crush it and make the treats less airy.
- Press into Pan: Pour the warm, sticky cereal mixture into your prepared 9×9-inch pan. Lightly spray your hands with nonstick cooking spray, or use a butter wrapper, and gently press the mixture into an even layer. The key here is to press lightly; pressing too firmly will compact the treats, making them dense and hard instead of delightfully soft and chewy.
- Cool and Set: Allow the treats to cool completely and set at room temperature for at least one hour. Rushing this step can result in sticky, hard-to-cut bars.
- Cut and Serve: Once fully cooled and set, use the parchment paper overhang to easily lift the entire slab of treats out of the pan. Place them on a cutting board and cut them into 12 even squares using a sharp, lightly greased knife. Serve and enjoy your vibrant, delicious Fruity Pebble Rice Krispies Treats!
Expert Tips for Perfect Fruity Pebbles Rice Krispies Treats
Achieving that ideal balance of gooey, chewy, and flavorful is simple with a few key techniques:
- Don’t Press Too Hard: This is perhaps the most crucial tip! After spreading the cereal mixture into the pan, resist the urge to press down firmly. Gently pat it into an even layer using lightly greased hands or a butter wrapper. Over-compressing the mixture will lead to dense, hard, and crumbly treats instead of the desired soft, chewy texture.
- Utilize Low Heat: When melting the butter and marshmallows, always keep the heat on low. High heat can cause the sugar in the marshmallows to crystallize, resulting in treats that become hard and stiff once cooled. Stir frequently and remove the mixture from the heat as soon as the marshmallows are fully melted and smooth.
- Always Use Fresh Marshmallows: The freshness of your marshmallows directly impacts the softness of your treats. Older, stale marshmallows tend to produce harder, less appealing Rice Krispies Treats. Always open a fresh bag for the best results!
- Mix Thoroughly but Gently: Once the marshmallow mixture is melted and off the heat, stir in your cereals and the reserved marshmallows until everything is evenly coated. Take your time to ensure full coverage without vigorously mashing or crushing the cereal, which can compromise its texture.
- Cool Completely for Clean Cuts: Patience is a virtue here. Allow your treats to cool and set completely for at least an hour at room temperature before cutting. This ensures they firm up properly, preventing stickiness and allowing for clean, defined squares that are easy to handle and serve.
- Grease Your Knife: For effortless slicing, lightly grease your knife with cooking spray or a thin layer of butter before cutting the cooled treats. This prevents the sticky marshmallow from adhering to the blade, giving you perfectly clean cuts.
Storage Solutions for Your Treats
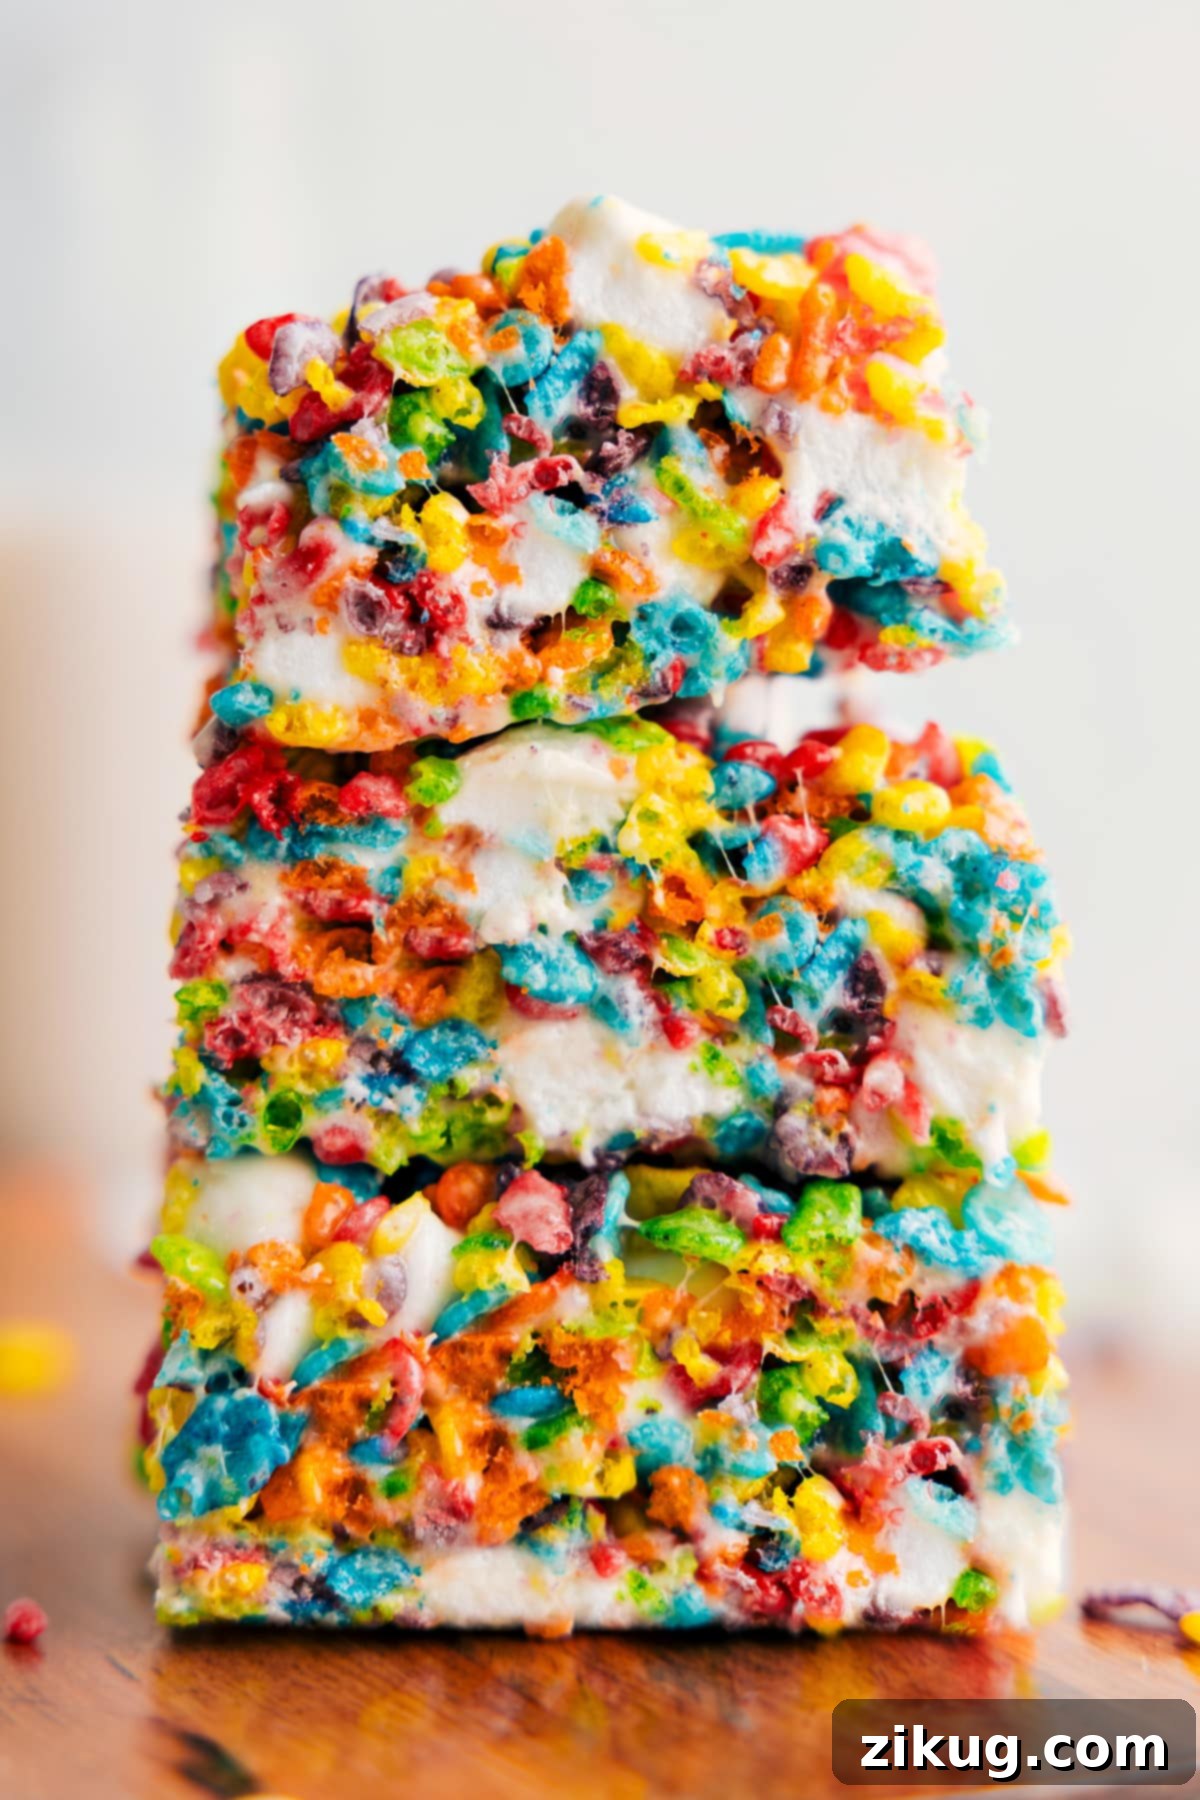
For the absolute best texture and gooey freshness, these Fruity Pebble Rice Krispies Treats are truly at their peak the day they are made. The marshmallow remains perfectly soft and pliable. If you happen to have any leftovers, simply store them in an airtight container at room temperature. They will maintain their deliciousness and a good texture for up to 2 days. Avoid refrigerating them, as this can make the treats hard and less enjoyable.
Fun Variations & Serving Suggestions
These Fruity Pebble Rice Krispies Treats are fantastic as is, but don’t hesitate to get creative! Here are a few ideas to customize them:
- Chocolate Drizzle: For an extra touch of indulgence, melt some white or dark chocolate and drizzle it artfully over the cooled treats.
- Sprinkle Fun: Before the treats fully set, sprinkle some extra colorful sprinkles on top for an added festive touch.
- Different Cereals: While Fruity Pebbles are the star, you could experiment with other flavored cereals like Cocoa Pebbles or even a mix of different colorful cereals.
- Marshmallow Swirl: For even more gooeyness, gently fold in a few extra miniature marshmallows at the very end, just before pressing into the pan, so they remain slightly intact.
- Cut Shapes: Instead of squares, use cookie cutters to create fun shapes (stars, hearts, circles) for special occasions. Just make sure to grease your cookie cutters!
More Easy No-Bake & Dessert Recipes You’ll Love:
If you enjoy simple, delicious desserts, be sure to explore these other fantastic recipes:
- Carmelitas: Irresistible bars featuring layers of oatmeal, rich caramel, and decadent chocolate.
- Lemon Bars: Zesty and sweet, with a bright lemon filling atop a buttery shortbread crust.
- Seven Layer Bars: A classic treat packed with coconut, chocolate chips, butterscotch, and more.
- Vanilla Cheesecake Bars: Creamy vanilla cheesecake bliss, perfectly portioned on a delicious graham cracker crust.
- Smores Bars: All the campfire magic of S’mores transformed into an easy-to-make bar, complete with mini marshmallows, chocolate, and graham crackers.
Fruity Pebbles Rice Krispies Treats
By Chelsea Lords
Fruity Pebble Rice Krispies Treats are vibrant, sweet, and incredibly simple to make. With only six classic ingredients, they’re a crowd-pleaser wherever you serve them. This no-bake recipe is quick, easy, and yields perfectly chewy, colorful bars that everyone will love.
Average Rating: 4.91 out of 5 stars (based on 21 votes)
Prep Time: 20 minutes
Setting Time: 1 hour
Total Time: 1 hour 20 minutes
Servings: 12 bars
Pin Recipe | Print Recipe
Equipment
- 9 x 9-inch baking pan with parchment paper
- Large nonstick pot
Ingredients
- 5 tablespoons unsalted butter
- 16 ounces miniature marshmallows (see Note 1 for freshness tips)
- 1/4 teaspoon salt
- 1 teaspoon vanilla extract
- 4 cups Fruity Pebbles cereal
- 2 cups Rice Krispies cereal (see Note 2 for substitution options)
Instructions
- Prepare Pan: Spray a 9 x 9-inch pan with cooking spray, then line it with parchment paper, leaving an overhang for easy removal. Set aside 2-1/2 cups (120 grams) of miniature marshmallows from the bag.
- Melt Marshmallows: In a large nonstick pot, melt the butter over low heat. Once the butter is melted, add all but the reserved 2-1/2 cups (120 grams) of the marshmallows. Stir constantly over low heat until the marshmallows are completely melted and smooth.
- Flavor Infusion: Remove the pot from the heat and stir in the salt and vanilla extract until well combined.
- Combine Cereals: Gently fold in the Rice Krispies and Fruity Pebbles cereals. Add the reserved 2-1/2 cups of marshmallows and stir until everything is well combined. Take your time here, and don’t mash the cereal while stirring to maintain its texture.
- Press into Pan: Pour the mixture into the prepared pan. Lightly spray your hands with cooking spray and gently press the mixture into an even layer. Be careful, pressing too hard can make the bars dense and heavy.
- Cool & Set: Allow the bars to cool and set at room temperature for at least one hour. This allows them to firm up properly for clean cuts.
- Cut & Serve: Use the parchment-paper overhang to lift the bars out of the pan. Cut them into squares with a sharp, lightly greased knife. Enjoy!
Recipe Notes
Note 1: The softer and fresher the marshmallows, the better these bars will taste and the chewier their texture will be.
Note 2: You can use all Fruity Pebbles (6 cups total) instead of the Rice Krispies and Fruity Pebbles mix. However, I found that using a combination helps to balance the sweetness, preventing the treats from being overly sugary.
Storage: For the best texture and gooeyness, enjoy these treats the same day they are made. Store any leftovers tightly wrapped in an airtight container at room temperature for up to 2 days. Refrigeration can cause them to harden.
Nutrition Information (Approximate per serving)
- Serving: 1 bar
- Calories: 189 kcal
- Carbohydrates: 35 g
- Protein: 1 g
- Fat: 5 g
- Saturated Fat: 4 g
- Polyunsaturated Fat: 0.2 g
- Monounsaturated Fat: 1 g
- Trans Fat: 0.2 g
- Cholesterol: 13 mg
- Sodium: 115 mg
- Potassium: 19 mg
- Fiber: 0.1 g
- Sugar: 19 g
- Vitamin A: 790 IU
- Vitamin C: 6 mg
- Calcium: 5 mg
- Iron: 2 mg
Nutrition information is automatically calculated and should be used as an approximation.
Found this recipe helpful? Don’t forget to leave a comment below and share your experience!