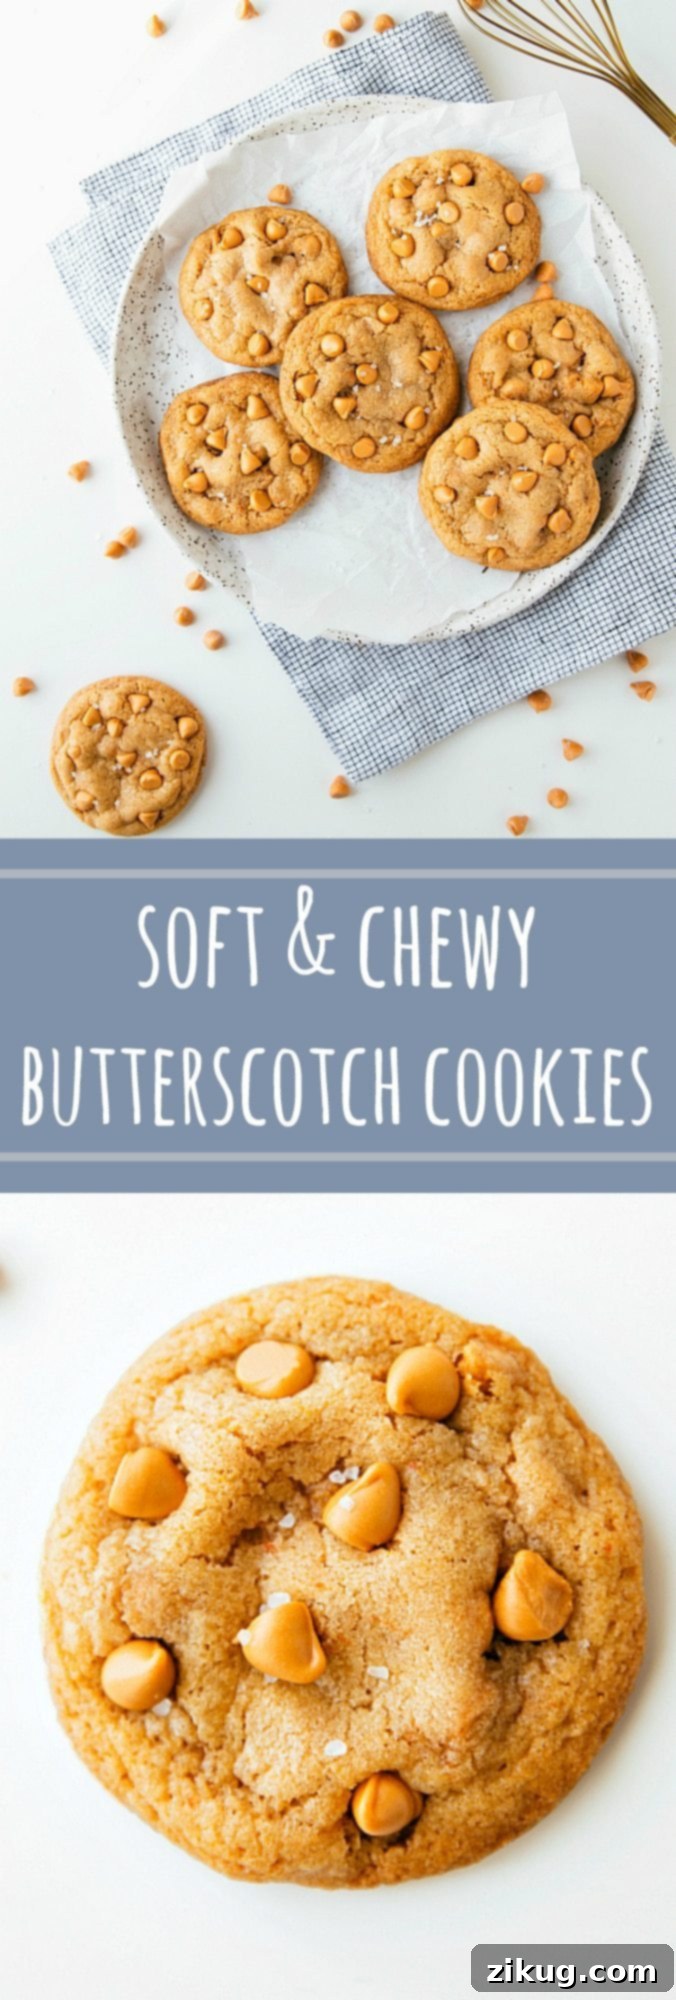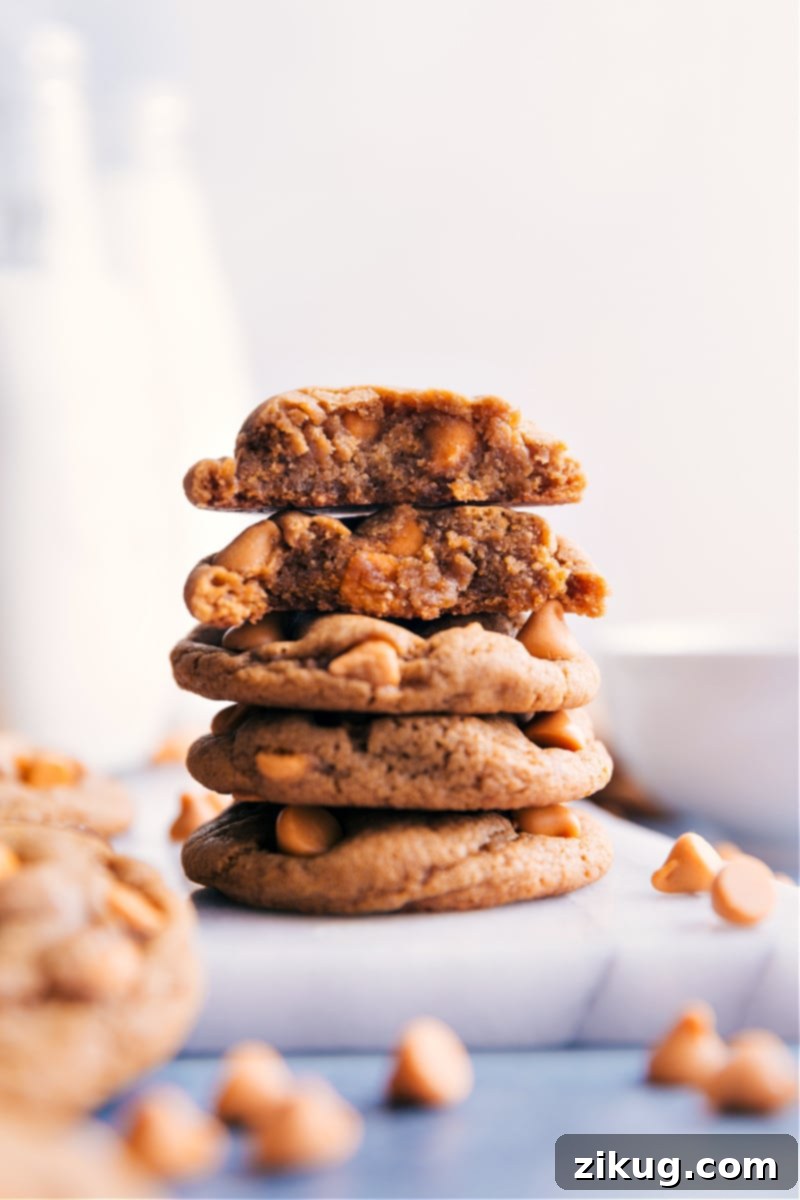
Discover the ultimate recipe for the softest and chewiest Butterscotch Cookies, bursting with an incredibly deep, rich caramel-toffee flavor. These delightful treats are generously loaded with butterscotch baking chips, amplifying their inherent sweetness and providing an irresistible texture. Perfect for any occasion, these cookies are a true celebration of classic butterscotch goodness, promising a melt-in-your-mouth experience with every bite.
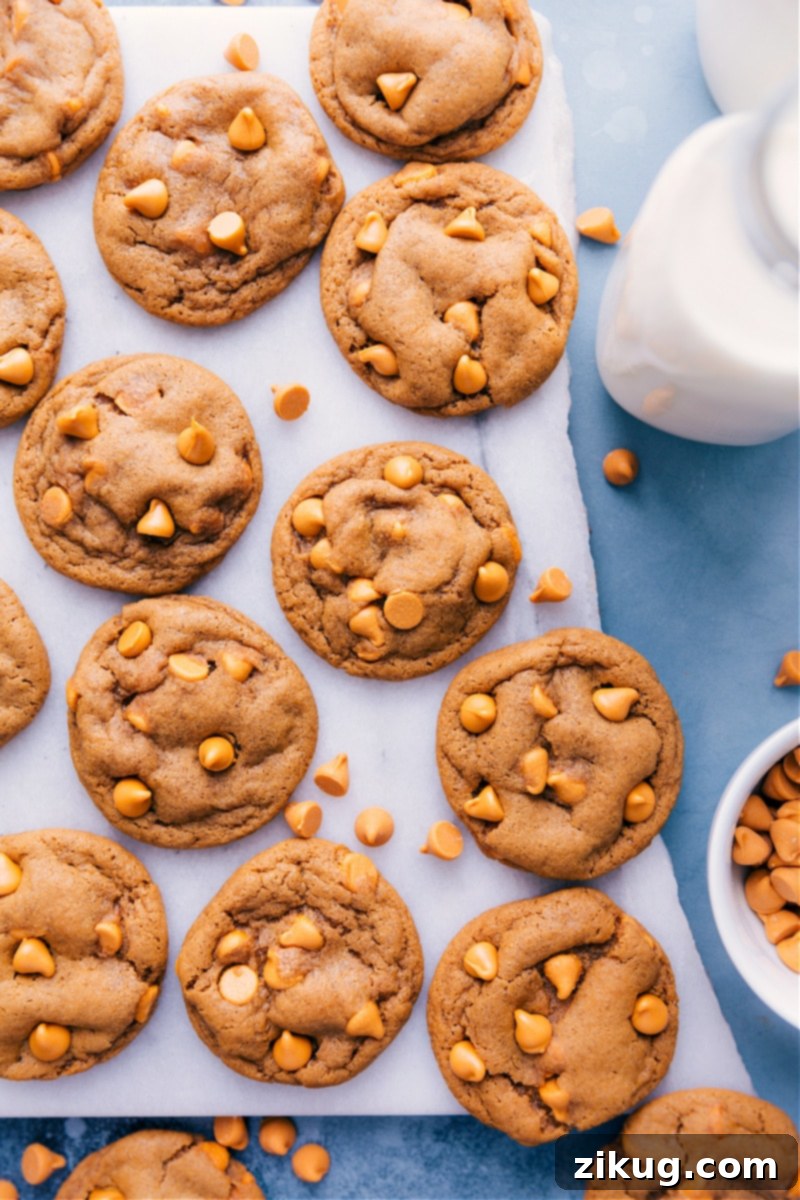
What Makes Butterscotch Unique? A Flavor Deep Dive
Butterscotch is a beloved flavor profile, distinctly crafted from a harmonious blend of brown sugar and butter. Often mistaken for caramel, butterscotch possesses its own unique characteristics. While caramel is primarily sugar cooked until it undergoes a chemical change, often with water or cream, butterscotch specifically incorporates butter from the outset, along with brown sugar, which naturally contains molasses. This foundational difference gives butterscotch its signature rich, almost burnt sugar, and buttery notes, distinct from caramel’s pure sugar sweetness.
Traditionally, butterscotch sauce is made by combining brown sugar, melted butter, a touch of cream, and a pinch of salt, all simmered together to create a luxurious, syrupy consistency. For these cookies, achieving an authentic and profound butterscotch taste was my primary goal. While butterscotch chips offer a convenient way to infuse flavor, I embarked on extensive testing to truly capture that deep, complex essence. The secret lies in integrating the core butterscotch ingredients directly into the cookie dough: a generous amount of butter, dark brown sugar, and a crucial addition of molasses. This foundational blend is then enhanced with a generous quantity of butterscotch chips, ensuring every bite delivers an intense, satisfying butterscotch experience.
Quick Tip: The Magic of Brown Sugar
Brown sugar owes its distinctive color and flavor to molasses, which is either naturally present from processing sugar cane or added back to refined white sugar. Dark brown sugar contains a higher proportion of molasses compared to light brown sugar, resulting in a deeper color and a more robust flavor. In this recipe, we ingeniously combine both light and dark brown sugars and further boost the molasses content. This strategic addition of extra molasses is paramount; it’s not just for flavor, but it’s also the key to achieving the exceptionally soft and delightfully chewy texture that defines these remarkable butterscotch cookies. The molasses helps retain moisture, preventing the cookies from drying out and ensuring they stay wonderfully tender for days.
The Irresistible Texture and Taste of These Butterscotch Cookies
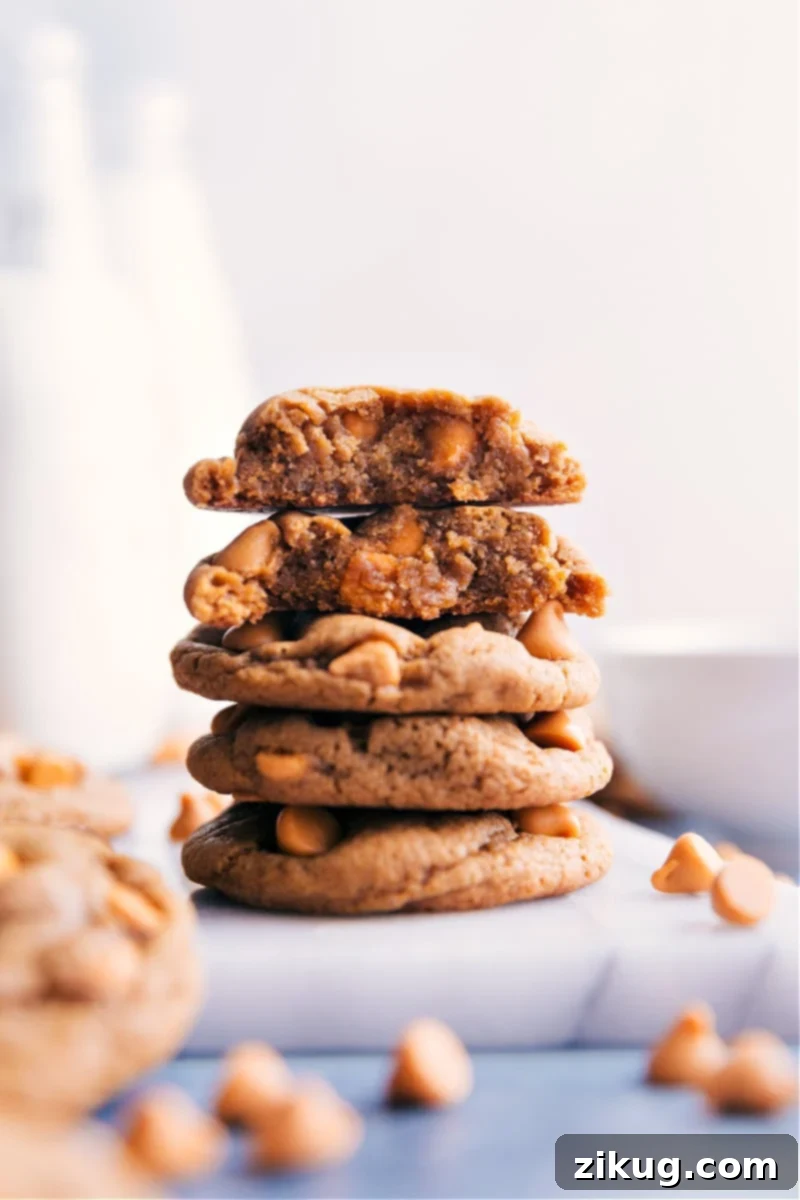
Prepare your taste buds for an unparalleled cookie experience. These butterscotch cookies are a symphony of flavors and textures, boasting a profound molasses and sweet caramel-toffee profile that lingers delightfully. From the moment you take your first bite, you’ll notice their exceptional softness and chewiness, a hallmark of a perfectly crafted cookie. The edges achieve a delicate crispness, providing a pleasing contrast to the tender interior, creating a dynamic textural experience.
What truly elevates these cookies is the generous inclusion of butterscotch chips. These chips are not merely an afterthought; they are integral to intensifying the overall butterscotch flavor, adding layers of sweetness, and contributing a wonderful melt-in-your-mouth texture. Each chip bursts with creamy, buttery notes, reinforcing the core flavor and making these cookies an irresistible treat that will have everyone asking for the recipe.
Mastering Molasses: The Secret to Chewy Perfection
Molasses is more than just a sweetener in these butterscotch cookies; it’s a critical ingredient that plays a multifaceted role in shaping their flavor, texture, and overall appeal. Its inherent characteristics infuse a soft caramel or distinct toffee taste, providing a depth that refined sugar alone cannot achieve. Beyond flavor, molasses is instrumental in making these cookies exceptionally soft and chewy. Its hygroscopic nature means it attracts and retains moisture, keeping the cookies tender long after they’ve cooled. Furthermore, molasses contributes a subtle, natural sweetness that complements the robust butterscotch profile beautifully.
When selecting molasses for your baking, it’s essential to understand the different varieties available. Stores typically stock a range, from light molasses to very dark, almost black, known as blackstrap molasses. Blackstrap molasses, while rich in nutrients, has a very strong, somewhat bitter, and less sweet flavor profile, making it generally unsuitable for most baked goods where a pleasant sweetness is desired. For these butterscotch cookies, and indeed for many other sweet recipes, opt for dark molasses, often labeled as “robust” or “full-flavored.” This type strikes the perfect balance, offering a rich, sweet, and complex taste without any bitterness, ensuring your cookies achieve their intended deliciousness.
Through extensive testing, I’ve found that Brer Rabbit® and Grandma’s® are consistently excellent choices, delivering the ideal flavor and consistency needed for these cookies. Their quality ensures that the molasses contributes positively to the overall richness and chewiness without overpowering other elements.
Quick Tip: Creative Uses for Leftover Molasses
Don’t let any leftover molasses go to waste! This versatile ingredient can elevate a variety of baked goods. It’s the key to the authentic, spicy-sweet flavor of classic Gingersnap Cookies, or adds a delightful depth to Oatmeal Scotchies, transforming them into even richer treats. Beyond cookies, molasses is excellent in barbecue sauces, marinades, baked beans, and even certain breads, adding moisture and a distinctive robust sweetness. Keep it in your pantry for these and many other culinary adventures!
The Role of Brown Sugars: Light and Dark for Balanced Butterscotch Cookies
Beyond the direct addition of molasses, both dark and light brown sugars are fundamental to the success of these butterscotch cookies. Both types of brown sugar contain molasses, but in varying concentrations, which significantly impacts their flavor and physical properties. Dark brown sugar, with its higher molasses content, offers a deeper, more profound caramel-like flavor and a darker hue. Light brown sugar, containing less molasses, provides a milder sweetness and a softer texture.
My preference for using a combination of both light and dark brown sugars in these butterscotch cookies is deliberate. This blend is crucial for achieving a perfectly balanced flavor profile that is rich without being overly intense, allowing the butterscotch notes to shine harmoniously. Furthermore, the combination contributes significantly to the cookie’s desirable texture. Light brown sugar, with its lower moisture content, helps to create a slightly firmer structure, while the higher moisture and molasses in dark brown sugar ensure the cookies remain incredibly soft and chewy.
If you find yourself with only one type of brown sugar, don’t worry! You can certainly use all light brown sugar in this recipe. While the flavor might be slightly less complex and the texture marginally different, the cookies will still be delicious. However, for the ultimate experience as intended, the blend of both sugars is highly recommended. You can easily find both varieties in the baking aisle of any grocery store; just note that dark brown sugar will visibly appear darker and more moist than its light brown counterpart.
Expert Baking Tips for Perfect Butterscotch Cookies
Achieving the perfect batch of butterscotch cookies is simple when you pay attention to a few key details. These expert tips will help ensure your cookies come out soft, chewy, and bursting with flavor every time.
- Ensure Butter is Cooled (But Still Melted): It’s crucial to melt the butter as instructed, but then allow it to cool slightly before combining it with the sugars. Using hot butter will prematurely melt the brown sugars, leading to a dough that’s too oily and cookies that are greasy and spread excessively thin. A slightly cooled, still-liquid butter ensures proper emulsification with the sugars and contributes to the ideal soft, chewy texture.
- Measure Molasses with Precision: Molasses is a potent ingredient. If your measuring spoons are over-filled, the strong flavor can easily overwhelm the delicate balance of the butterscotch, and the excess liquid will make the cookie dough too wet and difficult to handle. Always measure molasses carefully, leveling it off precisely at the top of the measuring spoon to ensure the perfect consistency and flavor.
- Thoroughly Mix Butter and Brown Sugar: This step is more important than it seems. After adding the sugars to the cooled melted butter, you might initially feel that they won’t fully combine. However, persistence is key. Continue to whisk or stir diligently for 1-2 minutes until the butter and sugars are completely integrated and form a smooth, uniform mixture. Neglecting this step can result in cookies that bake up greasy, as the fat and sugar separate during baking. Proper mixing ensures a cohesive dough and a delightful, non-greasy texture.
- Don’t Skip the Dough Chilling: While it might seem like an extra step, chilling the cookie dough for at least an hour is vital for the best results. Chilling allows the flavors to meld and deepen, and more importantly, it solidifies the butter in the dough. This prevents the cookies from spreading too much in the oven, ensuring they maintain a thick, chewy center and perfectly crispy edges. Cold dough bakes more evenly and yields a superior texture.
- Underbake Slightly for Ultimate Chewiness: For the softest, chewiest butterscotch cookies, keep a close eye on them in the oven and consider removing them when they are *just* set around the edges but still appear slightly underbaked and glossy in the center. Overbaking is the quickest way to dry out your cookies and make them hard. The cookies will continue to cook slightly from residual heat once removed from the oven, so trust the process and embrace a slightly underbaked finish for that coveted chewy interior.
More Irresistible Cookie Recipes to Try
If you’ve enjoyed the rich, chewy goodness of these butterscotch cookies, you’re in for a treat with these other fantastic cookie recipes from Chelsea’s Messy Apron. Expand your baking repertoire with these delightful options:
- Funfetti Cookies: Indulge in soft, delightful sugar cookies generously studded with colorful sprinkles, perfect for celebrations.
- Maple Cookies: Experience the comforting sweetness of maple in every bite, topped with a luscious maple glaze.
- Cookies and Cream Muddy Buddies: A fun, no-bake treat featuring crunchy cereal coated in a sweet mixture and crushed Oreo cookies.
- Salted Caramel Cookies: A sophisticated blend of sweet and salty, these cookies are enhanced with a rich cream cheese frosting and a decadent caramel drizzle.
- Magic Cookie Bars: A classic, layered dessert with a buttery graham cracker crust and a medley of delicious toppings, magically baking together.
Frequently Asked Questions About Butterscotch Cookies
Can I substitute butterscotch chips with chocolate chips?
While you can certainly substitute butterscotch chips with chocolate chips to make chocolate chip cookies, please note that the flavor profile will be entirely different. These cookies are specifically designed to highlight the rich caramel-toffee notes of butterscotch. If you do switch to chocolate chips, the unique butterscotch essence that comes from the molasses and brown sugars will still be present, offering a delightful twist on a classic chocolate chip cookie.
Why are my butterscotch cookies spreading too much?
Several factors can cause cookies to spread too much. Common culprits include butter that is too warm, dough that hasn’t been adequately chilled, or too much flour (or not enough, which is less common but possible if measurements are off). Ensure your butter is cooled after melting, chill the dough for the recommended time (or even longer if your kitchen is warm), and measure your flour accurately by spooning it into the measuring cup and leveling it off. Also, ensure your baking soda and powder are fresh and active.
Can I make this dough ahead of time?
Absolutely! Cookie dough is excellent for making ahead. You can prepare the dough, form it into balls, and then chill them in the refrigerator for up to 3 days. For longer storage, you can freeze the dough balls for up to 3 months. This is a fantastic time-saver for busy schedules, allowing you to bake fresh cookies whenever a craving strikes.
What’s the best way to store baked butterscotch cookies?
To keep your baked butterscotch cookies at their best, store them in an airtight container at room temperature. They will retain their delightful softness and chewiness for 3-4 days. If you want to enjoy them for longer, freezing the dough (as mentioned above) is preferable to freezing baked cookies, as it preserves their fresh-baked quality better.
Print Recipe
Irresistibly Chewy Butterscotch Cookies
Video
Equipment
-
Large bowl (microwave-safe)
-
Sheet pan (15″ x 10″) (lined with parchment paper or a silicone baking mat)
Ingredients
- 8 tablespoons unsalted butter
- 1/2 cup light brown sugar (lightly packed)
- 1/4 cup dark brown sugar (lightly packed)
- 1 large egg
- 1/2 teaspoon vanilla extract
- 2 tablespoons molasses (dark/robust, see Note 1)
- 1/2 teaspoon baking soda
- 1/2 teaspoon baking powder
- 3/4 teaspoon salt
- 1-3/4 cups all-purpose flour (spooned and leveled, see Note 2)
- 3/4 cup butterscotch baking chips
Instructions
-
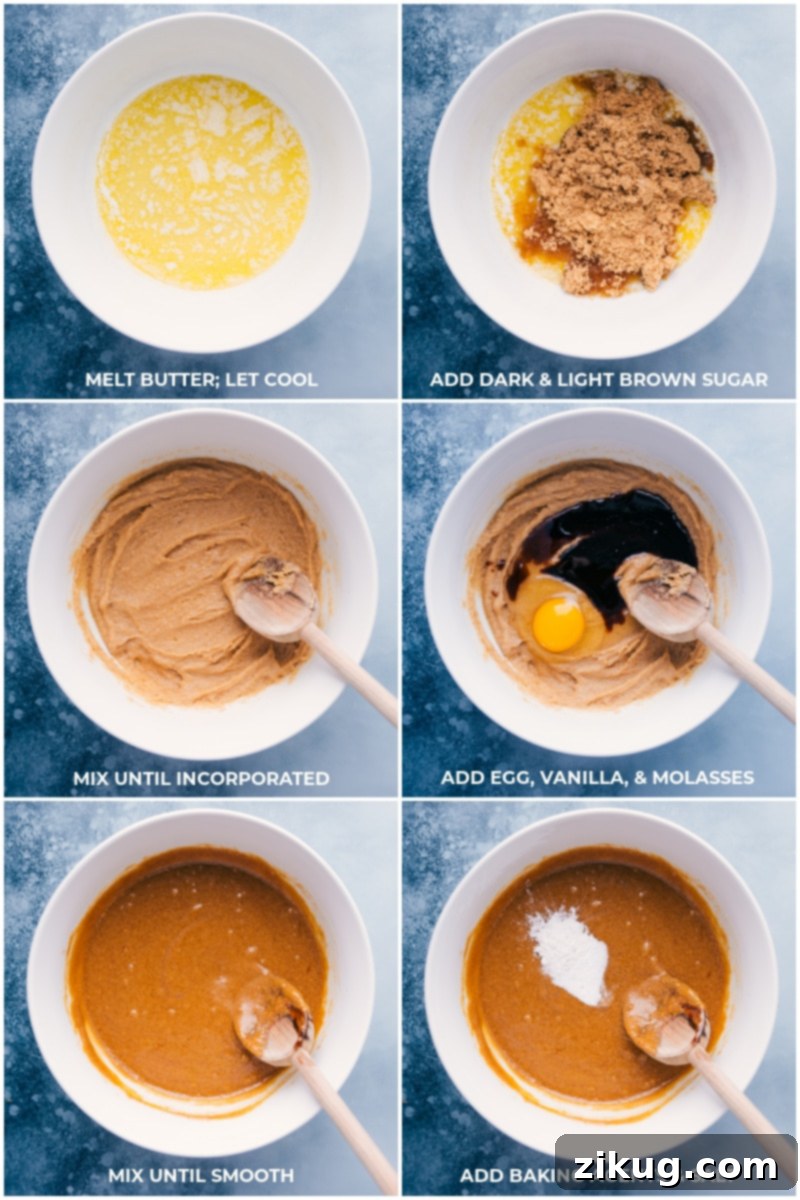
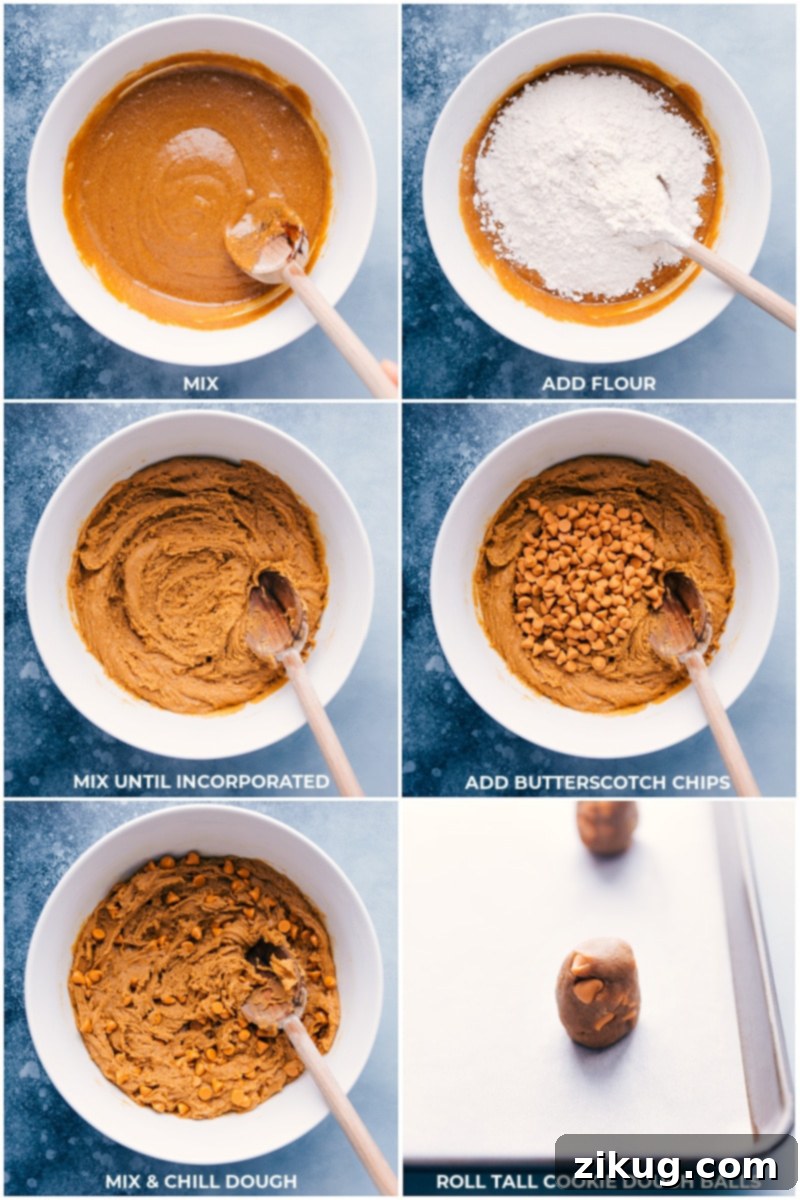
In a large microwave-safe bowl, melt the unsalted butter. Once melted, set aside and let it cool at room temperature for at least 5 minutes. This cooling step is crucial; hot butter will melt the sugars prematurely, resulting in greasy cookies that spread too much. After the butter has cooled slightly, add both light and dark brown sugars. Whisk or stir vigorously for 1-2 minutes until the butter and sugars are thoroughly combined and no streaks of butter remain. This thorough mixing prevents greasiness. Incorporate the large egg, vanilla extract, and molasses, mixing until just combined.
-
Next, add the baking soda, baking powder, and salt to the mixture and stir until fully combined. Pour the all-purpose flour on top of the wet ingredients. Mix carefully until the flour is just incorporated, taking care not to overmix the dough, which can lead to tough cookies. Finally, fold in the butterscotch baking chips until they are evenly distributed throughout the dough. Cover the dough tightly with plastic wrap and chill in the refrigerator for a minimum of 1 hour. This chilling time helps the flavors develop and prevents the cookies from spreading too much during baking.
-
After chilling, scoop the dough and divide it into 1-1/2 tablespoon sized balls. For best results, shape these balls to be taller than they are wide. This helps create thick, chewy cookies. Once formed, place the dough balls back onto a plate or small tray, cover, and refrigerate for another 5-10 minutes. This secondary chill ensures the butter remains cold, contributing to the perfect cookie texture.
-
Preheat your oven to 350°F (175°C). Line a large sheet pan with parchment paper or a silicone baking mat. Arrange no more than 6 dough balls on the prepared pan, ensuring they are spread far apart to allow for proper airflow and expansion. Bake for 9–14 minutes. It is crucial to watch your cookies carefully to prevent overbaking. I typically remove mine after 10 minutes, when the edges are set and lightly golden, but the centers still appear slightly soft and glossy. Slightly underbaked butterscotch cookies are supremely chewy! Allow the cookies to cool on the baking sheet for 4–5 minutes before carefully transferring them to a wire rack to cool completely. This resting period allows them to set fully without falling apart.
Recipe Notes
Note 2 – Accurate Flour Measurement: For perfect cookie texture, it’s crucial to measure flour correctly. Do not scoop flour directly with your measuring cup, as this can pack in too much, resulting in dry, dense cookies. Instead, lightly spoon the flour into your measuring cup until it overflows, then use the back of a knife or a straight edge to level it off.
Storage and Freezing Instructions: Store baked cookies in an airtight container at room temperature for 3–4 days to maintain their freshness. For longer preservation, freezing the cookie dough is recommended over freezing baked cookies. To freeze dough, simply drop the formed cookie dough balls onto a parchment-lined sheet pan and freeze until completely solid. Once frozen, transfer the dough balls to an airtight freezer-safe container or bag. They can be stored this way for up to 3 months. When you’re ready to bake, you can place them directly from the freezer onto a baking sheet, adding just a few extra minutes to the typical baking time until they are golden and delicious.
Nutrition Information
Calories: 129 kcal |
Carbohydrates: 20 g |
Protein: 1 g |
Fat: 5 g |
Saturated Fat: 3 g |
Trans Fat: 1 g |
Cholesterol: 22 mg |
Sodium: 167 mg |
Potassium: 42 mg |
Fiber: 1 g |
Sugar: 17 g |
Vitamin A: 169 IU |
Calcium: 20 mg |
Iron: 1 mg
Nutrition information is automatically calculated, so should only be used as an approximation.