
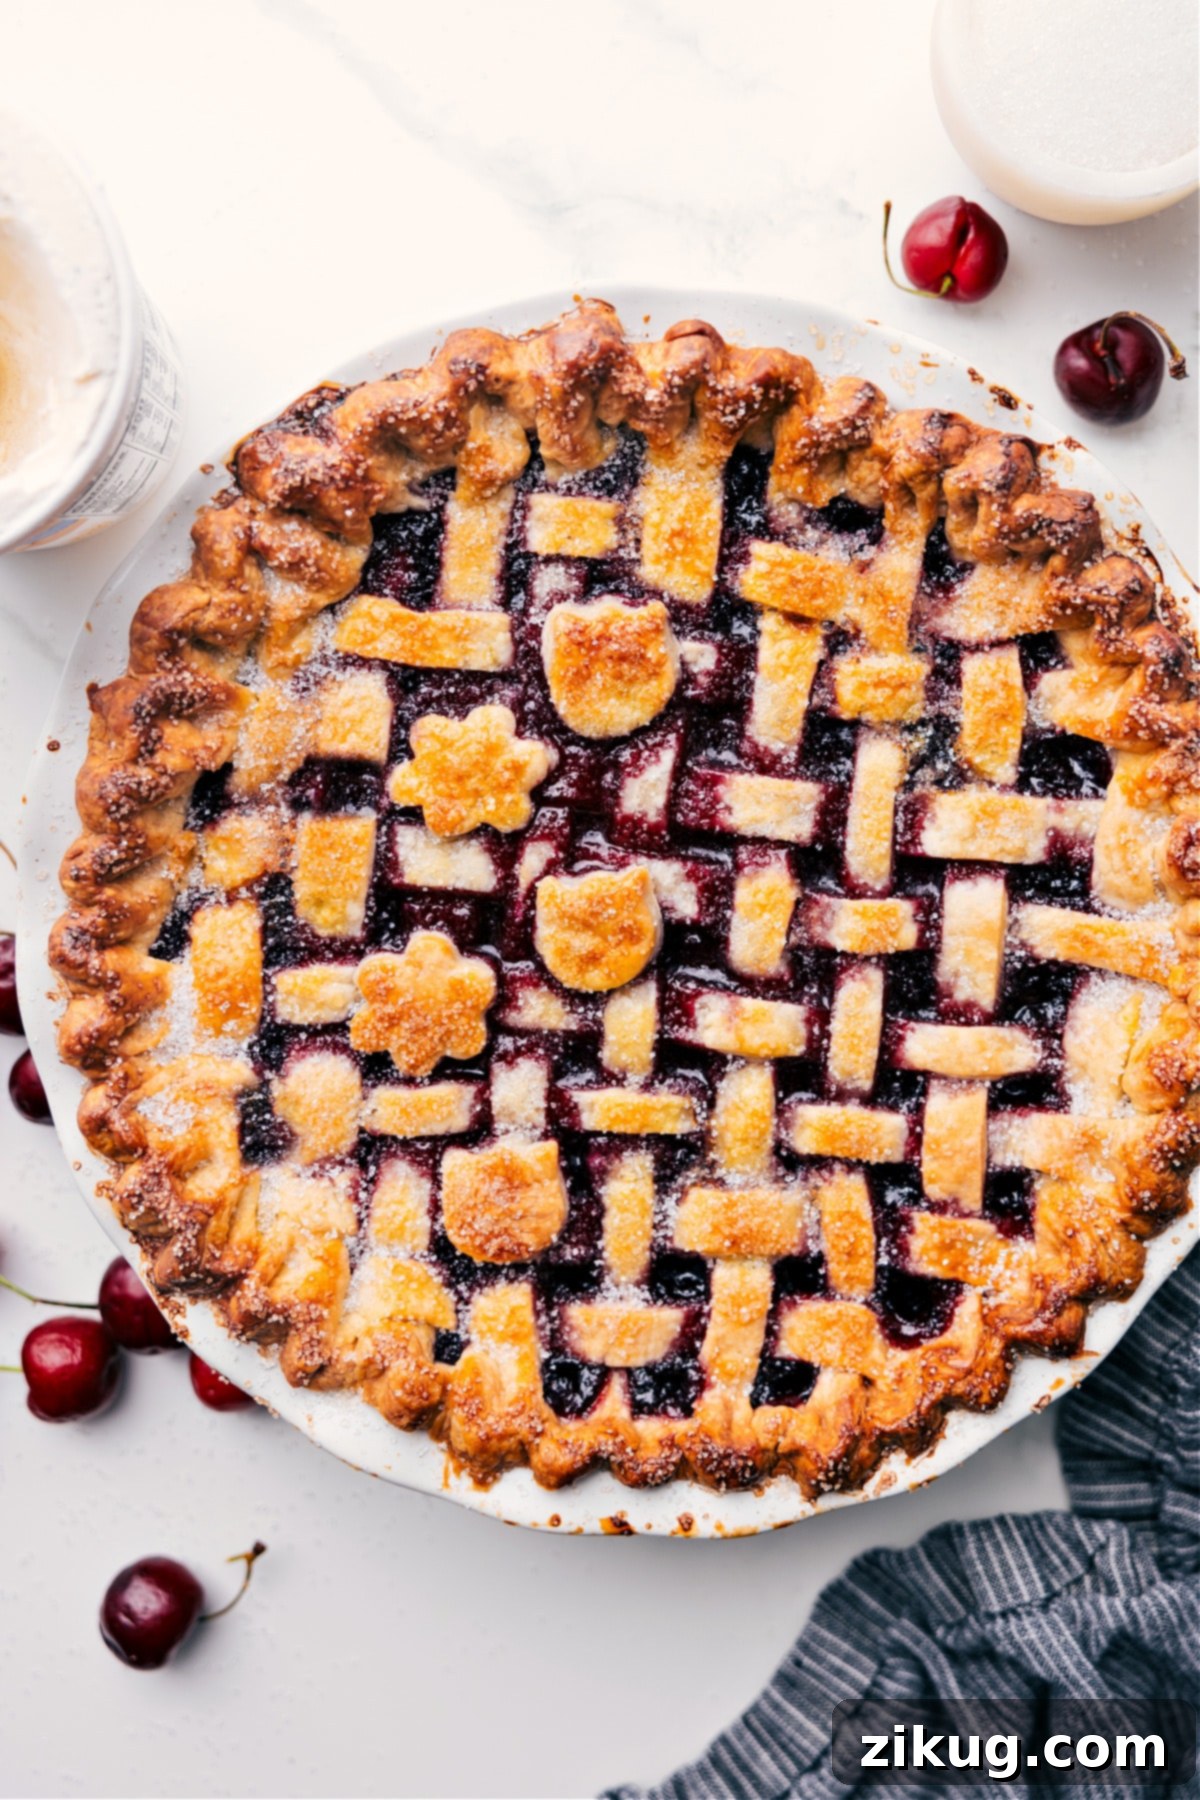
Experience the Ultimate Homemade Cherry Pie: A Guide to Baking Perfection
Unlock the secrets to baking the perfect cherry pie with our comprehensive recipe, guaranteed to deliver a rich, jammy filling encased in a golden, impossibly flaky crust. Finished with a delicate crunch from a sparkling sugar topping, this pie isn’t just a dessert; it’s a cherished summer tradition, promising an unparalleled blend of sweet and tart flavors. Get ready to impress with a pie that embodies the true taste of homemade comfort.
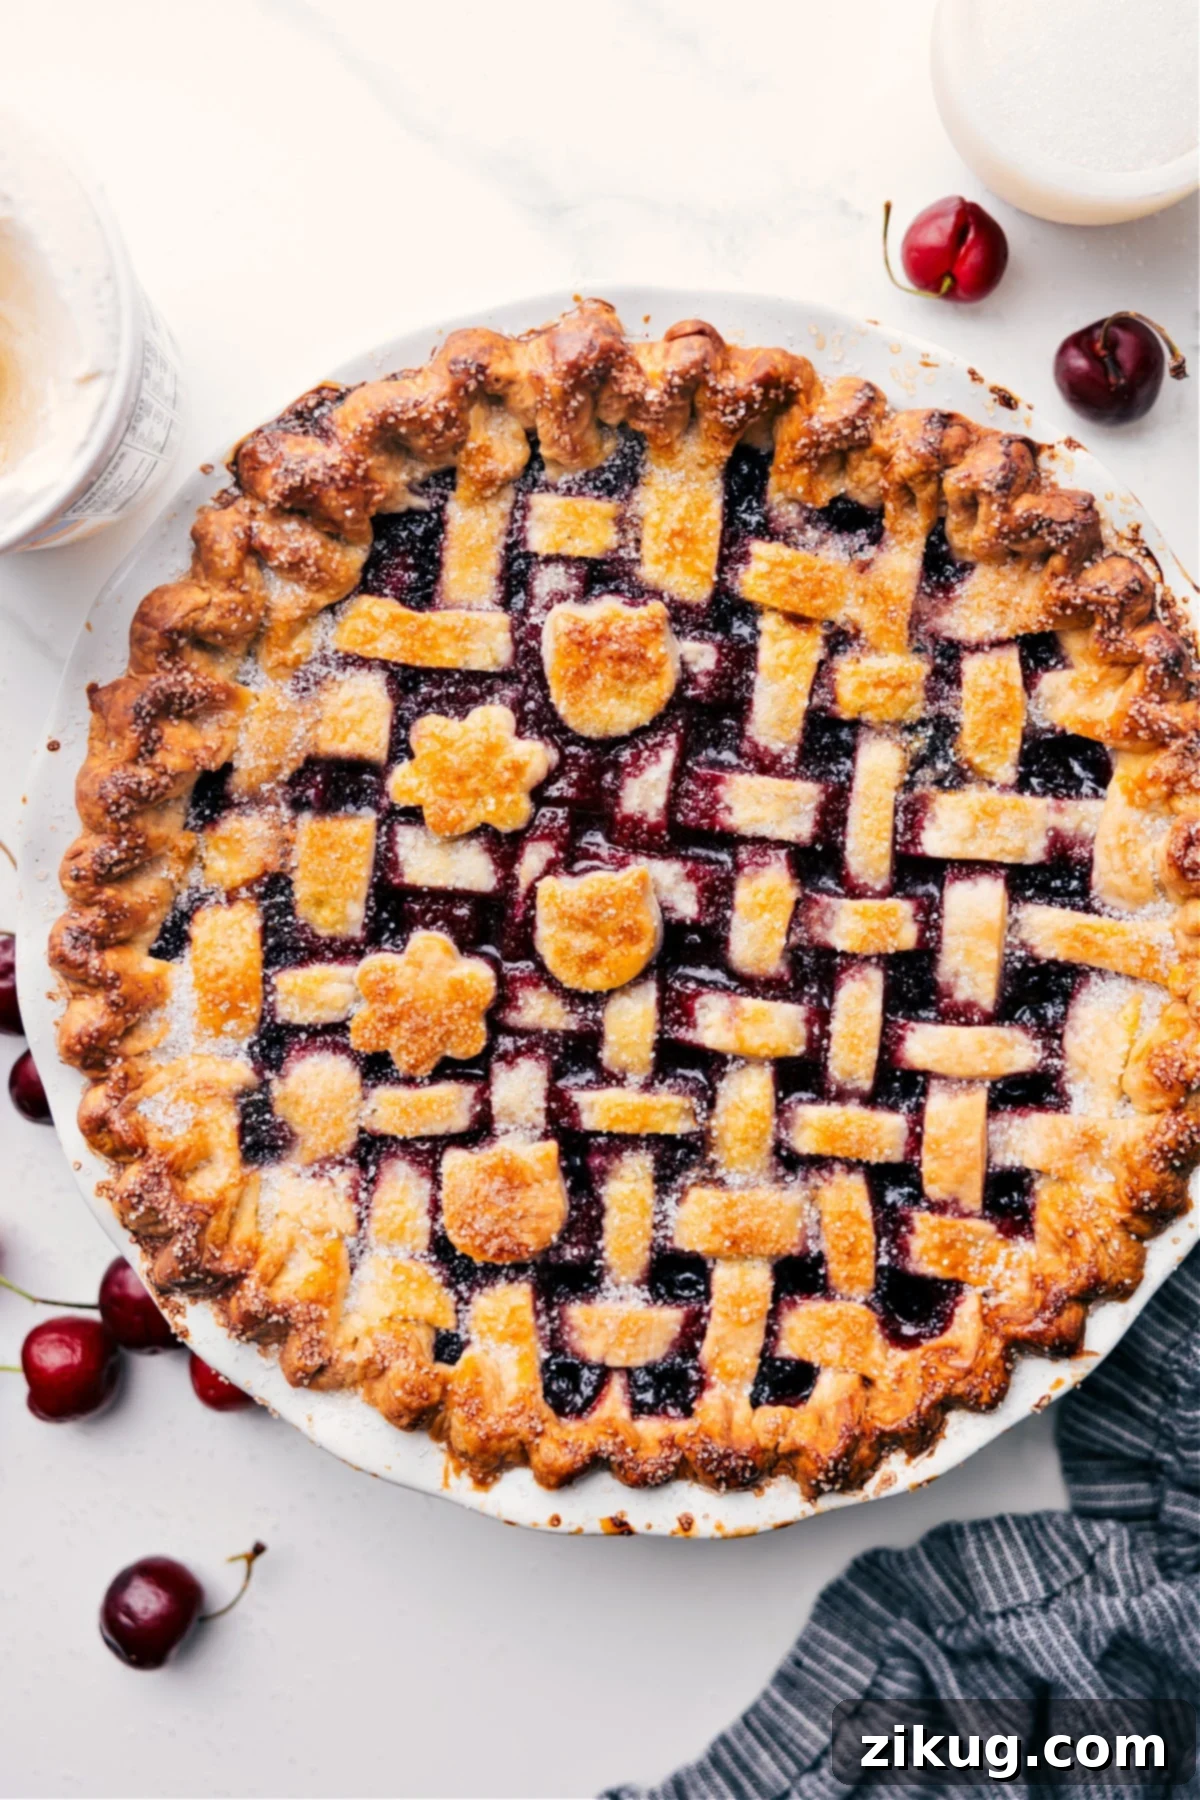

Author’s Notes
The Summer Pie Tradition: My Must-Bake Cherry Pie
Every summer, as soon as the vibrant cherry season arrives, my kitchen transforms into a cherry pie factory. It’s a tradition my husband eagerly anticipates, often declaring it “the best part of the summer.” Despite its legendary status in our home, I realized with a chuckle that this beloved recipe, one I’ve perfected over many years, has never actually graced the pages of my blog. Why the delay? Simply put, it disappears too fast! My family has a remarkable talent for devouring it before I can even grab my camera for a decent shot.
This recipe is a culmination of years of experimentation. I’ve meticulously refined the filling, balancing the sweetness and tartness to achieve that perfect jammy consistency. And, of course, it features my signature all-butter pie crust – the foundation for any truly spectacular pie. It’s the crust that lends that irresistible flakiness and rich, buttery flavor that makes all the difference. So, with cherry season once again upon us, I knew this was finally the year to share this ultimate cherry pie recipe with you. It’s more than just a dessert; it’s a taste of pure summer joy, and I believe it will become a treasured tradition in your home, too.
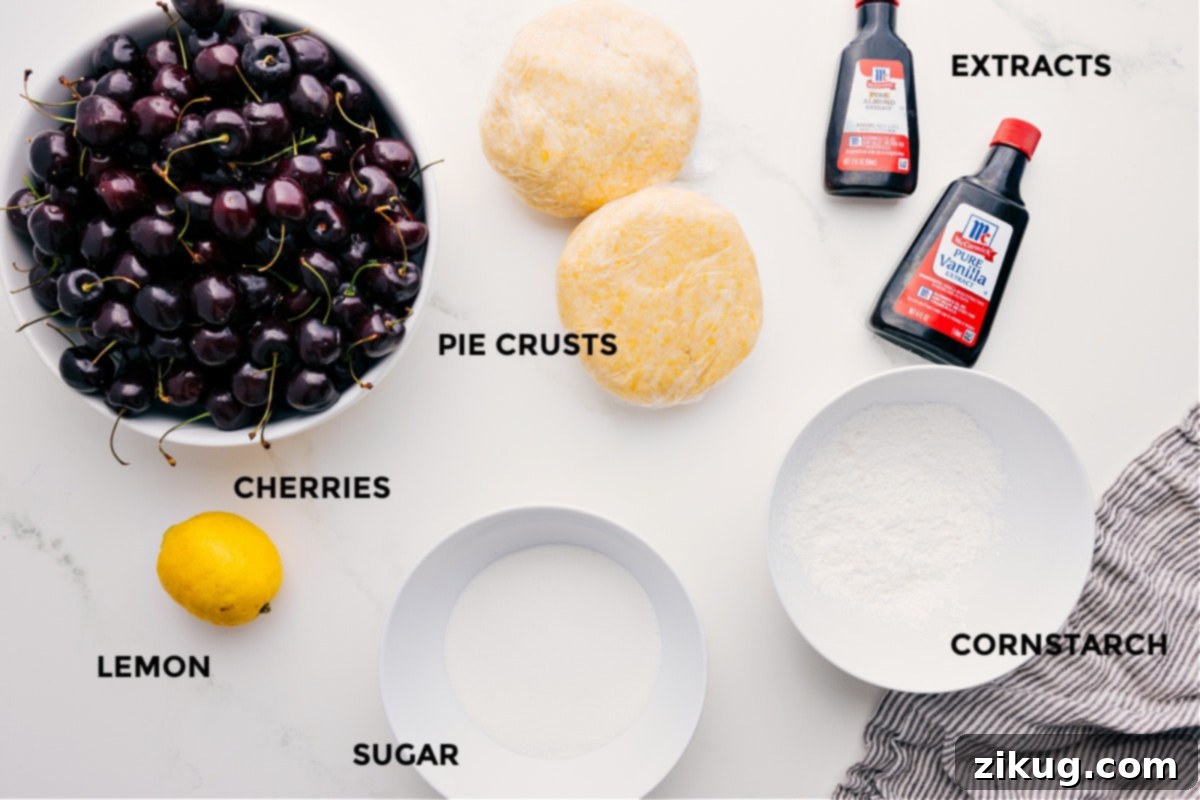
Essential Ingredients for a Heavenly Cherry Pie
Crafting the perfect cherry pie begins with selecting the right ingredients. Each component plays a vital role in achieving that rich flavor, delightful texture, and beautiful golden finish. Here’s a detailed look at what you’ll need:
| Ingredient | Helpful Notes & Tips for Success |
|---|---|
| Fresh Cherries | For the most complex flavor profile, I recommend a 50/50 blend of dark sweet cherries (like Bing) and Rainier cherries. This combination offers a delightful balance of deep sweetness and subtle tartness. You’ll need about 1.5 pounds of cherries, which typically yields around 5 cups pitted. |
| Granulated Sugar | The amount of sugar can be adjusted based on the inherent sweetness or tartness of your cherries. If you opt for sour cherries, you’ll want to increase the sugar to ¾–1 cup to achieve a balanced flavor. Always taste your cherries and adjust accordingly. |
| Fresh Lemon Juice | A splash of fresh lemon juice is crucial. It acts as a bright counterpoint to the sweetness of the cherries, enhancing their natural flavor and preventing the pie from tasting overly sweet. It also helps to balance the overall profile of the filling. |
| Cornstarch | This is your secret weapon for a perfectly set filling. Cornstarch thickens the cherry juices, ensuring a beautiful, jammy consistency that holds its shape when sliced, rather than a runny mess. Precise measurement is key here. |
| Unsalted Butter | Stirred in at the very end of the filling preparation, butter adds a luxurious richness and a beautiful glossy sheen to your cherry filling. It also contributes to the overall mouthfeel and depth of flavor. |
| Homemade Pie Crusts | A truly exceptional cherry pie demands an exceptional crust. My all-butter pie crust recipe is the cornerstone of this dessert, providing that desired flaky, tender, and buttery foundation. While store-bought crusts can work in a pinch, I highly encourage making your own for superior flavor and texture. |
| Egg Wash & Sparkling Sugar | An egg wash (a whisked egg with a touch of milk) brushed over the top crust creates a stunning, deep golden-brown hue during baking. The coarse sparkling sugar sprinkled on top not only adds a beautiful visual appeal but also provides an irresistible, delicate crunch with every bite. |
Each of these ingredients contributes to the magic of this cherry pie. Don’t be afraid to adjust the sugar content to suit your preference and the specific type of cherries you’re using. The goal is a harmonious blend of flavors and textures that truly celebrates the star ingredient: fresh, ripe cherries.
Mastering Your Cherry Pie: Expert Tips for Success
Baking a show-stopping cherry pie is within reach, and with these expert tips, you can ensure a flawless outcome every time. From preparing the fruit to achieving that perfect golden crust, these insights will elevate your pie-baking game.
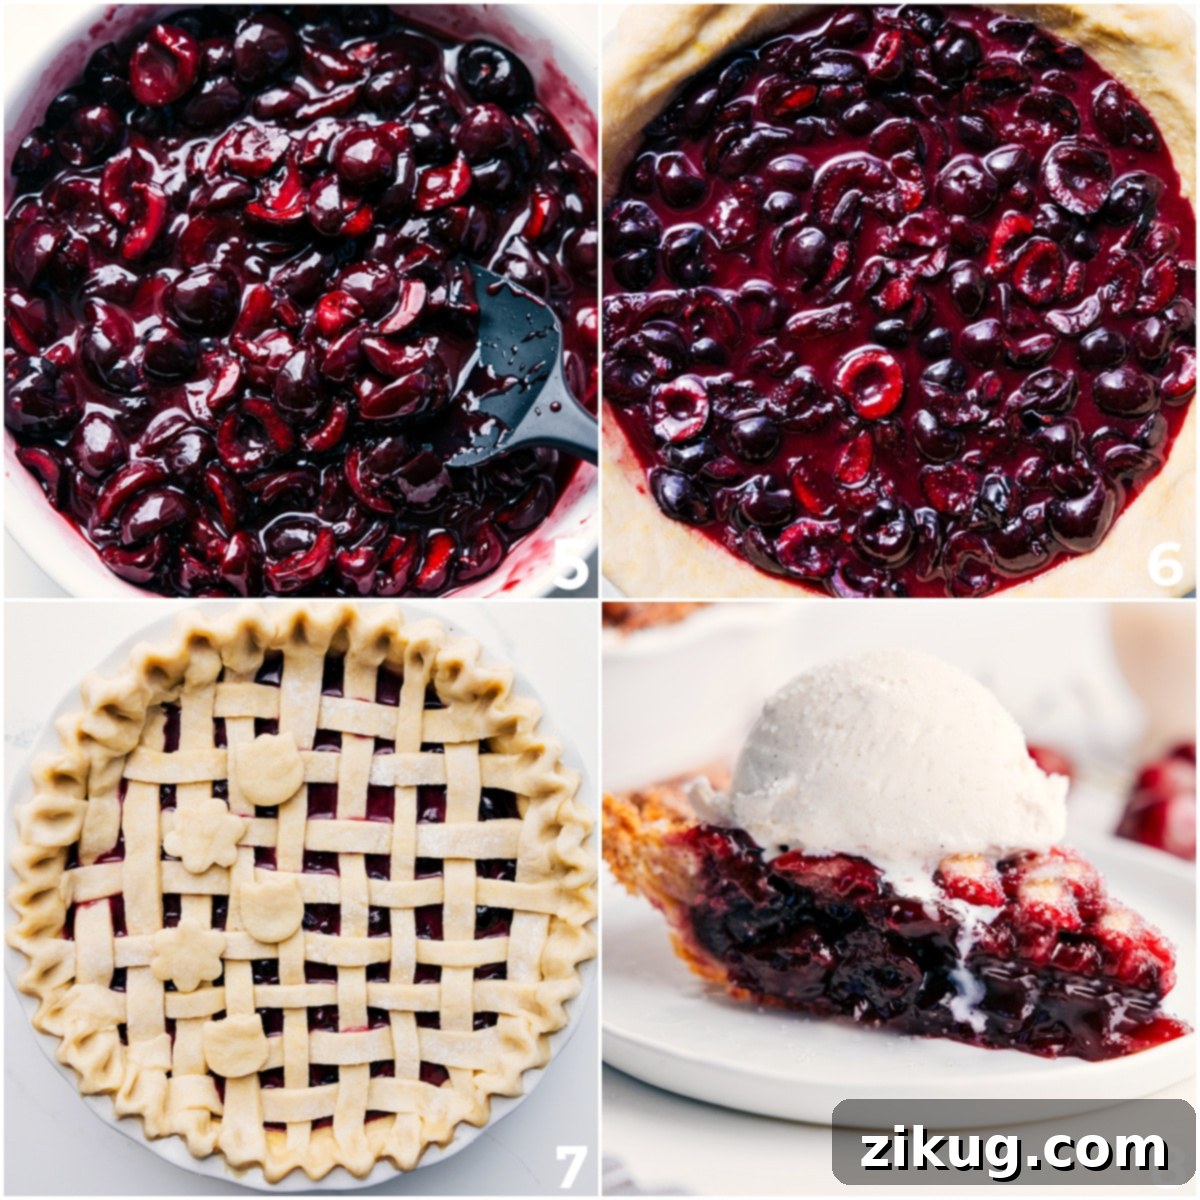
- Optimal Cherry Texture: For a filling that’s both beautifully set and bursting with fruit, I recommend cutting half of your pitted cherries into halves and the other half into quarters. This variation in size creates a more interesting texture and helps the filling set up nicely, preventing a soupy pie while still offering substantial fruit bites.
- Cool the Filling First: This is a crucial step often overlooked! Always allow your cherry filling to cool completely before spooning it into your prepared base crust. Adding warm or hot filling to a cold pie crust can instantly make the dough soggy, leading to an undesirable gummy bottom crust. Patience here pays off in a crisp, flaky foundation.
- Keep Everything Cold: The secret to a truly flaky pie crust lies in maintaining cold temperatures. Ensure your pie crust doughs are thoroughly chilled before rolling them out. After assembling the entire pie with the cooled filling and top crust, chill the whole pie again for at least 15-30 minutes before baking. This helps the butter in the crust remain solid, creating those desirable pockets of steam that result in layers of flakiness during baking.
- Shield the Edges for Even Browning: Pie crust edges tend to brown much faster than the rest of the pie, especially with longer bake times. To prevent over-browning or even burning, use a pie crust shield. Alternatively, you can loosely tent the edges with aluminum foil after the first 20-30 minutes of baking. This ensures a beautifully golden-brown crust all over, without any burnt edges.
- Patience is Key: Set Before Slicing: I know it’s tempting to dive into a warm, fragrant pie straight out of the oven, but resisting the urge is essential for a perfectly set filling. Let your cherry pie cool on a wire rack for a minimum of 3 to 4 hours, or even longer, before attempting to slice it. The filling continues to set as it cools, and cutting too early will almost certainly result in a runny, messy pie. Good things come to those who wait!
By following these tips, you’ll be well on your way to baking a cherry pie that is not only delicious but also visually stunning and perfectly structured.
Quick Tip: Knowing When Your Cherry Pie is Perfectly Baked
Determining when your cherry pie is truly done is key to its success. Look for a deeply golden-brown crust across the entire surface, not just the edges. More importantly, observe the filling: it should be visibly bubbling through the lattice or any openings in the top crust, and these bubbles should be thick and persistent, continuing for at least 5 minutes. This ensures the cornstarch has fully activated and thickened the filling properly, preventing a runny pie. Trust your eyes and ears for this crucial indicator!
Storage & Reheating for Your Cherry Pie
- Storing Leftovers: To keep your cherry pie fresh, cover any leftover slices or the entire pie tightly with plastic wrap or aluminum foil. Refrigerate promptly for optimal freshness, and it will remain delicious for up to 5 days.
- Freezing for Later Enjoyment: This cherry pie freezes beautifully! Once the pie is fully baked and completely cooled, wrap it very tightly in several layers of plastic wrap, followed by a layer of aluminum foil. This double wrapping prevents freezer burn. You can freeze the pie for up to 3 months. Thaw overnight in the refrigerator before serving or reheating.
- Reheating Instructions: To enjoy a warm slice of pie, you can reheat individual slices in a preheated oven at 300°F (150°C) for about 10-15 minutes, or until warmed through. Alternatively, a quick zap in the microwave will warm it, though the crust won’t be as crisp. Many also enjoy it cold, straight from the fridge, especially on a hot summer day!
More Irresistible Summer Desserts to Try
Desserts
Fruit Pizza Recipe
Desserts
Blueberry Cobbler Recipe
Desserts
Frozen Protein S’mores
Desserts
S’mores Cereal Bars
Best Homemade Cherry Pie Recipe
Equipment
-
Pie pan 9-inch
Ingredients
- 5 cups fresh cherries pitted, see note 1
- 2/3 cup granulated sugar
- 1 large lemon (1-1/2 tablespoons juice)
- 1/8 teaspoon salt
- 1/4 cup cornstarch
- 2 tablespoons unsalted butter
- 1 teaspoon vanilla extract
- 1/8 teaspoon almond extract optional, for enhanced flavor
- 2 homemade pie crusts
- 1 large egg plus 1 tablespoon milk, for egg wash
- 2 tablespoons coarse sparkling sugar
Instructions
-
Prepare the Pie Crust: For the flakiest results, aim to make your pie crusts the day before. Refer to my pie crust recipe for detailed instructions. Ensure the dough is thoroughly chilled before proceeding to the next steps. Cold dough is essential for a superior pie texture.
-
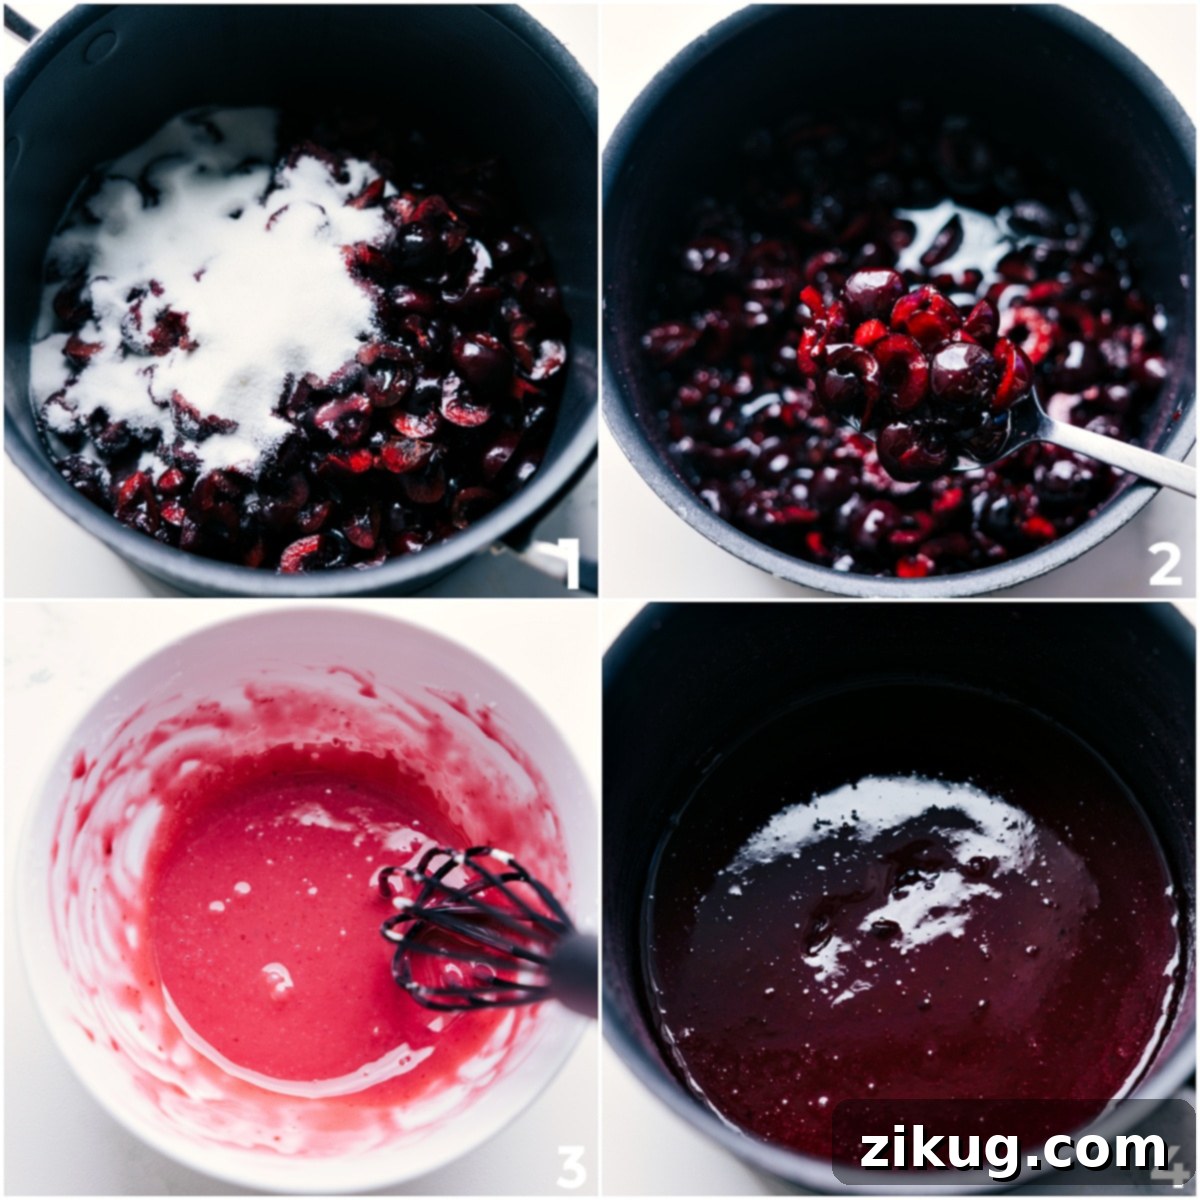
Cook the Cherries: Begin by washing and completely drying your fresh cherries. Carefully remove all stems and pits. For varied texture, cut approximately half of the cherries into halves and the remaining half into quarters. Transfer the prepared cherries to a medium-sized pot, then add the granulated sugar and fresh lemon juice. Cook this mixture over medium heat, stirring occasionally, for about 3–5 minutes until the cherries begin to release their vibrant juices. Using a slotted spoon, transfer the softened cherries to a large bowl, making sure to leave all the accumulated juices in the pot on the stovetop.
-
Thicken the Filling: In a separate small bowl, combine the cornstarch. Carefully remove 2 tablespoons of the hot cherry juice from the pot and whisk it into the cornstarch until you achieve a smooth, lump-free paste. Gradually pour this cornstarch mixture back into the pot with the remaining cherry juice, whisking continuously to prevent any lumps from forming. Continue to cook, whisking constantly, over medium heat until the mixture visibly thickens and becomes smooth, which typically takes about 3-5 minutes. Pour the thickened juice over the cherries in the large bowl and gently toss to ensure all cherries are evenly coated. Stir in the unsalted butter until it is completely melted and incorporated. Finally, add the vanilla extract and, if desired, the almond extract for an extra layer of flavor. Immediately refrigerate the filling while you prepare the pie crust. It is critical that the filling is cold before it’s added to the base crust to prevent sogginess.
-
Assemble the Pie: Lightly grease a 9-inch pie pan with cooking spray to prevent sticking. On a lightly floured surface, roll out one of the chilled pie crusts into a 12-inch circle. Carefully fit this crust into the prepared pie pan. Spoon the completely cooled cherry filling evenly into the pie crust. Preheat your oven to 400°F (200°C). Roll out the second chilled pie crust and cut it into uniform 1/2-inch wide strips. Arrange these strips over the filling in a beautiful lattice pattern (see note 2 for lattice crust tips). Once the lattice is complete, seal and crimp the edges of both crusts together as desired for a decorative and secure seal.
-
Bake to Perfection: In a small bowl, whisk together the large egg and 1 tablespoon of milk to create an egg wash. Gently brush this mixture over the entire top crust, ensuring even coverage. Generously sprinkle the coarse sparkling sugar over the egg-washed crust. Place the pie in the preheated 400°F (200°C) oven and bake for 20 minutes. After 20 minutes, reduce the oven temperature to 375°F (190°C) and continue baking for an additional 30-40 minutes, or until the top crust is a deep golden brown and the cherry juices are visibly bubbling through the lattice for at least 5 minutes. This bubbling indicates the filling has fully thickened. Check the pie after 30 minutes at the lower temperature; if the edges are browning too quickly, cover them with a pie crust shield or a loose ring of aluminum foil.
-
Cool and Serve: This step is critical! Allow the baked pie to cool completely on a wire rack for at least 3-4 hours before attempting to slice it. The filling requires this extended cooling time to fully set and achieve its perfect jammy consistency. Cutting the pie too early will result in a runny, disappointing slice. Once fully cooled and set, slice and serve your magnificent cherry pie as is, or cover and refrigerate it to serve the next day for equally delicious results.
Recipe Notes for Optimal Results
You will need approximately 1-½ pounds of fresh cherries in total. My preference is a harmonious 50/50 blend of dark sweet cherries (such as Bing) and the lighter, sweeter Rainier cherries, which offers a delightful complexity of flavor. However, feel free to use all of one type if that’s what you have available or prefer. If you opt for sour cherries (like Montmorency), you’ll need to adjust the sugar content; increase it to ¾–1 cup, depending on how sweet you prefer your pie. For those who prefer convenience, frozen cherries also work wonderfully. Halve or quarter them while they are still frozen, and then follow the recipe as written. Be aware that using frozen cherries might require a slightly longer baking time to ensure the filling is properly set and bubbling.
Note 2: Crafting a Beautiful Lattice Crust
A lattice crust adds a professional and elegant touch to your cherry pie. To create one, begin by cutting your rolled-out top pie dough into even strips, ideally about 1/2-inch wide. Lay half of these strips across the pie filling in one direction, spacing them evenly. Now, gently fold back every other strip about halfway. Take a new strip of dough and lay it perpendicular over the unfolded strips, close to the folded-back strips. Unfold the original strips over this new perpendicular strip. Next, fold back the *other* set of alternating strips (the ones that were previously unfolded). Lay another new strip of dough parallel to the first perpendicular strip, and then unfold the second set of strips over it. Continue this weaving pattern, alternating which strips you fold back, until your entire pie is covered with a beautiful crisscross design. Once your lattice is complete, carefully trim any dough that overhangs the pie pan. Then, press the edges of the top and bottom crusts together firmly to seal them. For a decorative finish, you can crimp the edges by pinching the dough with your fingers or pressing down with the tines of a fork.
Storage Guidelines: Preserving Your Delicious Pie
To store any leftover cherry pie, ensure it is thoroughly covered, either with plastic wrap or in an airtight container, and place it in the refrigerator. It will maintain its delicious flavor and texture for up to 5 days. For longer storage, this pie freezes exceptionally well. Once completely baked and cooled, wrap the entire pie tightly in multiple layers of plastic wrap, followed by a layer of aluminum foil to prevent freezer burn. It can be stored in the freezer for up to 3 months. When you’re ready to enjoy it again, simply reheat individual slices in a warm oven until heated through, or savor them cold directly from the fridge for a refreshing treat.
Nutrition Facts (Per Serving)
Calories: 243kcal |
Carbohydrates: 36g |
Protein: 2g |
Fat: 10g |
Saturated Fat: 4g |
Polyunsaturated Fat: 1g |
Monounsaturated Fat: 3g |
Trans Fat: 0.1g |
Cholesterol: 24mg |
Sodium: 78mg |
Potassium: 122mg |
Fiber: 1g |
Sugar: 21g |
Vitamin A: 215IU |
Vitamin C: 2mg |
Calcium: 16mg |
Iron: 0.5mg
Please note: Nutrition information is automatically calculated and should be used as an approximation only.
Love this recipe? Share your thoughts below!
Perfect Pairings: What to Serve with Your Cherry Pie
While this homemade cherry pie is undeniably delicious on its own, pairing it with the right accompaniments can elevate the experience to pure bliss. Here are my top recommendations for serving your perfect pie:
- Classic Vanilla Ice Cream: This is the ultimate, timeless pairing for a warm fruit pie. The cold, creamy sweetness of vanilla ice cream melts perfectly into the warm, jammy cherry filling, creating a delightful contrast in temperature and texture. It’s truly a match made in heaven!
- Light & Fluffy Whipped Cream: For a slightly lighter, yet equally indulgent, topping, a dollop of fresh, homemade whipped cream is ideal. Its airy texture and subtle sweetness complement the rich fruit filling without overpowering it. A sprinkle of cinnamon or a shaving of dark chocolate on top can add an extra gourmet touch.
- Fresh Cherries: Reinforce the star of the show by serving your pie with a handful of fresh, ripe cherries on the side or scattered artfully over the top of each slice. This adds a beautiful visual appeal and a burst of fresh fruit flavor, reminding everyone of the seasonal delight.
Frequently Asked Questions About Cherry Pie
Absolutely! Frozen cherries are a fantastic option, especially when fresh ones are out of season or hard to find. For best results, halve or quarter the frozen cherries while they are still frozen to maintain their shape. Then, follow the recipe instructions exactly as written. Keep in mind that using frozen cherries might require a slightly longer baking time, as they will release more moisture initially. Just ensure the filling is bubbling thickly for at least 5 minutes to confirm it’s fully set.
No, there’s no need to blind bake the crust for this particular cherry pie recipe. The filling goes into a raw, chilled bottom crust. The full baking time, which is carefully calibrated, is sufficient to cook both the crust and the filling thoroughly, ensuring a perfectly golden and crisp bottom without any sogginess, as long as the filling is cooled as instructed.
A runny cherry pie filling is a common issue, often due to insufficient baking time. The cornstarch in the filling needs high heat and enough time to fully activate and thicken the juices. To ensure a perfectly set, jammy filling, make sure it is visibly bubbling through the lattice or any vents in the crust for at least 5 minutes during the final stages of baking. This prolonged bubbling is your key indicator that the cornstarch has done its job.
There are a couple of reasons why your beautiful lattice might sink. First, if the filling was too warm when you added it, it could cause the butter in the crust to melt prematurely, leading to a weaker structure. Second, if your lattice strips were cut too thin, they might not have had enough structural integrity. To prevent this, always ensure your filling is completely cooled before assembly, and cut your pie dough strips to at least 1/2-inch width for better support. Chilling the assembled pie before baking also helps the crust maintain its shape.
A soggy bottom crust can be frustrating, but it’s preventable! The most critical step is ensuring your cherry filling is fully cooled – ideally refrigerated – before it touches the raw pie crust. Warm filling will steam the dough, making it soggy. Additionally, make sure you bake the pie for the full recommended time, allowing enough heat to reach and cook the bottom crust. A fantastic trick is to preheat a baking sheet in the oven while it’s coming to temperature, then place your pie directly onto this hot sheet. The direct heat from the baking sheet helps to cook the bottom crust more effectively, promoting a crisp, golden base.