
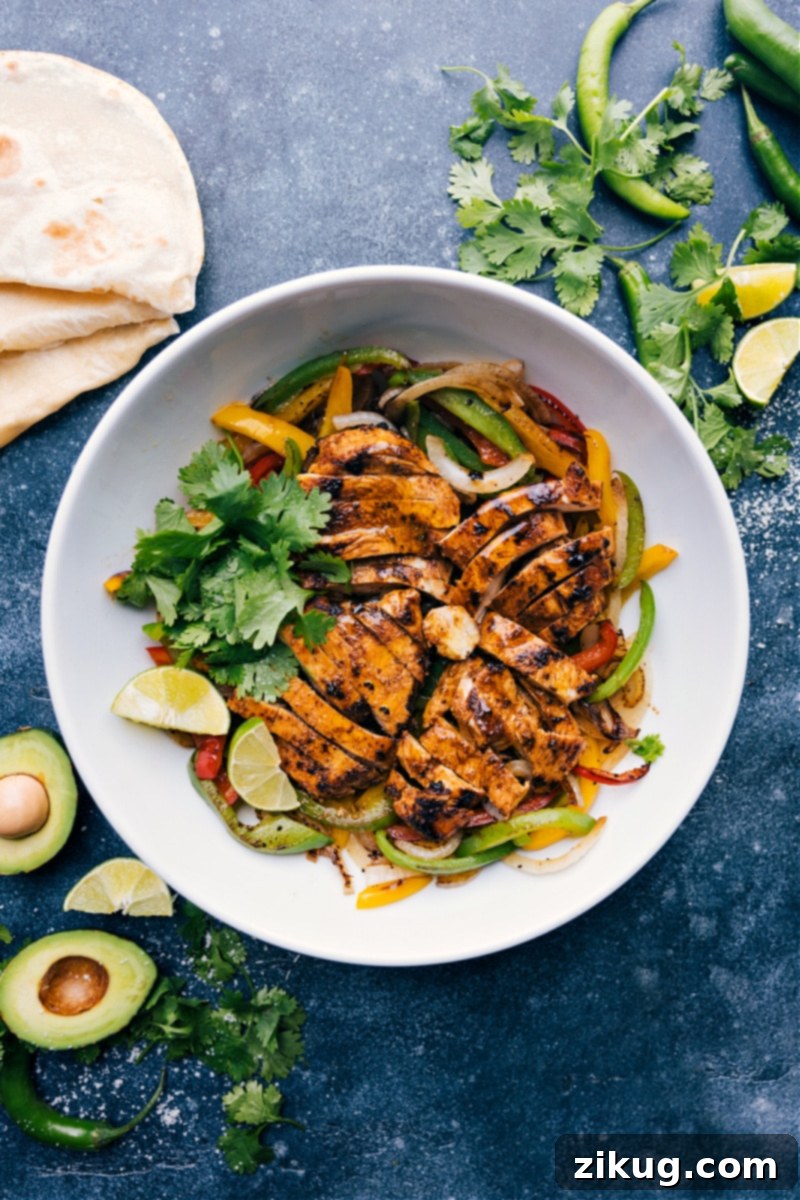
Welcome to the ultimate guide for crafting the most irresistible **Chicken Fajitas** right in your own kitchen! Forget waiting for a table at your favorite Mexican restaurant; this recipe brings that vibrant, sizzling experience directly to your dinner table. Packed with succulent, perfectly seasoned chicken, vibrant bell peppers, and tender-crisp onions, all expertly sautéed to perfection, these fajitas promise a quick, easy, and incredibly flavor-packed meal that will become an instant family favorite. Whether nestled in warm, soft tortillas or served over fluffy rice, the combination of savory fillings and an array of fresh toppings creates a culinary adventure everyone will love.
Looking to explore more delicious variations of this classic dish? Don’t miss out on these fantastic alternatives: discover the simplicity of Sheet Pan Chicken Fajitas for minimal cleanup, savor the robust flavors of Steak Fajitas, indulge in the light and zesty Shrimp Fajitas, or enjoy a wholesome, plant-based meal with Vegetarian Fajitas. Each offers a unique twist on this beloved Mexican-inspired dish.
Unveiling the Best Chicken Fajita Recipe!
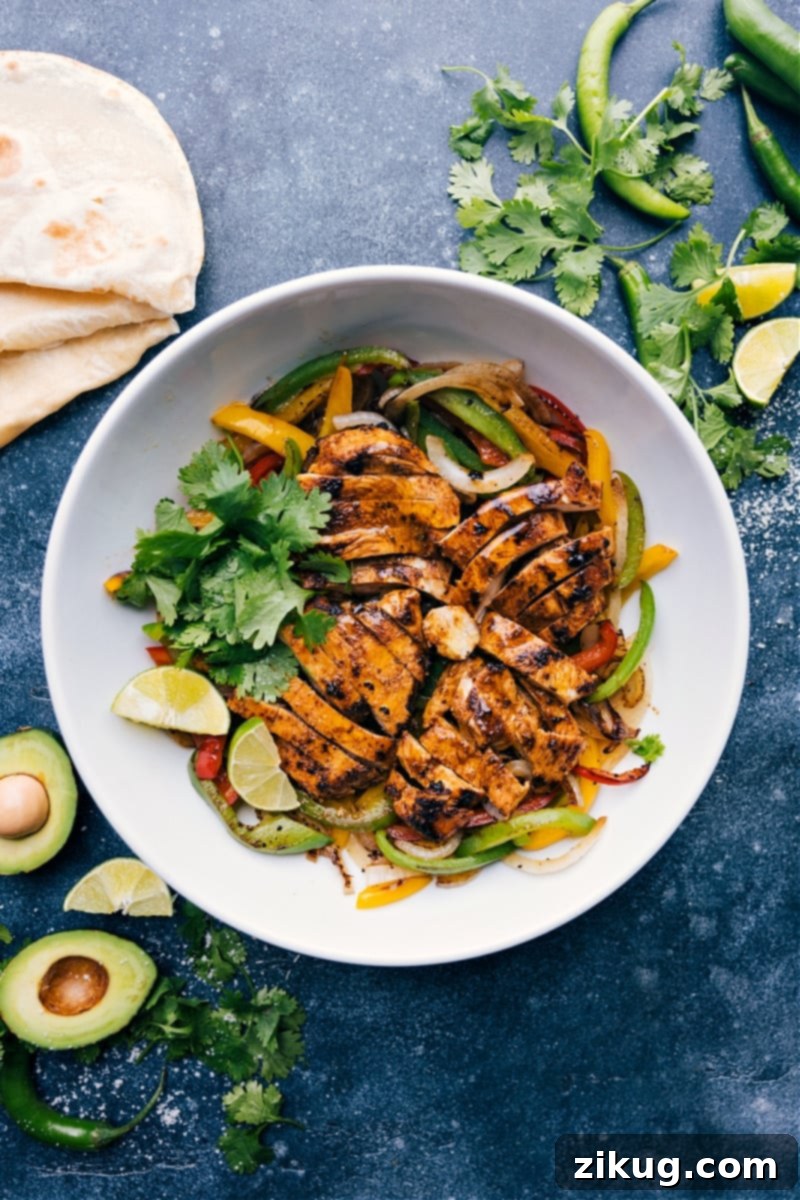
At our core, we are absolutely *obsessed* with these Chicken Fajitas, and we’re confident you will be too. They’ve earned a permanent spot as a frequent go-to dinner in countless homes, and for good reason. This recipe transcends the ordinary, transforming simple ingredients into a truly exceptional meal.
What makes these fajitas stand out? It’s a harmonious blend of health and incredible taste. These healthy fajitas brilliantly combine lean, high-quality protein from the chicken with an abundance of fresh, colorful vegetables. The result is a meal that isn’t just protein-loaded and nourishing, but also deeply satisfying and *bursting* with authentic flavor. It’s the kind of wholesome comfort food that fuels your body without compromising on that craveable taste.
This isn’t just a meal; it’s an experience the whole family will adore. With all the delightful toppings and additions piled high atop the perfectly cooked chicken and tender-crisp veggies, every bite delivers a taste that genuinely rivals your favorite restaurant-quality fajitas. The interactive nature of assembling your own fajitas makes dinner fun and engaging, ensuring everyone gets exactly what they love.
Essential Ingredients for Perfect Chicken Fajitas
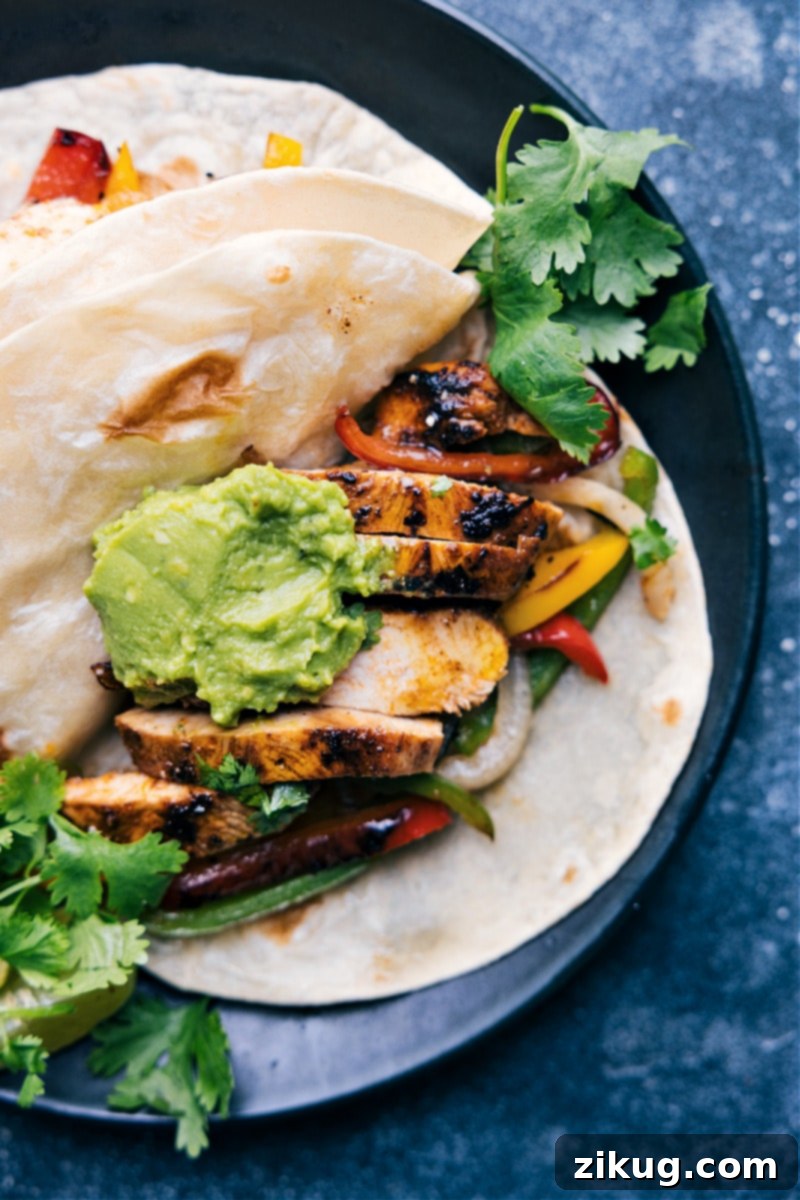
The beauty of this Chicken Fajita recipe lies in its simplicity and the power of a few key, high-quality ingredients. To build the flavorful foundation of this dish, you’ll primarily need fresh **chicken**, vibrant bell **peppers**, aromatic **onions**, zesty **lime** juice, and a carefully selected blend of **spices**. Beyond these core components, the magic truly unfolds when you decide how to serve it – gather your favorite toppings and a stack of warm tortillas to complete the ultimate fajita experience.
Choosing the right ingredients makes a significant difference. Opt for lean, boneless, skinless chicken breasts or thighs for juicy results. Select a variety of bell pepper colors (red, yellow, orange, green) not just for visual appeal but for a spectrum of mild, sweet, and slightly earthy flavors. Freshly squeezed lime juice is non-negotiable; it provides a bright, acidic counterpoint to the rich spices and tender chicken. And while a pre-made seasoning packet can be convenient, crafting your own spice blend elevates the flavor to new heights, allowing you to control the freshness and intensity.
The Art of Toppings: Elevating Your Fajitas
While Chicken Fajitas are undeniably delicious on their own, the secret to achieving truly outstanding, restaurant-quality flavors and captivating textures lies in the array of toppings and side dishes you choose. Think of your fajitas as a blank canvas, ready to be adorned with a palette of vibrant colors and dynamic tastes. The key is to offer an abundance of options and, of course, excellent flour tortillas.
- Start with our highly recommended Guacamolerecipe, a fantastic creation. Alternatively, fresh, ripe **avocados**, diced or thinly sliced, offer a creamy, rich contrast. If ripe avocados are hard to come by, consider a convenient product like WHOLLY GUACAMOLE Minis.
- Add a burst of freshness with salsa. This quick food processor Salsa recipe, made from canned tomatoes, is incredibly easy. Or, for a chunkier, fresher option, try a generous scoop of Pico de Gallo or the unique flavor of Avocado Salsa.
- A drizzle of this practically famous Cilantro Lime Sauce adds an irresistible zing and creamy texture that ties all the flavors together beautifully.
- Brighten up the entire dish with fresh **lime** wedges, allowing each diner to add a squeeze of citrusy goodness, and a sprinkle of fresh **cilantro** for herbaceous notes.
- Cool and creamy **sour cream** (whether fat-free, lite, or regular) provides a wonderful balance to the savory and spicy elements of the fajitas.
- For a refreshing crunch, include a handful of shredded **lettuce** – it adds a cool, crisp texture that contrasts perfectly with the warm fillings.
- No fajita is complete without cheese! Offer freshly grated or shredded **cheese** such as a Mexican blend, sharp Cheddar, mild queso fresco, or crumbly cotija cheese.
- For those who crave a bit of heat, thinly sliced **jalapeños** (fresh or pickled) add a fiery kick that truly awakens the palate.
Versatile Serving Suggestions for Chicken Fajitas
The beauty of chicken fajitas extends beyond their delicious flavor; it’s also in their incredible versatility when it comes to serving. While warm tortillas are the traditional choice, there are many delightful ways to enjoy your seasoned chicken and peppers, whether wrapped up or served alongside.
- **Warmed Tortillas:** The classic choice! Serve with your favorite toppings (as listed above). We highly recommend trying fresh, ready-to-cook flour tortillas for an authentic, soft texture and delightful char.
- **Flavorful Rice or Quinoa:** For a heartier meal, serve your fajita filling over a bed of Cilantro Lime Rice or nutritious Quinoa. These options absorb the delicious juices and spices, creating a comforting and filling dish. For a low-carb alternative, cauliflower rice or a crisp bed of fresh lettuce makes an excellent substitute.
- **Side of Black Beans:** A classic pairing, black beans offer a hearty, earthy complement to the fajita flavors. Season them simply with a little cumin, garlic, and lime juice.
- **Corn Delights:** Bring in the sweetness of corn with a side of Elote (Mexican Street Corn), or simply serve plain grilled corn on the cob for a summery touch.
Mastering the Chicken Cut for Perfect Fajitas
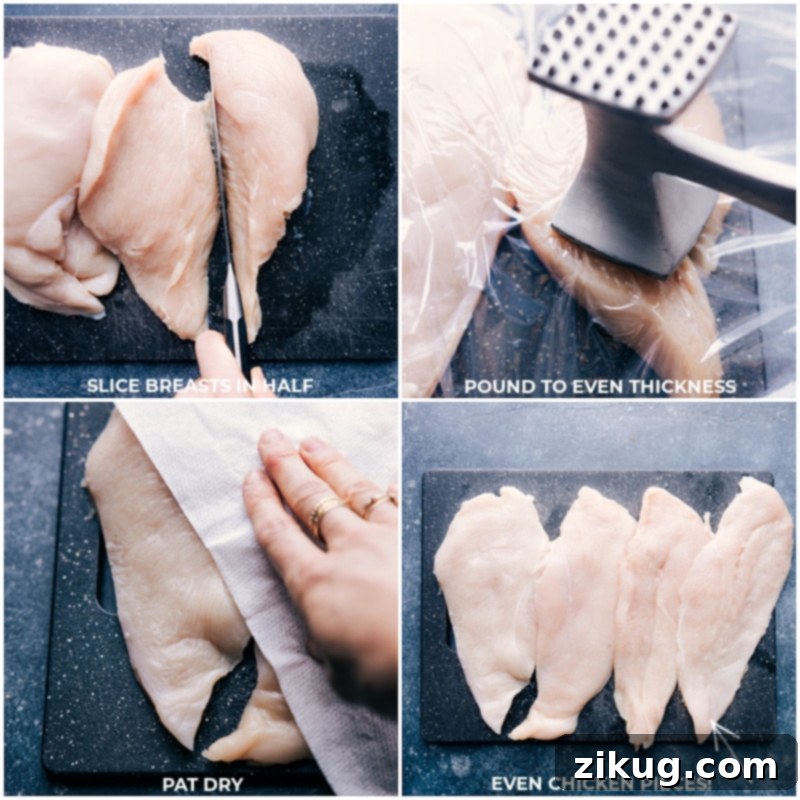
The secret to incredibly tender, evenly cooked chicken that’s ready in a flash lies in how you prepare the chicken before it even touches the pan. Trying to cook a whole chicken breast in a skillet can be time-consuming and often results in uneven cooking, where the exterior might burn before the center is fully cooked. This is precisely why we recommend a specific preparation method.
First, if using chicken breasts, **cut each breast horizontally in half** to create thinner cutlets. This simple step reduces cooking time significantly. Once halved, the next crucial step is to **pound the chicken pieces into an evenly thick consistency**. The goal here isn’t to flatten them completely, but rather to ensure that each piece has a uniform thickness throughout. This uniformity guarantees that every part of the chicken cooks at the same rate, preventing dry edges and undercooked centers. We highly recommend a reliable meat mallet for this task. If you don’t have one, the base of a heavy frying pan or even your fist can work in a pinch to gently even out the chicken. For a visual guide, this YouTube video illustrates the pounding process perfectly.
Once your chicken is cooked and has had a chance to rest (more on that later!), the final cutting step is equally important for tenderness. Always cut the chicken into strips **perpendicular to (or across) the grain of the meat**. This technique shortens the muscle fibers, resulting in slices that are incredibly tender and easy to chew. This YouTube video demonstrates how to cut against the grain for optimal results.
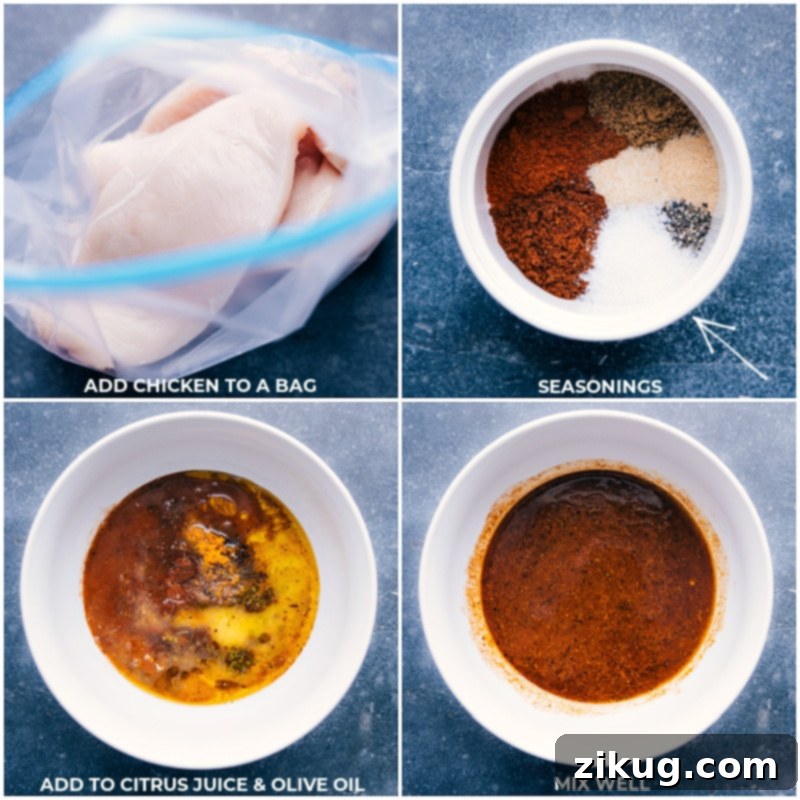
Crafting the Perfect Chicken Fajita Seasoning
While convenient seasoning packets line grocery store shelves, nothing truly compares to the robust, fresh flavor of a homemade fajita seasoning blend. Not only is it far more economical, but it also allows you to avoid unnecessary fillers, artificial ingredients, and excessive sodium often found in pre-packaged mixes. Creating your own blend is quick, simple, and gives you complete control over the flavor profile.
Here’s a breakdown of the essential spices that form this irresistible chicken fajita seasoning blend:
- Chili powder: Provides a rich, earthy, and slightly smoky base.
- Paprika: Adds warmth, color, and a subtle sweetness. You can use sweet, smoked, or hot paprika depending on your preference.
- Cumin: This is a cornerstone of Mexican cuisine, offering a distinctive earthy, warm, and slightly pungent flavor that is quintessential to fajitas.
- Onion powder: Delivers a concentrated onion flavor without the moisture or texture of fresh onion.
- Garlic powder: Aromatic and savory, garlic powder complements all the other spices beautifully.
- Cayenne pepper: For those who enjoy a little heat, cayenne adds a fiery kick. Adjust the amount to your desired spice level, or omit for a milder version.
- Salt & Pepper: Fundamental seasoning to enhance all the other flavors.
Quick Tip: DIY Fajita Seasoning Packets
To make future fajita nights even easier and quicker, we highly recommend trying this clever hack: **make your own DIY fajita seasoning packets!** The next time you’re preparing this recipe, simply measure out 5 or 6 extra batches of the dry spice blend. Since you’re already measuring the individual spices, it takes just a few additional minutes of effort. Store these spice-filled snack-size bags in your pantry, clearly labeled. The next time you crave chicken fajitas, your seasoning will be pre-mixed and ready to go, saving you valuable time and ensuring consistently delicious results!
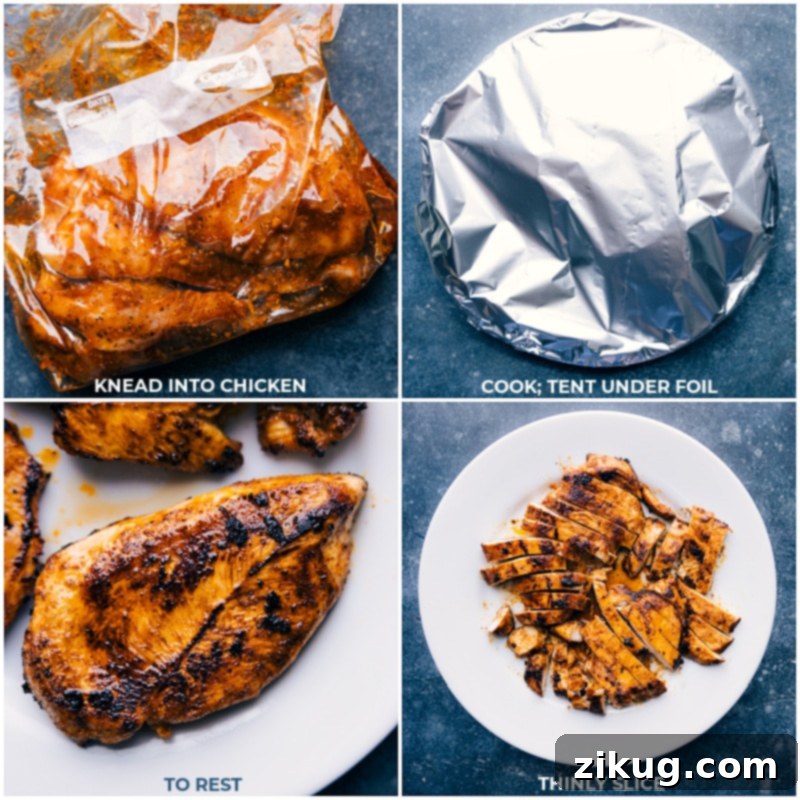
Expert Tips for Cooking Perfect Chicken Fajitas
Achieving truly fantastic chicken fajitas involves more than just great ingredients and seasoning; it also requires a few smart cooking techniques. Here are our top tips for preparing this easy Chicken Fajitas recipe, ensuring tender chicken and perfectly charred vegetables every time:
- **Embrace a Digital Meat Thermometer:** This simple tool is your best friend in the kitchen, especially when cooking chicken. A digital meat thermometer removes all guesswork, ensuring your chicken is perfectly cooked, never underdone or overdone.
- Cooking times can vary significantly based on factors like chicken thickness, pan temperature, and even your stove. Always rely on a thermometer to test your chicken as it cooks. Aim to remove the chicken from the heat when it reaches an internal temperature of **160 degrees Fahrenheit**. This slight undercook is intentional; the phenomenon of “carry-over heat” means the chicken will continue to cook a few more degrees as it rests, safely bringing it to the recommended 165 degrees Fahrenheit. This method guarantees juicy, tender chicken every time.
- **The Importance of Letting the Chicken Rest:** This step is absolutely crucial for juicy results! After your chicken is cooked through, transfer it to a plate, tent it loosely with aluminum foil, and let it stand undisturbed for 5-10 minutes before slicing. This resting period allows the muscle fibers, which contract during cooking and push juices to the center, to relax and reabsorb those delicious juices. The result is significantly more succulent and flavorful meat.
- **Utilize Two Skillets for Efficiency:** While it might mean a couple more dishes to wash, using two skillets concurrently is a game-changer for speed and quality. Cook the bell peppers and onions in one pan while the chicken sizzles away in the other. This ensures everything cooks quickly and evenly, allowing you to serve your fajitas piping hot, with perfectly charred chicken and tender-crisp vegetables, all at the same time. This method is particularly beneficial for larger batches or when you’re aiming for that ideal “sizzle” from both components.
Do You Need a Cast Iron Skillet for Fajitas?
While often associated with fajitas, a cast iron skillet isn’t strictly necessary, but it certainly offers distinct advantages. The superior heat retention and even heating of cast iron excel at creating that coveted char and deep sear on both your chicken and vegetables, contributing to an incredibly rich and authentic flavor. The high heat of cast iron helps achieve that beautiful browning, forming a delicious crust that is characteristic of great fajitas.
That said, if you don’t own a cast iron skillet, don’t despair! A good quality nonstick pan or a heavy-bottomed stainless steel skillet can still yield excellent results. Just ensure your chosen pan is heated properly and you don’t overcrowd it, allowing the ingredients to sear rather than steam. If you are using a cast iron skillet, always make sure it is properly seasoned. A well-seasoned cast iron pan creates a natural nonstick surface, preventing food from sticking and burning, and making cleanup much easier.
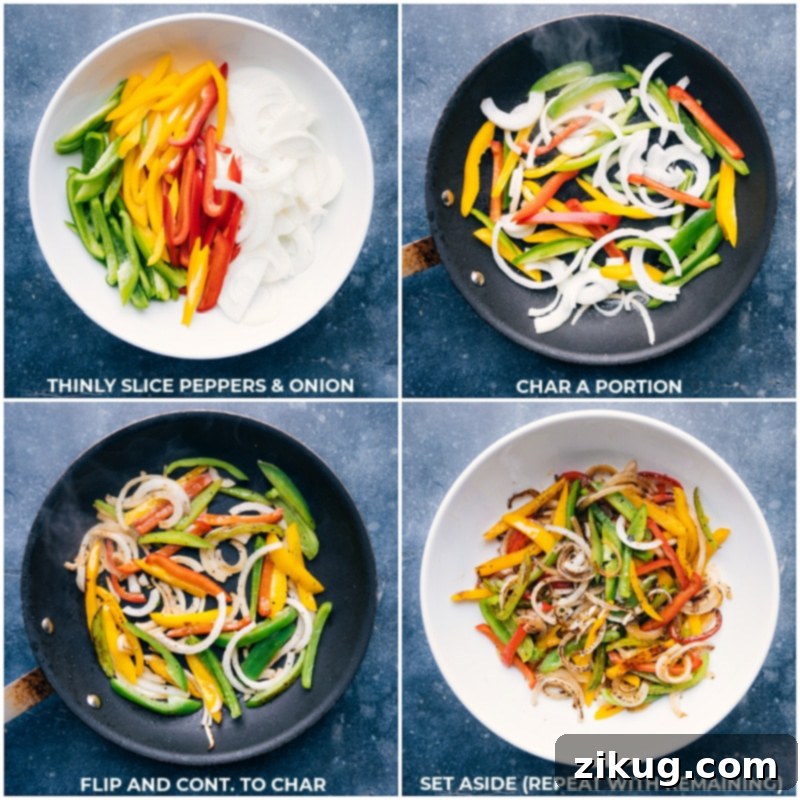
Getting the Veggies Just Right: Crisp-Tender Perfection
The bell peppers and onions in these chicken fajitas are more than just an accompaniment; they are an integral part of the dish’s flavor and texture profile. While they cook relatively quickly, achieving that ideal “crisp-tender” texture with a beautiful char requires a little attention at the stovetop. We’re not aiming for super soft, limp, or fully caramelized vegetables; instead, we want them to retain a slight bite, showcasing their vibrant color and, most importantly, developing those delicious charred edges which add depth of flavor.
To truly achieve this desirable char and perfect texture, follow these key steps:
- **Cook in a Single Layer:** This is crucial! When adding your sliced peppers and onions to the hot pan, ensure they are in a single layer without overlapping. If the vegetables are piled on top of each other, they will steam instead of sear, preventing that coveted char from forming. This means you’ll likely need to cook them in batches, especially if you have a generous amount of vegetables.
- **Toss, Sear, Repeat:** Once the veggies are in the pan, resist the urge to constantly stir them. Let them sit undisturbed for about 45 seconds to a minute to develop a good sear on one side. Then, toss them quickly to expose a new surface to the hot pan, and let them sit again for another 45 seconds to a minute. Repeat this process until all sides are nicely charred and the vegetables have reached your preferred crisp-tenderness.
- **Season as You Go:** A light sprinkle of salt and pepper during the cooking process enhances their natural sweetness and helps draw out moisture, contributing to better searing.
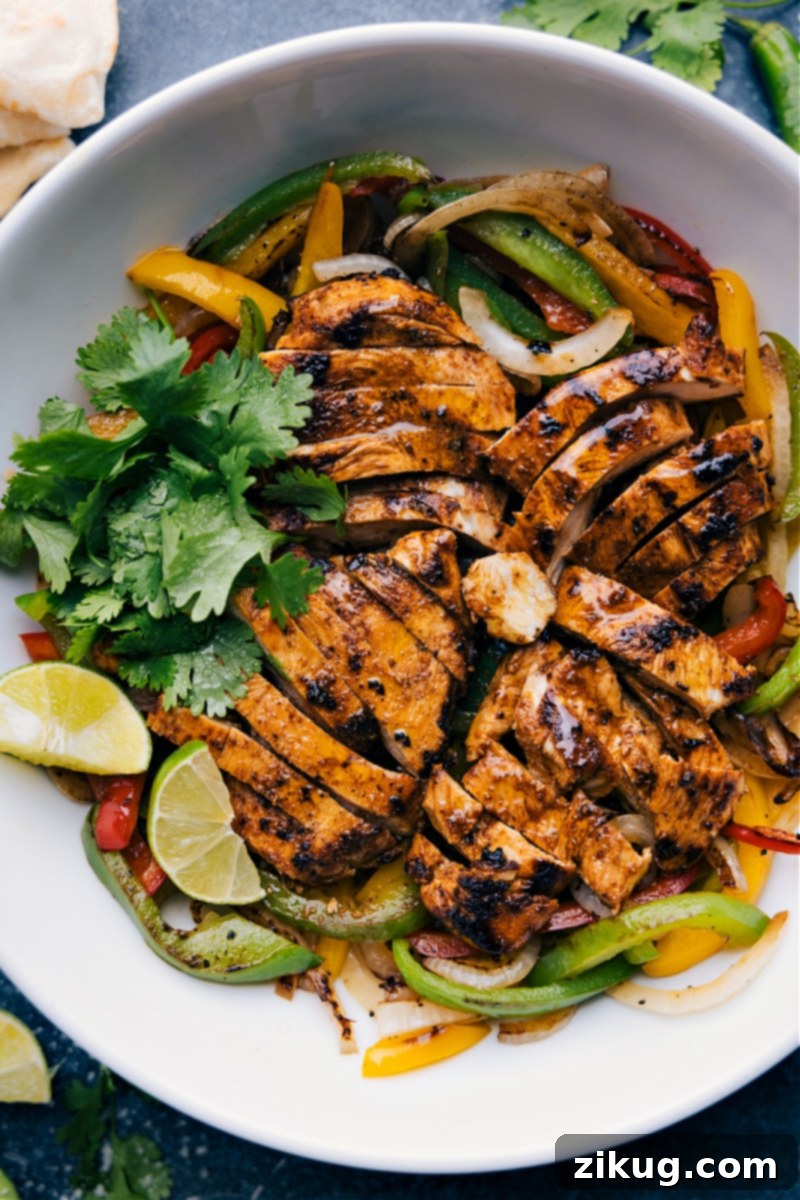
Smart Storage & Meal Prep for Chicken Fajitas
Chicken Fajitas are not only a fantastic fresh dinner but also an excellent choice for weekly meal prep. Their components hold up beautifully, making them perfect for quick and healthy lunches or effortless weeknight dinners throughout the week. To maximize freshness and flavor for meal prep, we highly recommend making a double batch!
How to Store Your Chicken Fajitas
For optimal storage, keep the cooked chicken and sautéed vegetables in separate airtight containers. This helps maintain the texture of each component and prevents the vegetables from becoming overly soft. Store any toppings (like shredded cheese, salsa, or sour cream) in their own separate containers. When it’s time to enjoy, simply re-warm the chicken and veggies (a quick reheat in a skillet or microwave works well) and assemble with your fresh toppings. You can serve them traditionally in tortillas or transform them into a satisfying fajita salad over a bed of crisp lettuce. The chicken and vegetables will remain fresh and delicious for **3-5 days when stored properly in the fridge in airtight containers**.
Explore More Mexican-Inspired Favorites:
- Master the art of Mexican Rice Recipe, prepared and baked all in ONE pan for ultimate convenience and flavor!
- Indulge in Loaded Sweet Potatoes, a unique and delicious dish inspired by the vibrant flavors of Mexican Street Corn.
- Whip up incredible Chicken Tacos, elevated with a fresh and creamy corn and avocado topping.
- Discover wholesome and tasty Mexican Zucchini Boats, generously stuffed with savory fillings and drenched in rich enchilada sauce.
- Enjoy authentic flavors with Pozole, made even easier with smart shortcuts for a quick and satisfying recipe!
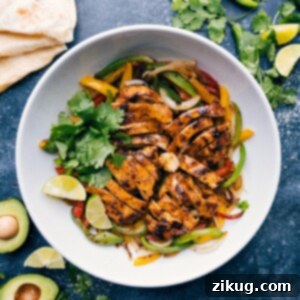
Chicken Fajitas
Equipment
-
Large pan
-
Meat mallet (optional, or use a heavy pan)
-
Digital meat thermometer
Ingredients
- 1 pound boneless, skinless chicken breast or thighs
- 3 tablespoons olive oil
- 1 orange (for juice)
- 2 limes (for juice)
- 2 teaspoons ground chili powder
- 1 teaspoon paprika
- 1 teaspoon ground cumin
- 1 teaspoon salt
- 1/2 teaspoon onion powder
- 1/2 teaspoon garlic powder
- 1/2 teaspoon pepper
- 1/8 teaspoon ground cayenne pepper optional, for heat
- 2 tablespoons olive oil divided
- Salt and pepper to taste, for vegetables
- 3 large bell peppers (any color, thinly sliced)
- 1 large yellow onion (thinly sliced)
- Toppings as desired (see note 1 in Recipe Notes for ideas)
Instructions
-
**Prepare the Chicken:** If using chicken breasts, carefully slice each breast in half horizontally to create thinner cutlets. Using a meat mallet or the base of a frying pan, gently pound all four chicken pieces to an even thickness. The goal is uniformity for even cooking, not necessarily to flatten them completely. If you are using chicken thighs, no special preparation is needed for thickness.
-
**Prepare the Marinade:** Juice the orange using a citrus juicer to yield 3 tablespoons of fresh orange juice. Similarly, juice the limes to obtain 3 tablespoons of fresh lime juice.
-
**Marinate the Chicken:** Place the prepared chicken into a large, resealable plastic bag. In a small bowl, combine all of the remaining ingredients listed under “Chicken & Marinade” (olive oil, orange juice, lime juice, chili powder, paprika, cumin, salt, onion powder, garlic powder, pepper, and optional cayenne pepper). Whisk these ingredients together until thoroughly combined and smooth. Pour this vibrant marinade over the chicken in the bag, seal the bag, and use your hands to gently knead the bag, ensuring every piece of chicken is thoroughly coated. Place the bag in the fridge to marinate for at least 30 minutes, or for optimal flavor, 3–4 hours. Do not marinate for longer than 8 hours, as the citrus can begin to break down the chicken’s texture too much.
-
**Cook the Vegetables:** While the chicken marinates, thinly slice the bell peppers and yellow onion. We will cook these in stages to achieve a beautiful char. Place your largest skillet (preferably cast iron if available) over high heat. Add 1 tablespoon of olive oil, and once it’s shimmering hot, add a handful of the sliced veggies, spreading them out to cover the entire base of the pan in a single layer without overlapping. Let them stand undisturbed for about 45 seconds to allow a char to form. Toss quickly with tongs and spread them out again, cooking for another 45 seconds. Sprinkle lightly with salt and pepper, stir once more, then spread out and let stand for another 30 seconds or until they are nicely charred and crisp-tender. Remove the cooked veggies from the pan, set them aside, and repeat this process with the remaining vegetables, adding more olive oil as needed, until all are done.
-
**Cook the Chicken:** Add the remaining 1 tablespoon of olive oil to a large pan (the same one used for vegetables, or a second one if using two). Set the heat to medium-high. Using tongs, remove the chicken pieces from the marinade bag, allowing any excess marinade to drip off. Place the chicken flat into the hot pan in an even layer, ensuring pieces do not overlap (cook in batches if necessary). Let the chicken stand and sear for about 3–4 minutes before flipping to the other side and cooking for another 3–4 minutes, or until nicely charred and cooked through. Use a digital meat thermometer to ensure the chicken reaches an internal temperature of 160°F. Once cooked, transfer the chicken to a plate, cover loosely with foil, and let it rest for 5–10 minutes before thinly slicing it against the grain.
-
**Assemble and Serve:** Prepare your tortillas if using (refer to Note 2 in the Recipe Notes for warming instructions). Arrange the sautéed peppers, onions, and sliced chicken onto the warm tortillas. Invite everyone to add their favorite toppings from your selection, wrap them up, and enjoy your sensational homemade Chicken Fajitas!
Recipe Notes
Note 2: Warming Tortillas: For the best experience, we love using unbaked tortillas by TortillaLand® (this is not a sponsored recommendation, just a genuine favorite!). To get a lovely char on your tortillas, lightly spray both sides with cooking spray. Using tongs, hold each tortilla directly over an open flame on your stovetop, charring each side for about 10-15 seconds until lightly browned and pliable. If you don’t have an open flame, simply warm them in a dry hot pan for 10-15 seconds per side. Immediately remove the warmed tortilla from the heat and fold it in half. Place it under a clean kitchen towel to keep warm and soft while you repeat with the remaining tortillas. This ensures they stay perfectly pliable and warm until serving.
Nutrition Note: The provided nutrition information is only for the fajita filling (chicken and vegetables) and does not include tortillas or any additional toppings you may add. The nutritional values of tortillas and various toppings can vary widely.
Storage: For best results, store the cooked chicken and sautéed vegetables in separate airtight containers in the fridge. This keeps their textures optimal. They will remain fresh and delicious for 3–5 days.
Nutrition
Nutrition information is automatically calculated, so should only be used as an approximation.