
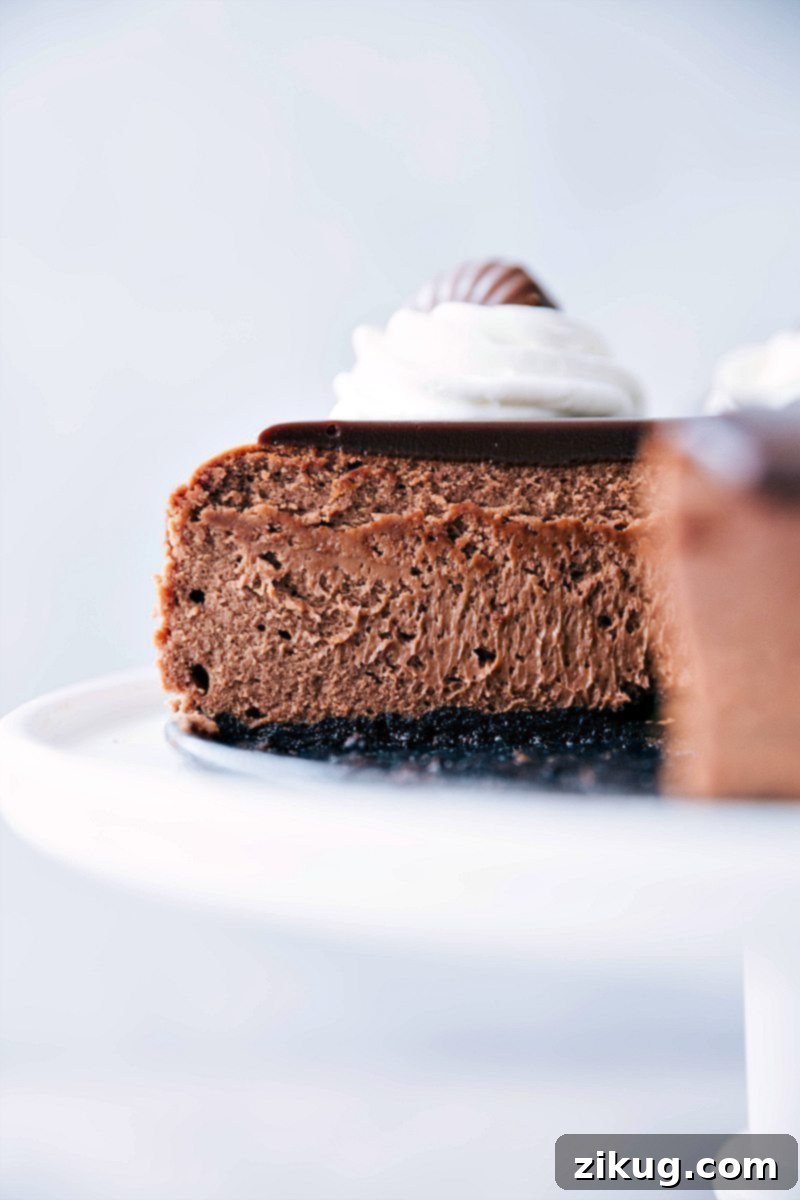
Indulge in the ultimate rich and fudgy Chocolate Cheesecake, a true masterpiece for any dessert enthusiast. This show-stopping treat features a perfectly crunchy Oreo cookie base, an unbelievably smooth and intensely chocolatey interior, all crowned with a simple yet luxurious ganache topping.
Our passion for cheesecake knows no bounds! If you adore this classic dessert, be sure to explore some of our other beloved cheesecake recipes. You might love our original Oreo Cheesecake, the delightful vanilla Cheesecake Bars, or these charming Mini Cheesecakes, often served with a vibrant berry topping.
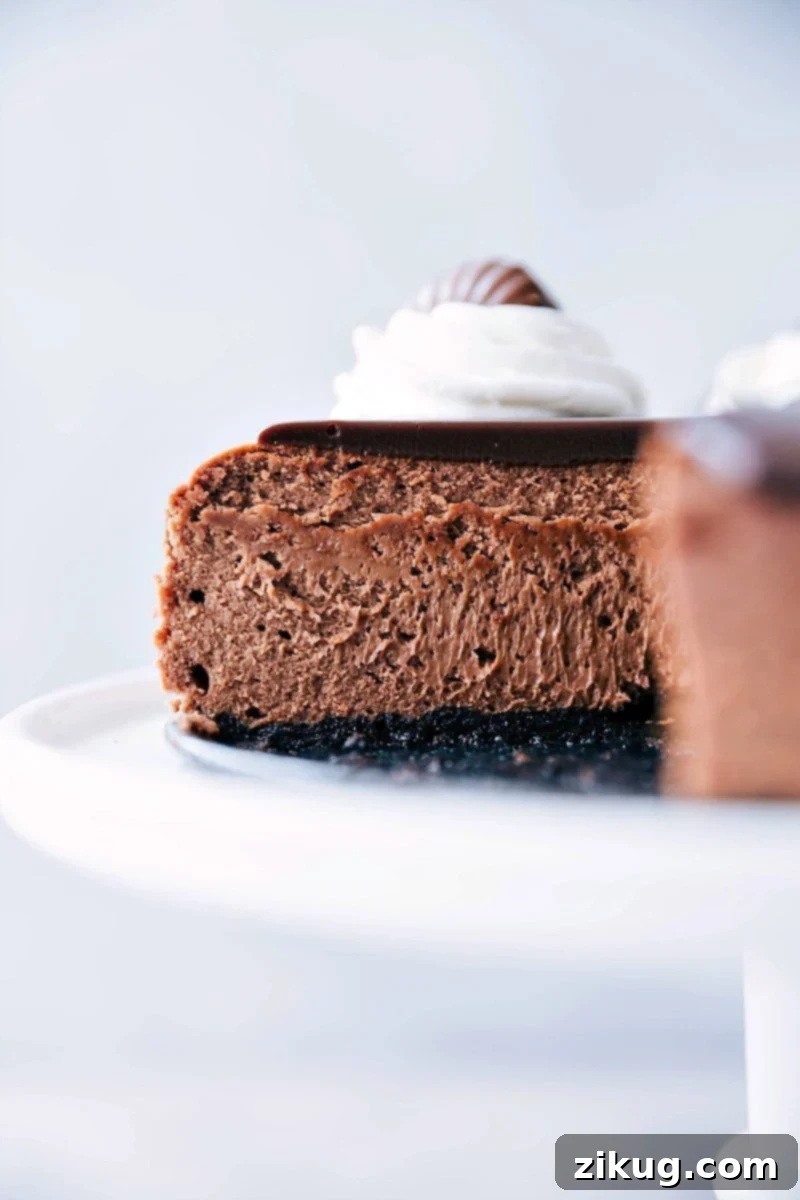
Decadent Chocolate Cheesecake: A Chocolate Lover’s Dream
Crafting this rich chocolate cheesecake has been a delightful, albeit sometimes challenging, endeavor. On a few occasions when I attempted to photograph the finished masterpiece, my little boys proved to be far too eager to wait for a proper photoshoot. Their love for chocolate is so intense that they’d begin to demolish the cake before I could even capture its beauty!
To outsmart my enthusiastic taste-testers and ensure I could get a few precious photos, I devised a plan. After tucking them into bed one night, I secretly made this triple chocolate cheesecake and swiftly hid it in the fridge. The next morning, I carefully cut a few slices. However, even as I turned to grab my camera, their keen senses had already detected the forbidden treat, and they began to dig in!
Witnessing their sheer joy, I couldn’t help but smile. It seems I’ve successfully cultivated my own little band of dedicated chocolate lovers, and honestly, I couldn’t be prouder or happier about it. Their undeniable enthusiasm is the ultimate testament to how truly irresistible this chocolate cheesecake is.
This triple chocolate cheesecake is more than just a dessert; it’s an experience. It’s ridiculously rich, incredibly smooth, wonderfully creamy, and boasts a profound, deep chocolate flavor that will transport any chocolate enthusiast to pure bliss. It’s truly a total dream for anyone who cherishes the intense, comforting taste of chocolate.
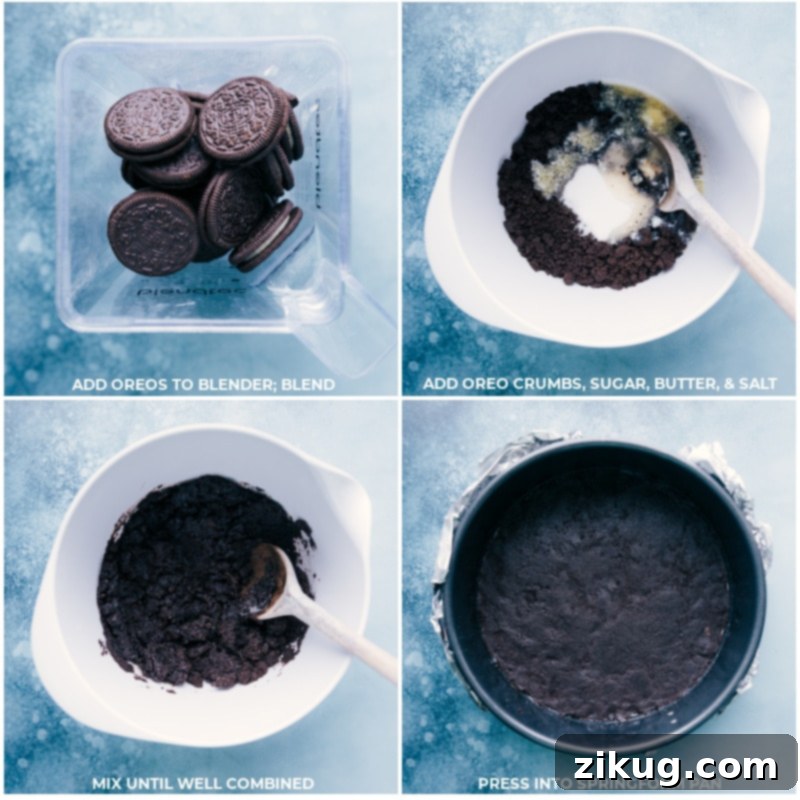
Creating this magnificent chocolate cheesecake involves three distinct, yet equally important, components: the foundational Oreo crust, the velvety chocolate cheesecake filling, and the glossy chocolate ganache topping. Below, I’ll meticulously break down each section, offering my best tips and insights to help you achieve cheesecake perfection.
Crafting the Perfect Oreo Crust for Your Chocolate Cheesecake
The base of any great cheesecake sets the stage, and for this rich chocolate cheesecake, an Oreo crust is simply unbeatable. Here are my essential tips for a flawless, flavorful foundation:
- Achieve a Fine Crumb: The key to a beautiful, sliceable crust lies in how thoroughly you crush your Oreos. If large pieces of cookies remain, the crust, while still delicious, won’t cut as cleanly, and slices might crumble rather than hold their shape. For the smoothest and most uniform crumbs, I highly recommend using a blender or food processor. If these gadgets aren’t available, an effective alternative is to place all the cookies in a sturdy, large plastic bag, remove as much air as possible, and then use a rolling pin or meat mallet to bash them into fine crumbs. The finer the crumbs, the better the structure of your crust will be.
- Embrace the Creme Filling: There’s absolutely no need to painstakingly separate the creme filling from the cookie wafers. In fact, the creme is a secret weapon! It contributes significantly to both the structure and the sweetness of the crust, acting as a natural binder and adding an extra layer of flavor that complements the rich chocolate cheesecake filling beautifully.
- Precision in Measurement: While it might seem convenient to simply count out a certain number of Oreos, cookie sizes can vary between brands and even batches. For a truly foolproof crust that is consistently perfect, always measure the crushed crumbs rather than counting individual cookies. To get the most accurate measurement, slightly overfill your measuring cup and then level off the top with the straight edge of a table knife. This ensures you have just the right amount of crumbs for an ideal crust consistency.
- Cool the Melted Butter: Once you’ve melted your butter, resist the urge to immediately pour it into the crushed cookies. Hot butter can cause the cookies to become greasy, leading to a crust that’s too oily and less pleasant in texture. Allow the butter to cool slightly to room temperature before mixing it with the crumbs. This step ensures a perfectly moist, yet firm, crust.
- Firmly Compress the Crust: After mixing your crumbs and butter, it’s crucial to compress the mixture tightly into the bottom of your springform pan. I find that lightly spritzing the back of a one-cup measuring cup with cooking spray provides the perfect non-stick surface. Use it to firmly and evenly press the crumbs into the pan, creating a compact and stable base that won’t fall apart when sliced.
- Pre-Bake for Stability: To prevent your delicious crust from becoming soggy once the wet cheesecake filling is added, we always pre-bake it. This quick baking step helps to set the butter and crumbs, creating a sturdy barrier. While the crust doesn’t need to be completely cold when you add the filling, it should be at least slightly cooled to ensure the best results.
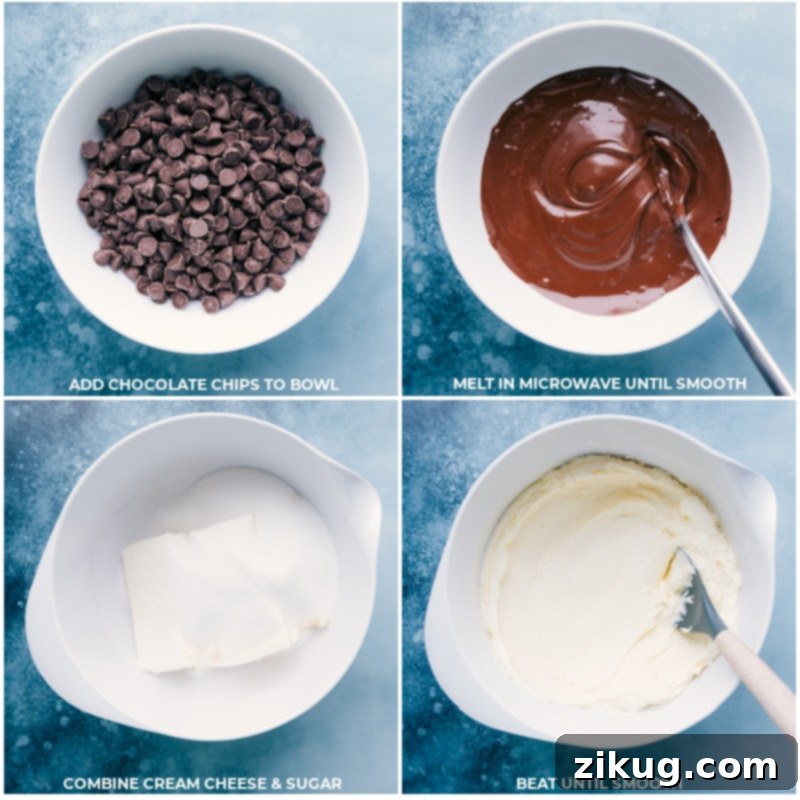
Expert Tips for a Velvety Smooth Chocolate Cheesecake Filling
The heart of this decadent dessert is its smooth, rich chocolate filling. Achieving that perfect, crack-free texture requires a few key techniques:
- Always Use Room-Temperature Cream Cheese: This is perhaps the most critical tip for a perfectly smooth cheesecake. When cream cheese is at room temperature, it’s incredibly pliable and blends effortlessly with other ingredients. Cold cream cheese, on the other hand, tends to remain lumpy, resulting in a batter that’s not fully incorporated. Lumps can lead to overmixing as you try to smooth them out, which is detrimental to cheesecake texture. For a quick hack, see the “Quick Tip” below.
- Bring Eggs to Room Temperature Too: Just like cream cheese, eggs should also be at room temperature. When all your ingredients share a similar temperature, they emulsify and combine much more uniformly. This consistency in temperature is a simple yet powerful way to help prevent unwanted cracks from forming on the surface of your beautiful cheesecake during baking and cooling.
- Avoid Overmixing the Batter at All Costs: This cannot be stressed enough. Mix the cheesecake batter only until the ingredients are just combined and any lumps from the cream cheese have disappeared. Overmixing incorporates too much air into the batter, which causes the cheesecake to puff up excessively in the oven. As it cools, this trapped air escapes, causing the cheesecake to dramatically fall and, inevitably, crack. A gentle hand is best here.
- Mix at Low and Consistent Speeds: When beating your cheesecake batter, maintain a low and consistent speed. Beating too fast or erratically will introduce more air, increasing the risk of cracks. I also recommend beating the batter in the same direction throughout the mixing process. This steady motion further helps to minimize air incorporation and ensures a consistently smooth texture.
- Allow for Gradual Room Temperature Cooling: Once baked, your cheesecake needs to cool down slowly and gently. Placing a hot cheesecake directly into the fridge can cause a rapid temperature change, leading to condensation, a potentially rubbery texture, and—you guessed it—cracks. First, let it cool completely at room temperature on a wire rack, then chill it thoroughly in the refrigerator for the best results.
Quick Tip: Achieve Room-Temperature Cream Cheese in Minutes
If you forgot to take your cream cheese out of the fridge, don’t worry! Remove the cream cheese from its foil packaging and place it in a microwave-safe bowl. Microwave it in short bursts of 15-20 seconds, checking and flipping between each burst, until it is just at room temperature – be careful not to soften or melt it. The goal is pliable, not liquid.
Mastering the Bake: Essential Chocolate Cheesecake Baking Tips
Baking a perfect cheesecake, especially a rich chocolate one, can seem intimidating, but with these simple tips, you’ll achieve a beautifully even bake and a creamy texture every time:
- Invest in a Springform Pan: This specialized baking pan is indispensable for cheesecakes. Its unique latch mechanism allows the sides to be released and removed, making it effortless to unmold your cheesecake without damaging its delicate form and shape. Unlike a traditional cake, a cheesecake cannot be inverted, so a springform pan is essential for preserving its integrity and presentation. Always remember to generously grease your springform pan before adding the crust.
- Protect Your Pan with Foil: This chocolate cheesecake is designed to bake in a water bath, a technique that requires your springform pan to be completely sealed. I strongly recommend wrapping your springform pan twice with heavy-duty aluminum foil. This creates a robust barrier, ensuring that no water from the bath can seep into your cheesecake, which would result in a soggy crust and a compromised texture.
- The Magic of a Water Bath: While a water bath (or “bain-marie”) might sound like a professional, complex technique, it’s surprisingly simple and incredibly effective. To create one, you merely place your foil-wrapped springform pan into a larger baking pan, then carefully fill the larger pan with about an inch of boiling water. This method, similar to how we make creme brulee, provides gentle, moist, and evenly distributed heat. The water bath helps to regulate the oven temperature around the cheesecake, preventing the edges from baking too quickly and cracking. The steam from the water also keeps the cheesecake moist, resulting in that wonderfully creamy, smooth texture and, most importantly, helps you avoid those dreaded cracks on top.
The Luscious Chocolate Ganache Topping for Cheesecake
A glossy, smooth chocolate ganache is the ideal finishing touch for this rich chocolate cheesecake. Not only does it add an extra layer of deep chocolate flavor and a beautiful sheen, but it’s also your secret weapon if your cheesecake happens to develop any small cracks – the ganache will elegantly cover them, and no one will ever know!
- Opt for High-Quality Chocolate: The quality of your chocolate directly impacts the taste and texture of your ganache. For the best results – a superior melt and a richer, more profound chocolate flavor – choose high-quality milk chocolate chips or finely chopped bars. My personal favorites for this specific chocolate cheesecake recipe are Ghirardelli® or Guittard®; they consistently deliver exceptional results.
- Don’t Forget to Decorate! Even with the perfect ganache, a little extra flourish can elevate your cheesecake from great to truly unforgettable. If your ganache application isn’t absolutely flawless, don’t fret! A few creative garnishes can easily hide any imperfections and add a professional touch. Consider adding elegant chocolate curls, a generous dollop of homemade whipped cream, or even a sprinkle of your favorite chocolate candies for a playful finish.
Storage Guidelines for Your Chocolate Cheesecake
Chocolate Cheesecake Storage Best Practices
This exquisite chocolate cheesecake, complete with its delicious Oreo crust, can be safely kept at room temperature for a maximum of 2 hours. Beyond this timeframe, it is crucial for both food safety and maintaining optimal texture that the cheesecake be refrigerated.
To Store in the Refrigerator: For any leftover slices, the best method is to place them in an airtight container. Alternatively, you can individually wrap each slice tightly in plastic wrap to prevent them from drying out or absorbing other fridge odors. Stored correctly in the refrigerator, your chocolate cheesecake will remain fresh and delightful for up to 5 days. Keep in mind that the Oreo crust may gradually soften the longer it is stored.
To Freeze for Longer Enjoyment: To extend the life of your cheesecake, you can easily freeze it. Tightly wrap individual cheesecake slices in several layers of plastic wrap, ensuring no air can get to them. Then, place all the individually wrapped slices into an airtight freezer-safe container or a heavy-duty freezer bag. This double-layer protection helps prevent freezer burn. Your chocolate cheesecake can be frozen for up to 3 months. To serve, simply transfer the frozen slices to the refrigerator and allow them to thaw overnight. For the best texture, let the thawed cheesecake sit at room temperature for about 20-30 minutes before indulging.
Quick Tip: Achieving Perfect Cheesecake Slices
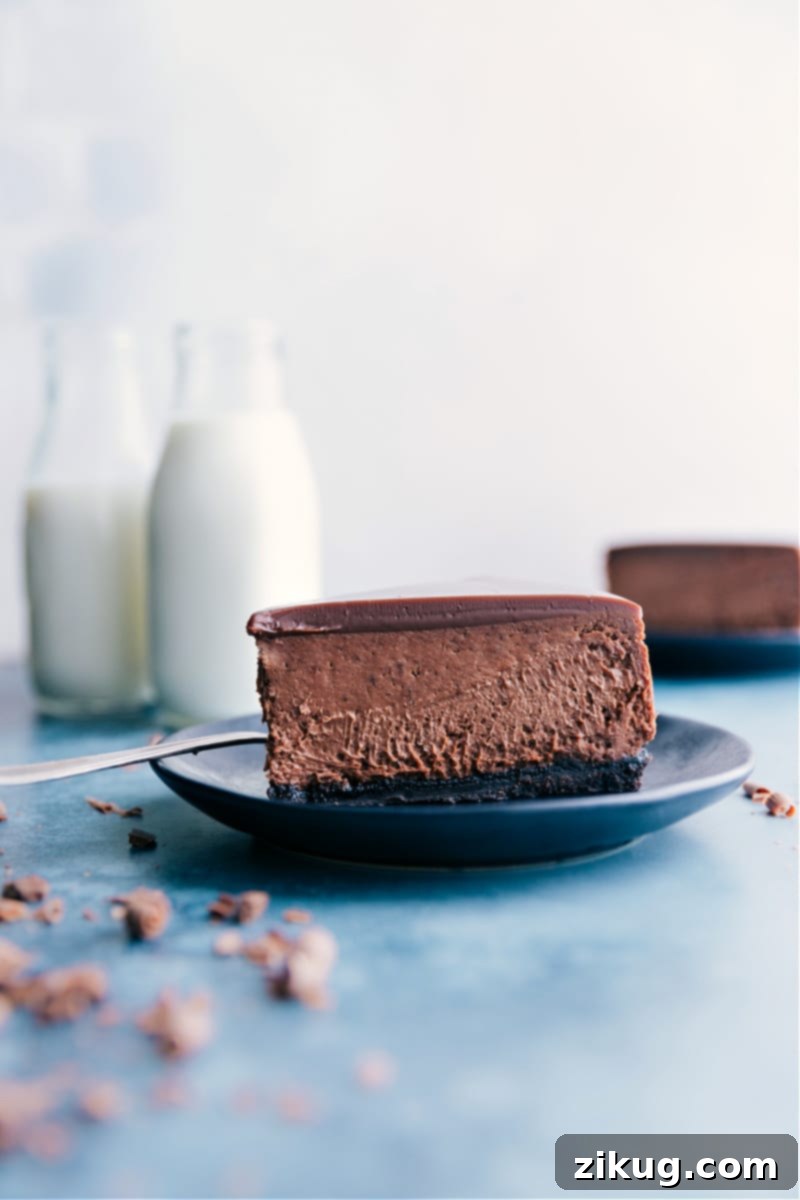
To ensure your chocolate cheesecake slices are impeccably clean and perfectly presented, use a very sharp, hot knife. The trick is to run your knife under very hot water for a few seconds, then immediately dry it off with a clean kitchen towel. Make one swift, decisive cut through the cheesecake. Before making the next cut, repeat this heating and drying process. This technique prevents the cheesecake from sticking to the blade and creates beautiful, smooth edges every time.
More Irresistible Chocolate Desserts to Try
If this rich chocolate cheesecake has awakened your inner chocoholic, you’ll love these other fantastic chocolate-infused treats:
- Chocolate Covered Oreo Fudge — a delightful combination of milk chocolate and Oreo goodness.
- Chocolate Tart — featuring multiple layers of chocolate and a luscious chocolate ganache topping.
- Hot Chocolate Snack Mix — a cozy and fun treat with chocolate-covered marshmallows.
- Chocolate Cake Recipe — a classic chocolate cake elevated with triple chocolate frosting.
- Chocolate Rice Krispie Treats — a chewy, chocolatey version loaded with marshmallows.
Pin
Chocolate Cheesecake
This rich and fudgy Chocolate Cheesecake features an Oreo cookie base, a smooth chocolate filling, and a simple ganache topping.
Video
Equipment
-
9-inch Springform pan
-
Aluminum foil
-
9 x 13-inch baking pan
Ingredients
- 1-3/4 cups Oreo crumbs or other chocolate cookie sandwich
- 2 tablespoons granulated sugar
- 4 tablespoons unsalted butter melted
- 4 (8-ounce) packages cream cheese full-fat, room temperature
- 1 (12-ounce) package semi-sweet chocolate chips
- 1-1/2 cups granulated sugar
- 4 tablespoons cocoa powder
- 4 large eggs
- 1/2 teaspoon salt
- 1/2 tablespoon vanilla extract
- 1 cup chocolate chips
- 1/2 cup heavy cream
- 1 tablespoon unsalted butter
- 3/4 cup heavy cream
- 2 tablespoons powdered sugar
- 1 teaspoon vanilla extract
Instructions
-
Preheat oven to 325°F (160°C). Wrap a well-greased, 9-inch springform pan in two layers of heavy-duty aluminum foil, securing the foil snugly around the pan to prevent water from entering.
-
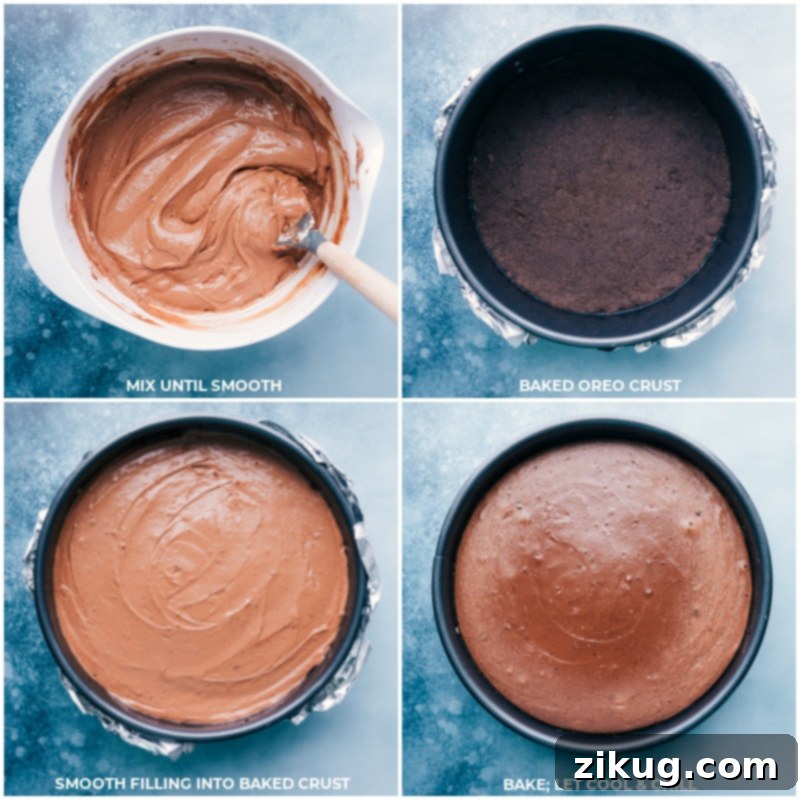
In a small bowl, combine the finely crushed Oreo crumbs and granulated sugar. Stir in the melted butter until thoroughly mixed. Press this mixture firmly into the bottom of the greased and foil-wrapped springform pan, creating an even layer; do not press it up the sides. Place the pan on a baking sheet. Bake for 10 minutes, then remove it to a cooling rack.
-
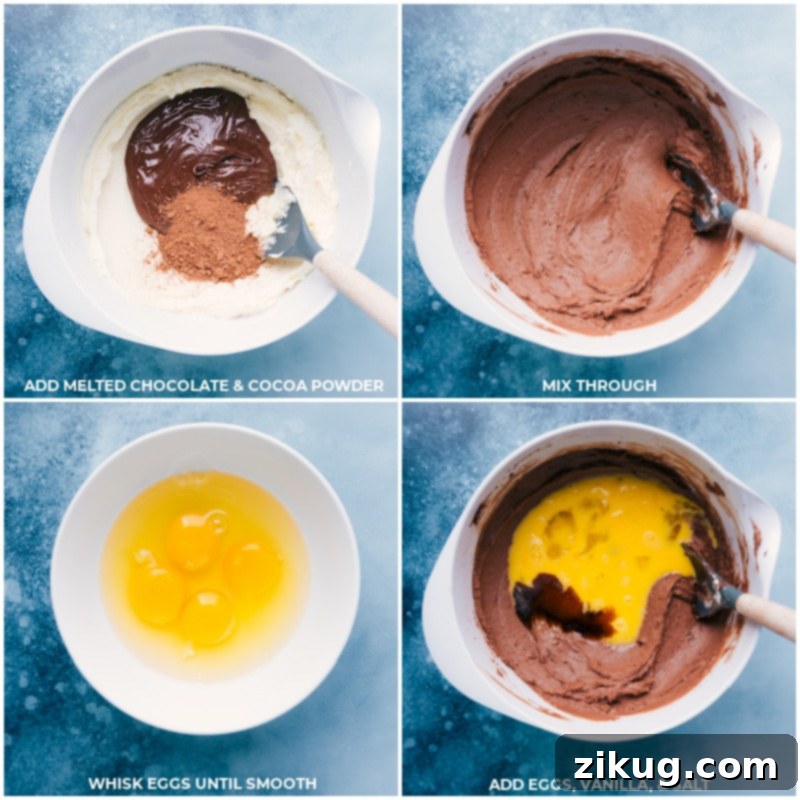
Melt the semi-sweet chocolate chips in the microwave. Heat in short bursts of 15 seconds, stirring well for 10 seconds between each burst, until the chocolate is completely melted and smooth. Set aside to cool to room temperature.
-
In a very large mixing bowl, using a stand mixer or hand mixer, beat the room temperature cream cheese and 1.5 cups granulated sugar in a circular motion at a consistent medium-low speed until the mixture is smooth and creamy. Be careful not to overbeat or beat too fast, as excessive air incorporation can cause your cheesecake to fall and crack after baking. With a spatula, scrape every bit of the melted and cooled chocolate into the cream cheese mixture. Add the cocoa powder. Continue to beat on low speed just until everything is combined and uniform.
-
In a separate small bowl, whisk the eggs gently until just broken. Add the whisked eggs to the cream cheese mixture along with the salt and vanilla extract. Beat on the lowest speed until just combined, ensuring no streaks remain but avoiding overmixing. Carefully pour this luscious chocolate filling mixture on top of the pre-baked Oreo crust in the springform pan. Use a spatula to smooth the top surface of the cheesecake. Place the springform pan inside the larger baking pan, then carefully pour about 1 inch of boiling water into the larger baking pan, surrounding the springform.
-
Bake the cheesecake in the preheated oven at 325°F (160°C) for 55–70 minutes, or until the edges are set and the top no longer looks shiny. The center should still have a slight, gentle jiggle when the pan is lightly tapped; it will continue to firm up as it cools. If it jiggles significantly, it needs more time—check again in 5-minute increments. Once fully baked, turn off the oven and open the oven door completely to allow a gradual temperature drop. Carefully pull the oven rack with the cheesecake out slightly and let it cool in the water bath within the oven for 45 minutes. Afterward, remove the cheesecake from the water bath, carefully take off the foil wrapping, and let it sit at room temperature on a wire rack for another 30 minutes. This slow, gradual cooling process is crucial for preventing cracks. Finally, cover the cheesecake loosely and transfer it to the fridge to chill for at least 8 hours, though preferably overnight, for optimal setting and flavor development.
-
Prepare the ganache: Place the chocolate chips, unsalted butter, and heavy cream in a small microwave-safe bowl. Microwave in bursts of 20 seconds, stirring thoroughly for 10 seconds between each burst, until the mixture is completely smooth and glossy. Allow the ganache to cool to room temperature before topping the chilled cheesecake. Spoon the ganache into the center of the cheesecake, leaving about an inch from the edge, and gently smooth it outwards with the back of the spoon to create an even layer. Cover the ganache-topped cheesecake and place it back in the fridge for at least an hour, or until the ganache is fully set.
-
When you are ready to serve, prepare the optional whipped cream topping. In a stand mixer fitted with a whisk attachment, combine the heavy cream, powdered sugar, and vanilla extract. Beat on high speed until soft peaks form. Spoon or pipe the whipped cream decoratively over individual cheesecake slices.
-
To achieve perfectly clean slices for an elegant presentation, use a large, very sharp knife. Run the knife under very hot water for a few seconds, then wipe it completely dry with a kitchen towel. Make one quick, decisive cut through the cheesecake. Repeat this heating and drying process for each subsequent slice you make to ensure smooth, clean edges every time.
Recipe Notes
Cheesecake Tips and Troubleshooting:
- Room Temperature Cream Cheese: Essential for a smooth batter without lumps, preventing overmixing.
- Room Temperature Eggs: Helps ingredients blend evenly, contributing to a crack-free cheesecake.
- Avoid Overmixing: Excess air causes puffing, falling, and cracks. Mix just until combined.
- Low, Consistent Speed: Gentle mixing in one direction minimizes air bubbles and prevents cracks.
- Slow Cooling: Allow to cool at room temp before chilling to prevent cracks and condensation.
Storage:
This chocolate cheesecake can sit at room temperature for up to 2 hours. After that, it must be refrigerated. To store, place leftover slices in an airtight container or individually wrap them in the fridge for up to 5 days. For longer storage, freeze individual slices wrapped tightly in plastic wrap, then placed in an airtight container, for 2–3 months. Thaw overnight in the fridge and let sit at room temperature for 20–30 minutes before serving for the best texture.
Nutrition
Nutrition information is automatically calculated, so should only be used as an approximation.
Loved this recipe? Leave a comment below!