
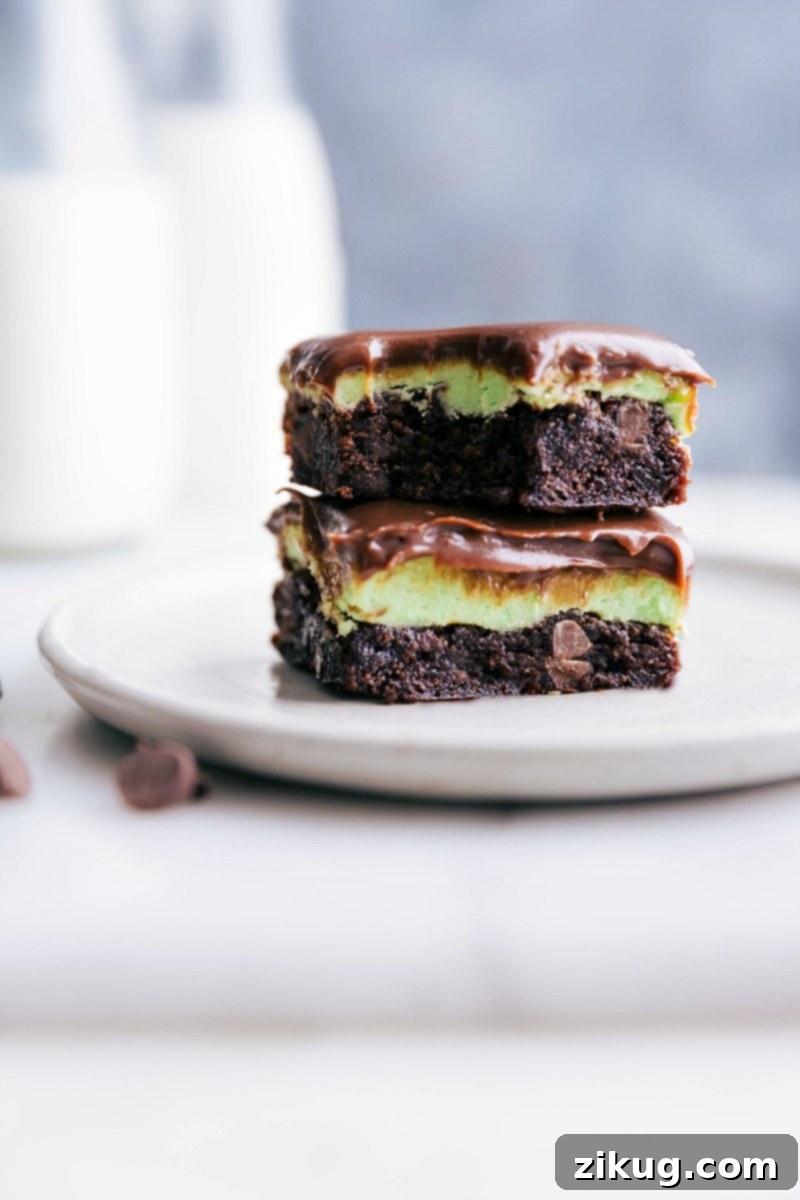
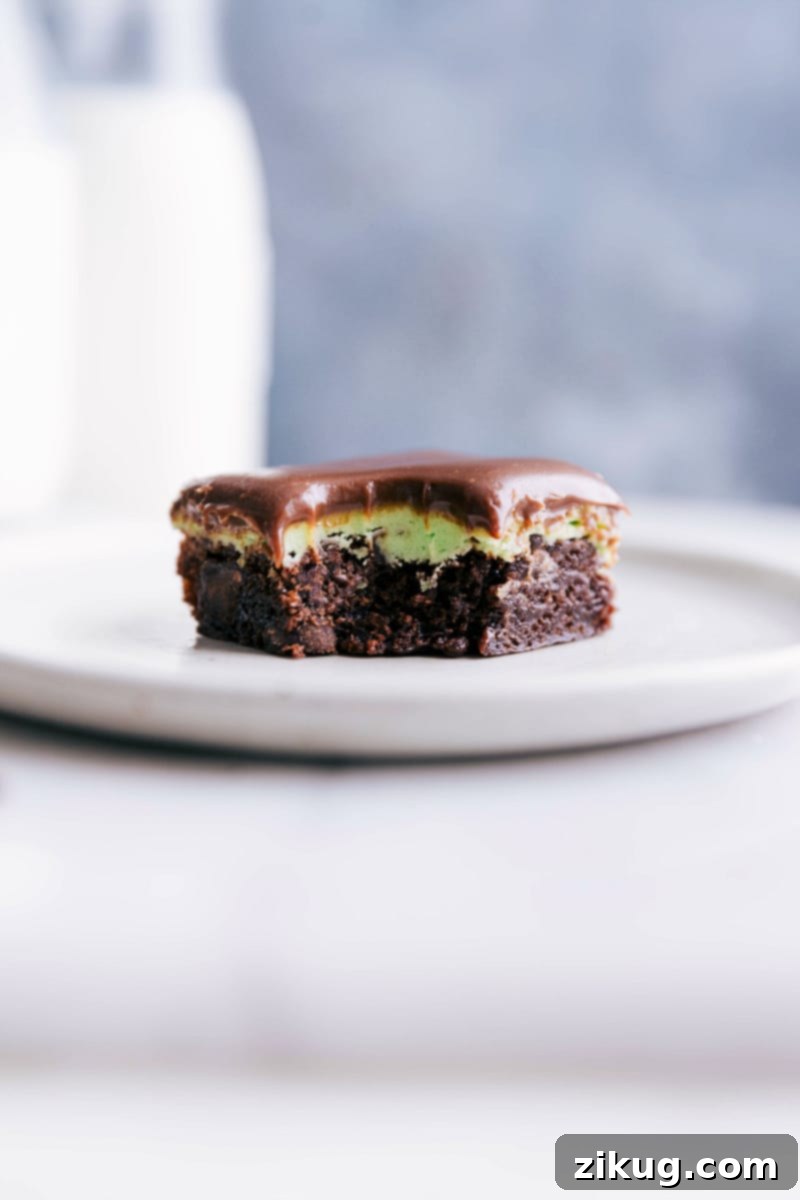
Indulge in the ultimate chocolate and mint experience with these incredible Mint Brownies. Featuring a perfectly fudgy brownie base, a thick, creamy layer of vibrant mint frosting, and a luscious, soft chocolate ganache topping, these brownies are surprisingly easy to make and guaranteed to impress. Whether you’re a lifelong fan of the mint-chocolate combination or looking for a show-stopping dessert, this recipe delivers on every front.
Craving more decadent treats? Don’t miss our festive Peppermint Brownies, the nostalgic delight of Cosmic Brownies, or our rich and chewy Gluten-Free Brownies.
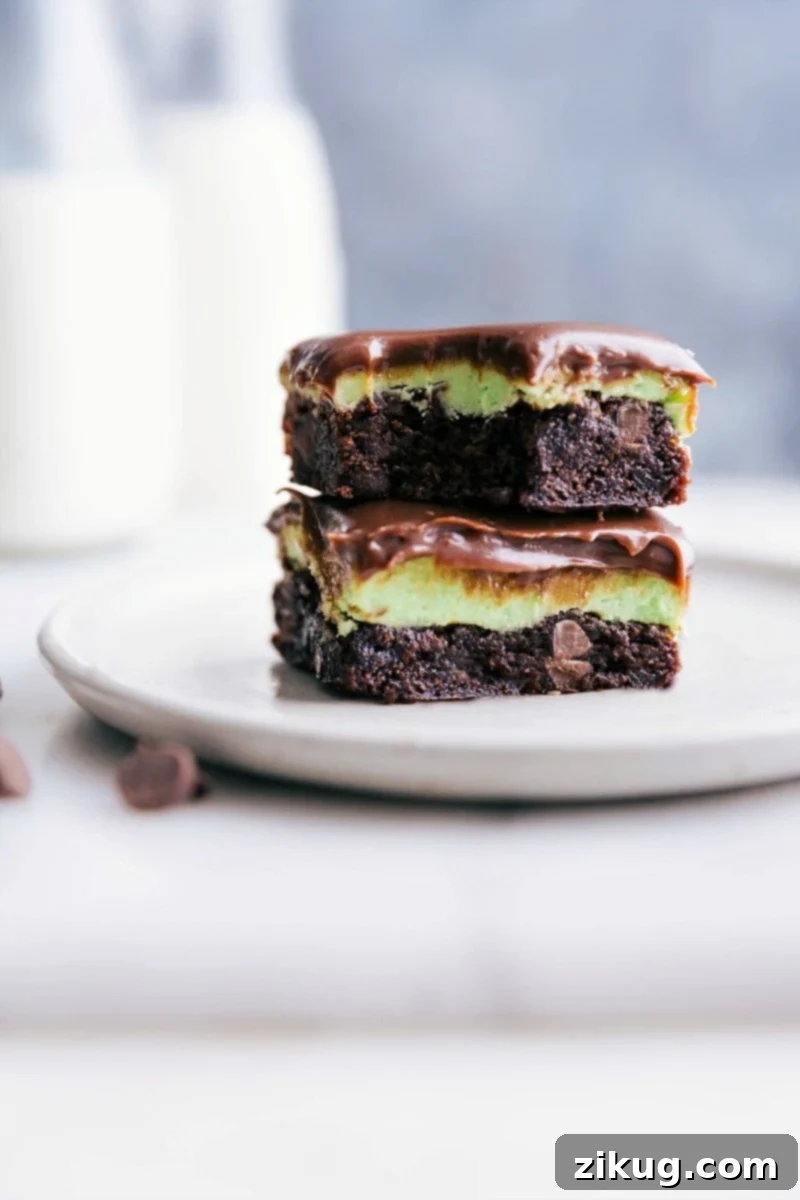
The Story Behind The Best Mint Brownies
My journey to crafting the perfect Mint Brownies began during my junior year of college, a time when I juggled early morning shifts at the beloved Creamery® in Provo with a full course load and evening waitressing. The Creamery was legendary around BYU, not just for its famous Graham Canyon ice cream but also for an array of delightful treats, including their highly sought-after mint brownies.
One of the best perks of my early morning shifts was getting to cut the fresh batches of mint brownies. This meant I often got to snag the “imperfect” pieces – a secret pleasure that quickly turned me into a discerning mint brownie connoisseur. My taste buds developed a high standard, craving that ideal balance of rich chocolate and refreshing mint. After months of tireless experimentation and fine-tuning in my own kitchen, I’m thrilled to finally share this ultimate Mint Brownie recipe. It’s the culmination of countless trials, ensuring every bite captures the magic I first discovered at the Creamery.
Why These Mint Brownies Are a Must-Try
What makes these Mint Brownies stand out? It’s the harmonious layering of textures and flavors that create an unforgettable dessert experience. Imagine a moist, chewy brownie base studded with crunchy Oreo pieces, generously topped with a velvety, cool mint frosting, and crowned with a glossy, rich chocolate ganache. This recipe combines convenience with gourmet taste, making it accessible for bakers of all skill levels.
- Effortless Brownie Base: We start with a high-quality brownie mix, saving you time without compromising on flavor or texture. The addition of finely chopped Oreos elevates the base with extra chocolatey goodness and a delightful crunch.
- Creamy Mint Perfection: The frosting is a dream – a rich, smooth cream cheese and butter mixture infused with just the right amount of peppermint extract. It’s light, refreshing, and beautifully complements the deep chocolate.
- Decadent Ganache Topping: A silky-smooth chocolate ganache provides the perfect finishing touch, adding an extra layer of chocolate indulgence and a beautiful, shiny finish.
- Visually Stunning: With their distinct layers and optional hint of green, these brownies are as appealing to the eye as they are to the palate, making them perfect for holiday gatherings, potlucks, or a special treat at home.
Essential Ingredients for Your Mint Brownies
Creating these layered Mint Brownies requires a few key components, each playing a vital role in their ultimate deliciousness. Here’s a closer look at what you’ll need and why each ingredient is important:
- For the Brownie Base:
- Brownie Mix & its Required Ingredients: We recommend a good quality boxed brownie mix, such as Betty Crocker’s Triple Chunk Supreme (17.8 oz), along with any oil, water, or eggs specified on the package. This forms the essential fudgy and moist foundation of your brownies. Using a mix simplifies the process significantly, allowing you to focus on the delicious layers above.
- Chopped Oreos: Six finely chopped Oreos (creme filling included!) are mixed directly into the brownie batter. These cookies contribute an extra layer of rich chocolate flavor and a delightful textural contrast with their signature crunch.
- For the Creamy Mint Frosting:
- Cream Cheese (full-fat): Three ounces of full-fat cream cheese provides a wonderfully tangy and smooth base for the frosting. Ensure it’s softened to room temperature for the best consistency.
- Unsalted Butter: Four tablespoons of unsalted butter add richness and help create a creamy, spreadable frosting. Also, ensure it’s at room temperature for smooth mixing.
- Peppermint Extract (not mint extract): One teaspoon of pure peppermint extract is crucial for achieving that authentic, refreshing minty flavor. Peppermint offers a cleaner, crisper taste than general “mint” extract. You can adjust this to taste based on the strength of your extract and personal preference.
- Salt: Just 1/16 teaspoon of salt helps balance the sweetness and enhances all the other flavors in the frosting.
- Powdered Sugar: Two cups of powdered sugar gives the frosting its characteristic smooth texture and sweetness.
- Green Food Coloring (optional): A few drops of green food coloring can be added for a festive visual appeal, making these brownies perfect for St. Patrick’s Day or Christmas.
- For the Silky Chocolate Ganache:
- Milk Chocolate Chips (or semi-sweet): One cup plus two tablespoons of milk chocolate chips create a smooth, rich, and mellow ganache. If you prefer a slightly less sweet or darker chocolate flavor, semi-sweet chocolate chips can be used.
- Heavy Cream (full-fat): Two-thirds cup of full-fat heavy cream is essential for creating the luxurious, pourable consistency of the ganache.
- Unsalted Butter: One tablespoon of unsalted butter is added to the ganache to give it extra shine and a smoother finish.
Quick Baking Tip: Maximizing Your Brownie Mix
If your brownie mix includes a fudge layer or packet, don’t mix it into the batter. Instead, reserve it and spread it evenly over the brownies immediately after they come out of the oven. This creates an extra layer of gooey chocolate goodness on top of your warm brownies.
How To Make Irresistibly Layered Mint Brownies
Crafting these delectable Mint Brownies is a straightforward process when broken down into three simple stages: preparing the brownie base, mixing the mint frosting, and finishing with a decadent ganache. Follow these steps for perfect results:
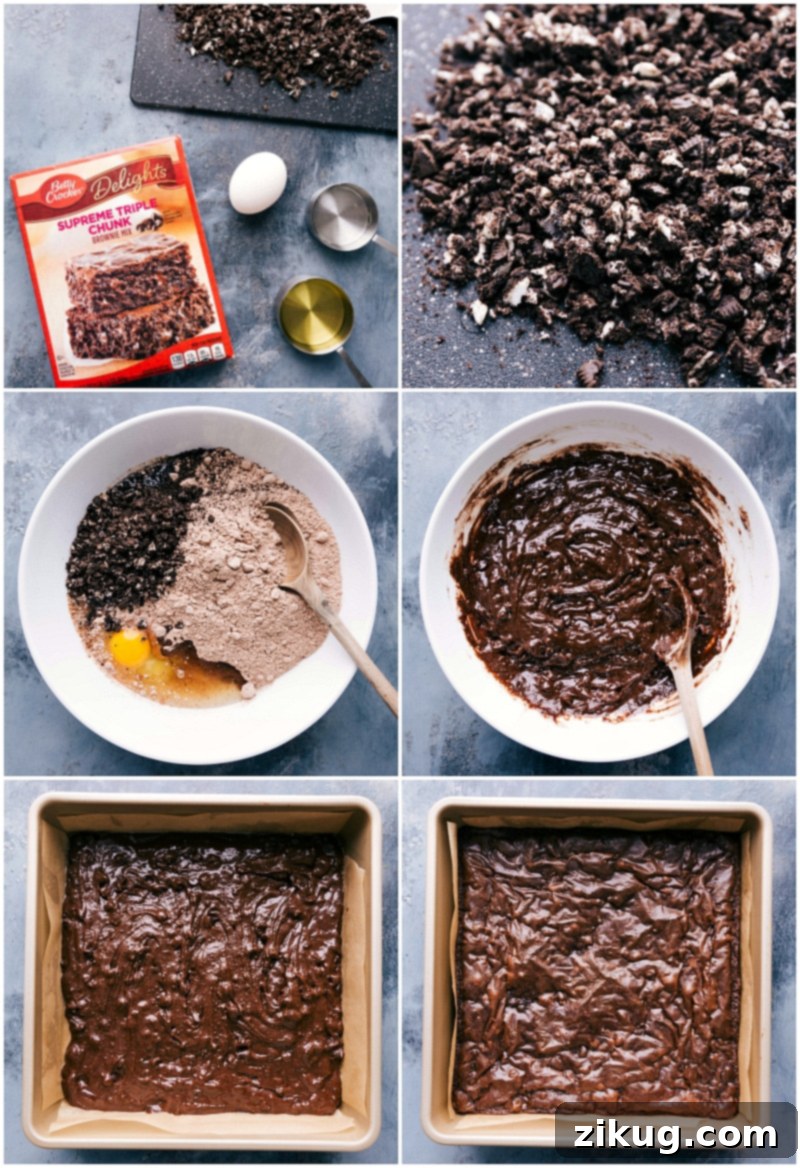
- Prepare and Bake the Brownie Base: Begin by preheating your oven to 350°F (175°C). Line a 9×9-inch baking pan with parchment paper, allowing some overhang on the sides for easy removal later. Prepare your chosen brownie mix according to the package instructions. If your mix comes with a fudge packet, remember to set it aside for later. Finely chop 6 Oreos, ensuring they are well crushed but still provide some texture, and fold them into the brownie batter until evenly distributed. Pour the thick batter into your prepared pan and bake as directed on the brownie mix package, being careful not to overbake, which can lead to dry brownies. Once baked, remove from the oven. If you reserved a fudge packet, spread it over the warm brownies immediately. Cover the pan tightly and place the brownies in the fridge (or freezer for quicker cooling) while you prepare the frosting.
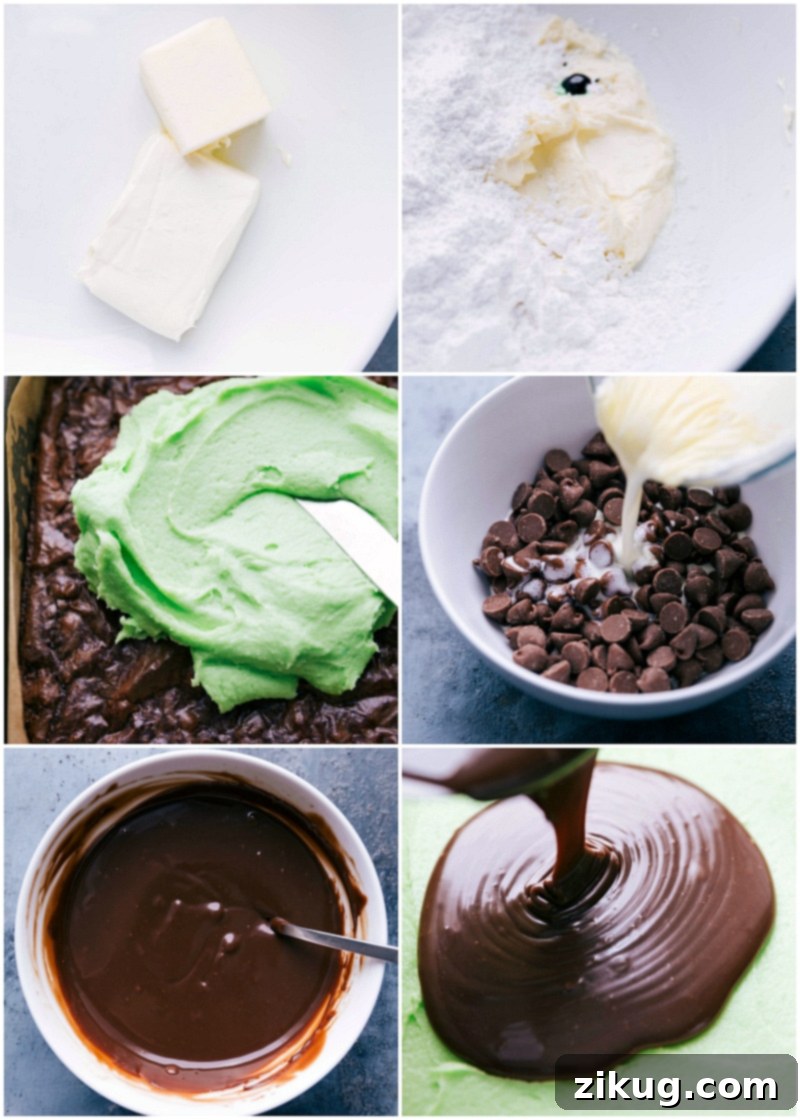
- Craft the Creamy Mint Frosting: In a large mixing bowl, combine the softened (room temperature, not melted) cream cheese and unsalted butter. Beat them together with an electric mixer until the mixture is completely smooth and creamy, with no lumps. Add the peppermint extract; start with 1 teaspoon and adjust to your preferred intensity. Then, add the salt and, if desired, a few drops of green food coloring. Gradually add the powdered sugar, beating until the frosting is smooth and fluffy. Don’t be tempted to add milk or cream if it seems too thick at first; continue beating, and it will come together beautifully. Scrape down the sides of the bowl with a spatula as needed. Once the brownies are completely cooled, spread this vibrant mint frosting evenly over the top. Return the frosted brownies to the fridge to chill while you prepare the ganache.
- Create the Decadent Chocolate Ganache: Place your milk chocolate chips (or semi-sweet chips) into a heatproof bowl and set it aside. In a glass measuring cup, combine the heavy cream and butter. Microwave until the mixture is steaming hot but not boiling, typically 60-90 seconds. Pour this hot cream mixture directly over the chocolate chips. Resist the urge to stir immediately! Cover the bowl with a pot lid or plate to trap the heat and let it stand for 5 minutes. After 5 minutes, uncover and stir gently until the chocolate is fully melted and the ganache is smooth and glossy. If any chocolate chunks remain, microwave for an additional 15 seconds and stir again. Allow the ganache to stand at room temperature for 10-15 minutes to thicken slightly. Whisk it once more, then pour it evenly over the chilled mint frosting layer. To maintain a beautiful, glossy finish, let the brownies stand at room temperature for about 30 minutes before refrigerating. Then, transfer them to the refrigerator for 2-3 hours, or until the chocolate ganache topping is firm and set.
- Slice and Serve: Once the ganache is firm, use the parchment paper overhang to carefully lift the entire brownie slab out of the pan. For perfectly clean, sharp slices, warm a very sharp knife under hot running water, wipe it dry, and make quick, decisive cuts. Re-warm and wipe the knife between each slice for the best results. Enjoy your beautifully layered Mint Brownies!
Expert Tips for Flawless Mint Brownies
Achieving bakery-quality Mint Brownies at home is simple with these essential tips:
- Line Your Pan for Easy Removal: Always line your baking pan with parchment paper, leaving an overhang on all sides. This simple step makes it incredibly easy to lift the entire batch of cooled brownies out of the pan, allowing for clean cuts and hassle-free serving without damaging the layers.
- Room Temperature Ingredients for Smooth Frosting: Ensure your cream cheese and unsalted butter are softened to true room temperature before mixing the frosting. This is crucial for achieving a perfectly smooth, lump-free, and creamy frosting consistency that spreads beautifully. Cold ingredients will result in a clumpy texture.
- Finely Chop Oreos for Even Distribution: For the best texture in your brownie base, finely chop the Oreos. This ensures that the chocolatey crunch is evenly distributed throughout the brownies, rather than having large, uneven chunks.
- Patience with Cooling and Chilling: Each cooling and chilling step is vital for the distinct layers and structural integrity of your Mint Brownies.
- Cool Brownies Completely: Do not frost warm brownies! The heat will melt the frosting and create a mess. Allow them to cool entirely before adding the mint layer.
- Chill Frosted Brownies: After frosting, chill the brownies for a short period before adding the ganache. This helps set the frosting, preventing it from mixing with the warm ganache and ensures clean layers.
- Plan Ahead: Consider making the brownie layer a day in advance to simplify the process and ensure it’s perfectly cooled. You can then prepare and add the frosting and ganache on the day you plan to serve.
- Achieve Clean Slices with a Warm Knife: For professional-looking, neat squares, use a very sharp knife. Before each cut, run the knife under hot water, then wipe it completely dry. The warmth helps the knife glide through the chocolate ganache and frosting without dragging or sticking, creating beautiful, defined layers. Repeat this warming and wiping process for every single cut.
Storage and Freezing Advice
Storage
How to Store Your Mint Brownies
To keep your Mint Brownies fresh and delicious, store any leftovers in an airtight container in the refrigerator. They are best enjoyed within 3-4 days of baking. The cool temperature helps maintain the firmness of the ganache and frosting, preserving the distinct layers and refreshing taste.
Freezing is generally not recommended for these brownies. The dairy components in both the cream cheese frosting and the chocolate ganache tend to separate and change texture when frozen and subsequently thawed. This can result in a less desirable, grainy, or watery consistency, detracting from the overall quality of your layered treat. For the best experience, enjoy them fresh from the fridge!
Variations and Customizations for Your Mint Brownies
While this recipe delivers a classic and beloved Mint Brownie, there’s always room to get creative and tailor them to your personal preferences or for different occasions. Here are a few ideas to inspire your culinary adventures:
- Brownie Base Alternatives:
- From Scratch: If you prefer baking from scratch, feel free to use your favorite homemade fudgy brownie recipe instead of a mix. Just ensure it bakes in a 9×9-inch pan and cools completely before frosting.
- Dark Chocolate Base: For a more intense chocolate flavor that beautifully contrasts the mint, opt for a dark chocolate brownie mix or a scratch recipe with a higher cocoa content.
- Mint Frosting Twists:
- Add Mint Chips: For an extra burst of mint flavor and texture, fold in a handful of finely crushed Andes Mints or green mint chocolate chips into your frosting.
- Adjust Peppermint Intensity: As noted in the recipe, the strength of peppermint extract varies. Taste your frosting as you go and adjust the amount from 1 to 1.5 teaspoons to achieve your perfect minty balance.
- Ganache Enhancements:
- Dark Chocolate Ganache: Substitute milk chocolate chips with semi-sweet or even bittersweet chocolate chips for a more sophisticated, less sweet ganache layer.
- White Chocolate Ganache: For a striking visual contrast and a different flavor profile, try a white chocolate ganache. Just be mindful that white chocolate can be trickier to melt smoothly.
- Fun Toppings:
- Sprinkles: Before the ganache sets, scatter some festive green, white, or holiday-themed sprinkles for a playful touch.
- Crushed Peppermint Candies: For a holiday twist, sprinkle crushed candy canes or peppermint candies over the set ganache.
- Chocolate Shavings or Curls: A elegant finish can be achieved by garnishing with delicate chocolate shavings or curls.
Common Questions About Mint Brownies
Here are some frequently asked questions to help you master your Mint Brownies:
- What is the difference between mint extract and peppermint extract? Peppermint extract has a distinct, strong, and cool flavor, primarily from menthol. Mint extract can be a blend of different mints (like spearmint) and often has a milder, sweeter, or sometimes more “leafy” flavor. For these brownies, peppermint extract is highly recommended to achieve that classic, refreshing mint-chocolate taste.
- Can I make these brownies gluten-free? Absolutely! Simply use your favorite gluten-free brownie mix and follow its package directions. Many gluten-free brownie mixes are excellent and will work perfectly with this recipe’s frosting and ganache layers. (You can also refer to our Gluten-Free Brownies recipe for a homemade base.)
- Can I use homemade brownies instead of a mix? Yes, you can! If you have a go-to fudgy brownie recipe that fits a 9×9-inch pan, feel free to use it. Just ensure the brownies are completely cooled before you add the frosting.
- How do I prevent my ganache from splitting or becoming grainy? The key to smooth ganache is patience and careful heating. Don’t let your cream boil, just get it steaming hot. Pour it over the chocolate chips and *resist stirring* for 5 minutes. This allows the hot cream to melt the chocolate gently. Stir from the center outwards until smooth. If it looks like it’s separating, add a tiny bit more warm cream or whisk in a pat of cold butter, which sometimes helps emulsify it.
- How long do Mint Brownies last? When stored in an airtight container in the refrigerator, these Mint Brownies are best enjoyed within 3-4 days. The refrigeration keeps the layers firm and the dairy components fresh.
More Decadent Dessert Recipes You’ll Love:
- Carmelitas: Irresistible caramel-oatmeal bars that are rich and chewy.
- Brownie Bites: Fudgy brownie cups with a molten chocolate center for a delightful surprise.
- 7-Layer Bars: A classic dessert featuring layers of graham crackers, chocolate, butterscotch, coconut, and nuts, all sweetened with condensed milk.
- Brownie Trifle: Layers of rich brownies, whipped cream, and fresh berries, creating an elegant and refreshing dessert.
- Chocolate Dip for Fruit: A luscious, creamy chocolate dip infused with Nutella, perfect for pairing with your favorite fresh fruits.
Print Recipe
Rating: 5 out of 5 stars (based on 4 votes)
Mint Brownies
Equipment
-
9 x 9-inch baking pan
-
Parchment paper
Ingredients
- 1 (17.8-ounce) package brownie mix and the ingredients called for on the package
- 6 Oreos finely chopped, leave the creme filling inside
- 3 ounces cream cheese full-fat, softened
- 4 tablespoons unsalted butter softened
- 1 teaspoon peppermint extract not mint
- 1/16 teaspoon salt
- 2 cups powdered sugar
- Green food coloring optional
- 1 cup + 2 tablespoons milk chocolate chips or semi-sweet chocolate chips if desired
- 2/3 cup heavy cream full-fat
- 1 tablespoon unsalted butter
Instructions
Brownies
-
Preheat oven to 350°F (175°C). Line a 9×9-inch baking pan (8×8-inch also works, but 9×9 is preferred for thinner brownies) with parchment paper, leaving an overhang on all sides. Prepare the brownie mix according to package directions. If your mix includes a fudge packet, set it aside for later; do not add it to the batter now. Finely chop 6 Oreos and fold them into the brownie batter. Stir everything together until you have a thick batter.
-
Transfer the batter to the prepared pan and bake according to package instructions, taking care not to overbake, as this can dry out the brownies. As soon as the brownies are baked, remove them from the oven and let them cool for 3–4 minutes. If you had a fudge packet, spread it over the warm brownies now. Cover the brownies tightly and place them in the fridge (or freezer for faster cooling) while you prepare the frosting layer. Ensure the brownies are completely cooled before proceeding.
Cream Cheese Frosting
-
In a large bowl, beat together the softened (room temperature, not melted) cream cheese and butter until the mixture is smooth and creamy. Add peppermint extract to your preference; 1 teaspoon is often perfect, but you may use up to 1½ teaspoons depending on your extract’s strength and desired intensity (see Note 1). Incorporate the salt and green food coloring (if using). Gradually add the powdered sugar, beating until the frosting is smooth and creamy. It may seem stiff at first, but resist adding milk or cream; just keep beating, and it will come together. Scrape down the sides of the bowl with a spatula as needed. Spread this smooth frosting evenly over the completely cooled brownies. Return the brownies to the fridge to chill while you prepare the ganache.
Ganache
-
Measure the chocolate chips into a heatproof bowl and set aside. In a glass measuring cup, combine the heavy cream and butter. Microwave until the mixture is steaming hot (but not boiling), typically about 60–90 seconds. Pour the hot cream mixture over the chocolate chips in the bowl. Do not stir yet. Cover the bowl with a pot lid or plate to trap the heat. Let it stand undisturbed for 5 minutes. After 5 minutes, stir the mixture until the chocolate is fully melted and the ganache is smooth and glossy. If any chocolate pieces remain, microwave the mixture for an additional 15 seconds and stir again until smooth.
-
Allow the ganache to stand at room temperature for 10–15 minutes to thicken slightly. Whisk it again briefly, then carefully pour and smooth it over the chilled frosting layer on the brownies. Let the brownies stand at room temperature for about 30 minutes to maintain the ganache’s glossy finish before refrigerating. Then, transfer them to the refrigerator for 2–3 hours, or until the chocolate topping is completely firm and set.
-
Using the parchment paper overhang, carefully remove the brownies from the pan. For clean, sharp cuts, use a very sharp knife. Run your knife under very hot water, wipe it completely dry, and make quick, decisive slices. Repeat the warming and wiping process for each cut to ensure beautifully neat squares.
Recipe Notes
Note 1 (Peppermint Extract Strength): The potency of peppermint extract can vary significantly between brands. For reference, I typically use McCormick extract, and 1 teaspoon provides a perfect balance of mint flavor for my taste. When making your frosting, taste it after adding 1 teaspoon. If you desire a stronger mint flavor, you can add up to an additional ½ teaspoon (for a total of 1½ teaspoons), adjusting to your preference.
Storage: Store any leftover Mint Brownies in a sealed, airtight container in the refrigerator. They will remain fresh and delicious for up to 3–4 days. Freezing these brownies is generally not recommended, as the dairy components in both the cream cheese frosting and the chocolate ganache do not hold up well when frozen and then thawed, potentially leading to an undesirable change in texture.
Nutrition
Nutrition information is automatically calculated, so should only be used as an approximation.
Enjoyed this recipe? Leave a comment below and share your thoughts! Your feedback is always appreciated.