
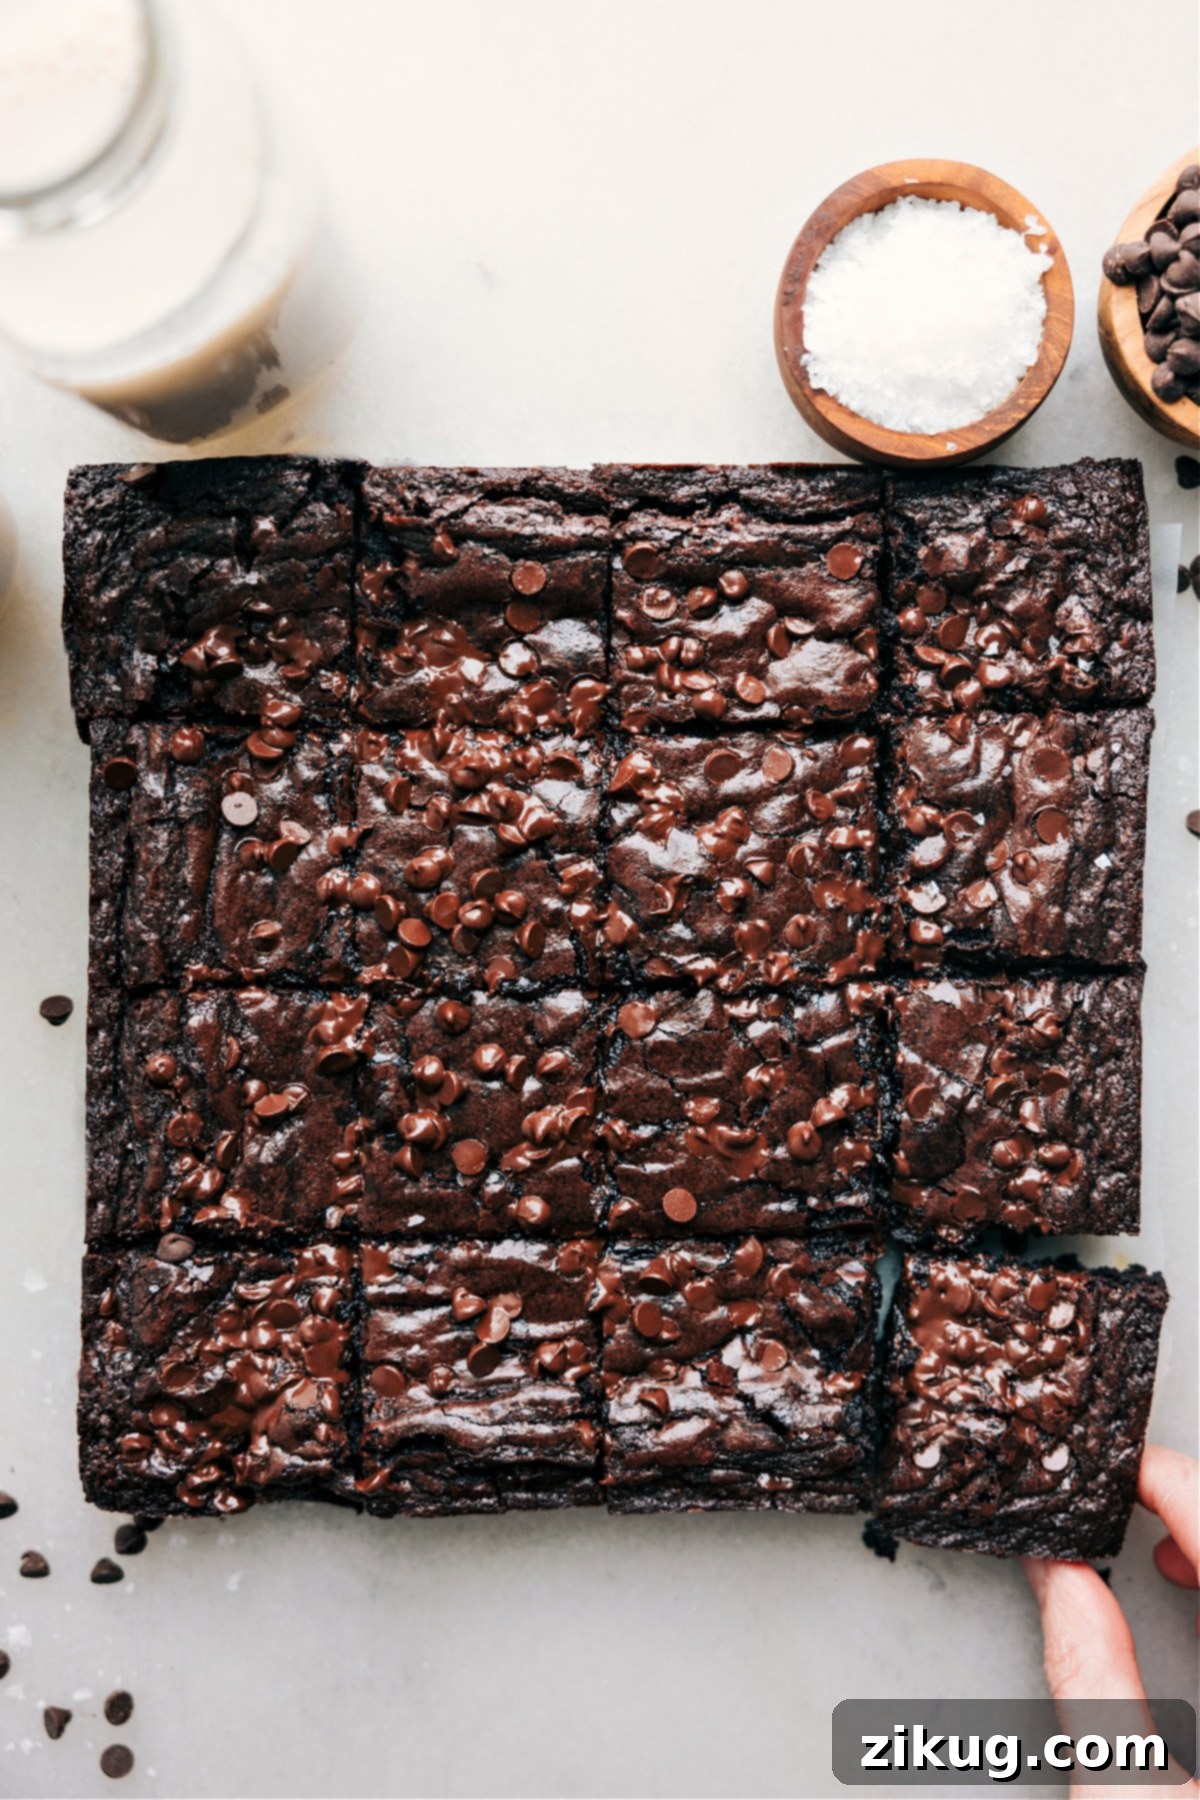
Welcome to the definitive guide for crafting the **Ultimate Fudgy Brownie Recipe**! Forget dry, crumbly, or cake-like brownies; this recipe delivers an intensely chocolatey, perfectly moist, and wonderfully dense brownie with that coveted shiny, crinkly top. Requiring minimal effort and just a handful of staple ingredients, you’ll find yourself reaching for this reliable, one-bowl method time and again, leaving those boxed mixes firmly in the past.

author’s note
My Quest for the Perfect Fudgy Brownie Recipe!
As a passionate baker, the pursuit of the perfect brownie has been a delightful, albeit extensive, journey. After countless tests, tweaks, and taste-tests over the years, I’m thrilled to share what I truly believe is *the* ultimate **fudgy brownie recipe**. This isn’t just a recipe; it’s a meticulously perfected method designed to yield brownies that are rich, deeply sweet, and unequivocally fudgy, boasting that signature crinkly top and an abundance of chocolate in every single bite.
I understand that brownie preferences are as diverse as bakers themselves. So, to set your expectations right, here’s what makes these brownies stand out:
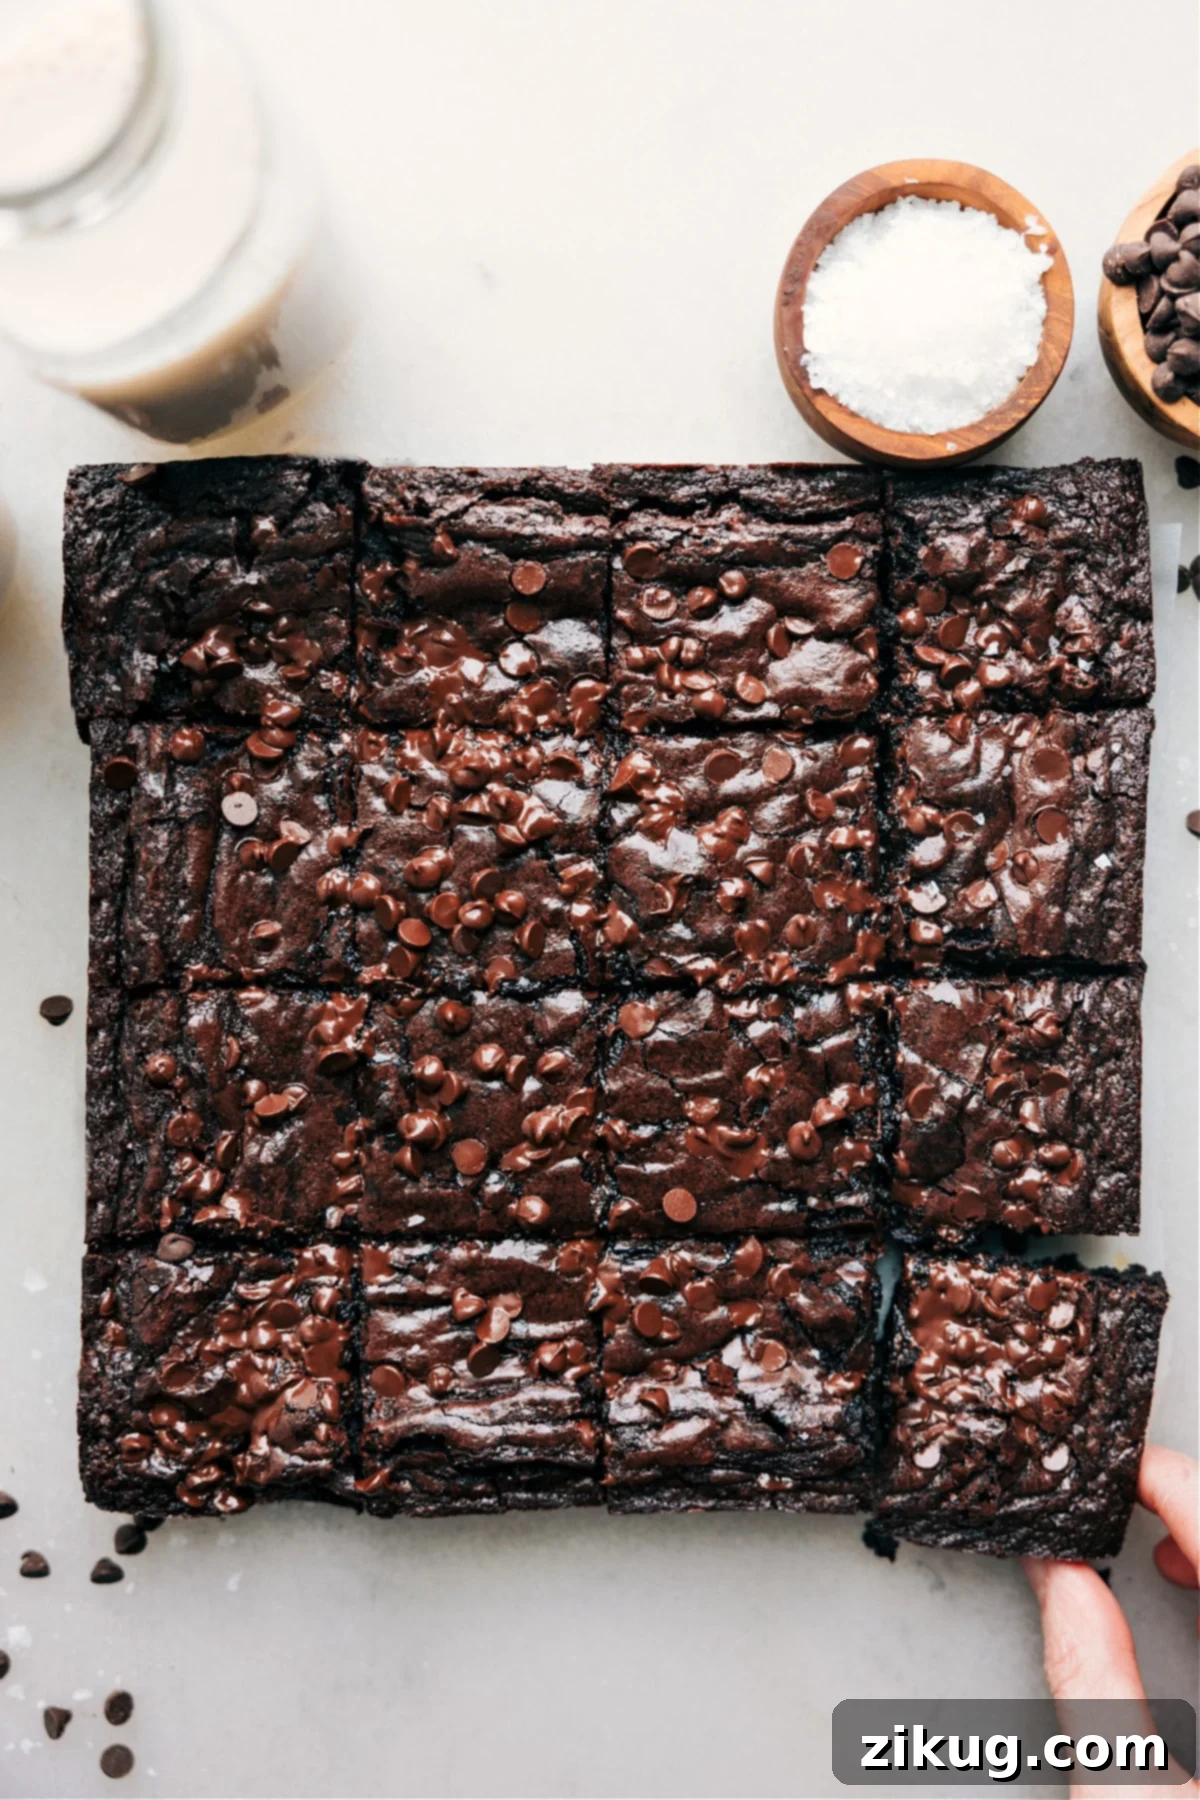
These are truly a chocolate lover’s dream: ultra-rich and intensely sweet. The texture is key – they are wonderfully dense, slightly gooey, and decidedly fudgy, steering far away from any hint of cakiness. We’ve ensured every bite is loaded with mini chocolate chips, guaranteeing a consistent burst of chocolate in every square.
While the convenience of a boxed mix is undeniable, the unparalleled flavor and texture of homemade brownies simply cannot be matched. And while this recipe involves a tad more love and attention, it remains remarkably straightforward. Prepared in just one bowl with fewer than ten ingredients, the result is a transcendental experience that makes every minute of effort absolutely worthwhile. Get ready to elevate your baking game and impress everyone with these incredible, homemade treats!
Essential Brownie Recipe Ingredients for Fudgy Perfection
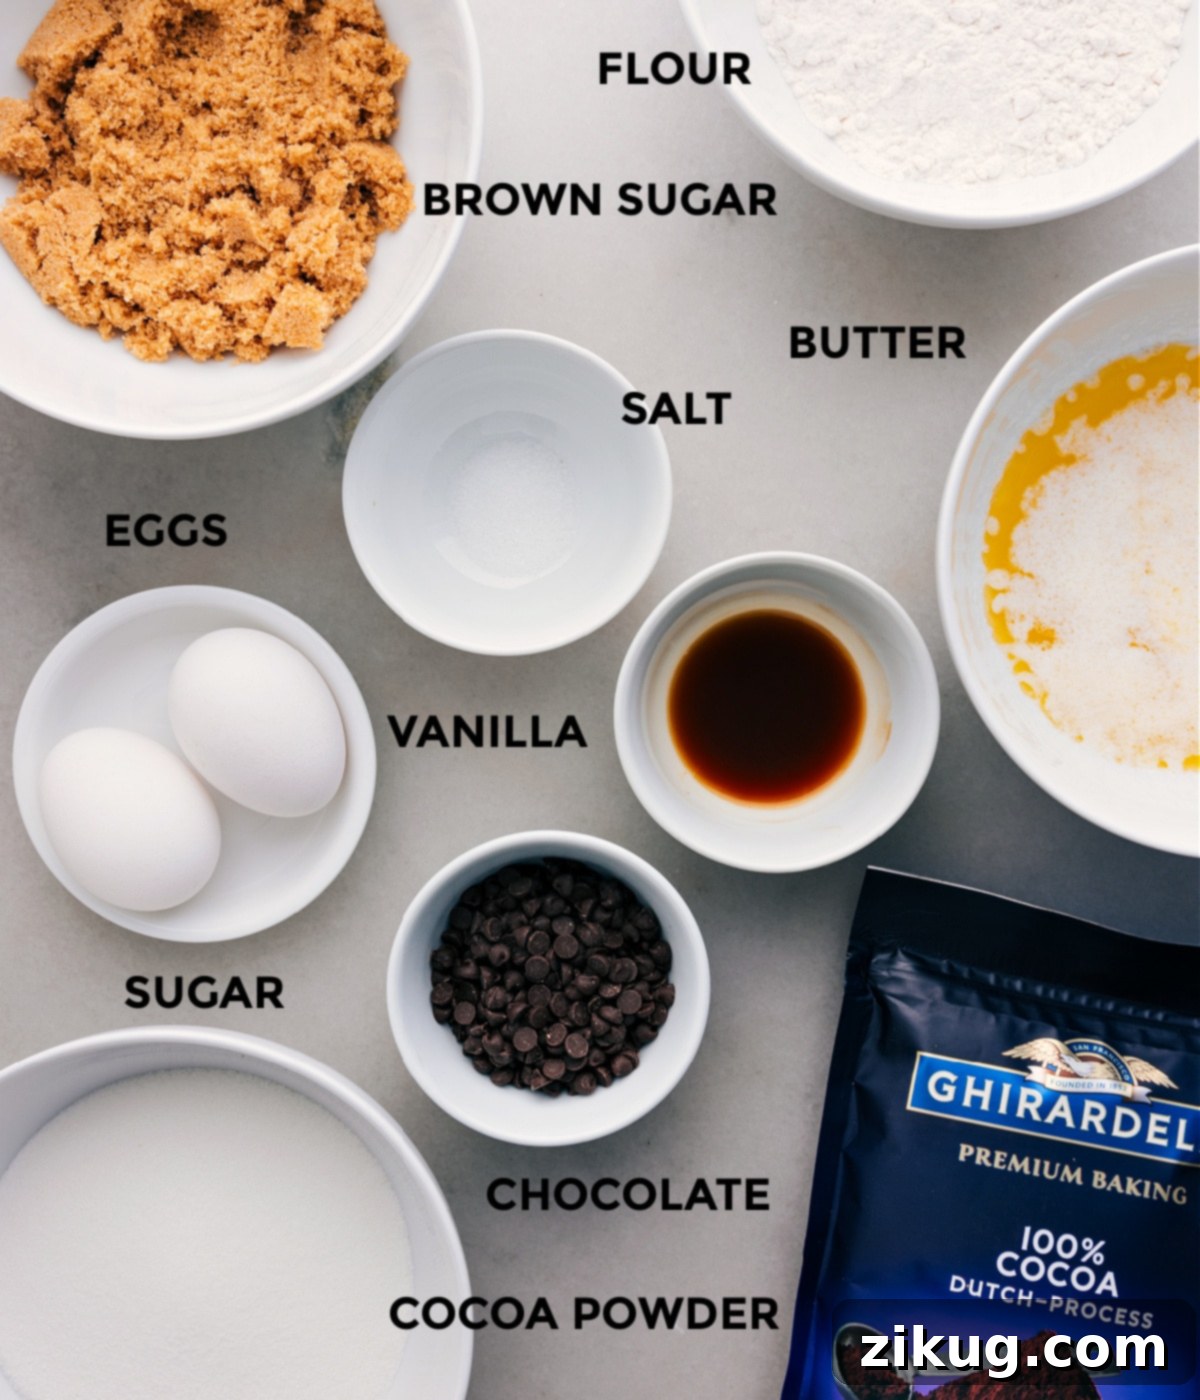
The secret to crafting truly exceptional brownies lies in the quality of your ingredients. Opting for good-quality components will significantly enhance the flavor and texture of your homemade brownies. Here’s a breakdown of what you’ll need and why each element is crucial for achieving that fudgy, rich result:
- Unsalted Butter: We melt the butter and then cool it slightly before incorporating it into the batter. This step is vital to prevent greasy brownies and ensures a smooth, emulsified mixture with the sugars. Unsalted butter allows you to control the overall saltiness of your recipe.
- Granulated Sugar: This common pantry staple doesn’t just add sweetness; it plays a critical role in developing the brownies’ characteristic shiny, crinkly top. When granulated sugar dissolves in the melted butter and eggs, it forms a thin, glassy layer during baking.
- Light Brown Sugar: Adding a touch of light brown sugar introduces moisture and a subtle caramel note, contributing to a deeper, more complex flavor profile. Its molasses content helps keep the brownies incredibly soft and fudgy.
- Large Eggs: Ensure your eggs are at room temperature. Room temperature eggs emulsify much more easily with the butter and sugar, creating a smoother, more cohesive batter. This leads to a finer crumb and better texture in the final brownie.
- Vanilla Extract: Often underestimated, vanilla extract doesn’t just add its own flavor; it profoundly enhances and amplifies the rich chocolate notes in the brownies, making them taste even more decadent. Don’t skip it!
- All-Purpose Flour: Flour provides the necessary structure for your brownies without making them tough or cakey. We use just enough to hold everything together, ensuring the brownies remain soft and dense.
- Dutch-Processed Cocoa Powder: This is where the deep, dark chocolate flavor comes from. Dutch-processed cocoa powder has been treated to reduce its acidity, resulting in a milder, less bitter taste and a much darker, richer color. It’s essential for that classic fudgy brownie intensity.
- Salt: A pinch of salt is crucial. It perfectly balances the sweetness, preventing the brownies from being overly cloying, and paradoxically, it makes the chocolate flavor pop even more vibrantly.
- Mini Chocolate Chips: These are folded into the batter and sprinkled on top for an extra burst of melted chocolate in every single bite. The mini size ensures even distribution and prevents them from sinking to the bottom.
Quick Tip for Cocoa Powder Precision
Achieving the ideal fudgy texture depends heavily on precise ingredient measurements, especially with cocoa powder. For the most accurate measurement, lightly spoon your Dutch-processed cocoa powder into the measuring cup until it’s slightly overfilled. Then, use the flat edge of a knife to level it off carefully. Avoid packing the cocoa powder, as too much can result in dry, crumbly brownies instead of the desired fudgy consistency.
Brownie Recipe Pans & Essential Baking Tips for Success
Achieving the perfect brownie goes beyond just the ingredients; your baking equipment and technique play an equally important role. Understanding these nuances will help you bake consistently superior brownies every time.
| Factor | Why It Matters | Quick Tips for Best Results |
|---|---|---|
| Pan Type | The material and color of your baking pan directly impact heat distribution and baking time. Metal pans, especially darker ones, heat up faster and retain more heat than glass. Dark metal can lead to overbaked edges, while glass requires longer baking. | Always opt for a **light-colored metal pan**, ideally an 8×8 inch size. These pans promote even heat distribution, preventing burnt edges and ensuring the brownies cook uniformly. Glass pans can work, but they often require a slight reduction in oven temperature and an increase in baking time. Avoid dark-colored metal pans if possible, or monitor baking closely to prevent scorching. |
| Oven Temperature | Many home ovens are notoriously inaccurate, often running hotter or colder than the set temperature by as much as 25°F or more. This variance can drastically alter your brownie’s bake time and final texture, leading to either underbaked or overbaked results. | Invest in an **oven thermometer** and check your oven’s true temperature regularly. Always allow your oven to preheat fully for at least 15-20 minutes after it signals it’s ready. Bake only one pan of brownies at a time on the center rack for optimal air circulation and even cooking. Begin testing for doneness about 5 minutes earlier than the recipe suggests, as oven temperatures can vary. |
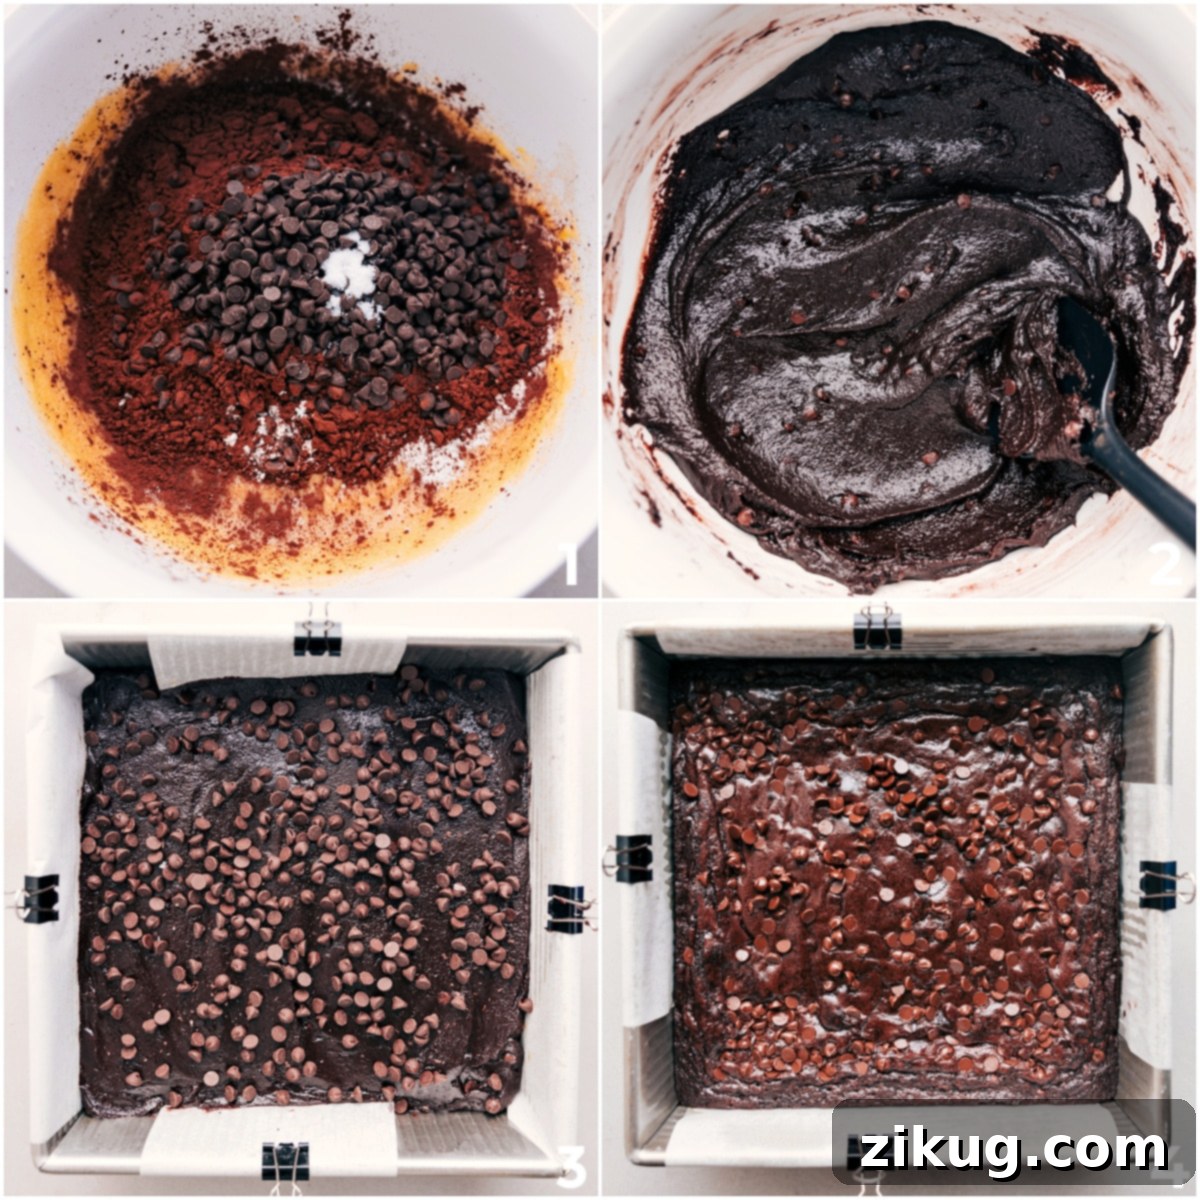
| Lining the Pan | Properly lining your baking pan is essential for ensuring your brownies cook evenly and can be removed cleanly and effortlessly once cooled, preventing them from sticking or tearing. | Line your chosen baking pan with **parchment paper**. Make sure to leave an overhang on two opposite sides; these “handles” will allow you to easily lift the entire slab of cooled brownies out of the pan. This method also helps create perfectly straight edges. Avoid using wax paper, which isn’t oven-safe for high temperatures, or aluminum foil, which can sometimes stick or react with certain ingredients. |
Mastering the Art of Baking Fudgy Brownies: Knowing When They’re Done
Baking brownies to the perfect fudgy consistency is often the trickiest part, as it requires a keen eye and a bit of practice. Overbaking is the arch-nemesis of a fudgy brownie, transforming it into a dry, cakey imposter. Here’s how to tell when your brownies have reached their peak:
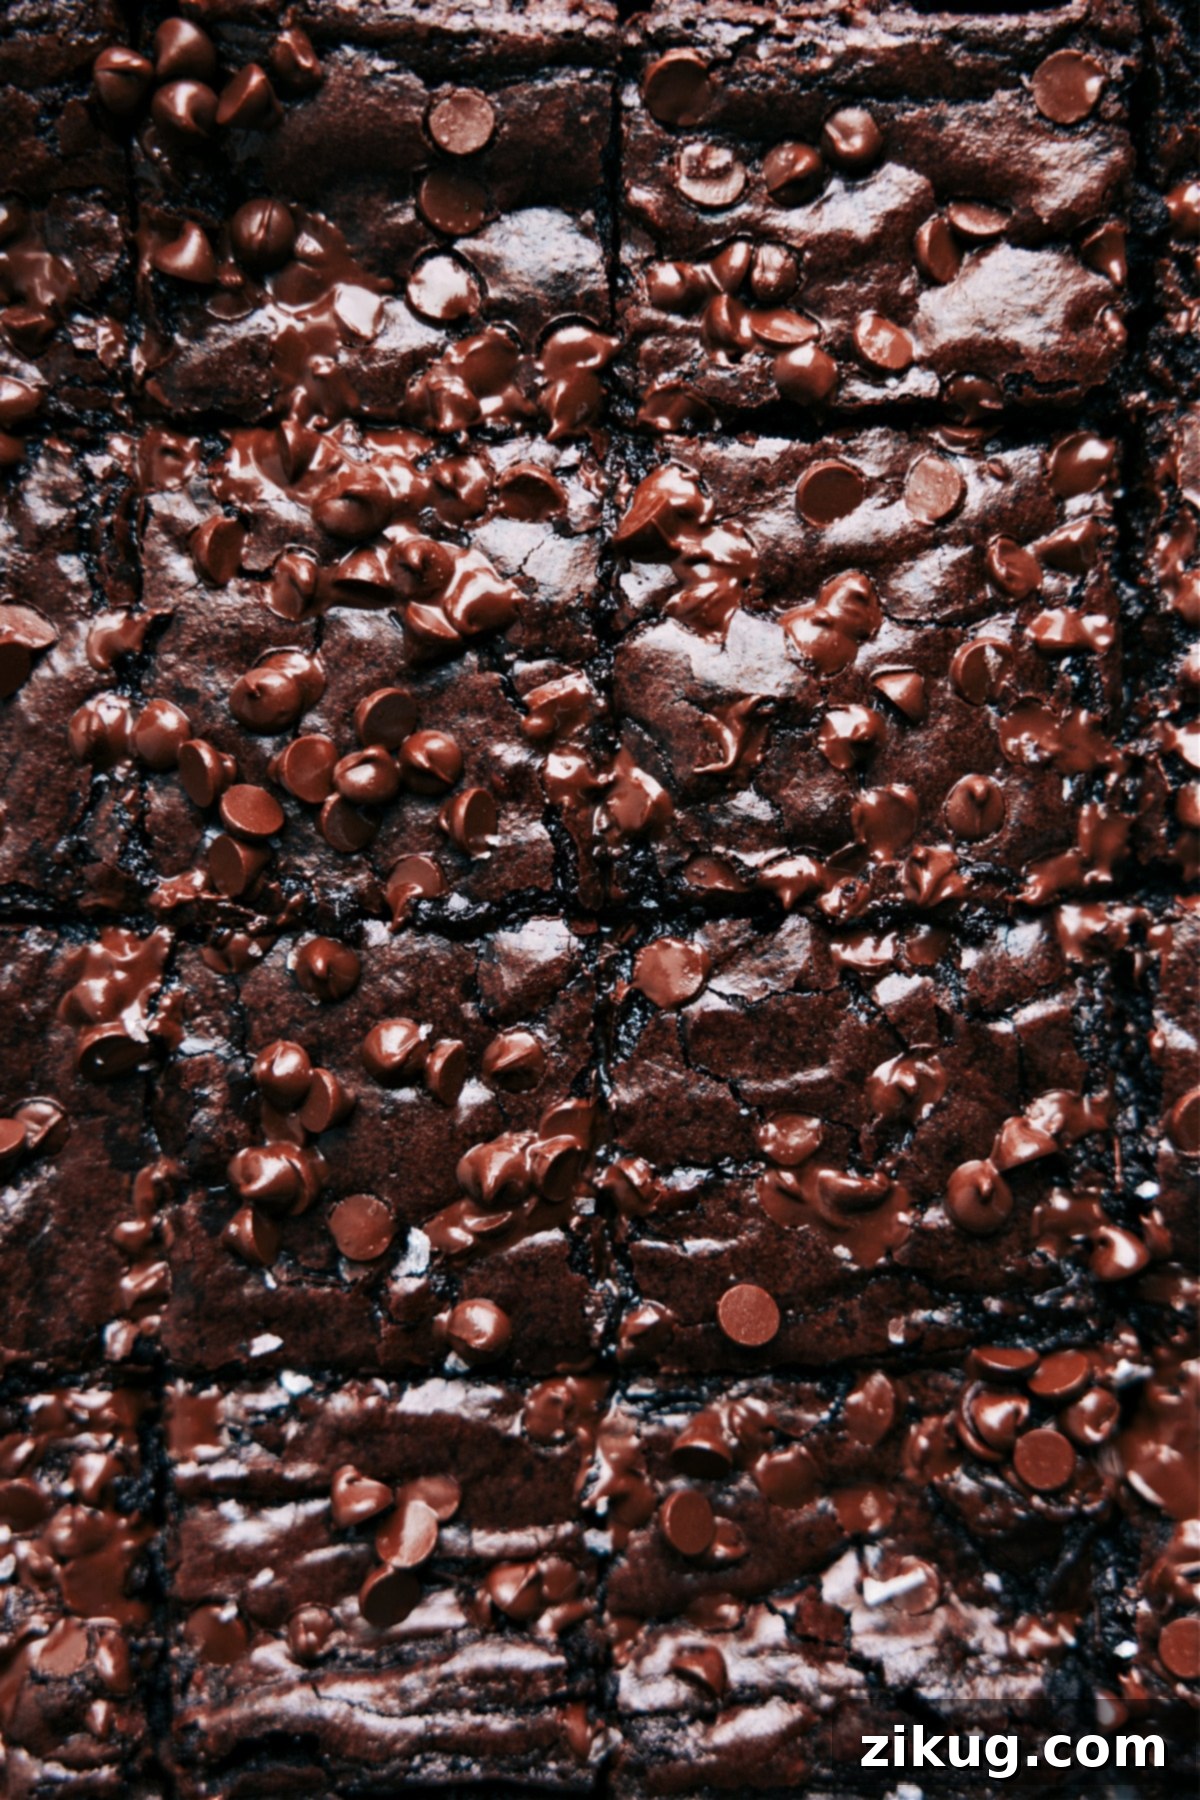
- Visual Cues for Doneness: Pay close attention to the appearance of your brownies. The edges should appear visibly set and lightly golden, indicating they are fully baked. The center, however, should still have a slight give and appear just set, with a signature shiny, crackly top. Gently jiggle the pan; if the center trembles minimally (like a very soft jelly), it’s a good sign. If it’s completely liquid or visibly wobbly, it needs more time.
- The Toothpick Test for Fudgy Brownies: This is a classic test, but for fudgy brownies, you’re looking for a specific result. Insert a toothpick or thin skewer into the center of the pan. For fudgy brownies, the toothpick should emerge with a few moist crumbs clinging to it – not wet batter, and certainly not completely clean. A perfectly clean toothpick indicates overbaked brownies, which will be more cake-like than fudgy. If the toothpick comes out wet with raw batter, continue baking for a few more minutes and re-test.
Visual Guide: Cooked vs. Undercooked Brownies
A key visual distinction for this brownie recipe: undercooked brownies will still appear noticeably glossy and wet in the center. As they approach perfection, the surface will begin to turn darker and develop a more matte finish, along with those irresistible crackly edges. Trust your eyes, but confirm with the toothpick test for absolute certainty!
Delicious Brownie Variations: Switch It Up!
- Go Gluten-Free: For those with dietary restrictions, delicious gluten-free options are available! Try these Gluten-Free Brownies or for a lighter option, these Healthy Brownies can also satisfy your cravings.
- Add a Decadent Topping: Elevate your brownies with a luxurious finish. Spread a silky smooth ganache over the cooled brownies for an extra layer of chocolate richness, or frost them with a luscious Chocolate Buttercream Frosting for a more classic dessert feel.
- Mix-In Magic: Personalize your brownies with various delightful mix-ins. Consider adding chopped walnuts or pecans for a delightful crunch, swirls of caramel or peanut butter for an extra layer of flavor, a sprinkle of flaky sea salt on top before baking to enhance the chocolate, or even a dash of peppermint extract for a festive twist during the holidays.
- Different Chocolate Experience: Instead of just mini chocolate chips, experiment with dark chocolate chunks, white chocolate chips, or a combination of different chocolates for varying levels of sweetness and texture.
Brownie Recipe Storage Tips for Optimal Freshness
- Room Temperature Storage: For short-term enjoyment, store your brownies in an airtight container at room temperature. They will retain their incredible fudgy texture and fresh taste for up to **4 days**. Ensure they are completely cool before storing to prevent condensation.
- Refrigerated Storage: If you prefer a slightly firmer, even fudgier brownie, or wish to extend their shelf life, place them in an airtight container in the refrigerator. They will stay wonderfully fresh for up to **1 week**. The colder temperature helps to preserve their density and chocolate intensity.
- Freezer Storage for Longer Enjoyment: Brownies freeze exceptionally well! For longer storage, wrap individual brownies tightly in plastic wrap, then place them in a freezer-safe airtight container or heavy-duty freezer bag. They can be frozen for up to **3 months**. To enjoy, thaw them at room temperature for a few hours, or microwave briefly (15-30 seconds) for a warm, gooey treat.
More Irresistible Dessert Recipes You’ll Love:
Desserts
Carmelitas (My Favorite Dessert!)
Desserts
Best Chocolate Cake Recipe
Desserts
Magic Bars
Desserts
Chocolate Chip Cookie Bars Recipe
Ultimate Fudgy Brownie Recipe
Video
Watch this video to see how easily these fudgy brownies come together!
(Original Video Content: A Brownie Recipe that’s fudgy, chocolatey, and perfectly rich! Made in one bowl with less than 10 ingredients, and you’ll never want a boxed mix again.)
Equipment
-
8 x 8-inch baking pan (light-colored is recommended for even baking)
-
Large Mixing Bowl
-
Whisk
-
Wooden Spoon or Spatula
-
Parchment Paper
-
Oven Thermometer (optional, but highly recommended)
Ingredients
- Cooking spray
- 11 tablespoons unsalted butter (melted and cooled)
- 1 cup granulated sugar
- 1/2 cup light brown sugar (lightly packed)
- 2 large eggs (at room temperature)
- 2 teaspoons vanilla extract
- 2/3 cup all-purpose flour
- 2/3 cup Dutch process cocoa powder (see note 1)
- 1/4 teaspoon salt
- 3/4 cup mini chocolate chips (divided)
Instructions
-
Prepare Your Pan: Preheat your oven to 350°F (175°C). Lightly grease a light-colored 8×8-inch metal baking pan with cooking spray. Then, line the pan with parchment paper, ensuring there’s an overhang on two opposite sides. This overhang will serve as handles, making it incredibly easy to lift the cooled brownies from the pan later. (Avoid using foil or wax paper as they may not perform as well.)
-
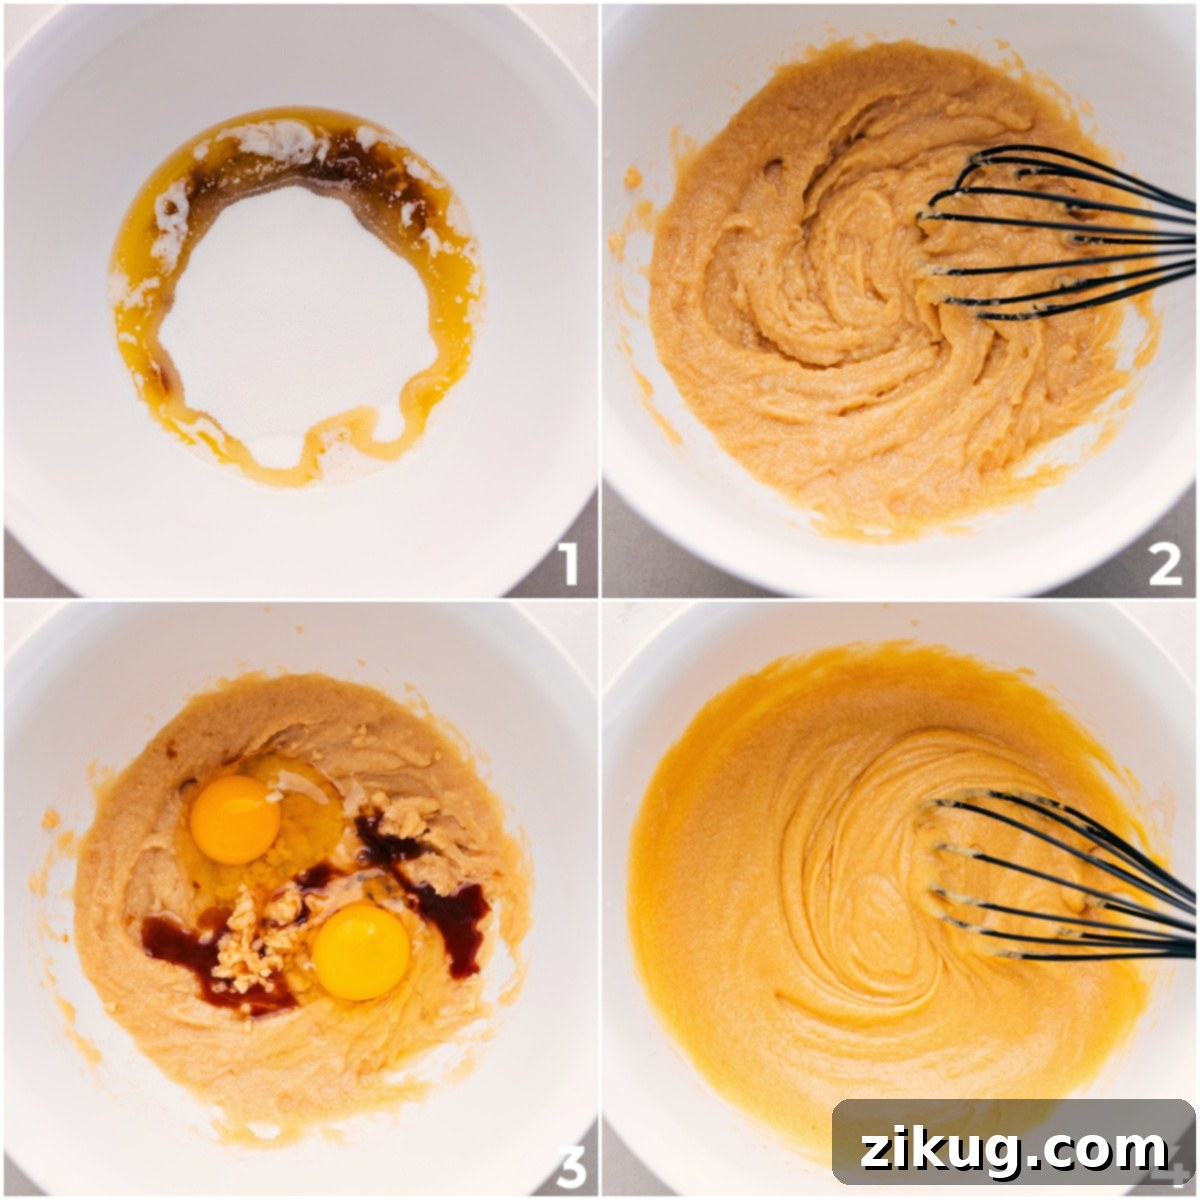
Whisk Wet Ingredients: In a large mixing bowl, combine the melted and cooled unsalted butter with the granulated sugar and light brown sugar. Whisk thoroughly until the sugars are mostly dissolved and the mixture is well combined. Next, crack in the room-temperature eggs and add the vanilla extract. Continue whisking vigorously for 1-2 minutes until the mixture is smooth, creamy, and slightly lightened in color. This step is crucial for achieving that desirable crinkly top.
-
Incorporate Dry Ingredients & Chocolate Chips: To the wet ingredients, add the all-purpose flour, Dutch-processed cocoa powder, and salt. Switch from the whisk to a wooden spoon or a sturdy spatula. Mix until the dry ingredients are *just* combined with no streaks of flour remaining. Be careful not to overmix, as this can develop the gluten in the flour and lead to tougher, less fudgy brownies. Gently stir in 1/2 cup of the mini chocolate chips until evenly distributed.
-
Fill the Pan & Top: Scrape the rich brownie batter into your prepared 8×8-inch pan. Use the back of your spoon or spatula to smooth the top evenly. Sprinkle the remaining 1/4 cup of mini chocolate chips evenly over the surface of the batter. These will create beautiful pockets of melted chocolate and add to the visual appeal.
-
Bake to Fudgy Perfection: Place the pan on the middle rack of your preheated oven. Bake for approximately 25 to 30 minutes. Begin checking for doneness around the 25-minute mark. The brownies are ready when the edges appear set and the center has a slight give, with a shiny, crackly top. A toothpick inserted into the center should come out with moist crumbs, not wet batter. Remember, it’s better to slightly underbake for a truly fudgy center, as the brownies will continue to set as they cool. Do not overbake!
-
Cool & Cut: Allow the brownies to cool completely in the pan on a wire rack. This is a critical step for achieving the perfect fudgy texture and clean cuts. Once cooled, use the parchment paper overhang to gently lift the entire brownie slab from the pan. Place it on a cutting board. For neat, precise squares, use a sharp knife. For even cleaner cuts, run your knife under warm water, wipe it dry, and repeat this process between each slice. Optionally, sprinkle with a pinch of flaky sea salt just before serving for an enhanced flavor contrast. Enjoy your ultimate fudgy brownies!
Recipe Notes
Note 2: Pan Material & Baking Time: Be aware that baking times can vary slightly depending on the type and color of your baking pan. Dark-colored metal pans or glass pans typically absorb and retain more heat, potentially requiring a slight adjustment to baking time (often a few minutes less for dark metal, and slightly longer at a lower temperature for glass). For consistently superior results, a light-colored, shiny metal pan is ideal as it provides the most even heat distribution, preventing hot spots and ensuring a perfectly fudgy center without overbaked edges.
Storage Tips: To maintain the incredible freshness and fudgy texture of your brownies, store them in an airtight container. At room temperature, they will remain delicious for up to 4 days. If you prefer a denser, even more fudgy bar, or want to extend their life, store them in the refrigerator for up to a week. For long-term preservation, wrap individual brownies tightly in plastic wrap and freeze for up to 3 months. Thaw at room temperature for a few hours, or gently warm in the microwave for a quick, gooey treat.
Nutrition Information
Nutrition information is automatically calculated and should only be used as an approximation. It may vary based on specific ingredients and preparation methods.