
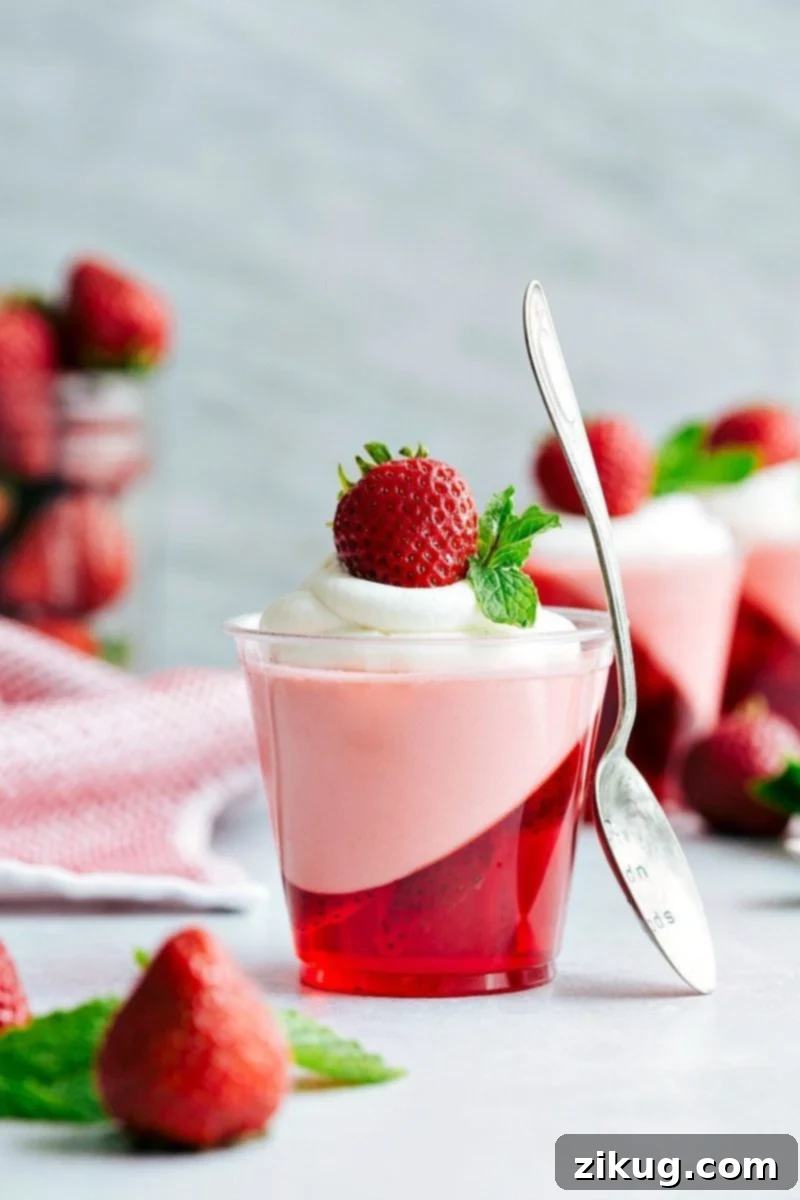
Unveiling the ultimate easy dessert: these delightful 5-Ingredient Double-Layered Strawberry Jello Parfait Cups. Featuring a vibrant, fruity Jello layer at the bottom and a velvety, creamy strawberry mousse on top, these parfaits are as stunning to look at as they are delicious to eat. Perfect for parties, picnics, or simply a refreshing treat, they promise a sophisticated presentation with minimal effort.
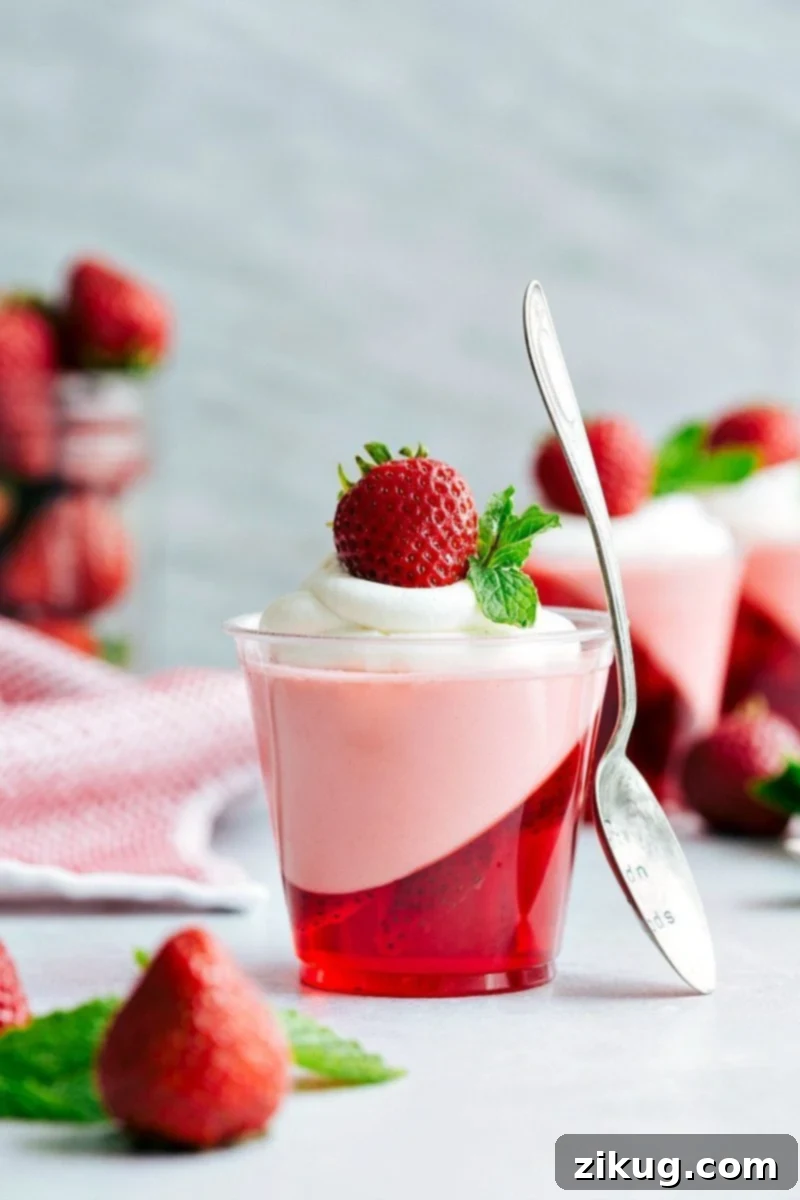
Irresistible Strawberry Jello Parfait Cups: A Crowd-Pleasing Dessert
Imagine a dessert that looks like it took hours of intricate work, yet comes together with incredible ease. Our Strawberry Jello Parfait Cups are precisely that! The secret to their impressive slanted Jello layer is ingeniously simple: merely prop your serving cups at an angle in a muffin tin. This clever trick creates a dynamic visual appeal that will surely impress your guests and elevate any dessert spread.
Beyond their captivating appearance, these parfaits are a symphony of textures and flavors. The initial bite offers the refreshing, slightly firm, and fruity burst of strawberry Jello, often speckled with fresh strawberry slices. This gives way to the smooth, light, and wonderfully creamy strawberry mousse, which perfectly complements the Jello’s tang. The combination is pure bliss – a harmonious blend that’s both light and satisfying, making it an ideal treat for warmer months or any time you crave a touch of sweetness.
While the process involves several chilling stages, the active preparation time is surprisingly minimal. The waiting periods are crucial for achieving the perfect set and distinct layers, but they are entirely hands-off. The end result is undeniably worth the anticipation, cementing these parfaits as one of the best Jello treats you’ll ever make. They’re not just a dessert; they’re an experience, offering a burst of fresh strawberry flavor in every elegantly crafted cup.
Essential Ingredients for Perfect Parfaits
Crafting these delectable Strawberry Jello Parfait Cups requires just five core ingredients, each playing a vital role in creating the perfect balance of flavor and texture. Understanding each component ensures your parfaits turn out flawlessly every time.
- Strawberry Jello Mix (3-ounce packages): This forms the vibrant, flavorful base of our parfaits. For the ideal smooth texture and proper setting, it’s crucial to fully dissolve the Jello mix in boiling water before incorporating any cold liquid. Using the recommended amount of water on the package for a regular set (not quick set) will give you the best firmness for layering.
- Boiling & Cold Water: These are essential for activating and setting the Jell-O. The boiling water ensures the gelatin granules fully dissolve, preventing a grainy texture, while the cold water helps to bring the mixture to the correct temperature for setting. Always follow the package instructions precisely for optimal results.
- Fresh Strawberries: These sweet, juicy berries add natural flavor, texture, and visual appeal to both the Jello layer and as an optional garnish. Slice them evenly to ensure a prettier presentation and consistent distribution throughout the Jello layer, providing a delightful burst of freshness with every spoonful.
- Lemon-Lime Soda (like Sprite): This is a surprising but key ingredient for the mousse layer. Using cold lemon-lime soda not only adds a subtle tang and effervescence but also aids in creating the light, airy texture of the mousse. The carbonation helps to incorporate air, making the mousse wonderfully fluffy.
- Full-Fat Cream Cheese: Softened, full-fat cream cheese is non-negotiable for achieving the smoothest, richest, and most stable mousse. Its fat content contributes to the luxurious creaminess and helps the mousse hold its structure. Ensure it’s fully softened to room temperature for a lump-free blend.
- Frozen Whipped Topping (like Cool Whip): This provides the ultimate light and fluffy consistency for the mousse. It’s pre-sweetened and stable, making it a convenient choice. For the best consistency and to avoid a watery mousse, allow it to thaw fully in the refrigerator before incorporating it into the mixture.
- Optional Garnishes: Whipped Topping or Fresh Whipped Cream & Fresh Mint: For an extra touch of elegance and freshness, consider adding a dollop of whipped topping or homemade whipped cream just before serving. A sprig of fresh mint or an extra strawberry slice can add a pop of color and aroma, making your parfaits truly Instagram-worthy.
Pro Tip: Achieving the Perfect Slant
The visually stunning slanted Jello layer is simpler than it looks! To securely hold your cups at the desired angle while pouring and chilling the Jello, create small, firm balls using aluminum foil or crumpled paper. Wedge these tightly into the cavities of a muffin tin. Then, place your clear plastic cups on top of these balls, tilting them firmly. This prevents any slipping and ensures your Jello sets into a beautifully angled layer, creating that impressive layered effect.
Crafting Your Strawberry Jello Parfait Cups: A Step-by-Step Guide
Follow these detailed instructions to create stunning and delicious double-layered strawberry Jello parfaits that will be the highlight of any gathering.
- Prepare Your Cups for the Slanted Layer: The key to the unique angled Jello is in the setup. Gather a 9-cavity muffin pan and either use small marbles, decorative balls, or simply wad up balls of aluminum foil or paper. Place one ball securely into each muffin cavity. Then, position your clear plastic cups on top of these balls, tilting them to achieve your desired angle. This creates the foundation for your eye-catching Jell-O layer.
- Prepare and Pour the Strawberry Jell-O Layer: Carefully follow the package directions for preparing two 3-ounce packets of strawberry Jell-O mix for a regular set. Ensure the gelatin is fully dissolved in the hot water before adding cold water. Once mixed, slowly and gently pour the Jell-O mixture into each angled cup, being extremely cautious not to disturb their position in the muffin tin. Consistency in pouring helps maintain the slant.
- Incorporate Fresh Strawberries: While the Jell-O is still liquid but slightly cooled (not yet setting), hull and thinly slice your fresh strawberries. Carefully place a few slices into each Jell-O cup. Lightly press the slices down into the liquid so they are submerged and don’t float to the top. This embeds them beautifully within the Jell-O layer. Gently transfer the muffin pan with the cups to the refrigerator and allow the Jell-O layer to set completely, which typically takes 2-3 hours.
- Begin the Jell-O Mousse Layer: While the Jell-O base is nearing its full set, you can start preparing the mousse. In a microwave-safe bowl or cup, measure out 1½ cups of lemon-lime soda (like Sprite). Heat this in the microwave just until it comes to a gentle boil. Immediately whisk in one 3-ounce package of strawberry Jell-O mix until it is completely dissolved and no granules remain.
- Blend for Creamy Smoothness: Transfer the hot Jell-O and soda mixture to a high-powered blender. Add 4 ounces of softened, full-fat cream cheese. Blend until the mixture is perfectly smooth and utterly lump-free. The warmth of the Jell-O mixture helps to fully incorporate the cream cheese, ensuring a silky texture.
- Finish the Mousse with Cool Sprite and Whipped Topping: Add the remaining 1 cup of cold lemon-lime soda to the blender and blend again until smooth. The cold soda helps to cool the mixture slightly and contributes to the airy texture. Finally, add the completely thawed 8-ounce container of frozen whipped topping (Cool Whip). Blend just until smooth and combined, being careful not to over-blend, which can deflate the mousse and make it less fluffy. If you plan to garnish with whipped topping later, reserve about ½ cup before adding it to the blender.
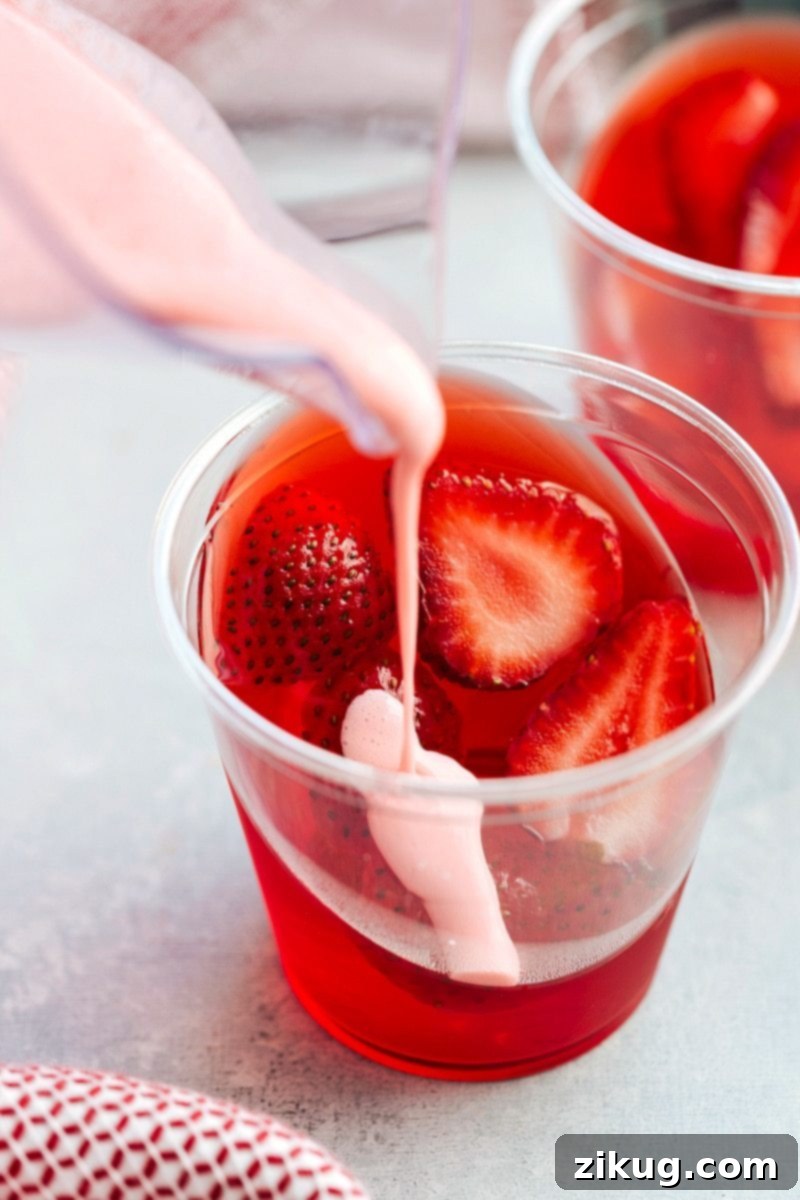
- Layer the Mousse on Top: Once the Jell-O base is completely set, remove the muffin tin from the fridge. Carefully and evenly pour the prepared strawberry mousse mixture over the set Jell-O layers in each cup. A good guideline is to use slightly less mousse than the Jell-O layer to ensure the flavors remain balanced and neither overpowers the other.
- Chill to Perfection: Return the cups to the refrigerator. Allow the mousse layer to set completely, which will take another 1-2 hours. The parfaits are ready when both layers are firm and distinct.
- Garnish and Serve for a Flourishing Finish: Just before serving, add your optional garnishes. A dollop of fresh whipped cream or the reserved whipped topping, a few fresh mint leaves, or a small, whole strawberry on top will add a beautiful and appetizing touch. Serve chilled and enjoy this exquisite, easy-to-make dessert!
Storage Solutions for Freshness
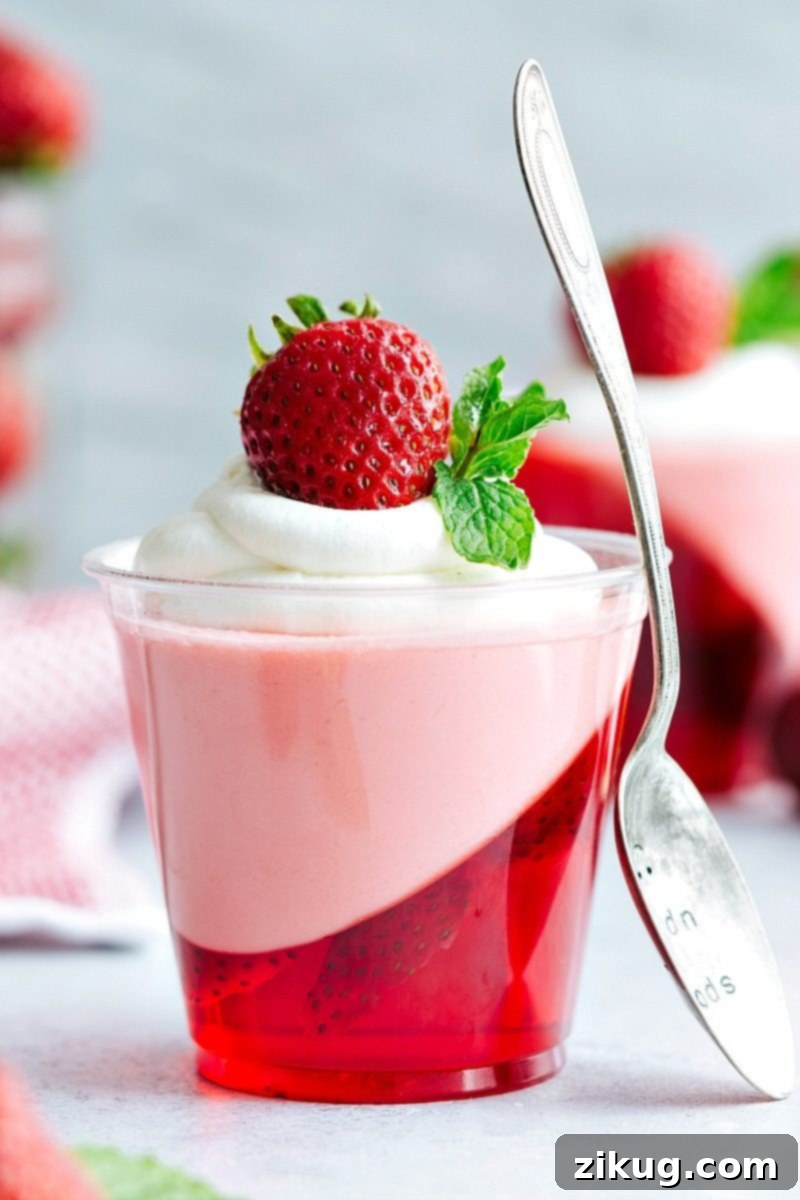
To ensure your Strawberry Jello Parfait Cups remain fresh and delicious, proper storage is key. Cover each individual parfait cup tightly with plastic wrap, pressing it gently onto the surface of the mousse to prevent air exposure. Alternatively, if you’re using cups with airtight lids, secure them firmly. This practice helps prevent the parfaits from drying out, developing a film, or absorbing unwanted odors from the refrigerator. Store them in the fridge for up to 3 days. For the absolute best taste and texture, remember to add any fresh toppings or garnishes just before serving.
Creative Variations & Serving Ideas
While the classic strawberry version of these Jello Parfait Cups is undeniably delicious, don’t hesitate to get creative! This recipe is incredibly versatile and can be adapted to suit various tastes and occasions. Consider experimenting with different Jello flavors like raspberry, cherry, or even a mixed berry blend for a colorful twist. You could also swap out fresh strawberries for other soft fruits such as blueberries, raspberries, or sliced peaches, especially if they complement your chosen Jello flavor.
For an extra layer of decadence, try adding a thin layer of crushed cookies (like shortbread or graham crackers) at the bottom of the cups before pouring the Jello, or sprinkle some on top of the mousse. A drizzle of chocolate syrup or a handful of mini chocolate chips can also add a delightful contrast. These parfaits are fantastic for summer barbecues, birthday parties, baby showers, or as a light and refreshing ending to any meal. Their individual serving size makes them convenient and elegant, minimizing mess and maximizing enjoyment.
Explore More Fruity & Refreshing Desserts:
Desserts
Raspberry Jello Cheesecake Bars
Salads
Creamy Orange Fluff Salad
Desserts
Classic Strawberry Pretzel Salad Recipe
Desserts
Decadent Snickers Salad

★★★★★
Strawberry Jello Parfait Cups
Chelsea Lords
20 minutes
20 minutes (plus chilling time)
9 parfait cups (Note 1)
Pin
Video Guide
A video demonstration of how to make these Strawberry Jell-O Parfait Cups would appear here, showing the unique slanted Jell-O method and mousse preparation. For a visual guide, please check the original source.
Equipment
- High-powered Blender
- 9-cavity Muffin Pan
- Clear Plastic Cups (9)
- Small balls of foil or paper (for tilting cups)
- Microwave-safe bowl or cup
- Whisk
Ingredients
Jell-O Layer
- 2 (3-ounce) packages strawberry jell-o mix (plus boiling and cold water as per package directions)
- 1 pint fresh strawberries, hulled and sliced (about 2 cups, plus extra for garnish if desired)
Jell-O Mousse Layer
- 2½ cups lemon-lime soda (like Sprite, divided)
- 1 (3-ounce) package strawberry jell-o mix
- 4 ounces full-fat cream cheese, softened
- 1 (8-ounce) container frozen whipped topping (like Cool Whip), completely thawed; plus additional whipped topping if desired for topping
- Fresh mint (optional, for garnish)
Instructions
- Prepare Cups for Slant: In a 9-cavity muffin pan, place small balls (e.g., marbles, foil balls, or crumpled paper) in each cavity. Position 9 clear plastic cups on top of the balls at an angle. This setup allows for the signature slanted Jell-O layer.
- Prepare Strawberry Jell-O: Follow the package directions for both strawberry Jell-O packets (for a regular set, not quick set). Ensure the Jell-O powder is fully dissolved. Carefully and evenly fill each angled cup with the prepared Jell-O mixture, being mindful not to shift the cups.
- Add Strawberries and Chill: Hull and slice your fresh strawberries. Gently place a few slices into each Jell-O-filled cup, lightly pressing them to submerge. Carefully transfer the muffin pan to the refrigerator and allow the Jell-O to set completely (this typically takes 2-3 hours). Begin the mousse layer when the Jell-O is almost set.
- Heat Sprite and Dissolve Jell-O: Pour 1½ cups of lemon-lime soda (Sprite) into a microwave-safe bowl. Microwave until the soda just comes to a boil. Immediately whisk in one 3-ounce packet of strawberry Jell-O mix until fully dissolved and smooth.
- Blend Mousse Base: Transfer the warm Jell-O and soda mixture to a high-powered blender. Add the softened 4 ounces of full-fat cream cheese. Blend until the mixture is completely smooth and creamy.
- Add Cold Sprite and Cool Whip: Pour in the remaining 1 cup of cold Sprite and blend again until smooth. Then, add the completely thawed 8-ounce container of frozen whipped topping (Cool Whip). Blend just until the mixture is smooth and fully combined, avoiding over-blending to maintain fluffiness. You may reserve about ½ cup of whipped topping for an optional garnish later.
- Layer the Mousse: Once the Jell-O layer in the cups is fully set, carefully pour the prepared strawberry mousse evenly over each Jell-O layer. Use slightly less mousse than Jell-O to ensure a balanced flavor profile.
- Final Chill: Return the cups to the refrigerator and allow the mousse layer to set completely, typically another 1-2 hours, or until firm.
- Garnish and Serve: If desired, garnish your parfaits just before serving with fresh whipped cream (or the reserved Cool Whip), fresh mint leaves, and a small, fresh strawberry. Serve chilled and enjoy!
Recipe Notes
Note 1: The total yield of this recipe is approximately 9 parfait cups, though this can vary slightly based on the size of the cups you use. Please note that the “Total Time” listed does not include the essential chilling time required for both Jell-O layers to set properly, which can be up to 4 hours in total. I have not tested this recipe with low-fat or sugar-free products. While they might work, there is a risk that the texture could be too watery or that the layers might not set correctly.
Storage: To keep these delicious parfaits fresh and prevent them from drying out or absorbing refrigerator odors, cover each cup individually with plastic wrap or secure them with airtight lids. Store them in the refrigerator, where they will maintain their freshness for up to 3 days. For the best presentation and taste, add any fresh garnishes right before serving.
Nutrition Facts
Calories:
237kcal
Nutrition information is automatically calculated and should only be used as an approximation.
Loved this recipe? Share your thoughts below!