
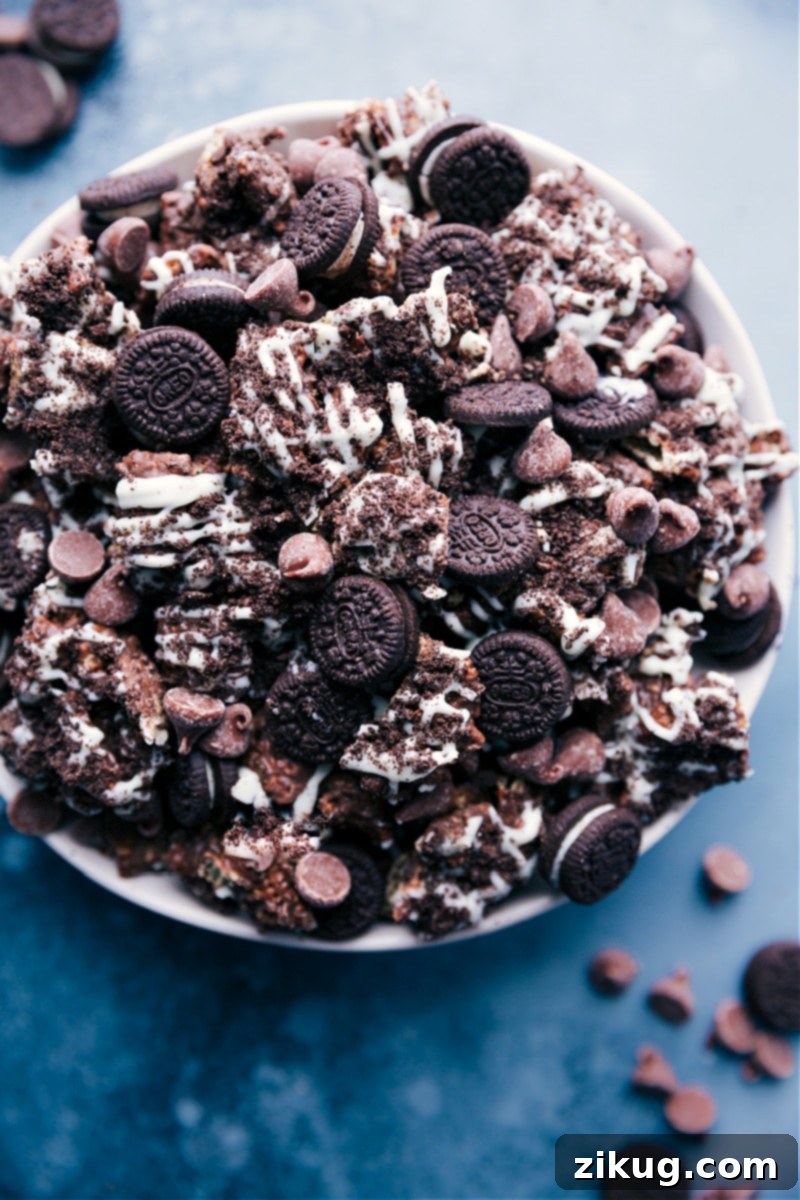
Cookies and Cream Muddy Buddies bring that iconic cookies-and-cream flavor to every crunchy, chocolatey bite—like eating Oreos by the handful! This irresistible snack mix is a delightful twist on a classic, offering all the fun without any peanuts, making it a perfect treat for everyone, especially those with nut allergies.

Author’s Note
Why These Cookies and Cream Muddy Buddies Are Unbeatable!
For years, traditional Puppy Chow (also fondly known as Muddy Buddies) has been a cherished snack, a staple at parties and casual get-togethers. However, one question consistently filled my inbox and comments sections: “What can I use instead of peanut butter?” or “How can I make this delicious treat nut-free?” I deeply understand this concern. Growing up, my own brother contended with a serious peanut allergy, which unfortunately meant many classic, peanut-butter-laden recipes were off-limits for our family. It was always a challenge to find delicious, inclusive alternatives that everyone could safely enjoy.
But rest assured, I’ve finally perfected the ultimate, definitive answer: Cookies and Cream Muddy Buddies! And, I’ll be honest, I truly believe these might even surpass the classic peanut butter version in flavor and appeal. This recipe is a genuine game-changer, not just for those managing nut allergies, but for anyone seeking a fresh, exhilarating new flavor profile for their snack mix. At my home, these treats disappear almost as quickly as I make them – we simply cannot stop snacking on them. They strike a perfect balance of sweetness, boast an incredible crunch, and encapsulate the unmistakable, beloved taste of America’s favorite sandwich cookie – Oreos – in every single, satisfying bite.
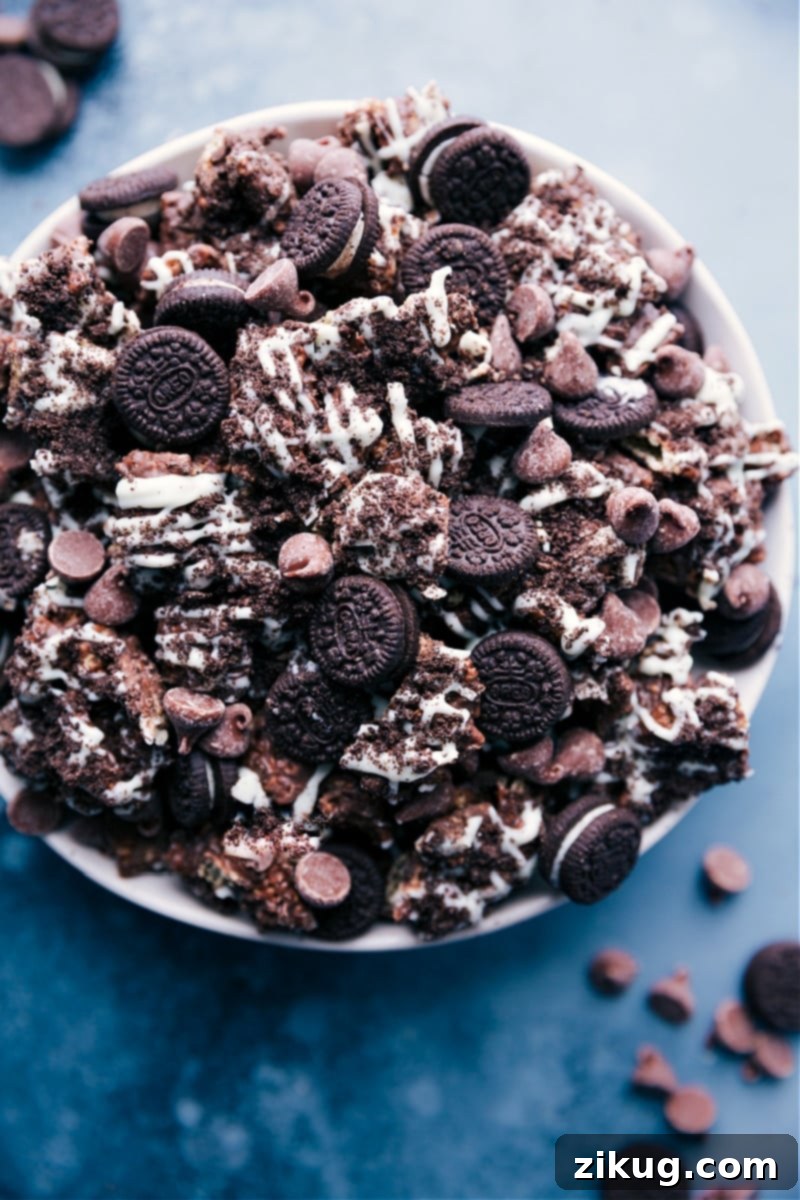
This recipe isn’t merely a substitute; it stands proudly as a stellar creation in its own right, destined to become a new, enduring favorite in your snack repertoire. Beyond being completely nut-free, this version features a rich, dark chocolate foundation generously studded with crunchy Oreo crumbs, then beautifully contrasted with a creamy white chocolate drizzle. It’s a harmonious symphony of textures and flavors that proves incredibly hard to resist. Whether you’re whipping up a batch for an upcoming party, a cozy movie night in, or simply as a special, everyday treat, these Cookies and Cream Muddy Buddies are absolutely guaranteed to be a sensational hit!
Ingredients Spotlight: The Foundation of Flavor
Creating the perfect batch of Cookies and Cream Muddy Buddies begins with carefully selecting and understanding your ingredients. While the recipe is wonderfully straightforward, a few key choices and techniques can significantly elevate your snack mix from merely good to absolutely phenomenal, ensuring every bite is a memorable experience.
Choosing Your Chocolate Wisely
- Quality Chocolate Chips Make All the Difference: Never underestimate the profound impact of using good quality chocolate. For superior flavor and a smooth, consistent melt, always opt for premium brands like Ghirardelli or Guittard. These brands are known for their higher cocoa butter content and better quality cocoa solids, which are crucial for achieving that silky, flowing texture. Inferior or cheaper chocolates often contain more sugar and fillers, making them prone to seizing, burning, or becoming grainy when melted, which can ruin your entire batch. Invest a little more here for a truly delicious result.
- Melt Chocolate Slowly and Carefully: Patience is a virtue when melting chocolate. Always use a sturdy glass or ceramic, microwave-safe bowl (avoid plastic, as it can retain heat unevenly). Heat the chocolate in short, 20-second bursts, ensuring you stir vigorously and continuously for 20 seconds after *each* burst. This method prevents overheating, burning, and helps the chocolate melt smoothly and evenly, yielding a perfectly glossy coating for your cereal.
- Tailor the Sweetness to Your Taste: If you or your guests prefer a less intensely sweet snack mix, you have options. For the main coating, consider substituting milk chocolate chips with semi-sweet or even dark chocolate chips. These provide a richer, more complex chocolate flavor with less sugar. Additionally, you can reduce or completely omit the optional extra chocolate chips and mini Oreos as toppings to further balance the overall sweetness profile.
- Working with White Chocolate – Speed is Key!: White chocolate behaves slightly differently from its milk or dark counterparts; it has a tendency to harden much more rapidly. Once you’ve melted and drizzled your white chocolate over the cereal, it’s crucial to act swiftly. Immediately proceed to add any desired toppings, such as additional mini Oreos or chocolate chips. Gently press them into the still-wet white chocolate to ensure they firmly adhere before it completely sets, creating a beautifully finished and well-adhered topping.
Expert Tips for Irresistible Cookies and Cream Muddy Buddies
While the process of making Muddy Buddies is generally straightforward and fun, a few insightful tips and clever tricks can ensure your snack mix achieves that coveted perfect crunch, uniform coating, and undeniably delicious flavor every single time. Follow these expert recommendations for a truly hassle-free and successful batch that will impress everyone.
- Achieving Perfect Oreo Crumbs: For the finest results, you’ll want your Oreos to be transformed into very fine crumbs. This powdery texture is key for them to seamlessly integrate into the chocolate coating, providing maximum flavor and a smooth finish. A high-powered blender or a food processor is your best tool for this, ensuring a consistent and uniform crumb. If these aren’t available, don’t worry! Place your Oreos in a sturdy, resealable plastic bag, press out all the excess air, seal it tightly, and then use a rolling pin or a heavy object (such as a sturdy can of food) to crush them vigorously until they reach a very fine, sandy consistency. Remember to include the rich cream filling – it adds an essential depth of flavor and moisture.
- Mastering the Effortless Drizzle Technique: Achieving a professional-looking white chocolate drizzle doesn’t require specialized pastry bags. A simple sandwich-sized resealable plastic bag works wonders and is a fantastic kitchen hack! Simply spoon your freshly melted white chocolate into one corner of the bag, twist the top tightly to secure it and prevent leakage, then carefully snip off a tiny, tiny bit of the very corner with a pair of sharp kitchen scissors. This instantly creates a makeshift piping bag, granting you excellent control for drizzling the white chocolate in elegant, decorative patterns over your snack mix.
- Strategic Work Surface Preparation: Before you even think about melting any chocolate, take a moment to prepare your workspace properly. Ensure your large baking sheet (or a couple of smaller ones) is meticulously lined. Parchment paper is highly recommended for its excellent non-stick properties and incredibly easy cleanup. Alternatively, a reliable Silpat® baking mat performs beautifully, or you can use aluminum foil (lightly greased if you’re concerned about any potential sticking). This seemingly minor preparatory step is absolutely crucial for easy spreading of the mixture and preventing it from adhering to the pan as it cools and sets.
- The Art of Even Coating: When it comes to combining the warm chocolate-Oreo mixture with the delicate Chex cereal, technique matters. Use a large, heat-resistant rubber spatula or a sturdy spoon. Employ a gentle folding motion, carefully lifting and turning the cereal to ensure every single piece gets thoroughly coated without being crushed or broken. Take your time during this step to achieve an even distribution of the rich chocolate and Oreo goodness, which is vital for a uniformly flavorful snack mix.
Quick Tip: Perfecting Your Drizzle Technique
For a clean and controlled white chocolate drizzle, grab a standard sandwich-sized resealable plastic bag. Place the bag inside a tall drinking cup and fold the top edges of the bag over the rim of the cup. This creates a stable opening, making it much easier to spoon your melted white chocolate into the bag without any mess. Once the chocolate is in, carefully lift the bag out of the cup, gently squeeze out any excess air, and securely seal the top. Guide the melted chocolate down into one of the bottom corners of the bag, then snip off a tiny piece of that corner with sharp scissors. Now you have a perfectly functional, disposable piping bag! Apply gentle, even pressure to the bag to drizzle the white chocolate in beautiful, crisscross patterns over your chocolate-coated Muddy Buddies, achieving that classic cookies and cream aesthetic.
Customize Your Cookies and Cream Muddy Buddies: Toppings Galore!
While the base Cookies and Cream Muddy Buddies are undeniably delicious and satisfying on their own, the addition of thoughtful toppings can truly elevate them to another level of indulgence and visual appeal. The mini Oreos and extra chocolate chips are perennial fan favorites, enhancing both the texture and intensifying the overall flavor profile. Remember, these delightful additions are entirely optional, but they are highly recommended if you’re aiming for an extra special and decadent touch.
- Critical Timeliness for Topping Application: The single most crucial tip when adding toppings is to do so immediately after you’ve finished drizzling the white chocolate. The white chocolate needs to still be warm, wet, and sticky to act as an adhesive. This ensures that your mini Oreos, chocolate chips, or any other chosen toppings adhere firmly to the snack mix and do not simply fall off once the white chocolate has set and hardened. If necessary, very gently press the toppings into the wet chocolate to secure them.
- Exploring Chocolate Chip Varieties: You have creative freedom with your chocolate chips! For a more subtle and delicate burst of chocolate in each bite, opt for mini chocolate chips. If, however, you prefer a bolder, more pronounced chocolate presence, regular-sized chips will work wonderfully. Milk chocolate chips will contribute to the overall sweetness, while semi-sweet or even a touch of dark chocolate chips can provide a delightful contrast in flavor, adding depth to the mix.
- Mini Oreos Versus Crushed Regular Oreos: Mini Oreos are fantastic for providing a distinct, satisfying cookie crunch and an appealing visual element to your Muddy Buddies. However, if mini Oreos aren’t readily available, or if you simply prefer using what you have, regular Oreos can be easily adapted. After crushing them for the main mix, simply chop a portion of the remaining Oreos into smaller, coarse pieces to use as a topping. You can even combine both, using some crushed bits alongside whole mini Oreos for a dynamic and varied texture.
- Beyond the Basics – Get Creative!: Don’t limit yourself to just chocolate chips and Oreos. This is where you can truly personalize your snack mix! Consider a vibrant sprinkle of colorful sprinkles for a festive and playful look, perfect for celebrations. For a gourmet twist, a dash of finely chopped, lightly toasted coconut flakes (if you enjoy the flavor and texture) can add an interesting dimension. A light dusting of powdered sugar (applied *after* all chocolate has fully set) can also impart that classic “Puppy Chow” finish and an additional whisper of sweetness.
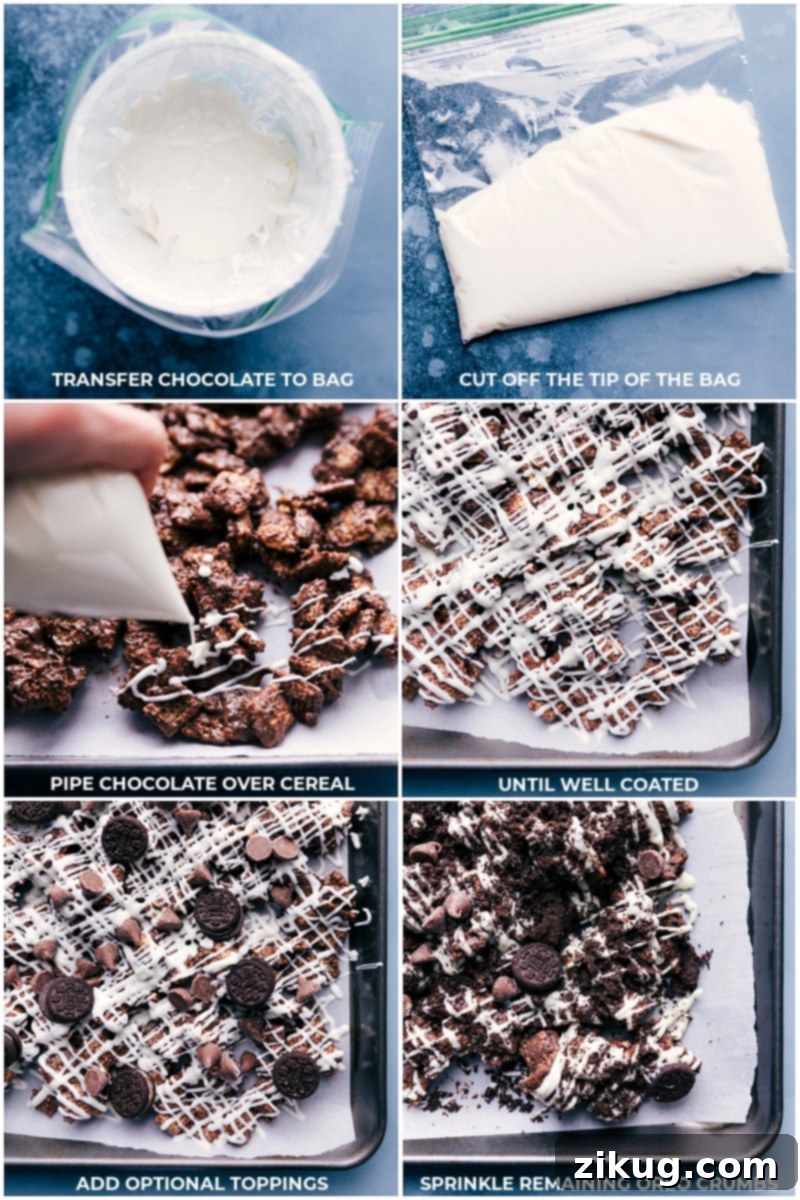
Once your Cookies and Cream Muddy Buddies are fully coated, drizzled, and generously topped, it’s time for the crucial setting phase. This can be achieved by allowing them to harden at room temperature for approximately one hour. If you’re eager to enjoy them sooner, you can significantly accelerate the process by placing the entire tray in the refrigerator for about 20 minutes. The setting time is absolutely essential as it allows all the chocolate to firm up, developing that wonderfully satisfying and characteristic crunchy texture that we all adore. After they’ve completely set, simply break the snack mix apart into delicious, individual bite-sized pieces and prepare yourself to enjoy one of the most addictive, crowd-pleasing snack mixes you’ll ever create!
Serving and Gifting Ideas for Your Muddy Buddies
These Cookies and Cream Muddy Buddies are not just a delicious snack; they are incredibly versatile, making them perfectly suited for almost any occasion you can imagine. Their unique, universally loved flavor and eye-catching appearance ensure they’re always a hit. Here are some creative ideas for how to best enjoy and share your delightful creation:
- Party Perfect Treat: Serve them proudly in a large, decorative bowl at your next gathering, potluck, or celebration. Their irresistible flavor and charming appearance make them a guaranteed crowd-pleaser, especially with the added bonus of being a nut-free option that everyone can safely enjoy.
- Ultimate Movie Night Must-Have: Elevate your next family movie night or cozy evening in. Ditch the traditional popcorn for this sweet, crunchy, and intensely satisfying snack mix. It’s the perfect companion for any film!
- Thoughtful Homemade Gift: These Muddy Buddies make for a truly delightful and personal homemade gift. Package small, individual portions in clear cellophane bags, tie them with a pretty ribbon or twine, and add a small personalized tag. They are ideal for holiday gifts, birthday treats, teacher appreciation presents, or simply as a heartfelt thank-you gesture. Everyone appreciates a delicious, handcrafted gift!
- Lunchbox Delight: Tuck a small handful into lunchboxes for a special, unexpected surprise that will bring a smile to anyone’s face, whether it’s for school or work.
- Game Day Snack Champion: Easy to pick up, munch on, and share, these Muddy Buddies are an absolute ideal snack for munching while you’re passionately cheering on your favorite team during the big game.
Smart Storage Tips for Maximum Freshness
- Optimal Room Temperature Storage: To ensure your Cookies and Cream Muddy Buddies retain their ideal freshness and satisfying crunch, always store them in an airtight container or a heavy-duty, gallon-sized plastic bag. It’s crucial to keep them in a cool, dry place, safely away from direct sunlight and any sources of heat, which can cause the chocolate to melt or the cereal to become soft. While they are undoubtedly best enjoyed within 2-3 days for peak crispness and flavor, they can actually remain delightfully palatable for up to a full week.
- Freezing for Extended Enjoyment: For those who love to plan ahead or wish to prolong the enjoyment of this delicious treat, these Muddy Buddies freeze beautifully. Once they are completely set and firm, transfer the snack mix into a freezer-safe container or a dedicated freezer bag. Make sure to remove as much excess air as possible from the container or bag to prevent any potential freezer burn, which can affect texture and flavor. They can be safely frozen for up to 2 months. When you’re ready to indulge, simply take the desired portion out of the freezer and allow it to come to room temperature for just a few minutes before serving. There’s typically no need for extensive thawing; they’ll be perfectly crunchy and ready to enjoy!
Discover More Delicious Treats:
Desserts
Oreo Truffles
Desserts
Tiger Butter Fudge
Snacks
Chocolate Peanut Butter Snack Mix
Desserts
Avalanche Cookies (No Baking!)
Print Recipe
Cookies and Cream Muddy Buddies
Chelsea Lords
30 minutes
1 hour
1 hour 30 minutes
10 servings
Equipment
- Large sheet pan (15″ x 21″) or 2 smaller sheet pans
- Parchment paper or aluminum foil
- Blender high-powered, or food processor
- Large microwave-safe bowls (at least two)
- Rubber spatula or large spoon
- Resealable plastic bags (sandwich size)
- Measuring cups and spoons
Ingredients
- 6 cups Rice Chex cereal
- 16 Oreos (standard size, with cream filling)
- 2 cups milk chocolate chips (or semi-sweet for a less sweet mix, high quality recommended)
- 3 teaspoons coconut oil (or vegetable/canola oil, divided; helps chocolate melt smoothly)
- 1 cup white chocolate chips (good quality for smooth melting)
- 1/2 cup milk chocolate chips (mini or regular-sized)
- 1/2 cup mini Oreos (or additional chopped regular Oreos)
- Additional reserved Oreo crumbs (from step 2)
Instructions
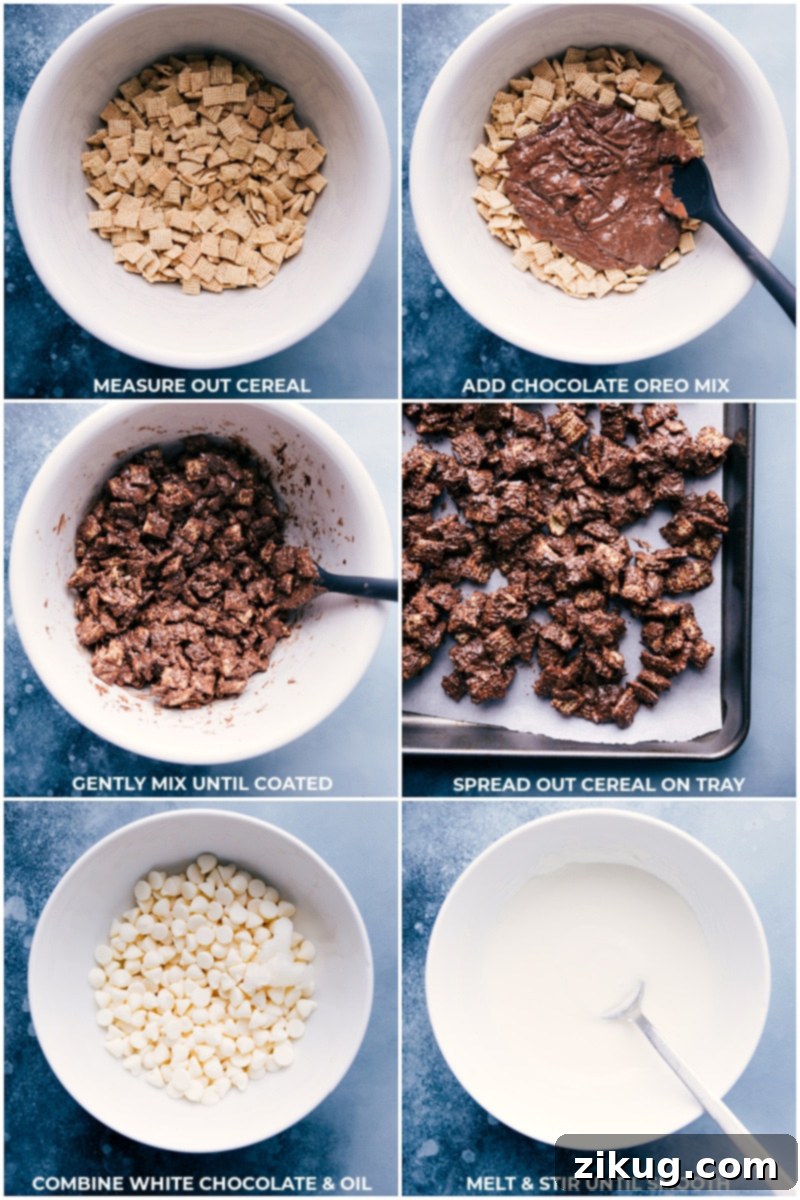
- 1. Prepare Your Workspace: Begin by lining a very large (approximately 15×21-inch) baking sheet or two smaller sheet pans with either parchment paper or aluminum foil. This crucial step prevents the snack mix from sticking and simplifies cleanup. Set the prepared pan(s) aside. Carefully measure out the 6 cups of Rice Chex cereal and gently pour them into an exceptionally large, sturdy mixing bowl, ensuring there’s ample room for stirring.
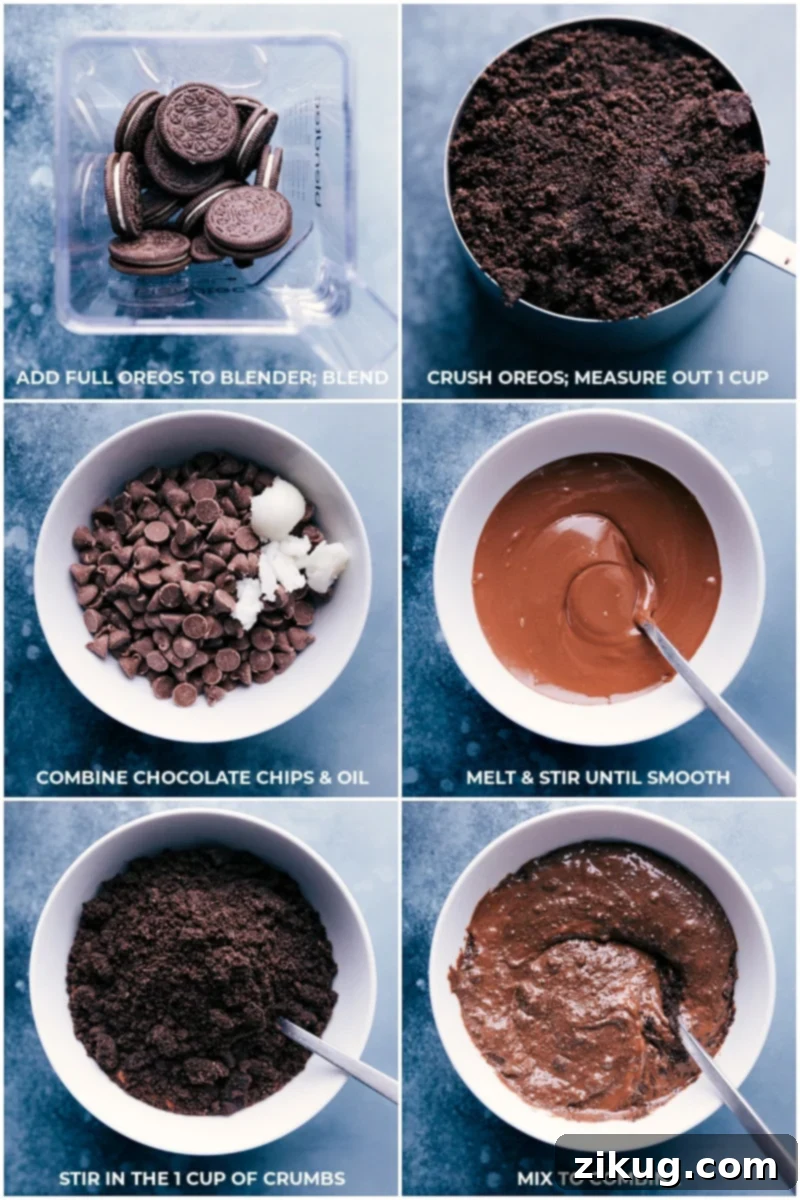
- 2. Crush the Oreos: Place all 16 whole Oreos (do not remove the cream filling, as it adds to the flavor and texture!) into a high-powered blender or a food processor. Process or pulse them until they are thoroughly transformed into fine, consistent crumbs. Measure out exactly 1 level cup (approximately 135 grams) of these crushed crumbs and set them aside. Keep any remaining crumbs, as they make an excellent optional topping later.
- 3. Melt Dark Chocolate & Combine with Oreos: In a separate large, microwave-safe bowl, combine the 2 cups of milk chocolate chips and 2 teaspoons of coconut oil. Microwave this mixture in short bursts of 20 seconds, ensuring you stir vigorously for 20 seconds after each burst. Continue this process until the chocolate is completely melted and perfectly smooth. The coconut oil aids in achieving a silky, pourable consistency. Once the chocolate is fully melted, stir in the measured 1 cup of crushed Oreos until they are thoroughly combined with the chocolate. Pour this rich chocolate-Oreo mixture directly over the Rice Chex cereal in your large mixing bowl. Use a rubber spatula to scrape every last bit of chocolate into the cereal. Gently fold and stir the cereal until every single piece is evenly coated in the chocolate and Oreo mix. Then, transfer this coated cereal to your prepared sheet pan(s), spreading it out into a single, even layer to cool slightly.
- 4. Melt & Drizzle White Chocolate: In a third large, microwave-safe bowl, add the 1 cup of white chocolate chips and the remaining 1 teaspoon of coconut oil. Repeat the melting process as before: microwave in 20-second bursts, stirring exceptionally well after each, until the white chocolate is entirely smooth and liquid. For effortless drizzling, line a medium cup with a resealable plastic bag and carefully pour the melted white chocolate into the bag. Seal the bag securely, pressing out any excess air, and snip off a tiny, tiny tip from one of the bottom corners. Generously drizzle the melted white chocolate over the chocolate-coated cereal on the sheet pan until all the white chocolate has been used, creating an appealing marbled effect.
- 5. Add Toppings & Set: This step requires quick action, as white chocolate tends to harden very fast! Immediately after drizzling, sprinkle on your optional 1/2 cup of chocolate chips (mini or regular), 1/2 cup of mini Oreo cookies, and any additional reserved Oreo crumbs over the wet white chocolate. Gently press these toppings into the white chocolate to help them adhere firmly. Allow the Cookies and Cream Muddy Buddies to harden and set completely. This can take about 1 hour at room temperature. For a quicker set, you can place the pan in the refrigerator for approximately 20 minutes. Once fully firm, break the snack mix apart into delicious, bite-sized clusters and savor every moment! For optimal crunch and flavor, this mix is best enjoyed within 2-3 days.
Recipe Notes
Storage: To ensure your delicious Muddy Buddies remain fresh and crunchy, store any leftovers in an airtight container or a heavy-duty gallon-sized plastic bag. Keep them in a cool, dry place, away from direct sunlight and heat. They are at their absolute best when enjoyed within 2–3 days, but can certainly last deliciously for up to a week. For longer preservation, these Muddy Buddies freeze beautifully. Transfer the completely set snack mix into a freezer-safe container or bag, making sure to remove as much excess air as possible to prevent freezer burn. They can be safely frozen for up to 2 months. When you’re ready to enjoy, simply take them out of the freezer and let them come to room temperature for a few minutes before serving – no thawing required for maximum crunch!
Nutrition Information
Nutrition information is automatically calculated and should only be used as an approximation. It is not a substitute for professional dietary advice and values may vary based on exact ingredients and preparation.
Loved this recipe? Leave a comment below!