
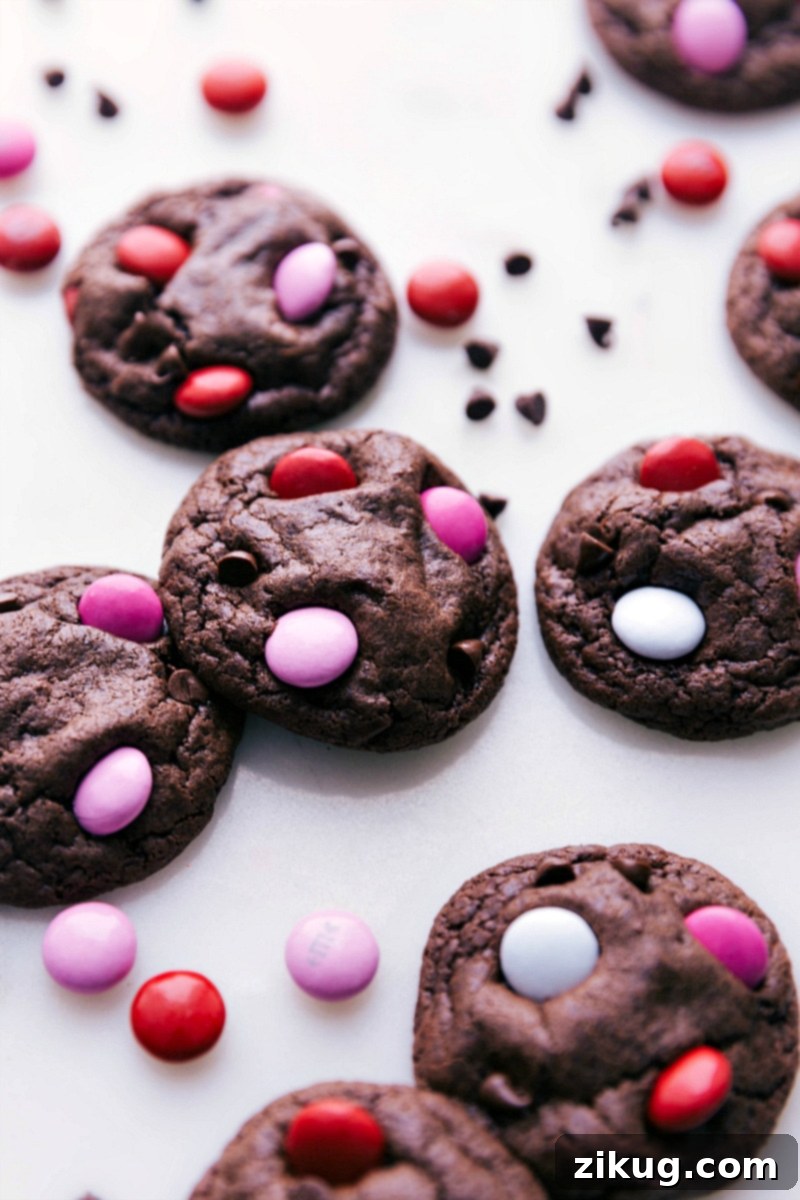
Indulge in rich, chocolatey Valentine Cookies, generously studded with festive pink, red, and white M&M’s and decadent chocolate chips. These delightful, fudgy cookies are the ultimate treat to celebrate love and add a touch of sweetness to your Valentine’s Day festivities. Simple to make yet incredibly satisfying, they promise pure chocolate bliss in every bite!

The Best Fudgy Chocolate Valentine Cookies for a Sweet Celebration
Valentine’s Day is synonymous with expressions of love, and what better way to show you care than with homemade treats? For years, my go-to recipe for a truly satisfying chocolate fix has been my signature chocolate crinkle cookies. Their deep cocoa flavor and incredibly fudgy texture make them an absolute family favorite. This year, with Valentine’s Day approaching, I wanted to infuse that beloved recipe with a special holiday twist, transforming it into something even more festive and heartwarming for my kids.
The original crinkle cookies are known for their powdered sugar coating, but I envisioned something bolder and more vibrant for Valentine’s. So, I experimented: what if I replaced the traditional dusting with a medley of pink, red, and white M&M’s, pressing them into the dough and scattering them on top? The result was nothing short of magical! The same deeply fudgy, moist cookies that my readers and I adore, now beautifully adorned with a burst of color and extra chocolate, perfectly capturing the spirit of Valentine’s Day. They’re not just cookies; they’re little edible declarations of love, perfect for gifting, sharing, or simply enjoying with your loved ones.
These truly stand out as the best cookies for any chocolate lover, offering a perfect blend of rich flavor and delightful texture. Each cookie is a testament to simple pleasures and the joy of creating something delicious from scratch. Whether you’re baking for a partner, friends, or your own children, these fudgy chocolate Valentine cookies are an undeniably sweet way to convey affection and make the holiday extra special.
The Secret to Deeply Fudgy Cookies: Demystifying Cocoa Powder
In the realm of chocolate baking, not all cocoa powders are created equal, and for these Valentine Cookies, the choice of cocoa powder is absolutely key to achieving that irresistible rich, fudgy texture and intense chocolate flavor. This recipe specifically calls for Dutch-process cocoa powder, and understanding why it’s so important will elevate your baking from good to extraordinary.
Dutch-process cocoa powder has been treated with an alkali solution to neutralize its acidity. This process, known as “Dutching,” results in a cocoa powder that is darker in color, milder in flavor, and less acidic than natural cocoa powder. The reduced acidity means it doesn’t react with baking soda (which requires an acid to activate), so it’s typically paired with baking powder, a leavener that contains its own acid. More importantly for these cookies, Dutch-process cocoa delivers a smoother, richer, and more mellow chocolate taste, often described as “earthy” or “less bitter.” This is precisely what contributes to the deep, almost brownie-like fudginess and moistness we crave in these Valentine treats.
Conversely, using regular (natural) cocoa powder in this recipe can lead to cookies that are noticeably drier, lighter in color, and have a sharper, more acidic chocolate flavor. While natural cocoa is fantastic in recipes that rely on its acidity for leavening (like many traditional chocolate cakes that use baking soda), it simply won’t yield the same luxurious, melt-in-your-mouth texture here. The difference in moisture retention and flavor profile is significant, so please don’t substitute!
I personally swear by Hershey’s Special Dark Dutched Cocoa Powder for its consistent quality and rich flavor, but any good quality Dutch-process cocoa will do. If you’re curious to learn more about the nuances between different types of cocoa, this quick guide offers an excellent overview to help you master your chocolate baking endeavors.
Crafting Perfect Valentine Cookies: A Step-by-Step Guide
Making these delightful Valentine Cookies is a straightforward process, but paying attention to a few key details will ensure your cookies turn out perfectly fudgy and flavorful every time. Follow these steps for baking success:
- Preheat Your Oven Accurately: Begin by ensuring your oven is fully preheated to 350°F (175°C). An oven that hasn’t reached its target temperature can lead to uneven baking and cookies that spread too much or don’t cook through properly. Take a moment to verify your oven temperature with an oven thermometer if you suspect it runs hot or cold.
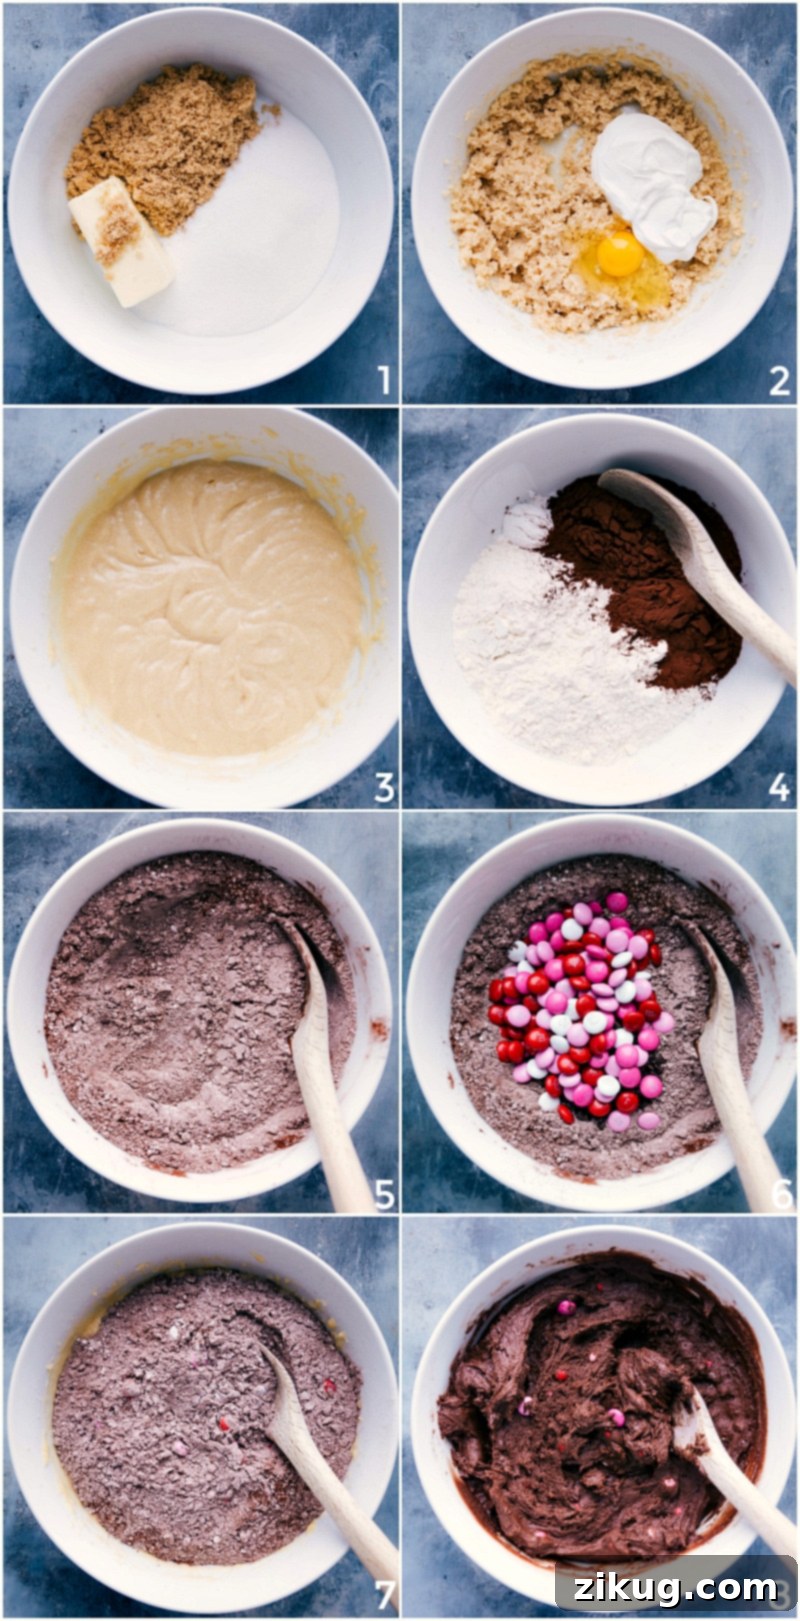
- Whisk the Dry Ingredients: In a medium bowl, combine your all-purpose flour, the essential Dutch-process cocoa powder (remember our discussion about its role!), baking powder, and salt. Whisk these ingredients thoroughly to ensure the leavening agents and cocoa are evenly distributed. This prevents pockets of unmixed ingredients and contributes to a consistent cookie texture. Once mixed, fold in your chocolate chips and Valentine’s M&M’s. Coating them in the dry mix helps prevent them from sinking to the bottom of the dough.
- Cream Butter and Sugars for Optimal Texture: In a separate, larger bowl, cream together the softened unsalted butter, granulated sugar, and light brown sugar until the mixture is light, fluffy, and resembles a smooth peanut butter. Room temperature butter is crucial here; it creams much better, incorporating air that will give your cookies a softer, more tender crumb. Next, beat in the room-temperature egg, sour cream, and vanilla extract (and almond extract, if using) until well combined. The sour cream is a secret weapon, adding incredible moisture and a subtle tang that balances the richness of the chocolate.
- Gently Combine Wet and Dry Ingredients: Gradually add the dry ingredients to the wet mixture. Mix until they are just combined, and no streaks of flour remain. The golden rule of cookie baking is to avoid overmixing. Overworking the dough can develop the gluten in the flour too much, resulting in tough, dry cookies instead of the soft, fudgy texture we’re aiming for.
- Don’t Skip the Chill: Cover your cookie dough and refrigerate it for at least 30 minutes, preferably an hour. Chilling the dough is a critical step that helps prevent the cookies from spreading excessively in the oven. It allows the fats to firm up, resulting in thicker, chewier cookies with a better shape and enhanced flavor. For even better results, you can chill for up to 24 hours.
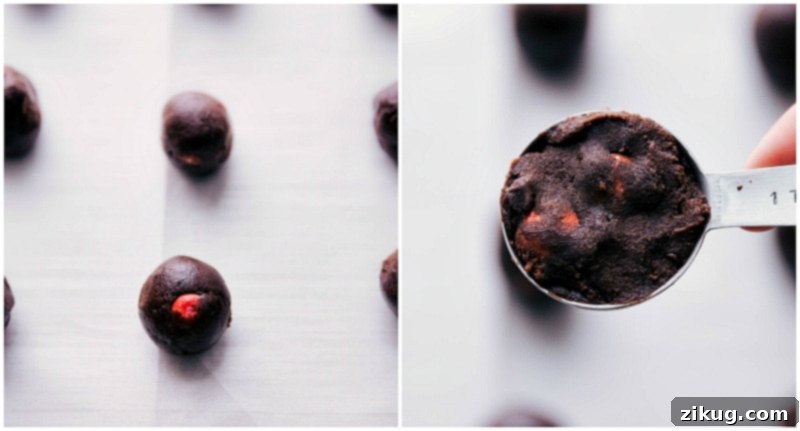
- Portion and Bake to Perfection: Once chilled, scoop out uniform dough balls using a tablespoon measure. Place them on a parchment-lined baking sheet, leaving enough space between each cookie for spreading. For an extra safeguard against spreading, pop the baking sheet with the formed dough balls into the fridge for another 10 minutes before baking. Bake for 7-10 minutes. The key to fudgy cookies is slight underbaking, so remove them when the tops are no longer glossy but the centers still look slightly soft.
Expert Baking Tips for Irresistible Valentine Cookies
Achieving bakery-quality Valentine Cookies at home is easier than you think with these simple yet effective tips:
- Uniformity is Key for Even Baking: Once your dough has been adequately chilled, use a 1-tablespoon measure or a small cookie scoop to portion out the dough. This ensures that each cookie is roughly the same size, allowing them to bake evenly. No one wants an overbaked edge and an underbaked center! Consistency in size directly translates to consistency in texture.
- Combatting Spread: The Power of Chilling (Again!): If you’re working in a warm kitchen, or if your dough has been sitting out for a while, it might soften. Soft dough is prone to spreading too much in the oven, leading to thin, crispy cookies instead of fudgy ones. To prevent this, place the scooped dough balls on your baking sheet and chill the entire pan in the refrigerator for an additional 10 minutes before baking. This quick chill firms up the butter in the dough, reducing spread and helping maintain a beautiful, plump shape.
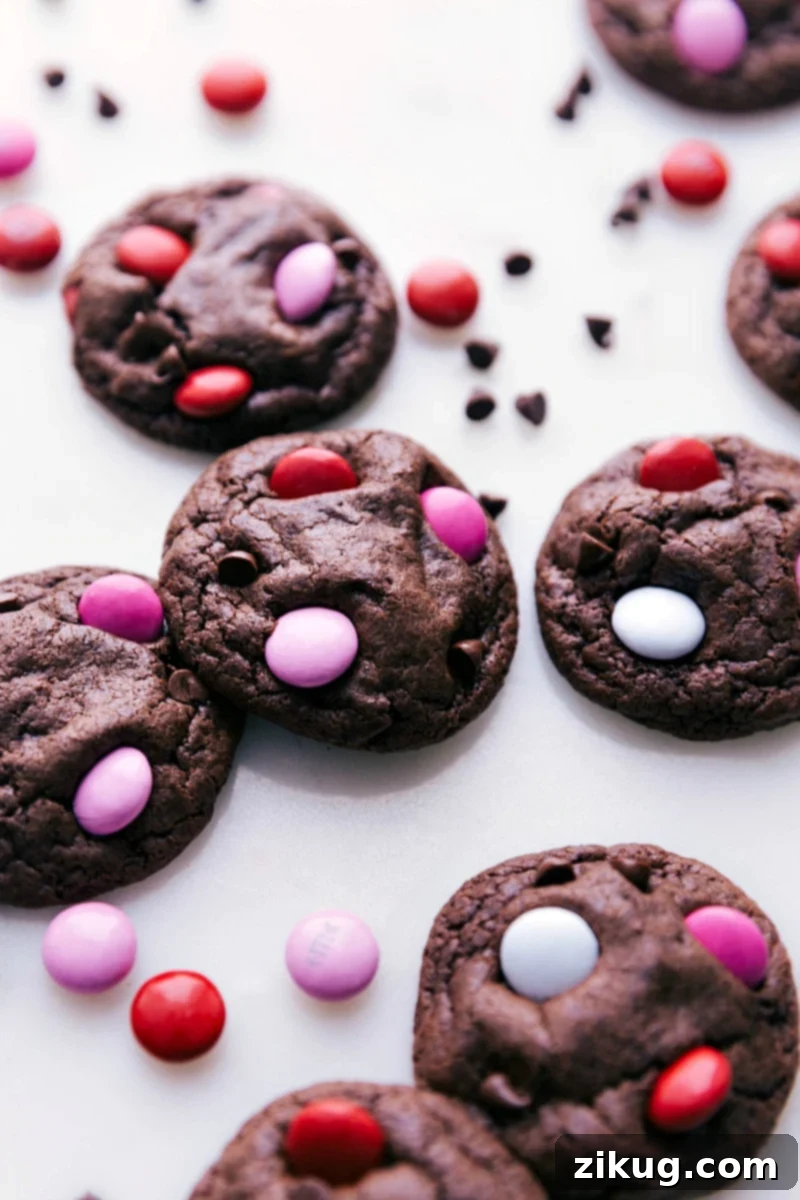
- Aesthetics and Extra Chocolate Boost: Immediately after taking the cookies out of the oven, while they are still warm and soft, gently press a few extra chocolate chips or Valentine’s M&M’s onto the tops of each cookie. This small step makes a huge visual difference, creating those appealing “bakery-style” cookies that are full of delicious add-ins. It also guarantees that every single bite delivers a wonderful burst of chocolate and festive color, making them even more inviting.
- Don’t Overcrowd the Pan: While it might be tempting to fit as many cookies as possible on one baking sheet, resist the urge! Overcrowding the pan can lead to uneven baking because it lowers the oven temperature and restricts air circulation. Stick to the recommended 9 cookies per pan to allow them ample space to spread and bake properly.
- Rotate for Evenness: If your oven tends to have hot spots, halfway through the baking time (around the 4-minute mark), rotate your baking sheet 180 degrees. This helps ensure that all cookies receive consistent heat, resulting in a uniform bake and preventing some cookies from being darker than others.
Quick Tip for Fudgy Perfection
The ultimate secret to achieving intensely fudgy cookies? Always slightly under-bake them. For these Valentine Cookies, baking them for just 7-8 minutes is often perfect. You’ll know they’re ready when the tops are no longer glossy, but the centers still look very soft and perhaps a tiny bit underdone. Once you pull them from the oven, resist the urge to move them immediately. Allow them to set and firm up on the hot baking sheet for 5-7 minutes. This carryover cooking will finish them beautifully, creating that coveted soft, gooey, and fudgy center while the edges set just right.
Storage Solutions: Keeping Your Valentine Cookies Fresh
Freezing And Storing Valentine Cookies for Lasting Freshness
To keep your delicious Valentine Cookies at their absolute best, proper storage is essential. Baked cookies will remain fresh and delightfully fudgy for about 3-4 days when stored in an airtight container at room temperature. For optimal texture, you might even consider adding a slice of bread to the container; the cookies will absorb moisture from the bread, keeping them softer for longer. Avoid refrigerating baked cookies, as this can dry them out and alter their texture.
For longer-term storage and convenient future baking, these cookies are fantastic for freezing. You have two excellent options:
- Freezing Baked Cookies: Once the cookies are completely cooled, place them in a single layer on a baking sheet and freeze until solid (about 1-2 hours). Transfer the frozen cookies to a freezer-safe airtight container or heavy-duty freezer bag. They can be stored for up to 3 months. When ready to enjoy, simply thaw them at room temperature or gently warm them in a microwave or oven for a few minutes.
- Freezing Dough Balls: This is a fantastic option for fresh-baked cookies on demand. After forming the dough into 1-tablespoon balls, arrange them on a parchment-lined baking sheet and freeze until completely solid. Then, transfer the frozen dough balls to a freezer-safe bag or container, removing as much air as possible. They will keep for up to 3 months. When a craving strikes, you can bake them straight from frozen – no need to thaw! Just add an extra 2-4 minutes to the bake time (depending on your oven) until the tops are set and the edges are slightly firm. This method ensures you always have warm, fresh Valentine Cookies ready in a flash!
Whether you’re planning ahead for Valentine’s Day or simply want to savor these treats beyond a few days, these storage methods will ensure your cookies remain as delicious as the day they were baked.
More Festive Valentine’s Day Delights and Gift Ideas:
Looking for more ways to celebrate Valentine’s Day with love and deliciousness? Here are some other wonderful recipes and gift ideas that will make your holiday extra special, all designed to bring joy to your loved ones:
- Easy Valentine’s Gifts with charming free printables, perfect for adding a personal touch to your presents.
- Discover even more thoughtful Easy Valentine’s Gifts Part 2, complete with additional free printables to inspire your gifting.
- Explore a collection of Four Easy Valentine’s Day Treats, offering quick and delightful options for last-minute celebrations or a sweet spread.
- Master the art of The Best Crème Brûlée, an elegant and impressive dessert that is sure to wow your Valentine.
- Indulge in sophisticated Nutella Crepes with an authentic recipe, bringing a touch of Parisian romance to your table.

Print Recipe
Valentine Cookies
Equipment
-
Large sheet pan (15″ x 21″)
-
Parchment paper or silicone baking mat
-
Cooling rack
Ingredients
- 1/2 cup unsalted butter softened to room temperature
- 3/4 cup granulated sugar
- 1/2 cup light brown sugar firmly packed
- 1 large egg at room temperature
- 1/2 cup sour cream full-fat, at room temperature
- 1 small drop almond extract optional
- 1 teaspoon vanilla extract
- 1-3/4 cups all-purpose flour
- 1/2 cup Dutch process cocoa powder see note 1
- 2 teaspoons baking powder
- 1/2 teaspoon salt
- 1/2 cup mini chocolate chips see note 2
- 1/2 cup Valentine’s Day M&M’s plus some extra for topping the cookies
Instructions
-
In a large bowl, cream the butter, granulated sugar, and brown sugar until light and fluffy (the mixture should resemble peanut butter). Beat in egg, sour cream, almond extract, and vanilla extract.
-
In a separate bowl combine flour, unsweetened Dutch-process cocoa powder, baking powder, and salt. Add in chocolate chips and Valentine’s M&M’s. Stir to combine.
-
Combine wet and dry and mix until just combined, being careful to not overmix. Cover the dough and chill for at least 30 minutes and preferably 1 hour.
-
Preheat oven to 350°F (175°C) and line a large sheet pan with parchment paper or a silicone liner. Use a tablespoon measuring spoon to measure exact cookie dough balls (each ball should be 1 tablespoon of dough; you should get around 45 cookies). Place on the prepared sheet pan, no more than 9 cookies per pan. Place the pan of cookies in the fridge for another 10 minutes.
-
Bake for 7–10 minutes or until set (just until the top is no longer glossy; this is around 8 minutes for me). Be careful to not overbake. A soft, very slightly underbaked cookie is the best for a delicious fudgy texture! Once the cookies come out of the oven, let them stand on cookie sheet for 5–7 minutes. If desired, press a few additional M&M’s and/or chocolate chips into the tops of the cookies (makes them pretty). Using a metal spatula, transfer the cookies to a cooling rack to finish cooling.
Recipe Notes
Note 2: Regular chocolate chips can be used instead of miniature if desired.
Storage: Store leftover cookies in an airtight container at room temperature. Cookies are best enjoyed within 2 days.
Nutrition
Nutrition information is automatically calculated, so should only be used as an approximation.