
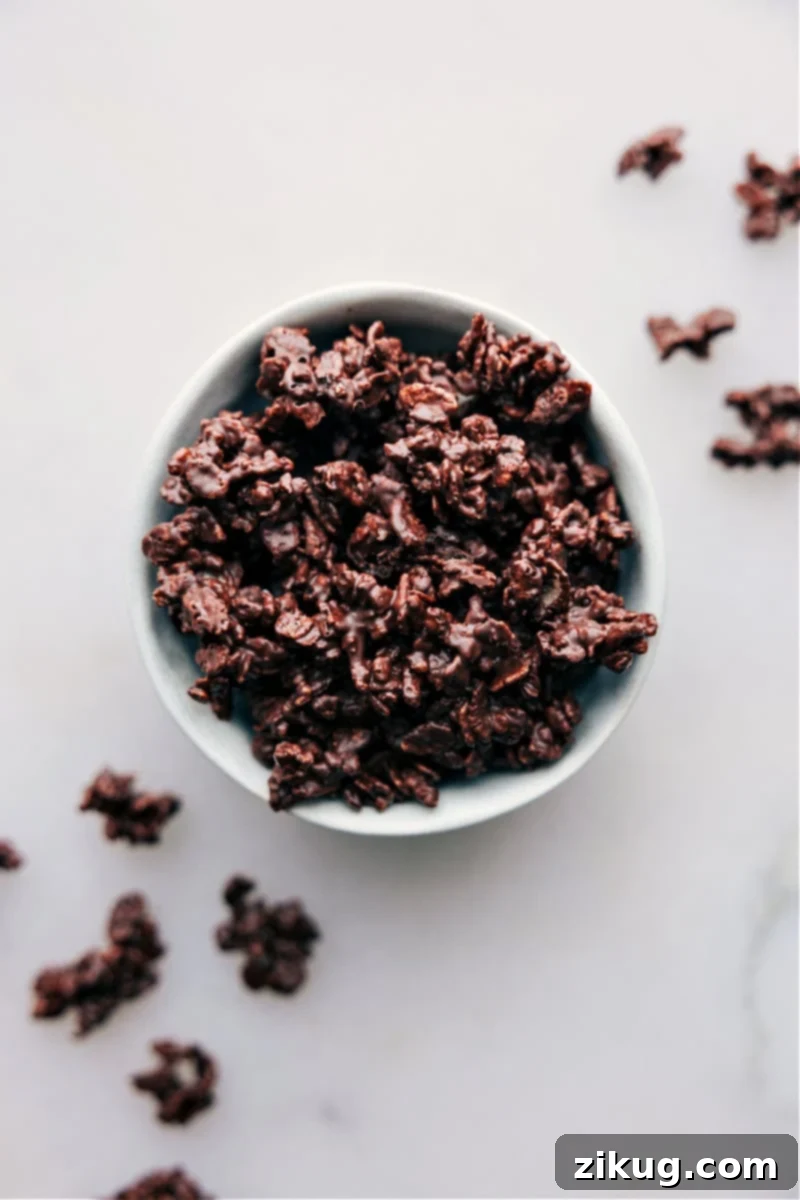
Irresistible Homemade Buncha Crunch: Your Ultimate No-Bake Chocolate Cereal Treat
Homemade Buncha Crunch is an incredibly simple, no-bake treat that brings together the delightful contrast of smooth, rich chocolate and irresistibly crispy cereal. With just three core ingredients, you can create an indulgent snack that perfectly satisfies your sweet cravings and adds a welcome crunch to any moment. Forget complicated baking; this recipe is all about quick satisfaction and delicious results, offering a customizable twist on a classic candy.
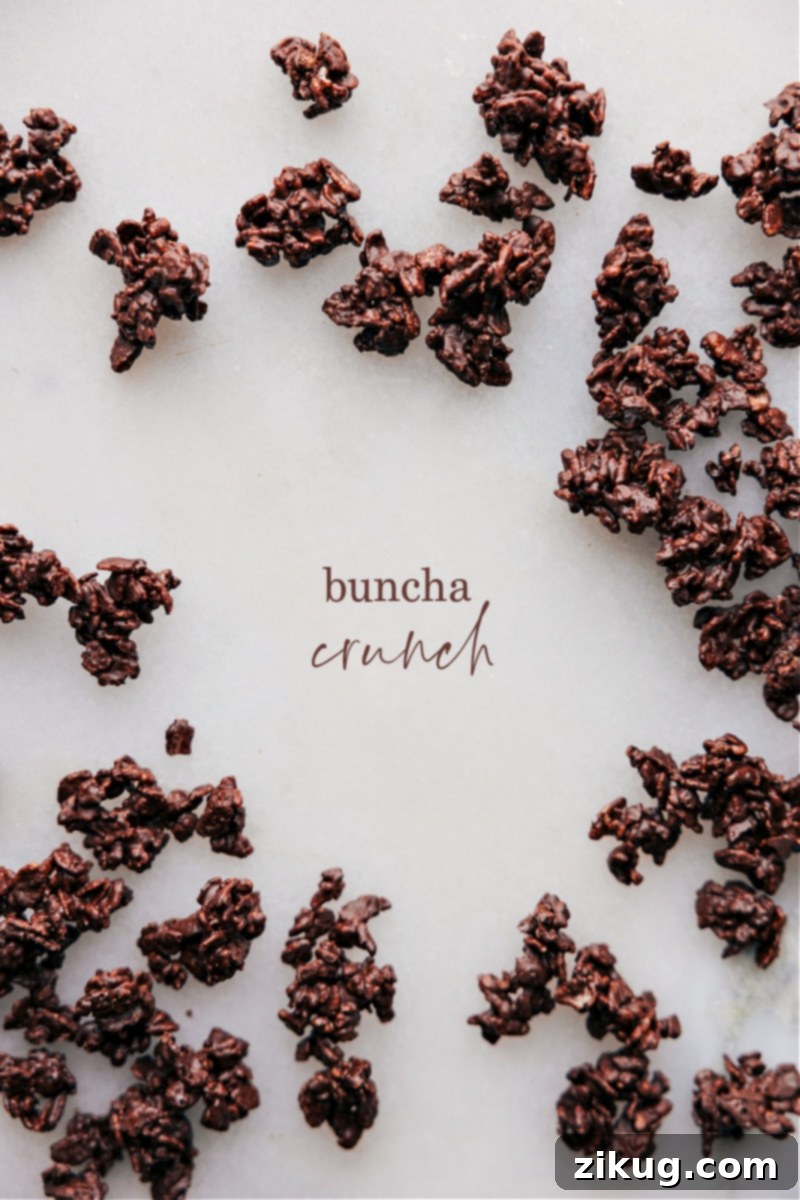
Rediscover the Joy of Homemade Buncha Crunch!
Do you remember the classic Buncha Crunch, those delightful clusters of chocolate-covered crispy rice cereal, famously made from crumbled Nestlé® Crunch Bars? The nostalgic taste of that sweet, crunchy snack is something many of us cherish. Recently, I’ve found immense joy in recreating my own version right in my kitchen. The beauty of homemade Buncha Crunch lies in its simplicity and the freedom it offers to tailor the treat precisely to your preferences, surpassing any store-bought alternative in freshness and quality.
Making these crispy chocolate clusters at home means you’re in control of every ingredient. You can elevate the flavor profile by choosing high-quality chocolate – whether it’s creamy milk chocolate, robust dark chocolate, or sweet white chocolate. Beyond the chocolate, you have the option to incorporate a variety of delicious extras like chopped nuts, chewy dried fruit, or even a sprinkle of sea salt to balance the sweetness. I personally prefer the sophisticated depth of dark chocolate, which is why I’ve highlighted it in this recipe, much like I do in my Healthy Crunch Bars recipe. This personalized approach guarantees a treat that not only tastes incredible but also aligns with your ingredient preferences, making each bite truly special.
The Simple Magic: Essential Ingredients for Homemade Buncha Crunch
Crafting these delectable chocolate cereal clusters requires only a handful of ingredients, emphasizing quality over quantity. Each component plays a vital role in achieving that perfect texture and flavor combination.
Core Ingredients:
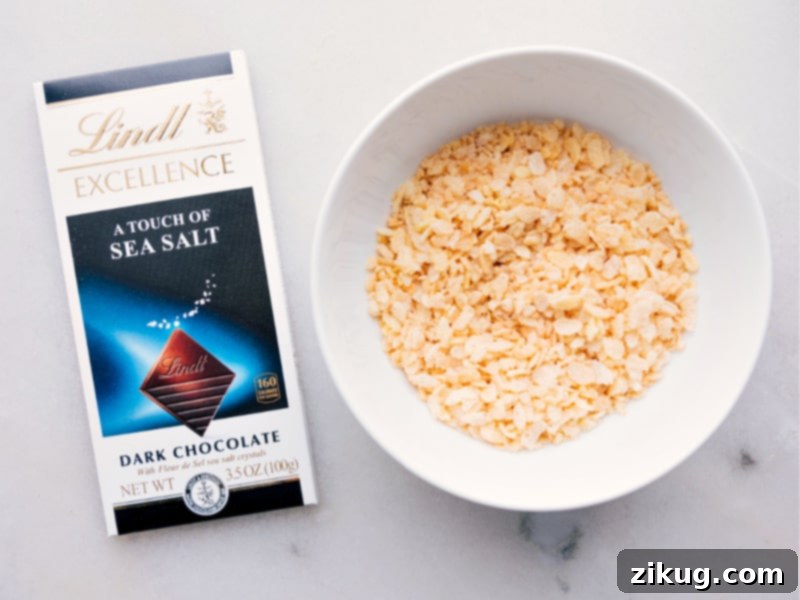
- Rice Krispies® Cereal (or Crisp Rice Cereal): The star of the crunch! Rice Krispies are essential for their incredibly light, airy, and distinctively crispy texture. When coated in chocolate, they maintain their snap, providing that satisfying contrast to the smooth chocolate. You can use any brand of crisp rice cereal, but ensure it’s fresh for maximum crunch.
- High-Quality Chocolate Bar: The choice of chocolate is paramount here, as it forms the foundation of your treat’s flavor. Using a good-quality chocolate bar, rather than chocolate chips (which often contain stabilizers that prevent smooth melting), makes a significant difference.
- Dark Chocolate: My personal favorite, offering a rich, slightly bitter note that beautifully complements the sweetness of the cereal. Lindt EXCELLENCE Sea Salt Dark Chocolate, as linked here, is an excellent choice for its superior taste and smooth melt.
- Semi-Sweet Chocolate: A versatile option that offers a balanced sweetness.
- Milk Chocolate: For those who prefer a sweeter, creamier, and milder chocolate flavor. Be extra careful when melting, as it’s more prone to burning.
- White Chocolate: A wonderfully sweet and creamy alternative, though also requiring careful melting.
- Coconut Oil (or Vegetable Oil): Just a small amount of oil is crucial for achieving the perfect consistency for your melted chocolate. It helps thin the chocolate slightly, making it smoother and easier to coat the cereal evenly. This also contributes to a glossy finish and a better mouthfeel once the chocolate sets.
Optional Enhancements:
- Flaky Sea Salt: If you appreciate the delightful salty-sweet combination, a pinch of flaky sea salt sprinkled over the freshly formed clusters is a game-changer. It not only enhances the chocolate’s natural flavors but also cuts through the sweetness, creating a more complex and addictive treat.
Unleash Your Creativity: Exciting Variations and Mix-Ins
The beauty of homemade Buncha Crunch lies in its adaptability. Once you master the basic recipe, the possibilities for customization are truly endless. Experiment with different additions to create unique flavor and texture combinations that cater to any craving or occasion.
- Different Types of Chocolate: Don’t limit yourself! Try mixing dark and milk chocolate, or drizzling melted white chocolate over dark chocolate clusters for a visually appealing and multi-flavored treat. Each type of chocolate brings its own nuances.
- Crunchy Additions: Elevate the crunch with other crispy elements. Finely chopped nuts like almonds, peanuts, pecans, or walnuts add a rich, nutty flavor and a different kind of snap. Crushed pretzels introduce a savory element and extra saltiness. Consider adding sunflower seeds or pepitas for a healthy boost and unique texture.
- Fruity Twists: Incorporate finely chopped dried fruits such as cranberries, raisins, cherries, or apricots for a touch of chewiness and tartness that contrasts beautifully with the chocolate.
- Sweet Enhancements: For an extra dose of sweetness and fun, mix in mini marshmallows, sprinkles, toffee bits, or even crushed candy pieces like peppermints or butterscotch. A swirl of caramel or peanut butter into the melted chocolate can also create a decadent marble effect.
- Spiced Surprises: A tiny pinch of cinnamon, nutmeg, or even a hint of cayenne pepper (for a Mexican hot chocolate flair) can add unexpected depth and warmth to your clusters.
- Drizzle for Decoration: For a professional touch, drizzle a contrasting melted chocolate (e.g., white chocolate over dark chocolate clusters) over the top of the candies once they’ve set slightly but are still sticky.
Mastering the Melt: Tips for Perfect Chocolate
Melting chocolate might seem straightforward, but it’s a crucial step that can make or break your Buncha Crunch. The goal is to achieve a silky-smooth, lump-free consistency that coats the cereal beautifully.
Microwave Method (My Favorite):
I find the microwave to be the quickest and easiest way to melt chocolate effectively. The key is patience and low power:
- Chop the Chocolate: Coarsely chop your chocolate bar into small, uniform pieces. Smaller pieces melt more evenly and quickly.
- Combine with Oil: Place the chopped chocolate in a microwave-safe bowl with the coconut oil. The oil helps distribute heat and prevents the chocolate from seizing.
- Short Intervals: Microwave on medium power (around 50-70%) in 30-second intervals.
- Stir Between: After each interval, remove the bowl and stir thoroughly, even if the chocolate doesn’t look fully melted. The residual heat will continue to melt the chocolate.
- Repeat: Continue microwaving and stirring in 30-second intervals until the chocolate is completely smooth and melted. This typically takes 1.5 to 3 minutes, depending on the amount and microwave wattage.
Double Boiler Method (Alternative):
For a gentler, more controlled melt, a double boiler is an excellent choice:
- Set Up: Place chopped chocolate and oil in a heatproof bowl that fits snugly over a saucepan without touching the water.
- Simmer Water: Fill the saucepan with an inch or two of water and bring it to a gentle simmer (not a rolling boil).
- Melt Slowly: Place the bowl over the simmering water, ensuring no steam or water gets into the chocolate, as this can cause it to seize. Stir continuously until the chocolate is melted and smooth.
Just a heads-up: White and milk chocolate contain more sugar and milk solids, making them more susceptible to burning than dark chocolate. Be extra vigilant when melting these types, using lower power settings in the microwave or very gentle heat with a double boiler.
Quick Tip for Easy Cleanup
Always use a silicone baking mat or parchment paper to line your baking sheet. This simple step is a lifesaver, ensuring that your delicious Buncha Crunch candies won’t stick and can be easily removed once hardened. It also makes cleanup a breeze!
Step-by-Step Guide to Your Homemade Buncha Crunch
Creating these delightful chocolate clusters is incredibly simple, making it a perfect activity for home cooks of all skill levels. Follow these easy steps for perfect results every time.
1. Prepare Your Workspace:
Start by preparing a baking sheet. Line it with parchment paper or a silicone baking mat. This is a crucial step that prevents the chocolate from sticking and ensures easy removal of your finished clusters. Have it ready before you begin melting the chocolate, as you’ll need to work quickly.
2. Melt the Chocolate:
Coarsely chop your chosen chocolate bar and place it in a microwave-safe bowl along with the coconut oil (or vegetable oil). Microwave the chocolate in 30-second intervals on medium power, stirring thoroughly between each interval. Continue this process until the chocolate is completely melted and smooth, with no lumps remaining. If using a double boiler, stir constantly until smooth.
3. Combine and Coat:
Once the chocolate is perfectly melted, add the Rice Krispies cereal to the bowl. Using a spatula or spoon, gently but quickly fold the cereal into the melted chocolate. Ensure that every piece of cereal is thoroughly coated. Work efficiently, as the chocolate will start to set as it cools.
4. Form Your Clusters:
Using a spoon or a small cookie scoop, quickly drop spoonfuls of the chocolate-covered cereal mixture onto the prepared baking sheet. Aim for roughly 1-inch clusters. You can make them uniform or embrace a more rustic, varied appearance. Leave a little space between each cluster to prevent them from sticking together as they set.
5. Chill to Harden:
Once all the clusters are on the baking sheet, place the entire sheet into the refrigerator. Allow the Buncha Crunch to chill for at least 30 minutes, or until the chocolate is completely hardened and the clusters are firm. This chilling process is essential for achieving that satisfying snap when you bite into them. Once firm, they are ready to enjoy!
Storage & Freshness: Keeping Your Treats Delicious
Proper storage is essential to maintain the crispness of your homemade Buncha Crunch and prevent the chocolate from melting or becoming tacky. These treats are best enjoyed when the chocolate is firm and the cereal is delightfully crunchy.
Once the chocolate clusters have fully hardened, transfer them to an airtight container or a resealable bag. You have a couple of excellent options for storage:
- Refrigeration: For up to a week, store your Buncha Crunch in the refrigerator. The cool temperature keeps the chocolate firm and helps preserve the cereal’s crunch. This is ideal for regular snacking.
- Freezing: For longer-term storage, freeze the clusters for up to three months. To freeze, first spread the hardened clusters in a single layer on a baking sheet and freeze for about an hour. Once individually frozen, transfer them to an airtight freezer-safe container or bag. This prevents them from clumping together. When you’re ready to enjoy, you can eat them directly from the freezer (they’re surprisingly good cold!) or let them thaw for a few minutes at room temperature.
Avoid Room Temperature: It’s generally best to avoid storing Buncha Crunch at room temperature, especially in warmer environments. Chocolate can melt, soften, or become sticky, leading to a loss of the desired texture and freshness. Keeping them chilled ensures maximum enjoyment.
Serving Suggestions: Beyond Just Snacking
While homemade Buncha Crunch is absolutely perfect as a stand-alone snack, its versatility extends far beyond a simple treat. These crispy chocolate clusters can elevate a variety of dishes and occasions:
- Dessert Topping: Crumble them over vanilla ice cream, yogurt parfaits, puddings, or even a simple fruit salad for an instant texture and flavor upgrade.
- Cake or Cupcake Decor: Use them as a fun, crunchy garnish for frosted cakes, cupcakes, or brownies.
- Edible Gifts: Package them in pretty bags or decorative boxes for a thoughtful, homemade gift during holidays or special occasions. They’re always a hit!
- Party Favors: Serve them in small individual cups at parties for an easy-to-grab, crowd-pleasing treat.
- Breakfast Boost: A sprinkle over oatmeal or a smoothie bowl adds a decadent crunch to your morning routine.
Frequently Asked Questions (FAQ) about Homemade Buncha Crunch
Here are some common questions about making and enjoying your own chocolate cereal treats:
Can I use other cereals besides Rice Krispies?
Yes, absolutely! While Rice Krispies offer the classic light and airy crunch, you can experiment with other crispy cereals like corn flakes (for a slightly different texture), puffed wheat, or even crushed Cheerios. The key is to use a cereal that holds its crunch well when coated in chocolate.
Can I make this recipe vegan?
Yes, this recipe can easily be made vegan. Simply ensure you use a high-quality vegan chocolate bar (many dark chocolate brands are naturally vegan, but always check the ingredients) and coconut oil, which is already plant-based. The cereal itself is usually vegan, but confirm that as well.
How do I prevent the chocolate from seizing?
Chocolate seizes when even a tiny drop of water or steam comes into contact with it during melting, turning it into a grainy, clumpy mess. To prevent this, ensure your bowl and utensils are completely dry. If using a double boiler, make sure the bottom of the bowl does not touch the simmering water, and prevent steam from escaping into the chocolate.
Why is my chocolate not hardening?
If your chocolate isn’t hardening, it could be due to a few reasons:
- Too much oil: While a little oil helps, too much can prevent the chocolate from setting properly.
- Low-quality chocolate: Some lower-quality chocolates or chocolate chips designed for baking might not set as firm.
- Insufficient chilling: Ensure you’ve given the clusters enough time in the refrigerator (at least 30 minutes, sometimes more depending on thickness and ambient temperature).
Good quality chocolate with the correct ratio of oil should harden beautifully when chilled.
How long do homemade Buncha Crunch last?
Stored in an airtight container in the refrigerator, homemade Buncha Crunch will stay fresh and crunchy for up to a week. If frozen, they can last for up to three months.
More Delectable Easy Treats:
If you love simple, no-fuss desserts, be sure to check out these other easy and delicious recipes:
- Chocolate Covered Strawberries with a fancy white chocolate drizzle.
- Chocolate Covered Dates, an indulgent treat featuring a creamy peanut butter filling.
- Mini Brownie Bites with Rolos, a delightful bite-sized dessert using a simple brownie mix.
- Chocolate Peanut Butter Pie, a rich and creamy pie served in a delicious Oreo pie crust.
- Chocolate Covered Oreos, an incredibly simple yet satisfying sweet snack.
Print Recipe
Rating: 5 out of 5 stars from 1 vote
Buncha Crunch
By Chelsea Lords
Homemade Buncha Crunch requires just three ingredients and no baking, this delightful treat satisfies your sweet tooth and adds a crunchy topping to desserts. The creamy chocolate pairs perfectly with the crispy cereal for a rich, indulgent snack.
Prep Time: 10 minutes
Chilling Time: 30 minutes
Total Time: 40 minutes
Servings: 1 cup
Equipment
-
Sheet pan (15″ x 10″) lined
Ingredients
- 1 cup rice krispies cereal
- 1 (3.5-ounce) bar chocolate see note 1 below for suggestions
- 1/2 teaspoon coconut oil or vegetable oil
Instructions
- Prepare a baking sheet lined with parchment paper or a silicone baking mat.
- Coarsely chop chocolate and place it in a microwave-safe bowl with oil. Microwave the chocolate in 30-second intervals, stirring between intervals until fully melted. Add the cereal to the melted chocolate and stir until cereal is well coated.
- Use a spoon to quickly drop the chocolate-covered cereal into roughly 1-inch clusters on the prepared baking sheet. Place the baking sheet in the fridge for 30 minutes to allow the chocolate to harden.
Recipe Notes
Note 1: Use a good-quality chocolate bar to get the best flavor. My favorite is Lindt® dark chocolate with sea salt! For a sweeter flavor, use milk chocolate, but if the chocolate isn’t salted, add a teeny pinch of flaky sea salt to amplify all the flavors and balance the sweetness.
Note 2: You can also add in finely chopped nuts, dried fruits, pretzels, or a white chocolate drizzle to give the clusters a different texture and flavor. See the “Variations” section above for more ideas!
Nutrition Note: The nutrition information is calculated for the whole batch based on typical ingredients. It is an approximation.
Storage: Once the clusters have hardened, store them in an airtight container or resealable bag. Refrigerate for up to a week or freeze for up to 3 months. Avoid storing them at room temperature as it can cause melting and reduce freshness.
Nutrition
Serving: 1 serving | Calories: 682 kcal | Carbohydrates: 62g | Protein: 9g | Fat: 44g | Saturated Fat: 26g | Polyunsaturated Fat: 1g | Monounsaturated Fat: 13g | Trans Fat: 0.03g | Cholesterol: 3mg | Sodium: 21mg | Potassium: 731mg | Fiber: 11g | Sugar: 24g | Vitamin A: 39IU | Calcium: 74mg | Iron: 12mg
Nutrition information is automatically calculated and should only be used as an approximation.
Like this recipe? Leave a comment below!