

Indulge in the perfect harmony of rich chocolate and refreshing mint with these incredibly thick and chewy Andes Mint Cookies. Featuring a decadent chocolate cookie base crowned with a smooth, melt-in-your-mouth mint chocolate topping, these impressive treats are surprisingly easy to make. All that delightful minty flavor comes from just one hero ingredient: the classic Andes mint!
Looking for more delightful chocolate and mint pairings? Explore these other popular treats: Mint Brownies, Mint Oreo Truffles, and Mint Brownie Cookies.

Elevate Your Dessert Table with Effortless Elegance: Andes Mint Cookies!
These Andes Mint Cookies don’t just look stunning; they deliver an unparalleled taste experience that will leave everyone craving more. Imagine a cookie that’s perfectly soft, satisfyingly chewy, and wonderfully fudgy, topped with a creamy layer of mint chocolate that melts in your mouth with every bite. The contrasting textures and complementary flavors make these cookies an absolute showstopper, perfect for any occasion from casual gatherings to elegant dessert spreads.
The ingenious simplicity of this recipe is what makes it truly special. I first discovered this brilliant hack on TikTok, and I instantly knew I had to try it. The concept is pure genius: simply bake your favorite chocolate cookies until they’re warm and fresh out of the oven, then immediately press an Andes mint onto the center of each one. The residual heat from the freshly baked cookies works its magic, gently softening the mint chocolate. A quick, gentle spread with a butter knife transforms the melted mint into a smooth, glossy, and perfectly even topping. Once the chocolate sets, you’re left with a cookie that’s not only visually appealing but also boasts a rich, creamy, and irresistibly minty finish.
Whether you’re looking for a unique contribution to a cookie exchange, a festive holiday treat, or simply a delightful dessert to share with loved ones, these Andes Mint Cookies are a unique and delicious addition that will impress without requiring hours in the kitchen. They strike the perfect balance between gourmet appeal and homemade comfort.
Why You’ll Fall in Love with These Andes Mint Cookies
These cookies aren’t just another recipe; they’re a revelation for anyone who adores the classic combination of chocolate and mint. Here’s why they’re destined to become your new favorite:
- Unmatched Flavor Profile: The deep, dark chocolate base perfectly complements the cool, refreshing burst of mint from the Andes mints. It’s a balanced flavor that satisfies both chocolate lovers and mint enthusiasts.
- Irresistible Texture: Expect a soft, chewy, and fudgy cookie base that yields to a smooth, creamy, and slightly firm mint chocolate topping. This textural contrast is pure dessert magic.
- Deceptively Simple: Despite their impressive appearance and gourmet taste, these cookies are incredibly easy to make. The key “minty magic” comes from a single, readily available ingredient, simplifying the process significantly.
- Visually Appealing: The glossy, emerald-green layer of mint chocolate atop a rich chocolate cookie creates a stunning visual appeal, making them perfect for gifting, parties, or holiday platters.
- Versatile for Any Occasion: From casual after-dinner treats to elegant dessert tables and festive holiday gatherings, these cookies fit right in. They’re also a fantastic choice for cookie exchanges and bake sales.
- Customizable: While perfect as is, the base chocolate cookie allows for personal touches. You can choose your favorite recipe, from rich and fudgy to cakey, to create your ideal texture.
Key Ingredients for the Perfect Andes Mint Cookies
Creating these delightful cookies requires just two primary components, offering flexibility and convenience to suit any baker. The quality of these ingredients, though few, plays a significant role in the final flavor and texture of your Andes Mint Cookies.
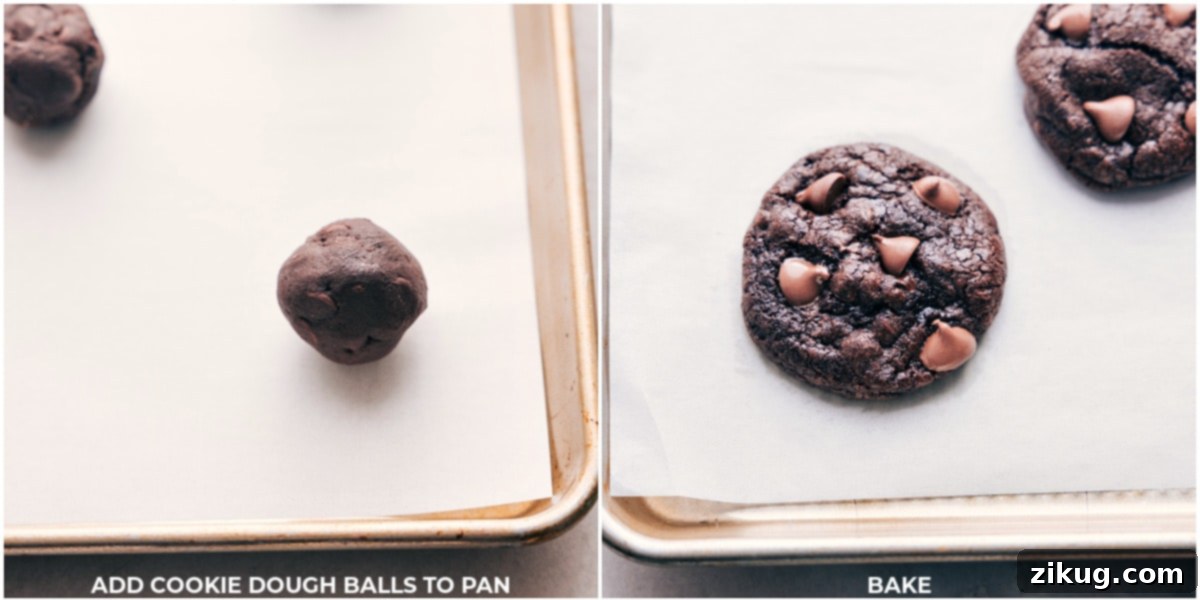
- Chocolate Cookie Dough: The foundation of our cookie masterpiece! For the best results, aim for a chocolate cookie dough that promises a rich, deep chocolate flavor and a soft, fudgy, and chewy texture. Recipes like these Chocolate Cookies are an excellent choice, providing a dense and satisfying base. If you’re seeking a delicious shortcut without compromising flavor, consider using a brownie mix as the base for a quicker, yet equally decadent, cookie – these Brownie Cookies are a fantastic example. For those days when time is of the essence, a truly fast and convenient option is to purchase high-quality pre-made chocolate cookie dough from your local grocery store. This allows you to jump straight to the baking process, ensuring freshly baked cookies with minimal effort. Whichever route you choose, ensure the dough is suitable for drop cookies and bakes up beautifully.
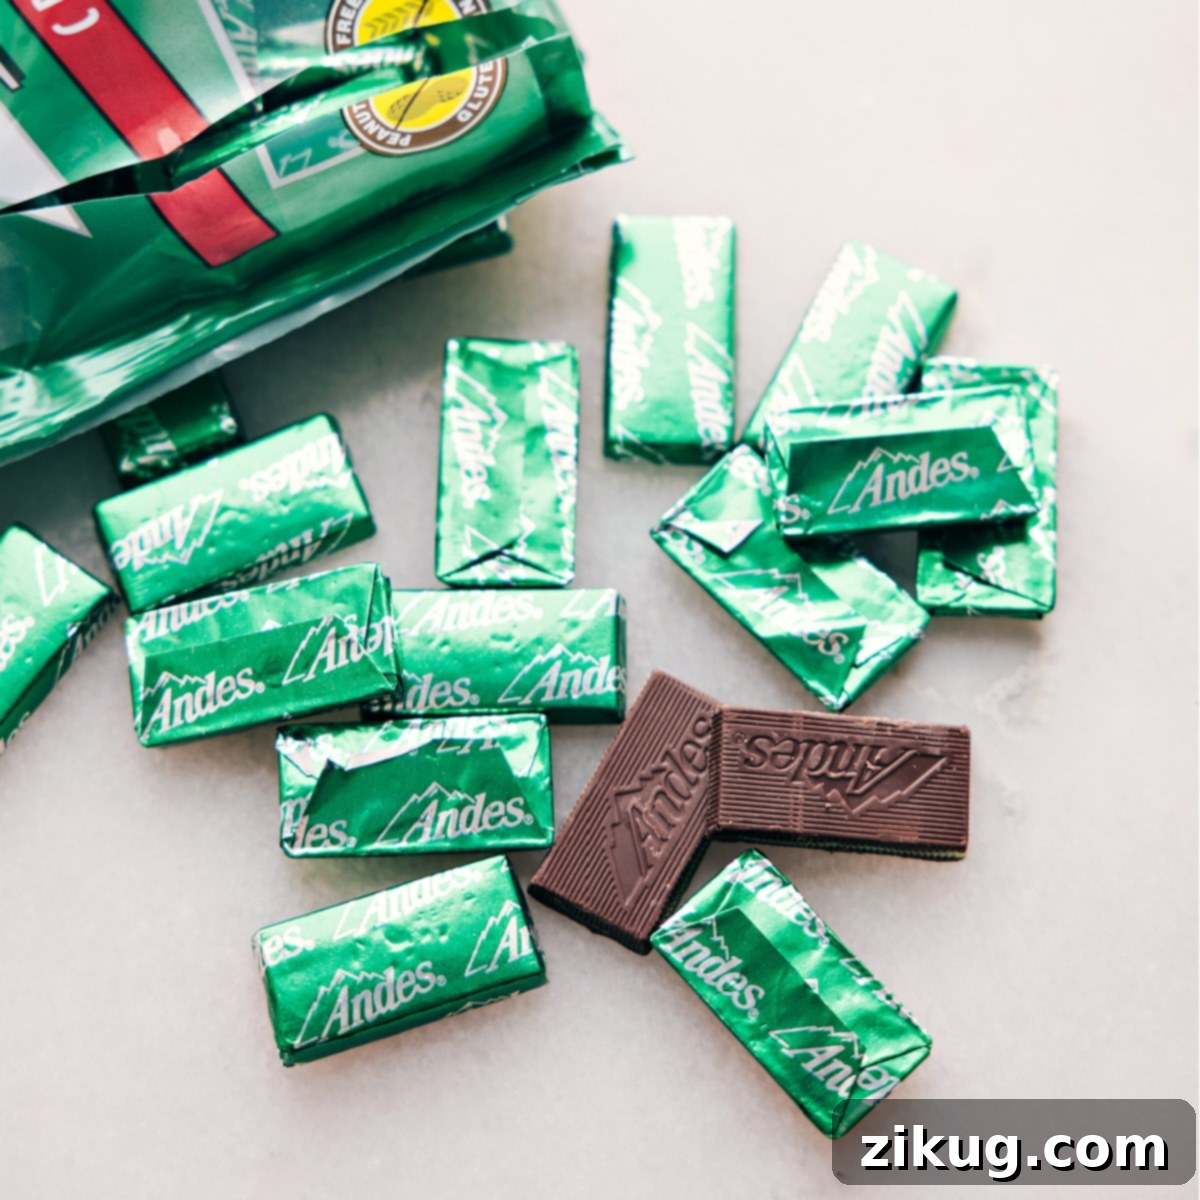
- Andes Mints (Crème de Menthe Thins): These iconic rectangular mint chocolates are the undeniable star of the show, providing all the distinct minty flavor and creamy topping for our cookies. Andes Mints are beloved for their layers of rich chocolate and refreshing green mint, which melt beautifully to create a smooth, glossy finish. They are widely available in most grocery stores, especially convenient stores or near the checkout aisles, and become particularly easy to find during holiday seasons. Their unique texture and flavor are precisely what makes these cookies so special, transforming a simple chocolate cookie into an extraordinary mint chocolate delight.
Essential Tools for Baking Andes Mint Cookies
While the recipe itself is straightforward, having the right tools on hand will ensure a smoother baking process and perfectly shaped, beautifully topped cookies. Here’s what you’ll need:
- Butter Knife: This unassuming utensil is surprisingly crucial for achieving that signature smooth, even layer of mint chocolate on top of your cookies. Once the Andes mints have softened on the warm cookies, a butter knife allows you to gently and precisely spread the melted chocolate from edge to edge. While a small offset spatula can also work, the thin blade of a butter knife often offers superior control for this delicate task, preventing you from tearing the soft cookie beneath.
- Silicone Baking Mat (or Parchment Paper): For optimal cookie baking and easy cleanup, a silicone baking mat (like a Silpat) or sheets of parchment paper are indispensable. These liners create a non-stick surface, ensuring your cookies bake evenly without sticking to the pan. They also promote consistent heat distribution, which is key for achieving that perfect soft and chewy texture, and they make transferring the warm cookies much easier.
- Cooling Rack: A wire cooling rack is essential for allowing your freshly baked cookies to cool properly and for ensuring the mint chocolate topping sets perfectly. Placing cookies on a cooling rack allows air to circulate underneath them, preventing the bottoms from becoming soggy due to trapped steam. This airflow also helps the melted Andes mint chocolate to cool and harden evenly, giving it that firm-yet-creamy texture we desire without creating condensation.
- Baking Sheets (Cookie Sheets): You’ll need sturdy baking sheets, preferably light-colored ones to prevent over-browning of the cookie bottoms. A standard 15″ x 10″ sheet pan is ideal, providing ample space for your cookies to spread without overcrowding.
- Cookie Scoop (Optional but Recommended): For uniformly sized cookies, a cookie scoop is a fantastic tool. It ensures that each cookie bakes at the same rate and looks consistent, which is especially important for presentation when you’re adding a topping.

Step-by-Step Guide: Crafting Your Andes Mint Cookies
Follow these simple instructions to create perfect Andes Mint Cookies every time:
- Step 1: Prepare and Bake Your Chocolate Cookies. Begin by preparing your chosen chocolate cookie dough according to its specific recipe instructions. This might involve mixing ingredients from scratch, using a box mix, or simply portioning out pre-made dough. Once your dough is ready, scoop or place it onto your prepared baking sheets, ensuring adequate space between each cookie for even baking and spreading. Bake the cookies as directed in your recipe, paying close attention to the recommended baking time to avoid over-baking.
- Step 2: Place Andes Mints While Warm. This is the crucial step for achieving the signature mint topping. Immediately after removing the baking sheet from the oven, allow the cookies to stand on the hot sheet for exactly one minute. This brief resting period helps the cookies set slightly while retaining enough heat to perfectly melt the mints. Promptly unwrap and gently place one Andes Crème de Menthe Thin Mint directly on top of the center of each warm cookie.
- Step 3: Melt and Spread the Mint Topping. Let the Andes mints sit undisturbed on the hot cookies for about 5 minutes. During this time, the residual heat from the cookies will work its magic, causing the mints to soften and melt into a luscious, pliable state. After 5 minutes, use a butter knife to gently and evenly spread the melted mint chocolate across the entire surface of each cookie, covering it with a beautiful, smooth layer. Be gentle to avoid tearing the soft cookie.
- Step 4: Allow the Chocolate to Set. Transfer the baking sheet with the topped cookies to a wire cooling rack. Allow the cookies to cool completely at room temperature. This step is essential for the chocolate topping to fully set and harden, creating a firm yet creamy layer that provides the perfect contrast to the soft cookie. Once fully set, your Andes Mint Cookies are ready to be enjoyed!
Expert Tips for Irresistible Andes Mint Cookies
Achieving bakery-quality Andes Mint Cookies is easy with a few key tricks. These tips will help ensure your cookies turn out perfectly soft, fudgy, and beautifully topped:
- Chill Your Dough (If Homemade): If you’re using a homemade chocolate cookie dough, chilling it for at least 30 minutes (or longer, as specified by your recipe) is highly recommended. This step firms up the butter in the dough, preventing the cookies from spreading too much in the oven and helping them maintain a thicker, chewier shape.
- Avoid Over-baking: Chocolate cookies can quickly go from perfect to dry if over-baked. Take the cookies out of the oven when their edges are just set and the centers still look slightly soft. They will continue to cook and firm up slightly as they cool on the hot baking sheet, resulting in a delightfully soft and fudgy texture.
- Place Mints Quickly and Precisely: The timing for placing the Andes mints is crucial. Wait no more than one minute after removing cookies from the oven to place the mints. This ensures the cookies are still warm enough to perfectly melt the chocolate without over-softening the cookie itself.
- Spread Gently: Once the mints have softened, which usually takes about 5 minutes, use a butter knife to spread the melted chocolate. Be very gentle with this step. The cookies will still be quite tender, and spreading too vigorously can cause them to break or crumble. A light hand will ensure a smooth, even topping.
- Cool on the Baking Sheet Initially: After spreading the mints, allow the cookies to rest on the baking sheet for a few extra minutes before transferring them to a cooling rack. This brief period of cooling on the sheet helps them firm up enough to be moved without falling apart and further assists the mint topping in setting.
- Let Chocolate Set at Room Temperature: For the best results, allow the mint chocolate topping to cool and harden completely at room temperature. Rushing this process by placing them in the fridge can sometimes lead to a duller chocolate finish or potential condensation. A slow, natural cool-down ensures a smooth, glossy, and perfectly set chocolate layer that maintains its flavor and texture.

Delicious Variations to Try
While the classic Andes Mint Cookie is perfect as is, there are several ways to customize and enhance this recipe to suit your taste or occasion:
- Different Chocolate Cookie Base: Don’t limit yourself to just one type of chocolate cookie! Experiment with a dark chocolate fudge cookie for an intense flavor, a chocolate chip cookie base for added texture, or even a double chocolate chip cookie for ultimate decadence. You could also try a red velvet cookie base for a festive touch, especially around the holidays.
- Add Sprinkles: For a pop of color and extra fun, sprinkle some festive sprinkles over the melted Andes mints before they set. Green and white sprinkles are perfect for a holiday theme, or use rainbow sprinkles for a year-round celebration.
- Different Mint Candies (with caution): While Andes Mints are ideal due to their consistent melting properties and flavor, you could experiment with other mint chocolate squares. However, be aware that melting times and consistency may vary. Avoid hard mint candies or those with uneven melting points.
- Mint Chocolate Drizzle: Instead of spreading the entire mint, you could melt the Andes mints and then drizzle the chocolate over the cookies for a more artistic look. This might require a slightly more fluid melt.
- Add a Pinch of Salt: A tiny sprinkle of flaky sea salt over the melted mint chocolate before it sets can wonderfully enhance the chocolate and mint flavors, adding a sophisticated touch and cutting through the sweetness.
Storage and Freezing Instructions
Proper storage ensures your Andes Mint Cookies remain fresh and delicious for as long as possible:
- Room Temperature Storage: Store these cookies in an airtight container at room temperature for up to 3 days. Placing a slice of bread in the container can help keep them soft and fresh, though this is often not needed for fudgy cookies.
- Refrigeration: While it’s generally recommended to set the chocolate at room temperature, if your kitchen is very warm, you can store the finished cookies in an airtight container in the refrigerator. Just be aware that refrigeration can sometimes alter the texture of the cookie, making it a bit firmer, and may cause a slight bloom on the chocolate. Allow them to come closer to room temperature before serving for the best texture and flavor.
- Freezing Dough: If you’re using homemade cookie dough, you can typically freeze unbaked cookie dough balls for up to 3 months. Thaw them slightly in the refrigerator before baking, then proceed with the recipe as usual.
- Freezing Baked Cookies (without topping): You can bake the chocolate cookies ahead of time and freeze them plain in an airtight container for up to 2-3 months. When ready to serve, thaw the cookies, warm them slightly in the oven for a few minutes, then proceed with adding the Andes mints.
Frequently Asked Questions (FAQ)
Here are answers to some common questions about making Andes Mint Cookies:
Q: Can I use store-bought cookie dough?
A: Absolutely! Store-bought chocolate cookie dough is a fantastic shortcut that makes this recipe even easier. Just follow the package directions for baking, then proceed with adding the Andes mints as described in the recipe.
Q: What if my Andes mints aren’t melting properly?
A: The most common reason for mints not melting is that the cookies have cooled too much. Ensure you place the mints on the cookies within one minute of them coming out of the oven. If they still seem stubborn, you can place the baking sheet back into the warm (but turned off) oven for a minute or two to encourage melting, but be very careful not to overcook the cookies.
Q: Can I use different types of mint chocolate?
A: Andes mints are specifically recommended because of their ideal size, flavor, and melting consistency. Other mint chocolates might work, but results could vary in terms of how well they spread and set. If you experiment, choose a thin mint chocolate square for the best outcome.
Q: How can I make these cookies even more fudgy?
A: To enhance fudginess, slightly underbake your chocolate cookies. The centers should still look very soft when you pull them from the oven, as they will continue to set as they cool. Using a recipe specifically designed for fudgy chocolate cookies will also help.
Q: Are these cookies good for gifting?
A: Yes, these cookies make wonderful gifts! Their beautiful appearance and delightful flavor are always a hit. Just ensure the chocolate topping has fully set before packaging them in an airtight container or cellophane bags.
Q: Can I make these ahead of time?
A: You can bake the chocolate cookie base ahead of time and freeze them without the mint topping. When you’re ready to serve, thaw the cookies, warm them briefly in the oven, then add the Andes mints. The finished cookies with the mint topping are best enjoyed within 3 days for optimal freshness and texture.

Print Recipe
Andes Mint Cookies
Equipment
-
Sheet pan (15″ x 10″) and liner
Ingredients
- Chocolate cookies see note 1
- Andes Crème de Menthe Thin Mints
Instructions
-
Follow the directions of your chosen chocolate cookie recipe. Bake the cookies as instructed in your recipe.
-
Allow the cookies to stand for 1 minute on the baking sheet after removing them from the oven. Then, gently place one unwrapped Andes mint on top of each warm cookie.
-
Let the Andes mints sit on the cookies for 5 minutes. The heat from the cookies will melt the mints. After 5 minutes, gently spread the melted chocolate over the cookie using a butter knife.
-
Let the cookies cool completely at room temperature until the chocolate is fully set (see note 2). Enjoy!
Recipe Notes
Note 2: Allow the chocolate to harden at room temperature because it maintains a smoother texture, preserves the flavor, prevents moisture-related issues, and avoids condensation that can occur in the fridge.
Storage: Store the cookies in an airtight container at room temperature for up to 3 days to maintain their freshness and texture.
Nutrition
Nutrition information is automatically calculated, so should only be used as an approximation.
More Delightful Cookie Recipes to Explore:
- Coconut Oil Chocolate Chip Cookies
- Fudge-Striped Cookies
- Peppermint Cookies
- Swig Sugar Cookies
- No Bake Cookies
We hope you enjoy making and sharing these incredible Andes Mint Cookies. Their unique blend of rich chocolate and refreshing mint is truly a match made in dessert heaven. Happy baking!