
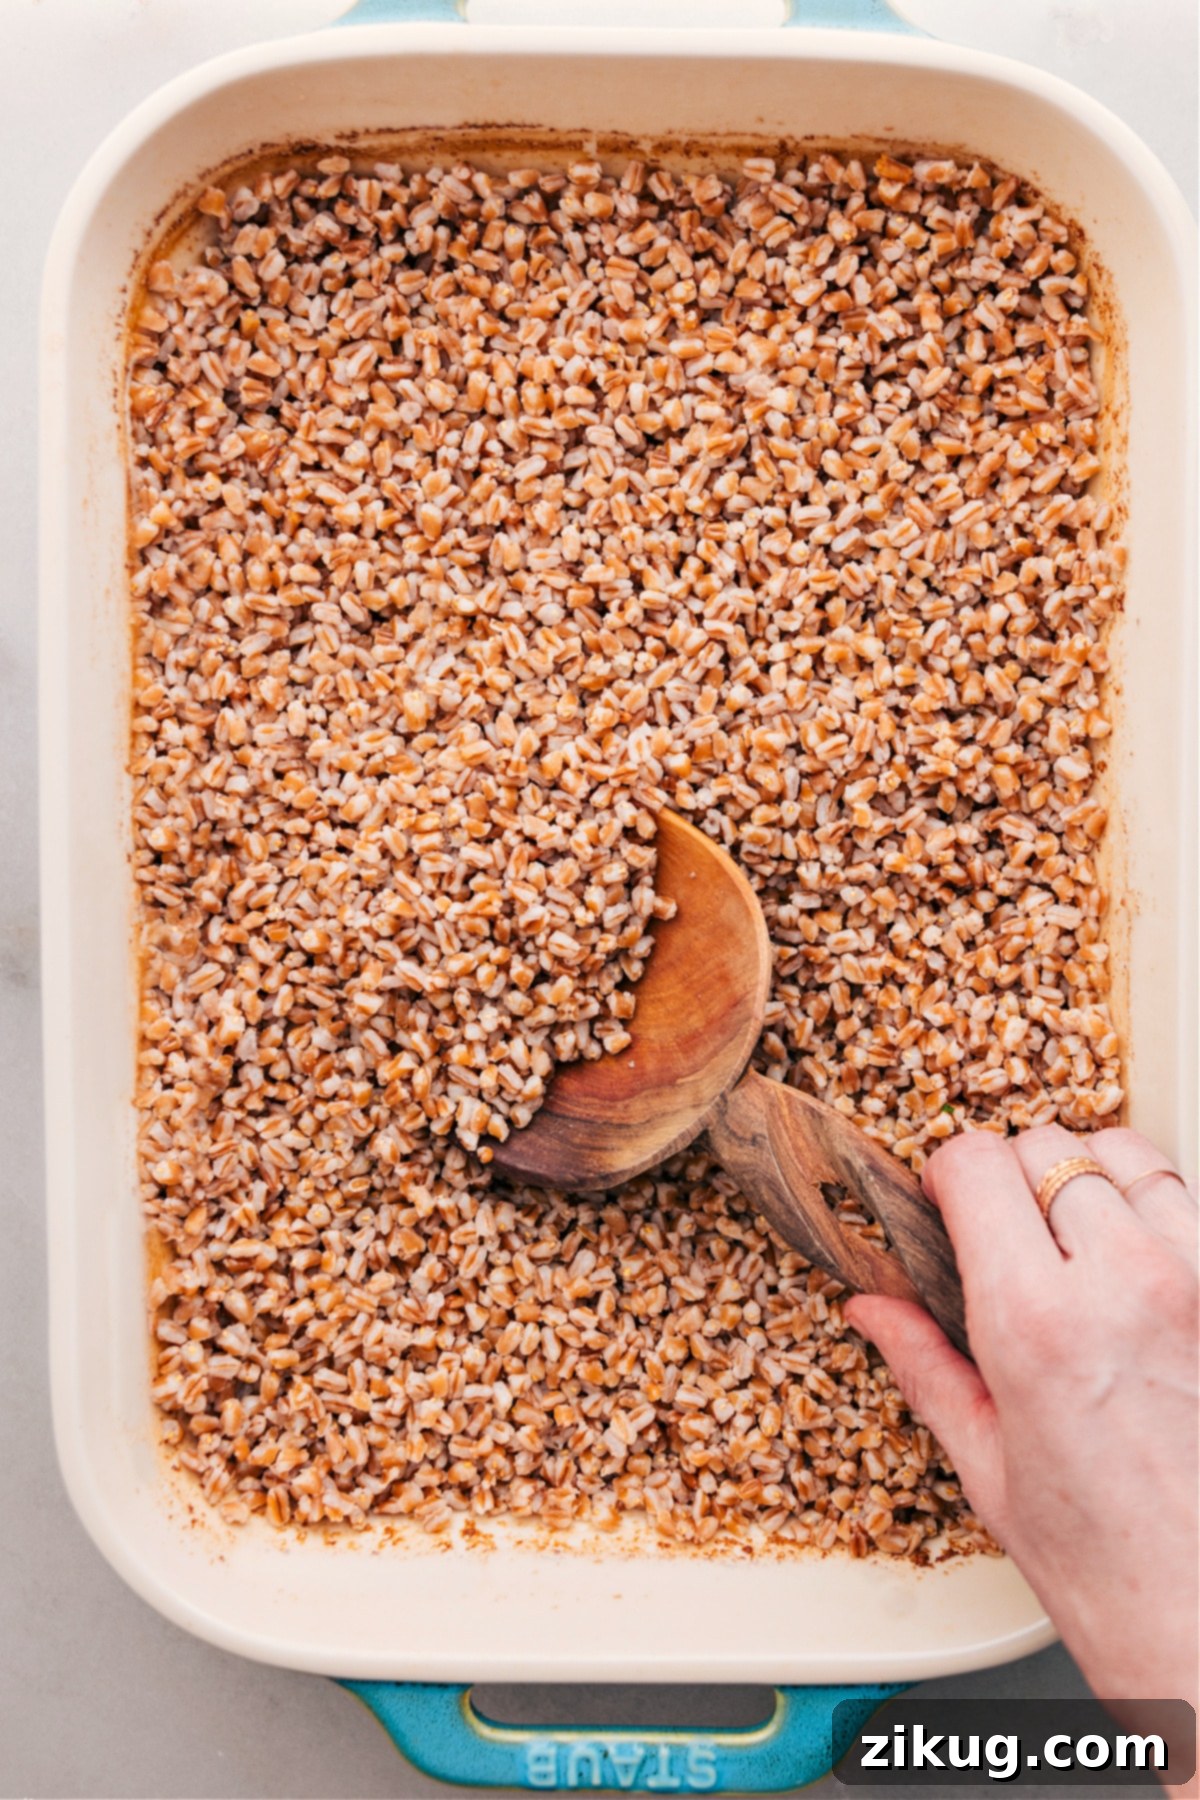
Unlock the Secret to Perfectly Cooked Farro: The Effortless Baked Method! Discover how to cook farro the easy way, yielding fluffy, nutty grains every single time. This ancient grain, celebrated for its satisfying chewiness and rich, earthy flavor, makes a delightful addition to salads, bowls, and countless other dishes. Forget constantly watching a pot on the stove; our revolutionary baked farro recipe allows your oven to do all the hard work, freeing you up to prepare the rest of your meal or simply relax. This comprehensive guide will walk you through everything you need to know to master farro preparation, ensuring delicious results that will elevate your culinary creations and impress your family and friends.
Quick Tip: Embrace Ancient Grains for Health and Flavor
Farro is more than just a grain; it’s an ancient culinary treasure, cherished for centuries across various cultures, particularly in the Mediterranean. Its distinct nutty flavor and wonderfully chewy texture make it a versatile and nutritious alternative to rice, quinoa, or other common grains. Rich in fiber, protein, and essential micronutrients like magnesium and zinc, farro not only tastes great but also contributes significantly to a healthy, balanced diet. Learning to cook it perfectly is a game-changer for any home chef seeking wholesome, satisfying, and flavorful meal options that are both easy to prepare and incredibly beneficial for well-being.
Mastering Farro: Why Baking is the Superior and Most Convenient Method
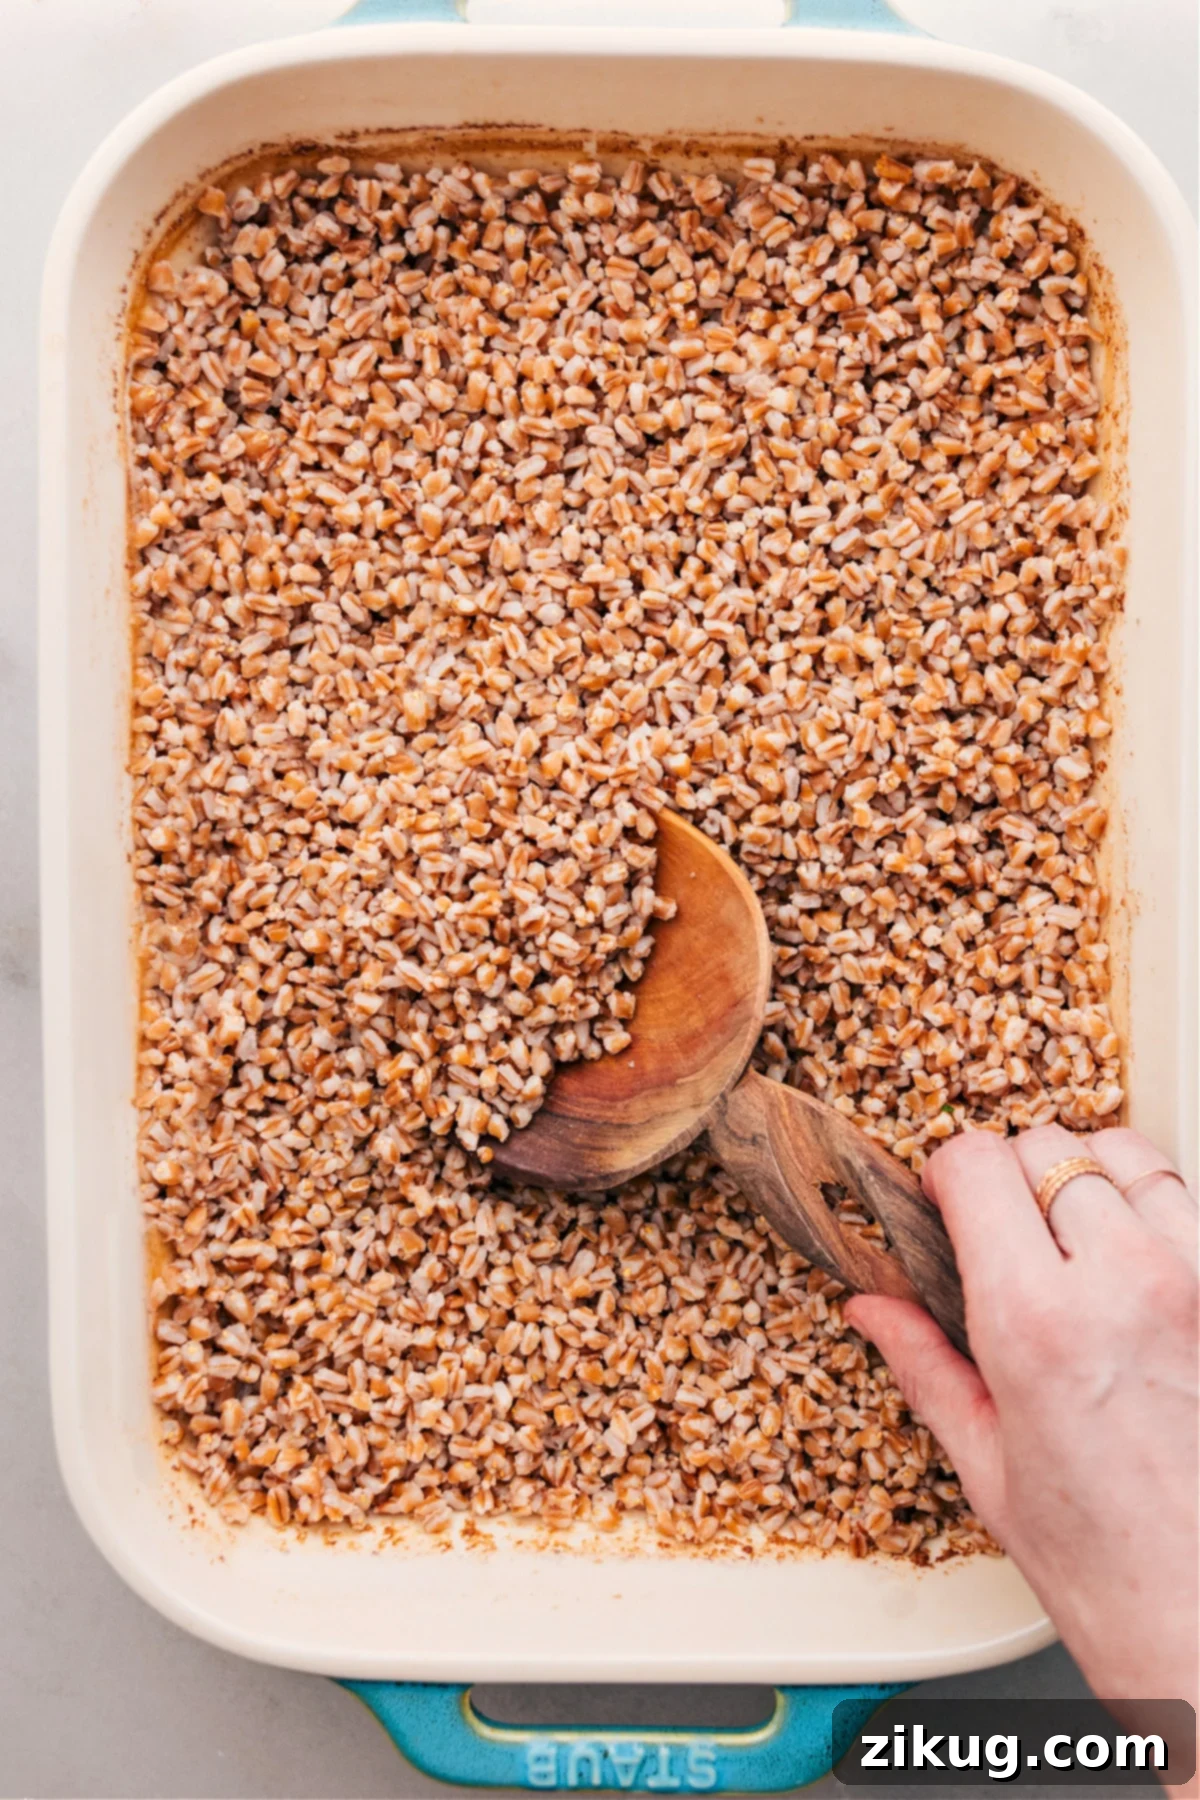
For too long, cooking grains on the stovetop involved constant monitoring, stirring, and a lingering anxiety about whether they would turn out perfectly or end up mushy or undercooked. That all changed when I discovered the magic of oven baking for grains. Baking farro has quickly become my absolute favorite method, transforming what could be a finicky process into an incredibly simple, hands-off experience. Just a few minutes of initial mixing, and your oven takes over, consistently delivering perfectly cooked, delightfully chewy, and tender farro without any fuss or supervision required.
My journey to baked farro perfection began after successfully experimenting with baking white rice and brown rice. The consistent, effortless results inspired me to apply the same principles to farro, an ancient grain I adore. After several tests and tweaks to get the liquid-to-grain ratio and cooking time just right, I perfected this baking technique. Now, I can confidently say it’s the only way I prepare this incredible grain. Once you experience the ease and reliability of this method, you’ll understand why it’s a true culinary revelation and will likely become your preferred method too!
Unbeatable Benefits of Baking Farro in the Oven
Opting for the oven method to cook your farro offers a multitude of advantages that stovetop cooking simply can’t match:
- Effortlessly Simple & Hands-Off: Say goodbye to standing over the stove, constantly checking for absorption or potential burning. This method is incredibly easy – just combine a few ingredients, cover the dish, and let your oven do all the hard work. You’re free to focus on other aspects of your meal preparation or simply relax.
- Consistently Perfect Texture: The enclosed environment of the oven ensures even heat distribution, cooking the farro uniformly from all sides. This results in an ideal chewy-yet-tender texture every single time, avoiding frustrating issues like mushy spots or hard, undercooked grains.
- Minimal Active Time Required: The true beauty of baking is its “set it and forget it” nature. After a quick initial prep that takes mere minutes, the farro bakes undisturbed, requiring no further attention until it’s time to rest and fluff.
- Ideal for Batch Cooking & Crowds: Whether you’re feeding a large family, preparing for a dinner party, or simply want to have extra on hand, baking allows you to easily make a substantial quantity of farro in a single dish, without any added complexity or requiring multiple pots.
- Excellent for Weekly Meal Prep: Cook a generous batch at the beginning of the week, and you’ll have perfectly prepared farro ready to add to salads, stir-fries, grain bowls, soups, or as a wholesome side dish for days. It significantly simplifies healthy eating and last-minute meal assembly.
- Reduced Chance of Sticking or Burning: The controlled, gentle heat of the oven, especially when the dish is tightly covered, dramatically minimizes the risk of the bottom layer sticking to the pan or burning, a common frustration with stovetop cooking.
- Enhanced Flavor Absorption: Baking in a covered dish allows the farro to steam gently and absorb the cooking liquid’s flavors more deeply and thoroughly. This results in a richer, more integrated taste profile, making your farro even more delicious.
- Cleaner Kitchen: With everything contained in one baking dish, you’ll find cleanup to be a breeze compared to splattered stovetops and multiple pots.
Essential Ingredients for Perfectly Baked Farro
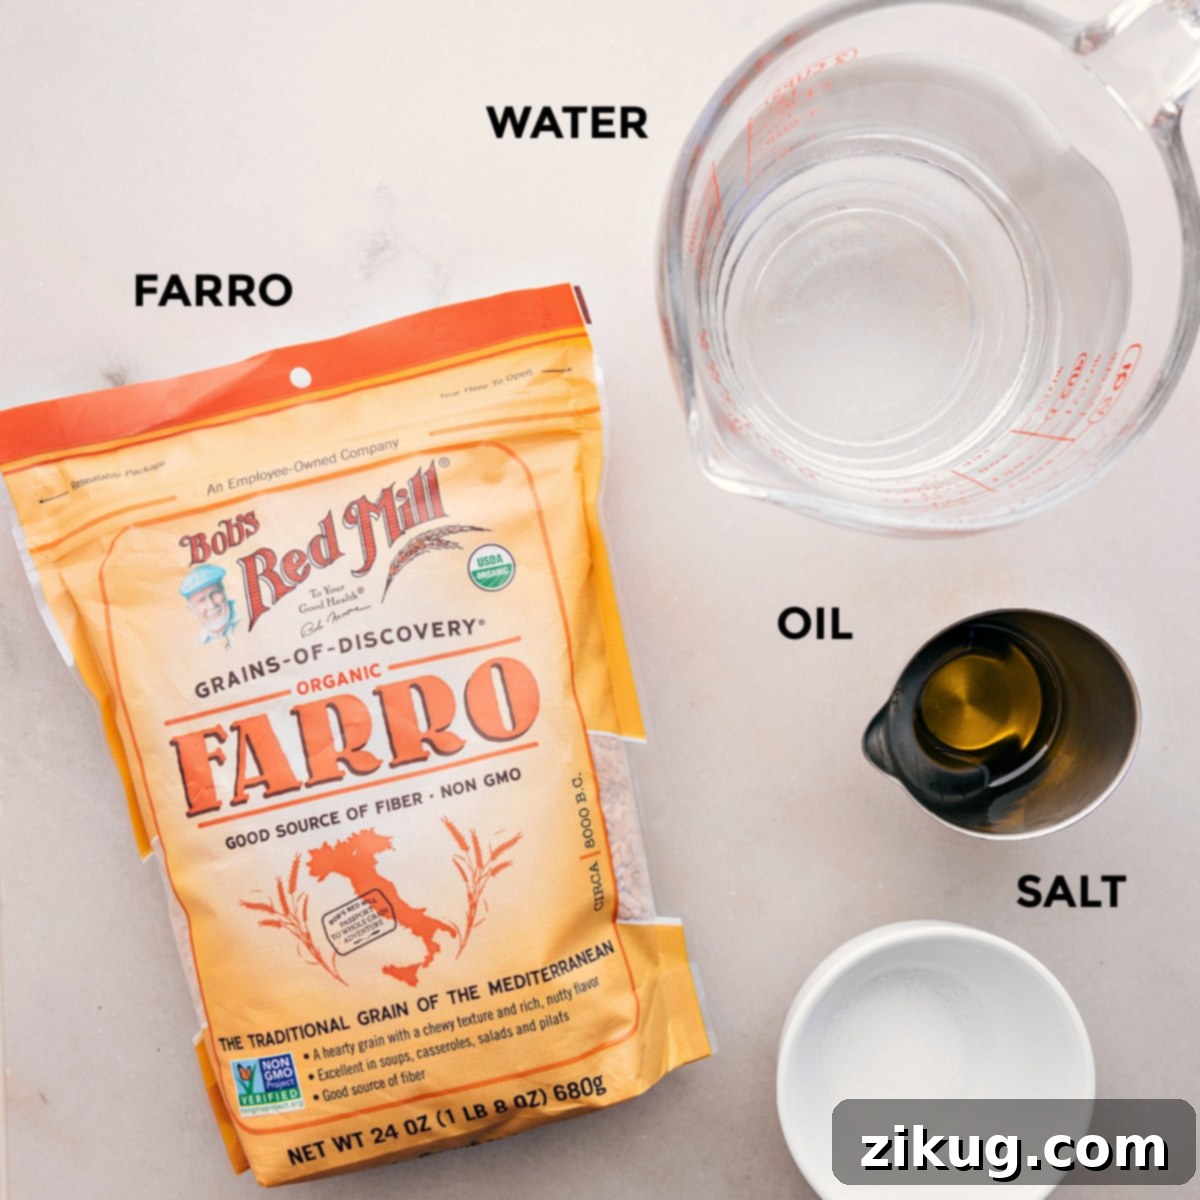
Creating exceptionally delicious baked farro requires only a handful of pantry staples. The key to success lies not just in the cooking method, but also in selecting the right type of farro and ensuring precise measurements for optimal hydration and flavor. Here’s a closer look at what you’ll need and why each ingredient plays an important role in achieving that perfect nutty, chewy grain.
| Ingredient | Notes for Best Results and Substitutions |
|---|---|
| Pearled Farro | This is the crucial choice for this specific baking recipe. Pearled farro has had most or all of its tough outer bran layer removed, which allows it to cook significantly faster and absorb liquid much more consistently compared to whole farro. Avoid using whole farro for this recipe, as it demands a much longer cooking time (often requiring pre-soaking) and absorbs substantially more liquid, leading to an entirely different cooking process and outcome. Opt for high-quality pearled farro brands like this one or this other option to ensure the best texture and flavor. |
| Olive Oil | A tablespoon of olive oil does wonders for this recipe. It adds a lovely depth of flavor to the farro, subtly enhancing its inherent nuttiness and creating a more rounded taste profile. More importantly, the oil acts as a lubricant, helping to prevent the farro grains from sticking together during baking. This results in a fluffy, separate grain texture rather than a clumpy mass. You can easily substitute olive oil with other neutral-tasting oils like avocado oil, grapeseed oil, or even a knob of unsalted butter for a richer, more decadent taste. Regardless of your choice, do not omit this ingredient! |
| Boiling Water | Starting with actively boiling water is absolutely essential for this baked farro method. It immediately jump-starts the cooking process once combined with the farro and helps maintain the oven’s temperature consistency, ensuring the grains cook through evenly within the specified time. This also promotes optimal hydration and prevents the farro from sitting in cool water and becoming gummy. A smart tip: always boil a little extra water (e.g., 5-6 cups) in your kettle or pot to account for any evaporation, ensuring you have precisely 4 cups ready to add to the baking dish when needed. |
| Salt | Salt is far more than just a seasoning; it’s a critical flavor enhancer that brings out the best in the farro. A teaspoon of fine sea salt or kosher salt will amplify the grain’s natural, earthy notes and make the final dish significantly more palatable and enjoyable. You can always adjust the amount slightly to your personal preference, but under no circumstances should you skip it entirely, as unseasoned farro can taste bland. |
Baking Farro to Perfection: A Simple Step-by-Step Guide
Achieving perfectly cooked farro in the oven is remarkably straightforward and requires minimal effort. Follow these simple, detailed steps for a consistently delicious outcome that will make you wonder why you ever cooked grains any other way:
- Preheat Oven and Prepare Baking Dish: Begin by preheating your oven to 400°F (200°C). Allowing the oven to reach its full temperature before you place the dish inside is crucial for consistent cooking. Lightly grease a 9×13-inch baking dish with cooking spray or a small amount of olive oil. This important step prevents the farro from sticking to the bottom and edges of the pan, ensuring easy serving and cleanup. Simultaneously, start bringing at least 5 to 6 cups of water to a rolling boil in a kettle or a large pot on your stovetop. Boiling extra water ensures that you will have precisely 4 cups of actively boiling water ready when you need it, accounting for any slight evaporation.
- Rinse the Farro Thoroughly: Measure out 2 cups of pearled farro and place it into a fine-mesh sieve. Rinse the farro thoroughly under cold running water for at least a minute or two, moving the grains around with your hand. This essential step helps to remove any excess starch that could lead to gummy farro and also washes away any potential dirt or debris. After rinsing, shake the sieve vigorously to remove as much excess water as possible from the grains.
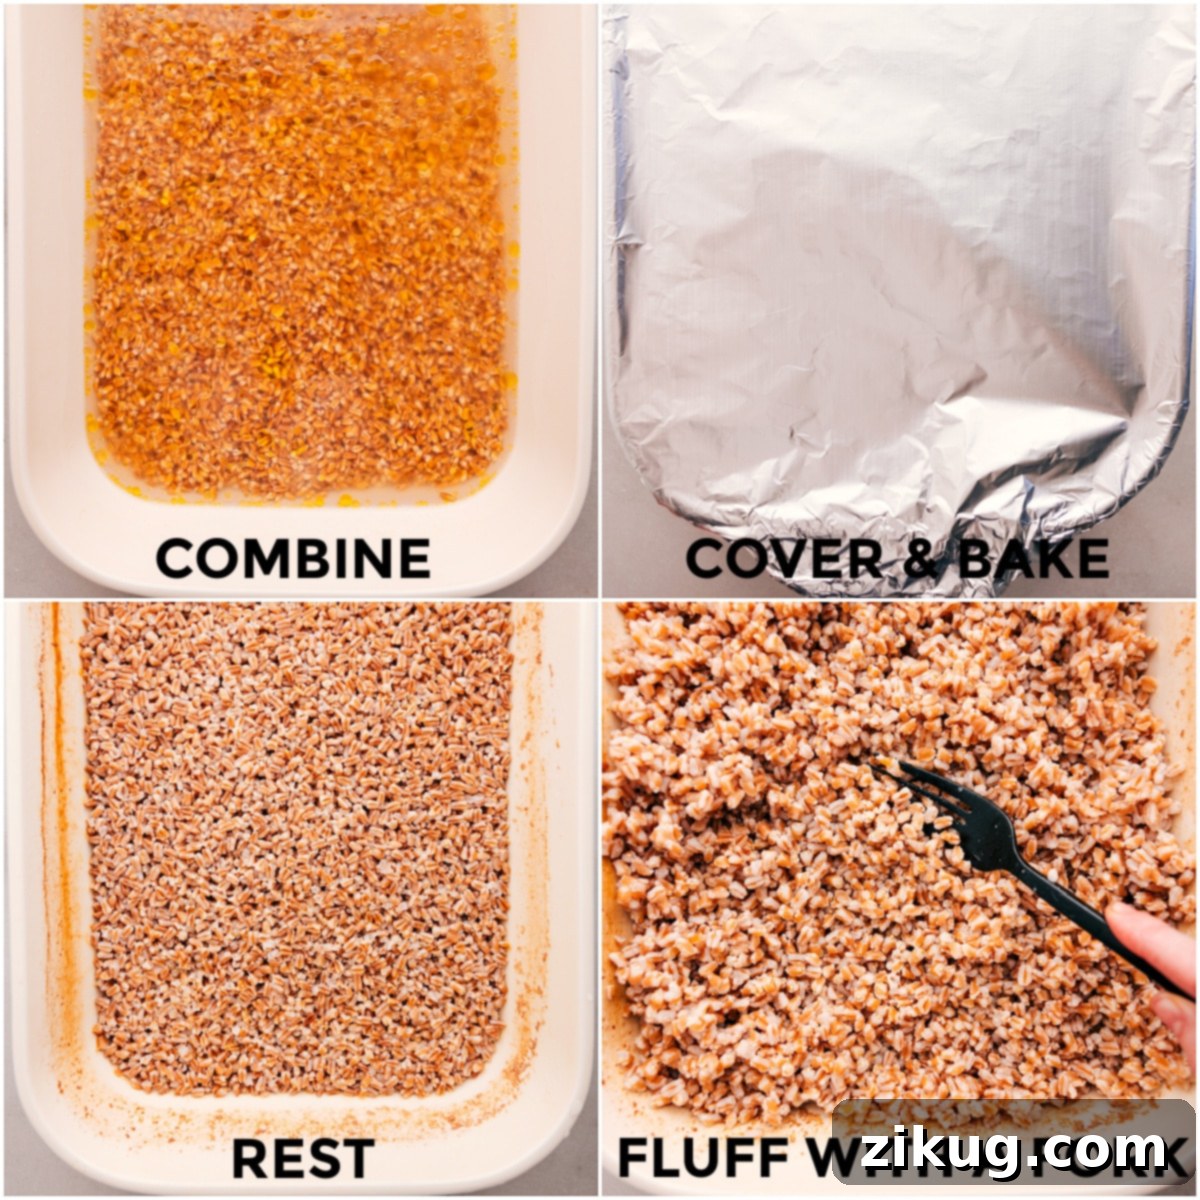
- Combine Ingredients in Baking Dish: Carefully transfer the rinsed farro from the sieve into your prepared 9×13-inch baking dish. Drizzle 1 tablespoon of olive oil evenly over the farro and sprinkle 1 teaspoon of salt across the grains. Next, very carefully pour in the 4 cups of freshly boiled water. Using a heat-resistant spoon or spatula, gently stir all the ingredients to ensure they are well combined and that the farro is evenly distributed across the bottom of the dish in a single layer.
- Cover Tightly and Bake: This step is the secret to perfectly steamed and tender farro. Take two sheets of aluminum foil and use them to cover the baking dish tightly. The double layer and tight seal are critical for trapping all the steam inside, creating an ideal, consistent cooking environment where the farro can hydrate and cook thoroughly. Place the covered dish into the center rack of your preheated oven and bake for exactly 60 minutes. It’s important to resist the urge to peek or remove the foil during this time, as releasing the steam will disrupt the cooking process and can lead to unevenly cooked grains.
- Rest and Fluff Before Serving: Once the 60 minutes of baking time are complete, carefully remove the baking dish from the oven. Crucially, keep the dish covered with the foil and let it rest undisturbed on a heat-safe surface for an additional 10-15 minutes. This resting period is absolutely vital: it allows the farro to absorb any remaining moisture, finish steaming gently, and further develop its perfectly tender, yet distinctly chewy texture. Skipping this step can result in farro that is slightly watery or less fluffy. After the resting time, remove the foil and gently fluff the cooked farro with a fork to separate the grains before serving your delicious, perfectly prepared farro.
Smart Storage Solutions for Prepared Farro
Preparing a batch of farro means you can enjoy it in various quick and healthy meals throughout the week. Proper storage is key to maintaining its freshness, flavor, and quality:
- Refrigerator Storage: Always allow your cooked farro to cool completely to room temperature before storing. Transfer it to an airtight container, ensuring it’s sealed well to prevent drying out and absorption of other refrigerator odors. Store it in the refrigerator, where it will remain fresh and delicious for 4–5 days. This makes it an ideal component for quick meal additions throughout your busy week.
- Effortless Reheating Instructions: To reheat refrigerated farro, simply scoop out your desired portion. For stovetop reheating, add a tablespoon or two of water or broth to a small pan with the farro. Warm over medium-low heat for about 5 minutes, stirring occasionally, until it’s heated through and revived. For microwave reheating, place the farro in a microwave-safe dish with a small splash of water or broth, cover loosely (or with a damp paper towel), and microwave for 1–2 minutes, stirring halfway, until warm. The added liquid helps to restore moisture and prevent the grains from becoming dry or stiff.
- Freezing for Extended Shelf Life: Farro freezes beautifully, making it perfect for long-term meal planning! Once completely cooled to room temperature, spread the cooked farro in a single layer on a baking tray lined with parchment paper. Freeze for about 1 hour, or until the individual grains are mostly frozen (this “flash freezing” step prevents them from clumping together in a large block). Then, transfer the frozen farro to a freezer-safe bag or an airtight container. It can be stored in the freezer for up to 6 months. To use, you can either thaw it in the refrigerator overnight or reheat it directly from frozen using the methods above, adding a little extra liquid if needed.
Creative Ways to Incorporate Cooked Farro into Your Meals
Cooked farro is an incredibly versatile grain that can enhance a multitude of dishes with its hearty texture, satisfying chewiness, and delightful nutty flavor. Beyond just a simple side dish, farro truly shines when thoughtfully incorporated into more complex and flavorful recipes. Its ability to absorb flavors makes it a fantastic base for various culinary creations. Here are some inspiring ideas to make the most of your perfectly baked farro, ensuring your meals are both nutritious and delicious:
Salads
Sweet Potato Farro Salad
This vibrant and wholesome salad combines the earthy sweetness of roasted sweet potatoes with the satisfying chewiness of farro, all tossed in a bright, zesty dressing. It’s a remarkably satisfying and nutrient-packed meal, perfect for a light lunch, a make-ahead side dish, or even a delightful contribution to a potluck.
Dinner
Hearty Harvest Bowl
Build a nourishing and customizable harvest bowl by layering a generous portion of farro with seasonal roasted vegetables like tender Brussels sprouts, caramelized butternut squash, or crisp kale. Add a lean protein such as chicken or chickpeas, and drizzle with a creamy, flavorful dressing for a meal that’s both delicious and incredibly healthy.
Dinner
Savory Black Bean Burger
Farro can contribute fantastic texture, substance, and a desirable chewiness to homemade veggie burgers. Mix it with mashed black beans, a blend of savory spices, and your favorite binders for a hearty, flavorful, and satisfying plant-based burger that holds its shape beautifully on the grill or stovetop.
Dinner
Italian Stuffed Peppers
Elevate your classic stuffed peppers by using farro as a flavorful and textural base for the filling. Combined with ground meat (or a plant-based alternative), aromatic herbs, and rich marinara sauce, farro adds a delightful chewiness and hearty quality that perfectly complements the tender bell peppers when baked.
Beyond these specific recipes, consider farro as a robust base for any grain bowl, a hearty and nutritious addition to vegetable soups or stews, a textured element in creative risottos (farrotto!), or even as a unique savory breakfast porridge with a fried egg and roasted vegetables. Its remarkable adaptability truly makes it an indispensable ingredient in a health-conscious and flavor-driven kitchen. Don’t limit its potential!
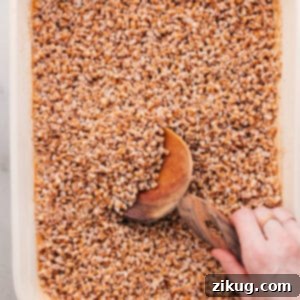
Baked Farro: The Ultimate Easy Recipe
By Chelsea Lords
Learn the BEST method for how to cook farro! Simply mix, bake, and enjoy perfectly nutty and fluffy grains every time, ideal for countless dishes and meal prepping.
For consistent, delicious results, I highly recommend using a high-quality 9×13-inch baking dish, like the one featured in these photos.
10 minutes
1 hour
10-15 minutes
1 hour 20 minutes
12 servings (approx. 6 cups cooked)
Equipment Needed
- 9 x 13-inch baking pan (or similar sized casserole dish)
- Fine-mesh sieve
- Kettle or large pot for boiling water
- Aluminum foil
Ingredients
- Cooking spray (or 1 tsp olive oil for greasing the dish)
- 2 cups pearled farro (Important: see Note 1 below regarding pearled vs. whole farro)
- 1 tablespoon olive oil (or your preferred cooking oil or melted butter; see Note 2)
- 4 cups boiling water (Crucial: ensure you boil extra water to compensate for evaporation; see Note 3)
- 1 teaspoon salt (adjust to taste)
Instructions for Baking Farro
- Preheat Oven & Prepare Dish: Preheat your oven to 400°F (200°C). Lightly grease a 9×13-inch baking dish with cooking spray to prevent the farro from sticking. Simultaneously, bring at least 5-6 cups of water to a rolling boil in a kettle or large pot; you’ll need precisely 4 cups of boiling water for the recipe, so boil extra to account for evaporation.
- Rinse Farro Thoroughly: Place the 2 cups of pearled farro in a fine-mesh sieve and rinse thoroughly under cold running water for 1-2 minutes. This removes excess starch, ensuring fluffier grains. Shake off any excess water from the sieve.
- Combine Ingredients: Add the rinsed farro, 1 tablespoon of olive oil, and 1 teaspoon of salt to the greased baking dish. Carefully pour in the 4 cups of actively boiling water and stir gently to combine all ingredients. Spread the mixture evenly across the bottom of the dish.
- Bake Covered: Cover the baking dish tightly with two layers of aluminum foil. This secure seal is crucial for trapping steam, which allows the farro to cook evenly and thoroughly. Bake in the center of the preheated oven for exactly 60 minutes. Avoid removing the foil during baking to maintain the steaming environment.
- Rest & Fluff: After 60 minutes, carefully remove the dish from the oven. Without uncovering, let it rest, still covered with the foil, for 10-15 minutes. This resting period is vital as it allows the farro to absorb any remaining moisture and achieve a perfectly fluffy, tender texture. Finally, remove the foil and gently fluff the cooked farro with a fork before serving.
Recipe Notes for Optimal Results
Note 1: Importance of Pearled Farro: It is absolutely critical to use pearled farro for this specific recipe. Pearled farro has its bran layer partially or completely removed, which allows it to cook significantly faster and more consistently with the given liquid and time. Whole farro will require a much longer cooking time (often needing pre-soaking) and a different liquid ratio, resulting in a less predictable outcome with this method. For excellent quality, consider this brand or this one.
Note 2: Choosing Your Cooking Oil: While olive oil is highly recommended for its flavor and health benefits, feel free to swap it with any preferred cooking oil like avocado oil, grapeseed oil, or even melted unsalted butter for a richer taste. The oil is a vital component as it not only adds subtle flavor but, more importantly, prevents the farro grains from clumping and sticking together during baking, ensuring a perfectly fluffy result. Do not skip adding oil!
Note 3: Accurate Water Measurement is Key: Always make sure to boil slightly more water than the recipe explicitly calls for (e.g., if you need 4 cups, boil 5-6 cups). This accounts for any evaporation that occurs during the boiling process, ensuring you have the precise amount of actively boiling water required for optimal farro hydration. Accurate water measurement is a non-negotiable factor in achieving perfectly cooked, never-mushy farro every single time.
The Power of Resting Time: The 10-15 minute resting period after baking, while still covered, is not merely a suggestion—it’s a crucial step. This time allows the farro to continue steaming gently and absorb any residual moisture from the baking dish. This crucial process transforms the grains, resulting in a perfectly fluffy, individual grain texture. Skipping this step can lead to a less desirable, potentially slightly watery or overly wet texture that lacks the signature farro chewiness.
Storage Tips Recap: Cooked farro is a meal prep superstar. Store any leftovers in an airtight container in the refrigerator for 3-5 days. To reheat, simply add a small amount of water or broth to your portion and warm it on the stovetop or in the microwave until heated through. For longer storage, farro can be frozen for up to 6 months; ensure it’s completely cooled, then spread it on a tray to flash-freeze before transferring to a freezer-safe container to prevent clumping.
Approximate Nutrition Information
Serving: 1 serving | Calories: 128 kcal | Carbohydrates: 26g | Protein: 3g | Fat: 2g | Sodium: 197mg | Fiber: 5g | Sugar: 0.3g
Nutrition information is automatically calculated and should be used as an approximation. Individual results may vary significantly based on specific ingredients used, precise measurements, and preparation methods.
Frequently Asked Questions About Cooking Farro
Using the efficient oven baking method outlined in this recipe, pearled farro takes exactly 60 minutes of active baking time in the oven. This is followed by an essential 10-15 minute resting period, which is crucial for achieving its perfect texture. So, from the moment it enters the oven until it’s ready to fluff and serve, you’re looking at approximately 70-75 minutes of total time, with the majority of that being completely hands-off.
Absolutely! Farro is an outstanding grain for meal prepping due to its hearty texture and ability to hold up well when stored. You can easily cook a large batch ahead of time and store it in an airtight container in the refrigerator for 3–5 days. When you’re ready to use it, simply reheat individual portions with a splash of water or broth on the stove or in the microwave. This extra liquid helps to restore its moisture and ensure it remains wonderfully tender and chewy, just like freshly cooked farro. It’s a fantastic way to have healthy grains ready for any meal throughout your busy week.
Perfectly cooked farro should be tender to the bite but still retain a pleasant, satisfying chewiness at its core – it should never be mushy or overly soft like a porridge. After the full baking and resting time has passed, simply take a small taste test from the dish. If it offers a slight, enjoyable resistance when chewed and is no longer hard in the center, it’s done. The grains should also appear plump, well-hydrated, and separate easily when fluffed with a fork.
This is a very important distinction when cooking farro! Whole farro (also known as whole grain farro) retains all parts of the grain, including the fibrous bran and nutrient-rich germ, making it the most nutritious. However, it requires significantly longer cooking times (often needing an overnight pre-soak) and more liquid. Pearled farro, which is specified for this recipe, has had most or all of its bran removed. This greatly reduces its cooking time and results in a softer, more consistent texture, making it ideal for the baking method described here. Semi-pearled farro is a middle ground, with some of the bran removed, offering a balance between cooking time and nutritional content. For the best and most consistent results with this recipe, always opt for pearled farro.
No, farro is a type of ancient wheat and, as such, naturally contains gluten. Therefore, individuals with celiac disease or gluten sensitivity should strictly avoid farro. If you are looking for delicious gluten-free ancient grains with a similar hearty texture and versatility, excellent substitutes include quinoa, brown rice, wild rice, or even buckwheat (kasha). While these grains will have different cooking times and liquid ratios, they offer fantastic gluten-free alternatives for various dishes.
Flavorful Variations: How to Customize Your Baked Farro
While plain baked farro is wonderfully delicious on its own, its mild, nutty flavor and satisfying texture also make it an excellent canvas for a myriad of exciting flavors. Don’t hesitate to experiment and customize your farro to complement any meal, seasonal ingredients, or satisfy your unique palate. Here are some popular and creative ideas to infuse your perfectly cooked farro with exciting tastes and aromas:
- Vibrant Pesto Infusion: For a burst of fresh, aromatic, and savory flavor, simply toss your warm, cooked farro with a few generous spoonfuls of vibrant homemade or store-bought pesto. To elevate it further, stir in some toasted pine nuts for crunch and a generous sprinkle of freshly grated Parmesan cheese. This combination makes a fantastic, quick side dish, a delightful base for roasted vegetables, or even a light main course.
- Earthy Mushroom & Thyme Farro: Elevate your farro with the rich, umami flavors of gently sautéed mushrooms and fragrant fresh thyme. For an even deeper flavor profile, consider cooking the farro using chicken or vegetable broth instead of plain water. Once baked, stir in the sautéed mushrooms and fresh thyme leaves. A dash of balsamic vinegar at the end can further intensify the earthy notes beautifully.
- Warm Curried Farro: Transform your farro into an exotic and warming dish by preparing it with a vibrant blend of spices, similar to the method used in a curry rice recipe. Incorporate curry powder, turmeric, ground ginger, and minced garlic into the cooking liquid, or briefly sauté them with the farro before baking. This aromatic version pairs wonderfully with grilled chicken, roasted vegetables, or any plant-based protein.
- Sweet & Savory Cranberry & Pecan Farro: For a delightful balance of sweet and savory notes, mix dried cranberries (or tart cherries), toasted pecans (or walnuts), and fresh chopped parsley into your cooked farro. For a truly cohesive dish, dress it lightly with a sweet and tangy vinaigrette, similar to the one used in a Wild Rice Pilaf, featuring ingredients like olive oil, fresh lemon juice, and a touch of maple syrup or honey. This makes a superb holiday side dish, a unique addition to fall salads, or a special meal prep component.
- Ultimate Customizable Add-Ins: The possibilities for customizing your farro are truly endless! Once your farro is cooked and fluffed, consider stirring in a wide variety of additional ingredients. This could include toasted nuts (almonds, cashews), crunchy seeds (sunflower seeds, pumpkin seeds), other dried fruits (chopped apricots, golden raisins), or finely diced fresh vegetables (colorful bell peppers, crisp cucumbers, sweet cherry tomatoes). A final squeeze of fresh lemon juice, a scattering of fresh herbs (cilantro, mint, dill), or a drizzle of your favorite homemade dressing can further personalize your creation. For even more inventive ideas and pairings, explore additional inspiration here.
Experiment boldly with these suggestions to find your absolute favorite combinations, turning simple baked farro into a continuous culinary adventure that perfectly suits your taste!