
Transform your Halloween celebrations with delightful, no-bake treats that are as fun to make as they are to eat! These simple recipes for Monster Eyeballs, Witch’s Hats, Witch’s Brooms, and Bat Bites require just four ingredients or less, making them perfect for busy parents, last-minute parties, or a fun activity with kids. No oven needed, just pure spooky creativity!

Unleash Spooky Fun with Minimal Effort this Halloween!
Halloween is arguably the most exciting holiday to get creative in the kitchen. When else do you have the perfect excuse to serve up creepy eyeballs, adorable bats, and whimsical witch’s hats as snacks? This year, I focused on keeping things incredibly simple because, let’s face it, no one wants complex dessert recipes demanding hours of attention on Halloween night. The goal is maximum fun with minimum fuss!
I crafted four fantastic spooky treats, each requiring only four ingredients or less. These include the delightfully creepy Monster Eyeballs, charming Witch’s Hats, magical Witch’s Brooms, and playful Bat Bites.
These recipes are not only quick and completely no-bake, but they also guarantee a kitchen full of giggles, especially when made with kids. My little helpers had a blast unwrapping candies, carefully placing edible googly eyes, and, of course, sneaking a few sprinkles here and there. The absolute best part? I never once had to turn on the oven, leaving more time for costume planning and trick-or-treating! Get ready to embrace the spirit of Halloween with these effortlessly delightful creations.
Spooky & Easy No-Bake Halloween Treats: Fun Recipes for Kids & Parties
Get ready to conjure up some magic this Halloween with these incredibly easy, no-bake treats! Whether you’re hosting a ghoulish gathering, preparing for a school party, or simply looking for a fun activity with your little monsters, these recipes are your secret weapon. Each treat is designed for simplicity, requiring minimal ingredients and no baking, ensuring a stress-free and super fun experience. Dive into creating some monstrously good memories that everyone will enjoy, from the youngest trick-or-treaters to the grown-up ghouls.
Essential Ingredients for Your Easy Halloween Treats
Crafting these spooktacular snacks is made even easier with a clear understanding of the ingredients. Here’s a comprehensive breakdown of everything you’ll need, along with helpful hints to ensure your treats turn out perfectly for a truly memorable Halloween:
- Oreo Thins Cookies: These are a star ingredient! For Witch Hats, the classic chocolate crème flavor works wonderfully as the hat’s brim. More importantly, for the Bat Bites, choosing Oreo Thins is crucial. Their lighter weight and thinner profile make them ideal for creating realistic bat wings that won’t overwhelm the Reese’s base. Regular Oreos tend to be too heavy and bulky for this particular application, often leading to breakage.
- Cream Cheese Frosting: The secret to delicious and easy assembly! While homemade cream cheese frosting offers unparalleled flavor and richness, don’t hesitate to use quality bakery tubs or your favorite store-bought variety for convenience. Just make sure it’s smooth and spreadable for piping. You can also experiment with vanilla frosting if cream cheese isn’t your preference, or even add a touch of almond extract for an extra flavor boost.
- White Chocolate: Essential for both binding and decorating, particularly for the Bat Bites. Opt for a good quality brand of white chocolate chips or melting wafers. This ensures a smooth, easy melt and a delicious flavor that complements the other ingredients. Poor quality chocolate can seize or become grainy, making it difficult to work with, so a little investment here goes a long way.
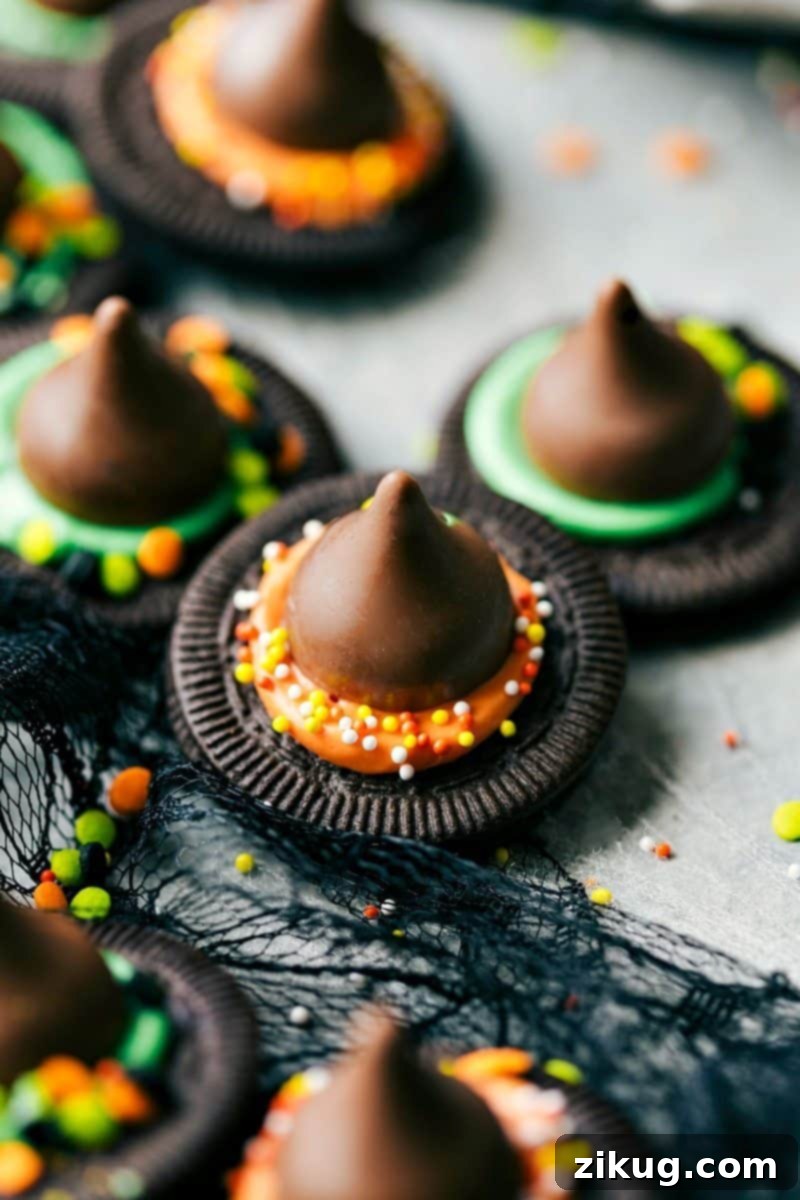
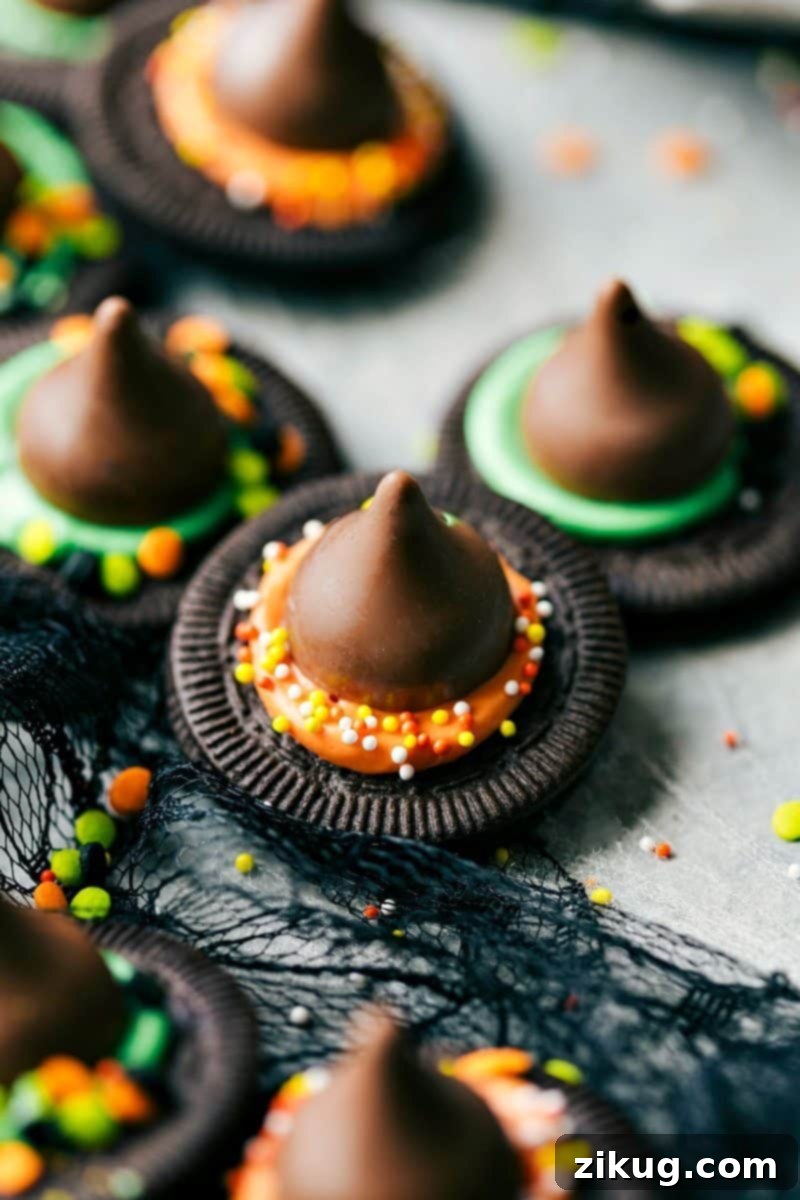
- Chocolate Candy Kisses: These iconic candies form the perfect peak for our Witch’s Hats. While classic chocolate kisses are traditional, don’t be afraid to get creative! Hershey’s “Hugs” (white chocolate with chocolate stripes) can add a fun, visually appealing twist to your witch hats, making them even more enchanting. You could even use different flavored kisses for variety.
- Food Coloring: To truly embrace the Halloween spirit, gel food coloring is your best friend. Gel colors are highly concentrated, meaning a small amount delivers vibrant, intense hues like spooky greens and fiery oranges without thinning your frosting. Liquid food colorings can sometimes dilute the frosting’s consistency, which can be problematic for structural integrity.
- Halloween Sprinkles: Sprinkles are the glitter of the edible world, adding instant festivity! Look for seasonal Halloween mixes at your local grocery or craft stores, or browse online for unique spooky shapes like bats, ghosts, or pumpkins. They add texture, color, and a touch of magic, transforming simple treats into party-ready masterpieces.
- Reese’s Miniature Cups: These delightful peanut butter cups are the foundation for our Witch’s Brooms and Bat Bites. For best results, ensure your Reese’s cups are fresh and, ideally, chilled. This helps them hold their shape better during assembly and prevents them from cracking or melting too quickly as you work. Unwrapped is key for speedy preparation!
- Pretzels: Versatility is key with pretzels! Use larger pretzel twists or snaps as the base for the Monster Eyeballs, providing a savory crunch that balances the sweetness. For the Witch’s Brooms, mini pretzel sticks are perfect for creating realistic, sturdy broom handles. Their structural integrity makes them easy to insert and hold.
- Pull-Apart Twizzlers: These are the ideal material for broom bristles! Fresh packs of pull-apart licorice are softer, more pliable, and much easier to separate and shape into the desired broom-like texture. Stale or hardened licorice can be difficult to work with and may not hold its shape as well.
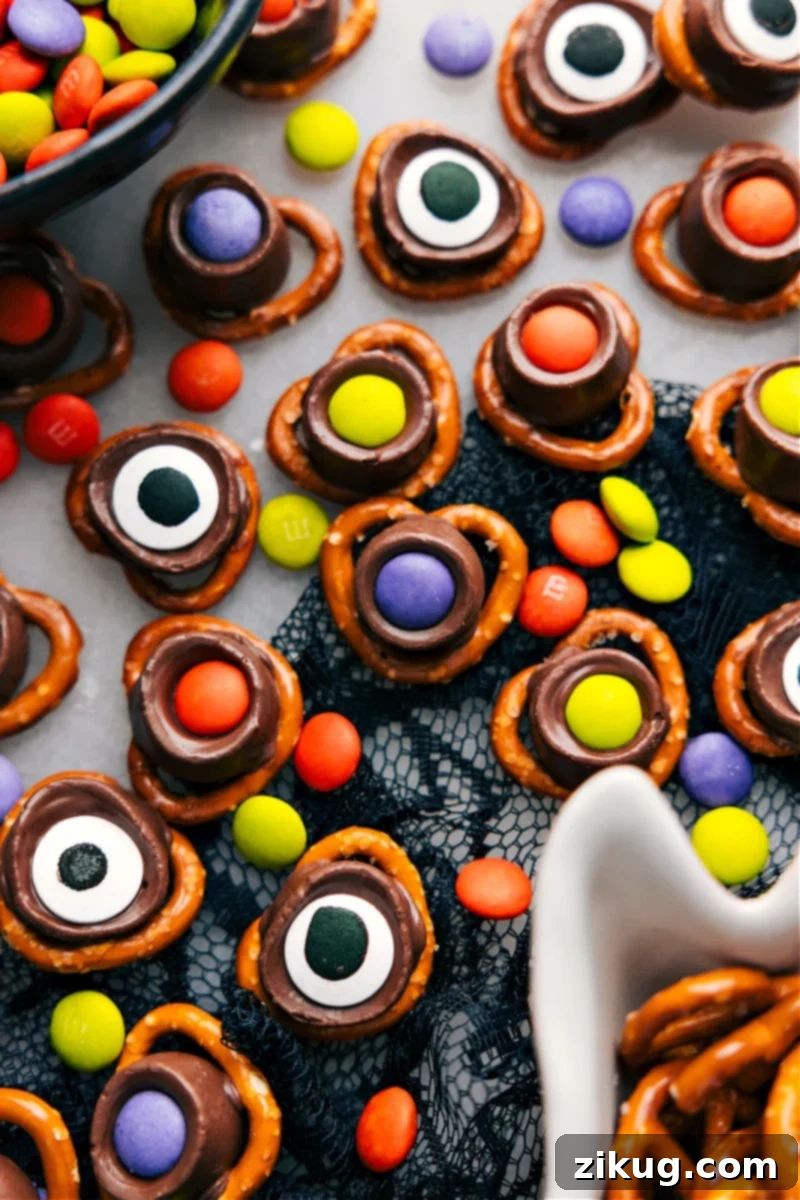
- Rolos: These caramel-filled chocolates are essential for the Monster Eyes, providing a soft, sweet base. Make sure they are fresh and unwrapped before you begin. Fresh Rolos soften beautifully in the oven without fully melting, allowing you to easily press other candies into them for that iconic “eye” effect.
- M&M’s: A pop of color and texture for the Monster Eyes! You can use seasonal Halloween M&M’s for themed colors or simply sort regular packs to get those vibrant oranges, greens, and purples. They add a delightful crunch and color contrast against the Rolo and candy eyeball.
- Edible Candy Eyeballs: No spooky treat is complete without a pair of watchful eyes! You’ll need a mix of sizes: mini candy eyeballs are perfect for the Bat Bites, giving them a more delicate, realistic look, while larger candy eyeballs make the Monster Eyeballs truly stand out. An assorted pack is a smart buy if you’re making all four treats, offering convenience and variety.
Quick Tip: Finding Edible Eyes!
Struggling to locate those essential edible candy eyeballs? Don’t fret! Check the baking aisle of your local grocery stores, especially during the Halloween season, as they often stock seasonal decorations. Craft stores like Hobby Lobby and JoAnn’s are also fantastic resources, often carrying a wide variety of sizes and styles. For the ultimate convenience, online shopping platforms offer an extensive selection, often including assorted packs perfect for multiple spooky creations, delivered right to your door!
Foolproof Tips for Halloween Treat Making Success
Achieving perfect, picture-worthy Halloween treats is easier than you think with these expert tips. Follow these guidelines to ensure your spooky snacks come together smoothly, look fantastic, and bring maximum joy with minimum stress:
- Strategic Preparation (Mise en Place): Before you even start assembling, gather all your ingredients and tools. Unpack candies, prepare your frosting bags, and lay out your workspace. This “mise en place” approach streamlines the process, especially when working with kids, and prevents frantic searching for items mid-assembly. Having everything within reach makes the experience much more enjoyable.
- The Power of Chilling: If you find your candies or assembled treats are becoming too soft or starting to melt due to warm hands or a warm kitchen, don’t hesitate! Simply pop them into the refrigerator for a few minutes. This quick chill will help firm them up, making them easier to handle and preventing any messy mishaps, especially for frosted items or those using melted chocolate.
- Piping Bag Alternative: No fancy piping bag? No problem! A simple zip-top plastic bag works perfectly. Spoon your frosting or melted chocolate into one corner of the bag, twist the top to secure, and then snip a very small piece off the corner. This creates a makeshift piping tool that offers surprising precision for details or larger dollops.
- Gentle Oreo Separation: When separating Oreo Thins for bat wings, delicacy is key. Use a thin table knife or a pastry scraper to gently twist and pry apart the cookie halves. This minimizes breakage and ensures you get clean, usable “wings” for your bats. Remember, a few might break, but gentle handling significantly improves your success rate.
- Rolos: Soften, Don’t Melt: For the Monster Eyes, the goal is to soften the Rolos just enough to press the M&M’s and candy eyeballs into them, not to melt them completely. Watch them closely in the oven; they should look slightly glossy and pliable, but still hold their distinct Rolo shape. Over-baking will result in a messy puddle that won’t hold the other candies.
- Assembly Line Efficiency: If you’re planning to make a large batch of any single treat, setting up an assembly line is a game-changer. Lay out all the bases (e.g., Oreo Thins for Witch’s Hats) on a parchment-lined tray. Then, go down the line adding the next ingredient to all of them, followed by the next, and so on. This method is much faster, more consistent, and helps maintain a steady workflow.
- Involve the Kids: These treats are designed for little hands! Let children take on age-appropriate tasks like unwrapping candies, shaking on sprinkles, or carefully placing candy eyeballs. Not only does this make the process more enjoyable for them, but it also creates wonderful Halloween memories and fosters a love for kitchen creativity. Always supervise closely, especially when handling smaller candies or hot items.
- Experiment with Colors: Don’t limit yourself to traditional Halloween colors! Think outside the box with purple frosting, neon green melted chocolate, or even black sprinkles for a truly unique and eerie touch.
Step-by-Step Guide: Crafting Your Easy Halloween Treats
You’ll be astonished at how quickly these fun Halloween treats come together. With minimal steps and absolutely no baking for most, you’ll have a spooky spread ready to impress your guests and delight your family in no time. Let’s get crafting!
- Monster Eyeballs: Begin by arranging pretzel twists on a parchment-lined baking sheet. Unwrap your Rolos and place one on each pretzel. Briefly bake them in a preheated oven at 250°F (120°C) for just 2-4 minutes, or until the Rolos are soft and glossy but still holding their shape. Immediately out of the oven, gently press an M&M into the center of each softened Rolo, followed by a large candy eyeball. The residual heat will help them adhere perfectly. Allow them to set at room temperature for about an hour, or chill them in the fridge until the chocolate firms up completely.
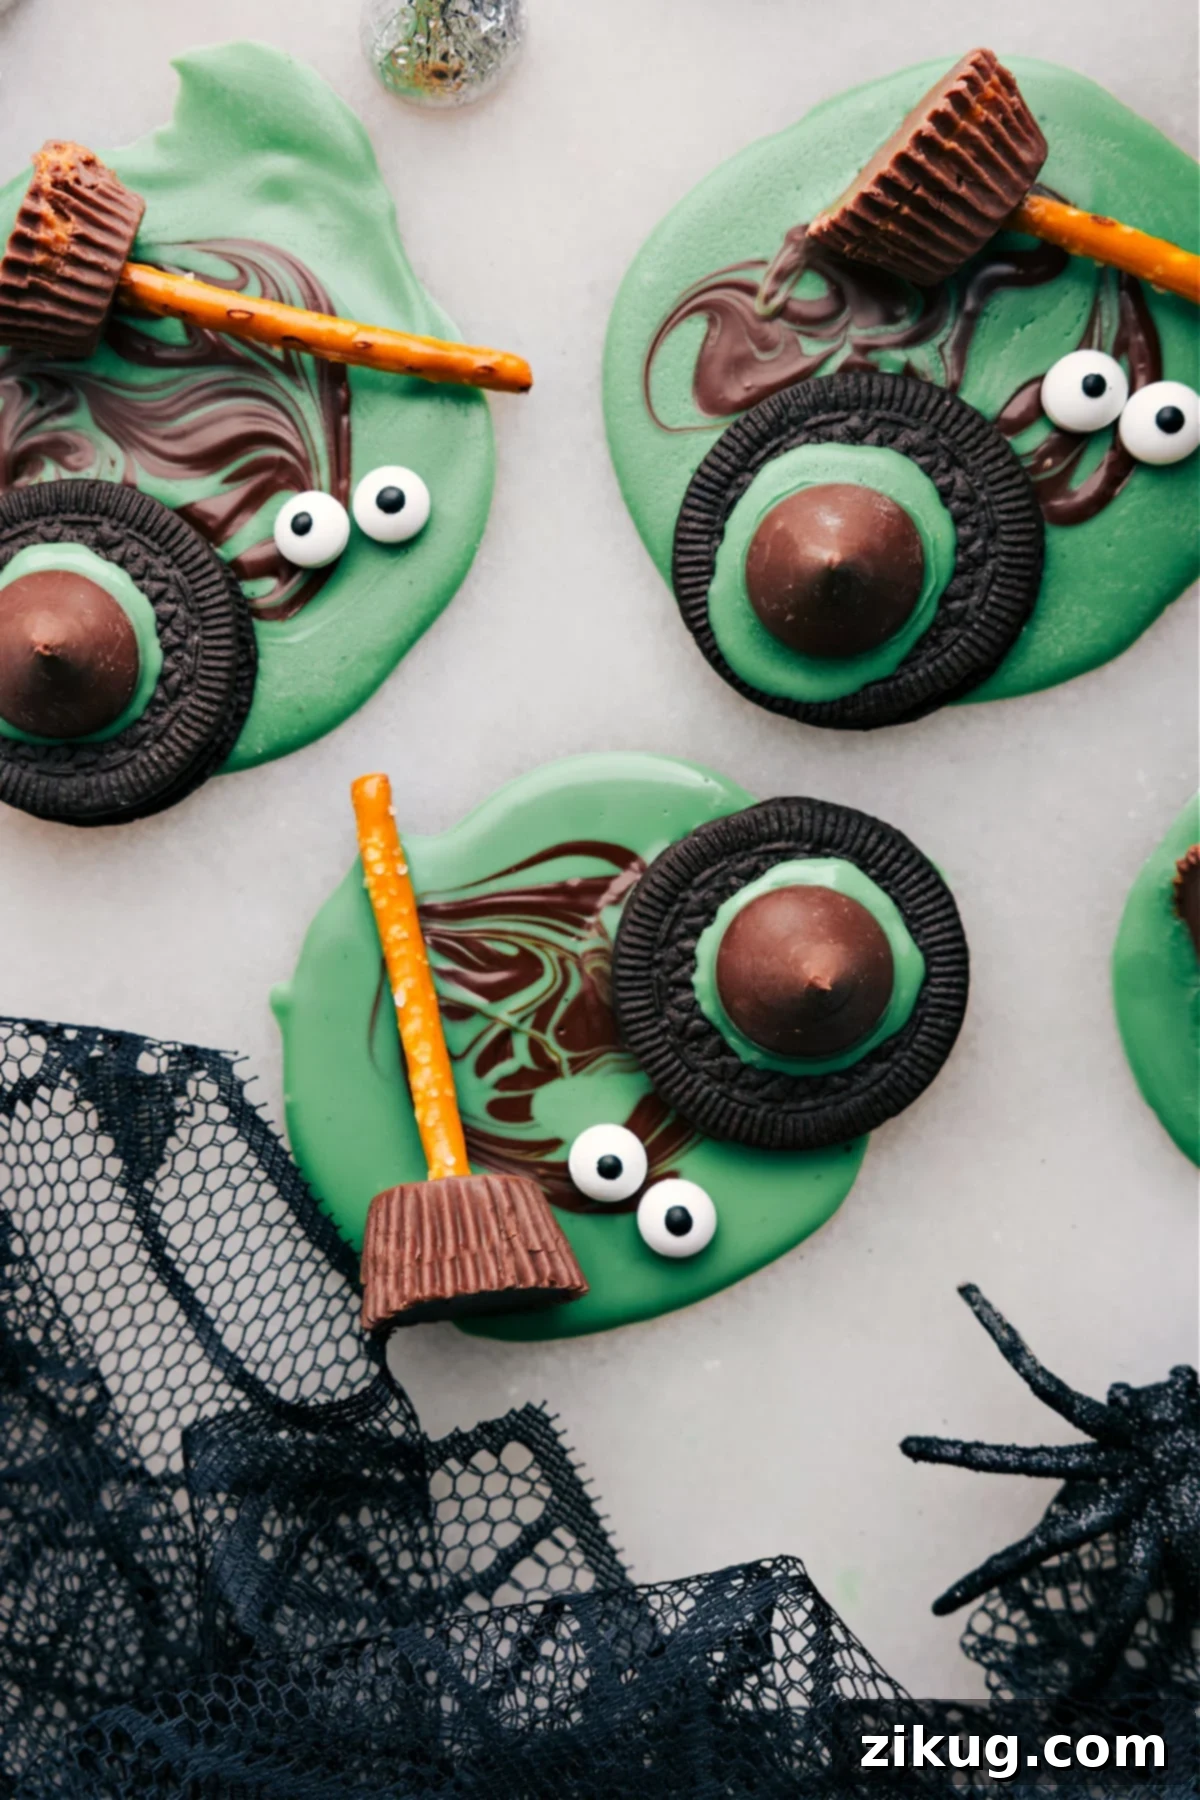
- Witch’s Hats: For these iconic hats, start by coloring your cream cheese frosting (if desired) with vibrant gel food coloring – green and orange are perfect Halloween hues, or go for a mystical purple! Transfer the colored frosting to a piping bag or a zip-top bag with a snipped corner. Place an Oreo Thin cookie on your serving platter as the brim. Pipe a generous dollop of frosting directly in the center of the Oreo. Carefully press an unwrapped chocolate kiss onto the frosting to form the pointed hat. For an extra touch of magic, sprinkle Halloween-themed sprinkles around the frosting base before it sets.
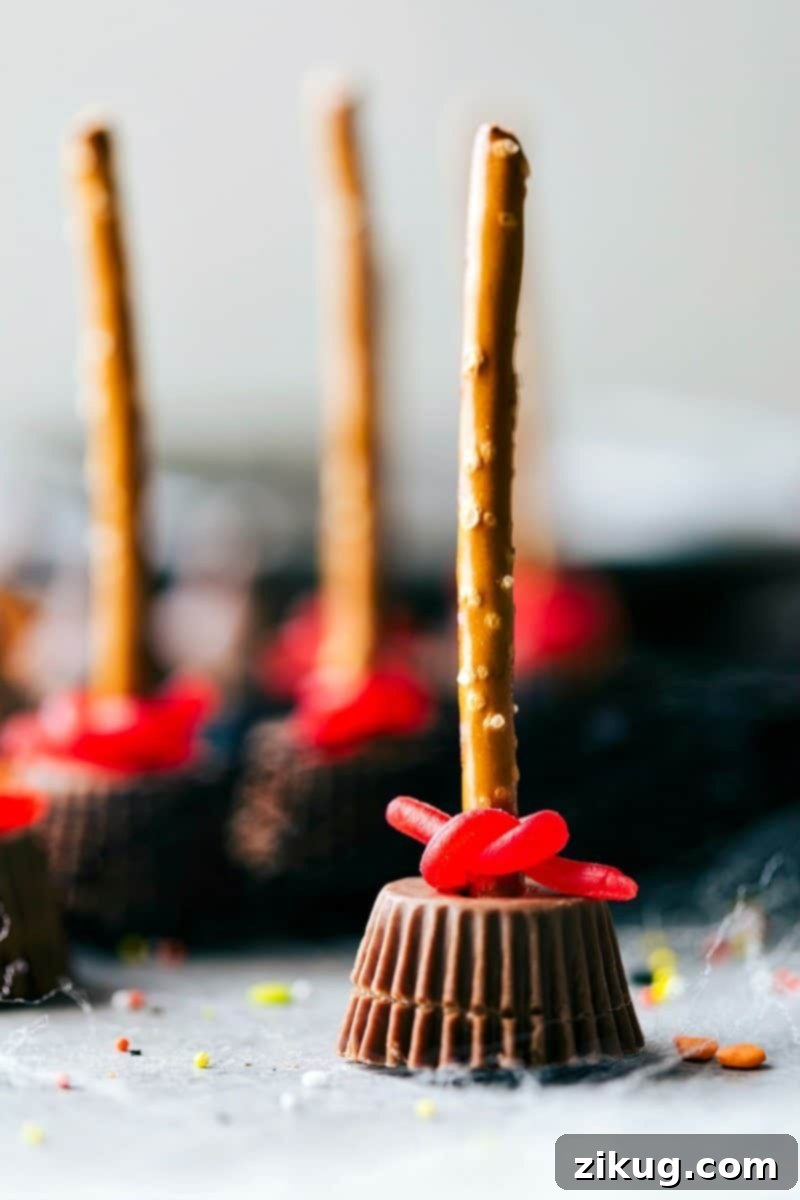
- Witch’s Brooms: These charming treats start with unwrapped Miniature Reese’s Cups, turned upside down. Gently push a pretzel stick into the center of each Reese’s cup, taking care not to push all the way through, to create the broom handle. Next, take your pull-apart licorice and separate a strand, then cut it into thirds or halves depending on desired bristle length. Wrap one of these smaller licorice pieces around the pretzel stick where it meets the Reese’s cup, creating the broom’s bristles. Secure it with a gentle squeeze or by tucking the ends, and trim any excess if needed for a neat, realistic look.
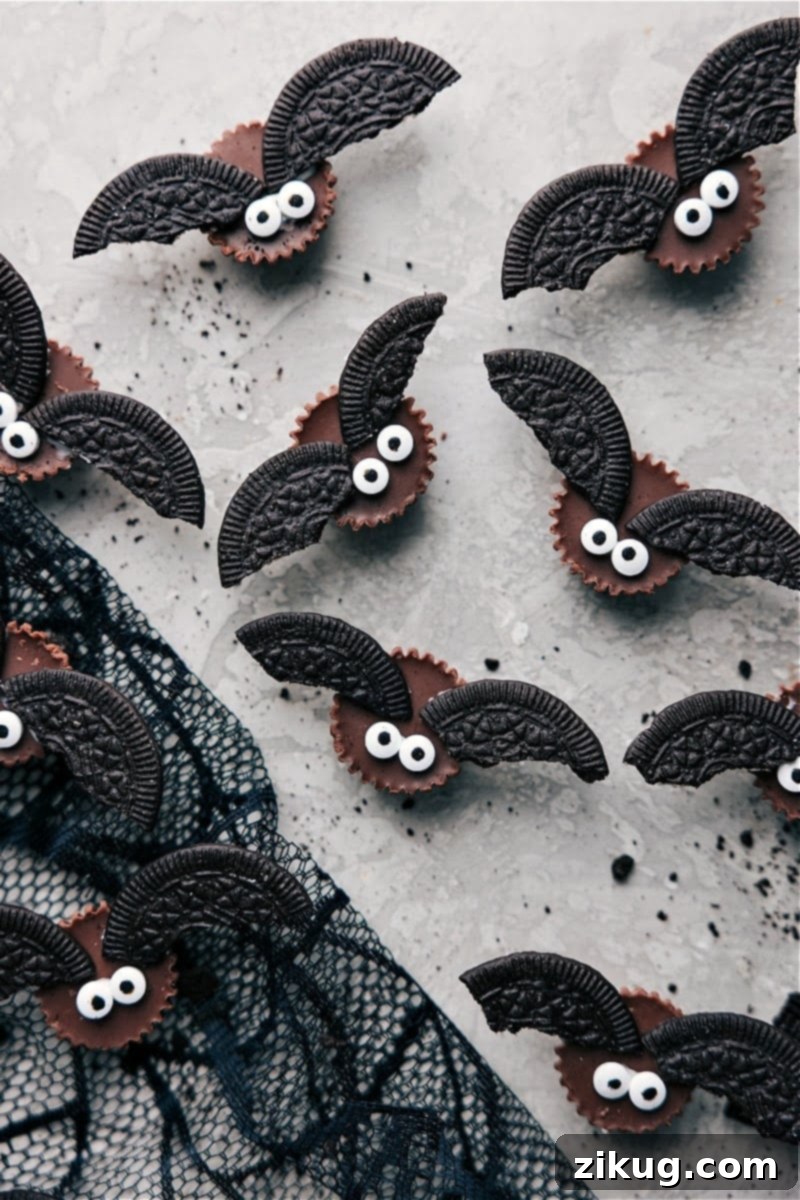
- Bat Bites: Unwrap each Reese’s Cup. Carefully separate your Oreo Thins, scraping off any cream filling (you can save this for another treat or enjoy it as a chef’s snack!). Break each Oreo half into two pieces to create bat wings – be gentle, as some might break imperfectly, but you’ll get the hang of it with practice. Melt white chocolate chips in short bursts in the microwave (25-second intervals), stirring between each until smooth. Transfer to a small piping bag or a snipped corner of a zip-top bag. Pipe a small dot of melted chocolate onto each side of the Reese’s cup. Immediately press an Oreo wing into each dot. Pipe two tiny dots of chocolate just below the wings and secure two mini candy eyeballs to create the bat’s adorable, yet spooky, face.
Creative Variations & Customizations for Your Spooky Treats
Don’t be afraid to unleash your inner mad scientist and experiment with these recipes! Halloween is all about creativity and personal flair. Try different Oreo flavors (like red velvet for a vampiric touch or mint for a spooky green base), swirl in various frosting flavors (like chocolate or peanut butter), or use a wider array of Halloween-themed sprinkles with unique shapes. You can also swap out chocolate kisses for other pointed candies, or even add small candy spiders, gummy worms, edible glitter, or small fondant cutouts for extra frightful flair. Consider drizzling melted dark chocolate over the white chocolate for added contrast or adding a tiny candy corn “nose” to your bats. The possibilities are endless when it comes to customizing these fun treats!
More Spooky & Simple Halloween Treat Ideas:
Halloween
Even Easier: 3-Ingredient Halloween Treat Ideas
Halloween
Spooky & Sweet Ghost Cookies
Halloween
Quick & Easy Halloween Cupcakes
Desserts
Fun & Festive Halloween Rice Krispie Treats
Easy Halloween Treats
By Chelsea Lords
Whip up spooky fun with these Easy Halloween Treats! With 4 ingredients or less, make Monster Eyeballs, Witch’s Hats, Witch’s Brooms, and Bat Bites—no baking required!
Prep Time: 30 minutes
Total Time: 30 minutes
Yields: Approximately 10 servings (or however many you wish to assemble/make)
Equipment
- Resealable plastic bag (for piping frosting or melted chocolate)
- Large sheet pan (approximately 15″ x 21″ or similar size)
- Parchment paper
- Small microwave-safe bowl (for melting chocolate)
- Spoon or small spatula
Ingredients
For Witch’s Hats:
- Oreo THINS cookies
- Cream cheese frosting (homemade or quality store-bought)
- Chocolate candy kisses (Hershey’s Kisses or similar)
- Food coloring (gel colors like green and orange recommended)
- Halloween sprinkles (optional, for decoration)
For Witch’s Brooms:
- Miniature Reese’s Cups (unwrapped)
- Pretzel sticks (mini size)
- Pull-apart licorice (e.g., Twizzlers)
For Bat Bites:
- Miniature Reese’s Cups (unwrapped)
- Oreo THINS cookies (crucial for lightweight wings)
- 3 tablespoons white chocolate chips (good quality for smooth melting)
- Candy eyeballs (miniature size for best effect)
For Monster Eyes:
- Pretzel snaps or twists (not straight pretzel sticks)
- Rolos (unwrapped)
- M&M’s (use Halloween colors or sort regular packs)
- Large candy eyeballs
Instructions
- Witch’s Hats: Divide cream cheese frosting into two bowls. Dye one bowl green and the other orange using gel food coloring to achieve vibrant hues. Transfer each colored frosting to separate resealable plastic bags, remove excess air, seal, and snip off a small corner from each bag for piping. Place an Oreo Thin cookie on your serving platter. Pipe a generous dollop of frosting directly in the center of the Oreo. Gently press an unwrapped chocolate kiss into the frosting to form the pointed hat. Optionally, add Halloween sprinkles around the frosting base for extra flair before the frosting sets.
- Witch’s Brooms: Turn Reese’s Cups upside down on your work surface. Carefully push one pretzel stick into the center of each cup to form the broom handle, ensuring it’s secure but doesn’t pierce through the bottom. Take your pull-apart licorice and separate a strand, then cut it into thirds or halves (depending on the desired bristle length). Wrap one of these smaller licorice pieces around the pretzel stick where it meets the Reese’s cup, creating the broom’s bristles. Secure it with a gentle squeeze or by tucking the ends, and trim any excess if needed for a neat, realistic look.
- Bat Bites: Unwrap each Reese’s Cup. Carefully separate your Oreo Thin cookies, gently twisting to minimize breakage. Scrape off the cream filling (you can discard this or save it for another use). Break each Oreo half into two pieces to create bat wings – work patiently, as some may break irregularly, but you’ll get the hang of it. Melt white chocolate chips in the microwave in 25-second bursts, stirring well between each interval until the chocolate is completely smooth. Transfer the melted white chocolate to a small piping bag or a zip-top bag with a snipped corner. Pipe a small dot of melted chocolate onto each side of the Reese’s cup. Immediately press an Oreo wing into each dot of chocolate. Pipe two tiny dots of chocolate just below the wings and secure miniature candy eyeballs to the Reese’s Cup to create the bat’s adorable face.
- Monster Eyes: Preheat your oven to 250°F (120°C). Line a large sheet pan with parchment paper. Arrange pretzel snaps or twists evenly on the prepared sheet. Place an unwrapped Rolo on top of each pretzel. Bake for 2–4 minutes, or until the chocolates are soft and glossy but still holding their shape (they should not be completely melted). Immediately after removing from the oven, press an M&M into the center of each softened Rolo, followed by a large edible eyeball. The warmth of the Rolo will help the candies adhere. Let the treats set at room temperature for about an hour, or chill them in the fridge until the chocolate hardens completely.
Recipe Notes
Oreo THINS cookies: It’s important to stick to the THIN Oreos for both Witch’s Hats and Bat Bites. Their thicker counterparts tend to be too heavy and bulky, especially when creating delicate bat wings or trying to balance a chocolate kiss atop a cookie.
Reese’s Miniature Cups: For easier handling and to prevent melting or smudging during assembly, a quick tip is to chill your Reese’s cups in the refrigerator for about 15-30 minutes before you start working with them. This ensures they maintain their firm structure.
Edible candy eyeballs: Size truly matters for the visual impact of these treats. Opt for miniature eyes for the Bat Bites to give them a more fitting scale, and use the larger variety for the Monster Eyeballs to make them wonderfully grotesque and prominent. An assorted size pack is a perfect choice if you plan on making all four types of these easy Halloween treats!
Nutrition Note: The nutrition information provided below is an approximation and calculated specifically for one serving of the Oreo Witch Hats, as nutritional values can vary significantly between the different treats.
Storage: To keep your delicious creations fresh, store any leftover treats in an airtight container at room temperature for up to 3 days. If your home is particularly warm, or if your treats contain a significant amount of frosting or melted chocolate that might soften, refrigeration might be a better option to maintain their structure and freshness.
Nutrition Facts
Serving: 1 serving | Calories: 143 kcal | Carbohydrates: 18 g | Protein: 2 g | Fat: 7 g | Saturated Fat: 3 g | Polyunsaturated Fat: 0.6 g | Monounsaturated Fat: 0.6 g | Cholesterol: 5 mg | Sodium: 90 mg | Potassium: 125 mg | Fiber: 1 g | Sugar: 12 g | Vitamin A: 10 IU | Calcium: 6 mg | Iron: 0.7 mg
Nutrition information is automatically calculated and should be used as an approximation. Actual values may vary based on specific ingredients and brands used.
Enjoyed making these treats? We’d love to hear about your spooky creations! Share your experience and leave a comment below!
Creative Presentation Ideas to Elevate Your Halloween Treats
Once you’ve mastered crafting these easy Halloween treats, it’s time to think about presentation! Elevating your display can transform simple snacks into a show-stopping centerpiece for any Halloween party or family gathering. Here are some fun and spooky ideas to make your treats truly shine, ensuring they’re as visually captivating as they are delicious:
- Spooky Platters & Cobwebs: Lay your finished treats on large serving platters or trays that have been lined with dark-colored parchment paper or wax paper. Drape delicate, fake spider webs over and around the treats, perhaps adding a few plastic spiders or other creepy crawlies for extra eeriness. A dark tablecloth underneath will make the colors of your treats pop!
- Edible Graveyard Scene: Create an eerie graveyard on a large serving board! Crumble chocolate cookies (like Oreos without cream, or chocolate wafers) over the surface to mimic dark, rich “dirt.” Arrange your Witch’s Hats to look like miniature headstones, perhaps sticking small, food-safe labels into them with funny epitaphs. Add some gummy worms or candy skulls peeking out of the “dirt” for a truly gruesome, yet delicious, touch.
- Cauldron Bowls with Mystical Smoke: For a dramatic and enchanting effect, serve your treats from small, decorative mini cauldrons. Fill the bottom of the cauldrons with fluffy cotton candy to create the illusion of “smoke” or mist billowing from a witch’s brew. Gently place your treats on top of the cotton candy, making it look as if they are mysteriously emerging from the magical concoction.
- Glowing Trays for a Creepy Ambiance: Add an otherworldly glow to your dessert table. Place small, battery-operated LED tea lights or glow sticks underneath a layer of parchment paper on your serving tray. Arrange your treats on top. The soft, flickering light will cast a spooky ambiance, making your Monster Eyeballs look even more unsettling and drawing guests in for a closer look.
- Mummy Wrap for Individual Servings: If you’re looking for individual, grab-and-go treats, try giving them a mummy makeover! Wrap each treat loosely with thin strips of white crepe paper streamers or even white licorice, leaving a small gap for a pair of mini googly eyes to peek through. Secure the ends with a tiny dab of frosting or a discreet piece of tape. This adds a cute, yet spooky, personal touch perfect for party favors or school treats.
- A Potions Laboratory Display: Arrange your treats alongside small glass bottles labeled as “potions” (filled with colored juices, sparkling cider, or even just tinted water), beakers, test tubes, and maybe even some strategically placed dry ice (always use proper safety precautions and adult supervision) to create a bubbling, mad scientist lab theme. This immersive display will impress your guests and enhance the overall Halloween atmosphere.
- Haunted Forest Setting: Utilize natural elements to create a rustic, spooky feel. Gather some cleaned, food-safe twigs and small branches. Use edible moss (like green-tinted shredded coconut or crushed green wafer cookies) to create a forest floor. Hang Bat Bites from the branches or nestle Witch’s Brooms amongst the foliage for a truly enchanted and eerie haunted forest display.
These easy, no-bake Halloween treats are more than just snacks; they’re an invitation to create joyful, spooky memories with your loved ones. With minimal effort and maximum fun, you can transform simple ingredients into a festive feast that will delight everyone, young and old. So, gather your ingredients, unleash your creativity, and get ready for a Halloween celebration filled with sweet, eerie enchantment! Happy haunting and happy treat-making!