

Delightful 3-Ingredient Christmas Candies: Your Ultimate Guide to Easy Holiday Treats
The holiday season brings with it a special kind of magic, often found in the simple joys of homemade treats. This year, simplify your festive baking with our incredible collection of easy 3-ingredient Christmas candies! These delightful recipes prove that you don’t need a pantry full of specialized ingredients or hours in the kitchen to create something truly spectacular. Perfect for sharing with loved ones, bringing to holiday gatherings, gifting to neighbors, or simply indulging in yourself, these confections are designed for maximum flavor with minimal effort. Get ready to embrace the spirit of the season with these quick, delicious, and utterly delightful homemade confections!

Charming White Chocolate Peppermint Hearts
Imagine sweet, creamy white chocolate infused with the refreshing zing of peppermint, shaped into festive hearts and adorned with vibrant sprinkles. These White Chocolate Peppermint Hearts are not just candies; they’re tiny expressions of holiday cheer, incredibly simple to make, and visually stunning. Whether you’re planning a holiday cookie exchange, looking for a unique edible ornament, or just want a quick, delicious treat, these hearts are an absolute must-try. Their delicate flavor and eye-catching design make them an instant favorite for all ages, perfect for spreading holiday cheer with every bite.
Quick Tips for Perfect Peppermint Hearts:
- I strongly recommend using a high-quality white chocolate for these candies. Brands like Guittard or Ghirardelli offer superior flavor and a much smoother, more consistent melt, which is crucial for piping perfect hearts. You can use either chocolate chips or baking bars, as both will yield excellent results.
- Always line your baking pan with parchment paper. This essential step ensures the peppermint hearts release easily from the pan once set, preventing any sticking or breakage and making cleanup a breeze.
- For an extra special touch, consider turning these into edible ornaments! Simply insert a loop of kitchen string or thin ribbon into the melted chocolate before it fully sets. Once hardened, these charming candy hearts can be hung on your Christmas tree for a beautiful and delicious decoration.
Shop Ingredients:
- Festive Christmas Sprinkles
- Miniature Candy Canes

White Chocolate Peppermint Hearts
By Chelsea Lords
These adorable treats feature white chocolate and festive sprinkles carefully placed inside two candy canes to form a heart shape. They are simple, elegant, and perfect for the holidays!
Average rating: 4.69 from 16 votes
Prep Time: 10 minutes
Setting Time: 20 minutes
Total Time: 30 minutes
Servings: 10 candy cane hearts
Print Recipe
Equipment
- Sheet pan (15″ x 10″)
- Parchment paper
Ingredients
- 20 miniature candy canes, unwrapped
- 6 ounces high-quality white chocolate (chips work and taste best!)
- Holiday sprinkles
- 1/2 to 1 teaspoon vegetable oil (optional, for thinning if needed)
Instructions
- Prepare a sheet pan by lining it with parchment paper; set aside.
- Arrange the unwrapped candy canes on the prepared tray, placing two together to form heart shapes across the pan.
- Carefully melt the white chocolate in the microwave. Heat in short bursts of 15 seconds, stirring thoroughly for 10-15 seconds after each burst. This patient melting technique is key to preventing the chocolate from burning and ensuring a smooth, glossy consistency.
- If your melted chocolate appears too thick, you may add 1/2 to 1 teaspoon of vegetable oil, very slowly, stirring well until it reaches your desired, slightly thinner consistency. This step is entirely optional.
- Pour the melted chocolate into a sturdy plastic bag and snip off a small tip from one corner with scissors to create a piping bag.
- Pipe the melted white chocolate into the centers of each candy cane heart shape. Gently wiggle the candy canes slightly to encourage the chocolate to settle smoothly and evenly within the heart.
- Immediately sprinkle with your favorite holiday sprinkles before the chocolate has a chance to set. This ensures they adhere well.
- Allow the candy hearts to set completely at room temperature or chill them in the refrigerator for quicker hardening before handling or packaging.
Recipe Notes
Storage: Store any leftover White Chocolate Peppermint Hearts in an airtight container at room temperature for up to one week. To maintain their quality and prevent melting, ensure they are kept in a cool, dry place away from direct sunlight or heat. For extended freshness, you can refrigerate them for up to two weeks.
Nutrition (Approximate per serving)
Serving: 1 serving | Calories: 99 kcal | Carbohydrates: 16g | Protein: 0.6g | Fat: 3g | Saturated Fat: 1g | Polyunsaturated Fat: 0.3g | Monounsaturated Fat: 1.25g | Cholesterol: 2mg | Sodium: 8mg | Potassium: 28mg | Fiber: 0.02g | Sugar: 16.3g | Vitamin A: 10IU | Calcium: 20mg
Nutrition information is automatically calculated and should only be used as an approximation.

Festive Rudolph Noses: A Sweet & Salty Holiday Hit
Bring a smile to everyone’s face with these adorable Rudolph Noses Christmas Candies! Combining the irresistible crunch of pretzels with the melty goodness of chocolate and the colorful surprise of an M&M, these treats are a symphony of sweet and salty. They’re unbelievably quick to assemble, making them ideal for last-minute party contributions, children’s holiday projects, or a fun, themed snack for movie night. Get ready for a treat that’s as charming as it is delicious, capturing the playful spirit of the season with their iconic red nose!
Expert Tips for Rudolph Noses:
- While regular twist pretzels work perfectly fine, I find that square pretzels are ideal for these Christmas candies. Their flat surface provides a more stable base for the chocolate and M&M, ensuring a neat and uniform appearance.
- To maintain the classic sweet-and-salty balance, always stick with plain pretzels rather than butter-flavored varieties. The butter flavor can sometimes overpower the chocolate and M&M.
- These cute Rudolph Noses aren’t just for snacking! They make an excellent edible table centerpiece for your holiday gatherings. For added visual appeal and variety, consider alternating between Hershey’s Kisses, Hugs, or Rolos. The different colors and shapes of chocolate will create a more dynamic and inviting display.
Shop Ingredients:
- Rolo Caramels (or Hershey’s Kisses/Hugs)
- Christmas M&Ms

Rudolph Noses
By Chelsea Lords
Rudolph Noses are the easiest festive treat! Melt a Hug, Kiss, or Rolo onto a pretzel, press in a holiday M&M, and let it set. They are a delightful combination of sweet, salty, and totally snackable!
Average rating: 4.86 from 14 votes
Prep Time: 5 minutes
Cook Time: 4 minutes
Total Time: 9 minutes
Servings: 25 candies
Print Recipe
Equipment
- Sheet pan (15″ x 10″)
- Parchment paper
Ingredients
- 25 pretzels (square or twist varieties work, squares are preferred for stability)
- 25 Hershey’s Hugs, Kisses, or Rolos (whichever you prefer; see note 1)
- 25 holiday M&M’s
Instructions
- Preheat your oven to 350°F (175°C). It’s important to avoid using convection settings for this recipe (see note 2).
- Line a large sheet pan with parchment paper to prevent sticking, and arrange the pretzels evenly on the tray.
- Unwrap your chosen chocolates (Hugs, Kisses, or Rolos) and place one on top of each pretzel.
- Bake for 3-4 minutes, or just until the chocolates are soft and glossy but have not fully melted or lost their shape. Overbaking can cause crumbling.
- Immediately upon removing the pan from the oven, gently press an M&M candy into the center of each softened chocolate, creating Rudolph’s iconic red nose.
- Allow the chocolate to harden completely at room temperature, or place them in the refrigerator for a quicker set, before serving or storing.
Recipe Notes
Note 1: When selecting your chocolates, I recommend sticking to solid chocolate varieties like standard Hershey’s Kisses or Hugs. I previously tried caramel kisses, and the caramel tended to ooze out, making a mess. Rolos also work well as they have a contained caramel center.
Note 2: If you find that your kisses (or other chocolates) are crumbling or becoming too soft, it usually indicates that the oven was too hot or the baking time was too long. For best results, I highly recommend testing one Rudolph Nose first. If it crumbles, reduce the baking time for the remaining candies. Also, avoid using convection oven settings, as they can cause uneven heating and quick melting.
Storage: To store any leftover Rudolph Noses, keep them in an airtight container at room temperature for up to 3 days. For longer-lasting freshness, refrigerate them for up to two weeks. If you wish to freeze them, place them in a freezer-safe bag or container and allow them to thaw at room temperature before enjoying.
Nutrition (Approximate per serving)
Serving: 1 serving | Calories: 55 kcal | Carbohydrates: 9g | Protein: 0.9g | Fat: 1g | Cholesterol: 0.8mg | Sodium: 86mg | Fiber: 0.3g | Sugar: 4.4g
Nutrition information is automatically calculated and should only be used as an approximation.
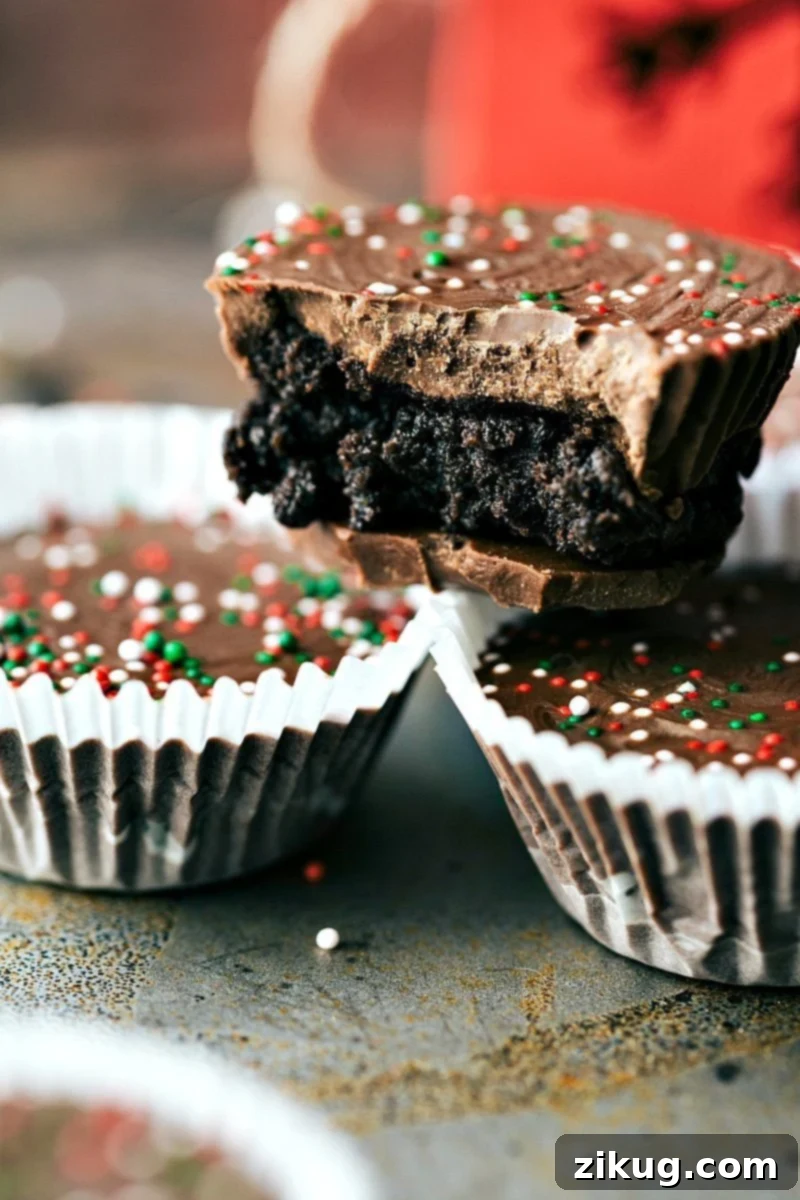
Irresistible Thin Mint Oreo Cups: A Mint-Chocolate Dream
If you’re a fan of the classic mint-chocolate combination, these Thin Mint Oreo Cups are about to become your new holiday obsession. Layers of rich Andes Mint chocolate encase a creamy, minty Oreo filling, creating a decadent bite-sized dessert that’s both refreshing and utterly satisfying. These cups are surprisingly easy to create, requiring no baking and minimal fuss, making them perfect for busy holiday schedules. They make for sophisticated yet simple additions to any holiday dessert platter or a delightful personal indulgence. Prepare to fall in love with this harmonious blend of flavors and textures!
Helpful Tip for Thin Mint Cups:
- You can easily locate Andes Mint baking chips in the baking aisle of most grocery stores, typically alongside other chocolate chip varieties. Look for them in a distinctive green bag – they’re key to achieving that perfect minty flavor!
Shop Ingredients:
- Christmas Sprinkles
- Oreos (or other chocolate sandwich cookies)

Thin Mint Cups
By Chelsea Lords
These Thin Mint Cups are a chocolate-minty dream! A creamy Oreo-mint filling is sandwiched between layers of smooth Andes Mint chocolate. Easy to make, fun to eat, and perfect with sprinkles on top!
Average rating: 4.82 from 16 votes
Prep Time: 20 minutes
Total Time: 20 minutes (plus chilling time)
Servings: 6 servings
Print Recipe
Equipment
- Mini muffin pan
- Mini cupcake liners
- Blender or food processor
Ingredients
- 16 Oreos or chocolate sandwich cookies
- 4 ounces cream cheese, softened to room temperature
- 1 to 2 bags Andes Creme De Menthe baking chips (see note 1 for quantity)
- Sprinkles (optional, for decoration)
Instructions
- Prepare a mini muffin pan by lining each cavity with mini muffin papers. This will make removing the cups much easier.
- In a blender or food processor, pulse the chocolate sandwich cookies until they form fine crumbs. There’s no need to separate the cookie from the creme filling.
- Transfer the cookie crumbs to a bowl. Add the room-temperature cream cheese and beat the mixture together until a thick, uniform dough forms.
- Chill the cookie dough for at least 30 minutes in the refrigerator. This will make it easier to handle and shape.
- While the dough is chilling, begin melting the Andes Mint baking chips. Start with one bag. Place the chips in a large, microwave-safe bowl and microwave in 15-second bursts, stirring thoroughly for 10-15 seconds between each burst, until completely smooth and melted.
- Spoon a small amount of the melted chocolate into the bottom of each prepared mini muffin liner. You only need enough to create a thin base layer.
- Allow this chocolate layer to set completely. If you’re working quickly, Andes Mint chips harden quite fast; if they start to solidify in the bowl, simply pop them back into the microwave for another 15 seconds to re-melt.
- Remove the chilled cookie dough from the fridge. Form it into small balls, then flatten each ball into a thin, completely flat disc. Place one disc of cookie dough on top of the set chocolate layer in each muffin liner.
- Spoon more melted Andes Mint chocolate over the cookie dough discs, completely covering them to form the top layer of the cup.
- If desired, immediately add sprinkles to the top of each cup for a festive touch before the chocolate sets.
- Allow the Thin Mint Cups to set completely at room temperature, or in the refrigerator for faster results. Once firm, they are ready to enjoy!
Recipe Notes
Note 1: The exact quantity of Andes Mint baking chips required can vary. If you prefer a generous amount of chocolate in your cups, you might use between 1 1/2 to 2 bags. This also depends on the size you make your Oreo filling discs and the overall size of your final cups. It’s always a good idea to have a little extra on hand.
Storage: To store any leftover Thin Mint Cups, keep them in an airtight container at room temperature for up to 3 days. For longer storage, refrigerate them for up to a week. These delightful treats also freeze exceptionally well; place them in a freezer-safe bag or container for up to a month, then simply thaw them at room temperature before enjoying.
Nutrition (Approximate per serving)
Serving: 1 serving | Calories: 276 kcal | Carbohydrates: 30g | Protein: 2g | Fat: 16g | Saturated Fat: 10g | Polyunsaturated Fat: 0.8g | Monounsaturated Fat: 3g | Trans Fat: 0.4g | Cholesterol: 16mg | Sodium: 121mg | Potassium: 61mg | Fiber: 1g | Sugar: 23g | Vitamin A: 138IU | Calcium: 34mg | Iron: 1mg
Nutrition information is automatically calculated and should only be used as an approximation.
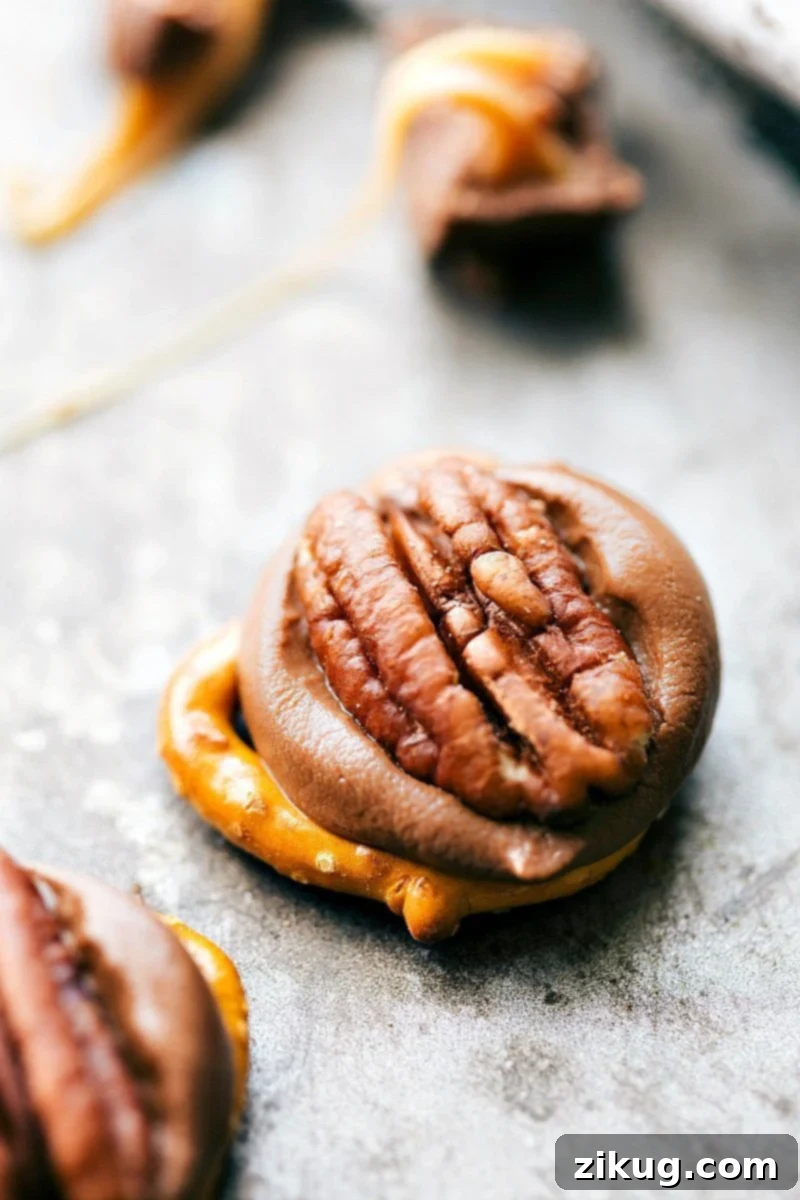
Classic & Easy Chocolate Turtles: A Timeless Holiday Indulgence
Embrace the timeless appeal of chocolate turtles with this incredibly simple, 3-ingredient recipe. Salty pretzels provide a delightful crunch, chewy caramel Rolos melt into a rich, sweet core, and a crunchy pecan crowns each treat, creating a perfect balance of flavors and textures in every bite. These delightful treats are not only effortless to assemble but also evoke a sense of nostalgic holiday warmth. Ideal for gifting, party platters, or simply enjoying by the fireplace, these homemade chocolate turtles promise a satisfying and comforting experience that embodies the true spirit of Christmas. They’re a classic for a reason, and now they’re easier than ever to make!
Shop Ingredients:
- Twist Pretzels (or squares)
- Rolo Caramels
- Pecans (whole halves work best)

Turtles
By Chelsea Lords
These Turtles are the ultimate sweet-and-salty treat! Melted Rolos on pretzels get topped with a crunchy pecan for a quick, irresistible bite. Simple, delicious, and perfect for snacking!
Average rating: 4.86 from 14 votes
Prep Time: 10 minutes
Cook Time: 3 minutes
Total Time: 13 minutes
Servings: 25 turtles
Print Recipe
Equipment
- Sheet pan (15″ x 10″)
- Parchment paper
Ingredients
- 25 pretzels (twist or square; choose your favorite for texture)
- 25 unwrapped Rolos (caramel chocolate candies)
- 25 pecan halves
Instructions
- Preheat your oven to 350°F (175°C). Please refer to note 1 for important information regarding oven settings to prevent issues.
- Line a large sheet pan with parchment paper, which will prevent the candies from sticking and ensure easy removal. Arrange the pretzels in a single layer on the prepared tray.
- Unwrap each Rolo candy and place one Rolo on top of each pretzel.
- Bake for 3-4 minutes, or just until the Rolos are soft and slightly melted but still largely holding their shape. They should not be completely liquid.
- Immediately remove the pan from the oven. Gently press one pecan half into the center of each softened Rolo, creating the classic turtle shape.
- Allow the chocolate and caramel to harden completely at room temperature. For quicker setting, you can place the pan in the refrigerator for about 15-20 minutes.
Recipe Notes
Note 1: Occasionally, some users report issues with the chocolate “crumbling” or becoming grainy after baking. This is typically a sign that the oven was too hot, or the Rolos were baked for too long. To avoid this, I highly recommend performing a test run with just one turtle first. If it crumbles, reduce your baking time for the remaining candies. Also, for optimal results, avoid using convection oven settings.
Storage: To store any leftover homemade turtles, place them in an airtight container at room temperature for up to 3 days. For prolonged freshness, refrigeration is recommended, extending their shelf life to up to two weeks. If you plan to make them far in advance, they can be frozen in a freezer-safe bag or container for up to a month. Be sure to thaw them completely at room temperature before serving to enjoy their best texture and flavor.
Nutrition (Approximate per serving)
Serving: 1 serving | Calories: 55 kcal | Carbohydrates: 9g | Protein: 0.9g | Fat: 1g | Cholesterol: 0.8mg | Sodium: 86mg | Fiber: 0.3g | Sugar: 4g
Nutrition information is automatically calculated and should only be used as an approximation.
These 3-ingredient Christmas candy recipes offer a simple yet impactful way to celebrate the holiday season. Whether you’re a novice baker or a seasoned pro, these delightful treats are guaranteed to bring joy and sweetness to your home. Enjoy the process of creating these festive confections, and most importantly, savor every delicious bite with your loved ones!