
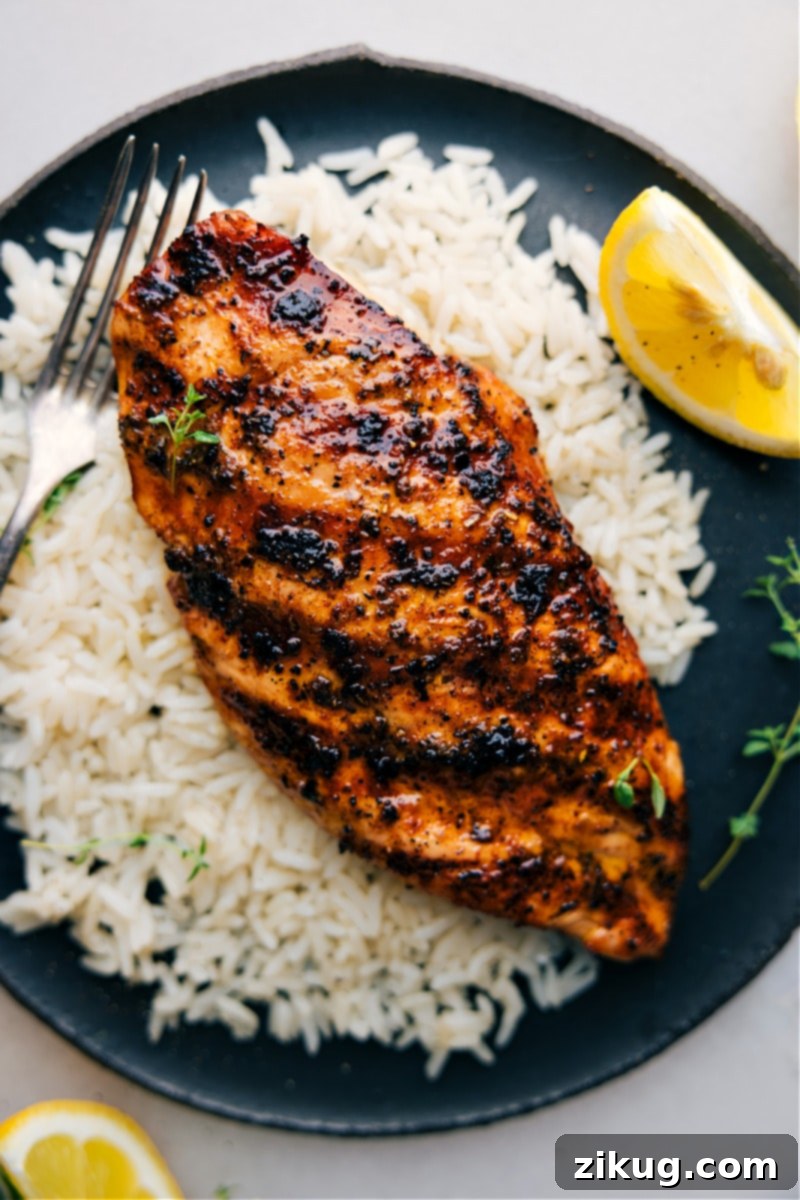
Unlock Unforgettable Flavor with The Best Chicken Rub Recipe
This **Chicken Rub Recipe** isn’t just a seasoning; it’s a flavor transformation. Crafted to deliver a bold, smoky, and perfectly balanced taste with just the right amount of sweetness and a delightful kick of heat, it promises to elevate your chicken dishes from ordinary to extraordinary. Get ready to experience chicken like never before—succulent, perfectly seasoned, and utterly irresistible!
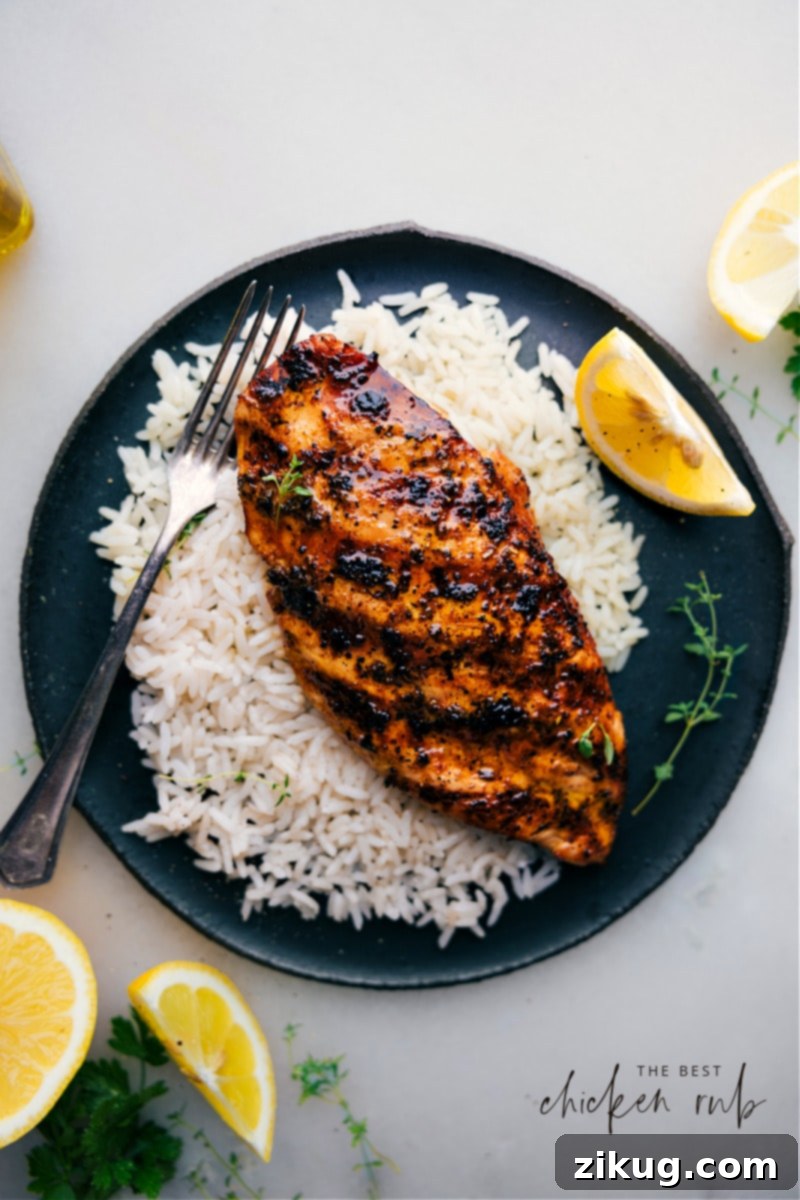

Author’s Note
The Secret to Instantly Flavor-Packed Chicken!
As a passionate home cook, I constantly seek ways to maximize flavor with minimal effort. While I adore a good chicken marinade – like my personal favorite, this Chipotle Chicken Marinade – there are days when marinating simply isn’t an option. Life gets busy, especially with the back-to-school rush or hectic weeknights. That’s precisely why I poured my heart into perfecting this ultimate chicken rub over the summer, and let me tell you, it’s been an absolute game-changer in my kitchen.
This dry rub recipe is designed for maximum impact and incredible convenience. It’s incredibly quick to mix up, transforming plain chicken into a gourmet meal in minutes. The balanced blend of Italian spices, smoky paprika, brown sugar, and a touch of red pepper flakes creates a complex flavor profile that adheres beautifully to the chicken, creating a tantalizing crust during cooking.
For ultimate meal prep efficiency, I highly recommend preparing several batches of this spice blend ahead of time. Simply measure all the dry seasonings into small zip-top bags or airtight containers. When dinner time rolls around, just grab a packet, add a splash of olive oil and red wine vinegar to create a quick wet paste (or use it dry for a traditional rub), apply it generously to your chicken, and you’re halfway to a sensational meal! This method ensures you always have delicious, flavor-boosting power at your fingertips, making weeknight cooking a breeze.
Quick Tip: Maximize Freshness and Flavor
If you decide to make a large batch of this incredible chicken rub, ensure its longevity and potency by storing it correctly. Transfer the mixed rub into an airtight container – a glass jar with a tight-fitting lid is ideal – and keep it in a cool, dark pantry. Properly stored, your homemade chicken rub will remain fresh and flavorful for up to 6 months, ensuring you’re always ready to whip up fantastic grilled chicken, baked chicken, or pan-seared delights whenever the craving strikes.
What is a Chicken Rub Recipe and Why Use One?
A chicken rub is a carefully curated blend of dried seasonings, herbs, and sometimes sugars that is applied to the surface of chicken (whether a whole bird or individual pieces like breasts, thighs, or wings) before it’s cooked. More than just adding flavor, a good rub serves several crucial purposes that dramatically enhance the final dish:
- Intensifies Flavor: This is the most obvious benefit. A rub infuses the meat with a concentrated burst of flavor that penetrates the surface and subtly seasons the meat beneath. The specific ingredients in the rub dictate the flavor profile, ranging from spicy and bold to sweet and savory, or a complex combination of all three.
- Creates a Delectable Crust: When exposed to heat during cooking (especially grilling, roasting, or pan-searing), the sugars and spices in the rub caramelize and crisp up. This forms a beautifully textured, richly colored, and incredibly flavorful crust on the exterior of the chicken, adding an irresistible textural contrast to the juicy interior.
- Enhances Moisture Retention: Key ingredients like salt play a vital role in tenderizing the meat and helping it retain its natural juices. Sugars in the rub also contribute to moisture retention and promote browning, leading to a juicier, more succulent final product that’s never dry.
Dry vs. Wet Rubs: Understanding the Difference
Chicken rubs come in two primary forms, each offering unique benefits:
- Dry Rub: This is the simplest form, where a mixture of powdered spices and dried herbs is directly sprinkled and massaged onto the chicken’s surface. Dry rubs are excellent for creating a crispy exterior and are ideal for grilling, smoking, or roasting where direct heat is applied.
- Wet Rub (or Paste): To create a wet rub, dry seasonings are combined with a liquid ingredient such as olive oil, vinegar, mustard, or even a touch of broth. This forms a thick paste that is then spread evenly over the chicken. Wet rubs help the flavors adhere more closely to the meat, can add extra moisture, and often contribute to a more tender result, especially when grilling or baking. Our recipe provides the base for a dry rub, but with the addition of oil and vinegar, it easily transforms into a flavorful wet rub!
Featured Comment
Tried this last night and this was so delicious. The chicken was flavorful and so moist. I will be making this again and again.
Thank you!– Carol
Mastering Your Chicken: Essential Chicken Rub Recipe Tips for Perfection
Achieving perfectly cooked, juicy, and flavorful chicken with this rub is simple when you follow a few key techniques. These tips will help you get the most out of every bite:
- Achieve an Even Coating: For consistent flavor and crust development, it’s crucial to spread the rub uniformly over every surface of the chicken. Don’t be shy – really massage the rub into the meat, ensuring all crevices and sides are covered. This creates a flavor barrier and ensures every bite is seasoned to perfection.
- Prepping Your Chicken:
- For Breasts: If using chicken breasts, especially thicker ones, consider slicing them horizontally to create two thinner cutlets or pounding them to an even thickness (about ¾ inch). This ensures faster and more even cooking, preventing one part from drying out while another finishes.
- For Thighs/Drumsticks: These cuts are more forgiving due to their fat content. Ensure the skin is crisp and flavorful by patting it very dry before applying the rub.
- Removing Tendons: For tenderloins, always remove the tough white tendon for a smoother eating experience.
- Optimal Grill Temperature: When grilling, maintaining a consistent medium-high heat (around 450°F / 230°C) is vital. This temperature allows the rub to caramelize and form a beautiful char without burning, while the inside cooks through to juicy perfection. Use a grill thermometer to monitor the temperature accurately.
- The Power of a Meat Thermometer: Never rely solely on visual cues or cooking time to determine doneness. An instant-read meat thermometer is your best friend in the kitchen. Insert it into the thickest part of the chicken, avoiding bones. Chicken is safely cooked when it reaches an internal temperature of 165°F (74°C). For grilling, I recommend removing the chicken from the heat when it hits 160°F (71°C), as carryover cooking will raise the temperature to the perfect 165°F.
- Resting is Non-Negotiable: This is perhaps one of the most overlooked, yet critical, steps. After removing the chicken from the heat, transfer it to a plate or cutting board and loosely tent it with foil. Allow it to rest for at least 5-10 minutes. This resting period allows the muscle fibers to relax and the juices to redistribute evenly throughout the meat, resulting in incredibly moist and tender chicken. Skipping this step means all those precious juices will run out onto your cutting board.
- A Clean, Oiled Grill is a Happy Grill: Before you even think about placing chicken on the grates, ensure your grill is spotless. Preheat your grill to high, then use a sturdy grill brush to scrape off any charred bits from previous cooks. Once clean, lightly oil the hot grates. This prevents the chicken from sticking, ensures those beautiful grill marks, and makes flipping much easier. I usually drench a rolled-up paper towel in a high-smoke-point oil (like vegetable or canola) and, holding it with tongs, rub it over the hot grates.
- Versatile Beyond the Grill: While this rub is spectacular for grilling, its versatility extends to various cooking methods. Feel free to use it when roasting chicken in the oven, broiling for a quick sear, or even pan-searing on the stovetop. Adjust cooking times and temperatures accordingly for your chosen method, always aiming for that 165°F internal temperature.
The Secret Weapon for Juicier Chicken: Using a Meat Mallet!
A simple yet incredibly effective tool in my kitchen arsenal is the **meat mallet**. This handy gadget is fantastic for preparing chicken breasts for grilling, roasting, or pan-searing. Its primary function is to flatten and tenderize meat, addressing two common challenges with chicken breasts: uneven cooking and lack of tenderness.
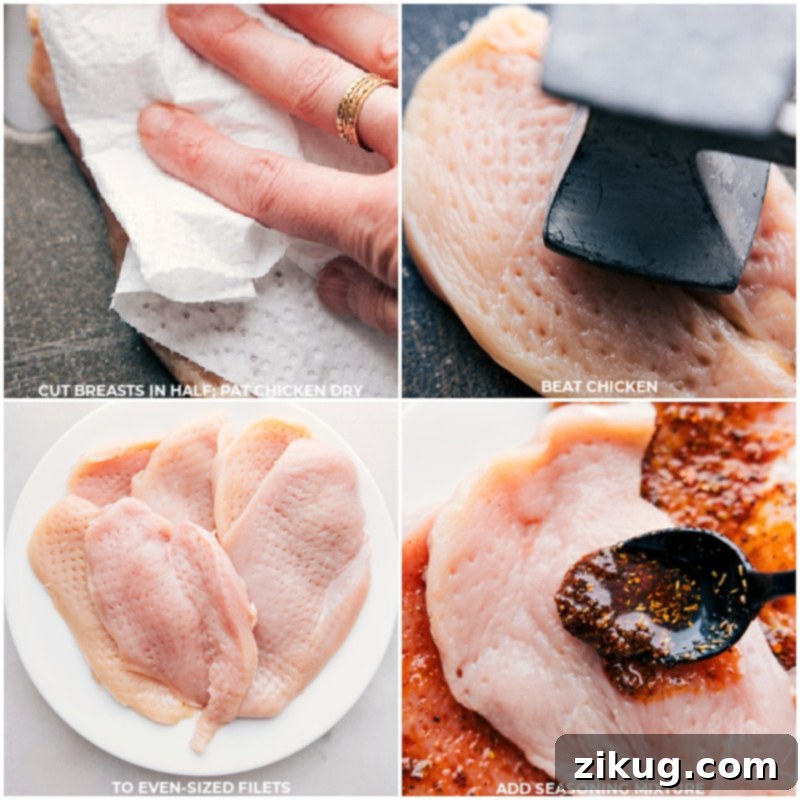
Most meat mallets feature two sides: a flat side for general flattening and a textured side with small spikes for tenderizing tougher cuts. For chicken breasts, I typically use the flat side to pound them to an even thickness, usually around ¾-inch. This ensures that every part of the chicken cooks at the same rate, preventing thinner edges from drying out while the thicker center finishes cooking.
Beyond even cooking, flattening chicken with a mallet helps the meat absorb marinades and rubs more effectively, leading to deeper flavor penetration. It also significantly speeds up cooking time, which is a huge plus on busy weeknights, and helps lock in those precious juices for a more succulent result. I honestly use mine every single time I prep chicken – it’s become one of my absolute favorite and most indispensable kitchen tools! If you don’t have a meat mallet, the bottom of a heavy frying pan or a rolling pin can work in a pinch.
Perfect Pairings: What To Serve With Grilled Chicken
Once you’ve mastered the art of perfectly seasoned and grilled chicken, the next step is to complete your meal with delicious and complementary side dishes. This versatile chicken pairs wonderfully with a variety of flavors and textures. Here are some of my top recommendations:
Green Salads
Fresh Garden Salad
A crisp, refreshing garden salad offers a delightful contrast to the rich flavors of the chicken. Its light, vibrant ingredients cleanse the palate and add essential freshness to your meal.
Salads
Classic Potato Salad Recipe
For a more hearty and comforting side, a creamy potato salad is always a crowd-pleaser. Its rich texture and tangy flavors complement grilled meats beautifully.
Appetizers
Life-Changing No-Knead Dinner Rolls
Warm, soft dinner rolls are perfect for rounding out any meal. They are fantastic for soaking up any flavorful drippings from the chicken and are surprisingly easy to make.
Side Dishes
Roasted Carrots (2 Ways!)
Sweet and savory roasted carrots add a touch of color and natural sweetness. Their tender texture and earthy flavor make them an ideal vegetable side.
Print Recipe
Best Chicken Rub Recipe
Chelsea Lords
15 minutes
6 minutes
21 minutes
6 servings
Recipe Video
Watch this short video to see how easily this incredible chicken rub comes together and how to apply it for the best results!
Click here to watch the Chicken Rub recipe video!
Equipment
-
Grill
-
Small Mixing Bowl
-
Meat Mallet (optional, but recommended)
-
Instant-Read Meat Thermometer
Ingredients
- 2 pounds chicken breasts, thighs, or tenderloins
- 2 tablespoons olive oil
- 4 teaspoons red wine vinegar
- 2-1/2 teaspoons salt
- 2-1/2 teaspoons Italian seasoning
- 1 teaspoon garlic powder
- 1 teaspoon paprika
- 1 teaspoon brown sugar
- 1 teaspoon black pepper
- 1/2 teaspoon onion powder
- 1/2 teaspoon ground mustard
- 1/4 teaspoon red pepper flakes (adjust to your heat preference)
- 1/4 teaspoon dried thyme
- Cooking spray or vegetable oil (for grill)
Instructions
-
Carefully trim any excess fat from your chicken breasts. If using larger breasts, slice them evenly in half crosswise to create thinner cutlets. Then, using a meat mallet (or the bottom of a sturdy frying pan), pound the chicken pieces to an even thickness, roughly ¾-inch. This ensures consistent cooking. If preparing tenderloins, ensure any tough tendons are removed.
-
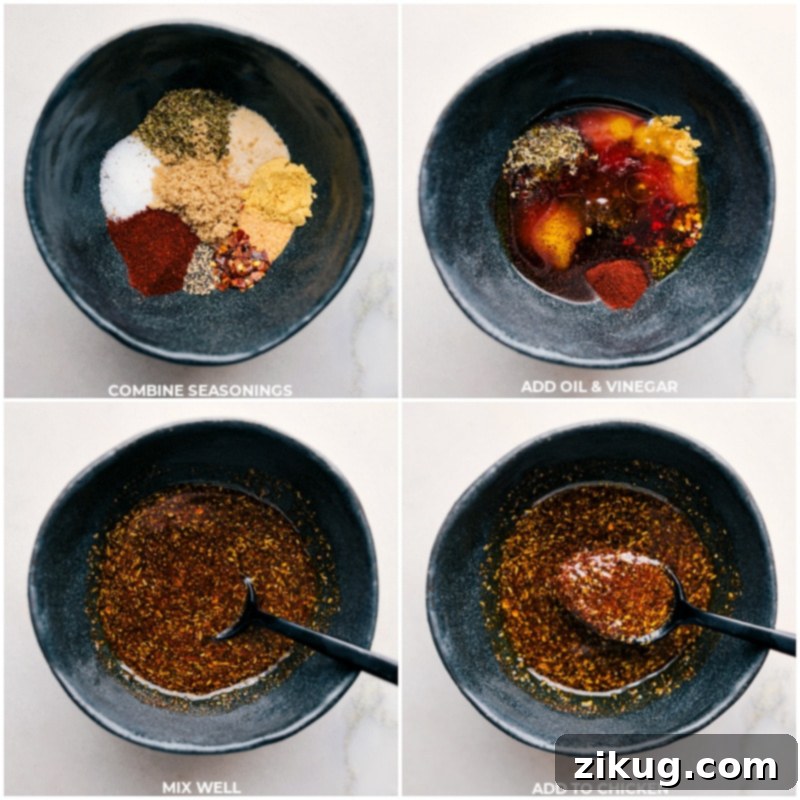
In a small bowl, combine all the rub ingredients: olive oil, red wine vinegar, salt, Italian seasoning, garlic powder, paprika, brown sugar, pepper, onion powder, ground mustard, red pepper flakes, and dried thyme. Stir thoroughly until a thick, cohesive paste forms.
-
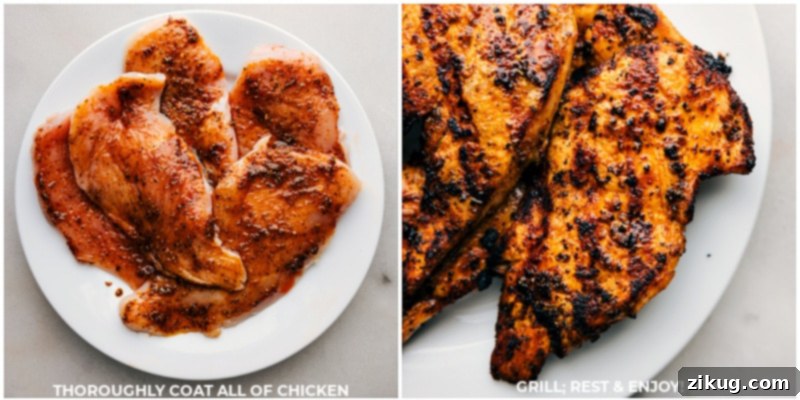
Generously spread the prepared rub evenly over all surfaces of the chicken pieces. Use your hands to massage the rub into the meat, ensuring every side is thoroughly coated for maximum flavor.
-
Preheat your grill to medium-high heat, aiming for an approximate temperature of 450°F (230°C). Once hot, clean the grill grates with a brush. Then, carefully and generously oil the grates. A good method is to drench a rolled-up paper towel in vegetable oil, hold it with tongs, and rub it over the hot grates. Alternatively, you can cautiously spray the grates with cooking spray, standing back to avoid flare-ups.
-
Using tongs, place the seasoned chicken pieces on the preheated grill, ensuring they are well-spaced to allow for even cooking. Grill the chicken for approximately 3-5 minutes per side. It should release easily from the grates when it’s ready to flip. Continue grilling, turning only once halfway through, until the thickest part of the chicken registers an internal temperature of 160°F (71°C) with an instant-read meat thermometer, and the exterior has a beautiful char. Remember, carryover heat will bring the chicken to the safe internal temperature of 165°F (74°C).
-
Once cooked, transfer the chicken from the grill to a clean plate and loosely cover it with aluminum foil. Allow the chicken to rest for 5-10 minutes. This crucial resting period allows the juices to redistribute throughout the meat, ensuring maximum tenderness and moisture. After resting, thinly slice or chop the chicken as desired. Taste a piece and add an additional sprinkle of salt if needed. Serve immediately, perhaps with fresh lemon wedges on the side for an extra bright finish.
Recipe Notes
Storage & Meal Prep: To store cooked chicken, allow it to cool completely before transferring it to an airtight container. It will keep fresh in the refrigerator for up to 4 days. For longer storage, you can freeze the cooked chicken in a freezer-safe bag or container for up to 3 months. Thaw in the refrigerator overnight before reheating.
Make Ahead Dry Rub: For ultimate convenience, mix all the dry spice ingredients (salt, Italian seasoning, garlic powder, paprika, brown sugar, pepper, onion powder, ground mustard, red pepper flakes, dried thyme) ahead of time. Store this dry blend in an airtight container or zip-top bag for up to 6 months. When ready to cook, simply add the olive oil and red wine vinegar to your desired portion of the dry mix and proceed with the recipe.
Nutrition
Serving: 1serving
|
Calories: 43kcal
|
Carbohydrates: 0.5g
|
Protein: 0.1g
|
Fat: 4.7g
|
Sodium: 969.5mg
|
Fiber: 0.3g
Nutrition information is automatically calculated and should be used as an approximation.
Loved this recipe? Leave a comment and rating below!
Your feedback helps others discover delicious meals.
Frequently Asked Questions About Chicken Rubs
- Can I make this rub ahead of time?
- Absolutely! You can mix all the dry ingredients for this rub and store them in an airtight container in a cool, dark place for up to 6 months. When you’re ready to cook, just add the olive oil and red wine vinegar to your desired portion of the dry mix.
- What kind of chicken is best for this rub?
- This rub is incredibly versatile and works wonderfully on all cuts of chicken! Whether you prefer boneless, skinless chicken breasts, tenderloins, juicy thighs, or even a whole roasted chicken, this rub will infuse it with fantastic flavor. Just remember to adjust cooking times based on the cut and thickness of the chicken.
- Can I use this rub for other meats?
- While specifically formulated for chicken, the robust and balanced flavors of this rub can also be delicious on pork (especially pork tenderloin or chops) or even turkey. Feel free to experiment and discover new favorites!
- How long should the rub sit on the chicken?
- For best results, apply the rub and let the chicken sit for at least 15-30 minutes at room temperature before cooking. If you have more time, you can refrigerate the seasoned chicken for up to 4 hours to allow the flavors to penetrate deeper, though it’s not strictly necessary for a flavorful outcome with this potent rub.
- What if I don’t have a grill?
- No problem! This rub performs beautifully with various cooking methods. You can roast the chicken in the oven at 400°F (200°C) until cooked through, pan-sear it on the stovetop, or even cook it in an air fryer. Adjust cooking times according to your chosen method and always check for an internal temperature of 165°F (74°C).
Final Thoughts on Elevating Your Chicken Game
This “Best Chicken Rub Recipe” isn’t just about mixing spices; it’s about crafting an unforgettable culinary experience right in your own kitchen. We’ve explored how a simple blend of high-quality ingredients can transform ordinary chicken into a masterpiece of flavor, texture, and juiciness. From the zesty Italian herbs to the smoky paprika and the gentle warmth of red pepper flakes, every component plays a vital role in creating a balanced and addictive profile.
Whether you’re a seasoned grill master or a novice home cook, the techniques and tips shared here will empower you to achieve perfection every time. Remember the importance of an even coat, the precision of a meat thermometer, and the magic of resting your meat. And don’t forget the secret weapon: the humble meat mallet, ensuring your chicken cooks uniformly and stays incredibly tender.
So, gather your ingredients, fire up your grill (or oven!), and get ready to impress your family and friends with chicken that’s bursting with flavor. This isn’t just a recipe; it’s your new go-to for delicious, perfectly seasoned chicken, ready to be paired with your favorite sides and savored bite after glorious bite. Happy cooking!