
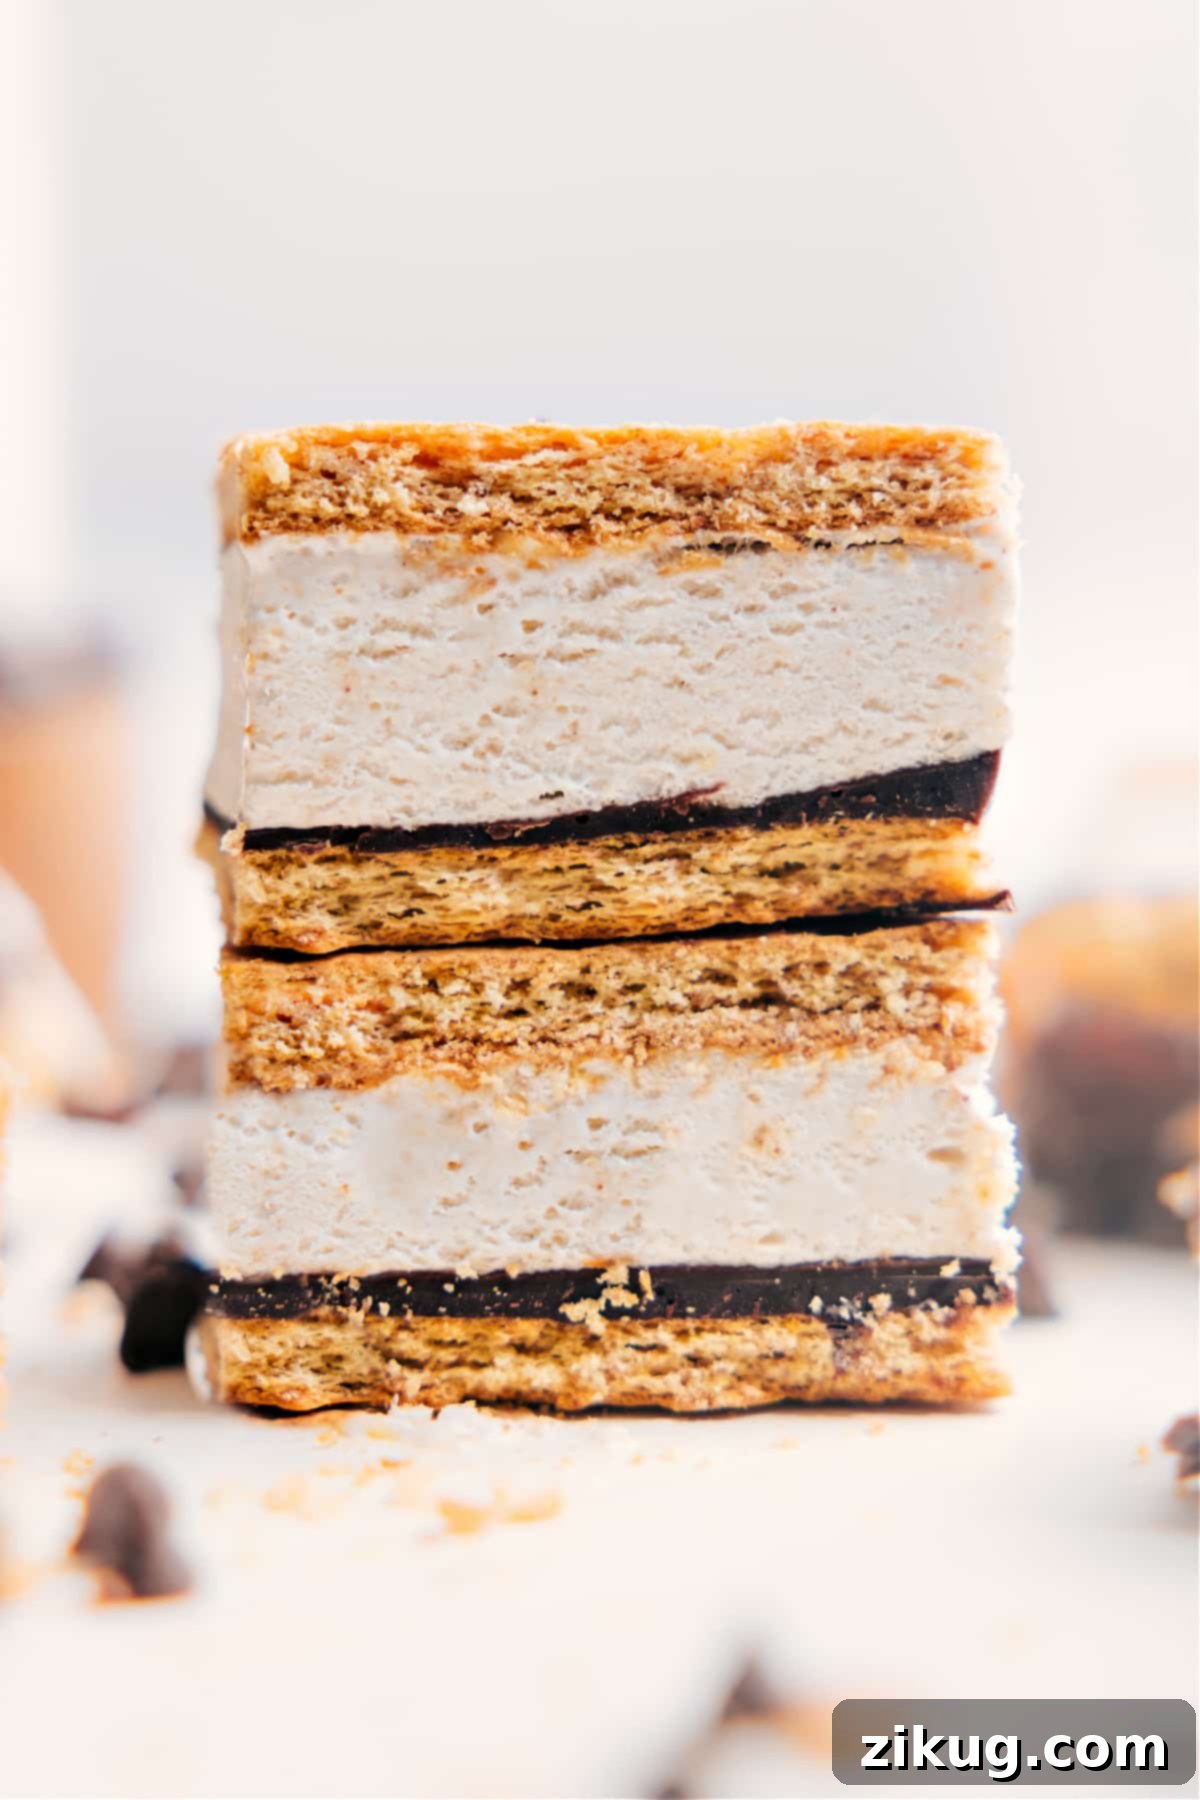
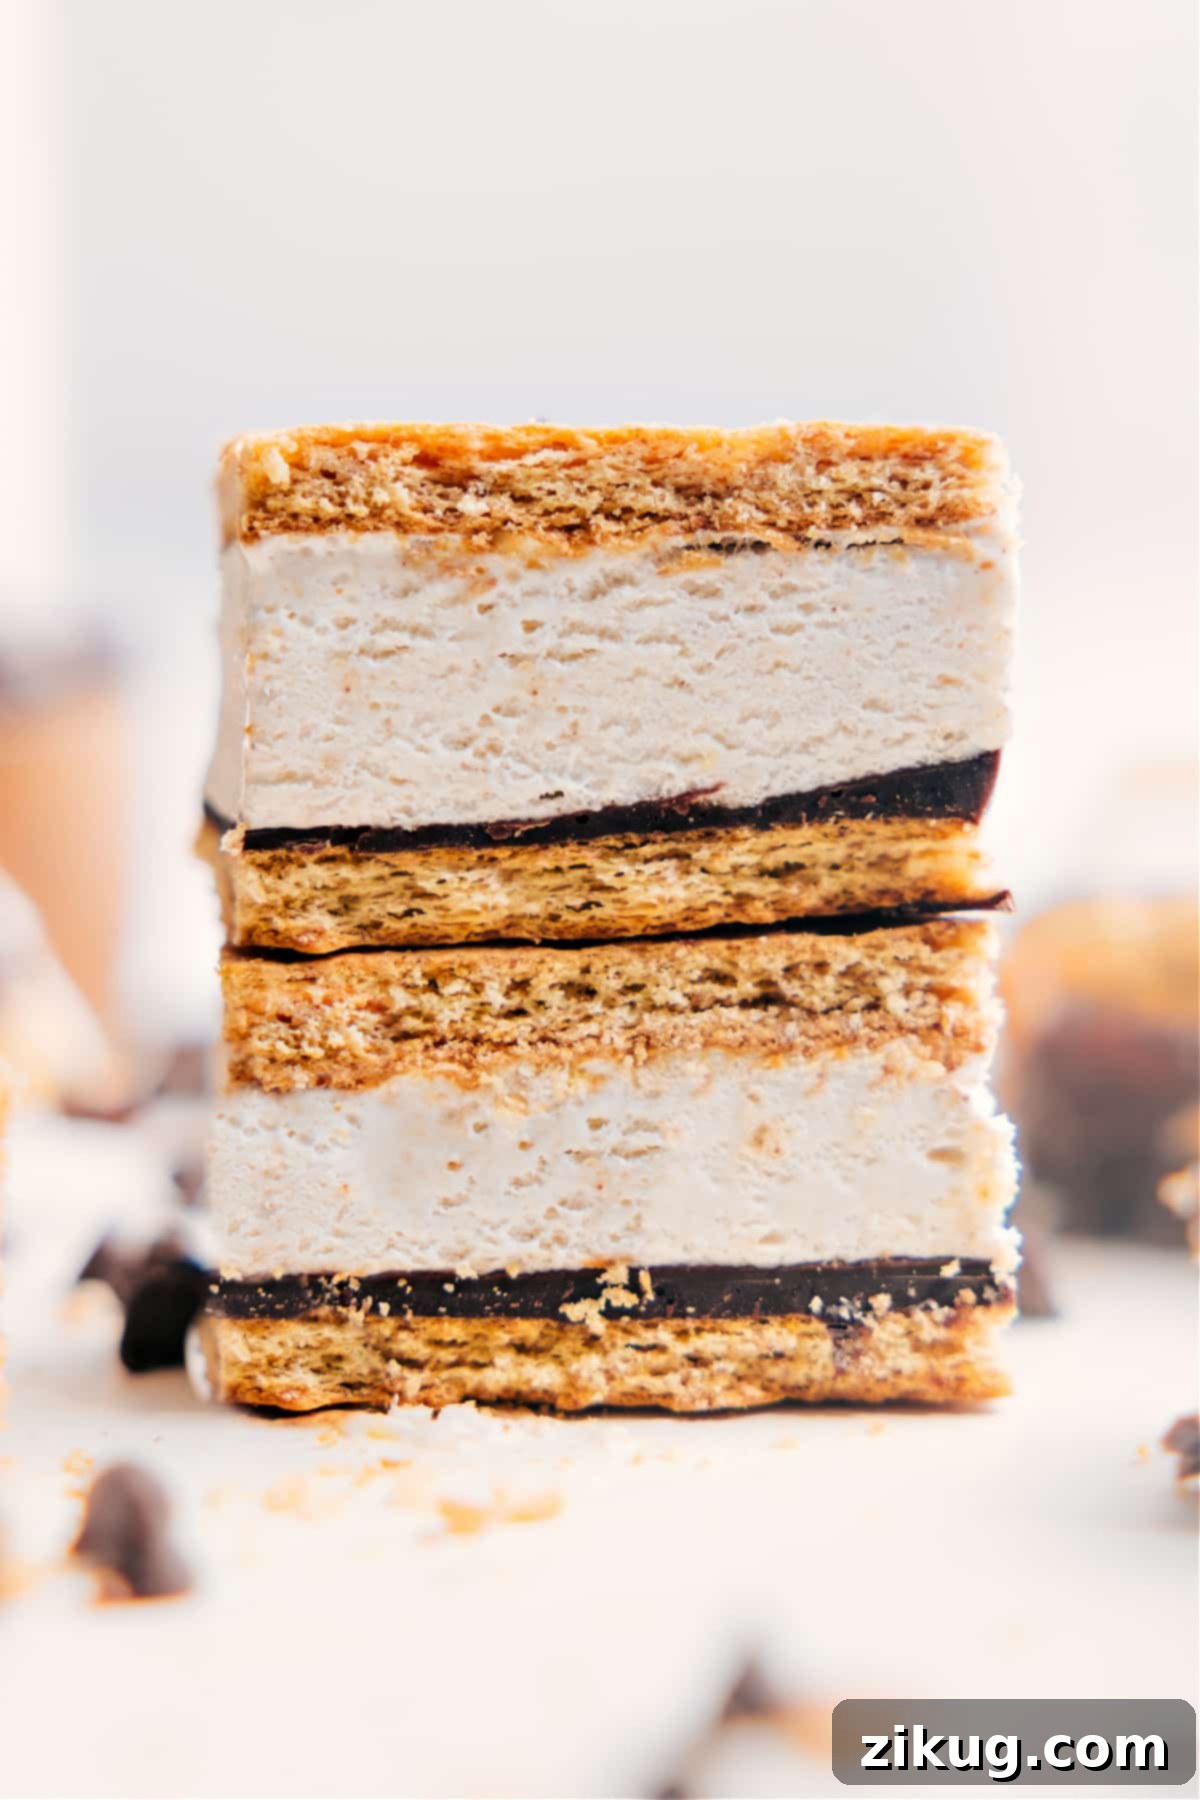
Frozen Protein S’mores offer a delightful fusion of classic campfire flavors with a healthy, protein-packed twist. Imagine the comforting crunch of sweet graham crackers, the rich embrace of smooth chocolate, and a creamy, satisfying protein filling—all in one easy-to-make, frozen treat. These S’mores are not just a nostalgic indulgence; they are an ingenious solution for anyone craving a guilt-free dessert or a high-protein snack, especially during warm summer months. They perfectly cater to your sweet tooth while subtly boosting your protein intake, making them an ideal choice for a post-workout treat, a wholesome dessert, or simply a refreshing pick-me-up.

author’s notes
Your Go-To Summer Freezer MVP: A Personal Favorite!
For years, these incredible frozen s’mores have been a steadfast summer tradition in my household. They’re so popular that even my kids’ friends specifically ask for them when they visit! So, when I began seeing innovative versions incorporating protein powder, I knew I had to give it a try. As many of you know, I have a deep affection for a well-made homemade protein bar, and the idea of a summer-friendly, protein-enhanced version was simply irresistible.
And let me tell you, the result is nothing short of an obsession! These protein s’mores have completely won me over. I’m already making plans to keep a fresh batch continuously stocked in my freezer all season long. They are truly phenomenal—not only do they expertly satisfy any sweet cravings, but they also cleverly deliver that much-needed extra boost of protein, making them a smart and delicious choice for any time of day!
Essential Ingredients & Creative Variations for Frozen Protein S’mores
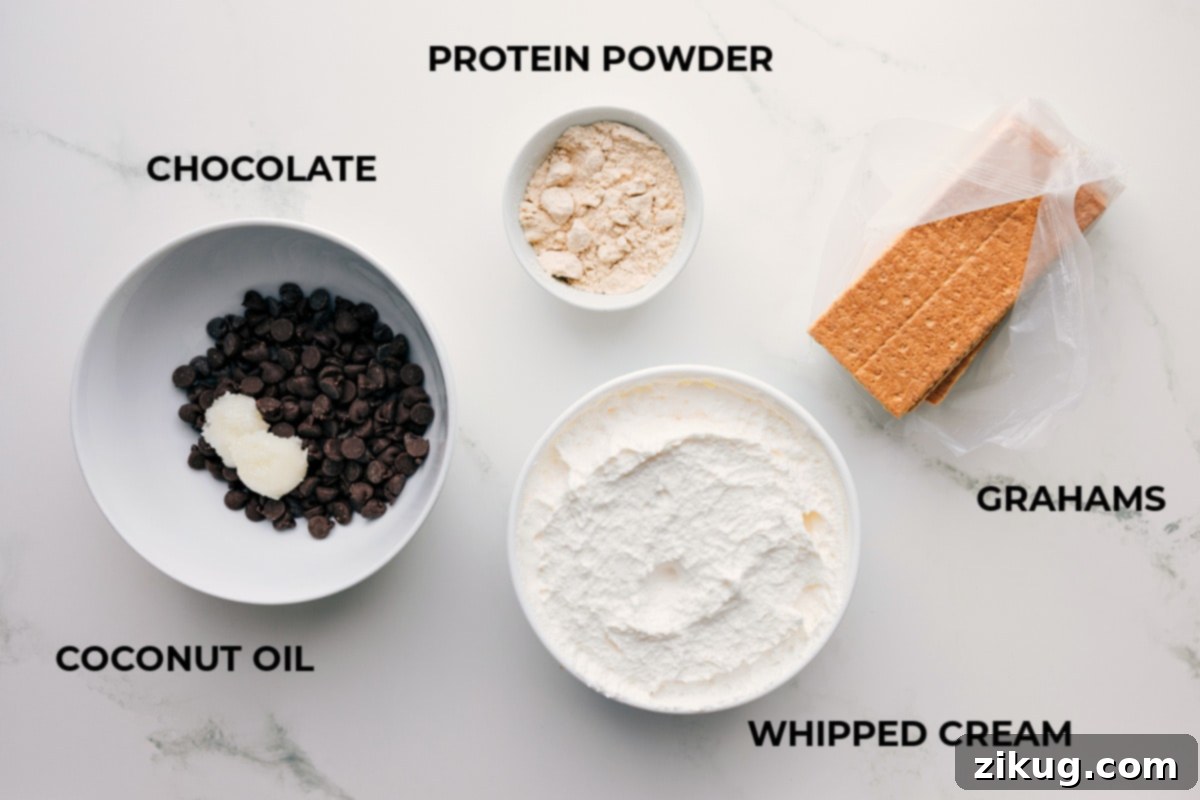
Crafting these delectable frozen protein s’mores requires just a handful of simple ingredients. What makes this recipe truly fantastic is its flexibility, allowing you to tailor it to your dietary preferences and taste buds. Here’s a closer look at what you’ll need and how you can personalize each component.
- Graham Crackers: These form the crisp, delightful base and top layer of your s’mores. While classic graham crackers work wonderfully, I’ve also successfully tested this recipe with Simple Mills Honey Cinnamon Sweet Thins for a less refined sugar option. Feel free to use gluten-free alternatives if needed.
- Chocolate Chips: The chocolate layer provides that quintessential s’mores richness. Any variety of chocolate chips will work beautifully—milk, semi-sweet, or dark chocolate, depending on your preference. For those looking to reduce sugar content, opting for dark chocolate with a higher cocoa percentage (70%+) or refined sugar-free chips is an excellent choice.
- Coconut Oil: A crucial ingredient for the chocolate layer, coconut oil helps the chocolate melt smoothly and ensures it remains soft and pliable even after freezing, preventing it from becoming too hard and brittle. This small addition makes a big difference in the texture of your frozen s’mores.
- Frozen Whipped Topping (Thawed): This creates the wonderfully creamy and airy texture for our protein-packed filling. You can use your favorite brand; I often reach for a light version, but many coconut-based or naturally sweetened whipped toppings are also fantastic dairy-free alternatives. Just make sure it’s completely thawed before mixing.
- Vanilla Protein Powder: This is where the “protein” in our “protein s’mores” comes in! The flavor of your protein powder will significantly impact the taste of your filling, so choose a high-quality brand you genuinely enjoy. Brands like Clean Simple Eats or Just Ingredients are excellent options, known for their delicious vanilla flavors and smooth texture. Whey protein or plant-based protein powders can both work well here, just ensure they mix easily.
Mastering the Slice: How To Easily Cut Frozen Protein S’mores
Cutting frozen desserts can sometimes be a challenge, but with a few simple tricks, you can achieve clean, perfect slices every time. These tips will help you manage your frozen protein s’mores without them cracking or crumbling.
- Choose the Right Knife: Always start with a large, sharp chef’s knife. A well-maintained blade is key to a clean cut.
- Warm the Blade: Run your sharp knife under hot water for about 30-60 seconds. This warms the blade, allowing it to glide through the frozen layers more smoothly.
- Wipe Dry: Immediately wipe the blade completely dry with a towel to prevent any water from freezing onto your dessert.
- Slice with Confidence: Make a single, firm downward press rather than sawing back and forth. For best results, clean and re-warm your knife between each slice.
- Serrated Knife for Tough Spots: If you find the graham crackers or chocolate layers are still breaking, don’t hesitate to switch to a serrated knife. Its “sawing” action can sometimes be more effective on hard, brittle layers.
- Embrace Imperfection: Remember, a little breaking or cracking, especially around the edges, is completely normal when dealing with frozen items. Don’t stress too much about achieving absolute perfection. The taste will still be incredible!
Unleash Your Creativity: How To Customize Your Frozen Protein S’mores
One of the best aspects of this recipe is how effortlessly it can be adapted to suit your personal preferences and dietary needs. Don’t shy away from experimenting with different flavors and textures to create your signature frozen protein s’mores.
- Elevate with Nut Butter: For an added layer of richness and flavor, swirl a few spoonfuls of your favorite nut butter—such as peanut butter, almond butter, or cashew butter—into the protein filling before layering. This adds healthy fats and a delightful nutty taste that complements the chocolate and graham cracker beautifully.
- Experiment with Flavored Protein Powder: While vanilla is a fantastic base, consider venturing into other protein powder flavors. Chocolate protein powder will intensify the s’mores experience, creating a double chocolate delight. Cookies & Cream, mint chocolate chip, or even a strawberry protein powder could introduce exciting new dimensions to your treat.
- Boost the Crunch Factor: Introduce delightful textural contrasts by adding crunchy elements to the protein filling. Crushed pretzels can offer a salty-sweet balance, mini marshmallows (or dehydrated marshmallow bits) will enhance the traditional s’mores feel, and chopped nuts (like almonds, pecans, or walnuts) provide a wholesome crunch and extra nutrients.
- Make it Dairy-Free: This recipe is already incredibly versatile for dairy-free diets. Simply ensure you select a coconut-based or other plant-based whipped topping and use high-quality dairy-free chocolate chips. Many brands now offer excellent dairy-free options that melt and taste just like their dairy counterparts.
- Add a Fruity Twist: For a burst of freshness, consider folding in finely diced fresh berries (strawberries or raspberries work wonderfully) into the protein filling. Or, drizzle a thin layer of raspberry or cherry preserve over the chocolate layer before adding the whipped topping.
- Spice it Up: A pinch of cinnamon or a tiny dash of cayenne pepper can add an unexpected depth and warmth to the chocolate layer. Cinnamon pairs especially well with graham crackers, while a hint of cayenne can create a subtle “Mexican hot chocolate” effect.
Smart Prep: Make-Ahead & Storage Tips for Frozen Protein S’mores
These frozen protein s’mores are not just delicious; they are also incredibly convenient for meal prepping and enjoying throughout the week. Their make-ahead nature means you can whip up a batch whenever you have time, and then have a healthy, satisfying treat ready to grab from the freezer whenever a craving strikes.
- Optimal Freezing: Once assembled, ensure the bars are frozen solid for at least 8 hours, or preferably overnight. This guarantees a firm texture that is easy to slice and prevents layers from melding together prematurely.
- Perfect Slicing: After they’ve thoroughly frozen, remove the loaf pan from the freezer. Use the parchment paper overhang to lift the entire block of s’mores out. Follow the cutting tips mentioned earlier (using a warm, sharp knife) to slice them into individual bars or squares.
- Storage is Key: Store your sliced frozen protein s’mores in an airtight container in the freezer. To prevent them from sticking together, place a small piece of parchment paper or wax paper between each layer of bars. This simple step makes it easy to grab just one or two without them clumping.
- Longevity: Properly stored, these delightful treats will maintain their freshness and delicious taste for up to 2 weeks in the freezer. This makes them perfect for batch cooking and enjoying over an extended period.
- Serving Suggestions: While best enjoyed straight from the freezer for that icy, refreshing bite, you can let them sit at room temperature for 5-10 minutes if you prefer a slightly softer texture. Remember to return any uneaten portions to the freezer right away to maintain their quality.
Discover More Protein-Packed Snacks:
Shakes And Smoothies
Decadent Chocolate Protein Shake
Breakfast
No-Bake Cinnamon Roll Breakfast Cookies
Desserts
Healthy Protein Cookie Dough
Snacks
Energizing Chocolate Protein Balls
Print Recipe
Frozen Protein S’mores: A Healthy No-Bake Delight
Equipment You’ll Need
-
8.5 x 4.5-inch Bread Pan: Essential for forming your s’mores into uniform bars. Lining with parchment paper is key for easy removal.
-
Microwave-Safe Bowl: For melting the chocolate and coconut oil until smooth and glossy.
-
Spatula: Perfect for gently folding the protein powder into the whipped topping and spreading the layers evenly.
-
Sharp Knife (Chef’s or Serrated): Critical for cleanly slicing your frozen bars.
-
Parchment Paper: Non-negotiable for preventing sticking and making the lifting process simple.
Ingredients for 14 Servings
- 5 graham crackers plus more as needed, see note 1
- 1 cup chocolate chips see note 2
- 2 teaspoons coconut oil
- 1 (8-ounce) container frozen whipped topping thawed
- 1 scoop vanilla protein powder use a high-quality brand you love!
Step-by-Step Instructions
-
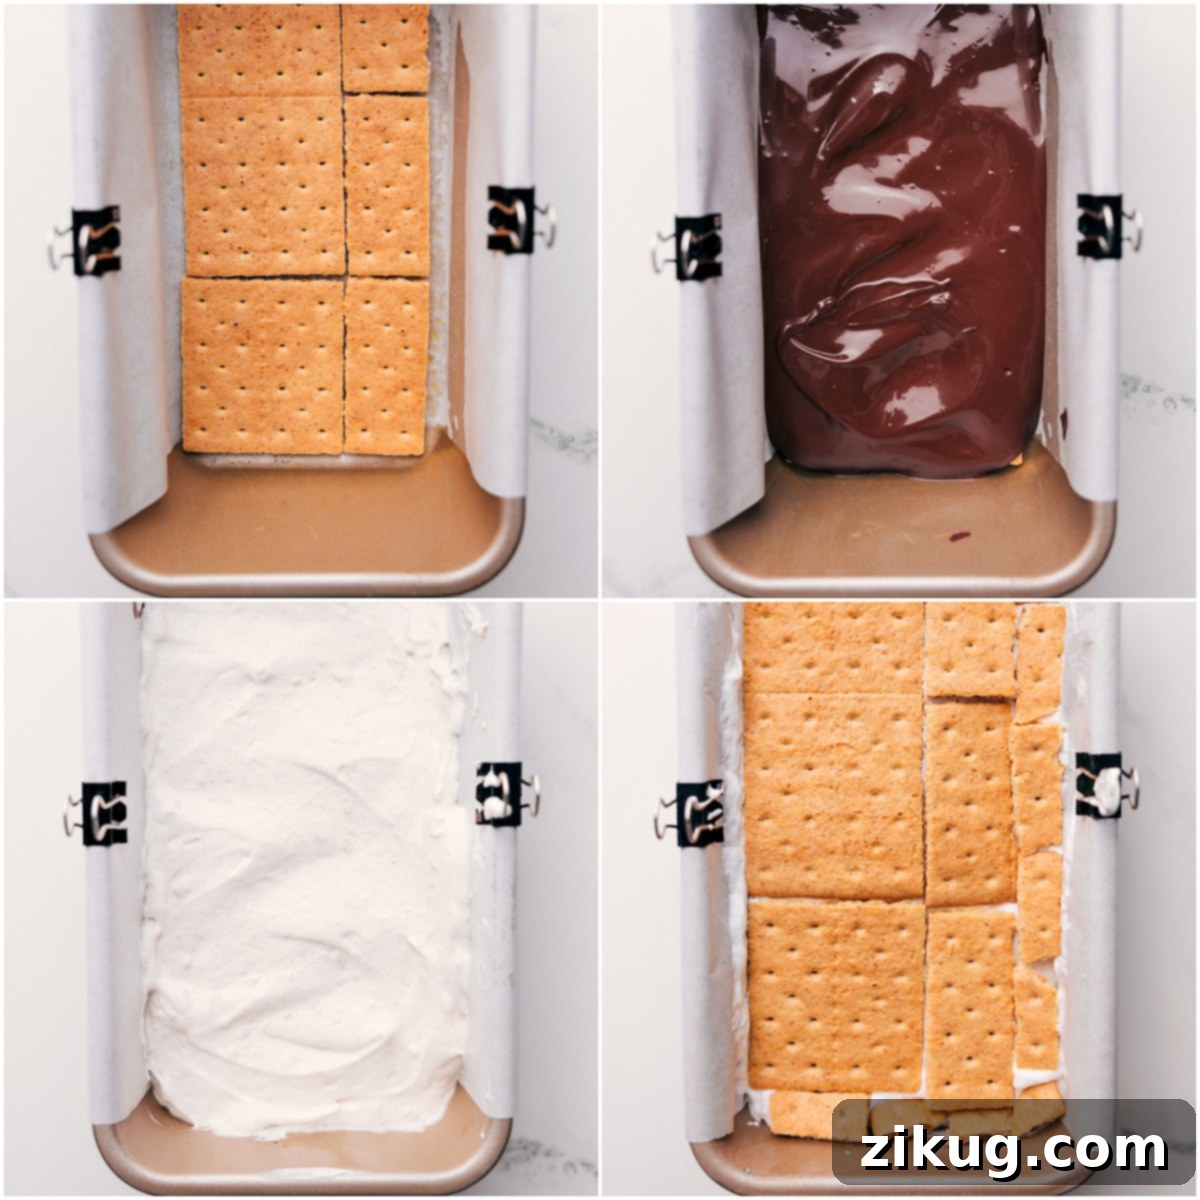
Prepare the Pan: Line an 8.5 x 4.5-inch bread pan with parchment paper, making sure to leave an overhang on the sides. This overhang will serve as handles, allowing for effortless removal of the frozen bars later. Arrange graham crackers at the bottom of the pan, covering the entire base. Break the crackers as needed to fit snugly and create an even layer.
-
Melt the Chocolate: In a microwave-safe bowl, combine your chosen chocolate chips and coconut oil. Microwave this mixture in short bursts of 20 seconds. After each burst, stir the chocolate vigorously for about 15 seconds. Continue this process until the chocolate is completely melted and beautifully smooth. Be careful not to overheat it.
-
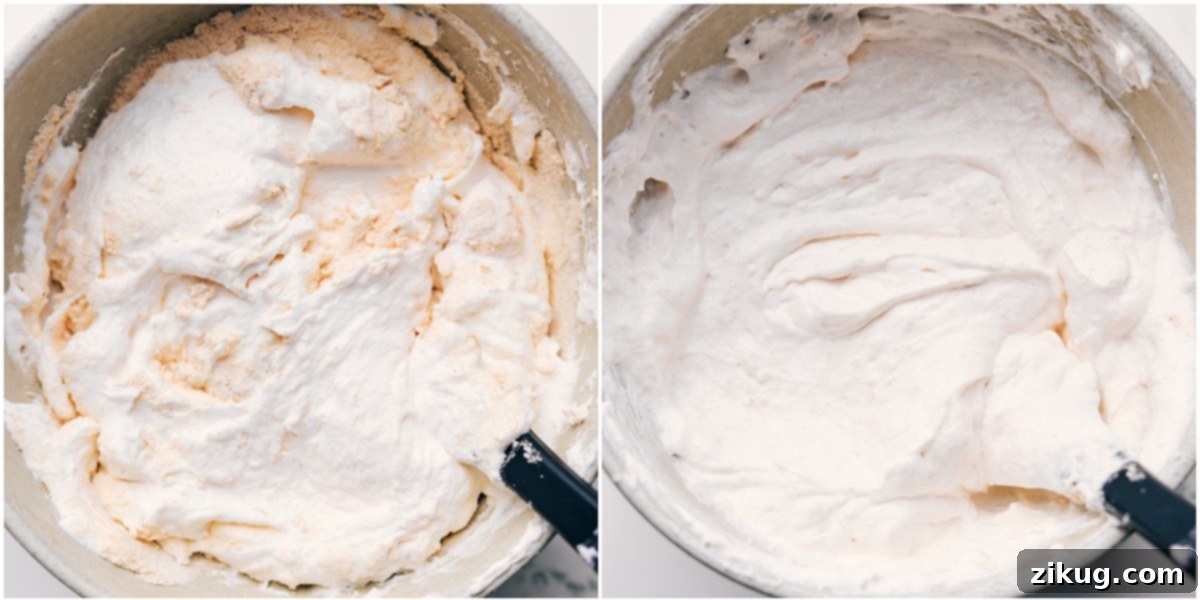
Create the Protein Filling: Add your vanilla protein powder to the thawed whipped topping. Using a spatula, gently fold the protein powder into the whipped topping until it is fully integrated and there are no lumps. Next, pour the melted chocolate mixture directly over the graham cracker base in your prepared pan and spread it into an even, consistent layer using the back of a spoon or a small offset spatula.
-
Layer the Filling: Carefully spread about three-quarters of the protein-infused whipped topping mixture over the chocolate layer. Distribute it evenly across the surface. You can save the remaining quarter of the mixture to enjoy as a light, protein-rich snack on its own, or use it as a delightful topping for pancakes, waffles, or fresh fruit.
-
Final Layer & Freeze: Top the protein whipped topping layer with another single layer of graham crackers, pressing them down gently. Transfer the pan to the freezer and allow the bars to freeze until they are completely solid. This usually takes at least 8 hours, but overnight is ideal for the best results.
-
Slice and Serve: Once fully frozen, lift the entire block of s’mores out of the pan using the parchment paper overhang. Place it on a sturdy cutting board. Using a large, sharp knife (and employing the warm-knife technique mentioned earlier for best results), carefully slice the block into 7 long bars. Then, cut each of these long bars in half to create 14 individual, perfectly portioned squares. These are best enjoyed straight from the freezer. Remember to store any leftovers immediately in an airtight container back in the freezer to maintain their firm texture and freshness.
Chef’s Notes & Pro Tips
Note 2: Chocolate Selection: Feel free to use any type of chocolate chips you adore—milk, semi-sweet, or dark. If you’re mindful of sugar intake, opt for a high-quality dark chocolate bar (chop it into chips) or look for refined-sugar-free baking chips. The coconut oil ensures a smooth, non-brittle chocolate layer once frozen.
Nutrition Information (Approximate)
Nutrition information is automatically calculated and is provided for informational purposes only. It should be used as an approximation, as ingredient variations can affect final values.