
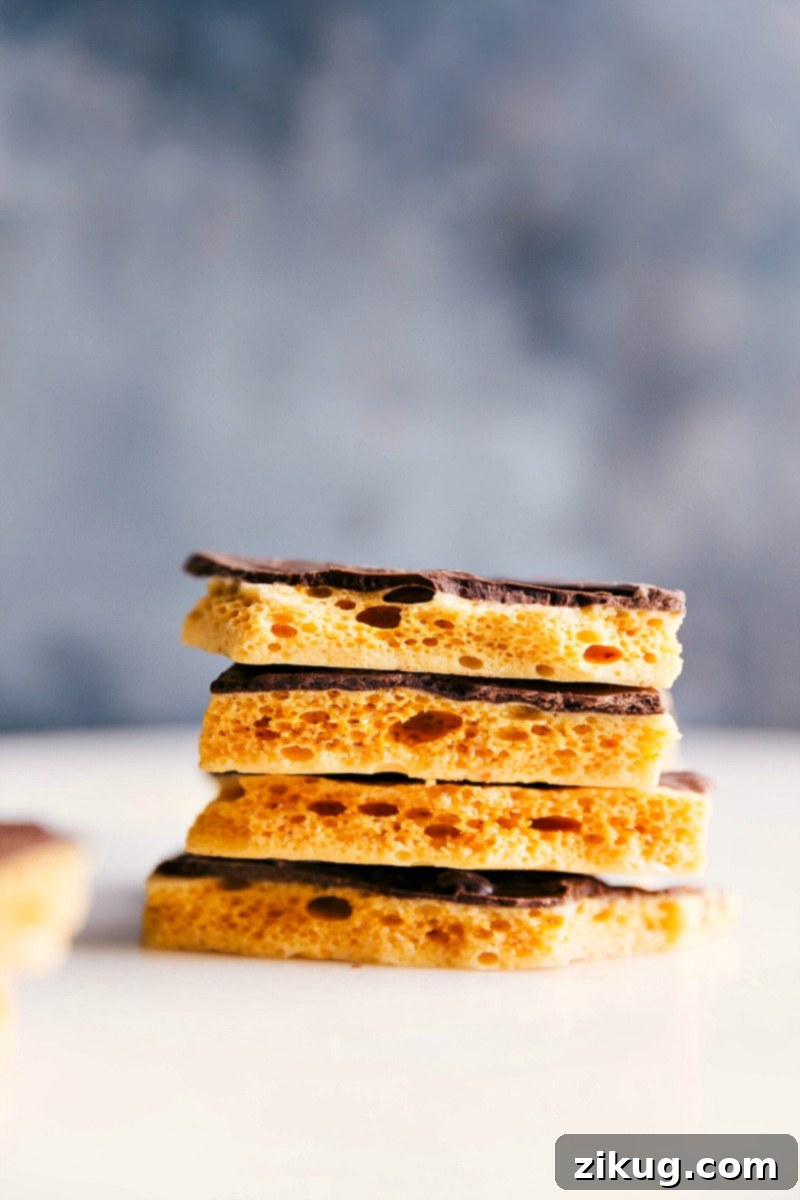
Homemade Honeycomb Candy is a delightful confection that looks impressively intricate but is remarkably simple to create right in your own kitchen. With just four fundamental ingredients, you can whip up this sweet, crunchy, and beautifully golden treat that’s perfect on its own or enhanced with a luxurious chocolate coating.
If you enjoy the rewarding process of crafting confections at home, you might also love our recipes for Homemade Toffee or fluffy Homemade Marshmallows. These delightful sweets offer similar satisfaction and are perfect for expanding your candy-making repertoire.
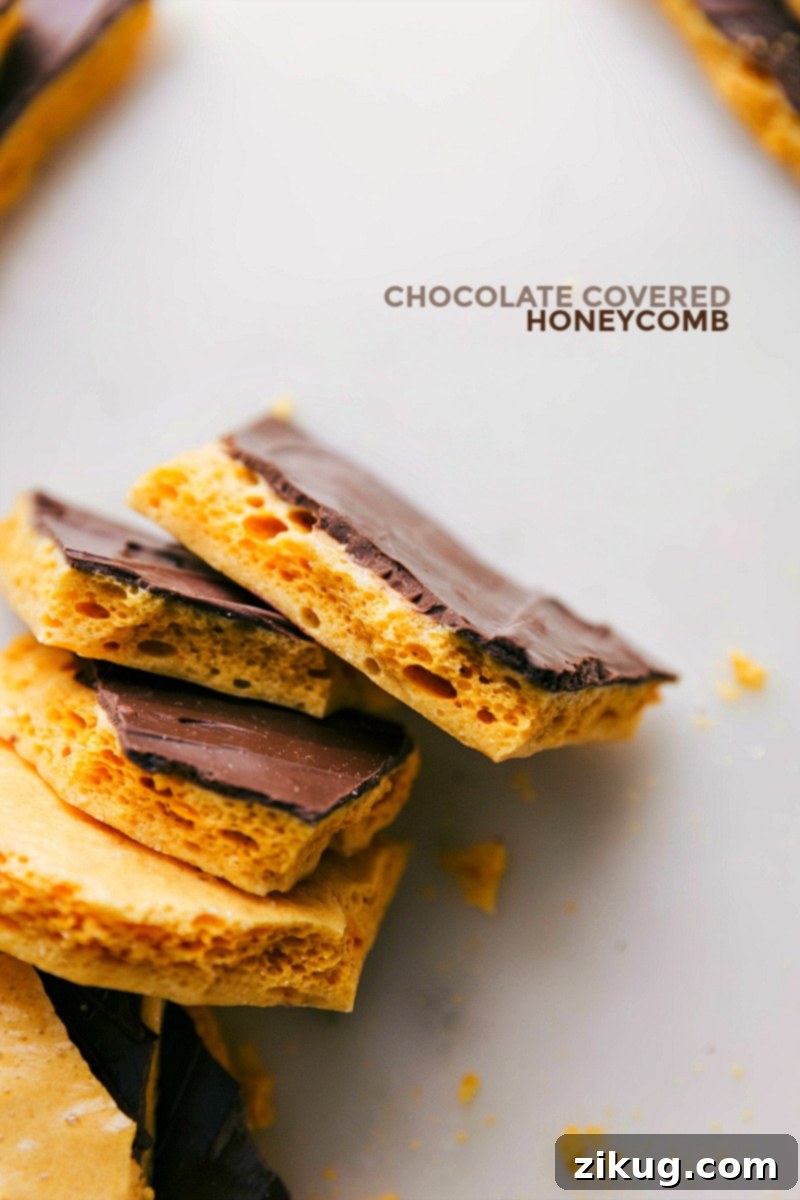
The Magic of Honeycomb Candy: A Global Sweet Sensation
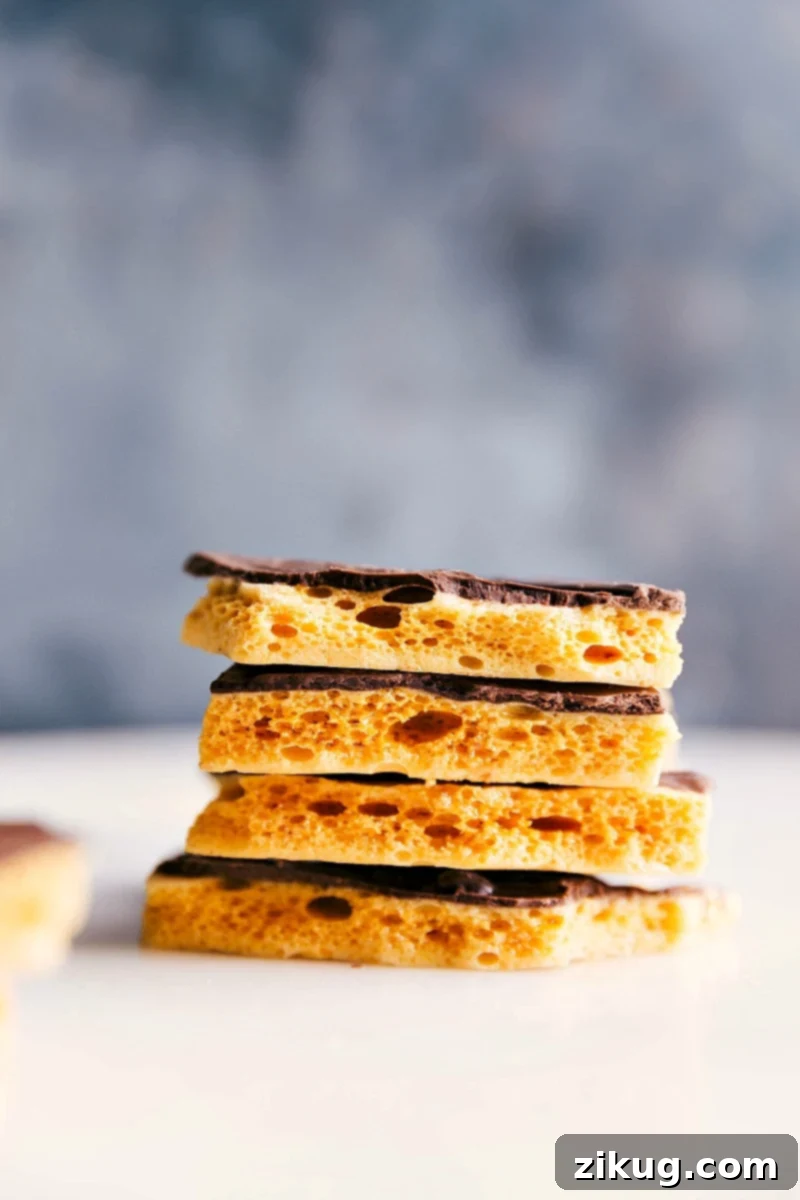
This beloved candy goes by many enchanting names across the globe—from Cinder Toffee in the UK to Sponge Candy in parts of the US and even Seafoam in others. Its widespread popularity truly highlights how much people cherish this unique confection. Regardless of what you call it, the allure of Honeycomb Candy lies in its distinctive characteristics: a rich, sweet toffee-like flavor complemented by an incredibly light, crispy, and bubbly texture that quite literally melts in your mouth.
While delicious on its own, dipping pieces of Honeycomb Candy in melted chocolate elevates it to an even more luxurious dessert. The contrasting bitterness of dark chocolate or the creamy sweetness of milk chocolate perfectly balances the intense sweetness of the honeycomb, creating a truly irresistible treat.
Many specialty shops and gourmet markets sell honeycomb candy at a premium, but the good news is that crafting it at home is not only surprisingly easy but also significantly more economical. This makes it an ideal project for budding home chefs or seasoned candy makers looking for a rewarding and impressive dessert without the hefty price tag. In our family, making Honeycomb Candy has become a cherished holiday tradition, filling our home with sweet aromas and joyful anticipation. We sincerely hope it can become a treasured tradition for you and your loved ones too, bringing smiles and delicious memories for years to come.
Beyond its simple ingredients and straightforward process, the true magic of honeycomb candy lies in its captivating airy structure. This unique internal architecture, reminiscent of a beehive, is what gives it its characteristic crunch and melt-in-your-mouth quality. It’s a testament to how a few basic components, combined with precise technique, can transform into something truly extraordinary. Whether you’re making it for a special occasion or simply to satisfy a sweet craving, homemade honeycomb promises an unforgettable experience.
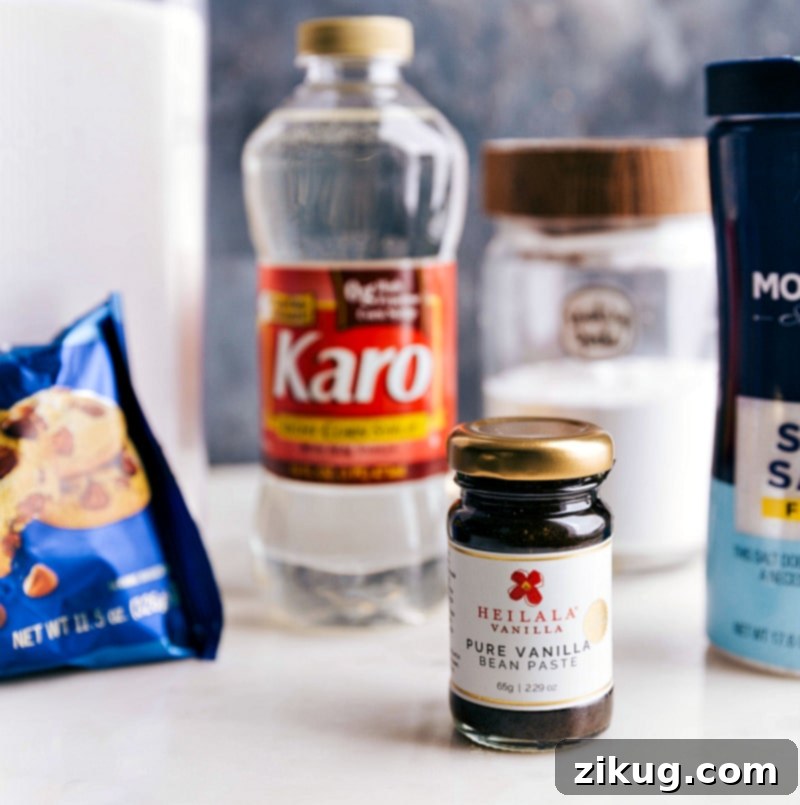
Key Ingredients for Perfect Honeycomb Candy
Creating spectacular Honeycomb Candy requires a handful of common pantry staples. Each ingredient plays a crucial role in achieving that iconic golden color, crisp texture, and delightful flavor profile. Here’s a closer look at what you’ll need and why:
- Light Corn Syrup: This ingredient is absolutely essential for achieving the perfect texture. Light corn syrup prevents sugar crystallization, which can lead to a grainy or chewy candy instead of the desired crisp and airy result. It also contributes to the beautiful golden hue and subtle sweetness. Brands like Karo® corn syrup are excellent choices for their consistent quality. Do not substitute with dark corn syrup, as it will alter the flavor and color significantly.
- White Granulated Sugar: The primary sweetener and structural base of our honeycomb. Granulated sugar provides the necessary sweetness and, when heated correctly, forms the hard, brittle matrix of the candy. It is crucial to use white granulated sugar, as brown sugar contains molasses which would change the flavor, color, and even the chemical reaction needed for the honeycomb’s signature bubbles.
- Salt: A small pinch of salt works wonders in balancing the intense sweetness of the candy. It acts as a flavor enhancer, bringing out the best in the other ingredients and adding a subtle complexity that prevents the candy from being one-dimensionally sweet. Don’t skip this seemingly minor addition!
- Baking Soda: This is the true “secret ingredient” that gives honeycomb candy its unique, porous structure. When baking soda (sodium bicarbonate) is added to the hot sugar syrup, it reacts with the acidic components (even trace amounts) and the heat, rapidly releasing carbon dioxide gas. This gas gets trapped within the viscous sugar mixture, causing it to foam up and create those characteristic bubbles and sponge-like crispness. Make sure your baking soda is fresh for the best results!
- Vanilla Extract: While optional, vanilla extract adds a wonderful depth of flavor to the honeycomb candy. Its warm, aromatic notes complement the sweet toffee taste beautifully, enhancing the overall sensory experience. For an even richer flavor, you can experiment with vanilla bean paste. Ensure you add it at the correct stage, as heat can diminish its potency.
- Water: Used to dissolve the sugar and corn syrup initially, helping them to reach the correct temperature without burning. The water eventually boils off, leaving behind the concentrated sugar syrup.
- Chocolate (Optional): For an elevated experience, a cup of dark, semi-sweet, or milk chocolate can be melted and used for dipping or drizzling. The choice of chocolate allows you to customize the sweetness and richness of your finished honeycomb.
- Vegetable Oil or Shortening (Optional): A tiny amount can be added to melted chocolate to achieve a smoother, thinner consistency, making it easier to dip and ensuring a glossy finish.
The Essential Tool: A Candy Thermometer
To successfully make Honeycomb Candy, or indeed most sugar-based confections, a reliable candy thermometer is not just recommended, it’s absolutely indispensable. Unlike meat thermometers, which measure internal temperatures for doneness, candy thermometers are designed to accurately gauge the high temperatures required for sugar syrups, often up to 400°F (200°C). Attempting to make this candy without one, relying solely on visual cues, makes it incredibly challenging to achieve the perfect “hard-crack stage” necessary for a crisp, rather than chewy, texture.
A good candy thermometer clips securely to the side of your pot, allowing the bulb to be submerged in the syrup without touching the bottom, ensuring an accurate reading. Investing in a quality thermometer will save you from numerous failed batches and ensure consistent results every time. Here is the specific candy thermometer I personally use and highly recommend for its accuracy and ease of use. Before you begin, it’s always a good practice to verify your candy thermometer’s accuracy. You can follow this helpful guide to ensure it’s giving you precise readings, a small step that makes a big difference in candy making.
Understanding the different stages of sugar cooking, particularly the hard-crack stage at 300°F (150°C), is fundamental. At this temperature, the sugar syrup contains almost no water and will immediately become brittle when cooled. This is what gives honeycomb its signature snap. Without reaching this precise temperature, your candy will retain too much moisture and turn out unpleasantly soft or chewy.
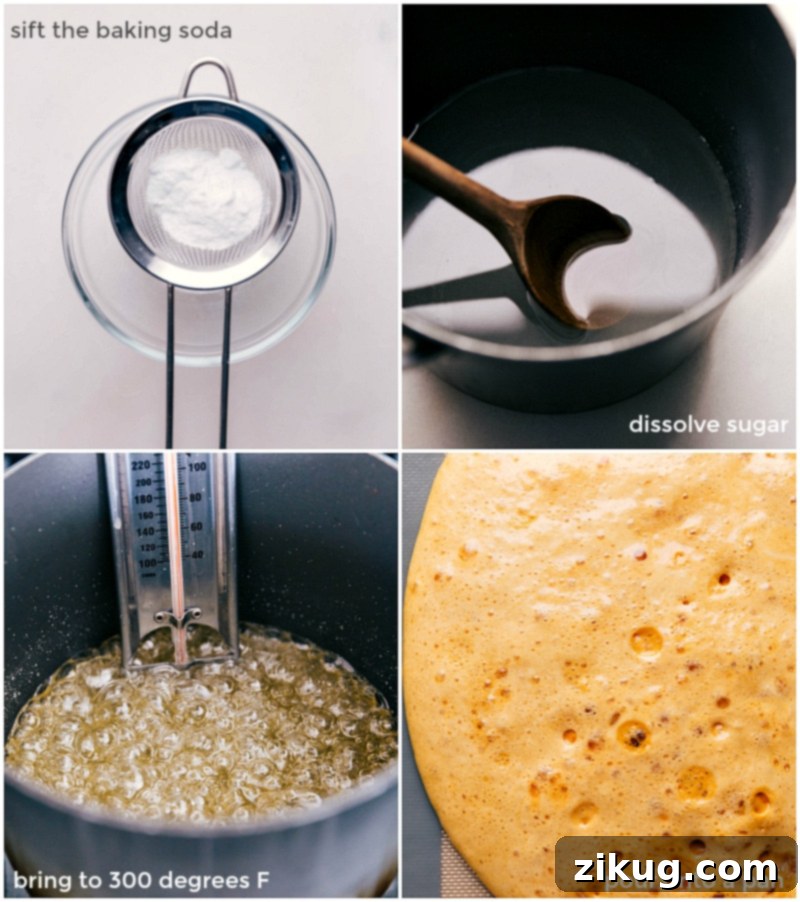
How To Make Irresistible Honeycomb Candy
Making honeycomb candy is a rewarding process that comes together quickly, so preparation is key. Follow these steps for a perfect batch:
- Prepare Your Workspace: Before you even turn on the stove, ensure all your ingredients are measured and ready to go. Line a large rimmed baking sheet with parchment paper or a silicone baking mat. Sift the baking soda through a fine-mesh sieve into a small bowl to prevent clumps, and have your vanilla extract and salt ready beside it.
- Begin the Cook: In a large, heavy-bottomed pot, combine the granulated sugar, water, and light corn syrup. Stir gently until the sugar is dissolved. Attach your candy thermometer, ensuring it doesn’t touch the bottom of the pot. Bring the mixture to a boil over medium-high heat. Once boiling, refrain from stirring to prevent crystallization.
- Achieve Hard-Crack Stage: Continue heating the syrup, without stirring, until your candy thermometer precisely registers 300°F (150°C). This is the critical hard-crack stage. Pay close attention as the temperature can rise rapidly once it gets close to the target. Do not be tempted to increase the heat to speed up the process, as this can lead to burning.
- Rapid Mixing: As soon as the syrup hits 300°F, immediately remove the pot from the heat. Working with extreme speed, sprinkle the pre-sifted baking soda, vanilla, and salt evenly over the hot syrup. Vigorously whisk the mixture for no more than 5-10 seconds. The syrup will instantly begin to bubble up and expand dramatically, tripling in size—this is the magic of the baking soda at work!
- Pour and Set: Quickly pour the expansive, foamy candy mixture onto your prepared baking sheet. Do not spread it or attempt to smooth it; allow it to expand and settle naturally. Leave the candy undisturbed and untouched for at least 1 to 2 hours to fully cool and harden.
- Break into Pieces: Once completely cooled and firm, carefully remove the honeycomb from the baking sheet. Use a blunt object, such as a meat mallet or the handle of a chef’s knife, to gently shatter the candy into bite-sized pieces. Alternatively, you can simply break it apart with your hands.
- Optional Chocolate Dip: For an extra layer of indulgence, melt your chosen chocolate in a microwave-safe bowl. Heat in short bursts (e.g., 30 seconds), stirring well for 15-20 seconds after each burst, until smooth and melted (usually 1 to 1.5 minutes total). If desired, stir in 1/4 teaspoon of vegetable oil or shortening for a thinner, glossier coating. Dip individual honeycomb pieces into the melted chocolate, or drizzle chocolate over them. Place the chocolate-coated pieces back onto a parchment-lined sheet pan and let them stand at room temperature until the chocolate hardens, typically about 1 hour.
Honeycomb Candy Frequently Asked Questions (FAQs)
Why Does My Honeycomb Candy Get Chewy Instead of Crispy?
The most common culprit for chewy honeycomb candy is humidity. Sugar is highly hygroscopic, meaning it absorbs moisture from the air, which can quickly turn crispy candy into a sticky, chewy mess. Therefore, it’s best to make this candy on a dry day. Another significant factor is not reaching the precise “hard-crack stage” of 300°F (150°C). If the candy mixture doesn’t hit this temperature, it retains too much moisture and will never become truly crisp. Using an inaccurate candy thermometer or skipping it altogether is often the root cause of this temperature issue. Ensure your thermometer is calibrated and reliable.
How Long Does Honeycomb Candy Take To Set Up and Harden?
While the honeycomb may appear set and firm almost immediately after pouring it onto the pan due to rapid cooling, it requires a full 1 to 2 hours to completely cool down and solidify throughout. Rushing this process can result in pieces that are still slightly soft in the center or prone to breaking incorrectly. Patience is key for achieving that perfectly crisp and stable structure. Avoid touching or moving the candy during this critical setting time.
What’s the Easiest Way to Clean the Pot After Making Candy?
Cleaning a pot with hardened sugar can seem daunting, but it’s surprisingly simple with this trick:
- First, allow the pot to cool completely. Once cool, fill it approximately halfway with water.
- Place the pot back on your stovetop and bring the water to a rolling boil. As the water heats up and boils, the hardened candy stuck to the sides and bottom will begin to dissolve and melt off.
- Use a spatula to gently scrape down the sides and dislodge any stubborn candy remnants. Once the candy has melted into the water, carefully pour the solution down your sink (preferably with a garbage disposal for any small lingering bits).
- Allow the pot to cool again before giving it a final wash with soap and water. This method prevents laborious scrubbing and protects your cookware.
Expert Tips for Honeycomb Candy Success
Achieving perfect honeycomb candy every time is easier with a few key strategies. These tips will help you navigate the process smoothly and avoid common pitfalls, ensuring you get that ideal crisp, bubbly texture:
- Mise en Place is Crucial: The world of candy making moves quickly, especially when dealing with hot sugar. Before you even turn on the stove, gather and precisely measure all your ingredients. Have your prepared baking sheet, sifted baking soda, vanilla, and salt within arm’s reach. This proactive approach ensures you can act swiftly when the critical moment arrives, as delays can lead to a compromised texture or even burnt sugar.
- Resist the Urge to Stir While Boiling: Once your sugar, water, and corn syrup mixture comes to a boil, it is imperative to stop stirring. Stirring introduces sugar crystals from the sides of the pot back into the syrup. These crystals can act as nucleation sites, causing the entire batch to crystallize and become grainy rather than smooth and clear. Let the mixture heat up undisturbed, allowing the candy thermometer to be your guide.
- Manage Your Heat Wisely: The time it takes for your syrup to reach 300°F (150°C) can vary significantly depending on your stove’s power and the type of pot you’re using. While it might be tempting to crank up the heat to speed things along, maintaining a medium heat is crucial. High heat can cause the sugar to caramelize too quickly or burn unevenly, resulting in a dark, bitter-tasting candy. Patience here will be rewarded with a beautiful golden hue and perfect flavor.
- Ensure Baking Soda is Fresh and Sifted: Fresh baking soda is vital for the vigorous reaction that creates the honeycomb’s signature bubbles. Old or clumpy baking soda will result in fewer bubbles and a denser candy. Sifting it beforehand ensures it disperses evenly and reacts uniformly, maximizing the volume and crispness.
- Don’t Over-Whisk After Baking Soda: The moment baking soda is added, a rapid chemical reaction begins, creating carbon dioxide gas. Whisk quickly and vigorously for only 5-10 seconds to incorporate it thoroughly. Over-whisking can deflate the precious bubbles before they have a chance to set, leading to a denser honeycomb.
- Choose the Right Pot: Use a pot much larger than you think you’ll need. The candy will dramatically triple (or even quadruple!) in volume when the baking soda is added. A large, heavy-bottomed pot will prevent boil-overs and help distribute heat evenly, reducing the risk of scorching.
Storage Guidelines for Honeycomb Candy
Keeping Your Honeycomb Fresh
Proper storage is essential to maintain the crisp texture of your homemade honeycomb candy. Because sugar is hygroscopic, it readily absorbs moisture from the air, which can quickly turn your perfectly crunchy candy into a sticky, chewy mess. To preserve its quality, store leftover honeycomb candy in an airtight container in a cool, very dry spot at room temperature for up to 1 week. It is crucial NOT to refrigerate honeycomb candy, as the refrigerator’s humid environment will accelerate softening and stickiness.
For longer preservation, honeycomb candy can be successfully frozen. Place the pieces in an airtight, freezer-safe container, separating layers with parchment paper if necessary, and freeze for up to 1 month. When you’re ready to enjoy it, simply remove it from the freezer and let it come to room temperature. This method helps maintain its crispness much better than refrigeration.
More Irresistible Homemade Desserts
If you’ve enjoyed the sweet satisfaction of making honeycomb candy, you’re sure to love these other fantastic dessert recipes. Each offers a unique flavor and texture, perfect for any occasion:
- 3-Ingredient Christmas Candies: Explore three wonderfully easy and festive candy ideas, perfect for holiday gifting or adding a touch of sweetness to your seasonal celebrations.
- Scotcheroos: Indulge in these incredibly popular crunchy bars featuring a delightful blend of chocolate and peanut butter, a true no-bake classic that’s always a crowd-pleaser.
- Carmelitas: Discover these heavenly oatmeal bars, generously filled with a luscious layer of gooey caramel and rich chocolate chips, offering a perfect balance of textures and flavors.
- Oreo Balls: Simple yet incredibly decadent, these chocolate cookie truffles are made with crushed Oreos and cream cheese, then dipped in chocolate for an effortless, delightful bite.
- Buckeye Brownies: Experience the ultimate combination of peanut butter and chocolate with these brownies, featuring rich fudgy layers topped with a creamy peanut butter filling and a smooth chocolate ganache.

Print Recipe
Rating: 5/5 stars (1 vote)
Homemade Honeycomb Candy
Equipment
-
Fine mesh sieve
-
Large sheet pan (15″ x 21″)
-
Silicone baking mat or parchment paper
-
Large pot
-
Candy Thermometer
Ingredients
- 1 cup granulated sugar
- 1 cup light corn syrup
- 1/2 cup water at room temperature
- 1 tablespoon baking soda do not use baking powder
- 1/8 teaspoon salt
- 1-1/2 teaspoons vanilla extract or 1 teaspoon vanilla bean paste
- 1 cup dark chocolate or semi-sweet or milk chocolate for a sweeter candy
- 1/4 teaspoon vegetable oil or shortening, optional
Instructions
-
Set out and precisely measure all your ingredients. Prepare a whisk. Line a large rimmed sheet pan with parchment paper or a silicone baking mat and place it conveniently next to your stovetop.
-
Carefully sprinkle the baking soda through a fine-mesh sieve into a small bowl. This crucial step ensures there are no clumps, which could lead to uneven aeration in your honeycomb. Place this bowl next to the stovetop along with your measured vanilla extract and salt.
-
Into a large, heavy-bottomed pot (remember, the candy will triple in size!), add the granulated sugar and water. Stir gently to combine the ingredients until the sugar is mostly dissolved. Turn the heat to medium-high and add the light corn syrup. Stir briefly to incorporate, then allow the mixture to come to a boil. Once boiling vigorously, do NOT stir the mixture again, as stirring at this stage can promote sugar crystallization, resulting in a grainy texture.
-
Carefully insert your candy thermometer into the boiling syrup, ensuring the tip does not touch the bottom of the pot. Continue to heat the mixture, without stirring, until it precisely reaches 300°F (150°C). Monitor the thermometer very closely—the temperature can appear to rise slowly for a while, then suddenly jump to the target. It is vital not to increase the temperature to hasten this process, as high heat can scorch the sugar.
-
The instant the temperature registers 300°F, immediately remove the pot from the heat source. Working with extreme swiftness, sprinkle the pre-sifted baking soda, vanilla, and salt evenly over the intensely hot candy syrup. You will notice the mixture rapidly begin to expand and dramatically triple in size due to the release of carbon dioxide. Quickly and vigorously whisk these additions into the sugar syrup for no more than 5–10 seconds. Excessive whisking will deflate the precious bubbles. Immediately pour the effervescent candy onto your prepared sheet pan and allow it to expand and settle naturally; do not spread or manipulate it. It is critical not to touch or move the candy for at least 1 hour while it cools and sets.
-
Once the candy has completely cooled and hardened (after at least 1-2 hours), carefully remove it from the pan. For clean breaks, use a blunt object like a meat mallet or the back of a chef’s knife to shatter the candy into irregular, bite-sized pieces. Alternatively, you can simply break up the candy with your hands, which also creates lovely rustic shapes.
-
Optionally, for a luxurious finish: Melt your preferred chocolate (dark, semi-sweet, or milk) in a microwave-safe bowl. Heat in 30-second bursts, stirring thoroughly for 15–20 seconds between each burst, until smooth and fully melted (total heating time typically 1 minute to 1 minute and 15 seconds). If you desire a slightly thinner and glossier chocolate coating, stir in 1/4 teaspoon of vegetable oil or shortening. Dip individual honeycomb pieces into the melted chocolate, or simply drizzle the chocolate over them using a spoon. Place the chocolate-covered candy onto a fresh parchment paper-lined sheet pan and let it stand at room temperature until the chocolate is completely hardened, which usually takes about 1 hour.
Recipe Notes
How to easily clean your pot after making the candy:
- Allow the pot to cool completely after pouring out the honeycomb. Once cooled, fill it just over halfway with water.
- Place the pot back on the stovetop and bring the water to a boil. As the water boils, the hardened candy stuck to the sides and bottom will begin to melt and dissolve.
- Use a heat-safe spatula to scrape down the sides and remove any stubborn candy residue. Carefully pour the hot water and dissolved candy down the drain (a garbage disposal can help with any small remaining bits). Let the pan cool before performing a final wash with soap and water. This method prevents strenuous scrubbing.
Storage: Store your homemade honeycomb candy in an airtight container in a very dry place at room temperature. This candy is best enjoyed within 1 week of preparation. Honeycomb will quickly become soft and chewy in a humid environment due to its hygroscopic nature. Do not refrigerate, as the moisture in a refrigerator will cause it to become sticky and lose its crispness.
Nutrition
Calories: 252 kcal |
Carbohydrates: 44g |
Protein: 2g |
Fat: 9g |
Saturated Fat: 5g |
Polyunsaturated Fat: 1g |
Monounsaturated Fat: 3g |
Trans Fat: 1g |
Cholesterol: 1mg |
Sodium: 315mg |
Potassium: 142mg |
Fiber: 2g |
Sugar: 40g |
Vitamin A: 8IU |
Calcium: 18mg |
Iron: 2mg
Nutrition information is automatically calculated and should only be used as an approximation.
Enjoyed this recipe? Share your thoughts below!
Your feedback helps others discover delicious treats.