

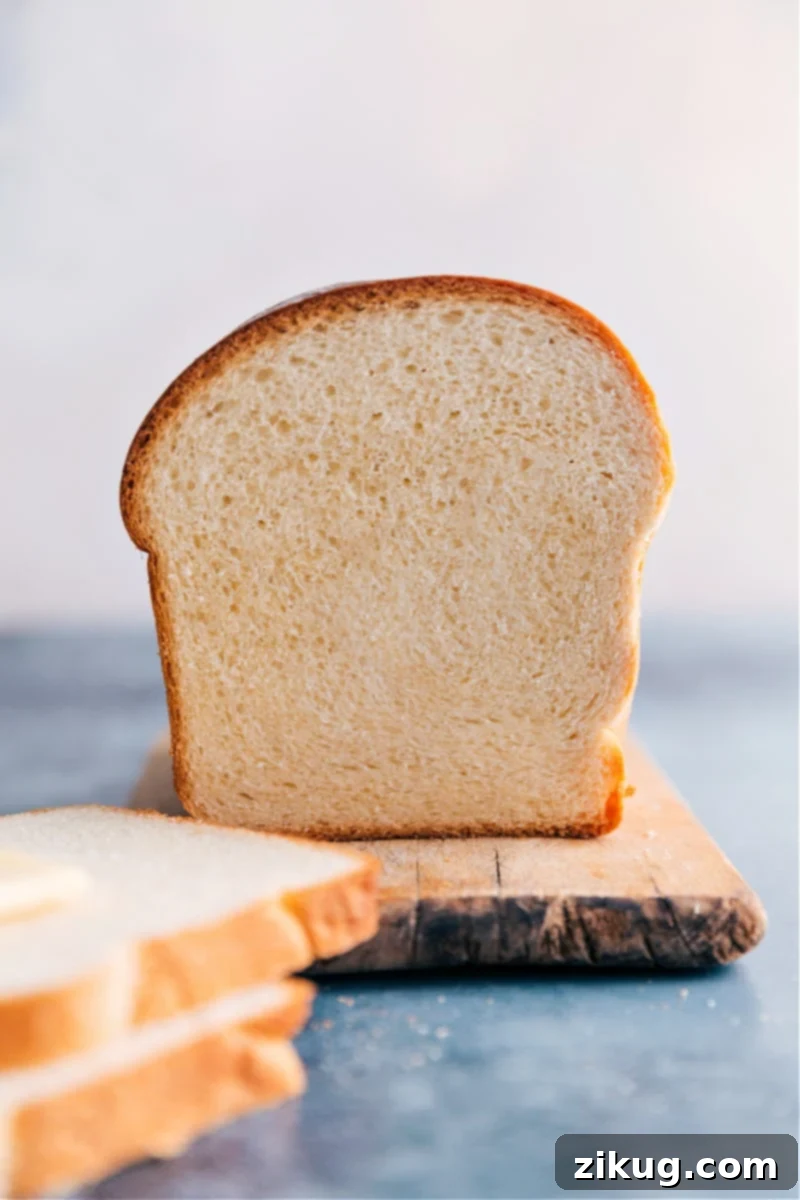
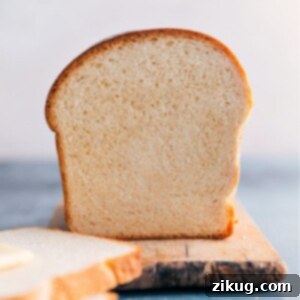
Master the art of baking with this classic White Bread Recipe, crafted from just six fundamental ingredients you likely already have in your pantry. Skip the grocery run and enjoy the comforting aroma of freshly baked bread filling your home!

Author’s Note
Bake Irresistibly Fluffy White Bread in Just One Afternoon!
There’s something uniquely satisfying about a warm slice of homemade white bread. It’s a nostalgic comfort food I grew up with, and sometimes, nothing else quite measures up. As a parent, however, I became increasingly aware of the long list of unfamiliar ingredients found in store-bought loaves.
Driven by a desire for a healthier, more transparent option for my family, I embarked on a journey to create a truly simple white bread recipe. My goal was a loaf made with ingredients I could easily pronounce and trust. And let me tell you, the result is truly exceptional! This homemade white bread isn’t just better than anything you’ll find at the supermarket; it’s surprisingly easy to make, often requiring less effort than a trip to the store.
While baking bread does involve some waiting for the dough to rise, the actual **hands-on preparation is incredibly minimal**. With **just six common ingredients**, this recipe is a keeper you’ll turn to again and again for its simplicity and delicious results.
Essential Ingredients for Your Perfect White Bread
Crafting the perfect loaf of white bread doesn’t require a pantry full of exotic items. This recipe relies on a handful of everyday staples, each playing a crucial role in achieving that desirable soft crumb and golden crust.
| Ingredient | Why It Matters & Helpful Tips |
|---|---|
| Warm Milk | Milk adds richness, tenderness, and a lovely golden color to the crust. Whole milk delivers the best flavor and a wonderfully soft texture. For a slightly leaner loaf, water can be substituted, but expect a less tender crumb. Ensure the milk is warm (105-115°F or 40-46°C) to activate the yeast effectively without killing it. |
| Yeast | The magic behind the rise! Both instant yeast and active dry yeast work beautifully in this recipe. Active dry yeast typically needs to be proofed (activated in warm liquid) first, while instant yeast can often be mixed directly with dry ingredients. Always check your yeast’s freshness to ensure a good rise; it should foam readily. If it doesn’t, your yeast might be old or the liquid temperature was off. |
| Honey | Honey provides a subtle sweetness and helps to beautifully brown the crust. It also feeds the yeast, contributing to a robust rise. If you don’t have honey, granulated sugar or maple syrup can be swapped in a 1:1 ratio. The flavor profile will be slightly different, but the functional role remains the same. |
| Flour | The structural foundation of your bread. All-purpose flour will yield a softer, classic white bread texture. If you prefer a chewier loaf, bread flour, with its higher protein content, will enhance gluten development. Remember to measure flour correctly – spooning it into the measuring cup and leveling it off prevents packing too much flour, which can lead to a dense, dry loaf. |
| Butter | Melted butter enriches the flavor, contributes to a tender crumb, and adds to the bread’s overall luxuriousness. Unsalted butter is preferred for better control over the salt content. It’s crucial that the butter is melted and *cooled* before adding to the dough to avoid killing the yeast. If dairy is a concern, a neutral-flavored oil can be used as a substitute, though the flavor will differ slightly. |
| Salt | More than just a flavor enhancer, salt plays a vital role in controlling yeast activity and strengthening the gluten structure, resulting in a more elastic dough and improved texture. I recommend fine sea salt for its consistent texture and pure flavor. If using table salt, which is finer and denser, you may want to use slightly less to prevent over-salting. |
Crafting Your Homemade White Bread: A Step-by-Step Guide
Baking homemade white bread might seem daunting, but with these clear, easy-to-follow steps, you’ll be a master in no time. Follow along to create two beautiful, fluffy loaves!
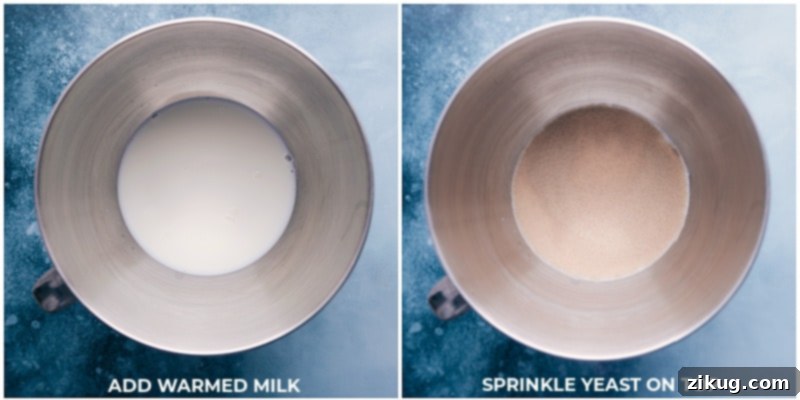
- Activate the Yeast: Begin by warming your milk to the ideal temperature (around 105-115°F or 40-46°C). In the bowl of your stand mixer, combine the warm milk with yeast and honey (and optional sugar, if using instant yeast). Stir gently and let this mixture sit for 5-10 minutes. This step is crucial; if using active dry yeast, you’ll want to see a foamy layer on top, indicating your yeast is alive and active. If it doesn’t foam, discard and start again, as dormant yeast won’t allow your bread to rise. If using instant yeast, simply combine and wait 3 minutes before proceeding.
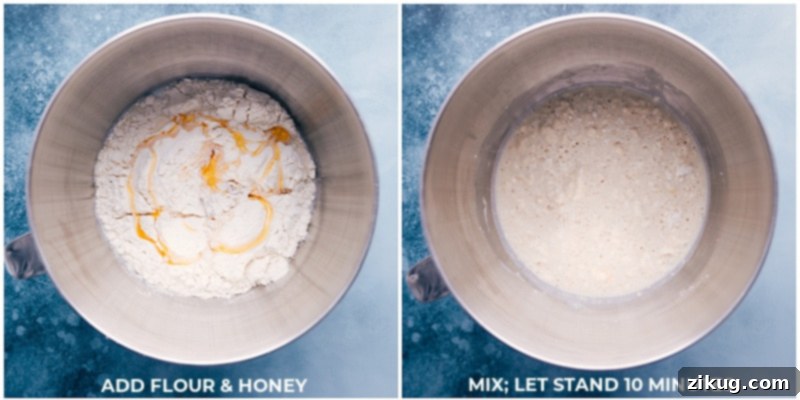
- Build the Starter: After the yeast has activated, pour in the honey and two cups of your chosen flour. Using the beater attachment on your stand mixer, stir just until the flour is moistened, about one minute, scraping down the sides of the bowl as needed with a spatula. Allow this starter mixture to rest undisturbed for another 10 minutes. This rest period gives the flour a chance to fully hydrate and the gluten to begin developing.
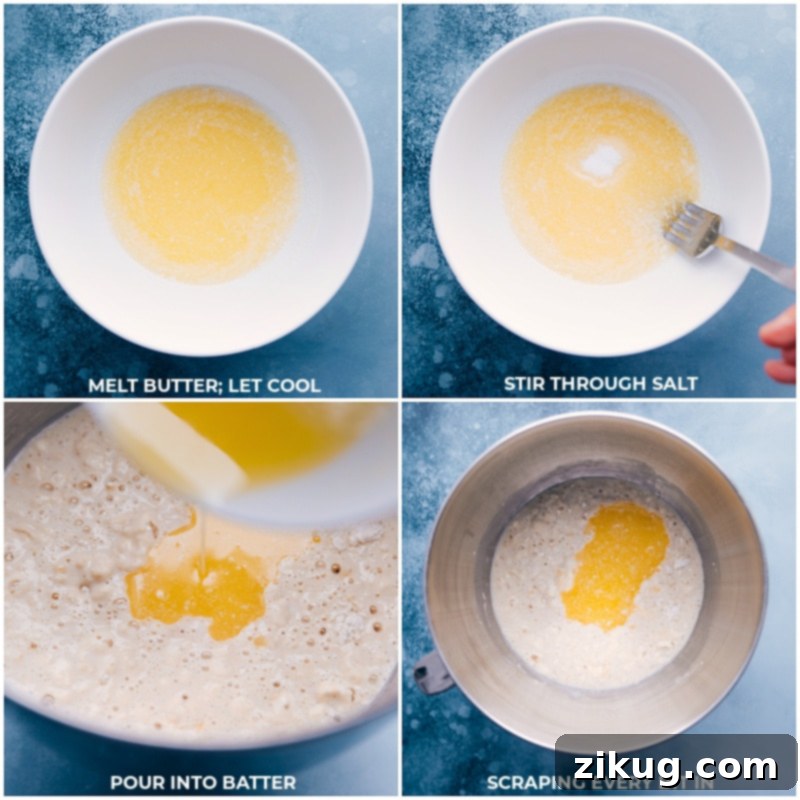
- Prepare the Butter & Salt: While your starter rests, melt six tablespoons of unsalted butter in the microwave. It’s essential that the butter cools completely to room temperature before being added to the dough. Once cooled, stir in the salt. This separation ensures the warm butter doesn’t harm the yeast, and the salt is evenly distributed without inhibiting yeast growth prematurely.
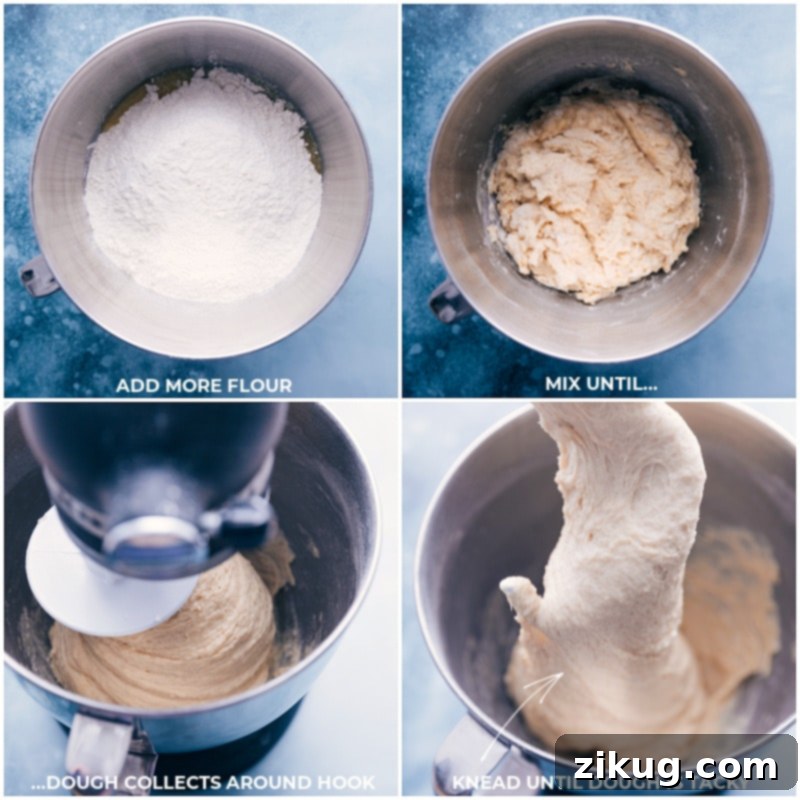
- Form the Dough: After the 10-minute rest, pour the cooled butter and salt mixture into your stand mixer bowl, ensuring you scrape out every bit. Add an additional four cups of flour. Switch to the dough hook attachment. Mix on low speed (speed 2) for about 2-3 minutes until all ingredients are combined and the dough begins to gather around the hook. If the dough appears too sticky and clings to the sides of the bowl, gradually add the remaining half cup of flour, one tablespoon at a time, until it forms a cohesive ball. The dough should be tacky but not wet or overly sticky. Avoid adding excessive flour, as this can lead to a dry, dense loaf.
- Knead to Perfection: Increase the mixer speed to medium (speed 4-6) and continue to knead the dough for a full 10 minutes. This prolonged kneading develops the gluten, creating the elasticity and structure needed for a light, airy bread. Keep an eye on your mixer; it might “walk” a bit if not weighted down! If kneading by hand, this step will take approximately 10-12 minutes, requiring vigorous effort until the dough is smooth, satiny, soft, and still slightly tacky to the touch.
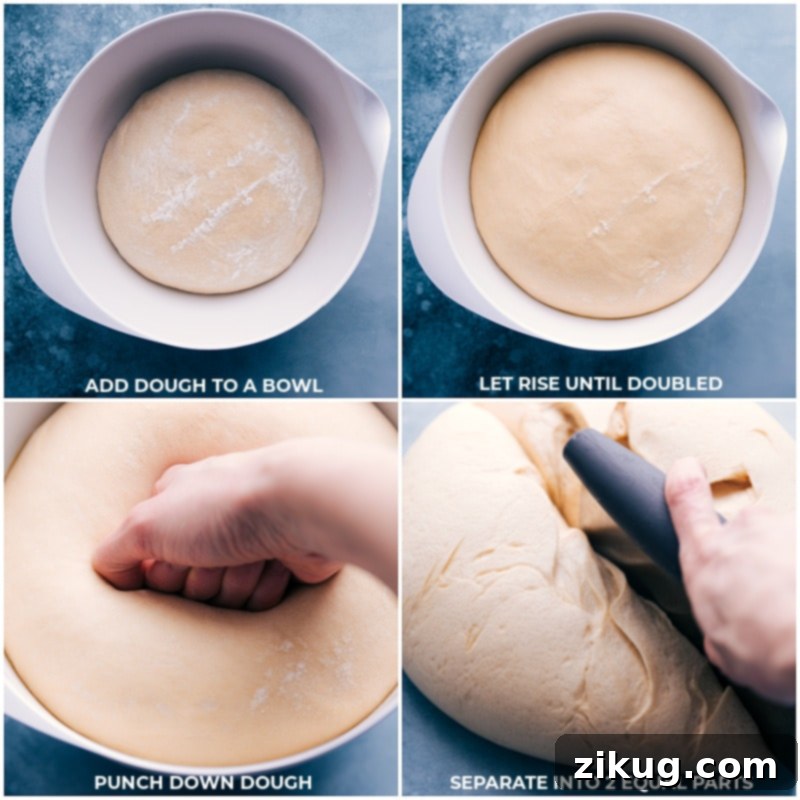
- First Rise (Bulk Fermentation): Once kneading is complete, remove the dough from the mixer and briefly knead it by hand for about 20 seconds to form a smooth, even ball. Generously grease your mixing bowl with cooking spray (olive or coconut oil works well). Place the dough in the greased bowl, turning it to coat all sides lightly with oil. Cover the bowl with a clean, damp cloth and place it in a warm spot (ideally around 70°F or 21°C). Let the dough rise until it has visibly doubled in size, which usually takes about 1 hour. This is the first proof, crucial for flavor development and texture.
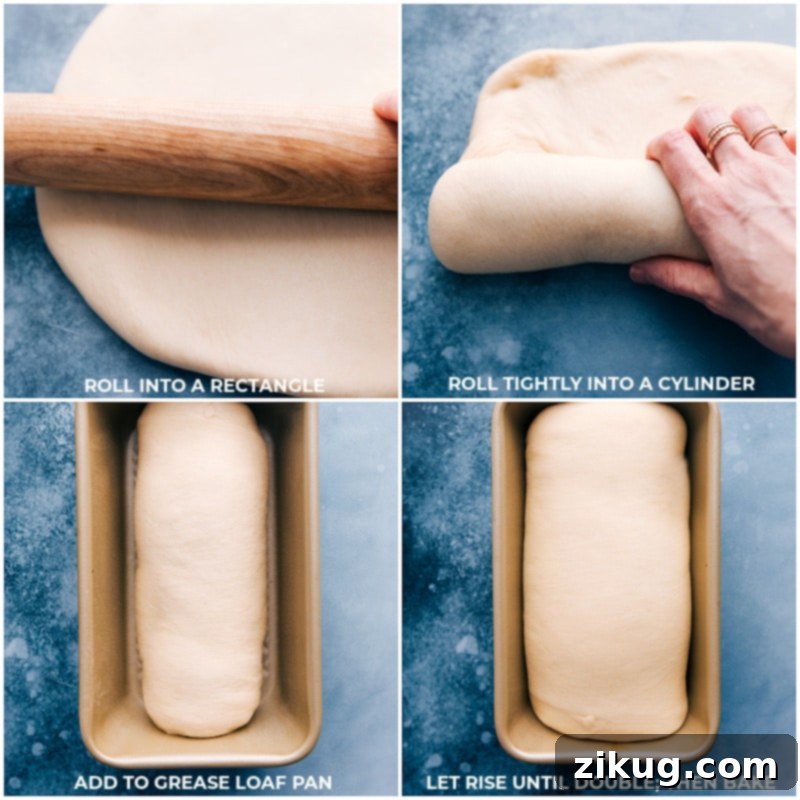
- Shape the Loaves: Gently uncover the dough and “punch it down” to release the accumulated air. Transfer the dough to a clean work surface. Divide the dough into two equal portions. For precision, a food scale is recommended. Shape each portion into a loaf. A good method is to roll the dough into a rectangle, then tightly roll it into a cylinder, pinching the seams closed and tucking in the ends to create a smooth loaf.
- Second Rise (Proofing in Pan): Place each shaped loaf into separate, greased 8.5×4.5-inch bread pans (or 9×5-inch pans if you prefer a slightly flatter loaf). Cover the pans again with a damp cloth and return them to a warm place for their second rise. Allow them to rise for another 30-60 minutes, or until the loaves are puffy and have roughly doubled in size. Be careful not to over-proof during this stage, as it can lead to a strong yeasty flavor or a collapsed loaf during baking.
- Bake to Golden Perfection: Preheat your oven to 375°F (190°C). Bake the loaves for 32-40 minutes. The bread is fully cooked when its internal temperature reaches 195°F (90°C). The crust should be a beautiful golden brown and feel firm and dry to the touch. If you tap the bottom of a loaf with your knuckles, it should sound hollow.
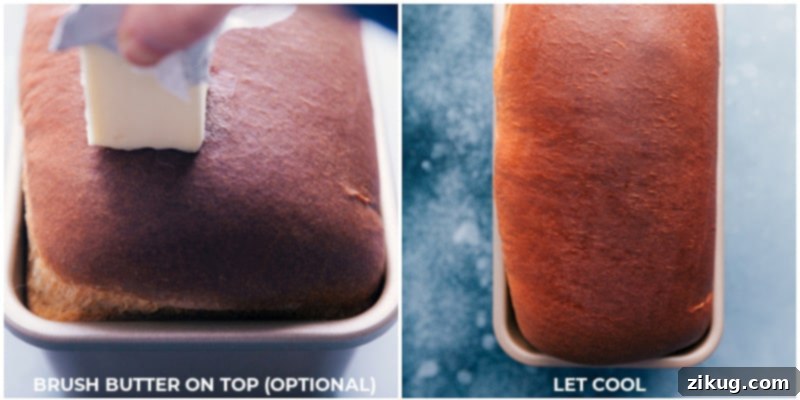
- Cool and Enjoy: Immediately after removing the bread from the oven, you can optionally rub two tablespoons of butter over the tops of the hot loaves for an extra soft crust and rich flavor. Let the bread cool in the pans for about 10 minutes before carefully transferring them to a wire cooling rack. It’s important to let the loaves cool for at least 30 minutes (or even longer) before slicing. The bread continues to “cook” as it cools, setting its internal structure. Slice and serve your delicious homemade white bread with a dollop of apple butter or creamy honey butter, or simply enjoy it plain!
The Art and Science of Proofing: Essential for Perfect Bread
Proofing, also known as rising, is perhaps the most crucial stage in bread baking, where the yeast works its magic. In this white bread recipe, the dough undergoes two distinct rises, each contributing uniquely to the final texture and flavor of your loaf.
- The First Rise (Bulk Fermentation): This occurs after the initial kneading. During this period, the yeast actively ferments, producing carbon dioxide gas which causes the dough to expand and develop complex flavors. The gluten strands also relax and strengthen, creating a more extensible dough.
- The Second Rise (Proofing the Shaped Loaves): After the dough has been shaped into loaves, it undergoes a second, shorter rise. This final proof ensures the loaf achieves maximum volume, a beautifully airy crumb, and an appealing shape when baked.
- Finding the Sweet Spot: Achieving the perfect rise is key. Letting the dough rise too long (over-proofing) can lead to several issues: off-flavors (a strong, overly yeasty taste), a gummy texture, a misshapen crust, or even a collapsed loaf in the oven as the gluten structure weakens. Conversely, not letting it rise enough (under-proofing) will result in a heavy, dense bread with poor volume and a dry texture.
- Overnight White Bread Variation: For a convenient baking schedule, you can slow down the first rise. After kneading and shaping the dough into a ball, place it in a greased bowl, cover it tightly, and let it rise slowly in the refrigerator for approximately 10-12 hours. This extended cold fermentation enhances flavor. The next day, let the dough come to room temperature for about 30-60 minutes before proceeding with shaping and the second rise, or simply shape cold dough and allow for a longer second proof at room temperature. More detailed information on cold proofing can be found here!
Quick Tip
Once you’ve mastered this incredibly soft and flavorful White Bread recipe, broaden your baking horizons! Try your hand at this hearty Honey Whole Wheat Bread for a nutritious twist or bake a batch of fluffy Dinner Rolls – perfect for any meal!
Choosing the Right Bread Pan for Your Loaves
The type and size of bread pan you use can significantly impact the final shape and height of your homemade white bread. I’ve thoroughly tested this recipe in two common loaf pan sizes to help you achieve your desired results.
For a classic, taller, and more compact American-style white bread loaf – the kind that yields perfect sandwich slices – I highly recommend using an 8.5 x 4.5-inch loaf pan. This smaller volume encourages the dough to rise higher, resulting in a beautifully domed top and a more uniform texture.
Alternatively, a slightly larger 9 x 5-inch loaf pan will also work well. However, be aware that using this larger pan will typically produce a loaf that is a bit wider and not quite as tall. Both options will yield delicious bread, but if visual appeal and height are priorities, stick with the 8.5 x 4.5-inch pans.
Always remember to grease your chosen bread pans thoroughly before adding the shaped dough to prevent sticking and ensure easy removal after baking.
Expert Tips for Baking the Best White Bread
Achieving a consistently perfect loaf of homemade white bread involves understanding a few key principles. These tips will help you navigate common challenges and ensure your baking success:
- Flour Measurement Matters: The amount of flour needed can vary based on humidity, altitude, and even the specific flour brand. I recommend starting with about 1/2 cup less flour than the recipe initially calls for. Then, slowly add more flour, one tablespoon at a time, until the dough pulls cleanly away from the sides of the bowl and feels slightly tacky, but not wet or sticky. Over-flouring is a common pitfall that leads to dense, dry bread. Remember the “spoon and level” method: gently spoon flour into your measuring cup and then level it off with a straight edge. Never scoop directly from the bag, as this compacts the flour and adds too much weight. Watch a video on how to measure flour correctly.
- Managing Sticky Dough: It’s normal for bread dough to be a little sticky, especially during kneading. Instead of adding more flour to your kneading surface (which can lead to a tough loaf), use a light coating of cooking spray on your hands and countertop. A dough scraper is also an invaluable tool for handling sticky spots and keeping your work surface clean.
- Maintain Ideal Kitchen Temperature: Yeast is a living organism, and its activity is highly dependent on temperature. For optimal rising, keep your kitchen temperature between 65°F and 75°F (18-24°C). If your kitchen is cooler, you can create a warm environment for your dough by placing the covered bowl in a slightly warmed (but turned off) oven, or near a sunny window.
- The Perfect Kneading Check: How do you know if your dough is perfectly kneaded? It should feel smooth, elastic, and soft. When gently stretched, it should form a thin, translucent “windowpane” without tearing. It will still have a slight tackiness to it, indicating proper hydration, but it shouldn’t stick aggressively to your hands or the bowl.
- Don’t Over-Proof: While letting the dough rise is essential, over-proofing can lead to a strong, sour, yeasty flavor and a potential collapse during baking. Look for visual cues: the dough should double in size and appear puffy. The “poke test” can also help – gently poke the dough with a floured finger; if the indentation slowly springs back, it’s ready. If it springs back immediately, it needs more time. If it doesn’t spring back at all and stays indented, it might be over-proofed.
Storage Solutions for Your Homemade White Bread
While homemade white bread doesn’t contain the preservatives found in store-bought versions, its incredible freshness and flavor mean it often disappears quickly! Here’s how to best store any leftovers:
- Room Temperature: For optimal freshness, store your cooled white bread in a cool, dry spot for 3-5 days. An airtight plastic bag or a bread box that allows for a little ventilation works best. Avoid storing bread in warm or humid environments, which can encourage mold. Also, surprisingly, the refrigerator is not ideal for storing bread as it tends to dry out and go stale much faster due to a process called retrogradation.
- Freezing for Longer Freshness: If you won’t consume your loaves within a few days, the freezer is your best friend. Once the bread has completely cooled, slice it into individual portions or half-loaves. Wrap each portion tightly in plastic wrap, then place them in a freezer-safe bag or container. Frozen slices can be kept for up to 3 months. When you’re ready to enjoy, simply toast slices directly from the freezer for a quick, delicious treat, or thaw them at room temperature for amazing white toast or sandwiches. Freezing is an excellent way to extend the life of your homemade masterpiece!
Delightful Ways to Enjoy Your Homemade White Bread:
Sandwiches
Refreshing Cucumber Sandwich Recipe
Lunch
Savory Chickpea Salad Sandwich
Lunch
Irresistible BBQ Chicken Sandwich Recipe
Sandwiches
Aromatic Rosemary Chicken Salad
Print Recipe
Classic Homemade White Bread
Chelsea Lords
15
35
2
2
50
2
loaves (approx. 24 slices)
Equipment
-
Stand mixer with dough hook (highly recommended for ease, but can be done by hand)
-
2 8.5 x 4.5-inch bread pans or 2 (9 x 5-inch) bread pans
-
Cooling rack
-
Large mixing bowl
-
Damp kitchen towel
Ingredients
- Cooking spray (olive or coconut oil based)
- 2 cups warm milk (whole milk recommended for best flavor and texture)
- 1 tablespoon active dry yeast (or instant yeast)
- 1/2 cup honey (or granulated sugar/maple syrup)
- 6-1/2 cups all-purpose flour (or bread flour for a chewier loaf, divided)
- 1 tablespoon fine sea salt (use slightly less if using table salt)
- 6 tablespoons unsalted butter (melted and completely cooled)
- 1 teaspoon granulated sugar (optional, for instant yeast activation)
- 2 tablespoons butter (optional, for brushing baked loaves)
Instructions
-
If using instant yeast: In the bowl of a stand mixer, add 2 cups warm milk (ensure it’s not too hot, 105-115°F, to prevent killing the yeast). Stir in the instant yeast and 1 teaspoon white sugar (optional). Let stand for 3 minutes. Proceed to step 3.
-
If using active dry yeast: In the stand mixer bowl, add 2 cups warm milk (105-115°F). Sprinkle active dry yeast over the milk, along with 1 teaspoon sugar (if using). Stir lightly, then let stand for 5–10 minutes, or until a foamy layer appears on top. If the yeast doesn’t foam, it’s not active (either old yeast or incorrect milk temperature). You’ll need to discard and start fresh, as the bread won’t rise otherwise.
-
Once yeast is activated, pour in the 1/2 cup honey and 2 cups (260g) of flour. Using the beater attachment, stir just until the flour is moistened, about 1 minute, scraping the sides with a spatula as needed. Let this mixture sit undisturbed for 10 minutes.
-
While the mixture rests, melt 6 tablespoons of butter in the microwave. Allow the butter to cool completely to room temperature (this is critical—even slightly warm butter can kill the yeast), then stir in 1 tablespoon of fine sea salt. Set aside.
-
After the dough starter has rested for 10 minutes, add the melted and cooled butter/salt mixture to the stand mixer bowl (scrape every bit out with a spatula). Add 4 more cups (495g) of flour. Swap to the dough hook attachment. Mix on low speed (speed 2) until the mixture is fully combined and begins to gather around the dough hook (about 2–3 minutes). If the dough is still sticking significantly to the sides of the bowl, gradually add the remaining 1/2 cup (60g) flour, one tablespoon at a time, until the dough collects around the hook. Avoid adding too much extra flour, as this can make the bread dense.
-
Once the dough has gathered around the hook, increase the speed to medium (speed 4–6) and knead for a full 10 minutes. Supervise your stand mixer to prevent it from moving too much. (If kneading by hand, vigorously knead for about 10–12 minutes). The goal is a dough that is smooth, satiny, soft, and tacky to the touch (it should stick slightly, but not be overly wet or dry).
-
After kneading, transfer the dough to a clean work surface. Knead with your hands for about 20 seconds to form a large, even ball. Generously grease the mixing bowl with coconut or olive-oil-based cooking spray. Place the dough in the bowl and turn it once to coat it lightly in the oil. Cover the bowl with a damp cloth and place it in a warm spot (around 70℉ / 21°C) to rise until it doubles in size, which typically takes about 1 hour.
-
Once doubled, remove the damp cloth and gently punch down the dough to release the air. Transfer the dough to your work surface and divide it into 2 equal parts (using a food scale ensures even loaves). Shape each dough portion into a loaf: roll the dough with a rolling pin into a rectangle, then tightly roll it into an even cylinder, pinching the seams closed and tucking the sides into the dough. Place each shaped loaf into greased 8.5×4.5-inch bread pans (or 9×5-inch pans if preferred). Cover the pans with a damp cloth and let them rise again in a warm place for another 30-60 minutes, or until they are puffy and nearly doubled in size. Be careful not to let the bread rise longer than needed, as this can lead to an undesirable yeasty flavor.
-
Preheat your oven to 375℉ (190°C). Bake the loaves for 32–40 minutes. The bread is done when an internal thermometer inserted into the center reads 195℉ (90°C). The crust should be evenly golden brown, firm, and dry. If you tap the bottom of the loaf with your knuckles, it should sound hollow. Right out of the oven, optionally rub the remaining 2 tablespoons of butter on the tops of the hot loaves for a softer crust. Let the bread cool in the pan for 10 minutes. Then, transfer them to a wire cooling rack and let cool for at least 30 minutes before slicing. (The bread continues to cook and set its internal structure even after coming out of the oven.) Slice and serve warm or at room temperature.
Recipe Notes
Note 2 (Yeast Activity): It’s crucial to confirm your yeast is alive and active before proceeding. Yeast thrives and produces gas best at temperatures around 105–115℉ (40-46°C). If your active dry yeast doesn’t foam after 5-10 minutes, it indicates an issue—either the yeast is old/dead, or the milk temperature was too hot (killing it) or too cold (keeping it dormant). In such cases, you must restart with new yeast and correctly tempered milk.
Note 3 (Flour Types): Both all-purpose flour and bread flour are suitable. Bread flour contains more protein, which contributes to greater gluten development and a chewier bread texture. If you opt for bread flour, you might find you need a touch less than the recipe specifies compared to all-purpose flour.
Note 4 (Salt Measurement): Not all salts have equivalent sodium content by volume. This recipe was developed using fine sea salt. If substituting with table salt, which is denser, use slightly less (e.g., about 3/4 tablespoon instead of 1 tablespoon). While it may seem like a lot, salt is vital not only for flavor but also for controlling yeast activity and strengthening the bread’s gluten structure.
Note 5 (Milk Temperature Test): To ensure your milk is at the perfect temperature for yeast, drizzle a few drops onto the inside of your wrist. It should feel comfortably warm, like a baby bottle. If it feels hot, it’s too hot for the yeast; if it feels cold, it’s too cold and the yeast will remain dormant.
Note 6 (Flour Adjustment): The precise amount of flour can fluctuate due to factors like local humidity, altitude, and ambient temperature. Always start with about 1/2 cup less flour than called for and add gradually until the dough cleanly pulls away from the sides of the bowl and is slightly sticky, but not wet. Too much flour will result in a dense, dry bread. When measuring, always weigh your flour for accuracy or use the spoon and level method. Packing flour directly into a measuring cup can add up to 25% more flour than intended.
Note 7 (Shaping Loaves): For best results, roll the dough with a rolling pin into a rectangle after the first rise. Then, starting from one of the longer sides, tightly roll the rectangle into an even cylinder. Pinch the seam firmly along the bottom and tuck the ends underneath to create a smooth, taut loaf ready for the pan.
Note 8 (Bread Pan Size): You can use either 8.5×4.5-inch or 9×5-inch bread pans. For a classic, taller, and more visually appealing loaf, I recommend the 8.5×4.5-inch pans. The smaller size forces the dough to rise higher.
Note 9 (Doneness Test): Beyond a golden-brown crust and hollow sound when tapped, the most accurate way to determine if your bread is fully baked is by checking its internal temperature with an instant-read thermometer. It should register 195℉ (90°C) in the center of the loaf. If it’s not quite there, bake for an additional 5 minutes and re-check.
Storage: Store cooled bread at room temperature in a cool, dry place for 3–5 days. A bread box or an airtight plastic bag (once fully cooled) works well. Avoid refrigerating, as it accelerates staling. For longer storage, slice the bread and freeze it in an airtight bag for up to 3 months. Slices can be toasted directly from the freezer or thawed at room temperature.
Nutrition Facts (Approximate per serving)
|
Calories: 179kcal
|
Carbohydrates: 32.9g
|
Protein: 4.4g
|
Fat: 3.3g
|
Cholesterol: 8mg
|
Sodium: 300.9mg
|
Fiber: 1.1g
|
Sugar: 6.9g
Nutrition information is automatically calculated, so should only be used as an approximation.
Love this recipe? Leave a comment below and share your experience!