
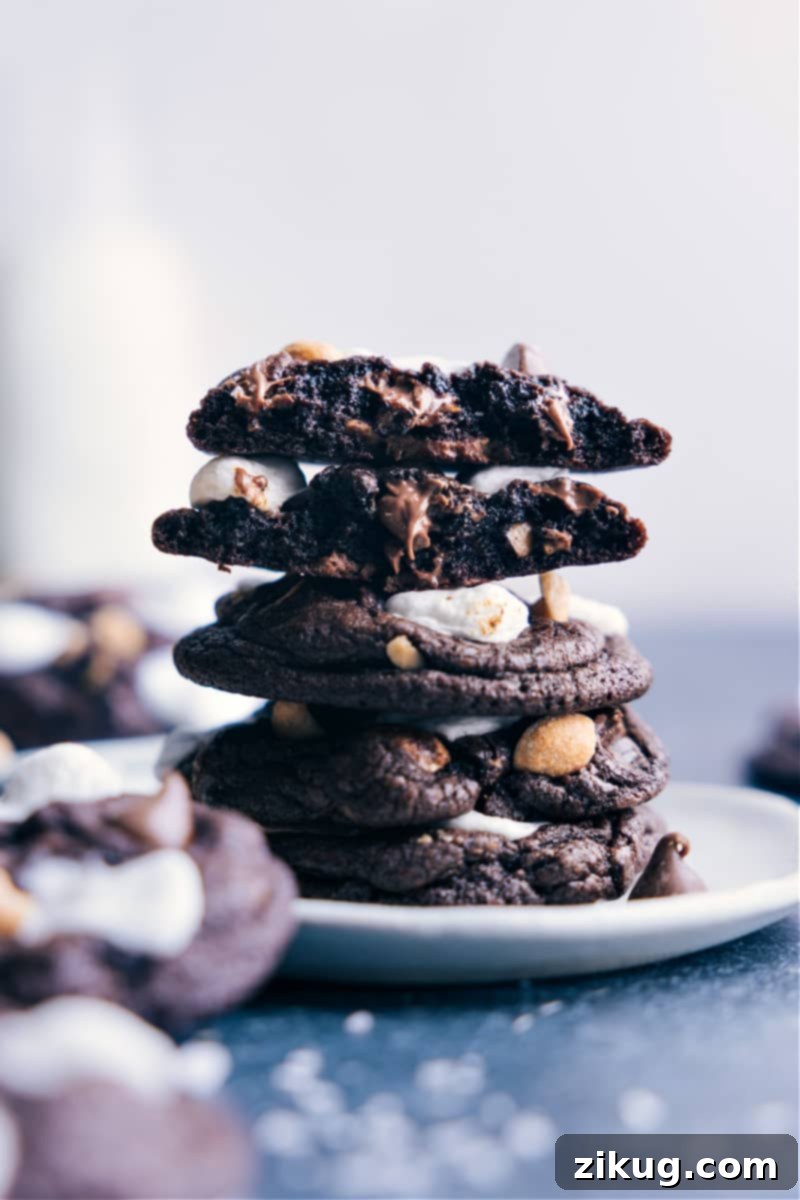
Rocky Road Cookies are the quintessential treat for anyone who adores the classic candy bar. Imagine a perfectly chewy, intensely rich chocolate cookie base, generously studded with luscious melty chocolate, crunchy roasted nuts, and irresistibly gooey marshmallows. These aren’t just cookies; they’re an experience – a symphony of textures and flavors in every single bite. If you’re searching for a cookie that truly stands out, combining the comforting familiarity of a chocolate chip cookie with an adventurous twist, look no further.
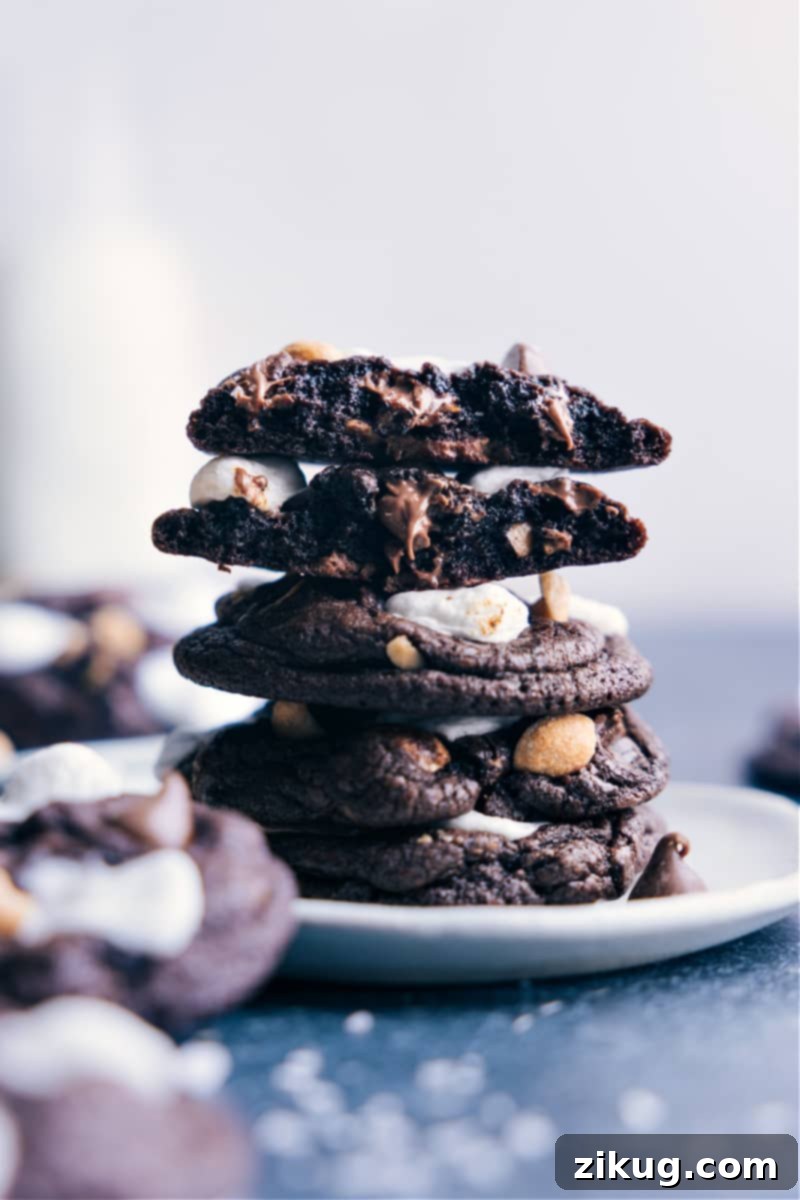

A Note from the Baker
Why Settle for Ordinary When You Can Have Extraordinary Rocky Road Cookies?
I believe baking should be an adventure, and sometimes, a plain chocolate cookie just doesn’t cut it. That’s where these Rocky Road Cookies come in. They transcend the ordinary by incorporating rich chocolate, fluffy marshmallows, crunchy nuts, and even a sprinkle of flaky sea salt to perfectly balance the sweetness.
This recipe isn’t just about mixing ingredients; it’s about understanding how each component contributes to a truly superior cookie. We’re talking about specific types of cocoa powder and flour that elevate the texture and flavor far beyond what you’d find in a standard recipe. Trust me, the difference is profound. For the best results, it’s crucial to use the right ingredients. Don’t rush it; waiting for your next grocery store trip to snag that special cocoa powder or cake flour will be entirely worth it. It ensures your cookies bake up perfectly, achieving that ideal fudge-like consistency and deep chocolate flavor without any disappointment. Let’s dive into what makes these cookies so exceptional!
Essential Ingredients for Unforgettable Rocky Road Cookies
Crafting the perfect Rocky Road Cookie starts with understanding the role of each ingredient. Here’s a closer look at what makes these cookies truly special:
- Dutch-Process Cocoa Powder: This is not your average cocoa powder! Dutch-processed cocoa has been treated with an alkali to reduce its acidity, resulting in a darker color and a smoother, less bitter chocolate flavor. This process also affects how it reacts with leavening agents. Unlike natural cocoa powder, which needs an acid (like baking soda) to react and rise, Dutch-process cocoa relies on baking powder or in this case, baking soda combined with brown sugar’s acidity. Substituting with regular cocoa powder will significantly alter the cookie’s texture, color, and even its overall rise, leading to a lighter, more crumbly cookie instead of the desired fudgy richness.
- Cake Flour: The secret to an incredibly tender and soft cookie lies in cake flour. It has a lower protein content compared to all-purpose flour, which means less gluten development. Less gluten equals a more delicate crumb and a melt-in-your-mouth texture that is simply unmatched. While you’ll also use some all-purpose flour for structure, the inclusion of cake flour is non-negotiable for achieving that luxurious, soft chew. Do not substitute it with all-purpose flour alone, or try to make homemade cake flour by adding cornstarch to all-purpose; the results will not be the same.
- Peanuts: We recommend using dry-roasted and lightly salted peanuts. The roasting brings out a deeper, nuttier flavor, and the touch of salt perfectly complements the sweetness of the chocolate and marshmallows, creating a fantastic sweet-and-salty dynamic. If peanuts aren’t your favorite, feel free to swap them for other dry-roasted nuts like almonds, walnuts, or pecans for a different but equally delicious twist.
- Mini Marshmallows: Fresh, soft mini marshmallows are key. Before buying, gently squeeze the bag to ensure they are pliable and not stale or hard. Stale marshmallows won’t melt into those delightful gooey pockets that are characteristic of Rocky Road. Their small size is also crucial for even distribution and melting within the cookies without overwhelming them.
- Unsalted Butter: Always use unsalted butter at room temperature. This is vital for proper creaming with the sugar. Room temperature butter is soft enough to incorporate air, which creates a light and fluffy base for your dough, contributing to the cookie’s texture. Butter that is too cold won’t cream properly, leading to dense cookies, while butter that is too warm or melted can result in greasy, flat cookies.
- Light Brown Sugar: Firmly packed light brown sugar not only adds sweetness but also moisture and a subtle caramel note to the cookies. Its molasses content contributes to the chewy texture we’re aiming for.
- Eggs: Large eggs, at room temperature, bind the ingredients together and add richness.
- Vanilla Extract: A good quality vanilla extract enhances the chocolate flavor and adds a warm aroma.
- Cornstarch & Baking Soda: Cornstarch contributes to the cookies’ softness and helps keep them thick. Baking soda acts as a leavening agent, working with the cocoa and brown sugar to give the cookies their rise and characteristic fudgy texture.
- Salt: A pinch of salt balances the sweetness and brings out the depth of the chocolate flavor.
- Milk Chocolate Chips (or Semi-Sweet): Use your preferred chocolate chips. Milk chocolate creates a sweeter, creamier profile, while semi-sweet will offer a more intense chocolate experience. The quality of your chocolate chips significantly impacts the flavor of your finished cookies.
- Flaky Sea Salt (Optional): A final sprinkle of flaky sea salt on top of the warm cookies is a gourmet touch that elevates the flavors, making the chocolate taste even more prominent and adding a delightful crunch.
Essential Baking Tools for Perfect Cookies
Having the right tools can make all the difference in your baking journey. These specific items will help you achieve consistently perfect Rocky Road Cookies:
- Silicone Baking Mat: Baking your Rocky Road Cookies on a silicone mat is a game-changer. It provides an even heat distribution, preventing the bottoms from becoming overly crispy or burned, and ensures easy release without sticking. Parchment paper is a good alternative, but silicone offers superior results for that ideal soft and chewy base.
- Digital Food Scale: Precision is key in baking, and a food scale guarantees consistent results. By weighing your dough balls to ensure they are all the same size (approximately 40g each), you ensure uniform baking. This means every cookie will cook at the same rate, preventing some from being underbaked while others are overbaked. Eyeballing dough portions can lead to significant inconsistencies in your final batch.
- Hand or Stand Mixer: A mixer is indispensable for properly creaming the butter and brown sugar. Using a stand mixer with a paddle attachment (or a sturdy hand mixer) allows you to achieve the thick, creamy consistency necessary for a stable cookie dough. This step incorporates air, which contributes to the cookies’ structure and chewiness.
- Large Sheet Pans: Essential for baking multiple cookies at once, ensuring adequate space between each cookie to prevent them from spreading into each other.
- Cooling Rack: Allows air to circulate around the cookies as they cool, preventing them from becoming soggy and helping them set properly.
Mastering Rocky Road Cookies: Expert Baking Tips
Achieving bakery-quality Rocky Road Cookies is simple when you follow these critical tips:
- Ingredient Quality and Precision are Paramount: As mentioned, the specified ingredients (like Dutch-process cocoa and cake flour) are chosen for a reason. Substitutions can drastically alter the outcome, affecting texture, flavor, and how the cookies bake. Always measure your ingredients accurately, especially flour (use the “spoon and level” method — see note 4 in the recipe card for a visual guide).
- Do Not Skip the Chilling Process: Chilling the dough for at least 45 minutes (and up to 2 hours) is non-negotiable. This step solidifies the butter, preventing the cookies from spreading too much in the oven, ensuring they remain thick and chewy. It also allows the flavors to meld, resulting in a more complex and delicious cookie. If you’re chilling for longer than 2 hours, let the dough sit at room temperature for about 30 minutes before rolling to make it more pliable.
- Perfect Room Temperature Butter: The ideal butter temperature is crucial. Your butter should be soft enough to make a slight indent when pressed with a finger, but still cool to the touch. If your finger leaves a deep, greasy indent, the butter is too soft. Pop it back into the fridge for a bit. Too-soft or melted butter will lead to greasy, flat cookies that spread excessively. Learn how to soften butter quickly here.
- Don’t Overmix the Dough: Once you add the flour, mix until just combined. Overmixing develops the gluten in the flour, which can lead to tough, dense cookies instead of soft and tender ones. Gently fold in the chocolate chips and peanuts at the end.
- Underbake Slightly for Maximum Fudginess: For the ultimate fudgy and chewy texture, remove the cookies from the oven when their edges are set but the centers still look slightly underbaked and gooey. They will continue to cook and firm up as they cool on the hot baking sheet. This ensures a perfectly soft interior.
- Marshmallow Placement: Add the marshmallows during the last few minutes of baking. This allows them to melt and become delightfully gooey without burning or fully disintegrating into the cookie. Pressing them into the partially baked cookies also ensures they stay on top for that classic Rocky Road look.
Storage Solutions for Your Rocky Road Cookies
Keeping Your Rocky Road Cookies Fresh
While these cookies are undeniably at their absolute best fresh out of the oven, or at least on the day they are baked, they can still be enjoyed for a few days if stored properly.
- Room Temperature Storage: Store cooled Rocky Road Cookies in an airtight container at room temperature. They will remain delicious for about 2-3 days. Be aware that the marshmallows may start to lose their soft, gooey texture and become a bit chewier over time. For a quick refresh, you can gently microwave a cookie for 10-15 seconds to soften the chocolate and marshmallows again.
- Freezing Baked Cookies (Not Recommended): While technically possible, freezing already baked Rocky Road Cookies isn’t ideal as the marshmallows tend to become tough and rubbery upon thawing.
- Freezing Cookie Dough (Highly Recommended!): The best way to enjoy freshly baked Rocky Road Cookies anytime is to freeze the dough. This allows you to bake a small batch whenever a craving strikes!
- To freeze dough: Form the dough into individual balls (approximately 40g each), just as you would for baking. Place these dough balls on a baking sheet lined with parchment paper, ensuring they don’t touch. Freeze until they are completely firm (about 1-2 hours). Once solid, transfer the frozen dough balls to an airtight freezer-safe container or a heavy-duty freezer bag. They will keep well for up to 3 months.
- To bake from frozen: When ready to bake, place the frozen dough balls directly on a prepared baking sheet. You may need to add an extra 2-4 minutes to the baking time compared to chilled dough, but otherwise, bake as directed. You’ll still achieve that perfect fresh-baked cookie experience!
More Tasty Cookie Recipes to Explore:
Desserts
Pistachio Cookies
Desserts
Maple Cookies Recipe
Desserts
Graham Cracker Cookies
Desserts
Brownie Cookies

Print Recipe
Rocky Road Cookies
Chelsea Lords
25 minutes
13 minutes
1 hour
1 hour 38 minutes
35 cookies
Video
Equipment
-
Stand mixer fitted with whisk attachment
-
Large sheet pan (15″ x 21″)
-
Parchment paper
-
Silicone baking mat or parchment paper
-
Cooling rack
Ingredients
- 16 tablespoons unsalted butter at room temperature, see note 1
- 1-1/2 cups light brown sugar firmly packed
- 2 large eggs
- 2 teaspoons vanilla extract
- 1 teaspoon cornstarch
- 1 teaspoon baking soda
- 1 teaspoon salt
- 1/2 cup Dutch-process cocoa powder (not plain cocoa powder)
- 1 cup cake flour (see note 2)
- 1-1/2 cups all-purpose flour
- 2 cups milk chocolate chips or semi-sweet
- 1 cup dry roasted and lightly salted peanuts or other nut you enjoy
- Miniature marshmallows (not full-sized ones, for topping)
- Flaky sea salt (optional, for topping)
Instructions
-
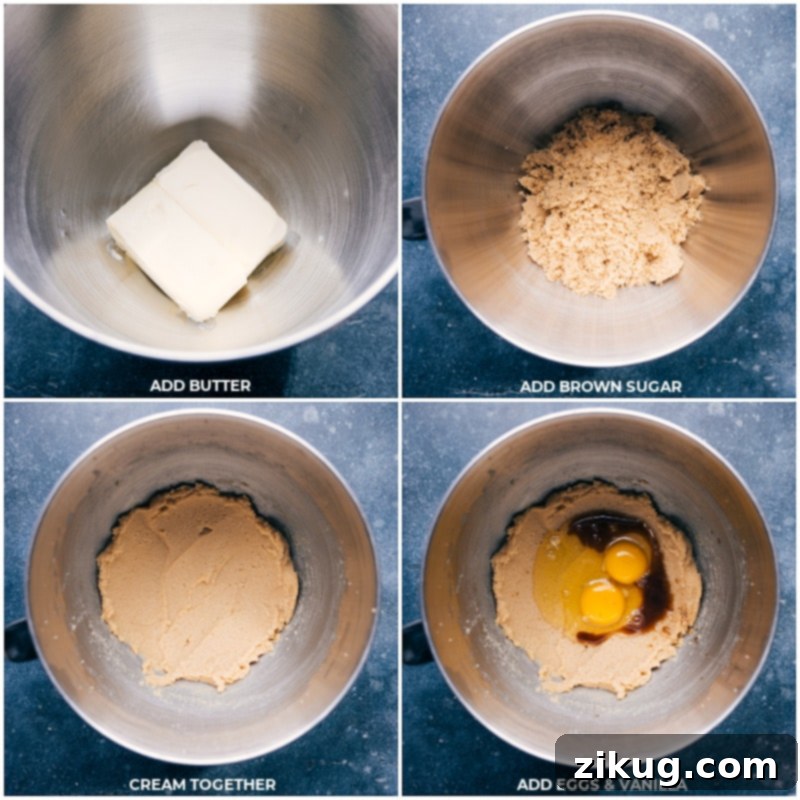
Add room-temperature butter (not softened or melted) and brown sugar into the bowl of a stand mixer fitted with a whisk attachment. Beat until completely combined and ultra-creamy, about 3–4 minutes. The mixture should have the consistency of peanut butter. See note 3 for important tips regarding ingredient quality.
-
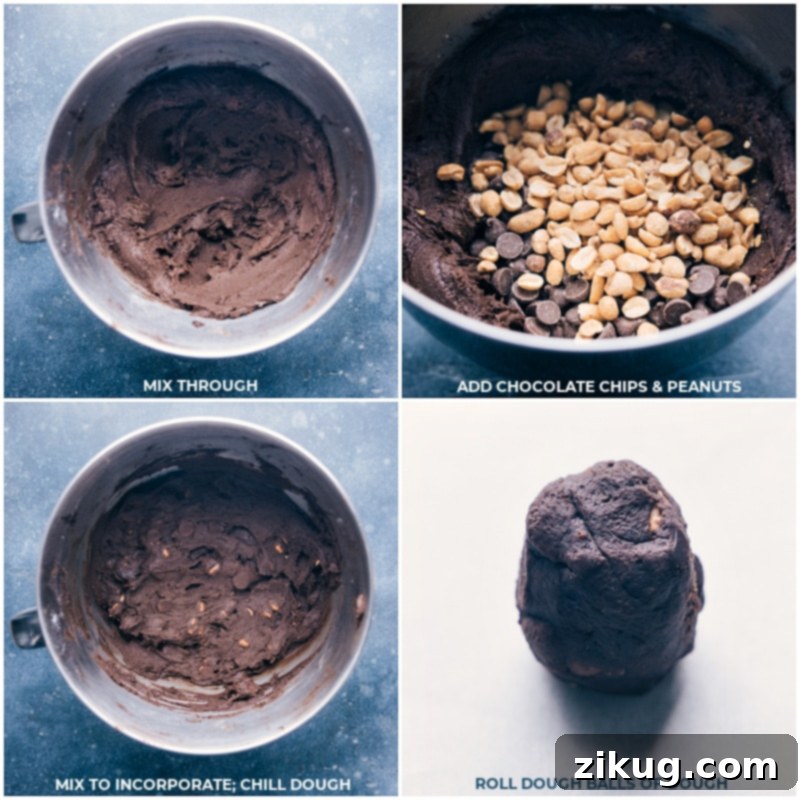
Add eggs and vanilla extract. Beat until just combined. Next, add cornstarch, baking soda, salt, and cocoa powder. Beat until just combined, scraping the sides of the bowl with a spatula as needed to ensure everything is incorporated. Add cake flour and all-purpose flour (see note 4 for proper measuring technique) and again, beat until just combined. Be careful not to overmix. Finally, fold the chocolate chips and peanuts into the dough using a spatula. Cover the bowl tightly with plastic wrap and refrigerate for 45 minutes up to 2 hours. (If chilling for longer than 2 hours, you may need to let the dough sit at room temperature for 30 minutes to make it easier to roll into balls.)
-
After the chilling period, remove the bowl from the fridge and begin forming dough balls. Each ball should be just over 2 tablespoons of dough, approximately 40 grams. You should yield around 35 dough balls. Roll them into tall rather than wide balls to help them bake up thick. Place these formed dough balls on a parchment-paper-lined sheet pan or plate and return them to the fridge or freezer to chill for an additional 15 minutes. This double-chill helps prevent spreading.
-
While the dough is chilling for the second time, preheat your oven to 325°F (162°C). Line an extra-large sheet pan with a silicone baking mat (parchment paper works, but cookies bake even better and more uniformly on a silicone liner). Arrange 6 dough balls on the sheet pan, ensuring to leave plenty of space between each cookie to allow for spreading. Bake for 10 minutes. Remove the sheet pan from the oven and quickly press 3 mini marshmallows into the top of each cookie. Return the sheet pan to the oven and continue baking for an additional 2–4 minutes, or until the cookie edges are set and the tops are no longer gooey, but still appear slightly underbaked. Slightly underbaked is key for that perfect fudgy and chewy texture; they will continue to firm up as they cool.
-
Optionally, immediately after removing the cookies from the oven, gently press a few extra chocolate chips and/or peanuts into the tops of the warm cookies for an even prettier presentation. Let the cookies stand on the hot baking sheet for 5 minutes before carefully transferring them to a cooling rack to cool completely and finish firming up. Repeat this baking process with the remaining cookie dough, or freeze any unused dough as directed in the storage notes.
Recipe Notes
Note 2: The Magic of Cake Flour: Cake flour is typically located in the baking aisle of most grocery stores, alongside other types of flour. For this recipe, I strongly advise against using a different flour substitute or attempting to make homemade cake flour. Its unique low-protein composition is essential for achieving the specific tender and delicate texture of these Rocky Road Cookies.
Note 3: Ingredient Quality for Best Results: To achieve the truly best Rocky Road Cookies, it is highly recommended to use the exact ingredients specified. This means if you don’t have Dutch-process cocoa powder or cake flour, it’s worth waiting for a grocery store trip. Using the correct ingredients will ensure your cookies are perfectly fudgy, chewy, and bake up just right, avoiding any lackluster or improperly baked results.
Note 4: Proper Flour Measurement (Spoon and Level Method): To avoid adding too much flour, which can lead to dry, dense cookies, do not press your measuring cup directly into the bag of flour to scoop. Instead, use a spoon to lightly scoop the flour into the measuring cup until it’s overfilled. Then, use the back of a straight edge (like a table knife) to level off the top of the measuring cup. This ensures an accurate and fluffy measurement. (Watch a video visual here).
Storage Tips: Store completely cooled cookies in an airtight container at room temperature. They are undeniably best the day they’re baked, but they will last up to a week. However, the texture and flavor might start to diminish after 3–4 days, especially for the marshmallows. For long-term enjoyment, freezing the cookie dough is highly recommended. Drop dough balls onto a sheet pan and freeze until solid. Then transfer them to an airtight container or freezer bag, where they will keep for up to 3 months. Bake from frozen, adding a few extra minutes to the baking time.
Nutrition
Nutrition information is automatically calculated, so should only be used as an approximation.
Like this recipe? Leave a comment below!
Your feedback helps us create more delicious recipes for you.
There you have it – the ultimate guide to baking Rocky Road Cookies that are sure to impress. With their deep chocolate flavor, satisfying chewiness, and irresistible pockets of gooey marshmallow and crunchy nuts, these cookies are more than just a dessert; they’re a celebration. Whether you’re baking for a special occasion, a casual get-together, or simply to treat yourself, this recipe promises a delightful experience. Remember the key tips: use quality ingredients, chill your dough, and don’t overbake. Follow these steps, and you’ll be enjoying the best Rocky Road Cookies you’ve ever tasted. Happy baking!