
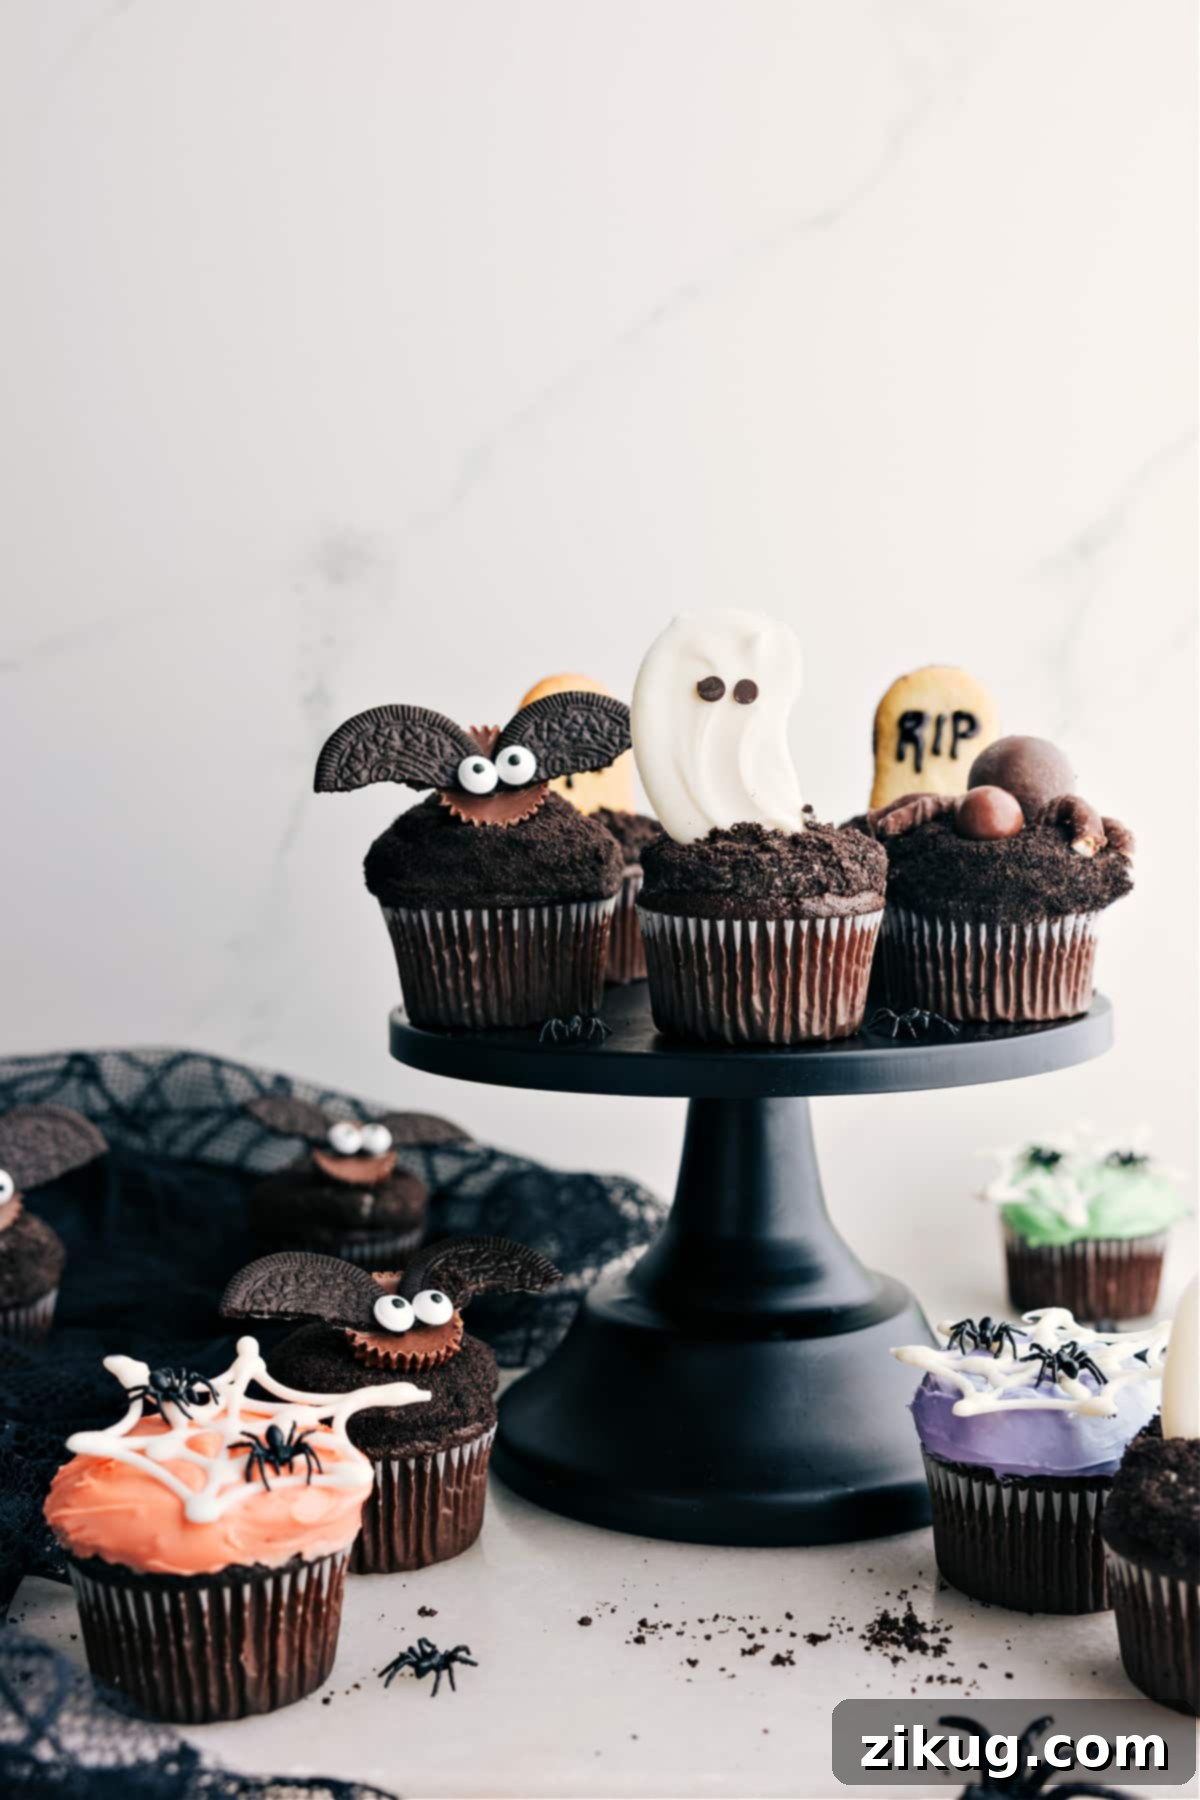
Halloween Cupcakes are the ultimate spooky treat, combining moist chocolate cupcakes with delicious frosting and crushed Oreo “dirt,” all imaginatively decorated to resemble classic Halloween characters and scenes. Whether you’re hosting a ghoulish gathering, looking for a fun activity with the kids, or simply craving a festive dessert, these easy-to-make cupcakes are guaranteed to bring smiles and a touch of delightful fright to your celebration.
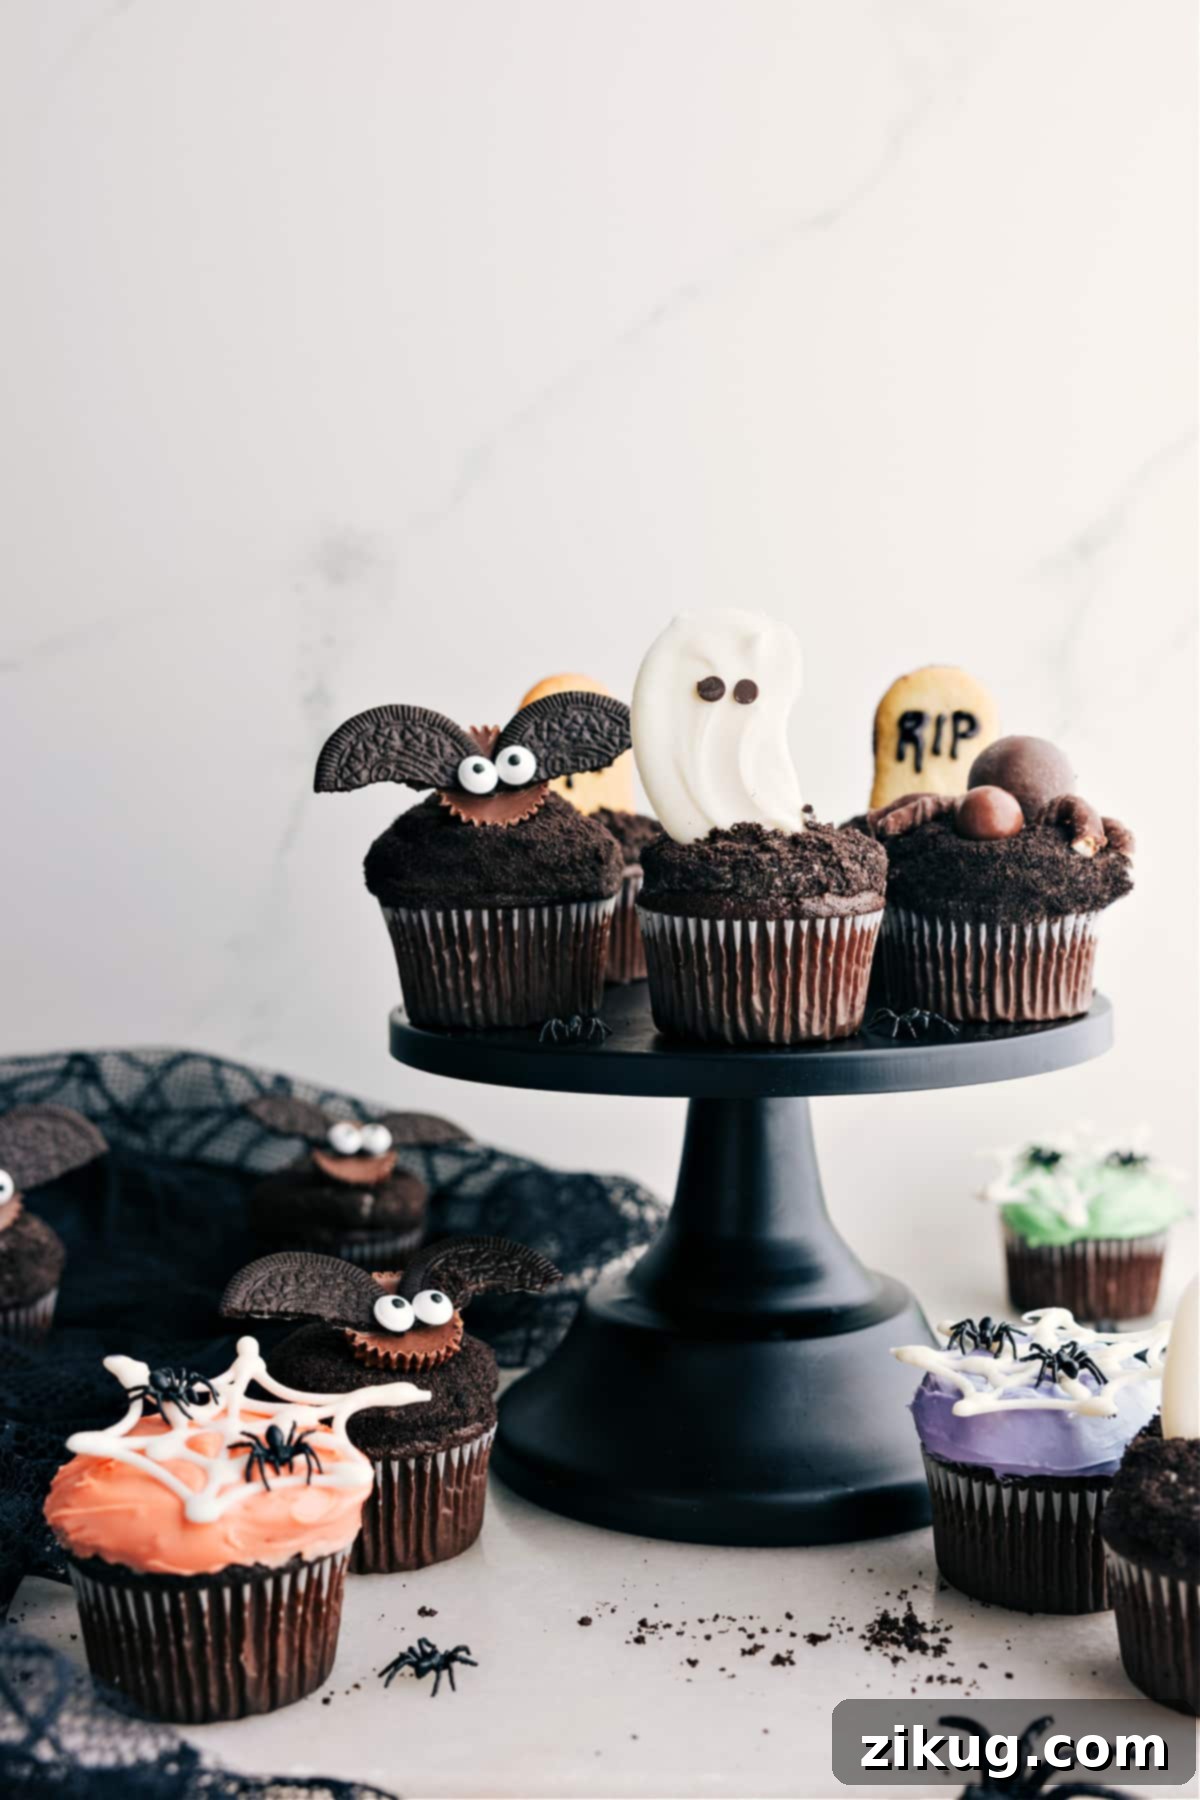
Delightful & Spooky Halloween Cupcakes: Your Ultimate Guide
Transform ordinary chocolate cupcakes into extraordinary Halloween masterpieces with this simple and fun recipe! Our Halloween Cupcakes are more than just a dessert; they’re an edible art project perfect for autumn festivities. Using a semi-homemade approach with a quality cake mix, we ensure a rich, moist chocolate base every time. The magic truly begins with the decorations, turning each treat into a mini canvas for bats, ghosts, gravestones, spiders, and intricate spiderwebs. These treats are not only incredibly easy to assemble but are also a fantastic way to engage the whole family in some festive baking fun.
Why These Halloween Cupcakes Are a Must-Try This Season
When it comes to Halloween baking, convenience and creativity go hand-in-hand. Our recipe stands out for several reasons, making it a favorite for busy parents, enthusiastic bakers, and anyone looking to add a personal touch to their holiday spread. Here’s why these spooky delights are absolutely essential for your Halloween celebration:
- Effortlessly Easy: By starting with a high-quality cake mix, we cut down on prep time without compromising on flavor or texture. This semi-homemade method means less stress and more fun in the kitchen, making it accessible for bakers of all skill levels.
- Incredibly Moist & Rich: The addition of sour cream and instant pudding mix elevates a simple boxed cake mix into a gourmet experience. These ingredients ensure each bite is supremely moist, tender, and bursting with deep chocolate flavor.
- Endless Decoration Possibilities: From charmingly creepy ghosts to intricate spiderwebs, the decorating options are limitless. We provide a detailed guide for popular Halloween motifs, but encourage you to unleash your imagination and create your own unique designs. This versatility makes every batch a unique creation.
- Perfect for Parties: Whether it’s a school party, a neighborhood gathering, or an office celebration, these cupcakes are always a hit. They’re perfectly portioned, easy to serve, and visually stunning, making them the star of any dessert table.
- Kid-Friendly Activity: Get the little ghouls and goblins involved! Decorating these cupcakes is a fantastic way to spend quality time with children, allowing them to express their creativity and enjoy the fruits of their labor. It’s an engaging activity that transforms baking into a memorable holiday tradition.
- Cost-Effective Fun: Using readily available ingredients and a cake mix base makes this a budget-friendly option for creating impressive Halloween treats without breaking the bank.
Gathering Your Ghoulish Ingredients
Creating these bewitching Halloween cupcakes starts with a selection of common baking ingredients, many of which you might already have in your pantry. We’ve included some helpful tips and swaps to ensure your baking experience is as smooth and delightful as possible. For the best results, we recommend using ingredients at room temperature unless otherwise specified, as this helps achieve a perfectly smooth and uniform batter.
| Ingredient | Tip/Swap for Best Results |
|---|---|
| Cake Mix | A 13.25-ounce box of Betty Crocker Super Moist Chocolate Fudge Cake Mix is our go-to for its consistent quality and rich flavor. Alternatively, a Devil’s Food mix will yield a darker, even more intensely chocolatey cupcake, perfect for a truly spooky look. |
| Sour Cream | This secret ingredient is crucial for adding unparalleled moisture and a tender crumb to your cupcakes. If sour cream isn’t available, plain Greek yogurt (full-fat for richness) makes an excellent substitute, providing a similar texture and tang. |
| Pudding Mix | An instant chocolate pudding mix (3.9 oz) significantly enhances the texture, making the cupcakes incredibly rich and dense. While you can skip it if necessary, be aware that the final texture won’t be quite as luxurious and moist. |
| Vegetable Oil | Oil is key for keeping your cupcakes wonderfully soft and moist, preventing them from drying out. Canola oil is a great alternative, or for a slightly richer flavor, melted unsalted butter can be used. |
| Mini Chocolate Chips | These tiny chips melt beautifully, adding pockets of gooey chocolate throughout the cupcake. For larger, more distinct chocolate chunks, feel free to use finely chopped chocolate bars or regular-sized chocolate chips. |
| Frosting | You can choose between homemade buttercream or cream cheese frosting for a rich, creamy topping. For ultimate convenience, a good quality store-bought frosting works perfectly. To make your Halloween cupcakes truly festive, dye your frosting vibrant orange, ghoulish green, or mystical purple using food coloring. |
| Oreos | Crushed Oreos create the perfect “dirt” effect, adding texture and a delicious chocolatey crunch to the top of your frosted cupcakes. In a pinch, crushed chocolate graham crackers can be used, though the flavor profile will be slightly different. |
| Large Eggs | Essential for structure and binding the ingredients. Ensure they are at room temperature for better incorporation into the batter. |
| Vanilla Extract | A tablespoon of pure vanilla extract enhances the chocolate flavor and adds a delightful aroma to your cupcakes. |
| Hot Water | Used to achieve the perfect batter consistency when working with a cake mix, ensuring everything blends smoothly. |
| Decoration Toppings | Prepare a variety of candies, sprinkles, edible eyes, cookies, and pretzel sticks to bring your spooky designs to life. (See the “Unleash Your Creativity” section for detailed ideas!) |
Step-by-Step Guide: Conjuring Your Creepy Cupcakes
Making these spooky Halloween cupcakes is a straightforward process that yields impressive results. Follow these simple steps to bake and decorate your way to a fantastically festive treat. Remember to take your time, especially during the decorating phase, to really bring your ghoulish visions to life!
- Prepare Your Workspace: Begin by preheating your oven to 350°F (175°C). This ensures the oven is at the correct temperature when your batter is ready, promoting even baking. Line a 12-cup muffin pan with festive Halloween-themed cupcake liners or standard paper liners. Having everything ready beforehand makes the baking process much smoother.
- Craft the Moist Batter: In a large mixing bowl, combine the wet ingredients first. Whisk together the large eggs until they are slightly frothy. Then, add the sour cream, vegetable oil, and vanilla extract. Continue whisking until the mixture is smooth and well-combined. Next, gradually incorporate the cake mix and instant pudding mix. Stir gently with a wooden spoon or spatula until the dry ingredients are just moistened. Finally, pour in the hot water and mix until the batter is smooth, being careful not to overmix. Fold in the mini chocolate chips for extra indulgence and texture. Overmixing can lead to tough cupcakes, so mix until just combined.
- Bake to Perfection: Evenly divide the cupcake batter among the prepared liners, filling each approximately 3/4 full. This allows room for the cupcakes to rise without overflowing. Place the muffin pan into your preheated oven and bake for 18-23 minutes. The best way to check for doneness is to insert a toothpick into the center of a cupcake; it should come out clean or with a few moist crumbs attached. Once baked, let the cupcakes cool in the pan for 5-10 minutes on a wire rack. This helps them set and prevents them from sticking. Afterward, transfer them directly to the wire rack to cool completely before frosting. Frosting warm cupcakes will cause the frosting to melt and slide off.
- Frost with Frightful Flair: Once your chocolate cupcakes are completely cooled, it’s time to add the frosting. If using homemade frosting, ensure it’s at a good piping consistency. Transfer your chosen frosting (cream cheese or chocolate buttercream, perhaps dyed a festive color) into a piping bag fitted with a round tip (such as a Wilton #10). Pipe a generous swirl of frosting onto each cupcake. If you don’t have a piping bag, simply use an offset spatula or knife to spread the frosting.
- Add the Oreo “Dirt”: Prepare your “dirt” by finely crushing about 10 Oreo cookies. A food processor works best for this, yielding fine, even crumbs that mimic soil. Place the crushed Oreos in a shallow bowl. Gently dip the top of each frosted cupcake into the Oreo crumbs, twisting slightly to ensure a good, even coating. This step adds a fantastic texture contrast and sets the stage for many of our Halloween decorations.
- Decorate Your Spooky Masterpieces: Now for the most exciting part – decorating! With your frosted and Oreo-dipped cupcakes as a base, unleash your creativity. You can adorn them with various Halloween-themed decorations like edible bats, whimsical ghosts, solemn gravestones, creepy crawly spiders, or delicate spiderwebs. Refer to our extensive “Unleash Your Creativity: Spooky Decoration Ideas” section below for detailed instructions and inspiration to bring your Halloween vision to life!
Unleash Your Creativity: Spooky Decoration Ideas
The real fun of Halloween cupcakes lies in their transformation! Once your chocolate cupcakes are frosted and coated in Oreo “dirt,” they become a blank canvas for endless spooky and delightful designs. Here are detailed ideas to inspire your ghoulish creations, ensuring there’s a perfect treat for every monster, ghost, and goblin at your party:
- Mummy Cupcakes: Achieve this classic look by piping thin strips of white frosting across the top of your frosted cupcake, mimicking bandages. Leave a small gap to add two edible candy eyes, giving your mummy a peeking, somewhat bewildered expression. For an aged look, you can slightly smudge some of the frosting.
- Pumpkin Faces: Frost your cupcakes with vibrant orange icing. Once the orange base is set, use black decorating gel to draw classic jack-o’-lantern faces—triangle eyes, a jagged mouth, and a small nose. You can vary the expressions for an assortment of personalities.
- Witch Hats: For an easy yet impactful decoration, take sugar cones and dip them into melted dark or colored chocolate. Allow the chocolate to set, then place these pointed hats on top of green-frosted cupcakes. A sprinkle of edible glitter can add a touch of magic.
- Monster Cupcakes: Let your imagination run wild with these! Use brightly colored frosting (think neon green, electric blue, or shocking pink) and create different textures with your piping bag. The key is multiple candy eyes—two, three, four, or even more—to give your monsters a delightfully quirky or menacing stare. You can also add some fun sprinkles for “fur” or mini chocolate chips for teeth.
- Candy Corn Cupcakes: Recreate the iconic Halloween candy. Pipe concentric rings of yellow, then orange, then white frosting on your cupcakes. Use a smooth round tip for clean lines. This design is simple yet instantly recognizable and festive.
- Bloody Cupcakes: For a deliciously gory effect, frost your cupcakes with plain white frosting. Then, artfully drizzle strawberry jam or red decorating gel over the white frosting to simulate dripping blood. Top it off with a mini edible knife candy or a plastic axe for an extra touch of horror.
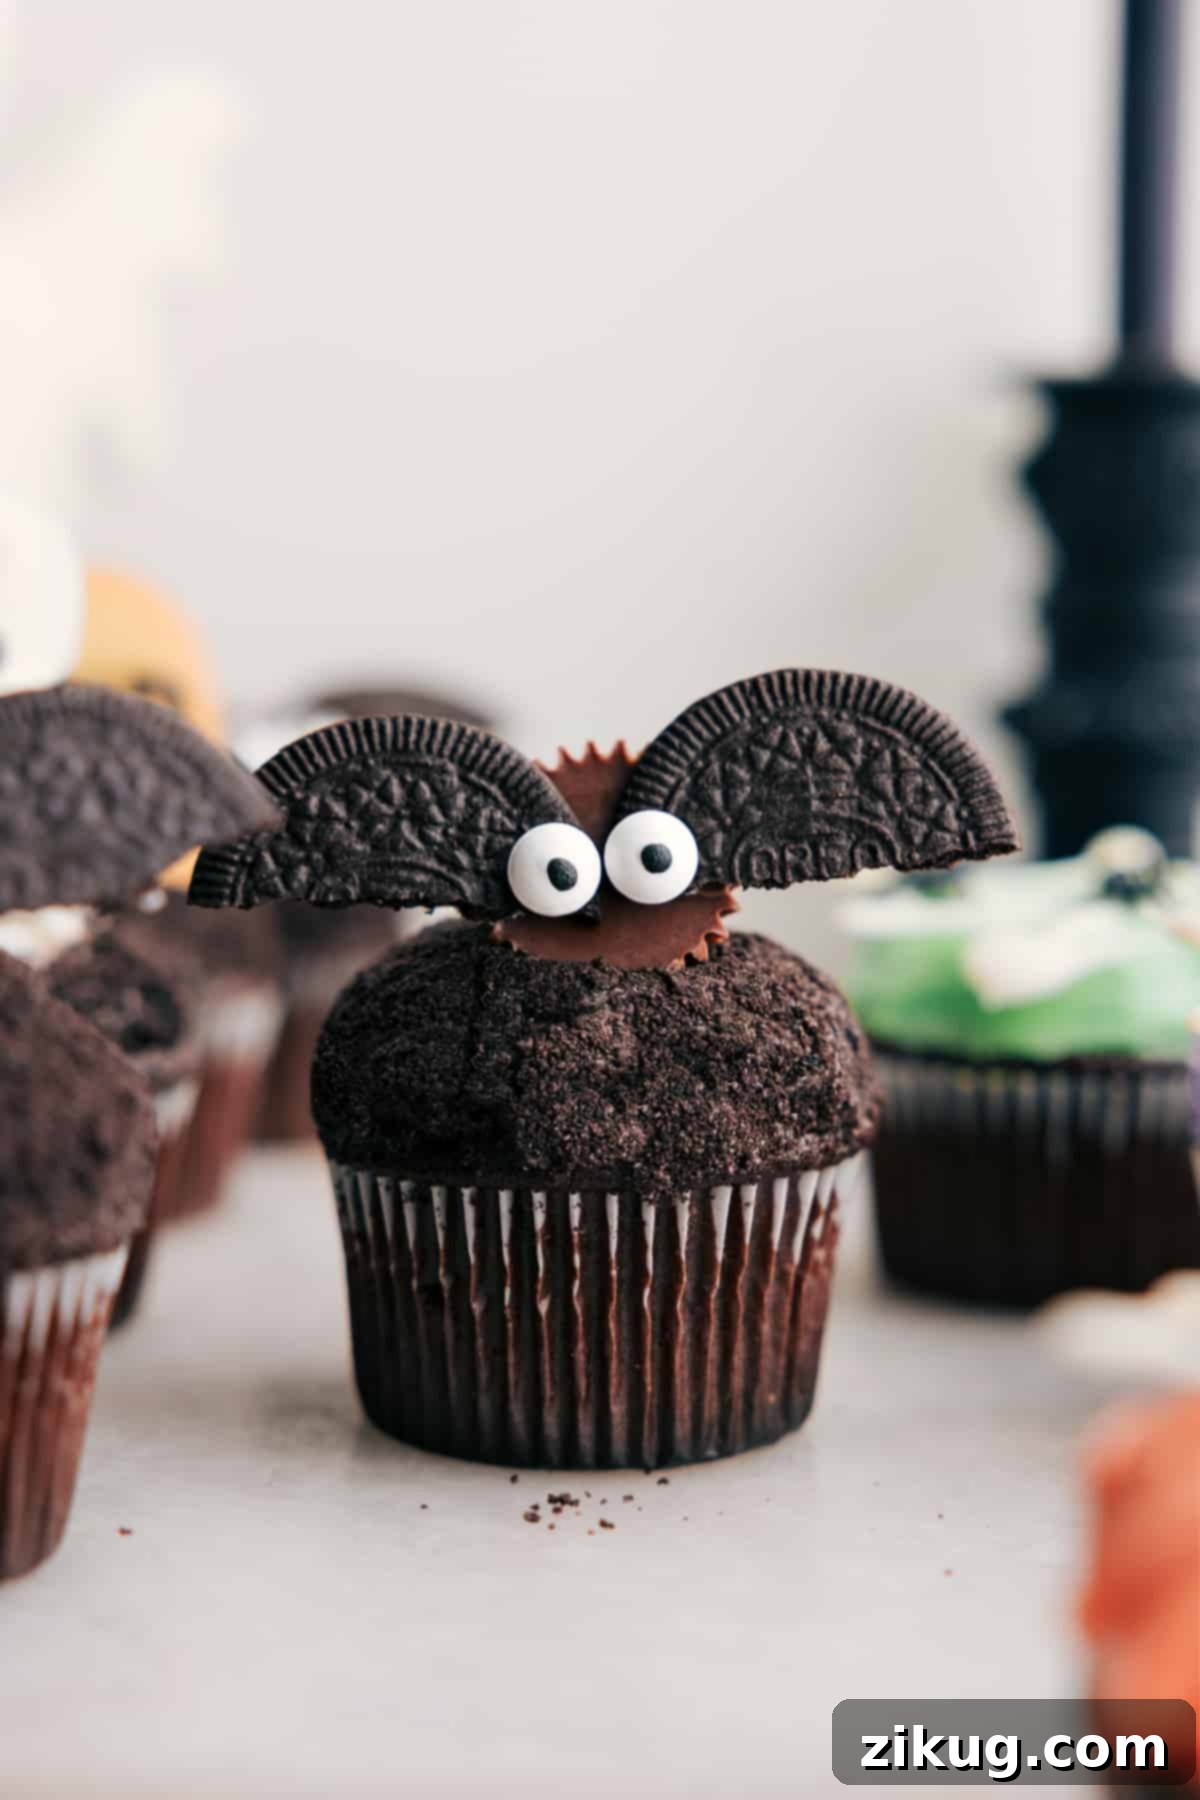
- Bat Cupcakes: Transform mini Reese’s peanut butter cups into the body of the bat, and use two halves of an Oreo cookie (without the cream filling) as the wings. Attach these to your frosted, Oreo-dipped cupcakes, then add two small edible eyes for a cute but creepy effect. Find more detailed instructions for these Halloween Bat Treats here.
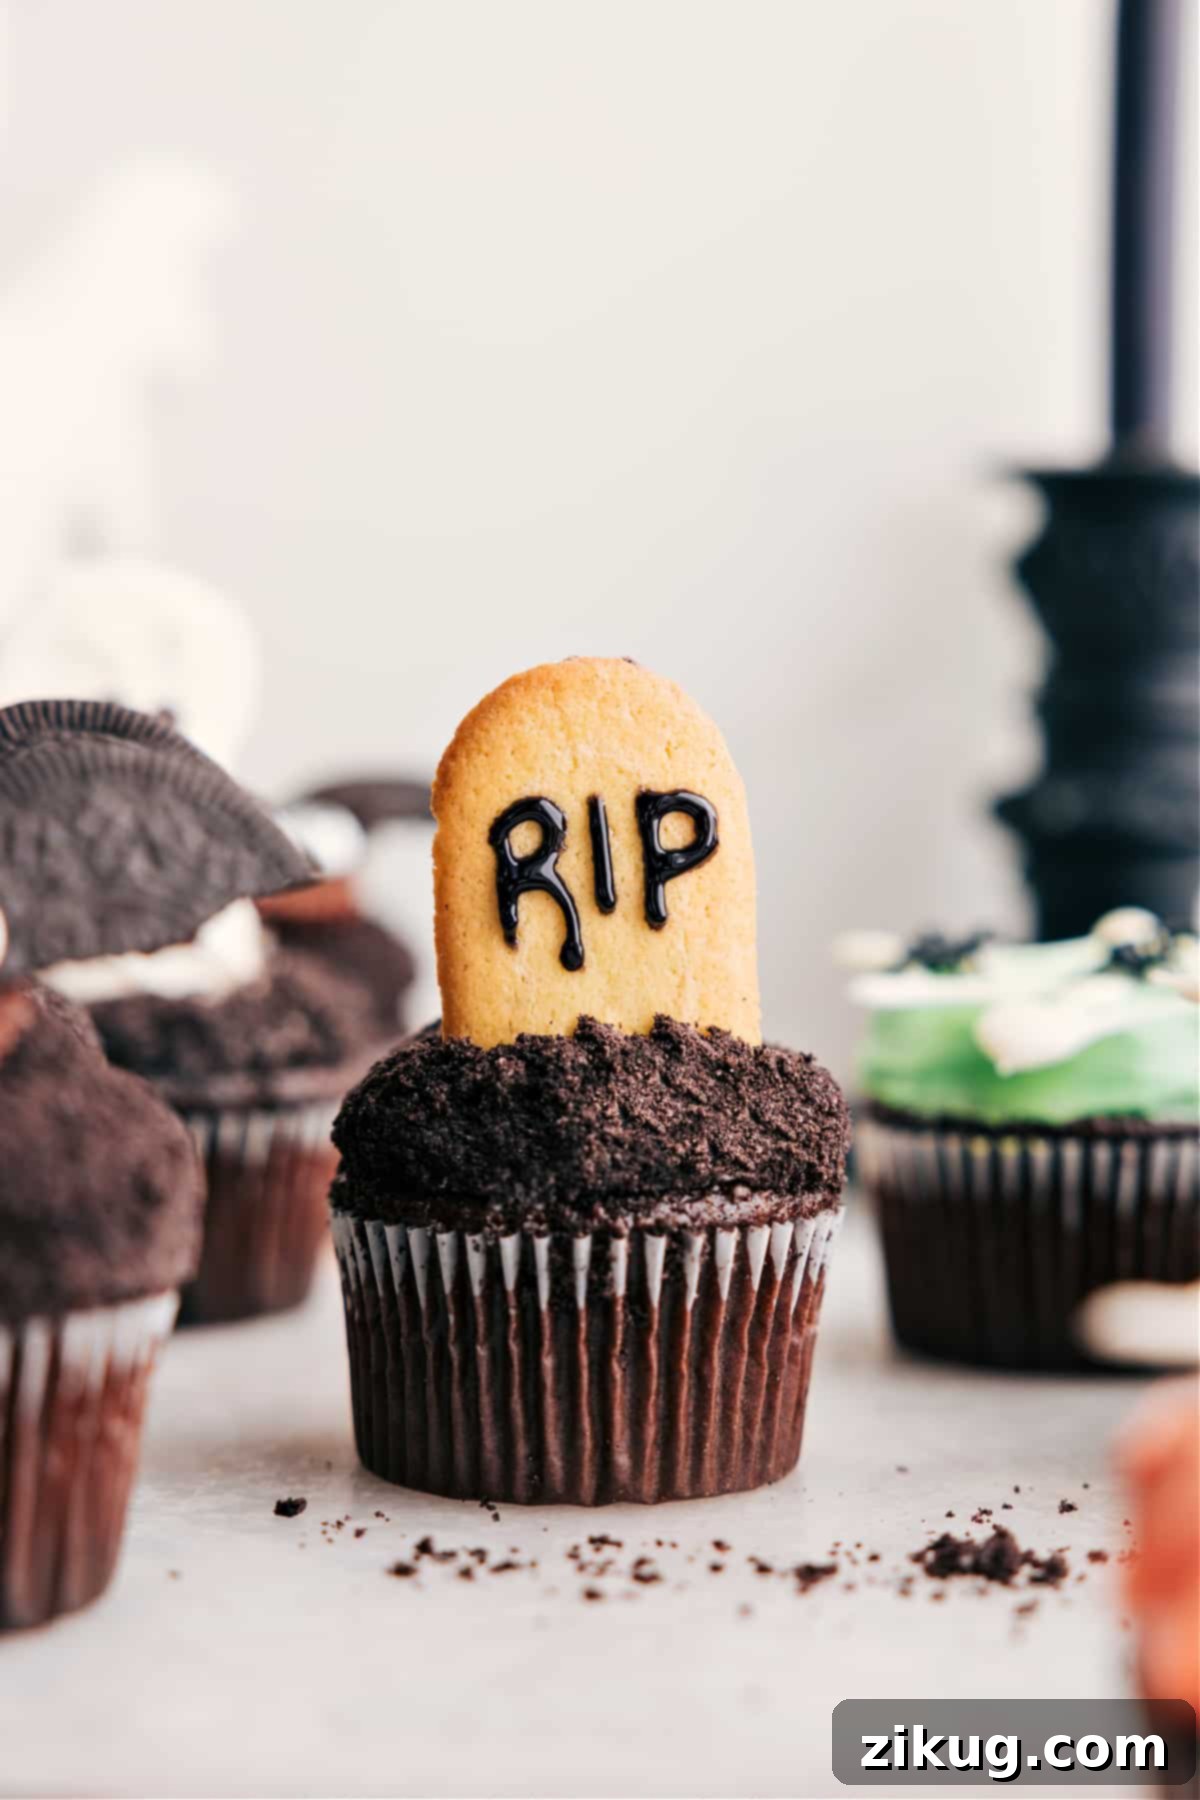
- Gravestone Cupcakes: For a simple yet effective gravestone, use Milano cookies (or similar rectangular cookies). Write “R.I.P.” or other spooky messages on them using black decorating gel. Carefully insert the cookie gravestone into the center of your frosted, Oreo-dipped cupcake.
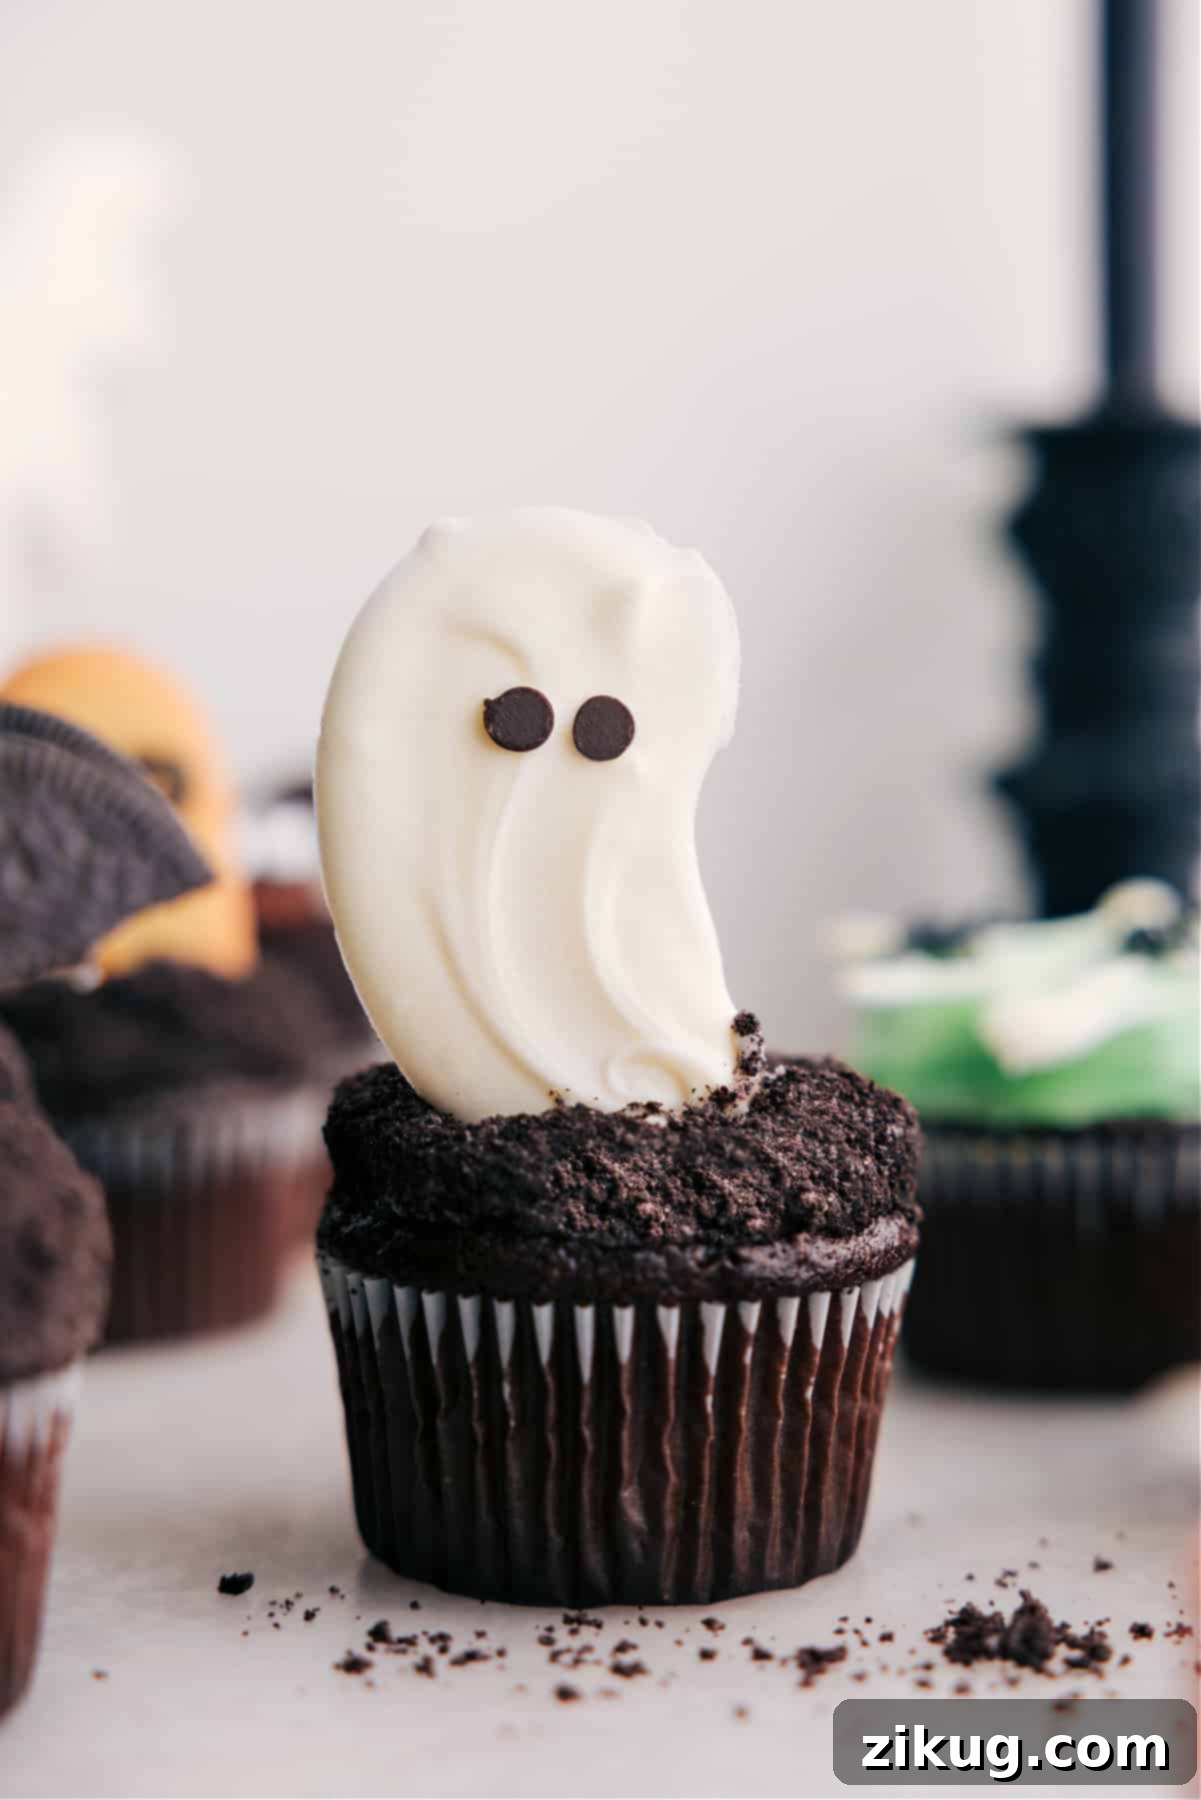
- Ghost Cupcakes: These adorable ghosts are made from white chocolate. Melt 1/2 cup of white chocolate. Spoon small dollops of melted chocolate onto a parchment-lined baking sheet. Using the back of the spoon, gently spread each dollop to form irregular ghost shapes. Before the chocolate sets, add two mini chocolate chips for eyes. Freeze until firm (about 5-10 minutes), then carefully peel off and press into your frosted, Oreo-dipped cupcakes.
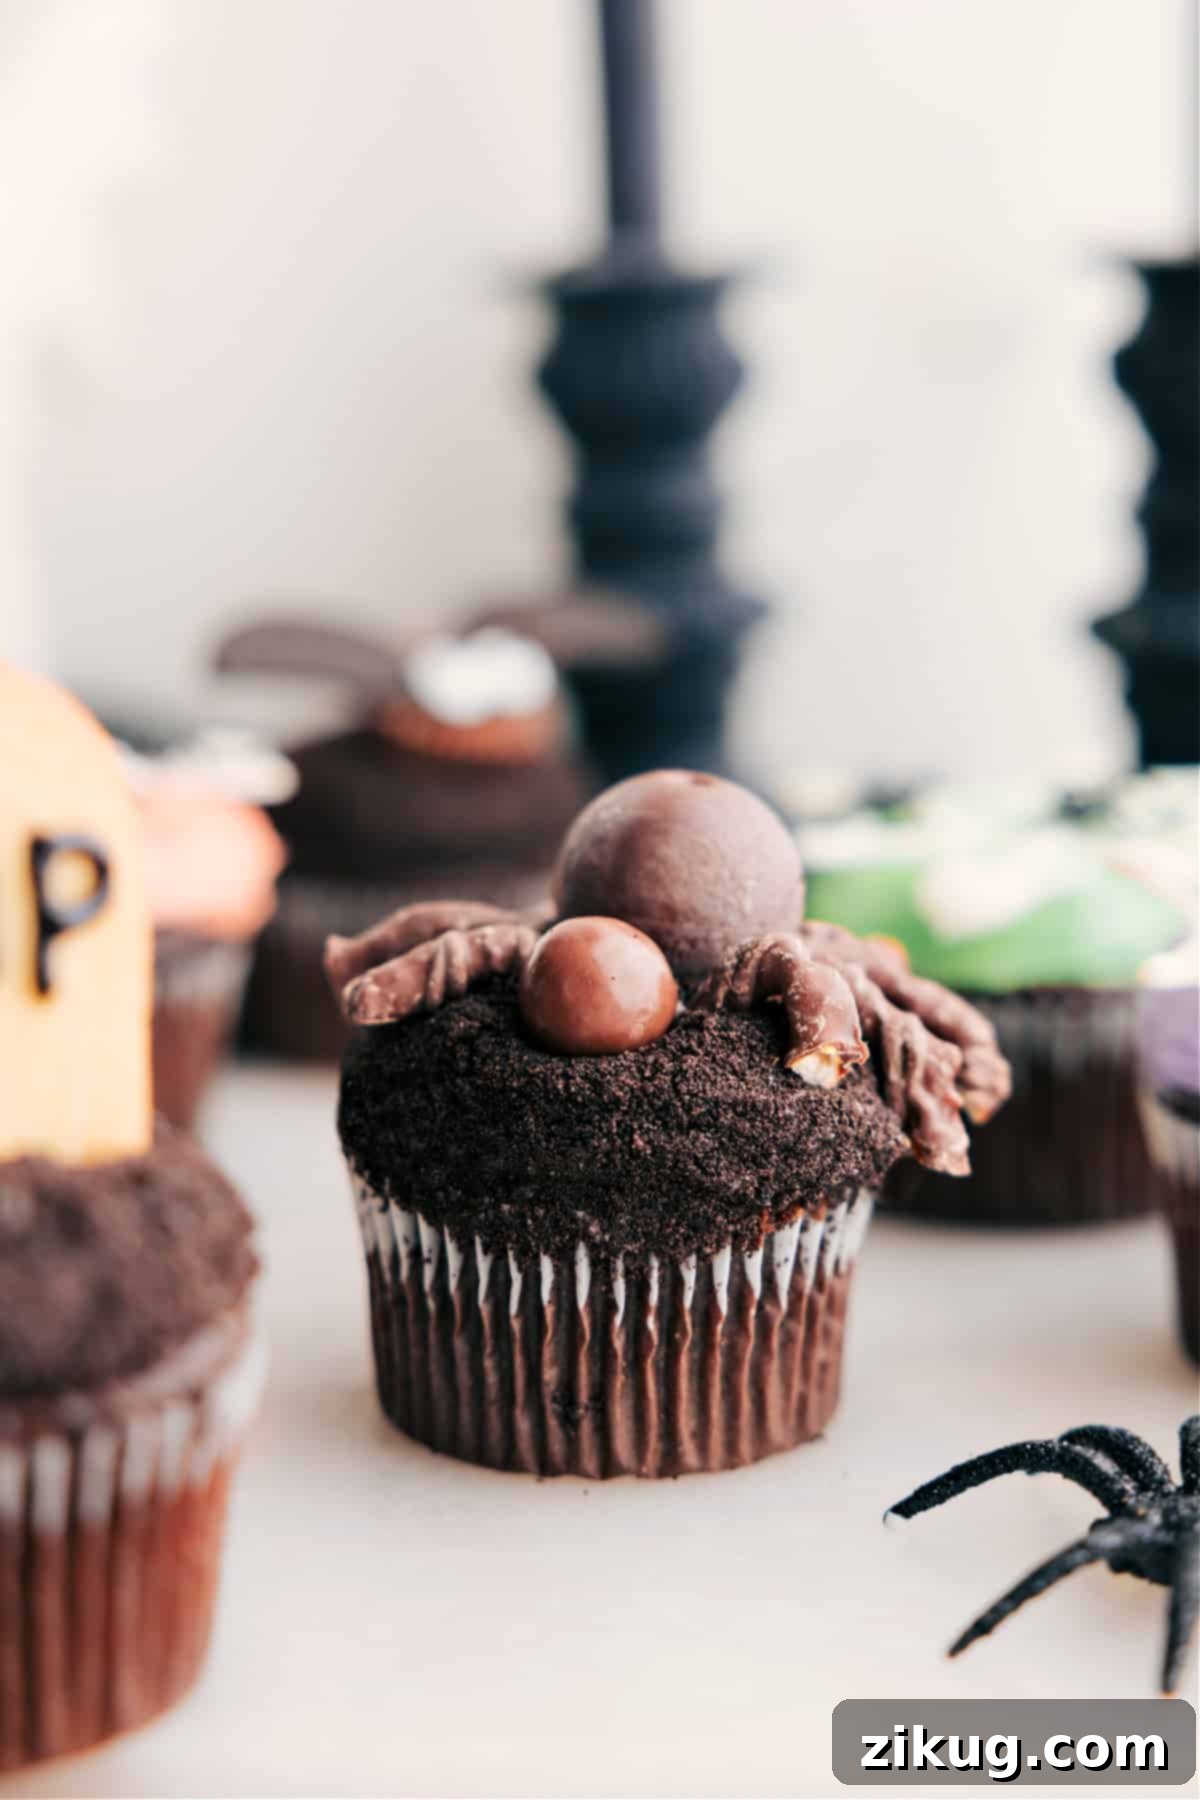
- Spider Cupcakes: Create a cute, plump spider by placing an unwrapped Lindt truffle (or a similar round chocolate candy) as the body and a Whopper candy as the head on top of your frosted, Oreo-dipped cupcake. Use chocolate-covered pretzel sticks or thin licorice strands as the eight creepy legs, arranging them around the body.
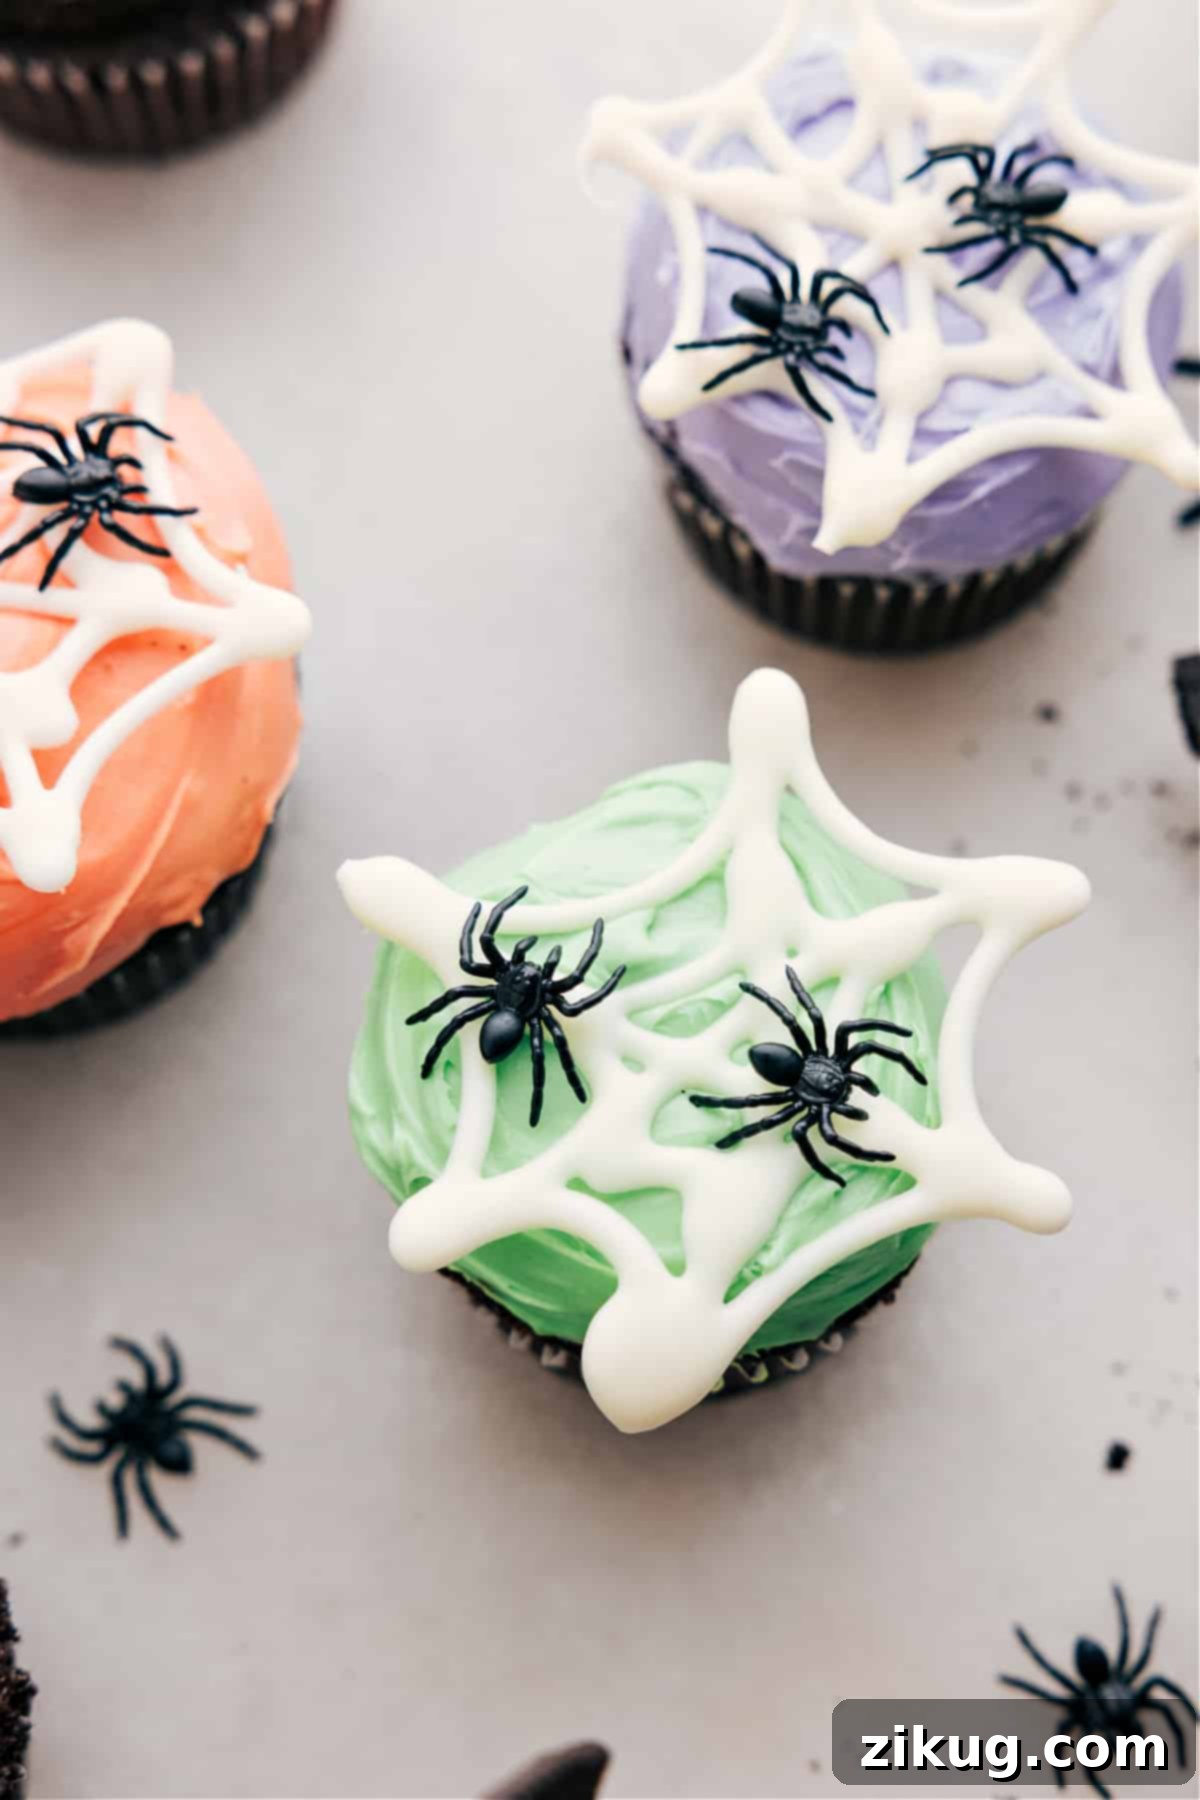
- Spiderweb Cupcakes: For an impressive spiderweb design, start by frosting your cupcakes with your desired color (black, purple, or green work well). Melt 1/2 cup of white chocolate and transfer it to a piping bag with a very fine tip (or a Ziploc bag with a tiny corner snipped off). Pipe concentric circles of melted white chocolate onto the frosted cupcakes. While the chocolate is still wet, use a toothpick to drag lines from the center outwards, creating a classic spiderweb pattern. For an extra touch of creepiness, add small plastic spiders (ensure they are food-safe or remove before eating) or edible sugar spiders.
Pro Tips for Perfect Halloween Cupcakes
Achieving bakery-quality Halloween cupcakes is easier than you think with a few simple tricks. Keep these expert tips in mind to ensure your treats are not only visually stunning but also incredibly delicious:
- Room Temperature Ingredients: Always use room temperature eggs and sour cream. This allows them to incorporate more easily and evenly into the batter, resulting in a smoother consistency and a more tender, uniform crumb in your finished cupcakes.
- Avoid Overmixing: Once you add the dry ingredients to the wet, mix only until just combined. Overmixing develops the gluten in the flour, which can lead to tough, dense cupcakes. A few lumps in the batter are perfectly fine!
- Don’t Overfill Liners: Filling cupcake liners about 3/4 full is the sweet spot. This allows the cupcakes to rise beautifully without spilling over, ensuring a neat and professional appearance.
- Cool Completely Before Frosting: This step is non-negotiable! Attempting to frost warm cupcakes will result in melted, sliding frosting and a very messy outcome. Ensure your cupcakes are entirely cool to the touch before you even think about piping on that delicious topping.
- Quality Matters: While we’re using a cake mix for convenience, choosing a good quality brand like Betty Crocker makes a difference in flavor and texture. Similarly, opt for high-quality chocolate chips and extracts.
- Prep Decorations Ahead: If you’re planning elaborate designs, consider making some of the edible decorations (like white chocolate ghosts or bat wings) a day or two in advance. Store them in an airtight container at room temperature (or in the fridge/freezer if specified) to save time on decorating day.
- Use a Scoop: For perfectly uniform cupcakes, use an ice cream scoop or a specific cupcake scoop to fill your liners. This ensures each cupcake bakes evenly and looks consistent.
- Experiment with Colors: Don’t limit yourself to just white or black frosting. Food gel colors are excellent for creating vibrant, spooky shades like neon green, electric purple, blood red, or eerie orange to match your Halloween theme.
Storage Tips for Your Spooky Sweets
To keep your decorated Halloween cupcakes fresh and delicious, store them in an airtight container at room temperature for up to 3 days. If your frosting is cream cheese-based or contains dairy that requires refrigeration, store them in the fridge and allow them to come to room temperature for about 15-20 minutes before serving for the best flavor and texture.
For advanced meal prep, you can bake the chocolate cupcakes ahead of time and freeze them unfrosted. Wrap them tightly in plastic wrap and then aluminum foil, and store them in a freezer-safe bag or container for up to 2 months. Thaw them at room temperature, then frost and decorate as desired. This is a fantastic way to spread out your Halloween baking tasks!
More Halloween Fun: Spooky Recipes & Treats
Looking for more ways to celebrate the spookiest season? Dive into these other fantastic Halloween-themed recipes and treats that are sure to add more delight to your festivities!
Desserts
Halloween Bat Treats
Quick And Easy
Halloween Donuts
Desserts
Monster Munch
Desserts
Halloween Popcorn
Halloween Cupcakes
Chelsea Lords
20 minutes
18 minutes
38 minutes
24
cupcakes
Equipment
-
Muffin pan
and muffin liners -
Piping bag
-
#10 round piping tip
-
Blender or food processor for crushing Oreos
Ingredients
-
3 large eggs -
3/4 cup sour cream -
3/4 cup vegetable oil -
1 tablespoon vanilla extract -
13.25 ounces Super Moist Chocolate Fudge Cake Mix -
3.9 ounces instant chocolate pudding mix -
1/2 cup hot water -
1 cup mini chocolate chips
-
1 batch cream cheese frosting
or 1 batch chocolate buttercream frosting -
10 Oreos, crushed into fine crumbs -
Decoration toppings as desired
(See “Unleash Your Creativity” section above for ideas)
Instructions
Chocolate Cupcakes
-
Preheat oven to 350°F (175°C). Line a muffin pan with cupcake liners. Set aside.
-
In a large bowl, whisk eggs until smooth. Add sour cream, vegetable oil, and vanilla extract; whisk until fully combined. Stir in cake mix and pudding mix with a wooden spoon until just moistened. Add hot water and mix until smooth. Gently fold in chocolate chips.
-
Fill cupcake liners 3/4 full. Bake for 18–23 minutes, or until a toothpick inserted into the center comes out clean or with a few moist crumbs. Let cupcakes cool in the pan for 5–10 minutes, then transfer to a wire rack to cool completely before frosting.
Frosting & Assembly
-
Prepare your chosen frosting (see links in ingredients or use store-bought). Ensure cupcakes are completely cooled.
-
Transfer frosting to a piping bag fitted with a piping tip. Frost the cooled cupcakes with a generous swirl.
-
Blend Oreos into fine crumbs (a food processor works best) and place them in a shallow bowl. Press the frosted cupcakes into the crumbs to coat the tops, creating a “dirt” effect.
Decorating
-
Refer to the “Unleash Your Creativity: Spooky Decoration Ideas” section above for detailed decorating instructions for bats, ghosts, gravestones, spiders, and spiderwebs.
Recipe Notes
Nutrition
Calories: 462kcal |
Carbohydrates: 58g |
Protein: 4g |
Fat: 27g |
Saturated Fat: 17g |
Polyunsaturated Fat: 2g |
Monounsaturated Fat: 6g |
Trans Fat: 1g |
Cholesterol: 58mg |
Sodium: 246mg |
Potassium: 208mg |
Fiber: 3g |
Sugar: 46g |
Vitamin A: 447IU |
Vitamin C: 1mg |
Calcium: 65mg |
Iron: 2mg
Nutrition information is automatically calculated, so should only be used as an approximation.
Like this recipe? Leave a comment below!