
Ultimate Buckeye Brownies: A Decadent Chocolate Peanut Butter Recipe
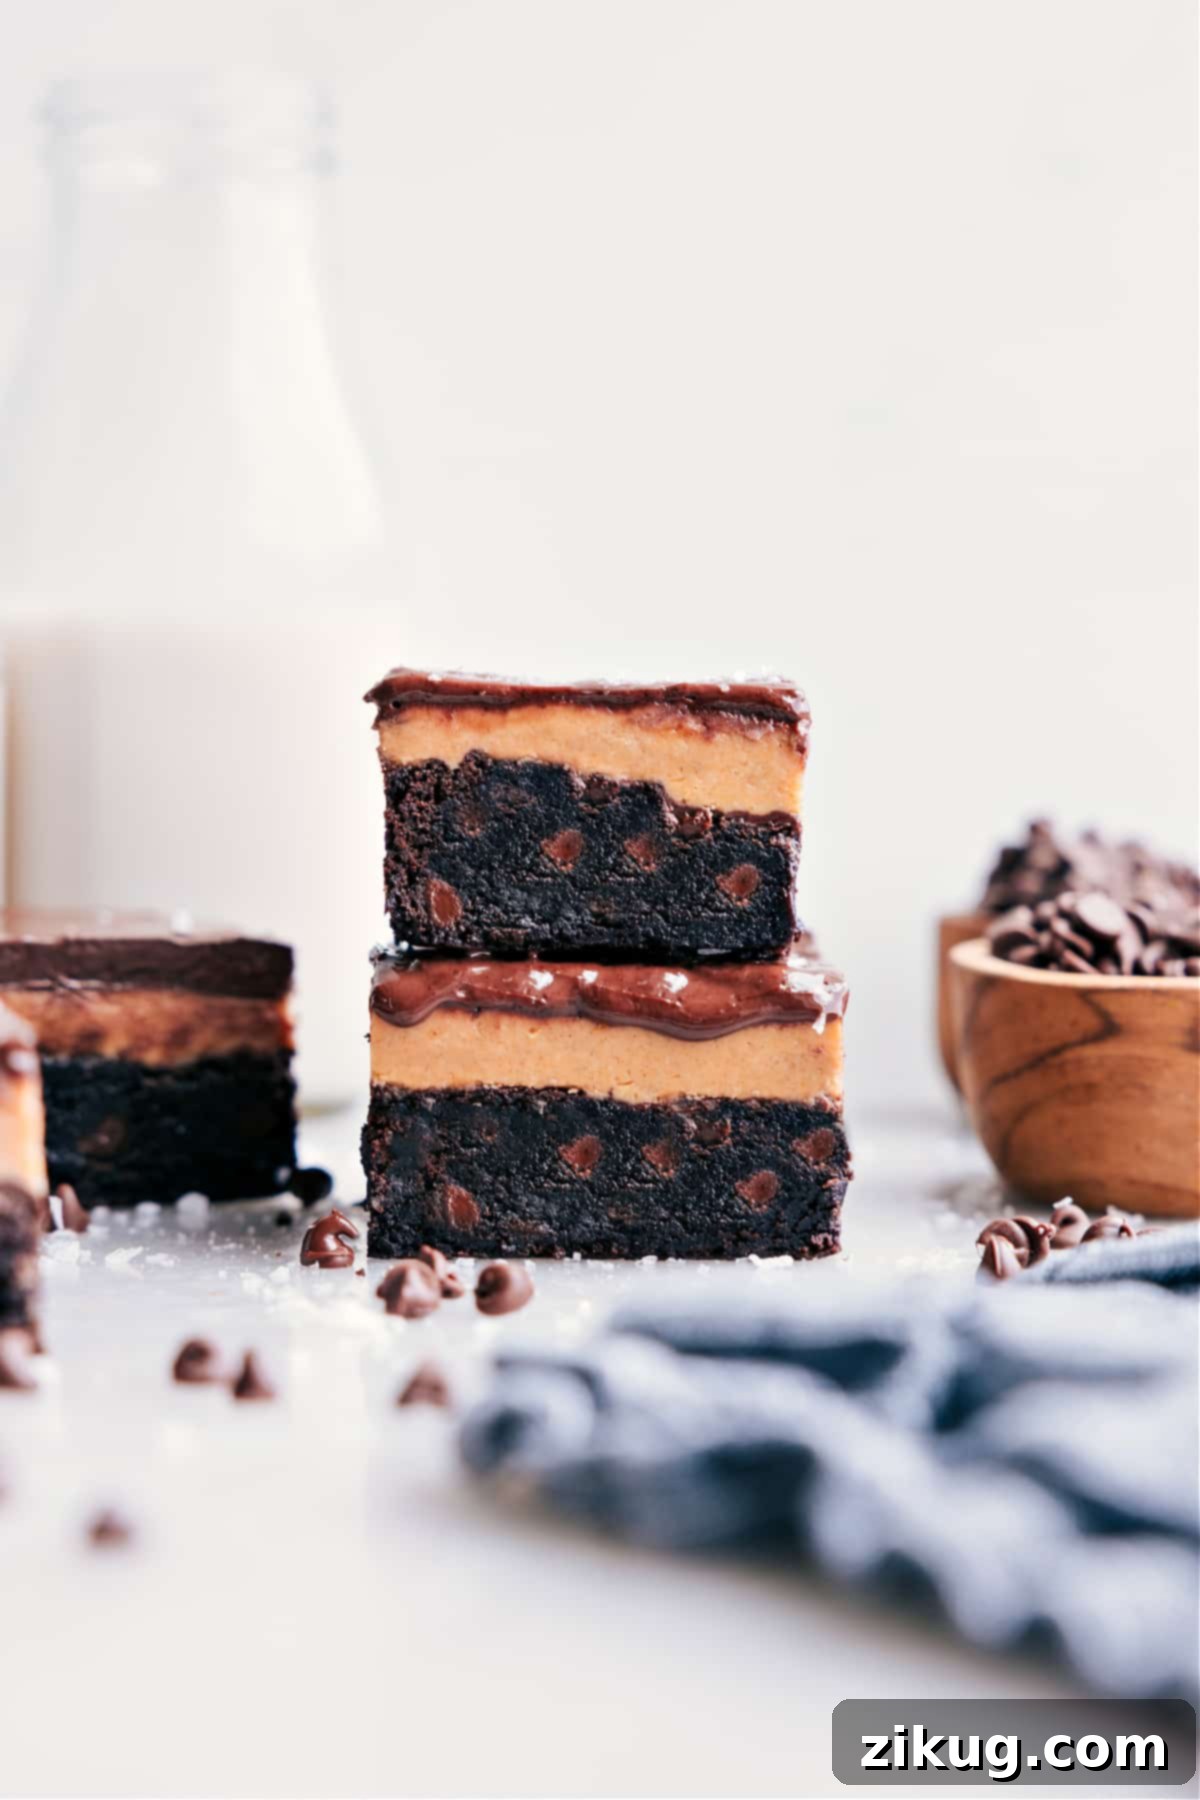
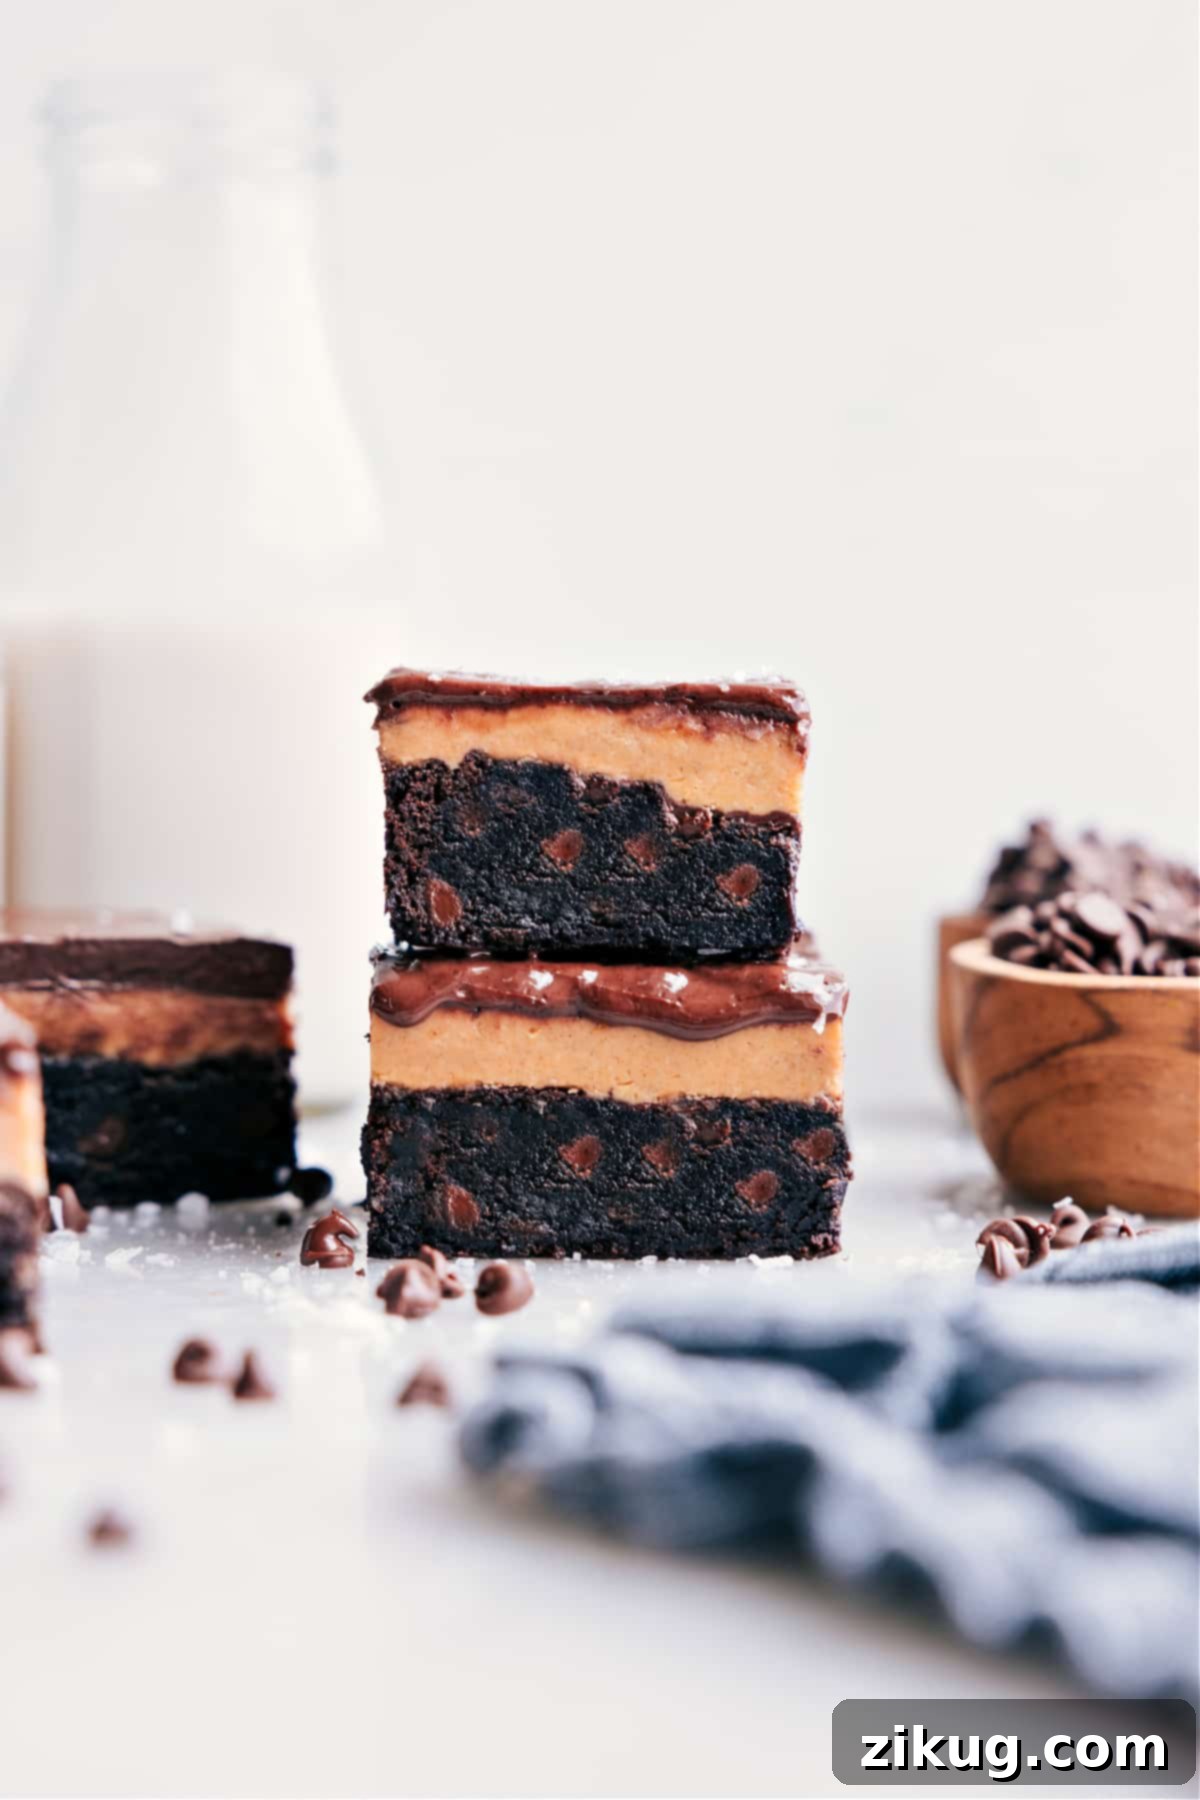
Indulge in the layers of pure bliss with our ultimate Buckeye Brownies Recipe! These decadent bars feature a thick, chewy brownie base, generously topped with a smooth, rich peanut butter layer, all finished with a glossy, melt-in-your-mouth chocolate topping. It’s the perfect combination of two classic treats, making for an unforgettable dessert that wins hearts every time.

A Personal Touch from the Kitchen
Why These Buckeye Brownies are a Game Changer!
Growing up, Buckeyes were a staple, especially around the holidays. This beloved Ohio treat—a delightful ball of peanut butter dipped in chocolate—holds a special place in my heart. When I lived in Cleveland, you couldn’t escape them; they were everywhere, a true symbol of comforting, indulgent sweetness. After I moved away, I found myself longing for that unique flavor combination, that perfect harmony of chocolate and peanut butter.
That longing led me to create these incredible Buckeye Brownies. I wanted to capture the essence of the classic candy but elevate it into a more substantial, shareable dessert. What emerged was a recipe featuring a wonderfully fudgy brownie base, followed by a thick, velvety smooth peanut butter layer, and crowned with a luscious, glossy chocolate topping. Each component is perfect on its own, but together, they create a symphony of textures and flavors that is truly extraordinary.
Honestly? I believe these Buckeye Brownies surpass the original candy. They offer a richer, more complex experience with every bite, combining the chewiness of a brownie, the creaminess of peanut butter, and the snap of chocolate. They’ve become a go-to for potlucks, family gatherings, and anytime I need a guaranteed crowd-pleaser. Get ready to fall in love with your new favorite dessert!
Why You’ll Adore This Buckeye Brownies Recipe
There are countless reasons why these chocolate peanut butter brownies have become a cherished recipe. Here are just a few:
- Irresistible Flavor Combination: The timeless pairing of rich chocolate and creamy peanut butter is a match made in heaven. These brownies amplify that classic taste to new heights.
- Perfectly Layered Texture: Each bite delivers a delightful contrast: the dense, fudgy chew of the brownie, the smooth and sweet peanut butter filling, and the satisfying snap of the chocolate ganache-like topping.
- Surprisingly Simple to Make: While they look impressive, this recipe is designed for ease. Using a boxed brownie mix as a base saves time without sacrificing flavor, making it accessible for bakers of all skill levels.
- Crowd-Pleasing Dessert: Whether you’re hosting a party, bringing a dish to a potluck, or simply treating your family, Buckeye Brownies are always a hit. They’re rich, satisfying, and disappear quickly!
- Versatile for Customization: While perfect as is, this recipe offers plenty of room for creative variations, allowing you to tailor it to your taste preferences or dietary needs.
- Holiday Favorite: Just like traditional Buckeyes, these brownies are especially popular during the holiday season, making them a festive and delicious addition to any celebration.
Essential Ingredients for Buckeye Brownies
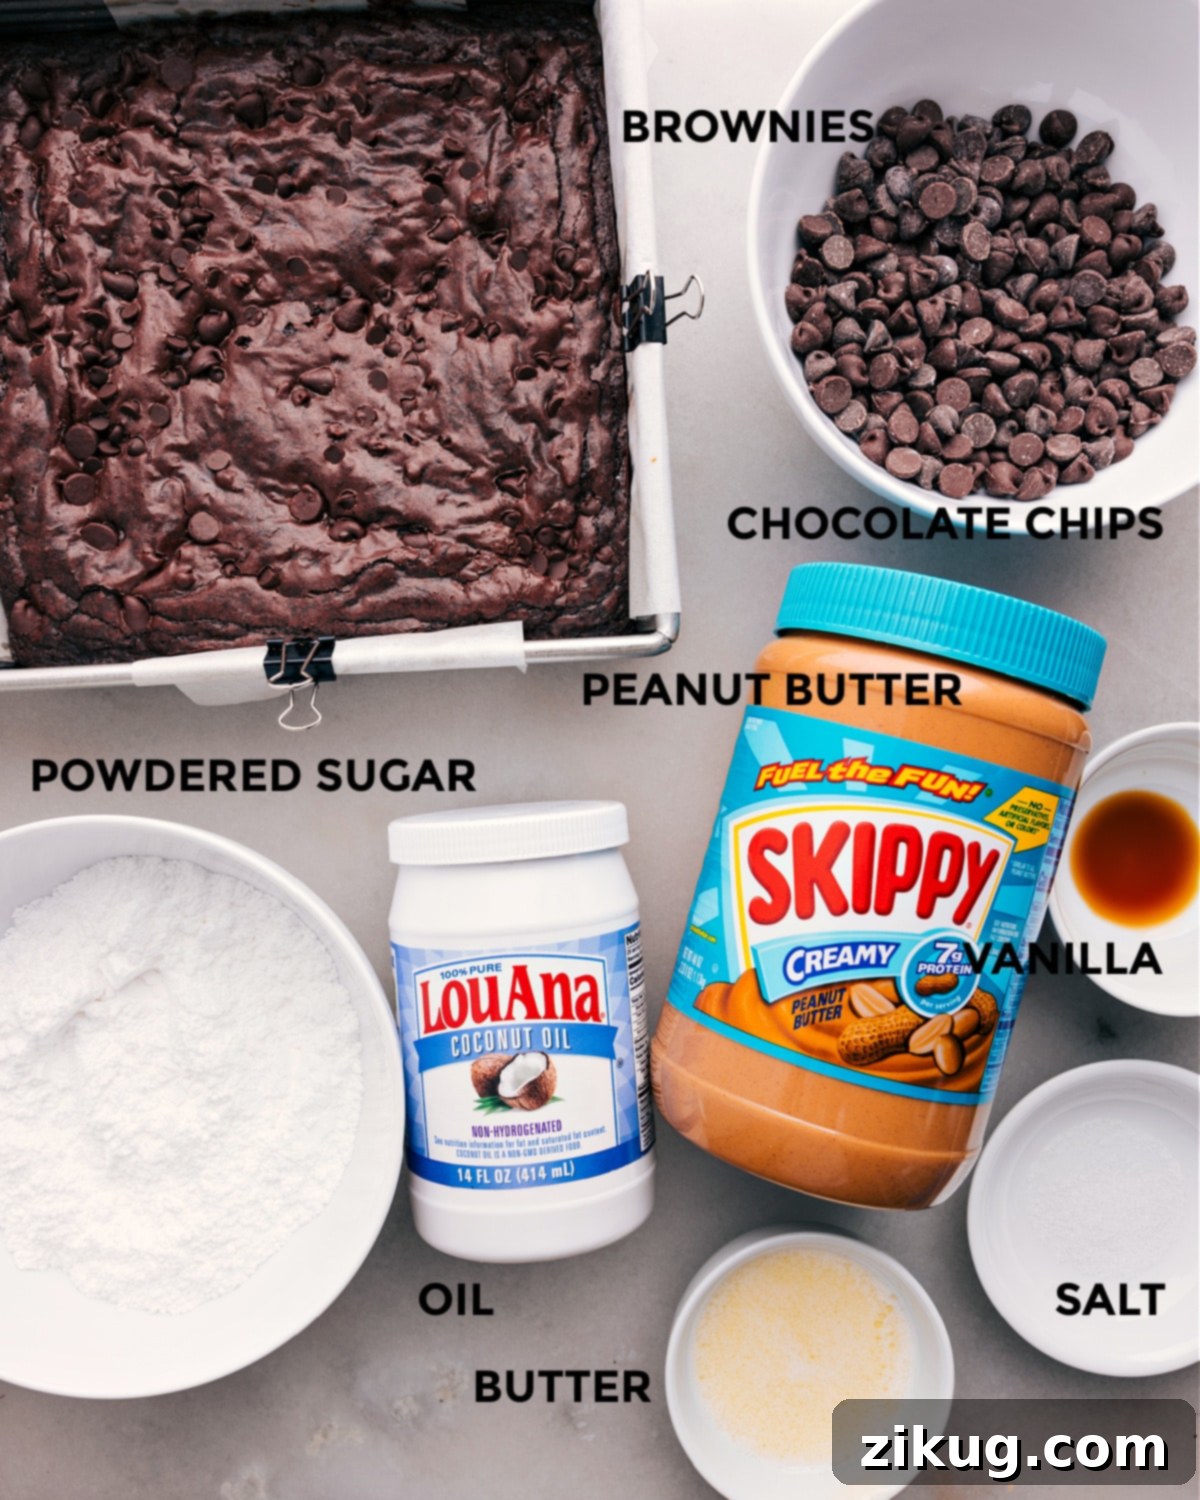
Crafting these delectable Buckeye Brownies requires a few key ingredients, most of which you likely already have in your pantry. Here’s a detailed look at what you’ll need to create each delicious layer:
- Brownie Mix: For ultimate convenience and consistent results, a boxed brownie mix is ideal. It significantly cuts down on prep time. However, if you prefer, a homemade brownie recipe can absolutely be used – just ensure it’s suitable for an 8×8 or 9×9-inch pan to achieve the right thickness. My personal favorites for boxed mixes are Betty Crocker Delights Supreme Triple Chunk and Ghirardelli Ultimate Chocolate Premium Brownie Mix for their rich flavor and fudgy texture.
- Unsalted Butter: Essential for the peanut butter layer, melted unsalted butter adds a crucial richness and helps the filling set properly, creating that perfectly smooth consistency.
- Creamy Peanut Butter: The star of the middle layer! Opt for smooth, creamy peanut butter (such as Jif or Skippy) for the best texture. Natural peanut butter, which often separates, can sometimes make the layer too oily or stiff, so stick to the classic creamy varieties for this recipe.
- Vanilla Extract: A touch of vanilla enhances the overall flavor profile, adding warmth and depth to the sweet peanut butter filling.
- Powdered Sugar (Confectioners’ Sugar): This fine sugar is vital for sweetening the peanut butter layer and giving it that characteristic thick, smooth, and fudge-like consistency that sets beautifully.
- Salt: Just a pinch of salt is crucial for balancing the sweetness of both the peanut butter and chocolate layers, enhancing all the flavors without making the dessert overtly salty.
- Semi-Sweet Chocolate Chips: These form the base of your luscious chocolate topping. Semi-sweet chocolate provides a balanced sweetness that complements the peanut butter. Dark chocolate chips also work wonderfully if you prefer a richer, less sweet finish.
- Coconut Oil: This secret ingredient is key to achieving a smooth, glossy chocolate topping that is easy to spread and, most importantly, easy to slice without cracking. It helps the chocolate melt smoothly and harden beautifully at room temperature.
Expert Tips for Crafting Perfect Buckeye Brownies
Achieving the best possible Buckeye Brownies is simple with these pro tips. Follow these guidelines to ensure every layer is perfect and your dessert is a showstopper:
- Always Line Your Pan with Parchment Paper: This step is an absolute game-changer! Lining your baking pan with parchment paper, allowing for an overhang on the sides, makes it incredibly easy to lift the entire batch of chilled brownies out of the pan. This ensures clean edges and effortless slicing, a detail you’ll be incredibly grateful for when it’s time to serve. Learn how to line pans with parchment like a pro.
- Avoid Overbaking the Brownie Base: For truly fudgy and moist brownies, it’s crucial not to overbake them. The brownies should appear slightly underdone in the center when you remove them from the oven. A toothpick inserted into the center should come out with moist crumbs, not entirely clean. Remember, they will continue to set as they cool.
- Patience is Key: Allow Ample Cooling and Chilling Time: This dessert is all about distinct layers, and rushing the cooling process can lead to a messy outcome. Ensure your brownie base is completely cool before adding the peanut butter layer, and then thoroughly chill the peanut butter layer before pouring on the chocolate topping. For best results, I often bake the brownies the night before, allowing them to chill completely overnight.
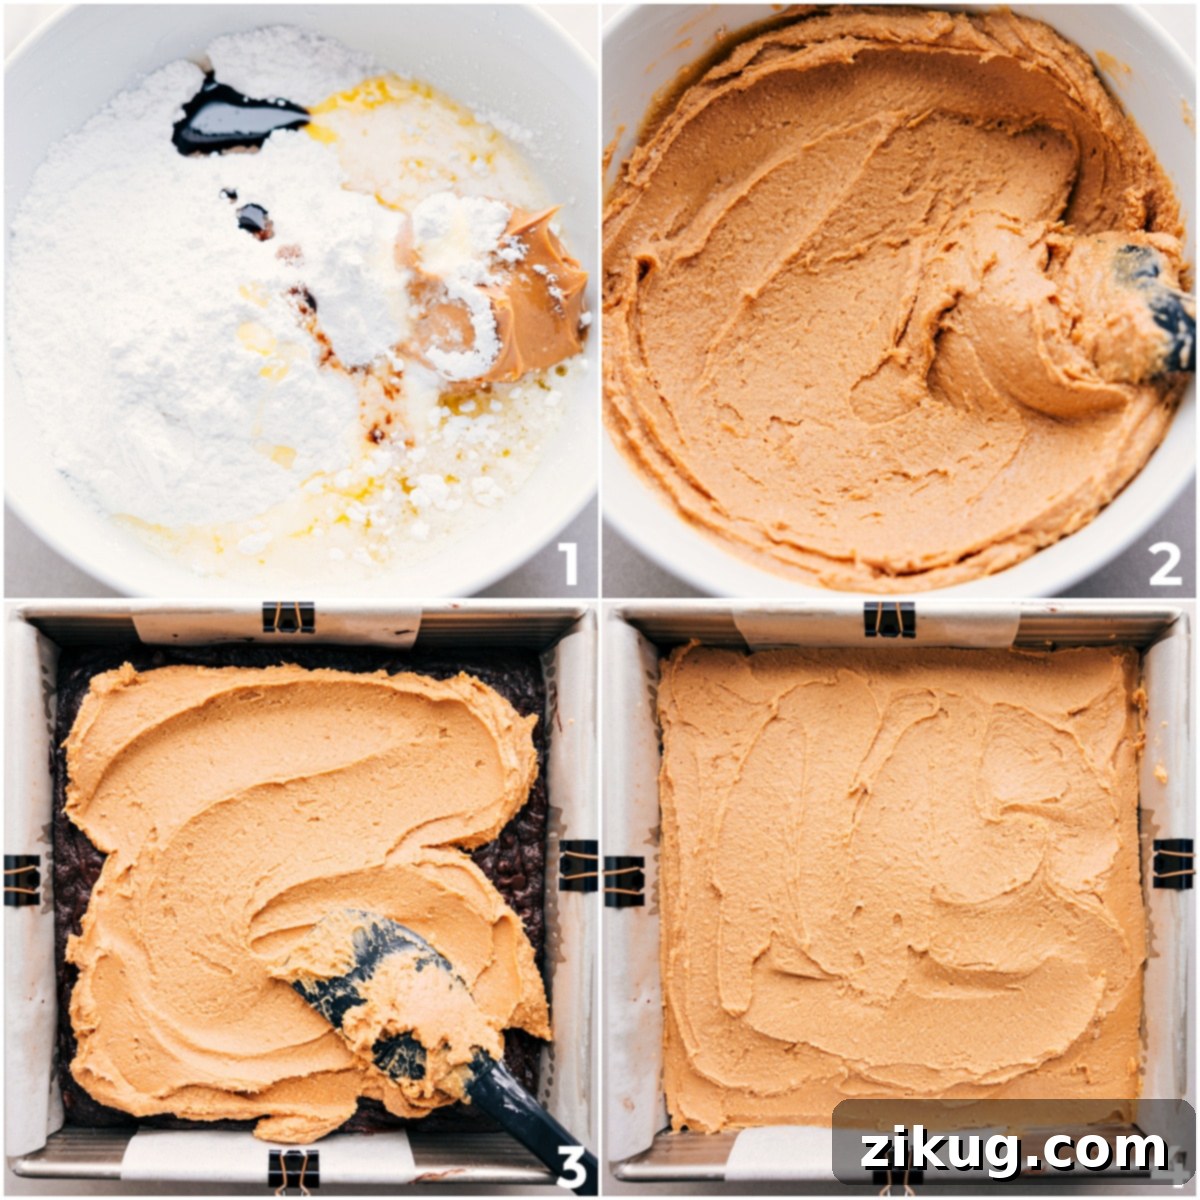
- Spread the Peanut Butter Layer Evenly: When applying the peanut butter filling, take your time to spread it smoothly and evenly across the cooled brownie layer, extending all the way to the edges of the pan. This creates a beautiful, consistent layer and prevents the chocolate topping from seeping down into the brownie, ensuring clean lines between each layer.
- Achieve Clean Slices Every Time: To get those picture-perfect, neat slices, use a sharp knife. For even cleaner cuts, warm the knife under hot running water for a few seconds, wipe it completely dry, and then make quick, decisive cuts. Repeat this process for each slice. This trick ensures the chocolate topping doesn’t crack and the layers remain distinct.
- Bring to Room Temperature Before Serving: While these brownies need to be stored in the fridge, allowing them to sit at room temperature for about 20-30 minutes before serving significantly enhances their flavor and texture. The chocolate softens slightly, and the peanut butter becomes creamier, providing a more enjoyable eating experience.
Delicious Buckeye Brownies Recipe Variations & Customizations
While the classic Buckeye Brownie is perfect in its original form, this recipe is also incredibly versatile, offering many opportunities for delicious variations. Don’t hesitate to get creative and tailor these bars to your unique taste:
- A Sprinkle of Sea Salt: For those who adore the sweet and salty combination, a delicate sprinkle of flaky sea salt over the top of the chocolate layer, just before it sets, is absolutely divine. It elevates the chocolate and peanut butter flavors beautifully.
- Explore Different Nut Butters: While peanut butter is traditional, feel free to experiment with other creamy nut butters. Almond butter or cashew butter can offer a slightly different, yet equally delicious, flavor profile. Just ensure they are the smooth, creamy varieties for the best texture.
- Go Darker with Chocolate: If you’re a fan of rich, intense chocolate flavor, swap out semi-sweet chocolate chips for dark chocolate chips in the topping. This creates a more sophisticated and less sweet finish that chocolate aficionados will appreciate. You could even use a mix of both!
- Boost the Peanut Butter Punch: For an extra dose of peanut butter goodness, consider adding chopped peanut butter cups or Reese’s Pieces candy directly onto the warm chocolate topping before it sets. This adds both flavor and a delightful textural crunch.
- Add a Crunchy Element: Fold in some chopped peanuts, pretzels, or even rice krispies into the peanut butter layer for added crunch and texture. This contrasts beautifully with the smooth layers.
- White Chocolate Swirl: After pouring the dark chocolate topping, drizzle melted white chocolate over it and swirl gently with a toothpick for a beautiful marbled effect and an extra layer of sweetness.
- Espresso Kick: Add a teaspoon of espresso powder to your brownie batter (if using a homemade recipe or enhancing a boxed mix) or even a tiny pinch to the chocolate topping to deepen the chocolate flavor.
Optimal Storage for Buckeye Brownies
To maintain their freshness and delightful texture, store your Buckeye Brownies in an airtight container in the refrigerator. They will remain wonderfully delicious for 3–4 days. Bringing them to room temperature for about 20-30 minutes before serving will enhance their flavor and texture.
Freezing is generally not recommended for this Buckeye Brownies recipe. The dairy content in both the peanut butter filling and the chocolate topping tends to alter its texture upon thawing, which can result in a less pleasant consistency and appearance. Enjoy them fresh for the best experience!
More Irresistible Brownie & Bar Desserts:
Desserts
Mint Brownie Cookies
Desserts
Brownie Oreo Ice Cream Bars
Desserts
Caramel Brownie Cookie Bars
Desserts
Brownie Batter Dessert Cheese Ball
Buckeye Brownies Recipe
Chelsea Lords
20 minutes
45 minutes
4 hours
5 hours 5 minutes
20 bars (cut into small, rich servings!)
Equipment
-
9 x 9-inch baking pan (or an 8 x 8-inch pan for slightly thicker brownies)
-
Parchment paper (for easy lifting and clean slices)
-
Large mixing bowl
-
Microwave-safe bowl
-
Spatula or offset spatula
-
Sharp knife
Ingredients
For the Brownie Base:
- 1 (17.8-ounce) package brownie mix and any additional ingredients listed on the package (e.g., eggs, oil, water). See Note 1 for recommendations.
For the Creamy Peanut Butter Filling:
- 4 tablespoons unsalted butter , thoroughly melted
- 3/4 cup creamy peanut butter (e.g., Jif or Skippy; avoid natural peanut butter as it can separate)
- 1/2 teaspoon pure vanilla extract
- 1 cup powdered sugar (confectioners’ sugar), sifted if clumpy
- 1/8 teaspoon fine sea salt (or table salt, to balance sweetness)
For the Decadent Chocolate Topping:
- 1 cup semi-sweet chocolate chips (or dark chocolate chips for a richer flavor)
- 2 teaspoons coconut oil (refined or unrefined, to achieve a smooth, sliceable topping)
Step-by-Step Instructions
-
Preparation Tip: Success with this layered dessert hinges on allowing sufficient time for each layer to cool and chill. Rushing this process can lead to layers that blend rather than stand distinctly. I highly recommend preparing the brownies the night before to ensure they are completely cool and firm.
Step 1: Prepare and Bake the Brownie Base. Begin by preheating your oven to 350°F (175°C). Line a 9×9-inch baking pan (or an 8×8-inch pan for slightly thicker brownies) with parchment paper, leaving a generous overhang on all sides. This overhang will act as handles for easy removal later. Prepare your chosen brownie mix according to the package directions. Pour the batter into the prepared pan and bake as instructed, being careful not to overbake. The brownies should look slightly moist in the center when removed. Let the brownies cool in the pan for 20 minutes on a wire rack. After this initial cooling, cover the pan loosely with foil or plastic wrap and transfer it to the refrigerator (or freezer for about 30 minutes if you’re in a hurry) until the brownies are completely chilled and firm. This firm base is essential for the next layer.
-
Step 2: Create the Creamy Peanut Butter Layer. While your brownies are chilling, prepare the decadent peanut butter filling. In a large mixing bowl, combine the melted unsalted butter, creamy peanut butter, vanilla extract, and salt. Gradually add the powdered sugar, mixing thoroughly until a smooth, thick, and dough-like consistency forms. It should be firm enough to handle but still spreadable. Once the brownie base is fully chilled, remove it from the fridge. Drop small dollops of the peanut butter mixture evenly over the surface of the cooled brownies. Using the back of a spoon or an offset spatula, gently and carefully spread the peanut butter mixture into an even layer, pressing it all the way to the edges of the pan. Ensure this layer is as smooth as possible. Cover the pan again and return it to the refrigerator to chill for at least 1-2 hours, or until the peanut butter layer is firm.
-
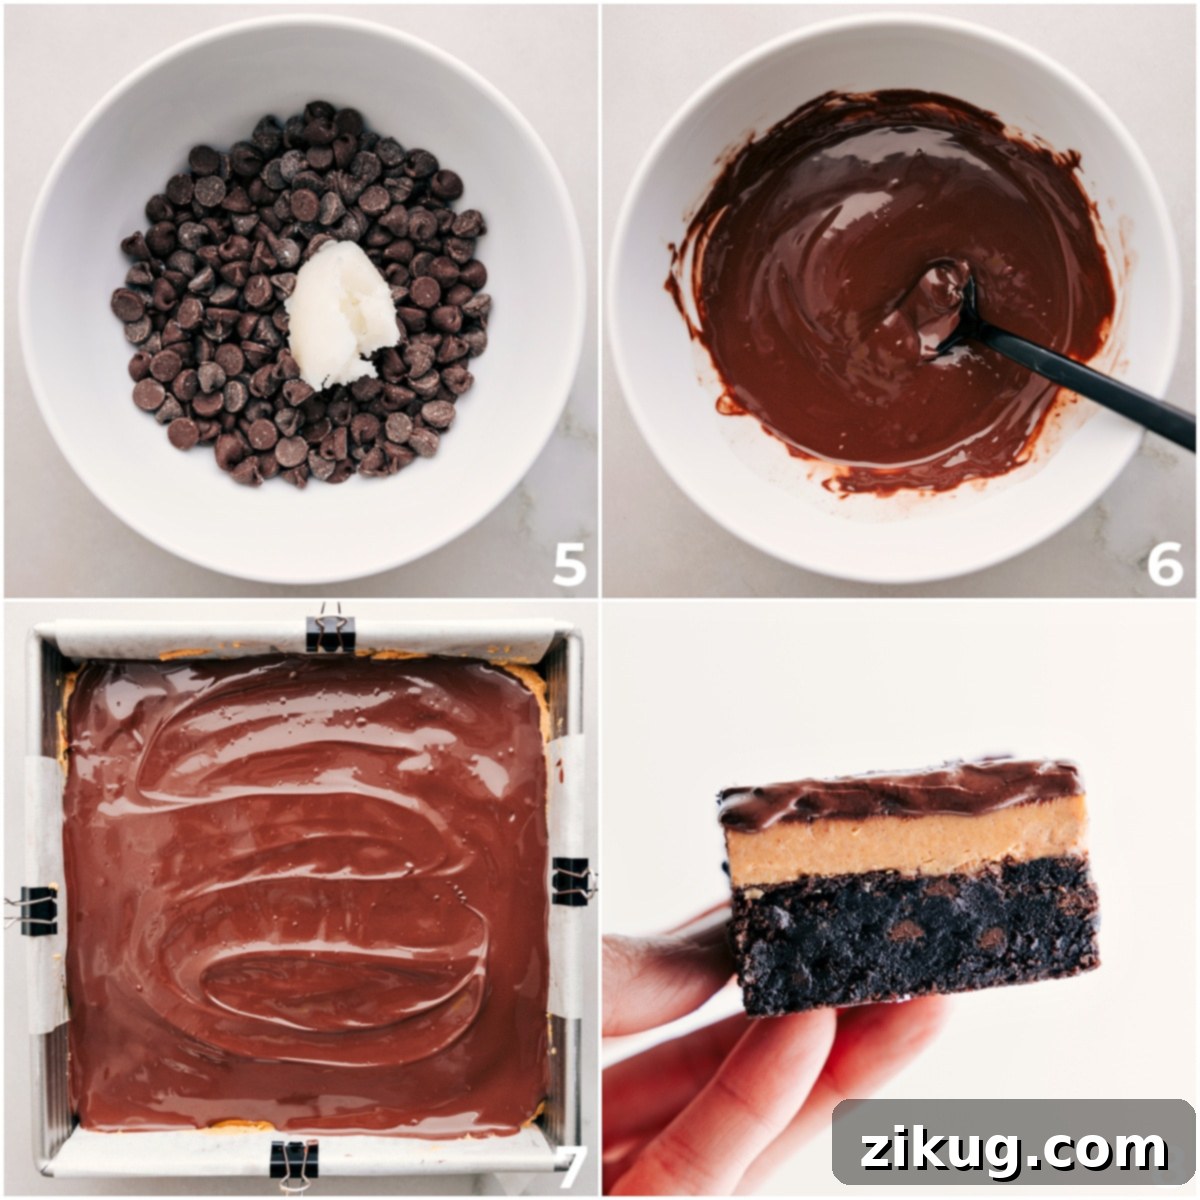
Step 3: Prepare the Smooth Chocolate Topping. For the grand finale, make the rich chocolate topping. In a microwave-safe bowl, combine the semi-sweet chocolate chips and coconut oil. Microwave the mixture in 20-second bursts, stirring well with a spoon or spatula after each interval, until the chocolate is fully melted and completely smooth. Be careful not to overheat the chocolate, as this can cause it to seize. Once melted, pour the glossy chocolate mixture evenly over the chilled peanut butter layer. Use a spatula to gently spread it out to cover the entire surface, creating a beautiful, uniform topping. Allow the chocolate to set at room temperature for at least 1-2 hours, or in the refrigerator for 30-45 minutes, until it is firm to the touch.
-
Step 4: Slice and Serve Your Buckeye Brownies. Once the chocolate topping is completely firm, use the parchment paper overhang to carefully lift the entire slab of Buckeye Brownies out of the baking pan and onto a cutting board. For impeccably clean slices, heat a sharp knife under hot running water for a few seconds, then wipe it completely dry. Make swift, firm cuts to slice the brownies into your desired bar size. Re-warm and dry the knife between each cut to ensure smooth, clean edges on every piece. These brownies are rich, so smaller bars are often preferred! For the best flavor and texture experience, let the cut brownies sit at room temperature for about 30 minutes before serving. Enjoy this irresistible chocolate peanut butter delight!
Recipe Notes
Storage Instructions: To keep your Buckeye Brownies fresh and tasting their best, store them in an airtight container in the refrigerator. They will maintain their quality for 3–4 days. Although tempting, freezing is not recommended for these brownies. The dairy components in the peanut butter filling and the chocolate topping can undergo textural changes when frozen and thawed, resulting in a less desirable consistency.
Nutrition Information (Approximate)
Calories: 299kcal |
Carbohydrates: 35.4g |
Protein: 4.4g |
Fat: 16.7g |
Cholesterol: 15.2mg |
Sodium: 117.4mg |
Fiber: 1.3g |
Sugar: 26.1g
Nutrition information is automatically calculated and should be used as an approximation only. Values may vary based on specific ingredients and brands used.
Frequently Asked Questions (FAQs)
Can I use natural peanut butter for the filling?
It’s generally not recommended to use natural peanut butter (the kind that separates) for this recipe. The oil separation in natural peanut butter can make the filling either too greasy or too stiff, and it may not set properly, affecting the desired smooth, creamy texture of the Buckeye layer.
My chocolate topping cracked when I cut the brownies. How can I prevent this?
Cracked chocolate often occurs when the chocolate is too cold and brittle. To prevent this, ensure you warm your knife under hot water and thoroughly dry it between each cut. Also, allowing the brownies to sit at room temperature for 20-30 minutes before slicing can help the chocolate soften slightly and become more pliable.
Can I make these Buckeye Brownies ahead of time?
Absolutely! These brownies are an excellent make-ahead dessert. You can bake the brownie base a day or two in advance and keep it covered in the refrigerator. Assemble the peanut butter and chocolate layers the day before you plan to serve. They need ample chilling time to set properly, making them perfect for preparing in advance for parties or events.
What if I don’t have coconut oil for the chocolate topping?
Coconut oil helps the chocolate melt smoothly and gives it a nice, shiny finish that’s easy to cut. If you don’t have it, you can substitute a small amount of vegetable shortening (like Crisco) or butter. Start with 1.5 teaspoons, adding a bit more if needed, until the chocolate is smooth and fluid. The texture might be slightly different, but it will still be delicious!
Are Buckeye Brownies gluten-free?
This recipe, as written, is not gluten-free due to the standard brownie mix. However, you can easily adapt it by using a certified gluten-free brownie mix for the base. All other ingredients are typically gluten-free, but always double-check labels to ensure they meet your dietary needs.
Love this Buckeye Brownies Recipe? Leave a comment below!