
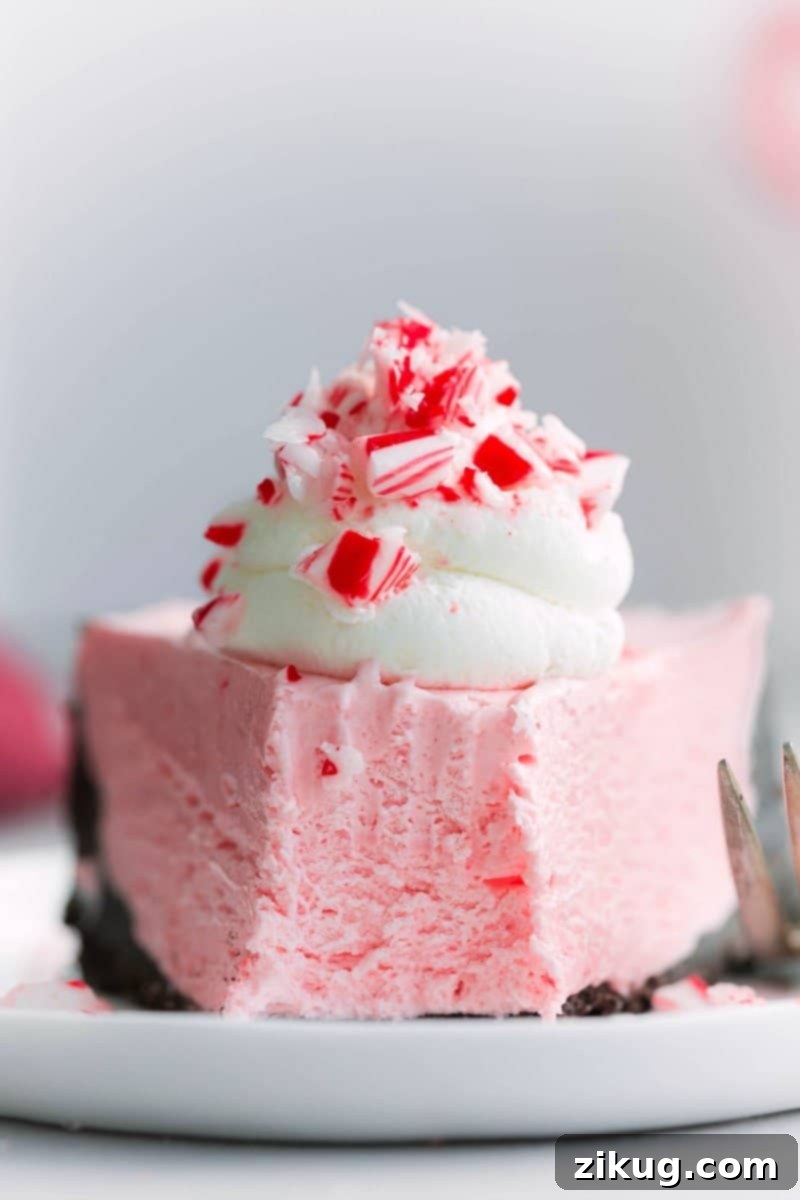
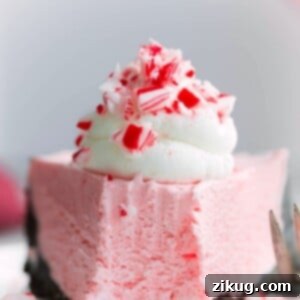
No-Bake Peppermint Cheesecake is the quintessential holiday dessert – a vibrant, deliciously refreshing, and effortlessly elegant treat that captures the festive spirit. Imagine a rich, sweet Oreo® cookie crust serving as the perfect foundation for a creamy, light-as-air peppermint filling, all crowned with fluffy whipped cream and a generous sprinkle of crushed peppermint candy. This stunning cheesecake is not only a showstopper on any holiday table but also a fantastic make-ahead option, saving you precious time during the busy season. Whether you’re hosting a grand Christmas dinner or simply seeking a delightful winter indulgence, this no-bake masterpiece promises to be a memorable addition to your celebrations.
For those who adore the cool, minty flavor of peppermint, explore more festive delights like our Peppermint Snowball Cookies and irresistible Peppermint Bark Brownie Cookies. Each recipe offers a unique way to enjoy the classic holiday flavor.
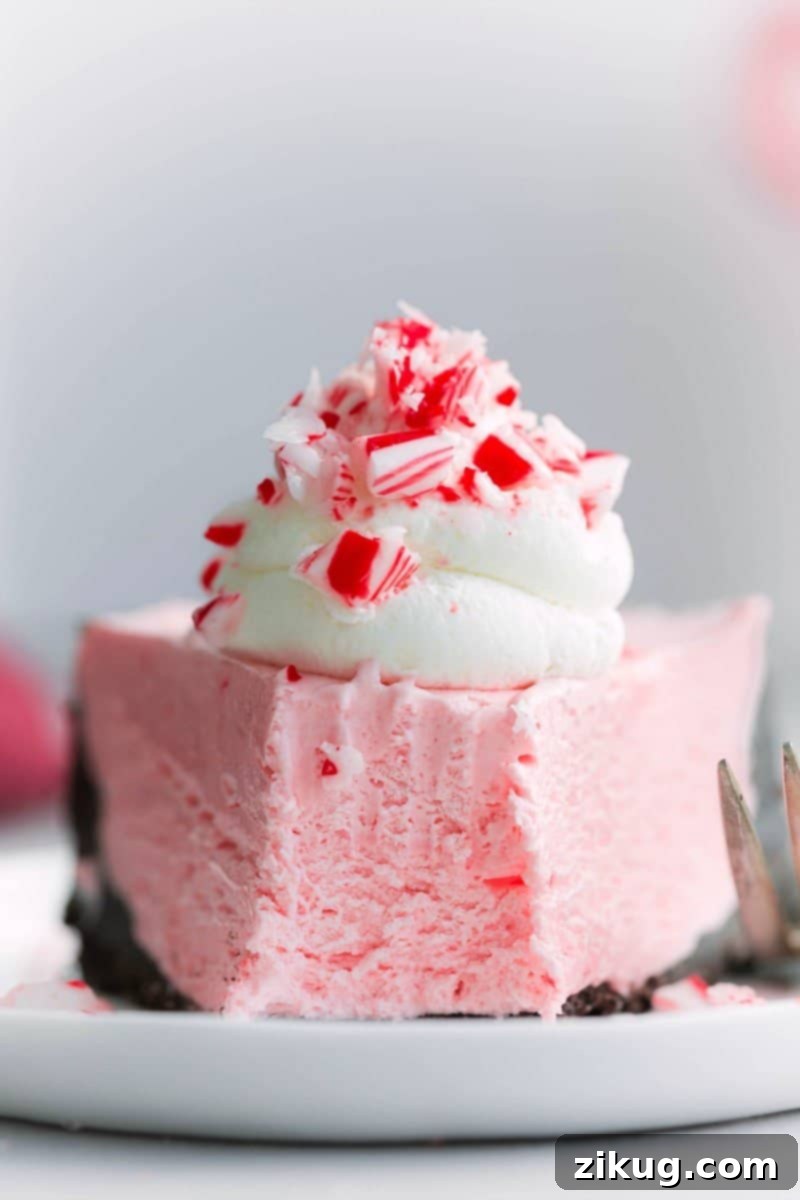
Indulge in the Best No-Bake Peppermint Cheesecake This Holiday Season
The holiday season is a whirlwind of activities, from decorating to gift shopping, and often leaves little time for elaborate baking. That’s precisely why this No-Bake Peppermint Cheesecake stands out as the ultimate dessert solution. It’s designed for convenience without compromising on flavor or visual appeal. This recipe is a true holiday miracle, offering a simple preparation process that yields a dessert your guests will absolutely adore.
Unlike traditional cheesecakes that demand precise baking times, water baths, and careful cooling to prevent cracks, this frozen cheesecake eliminates all that fuss. No baking is needed at all, making it incredibly beginner-friendly. Its no-bake nature means you can whip it up days or even weeks in advance and store it in the freezer, ready to be pulled out and served whenever you need a stunning dessert. This allows you to focus on other holiday preparations, knowing that a decadent, festive treat is already taken care of.
Why This No-Bake Peppermint Cheesecake is a Holiday Must-Have
Beyond its sheer deliciousness, this No-Bake Peppermint Cheesecake offers several compelling reasons to become your go-to holiday dessert:
- Effortless Elegance: Despite its sophisticated look, this cheesecake requires minimal effort, making it perfect for busy hosts.
- Make-Ahead Perfection: Prepare it days or weeks ahead, freeing up your time closer to your event. Just freeze and serve!
- Refreshing Flavor Profile: The cool, crisp taste of peppermint perfectly balances the rich creaminess, offering a delightful contrast to heavier holiday fare.
- Irresistible Oreo Crust: The classic chocolate cookie crust adds a familiar, comforting crunch and a depth of flavor that complements the minty filling beautifully.
- Crowd-Pleaser: Both kids and adults alike will be enchanted by its festive colors and enchanting peppermint flavor.
- No Oven Required: Keep your oven free for other holiday dishes or simply enjoy a stress-free dessert preparation.
Crafting the Perfect Oreo Crust
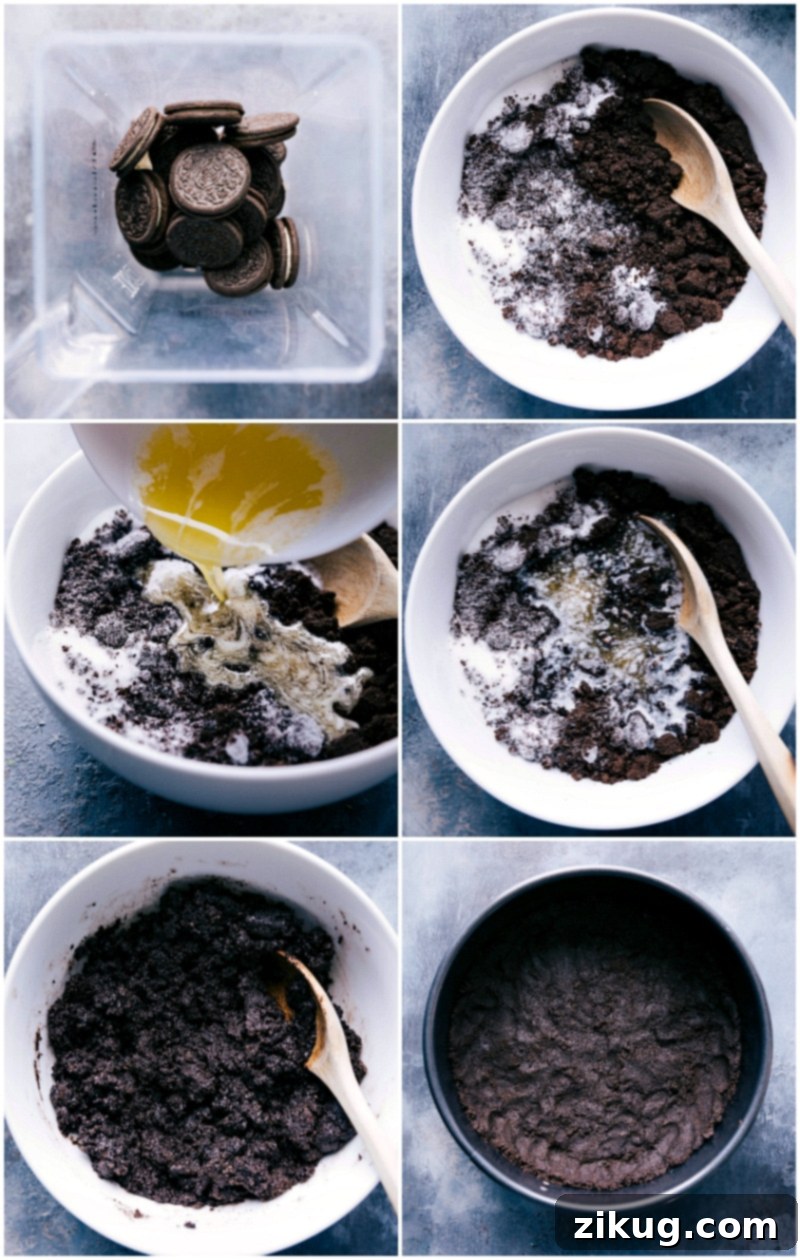
The foundation of our irresistible No-Bake Peppermint Cheesecake is an easy-to-make, incredibly flavorful Oreo crust. It’s a classic for a reason – the rich chocolate cookies perfectly complement the vibrant peppermint filling, creating a symphony of textures and tastes. Making it is simple: just pulse whole Oreos (no need to remove the cream filling, it adds to the richness!), combine with sugar and melted butter, then press it firmly into your pan.
For an exceptionally sturdy and delicious crust every time, follow these quick tips:
- Achieve Fine Crumbs: Ensure your Oreos are completely broken down into very fine crumbs. Large chunks can make slicing the finished cheesecake challenging and create an uneven base. Use a food processor for the best results, pulsing until no large pieces remain.
- Cool Melted Butter: It’s crucial to let your melted butter cool slightly before mixing it with the Oreo crumbs and sugar. Adding hot butter can prematurely melt the sugar in the mixture, leading to a greasy, less cohesive crust. Lukewarm is ideal.
- Press Down Firmly: Once the mixture is in the pan, press it down very firmly and evenly. This compaction is key to a crust that holds together well when sliced. The bottom of a metal measuring cup or a flat-bottomed glass works wonderfully for this, ensuring consistent thickness.
- Line with Parchment Paper: For effortless removal and beautifully clean slices, consider lining the bottom of your springform pan with a circle of parchment paper before adding the crust mixture. Once frozen, you can easily slide the cheesecake off the base.
How To Make No-Bake Peppermint Cheesecake: A Step-by-Step Guide
Creating this festive No-Bake Peppermint Cheesecake is surprisingly straightforward. Follow these simple steps for a dessert that’s guaranteed to impress with minimal fuss:
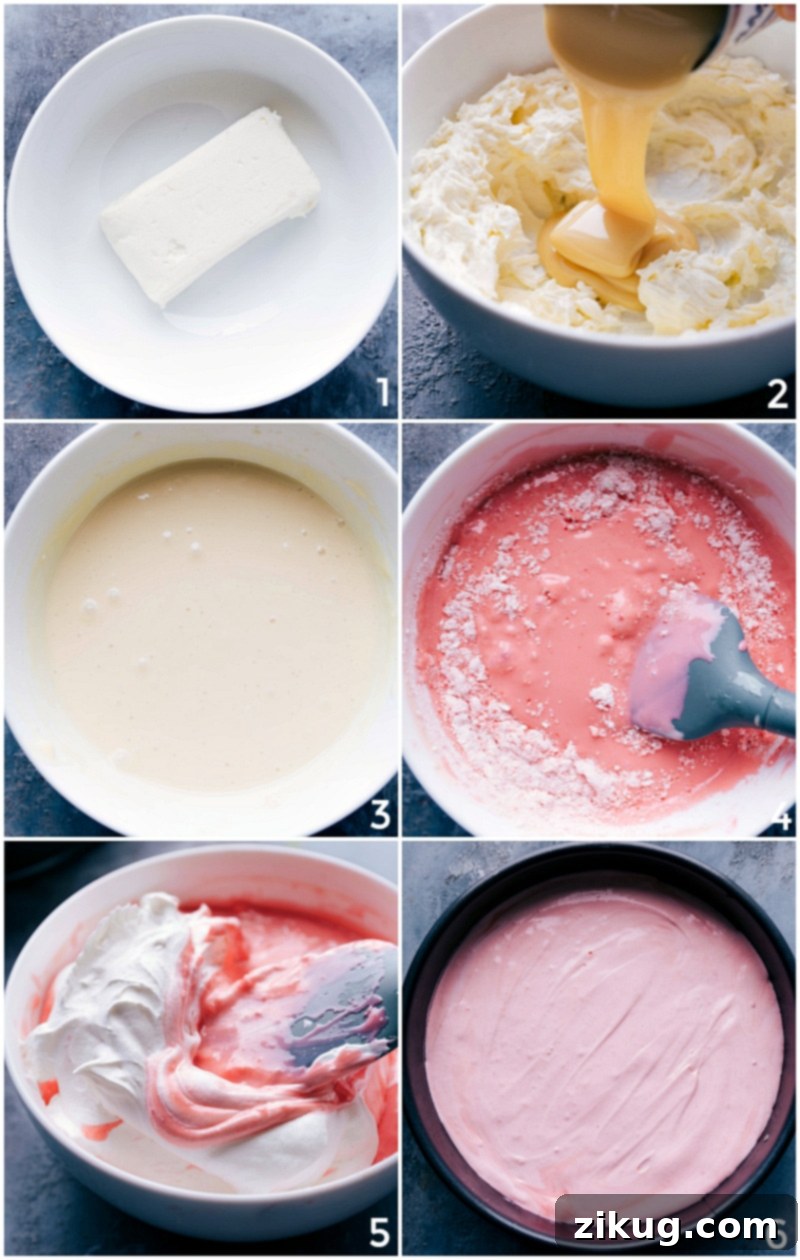
- Prepare the Cream Cheese: Begin by ensuring your full-fat cream cheese is at room temperature. This is vital for a smooth, lump-free filling. Beat it thoroughly in a large bowl until it’s light, airy, and perfectly smooth.
- Incorporate Sweetened Condensed Milk: Gradually add the sweetened condensed milk to the cream cheese mixture, continuing to beat until both ingredients are fully incorporated and the batter is silky smooth.
- Flavor and Color: Now for the festive touch! Mix in the peppermint extract and a few drops of red food coloring (optional, but highly recommended for that signature holiday pink hue). Add a tiny pinch of salt to enhance all the flavors.
- Add Crushed Peppermint: Gently fold in the crushed candy canes or peppermint candies. These bits of candy provide a wonderful crunch and an extra burst of minty flavor throughout the cheesecake.
- Fold in Whipped Topping: Carefully fold in the thawed frozen whipped topping using a spatula. This step adds incredible lightness and airiness to the filling. Be gentle to maintain the whipped topping’s volume and prevent overmixing.
- Assemble and Freeze: Pour the luscious peppermint filling over your prepared Oreo crust in the springform pan. Smooth the top with a spatula to create an even layer. Then, transfer the cheesecake to the freezer for at least 8 hours, or ideally overnight, until it’s completely firm and set. Once frozen, it’s ready to be sliced and served!
Essential Tips for a Flawless No-Bake Peppermint Cheesecake
While this recipe is incredibly forgiving, a few expert tips can elevate your No-Bake Peppermint Cheesecake from delicious to absolutely perfect:
- Peppermint vs. Mint Extract: This is crucial! Always use peppermint extract for this recipe, not mint extract. Mint extract often has a flavor profile that resembles toothpaste, which is not what you want in a dessert. Peppermint extract provides that authentic, refreshing holiday flavor.
- Room Temperature Cream Cheese is Key: For a silky-smooth, lump-free cheesecake filling, your cream cheese MUST be at room temperature. Cold cream cheese will result in a clumpy mixture, and attempting to microwave it to soften quickly can ruin its texture. Plan ahead and let it sit on your countertop for at least an hour, or even two, before you begin mixing.
- Allow Ample Setting Time: Patience is a virtue here! The cheesecake needs sufficient time in the freezer to firm up properly. Freeze the filling for a minimum of 8 hours. For the best, most stable results, I recommend freezing it overnight. This ensures clean slices and a perfectly chilled, dense texture.
- Achieve Clean Slices with a Hot Knife: Because this is a dense, frozen cheesecake, getting perfect slices can be tricky. To achieve clean, sharp cuts, run a sharp knife under hot water for a few seconds, quickly wipe it dry, and then make your cut. Repeat this process for each slice, reheating and wiping the knife as needed.
- Opt for Full-Fat Ingredients: For the best texture and stability, stick with full-fat cream cheese and whipped topping (if using homemade whipped cream, ensure it’s heavy cream). Low-fat or fat-free alternatives contain more water, which can make the cheesecake too soft, watery, and prone to breaking apart. The full-fat versions provide the necessary richness and structure.
- Don’t Overmix the Whipped Topping: Once you’ve folded in the thawed whipped topping, stop mixing as soon as it’s fully combined. Overmixing can deflate the whipped topping, reducing the airy, light texture of your cheesecake filling.
- Crush Peppermint Candies Effectively: To get perfectly crushed candy canes, place them in a zip-top bag and crush them with a rolling pin or the flat side of a meat mallet. Alternatively, a food processor can do the job quickly. Aim for a mix of fine crumbs and small pieces for texture.
Storage Guidelines
Proper storage is essential to maintain the quality and freshness of your No-Bake Peppermint Cheesecake. After serving, store any leftover cheesecake tightly covered in the freezer. Wrap it securely in plastic wrap, then an additional layer of aluminum foil, or place slices in an airtight freezer-safe container to prevent freezer burn and absorb odors. This method ensures it remains delicious and ready to enjoy.
It’s best enjoyed within the first 7 days for optimal flavor and texture. However, it will last exceptionally well for up to a month in the freezer, making it an excellent dessert to prepare well in advance for holiday gatherings.
Variations & Serving Suggestions
This No-Bake Peppermint Cheesecake is delicious as is, but feel free to get creative with variations and serving styles:
- Different Crusts: While Oreo is classic, consider a graham cracker crust for a milder base, or even a brownie crust for an extra rich chocolatey flavor.
- Chocolate Drizzle: A decadent drizzle of melted dark or white chocolate over the top before freezing, or on individual slices, adds another layer of flavor and elegance.
- Peppermint Bark Topping: Instead of just crushed candy canes, sprinkle homemade or store-bought peppermint bark for a more complex chocolate-mint topping.
- Fresh Mint Garnish: A few fresh mint leaves alongside the whipped cream and crushed peppermint can add a beautiful visual touch and a subtle herbaceous aroma.
- Hot Chocolate Pairing: Serve slices alongside a mug of rich hot chocolate for the ultimate cozy holiday treat.
- Individual Servings: Instead of a large cheesecake, press the crust into mini springform pans or even muffin tins (lined with paper liners) for adorable individual peppermint cheesecakes. Adjust chilling time accordingly.
More Festive Christmas Desserts
The holiday season is incomplete without an array of delightful treats. If you’re looking for more ways to sweeten your celebrations, explore these other fantastic Christmas dessert recipes:
- Peppermint Sugar Cookies with a luscious cream cheese frosting – a perfect blend of classic and festive.
- Five-ingredient Peppermint Bark Cookies, offering quick preparation and irresistible flavor.
- Easy Microwave Fudge, a simple and delicious option for last-minute cravings.
- A delightful Christmas Snack Mix that requires no baking at all.
- Fun-to-make Santa Cookies, perfect for involving kids in holiday baking.
Frequently Asked Questions About No-Bake Peppermint Cheesecake
Here are answers to some common questions about making and enjoying this festive dessert:
- Can I use homemade whipped cream instead of frozen whipped topping?
Yes, absolutely! If you prefer, you can use homemade whipped cream. Whip 2 cups of heavy cream with 1/2 cup of powdered sugar and 1 teaspoon of vanilla extract until stiff peaks form. Gently fold it into the cream cheese mixture as directed. Ensure it’s very cold before whipping for best results. - What if I can’t find peppermint extract?
While peppermint extract is highly recommended for its specific flavor, in a pinch, you could try a tiny amount of pure mint oil (food grade, not essential oil) or even a very small amount of a high-quality peppermint liqueur for adult versions. However, be cautious with quantities as these can be much stronger. - Can I make this in a regular pie dish?
Yes, you can use a regular 9-inch pie dish, though a springform pan makes serving much easier and produces a more visually impressive cheesecake. If using a pie dish, be aware that you will scoop out slices rather than lifting the whole cake. - My cheesecake didn’t set properly, what went wrong?
The most common reasons for a cheesecake not setting are not allowing the cream cheese to come to room temperature (leading to lumps and improper mixing), using low-fat ingredients, or not freezing for long enough. Ensure full-fat ingredients and at least 8 hours of freezer time. - How long before serving should I take it out of the freezer?
For the best slicing and serving experience, remove the cheesecake from the freezer about 15-20 minutes before you plan to cut into it. This allows it to soften just slightly, making it easier to slice cleanly, but still remain firm and wonderfully cold.
Print Recipe
No-Bake Peppermint Cheesecake
Equipment
-
9-inch Springform Pan
-
Food Processor or Blender
-
Large Mixing Bowl
-
Electric Mixer (handheld or stand mixer)
-
Rubber Spatula
Ingredients
For the Oreo Crust:
- 25 regular Oreos (about 2 1/2 cups finely crushed crumbs)
- 3 tablespoons granulated sugar
- 4 tablespoons unsalted butter, melted and cooled
For the Peppermint Filling:
- 1 (8-ounce) package cream cheese, full-fat, at room temperature
- 1 (14-ounce) can sweetened condensed milk
- 1-1/2 to 2 teaspoons peppermint extract (do not use mint extract)
- Red food coloring, optional for richer color
- 1/16 teaspoon salt (a tiny pinch of salt)
- 6 candy canes or peppermint candies, crushed (about 1/2 cup)
- 1 (8-ounce) container frozen whipped topping, thawed (e.g., Cool Whip®)
For Topping (Optional):
- Whipped cream or additional whipped topping
- Additional crushed candy canes or peppermint candies
Instructions
-
Prepare the Oreo Crust: In a food processor or blender, pulse the Oreos (no need to remove the cream filling) until they are finely crushed and resemble fine crumbs. Transfer the crumbs to a medium bowl, then add the granulated sugar and the cooled melted butter. Mix well until the crumbs are thoroughly moistened. Lightly spray a 9-inch springform pan with cooking spray. Press the cookie crust mixture evenly along the bottom and slightly up the sides of the pan. For an extra clean release, you can line the bottom of the springform pan with parchment paper before adding the crust. Place the prepared crust in the freezer while you prepare the filling.
-
Make the Peppermint Filling: In a large mixing bowl, using an electric mixer, beat the room-temperature full-fat cream cheese until it is completely smooth and creamy, with no lumps remaining. This usually takes 2-3 minutes.
-
Combine Wet Ingredients & Flavor: Slowly pour in the sweetened condensed milk into the cream cheese mixture while continuing to beat on low speed until everything is well combined and the batter is smooth. Next, beat in the peppermint extract, a few drops of red food coloring (if desired, for a festive pink hue), and a tiny pinch of salt. Then, fold in the crushed candy canes or peppermint candies using a spatula. Finally, gently fold in the thawed frozen whipped topping with a spatula until it is just combined. Be careful not to overmix, which can deflate the whipped topping. Taste the mixture and adjust peppermint extract or coloring if you prefer a stronger flavor or deeper color.
-
Assemble and Freeze: Pour the luscious peppermint cheesecake mixture over the chilled Oreo crust in the springform pan. Use a spatula to gently smooth the top into an even layer. Place the cheesecake in the freezer and freeze for at least 8 hours, or preferably overnight, until it is completely firm and set.
-
Slice and Serve: When you are ready to serve, remove the cheesecake from the freezer. For perfect, clean slices, run a sharp knife under hot water, quickly dry it off, and then make a cut. Repeat this hot water and dry wipe process for each slice, as the cheesecake is dense when frozen. If desired, garnish individual slices with additional whipped cream or whipped topping and a sprinkle of extra crushed peppermint candies for an extra festive touch. Enjoy your delightful holiday treat!
Recipe Notes
Storage: Cover any leftover No-Bake Peppermint Cheesecake tightly with plastic wrap and return it to the freezer promptly. It retains its best quality within the first 7 days but will last well for up to a month in the freezer.
Nutrition
Nutrition information is automatically calculated, so should only be used as an approximation.