
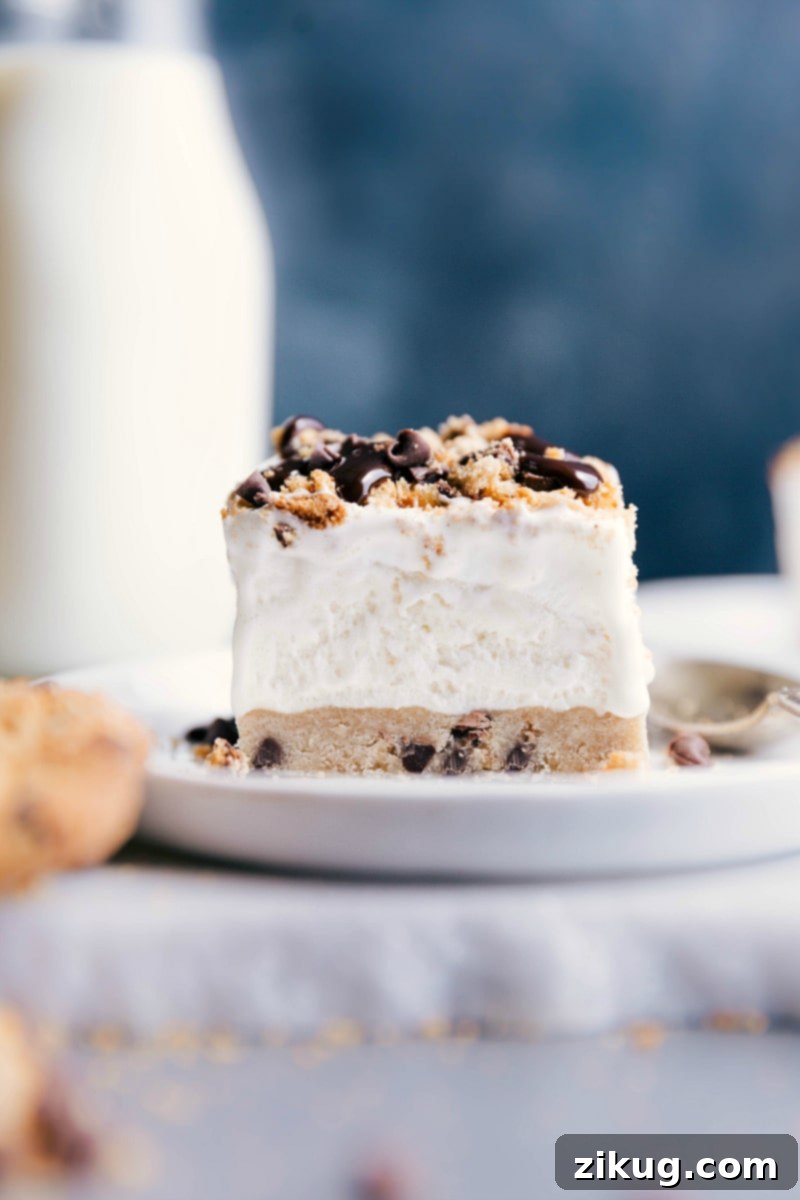
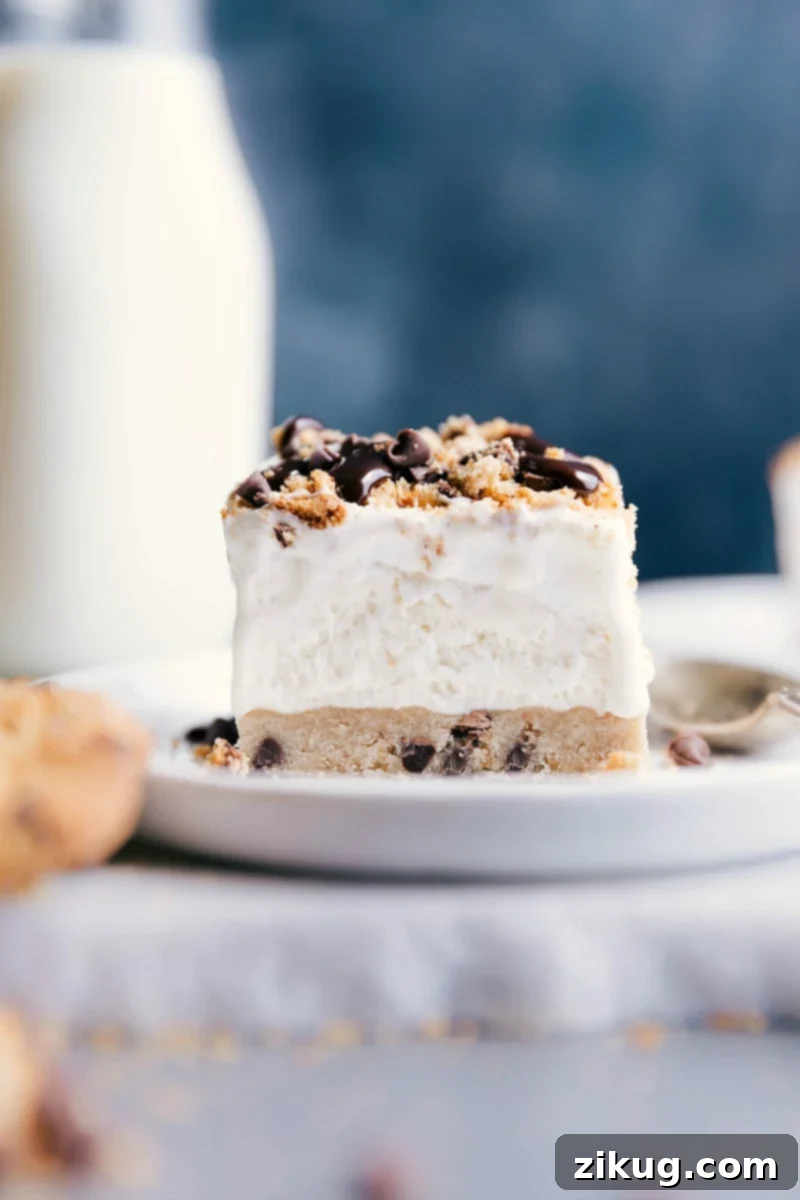
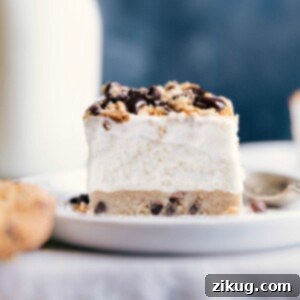
Cookie Dough Ice Cream Bars are the ultimate dream dessert, combining layers of irresistible edible cookie dough, creamy ice cream, and fluffy whipped cream, all finished with a sprinkle of crunchy cookie crumbs. This frozen delight offers a perfect blend of textures and flavors that will satisfy any sweet craving.
Indulge in Ultimate Cookie Dough Ice Cream Bars
Few desserts evoke the same sense of nostalgic joy as a spoonful of raw cookie dough. Combine that with the refreshing coolness of ice cream, and you’ve got a treat that’s simply irresistible. Our homemade Cookie Dough Ice Cream Bars are designed for true cookie dough aficionados, offering a safe and utterly delicious way to enjoy your favorite flavors in a cool, layered dessert format.
Our family adores edible cookie dough. We’ve explored various delightful variations, from classic chocolate chip cookie dough to a rich Peanut Butter Cookie Dough, a luscious Brownie Batter Dough, and even a fun Cake Batter Cookie Dough. However, this recipe marks a special occasion: the first time we’ve incorporated safe, edible cookie dough as the foundational layer for an ice cream dessert. And, of course, what better to pair with cookie dough than actual cookie dough ice cream?
These bars are wonderfully sweet, satisfyingly thick, and boast a delightful textural contrast, making them an absolute must-try for any cookie dough enthusiast. They are surprisingly easy to prepare, starting with a simple edible cookie dough base that forms a sturdy, flavorful crust. This is then generously topped with your favorite cookie dough ice cream, followed by a layer of homemade or store-bought whipped topping. A final flourish of crushed cookies adds both crunch and visual appeal, and then they’re ready to chill and serve!
Why Edible Cookie Dough is Essential for Your Ice Cream Bars
When it comes to enjoying cookie dough, safety is paramount. Traditional raw cookie dough, while tempting, is generally considered unsafe for consumption due to potential health risks associated with two main ingredients: **raw flour** and **uncooked eggs**. Raw flour can contain harmful bacteria like E. coli, which are naturally present in the environment and are only eliminated through cooking. Similarly, uncooked eggs may carry Salmonella bacteria, posing a risk of foodborne illness.
However, there’s no need to worry about these concerns with our Cookie Dough Ice Cream Bars! The cookie dough base in this recipe has been specially formulated to be completely safe for raw consumption. We achieve this by meticulously omitting eggs from the recipe and, crucially, by heat-treating the all-purpose flour. This simple yet vital step ensures that any potential pathogens in the flour are neutralized, making your cookie dough base perfectly safe and enjoyable to eat.
Safely Heat-Treating Your Flour for Edible Dough
Many home bakers are unaware of the risks associated with raw flour. Unlike other food products, flour is often minimally processed and not treated to kill germs like E. coli. To transform regular all-purpose flour into a safe ingredient for edible cookie dough in these ice cream bars, you must cook or heat-treat it properly. This step is non-negotiable for ensuring your dessert is not only delicious but also worry-free. Here are three effective methods to heat-treat your flour:
- Purchase Pre-Heat-Treated Flour: The easiest option, if available in your local grocery store, is to buy flour that has already undergone heat treatment. Look for labels indicating “heat-treated” or “safe for raw consumption.”
- Microwave Method: This is a quick and convenient way to heat-treat flour at home.
- Measure the required amount of flour (plus a little extra, as some may burn) into a microwave-safe bowl.
- Heat the flour in 30-second intervals on high power, stirring thoroughly after each burst to ensure even heating and prevent scorching.
- Crucially, use an instant-read food thermometer to check the internal temperature of the flour. Continue heating and stirring until the flour consistently reaches and maintains a temperature of 165°F (74°C) throughout. This temperature is necessary to kill harmful bacteria.
- If your flour looks or smells burnt, discard that portion to avoid imparting an unpleasant taste to your cookie dough.
- Oven Method: For larger batches or if you prefer baking, the oven method works well.
- Preheat your oven to 300°F (150°C).
- Line a large baking sheet with parchment paper or a silicone baking mat to prevent sticking.
- Spread the flour evenly in a thin layer across the prepared baking sheet. This helps in uniform heating.
- Bake the flour, stirring it every 1.5 to 2 minutes, and check its temperature with a thermometer. Continue baking until the entire batch of flour reaches 165°F (74°C). This typically takes about 5-10 minutes, but times may vary based on your oven and the thickness of the flour layer.
Essential Tips for Successful Flour Heat Treatment
- Cool Completely Before Use: This step cannot be overstated. After heat-treating, it is absolutely critical to let the flour cool down completely to room temperature before incorporating it into your cookie dough. Using warm or hot flour will melt the butter and sugars, resulting in a greasy, runny, and unworkable dough texture. To speed up the cooling process, you can spread the flour on a clean surface or sheet pan and place it in the refrigerator or even the freezer for a short period.
- Address Clumps and Discoloration: Once cooled, inspect your flour for any clumps. Gently break up any small clumps with your fingers. Discard any large, stubborn clumps that won’t break apart, as these may have been overcooked. Also, be sure to discard any flour that appears discolored (brown or burnt spots) or has a burnt smell. Burnt flour will negatively impact the flavor of your edible cookie dough. The goal is light, fluffy, and uniformly white flour.
Perfect Garnishes and Variations for Cookie Dough Ice Cream Bars
While the combination of edible cookie dough, ice cream, and whipped cream is already a showstopper, adding the right garnishes can elevate your Cookie Dough Ice Cream Bars to a new level of deliciousness and visual appeal. Customizing your bars allows for endless creativity and ensures they cater to every palate.
- Classic Cookie Crumbs: For a simple yet impactful topping, we typically use store-bought cookies, crushed into fine or coarse crumbs. Crisp cookies like Chips Ahoy® or Famous Amos® work exceptionally well, providing a satisfying crunch. If you happen to have some leftover chewy chocolate chip cookies on hand, crumbling those on top will add an extra layer of homemade flavor and texture. You can easily crush cookies by placing them in a Ziploc bag and rolling over them with a rolling pin, or by pulsing them briefly in a food processor.
Quick Tip for Cookie Crumbs
For the best store-bought cookie crumbs, opt for crisp varieties such as Chips Ahoy® or Famous Amos®. Their texture provides a delightful contrast to the creamy layers. You can coarsely chop them, give them a quick pulse in a food processor, or simply crumble them by hand for a more rustic look.
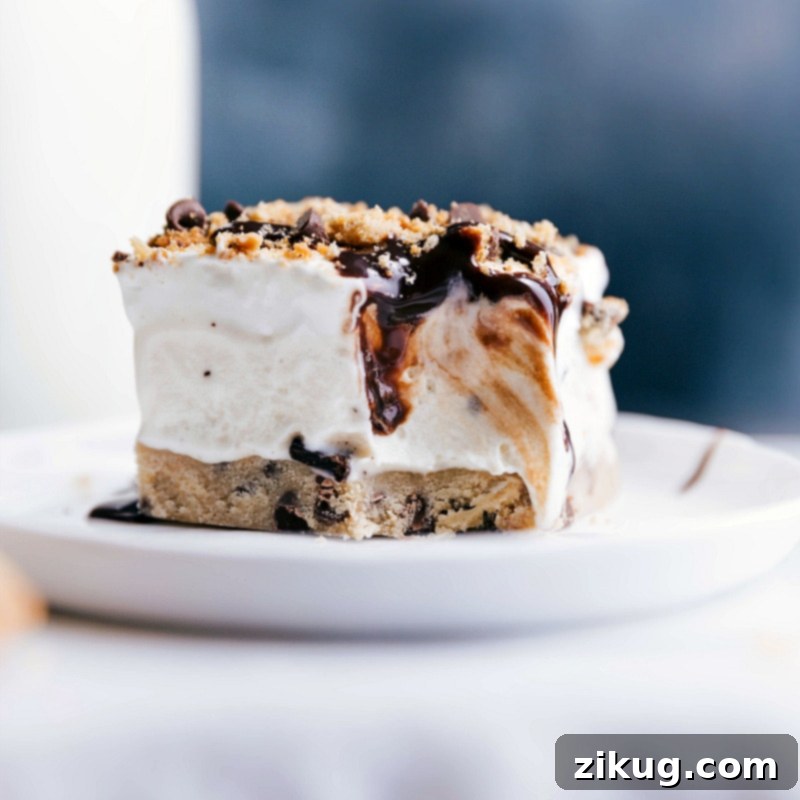
- Elevate with Chocolate: While cookie crumbs are often enough, if you’re a serious chocolate lover or just looking for something a little extra, these bars pair beautifully with additional chocolate elements. Consider sprinkling a handful of miniature chocolate chips over the whipped cream layer for bursts of chocolatey goodness. A generous drizzle of hot fudge topping or rich chocolate sauce just before serving will add a luxurious touch and a lovely visual swirl.
- Other Creative Topping Ideas: Don’t limit yourself! Think about adding chopped nuts (peanuts, pecans, walnuts), sprinkles for a festive look, caramel sauce, or even a light dusting of cocoa powder. For a different cookie experience, try crushing Oreos or graham crackers.
- Flavor Variations for the Base: While our recipe focuses on classic chocolate chip edible cookie dough, feel free to experiment with the cookie dough crust itself. Imagine a peanut butter cookie dough crust, a brownie batter base, or even a sugar cookie dough base to match different ice cream flavors.
- Ice Cream Choices: While cookie dough ice cream is the obvious choice, these bars are incredibly versatile. Try vanilla bean, chocolate, mint chip, or even a swirl of caramel ice cream to create your unique flavor combination.
Explore More Irresistible Ice Cream Treats
If you’re a fan of frozen desserts and crave more delightful creations beyond these spectacular Cookie Dough Ice Cream Bars, you’re in luck! Here are some other fantastic ice cream recipes to satisfy your sweet tooth and keep you cool:
- Samoas Brownie Ice Cream Bars: A decadent fusion of rich brownies, creamy ice cream, and the iconic flavors of Samoa cookies.
- Easy 3-Ingredient Ice Cream Pie: A ridiculously simple yet incredibly satisfying dessert that comes together with just three ingredients.
- Churro Ice Cream Sandwiches with Chocolate Ganache: Experience the magic of warm, cinnamon-sugar churros embracing cool ice cream, finished with a luscious chocolate ganache.
- Mint Chocolate Brownie Ice Cream Bars: A refreshing and indulgent treat featuring a fudgy brownie base crowned with cool mint ice cream and chocolate chips.
- Classic Oreo Icebox Cake: A timeless no-bake dessert made with layers of crisp Oreo cookies and whipped cream, chilling into a delightful cake-like texture.
Cookie Dough Ice Cream Bars Recipe
Cookie Dough Ice Cream Bars
Chelsea Lords
20 minutes
5 minutes
8 hours
8 hours 25 minutes
1 pan (9 x 9-inch, approximately 12 bars)
Equipment
-
9 x 9-inch baking pan
-
Parchment paper
-
Stand mixer (optional, for whipping cream)
Ingredients
- 8 tablespoons unsalted butter (1/2 cup, melted)
- 1/2 cup light brown sugar (firmly packed)
- 1/4 cup granulated sugar
- 2 tablespoons whole milk (1% or 2% will also work)
- 1 teaspoon vanilla extract
- 1/4 teaspoon salt
- 1-1/4 cups all-purpose flour (heat-treated, see Note 1 for instructions)
- 3/4 cup mini chocolate chips
- 1 (48-ounce) container cookie dough ice cream (slightly softened)
- 1 cup heavy cream (for homemade whipped cream, see Note 2)
- 1/2 cup powdered sugar (for homemade whipped cream)
- 1/2 teaspoon vanilla extract (for homemade whipped cream)
- (Alternatively, use 1 container (8 ounces) completely thawed whipped topping, like Cool Whip®)
- Optional toppings (see Note 3)
Instructions
-
Prepare Heat-Treated Flour: Refer to Note 1 for detailed instructions on heat-treating your all-purpose flour using either the microwave or oven method. It is crucial to test the flour with an instant-read thermometer to ensure it reaches a safe temperature of 165°F (74°C). After heating, allow the flour to cool completely to room temperature before proceeding. Discard any portions that appear burnt, discolored, or excessively clumpy, as these can impart a bitter flavor. The final heat-treated flour should be light, white, and fluffy. Measure the cooled flour accurately by spooning it into a measuring cup and leveling the top with the back of a table knife.
-
Prepare Baking Pan: Line a 9×9-inch baking pan with parchment paper. Leave an overhang of paper on two opposite sides, which will act as handles to easily lift the frozen bars out of the pan for cutting and serving later.
-
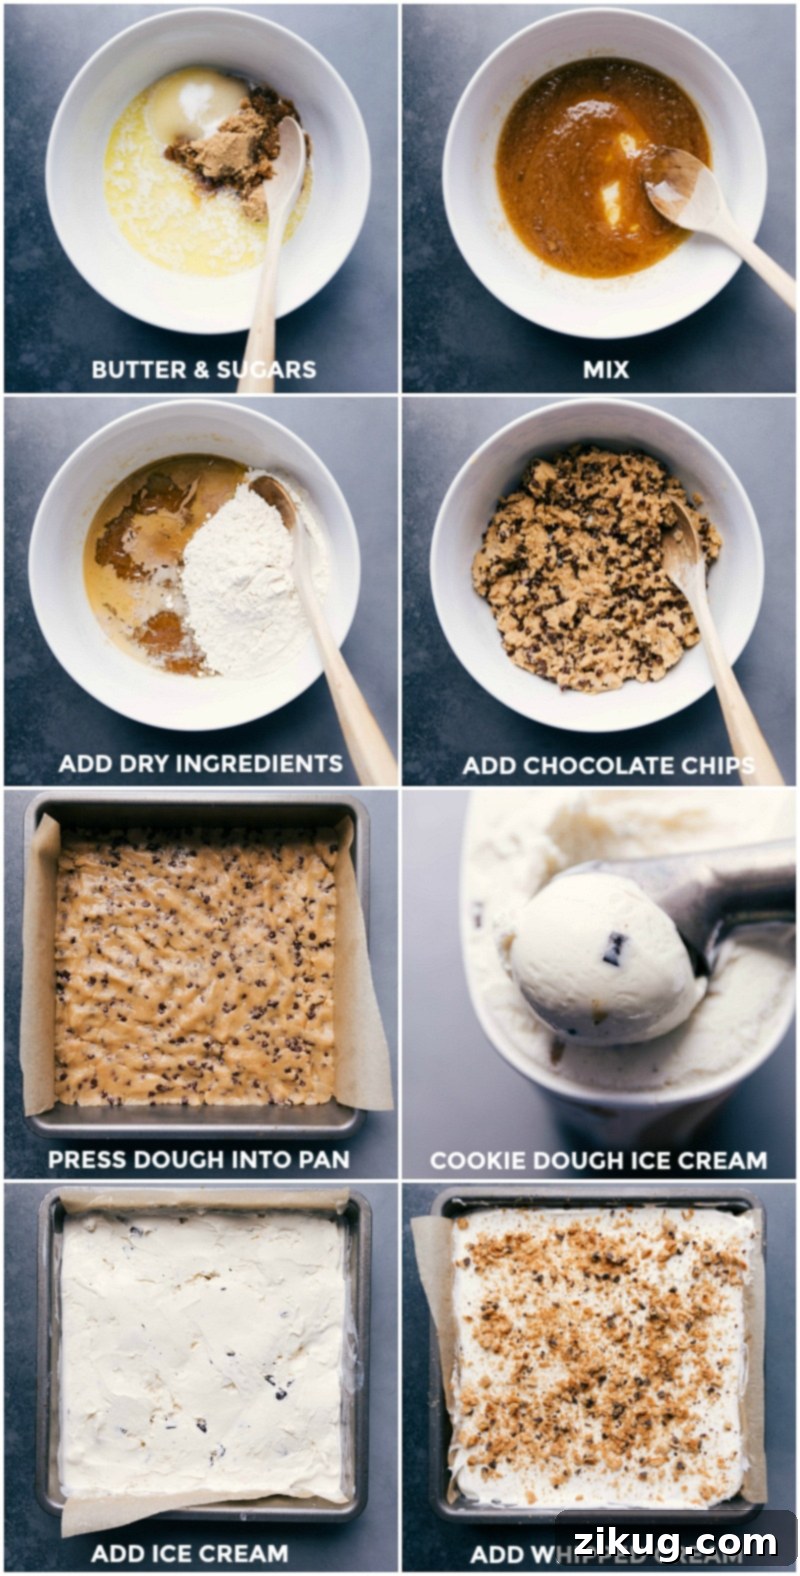
Make the Edible Cookie Dough Crust: In a large mixing bowl, combine the melted butter. Allow the butter to cool completely to room temperature. This is essential, as hot butter will melt the sugars and lead to a greasy, loose dough. Once cooled, add the light brown sugar and granulated sugar to the butter. Stir them together until well combined. Next, incorporate the milk, vanilla extract, and salt. Finally, add the cooled, heat-treated flour. Stir with a sturdy wooden spoon or spatula until a smooth, cohesive dough forms. Gently fold in the mini chocolate chips until they are evenly distributed throughout the dough. If the dough seems too dry and crumbly, add a tiny bit more heavy cream (1/2 to 1 teaspoon at a time). If it feels too wet, add 1-2 tablespoons more heat-treated flour.
-
Assemble the Layers (Part 1): Press the prepared edible cookie dough evenly and firmly into the bottom of the lined baking pan. Use the flat bottom of a 1-cup measuring cup or a clean spatula to press the dough into a compact, uniform layer. Next, scoop the slightly softened cookie dough ice cream over the cookie dough layer. Using a strong spatula or the back of a spoon, carefully spread the ice cream as smoothly and evenly as possible across the entire surface. Cover the pan tightly with plastic wrap or aluminum foil and freeze the bars for a minimum of 2 hours, or ideally, overnight, to allow them to set firmly.
-
Prepare and Add Whipped Cream: If making homemade whipped cream (recommended for best flavor, see Note 2), attach the whisk attachment to a stand mixer (or use a hand mixer). Pour the cold heavy cream into the bowl, then add the powdered sugar and vanilla extract. Beat on low speed until combined, then increase the speed to high. Continue whipping until firm peaks form, which typically takes about 2-4 minutes. Once whipped, use a spatula to gently spread the fluffy whipped cream evenly over the hardened ice cream layer. Alternatively, if using store-bought whipped topping, spread one (8-ounce) container of completely thawed whipped topping evenly over the bars. Return the pan to the freezer for another 30 minutes to 1 hour to allow the whipped cream layer to firm up.
-
Slice and Serve: Once all layers are thoroughly frozen and firm, remove the pan from the freezer. Use the parchment paper overhang to carefully lift the entire slab of ice cream bars out of the pan and place it on a cutting board. Using a sharp, warm knife (run under hot water and wipe dry between cuts for cleaner slices), cut the slab into individual bars. For an extra touch of deliciousness, top each bar with a generous sprinkle of crumbled cookies. If you desire, you can also add a drizzle of hot fudge topping and/or more mini chocolate chips. (We usually find that just the cookie crumbs are perfect!)
Recipe Notes
- Always heat treat approximately 1/2 cup more flour than the recipe calls for, in case some edges burn or for proper measurement after cooling.
- Microwave Method: Place flour in a microwave-safe bowl. Microwave in 30-second bursts, stirring well between each, to prevent burning and clumping. Check the temperature with an instant-read thermometer after each burst. It’s done when it consistently reaches 165°F (74°C).
- Oven Method: Preheat oven to 300°F (150°C). Line a large sheet pan with parchment paper. Spread flour thinly on the pan. Bake, stirring and checking the temperature every 2 minutes, until it reaches 165°F (74°C). This usually takes 3–6 minutes.
- Allow flour to cool completely before using in the recipe.
Note 2: Whipped Topping Options: You can either prepare homemade whipped cream as described in the instructions (using 1 cup heavy cream, 1/2 cup powdered sugar, and 1/2 tsp vanilla extract) or use one (8-ounce) container of completely thawed store-bought whipped topping, like Cool Whip®. While both work great, homemade whipped cream offers a superior fresh flavor and texture.
Note 3: Optional Toppings: Get creative with your toppings! Consider adding 3-4 chocolate chip cookies (or other favorite cookies) to crumble on top, a drizzle of hot fudge topping or chocolate sauce, and/or extra mini chocolate chips for an extra burst of flavor and texture.
Storage: Promptly return any leftover Cookie Dough Ice Cream Bars to the freezer. It’s important to note that whipped topping does not thaw and refreeze very well; it can become icy. For the best quality, try to enjoy the bars within a few days of making them. Store them in an airtight container to prevent freezer burn.
Nutrition
Serving:
1
bar
|
Calories:
565
kcal
|
Carbohydrates:
60.8
g
|
Protein:
6.5
g
|
Fat:
33.8
g
|
Cholesterol:
136
mg
|
Sodium:
76.9
mg
|
Fiber:
1.3
g
|
Sugar:
49.9
g
Nutrition information is automatically calculated and should only be used as an approximation. Values may vary based on specific ingredients and brands used.
Love this recipe? Share your thoughts below!