
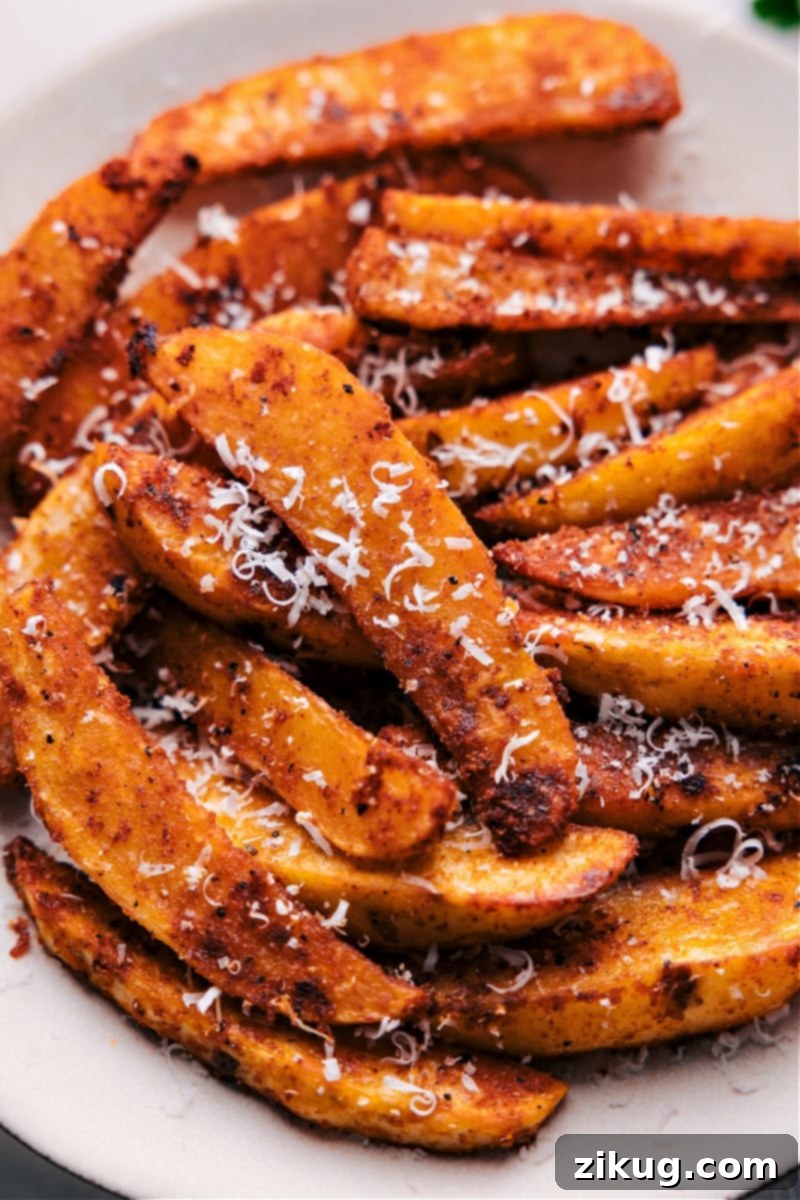
Welcome to the ultimate guide for crafting the perfect Crispy Baked Potato Wedges Recipe! This isn’t just any side dish; it’s a culinary revelation that promises irresistibly crispy, golden-brown edges, wonderfully fluffy interiors, and a flavor profile that will make your taste buds sing. Forget the deep fryer – our oven-baked potato wedges offer a healthier, budget-friendly, and profoundly satisfying alternative to traditional french fries. They’re incredibly versatile, pairing beautifully with virtually any main course, making them an ideal choice for weeknight dinners, weekend barbecues, or game day snacks. Get ready to transform humble russet potatoes into a truly unforgettable culinary experience that will have everyone asking for more.
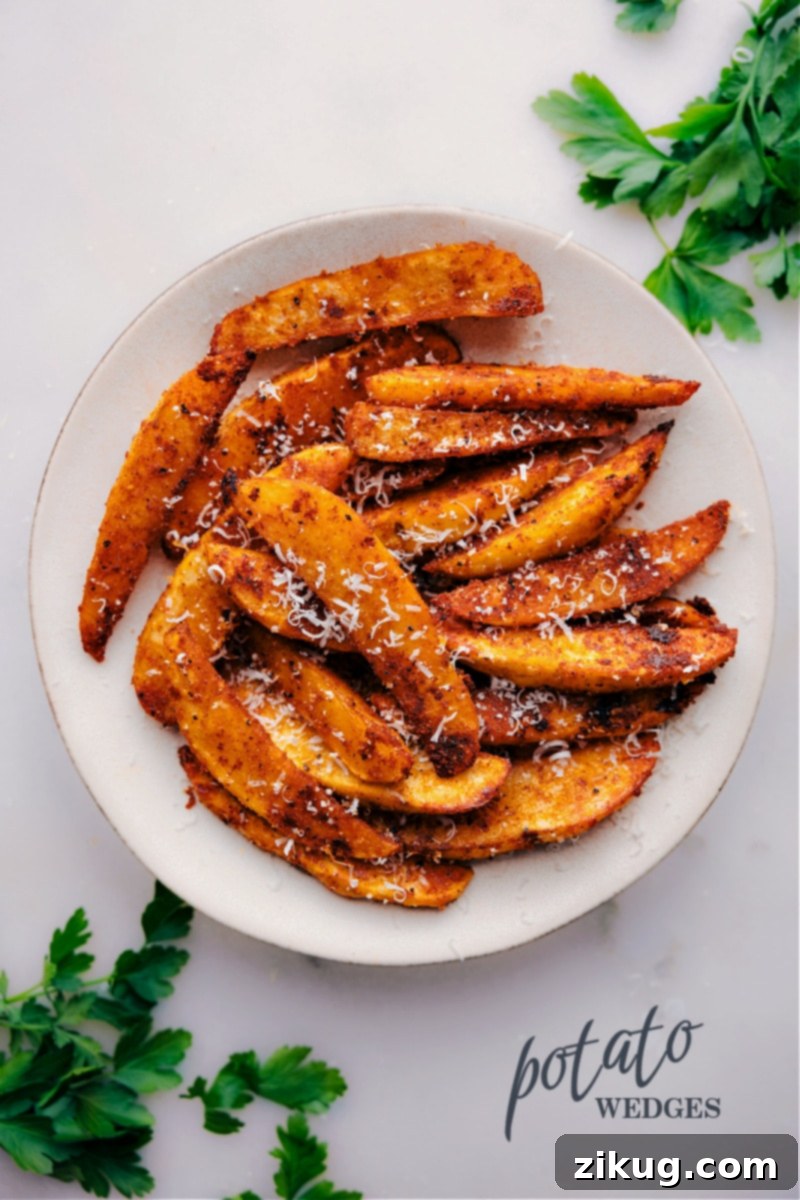
Discover the BEST Crispy Baked Potato Wedges Recipe You’ll Ever Make
Are you searching for a side dish that consistently delivers on flavor, texture, and ease? Look no further! This roasted potato wedges recipe stands out as truly the best, offering an unmatched combination of a perfectly crispy exterior and a wonderfully fluffy interior, all achieved without the excessive oil typically associated with deep-frying. These wedges are not merely inexpensive and filling; they are incredibly adaptable, ready to complement any meal, from a simple grilled sandwich to a sophisticated gourmet steak. What truly elevates these wedges from good to extraordinary is our carefully curated spice blend, which infuses every bite with a powerful, aromatic kick. And for an unparalleled finish, a generous sprinkle of freshly grated Parmesan cheese takes them completely over the top, adding a savory, umami depth that is simply irresistible. Once you experience the magic of these homemade, oven-baked potato wedges, you’ll wonder how you ever enjoyed them any other way.
Why These Oven-Baked Potato Wedges Are a Must-Try for Any Home Cook
In a culinary world brimming with side dish options, our crispy baked potato wedges shine for several compelling reasons. First, they represent a fantastic and significantly healthier alternative to deep-fried potatoes, offering all the satisfying crunch and robust flavor without the heavy oils and extra calories. The baking process allows the potatoes to caramelize beautifully, developing a rich, golden crust while maintaining a soft, tender, and moist center—a textural harmony that’s hard to beat. Secondly, they are remarkably budget-friendly, making them an excellent and economical choice for feeding a hungry crowd or simply enjoying a delicious, wholesome meal without straining your wallet. Russet potatoes are a staple pantry item, and with just a few common seasonings, you can effortlessly create something truly spectacular that tastes far more indulgent than it is. Lastly, their versatility is unmatched in the kitchen. Whether you serve them as a hearty side dish alongside a protein-rich main course, a satisfying snack with your favorite dip, or even as a flavorful component of a breakfast or brunch spread, these potato wedges are always a crowd-pleaser. They’re simple to prepare, yet impressive enough for any gathering or casual family dinner, proving that sometimes the simplest ingredients, prepared with a little care, yield the most extraordinary and memorable results. They are truly the ultimate comfort food reimagined.
Choosing the Perfect Potatoes for Unbeatable Crispiness
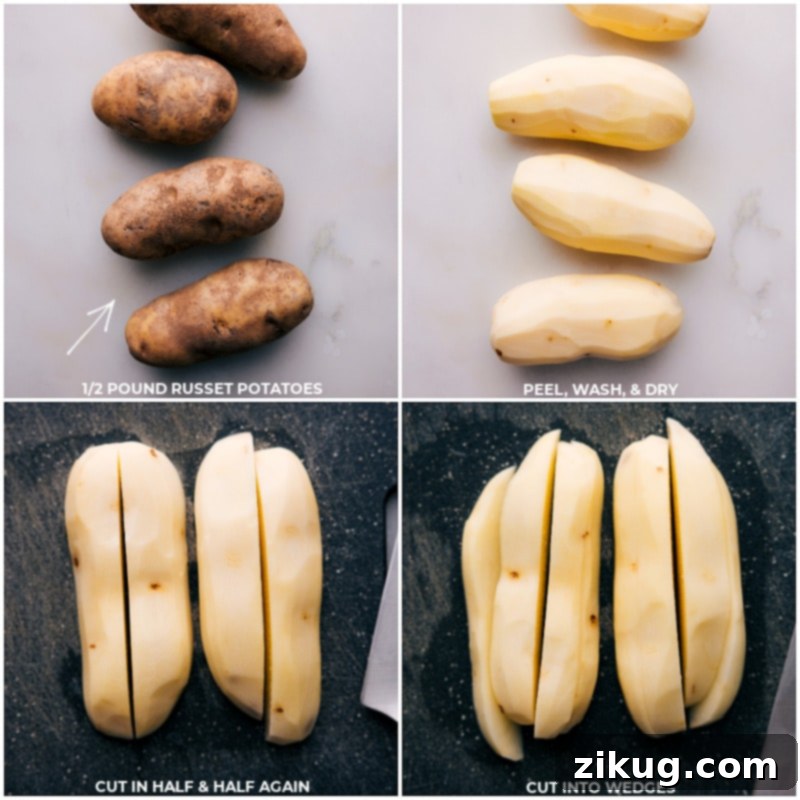
The foundation of truly crispy potato wedges lies in selecting the right variety of potato. For optimal results and that coveted crispy-on-the-outside, fluffy-on-the-inside texture, we highly recommend using russet potatoes, also known as Idaho potatoes. Their naturally high starch content and low moisture level are precisely what you need to achieve this desirable contrast. When baked at high temperatures, the starch on the surface caramelizes and crisps up beautifully, while the interior remains wonderfully light and tender. Other potato varieties, such as red or yellow potatoes (like Yukon Golds), contain less starch and significantly more moisture. While delicious in other applications, this higher moisture content tends to make them steam rather than crisp effectively in the oven, leading to a softer, less satisfying texture for wedges.
When selecting your russet potatoes, aim for medium to large-sized ones that are similar in shape and weight. This consistency is absolutely crucial for ensuring that all your wedges cook evenly at the same rate, preventing some from being undercooked and pale while others are perfectly golden and crispy. Look for firm potatoes without any green spots (which indicate solanine, a bitter compound), sprouts, or soft, bruised areas, as these can indicate poor quality or age. Fresh, healthy, and uniformly sized russet potatoes are the non-negotiable starting point for truly exceptional oven-baked wedges.
Quick Tip: Essential Potato Preparation for Maximum Crispiness
Once you’ve carefully chosen your russet potatoes, proper preparation is paramount to unlocking their full crispy potential. After washing them thoroughly under cold water to remove any dirt or impurities, it is absolutely vital to dry them completely. Excess moisture clinging to the surface of the potatoes is the ultimate enemy of crispiness. Instead of roasting and caramelizing, any residual water will cause the potatoes to steam in the hot oven, resulting in a soft, disappointingly soggy texture. Furthermore, wet potatoes will prevent your delicious spice blend from adhering properly, causing it to clump and slide off instead of coating each wedge evenly for maximum flavor. Use a clean, absorbent kitchen towel or several layers of paper towels to meticulously pat every single surface of the potato wedges until they are bone-dry. This seemingly small but critical step makes a dramatic and noticeable difference in the final texture and flavor of your wedges.
Peeling your potatoes is a matter of personal preference and entirely optional. Some home cooks prefer to leave the skins on for added rustic texture, fiber, and nutritional benefits, while others prefer a smoother, more refined finish. I personally find them more enjoyable when peeled for a consistent texture, but feel free to choose based on your preference and what your family enjoys most. Regardless of whether you peel them or not, always ensure they are thoroughly patted dry before you proceed with the crucial steps of cutting and seasoning.
Essential Tips for Making Perfect Crispy Potato Wedges Every Time
Achieving restaurant-quality, perfectly crispy and fluffy potato wedges at home is simpler than you might think, especially when you follow these tried-and-true tips. Each step plays a crucial role in ensuring your wedges turn out beautifully golden, incredibly crispy, and bursting with flavor. Master these techniques, and you’ll be making the best potato wedges consistently.
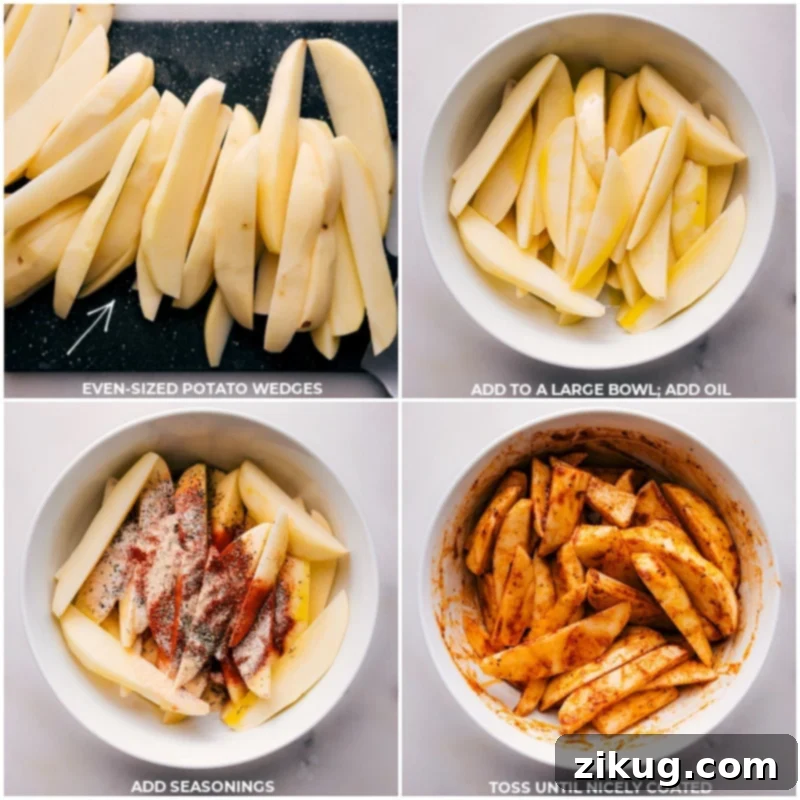
- Cut Evenly for Consistent Cooking: This is arguably the most critical tip for success. Potatoes cut into uniform sizes will cook at precisely the same rate. If some wedges are thick and others thin, you’ll inevitably end up with a mix of undercooked, raw centers and burnt, overly crispy pieces. Aim for wedges that are approximately ½ to ¾ inch thick. This ensures a perfect balance between a delightfully crispy exterior and a wonderfully tender interior. Take your time during this step; consistency truly pays off.
- Give Them Ample Space to Breathe (Avoid Overcrowding): Overcrowding your baking sheet is a very common mistake that directly sabotages crispiness. When potato wedges are packed too closely together on the pan, they release moisture, which then gets trapped around them. This creates a steaming environment instead of a roasting one, resulting in soft, soggy wedges rather than the desired crispy gems. Always arrange your wedges in a single layer with ample space between each piece—they should never touch. If necessary, don’t hesitate to use two baking sheets to accommodate all your potatoes without overcrowding.
- Utilize High Heat for Optimal Crispiness and Caramelization: A high oven temperature is absolutely essential for achieving that desirable golden-brown crust and perfectly crispy texture. Roasting at 425°F (220°C) ensures that the exterior of the potatoes quickly crisps up and caramelizes, developing rich flavors, while simultaneously locking in moisture to keep the inside wonderfully fluffy. Always ensure your oven is fully preheated to the specified temperature before you even place the potatoes inside. If you notice your potatoes browning too fast or too slowly, it might be worth checking your oven temperature accuracy with an oven thermometer, as oven calibration can vary.
- Coat Thoroughly for Maximum Flavor and Texture: Don’t just drizzle; toss with enthusiasm! It’s crucial to ensure every single potato wedge is thoroughly coated in olive oil and your chosen seasonings. The oil plays a dual role: it helps conduct heat efficiently, promoting crisping, while also providing the base for the seasonings to adhere. The seasonings, in turn, are responsible for the incredible flavor. Using a large mixing bowl or even a large zip-top bag to toss the wedges can make this step much easier and more effective, guaranteeing every inch is perfectly covered.
- Flip Halfway for Even Browning and Crispness: To guarantee an even crispiness and a beautiful golden color on all sides of your wedges, remember to flip them halfway through the cooking process. After the initial 15 minutes of baking, carefully remove the pan from the oven and, using tongs or a sturdy spatula, turn each wedge over to expose its other cut side to the direct heat of the baking sheet. This simple action ensures uniform crispness and browning across all surfaces.
- Serve Immediately for Peak Crispness and Flavor: Potato wedges are, without a doubt, at their absolute best when enjoyed fresh out of the oven. The moment they are removed from the heat, they begin to cool, and moisture can be reabsorbed, causing them to soften and lose their irresistible crunch. While leftovers are still delicious, they won’t quite replicate that initial, perfect crispness. Plan to serve them as soon as they’re ready for the ultimate, most satisfying experience.
Pro Tip: The Right Baking Sheet Matters Immensely
Using the correct size baking sheet is absolutely paramount for successful potato wedges. As we’ve emphasized, overlapping wedges lead to steaming rather than crisping. A generously sized 15×21-inch sheet pan (or a large half-sheet pan) is often ideal, as it provides ample space for your potato wedges to spread out in a single layer and roast evenly without touching. If you don’t have a pan this large, it’s always better to divide the potatoes between two smaller pans and roast them in batches (or simultaneously if your oven can accommodate two pans without crowding) rather than trying to fit them all onto one overcrowded sheet.
Storing and Reheating Leftover Potato Wedges
While potato wedges are undeniably best enjoyed fresh from the oven, you might occasionally find yourself with a delicious surplus. Don’t worry, leftover wedges still make for a wonderfully tasty snack or side dish, even if they won’t recapture their initial peak crispness. With proper storage and reheating techniques, you can ensure they remain enjoyable and flavorful.
- Storing Your Leftover Wedges: First and foremost, it is crucial to allow your cooked potato wedges to cool completely to room temperature before storing. Placing warm potatoes directly into a sealed container can create undesirable condensation, which inevitably leads to sogginess and a less appealing texture. Once thoroughly cooled, transfer the wedges to an airtight container. This helps prevent them from drying out, becoming stale, or absorbing other unwanted odors from your refrigerator. Stored correctly, your leftover potato wedges will keep well in the refrigerator for 3 to 5 days, ready for your next craving.
- Reheating for the Best Possible Results:
- Oven Method (Recommended for Regaining Crispiness): To maximize the chances of regaining some of that desirable crispiness, the oven is by far your best reheating option. Preheat your oven to 400°F (200°C). Spread the cooled potato wedges in a single layer on a baking sheet. You can lightly spray the pan with cooking spray or add a tiny drizzle of fresh olive oil if desired, which can help promote browning. Bake for 10 to 15 minutes, or until the wedges are thoroughly heated through, sizzling, and have begun to crisp up again. Keep a close eye on them during the final minutes to prevent burning, as oven temperatures can vary.
- Air Fryer Method (Excellent for Speed and Crispiness): For those fortunate enough to own an air fryer, this is an excellent and efficient alternative to the conventional oven for reheating. Preheat your air fryer to 375°F (190°C). Place the cooled wedges in a single layer in the air fryer basket (you might need to work in batches to avoid overcrowding). Cook for approximately 5-8 minutes, making sure to shake the basket halfway through to ensure even heating and crisping, until they are hot and deliciously crisp.
- Microwave Method (Quick but Least Crispy): If time is truly of the essence and crispiness isn’t your top priority, the microwave can be used for quick reheating. Place the wedges on a microwave-safe plate and cover them with a damp paper towel to help retain some moisture and prevent them from drying out. Heat in 30-second bursts, stirring or flipping the wedges between intervals, until they are hot to the touch. Be aware that this method will undeniably result in softer, less crispy wedges.
Regardless of the reheating method you choose, remember to adjust cooking times based on your specific appliance, its power, and the quantity of wedges being reheated. Always prioritize heating until thoroughly warmed through for food safety.
Perfect Pairings: What to Serve with Your Crispy Potato Wedges
These incredibly versatile crispy potato wedges are more than just a side dish; they’re a blank canvas for countless delicious meal combinations. Their savory flavor, satisfying texture, and irresistible crunch make them an ideal companion to a wide array of main courses and even other appetizers. Here are some fantastic pairing ideas to elevate your dining experience:
- Classic American Comfort Food: Transform a simple meal into something extraordinary. Serve them generously alongside juicy grilled burgers, classic hot dogs, a hearty Sloppy Joe sandwich, or a melty grilled cheese for an elevated take on classic comfort food pairings.
- Hearty Protein Powerhouses: These wedges complement almost any protein beautifully. Think succulent roasted chicken, perfectly pan-seared pork chops, a tender oven-baked salmon fillet, or a perfectly cooked steak. The robust, savory flavors and crisp texture of the potatoes stand up well to richer meats and fish, providing a delightful contrast.
- Fresh & Flavorful Seafood Options: Lighten things up by pairing your crispy wedges with baked or grilled white fish, zesty shrimp scampi, or even as a flavorful component of fish tacos. The crispiness of the potatoes offers a delightful textural contrast to tender, flaky seafood.
- Brunch & Breakfast Upgrade: Don’t limit these amazing wedges to just dinner! They make a fantastic, more exciting addition to breakfast or brunch. Serve them with fluffy scrambled eggs, crispy bacon, savory breakfast sausage, or even as a delicious side to a flavorful breakfast burrito or frittata.
- Dipping Delight & Sauce Sensations: Of course, no potato wedge experience is truly complete without a delicious dipping sauce! Ketchup is a timeless classic, but don’t stop there. Our homemade Fry Sauce is an absolute game-changer, offering a creamy, tangy, and slightly sweet complement. Other great options include a cool ranch dressing, a zesty spicy sriracha mayo, rich garlic aioli, a herbaceous pesto, or even a simple sour cream and chive dip. Get creative and find your favorite combination!
For specific main dishes that pair perfectly with these crispy delights, consider these fantastic recipes from our kitchen:
Dinner
Mini Turkey Meatloaf
Dinner
Grilled Flank Steak with Chimichurri
Dinner
The BEST Blackened Chicken Recipe
Dinner
Flat Iron Steak Recipe

Print Recipe
Crispy Baked Potato Wedges
Chelsea Lords
20
35
55
4 servings, as a side
Equipment
-
Large sheet pan (15″ x 21″ or similar)
Ingredients
- Cooking spray
- 2 pounds russet potatoes (aim for 4, ½-pound potatoes of similar size)
- 3 tablespoons olive oil
- 2 teaspoons garlic powder
- 2 teaspoons onion powder
- 2 teaspoons paprika
- 1 teaspoon salt
- 1/2 teaspoon black pepper (or to taste)
- Freshly grated Parmesan cheese (optional, see Note 1 for best results)
- Freshly chopped parsley (optional, for garnish)
- Fry sauce (or ketchup, for serving)
Instructions
-
Preheat your oven to a precise 425°F (220°C). Prepare a large sheet pan by lightly greasing it with cooking spray to prevent sticking. Thoroughly peel your russet potatoes (if desired), wash them meticulously under cold water, and most importantly, completely dry them using a clean kitchen towel or paper towels. Cut each potato in half lengthwise, then carefully cut each half into 4 uniform wedges. This means you will yield 8 pieces from each potato. If your potatoes are on the smaller side, you might adjust and cut them into 6 wedges. The critical goal is to ensure all wedges are approximately the same thickness (about ½ to ¾ inch) and size for consistent and even roasting.
-
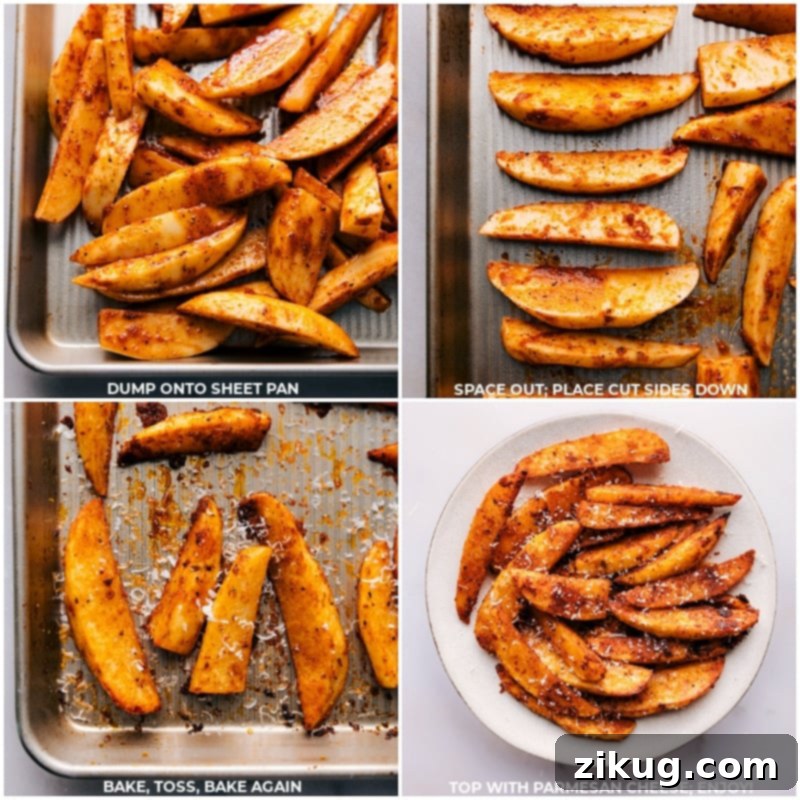
Place the dried, precisely cut potato wedges into a large mixing bowl (it’s important not to season them directly on the sheet pan, as they won’t coat as evenly). Drizzle them generously with the olive oil and toss vigorously until every single wedge is lightly and evenly coated. Next, add the garlic powder, onion powder, paprika, salt, and pepper. Toss again, preferably using your clean hands, ensuring the spices adhere beautifully and evenly to all surfaces of the potatoes. Transfer the perfectly seasoned wedges to your prepared sheet pan, arranging them in a single layer with plenty of space between each piece to prevent any steaming (refer to Note 2 for more on spacing). For maximum crispiness, place them cut-side down on the pan.
-
Bake in the preheated oven for an initial 15 minutes. Carefully remove the pan from the oven, and using tongs or a sturdy spatula, flip each potato wedge to its other cut side. Return the pan to the oven and continue baking for another 15 minutes. If, after this time, the wedges aren’t as crispy and tender as you’d like, flip them once more and roast for an additional 5–10 minutes, monitoring closely to achieve your desired level of golden-brown perfection and tenderness. (See Note 3 for troubleshooting if potatoes stick to the pan.)
-
Once perfectly roasted to a golden crisp, remove the potato wedges from the oven. Immediately grate fresh Parmesan cheese generously over the hot wedges; the residual heat will melt it beautifully, creating a savory coating. Sprinkle with freshly chopped parsley for a burst of vibrant color and fresh flavor. Serve your irresistible crispy baked potato wedges piping hot with a side of classic ketchup or our beloved homemade Fry Sauce, and savor every delicious bite!
Recipe Notes and Expert Tips
Note 2: The Critical Importance of Space. This point cannot be stressed enough: the more space your potato wedges have on the baking sheet, the better they will roast and crisp. When potatoes are crowded and overlap, they release moisture that then gets trapped in the confined space, creating a steaming environment. Steamed potatoes will be soggy and limp rather than developing that delicious, deeply caramelized, and crispy exterior we’re aiming for. Crowding will also significantly increase roasting time and lead to uneven cooking. If your potatoes don’t fit in a single, uncrowded layer on one large sheet pan, use two smaller pans.
Note 3: Understanding When to Flip. If you attempt to flip the potatoes and find that they are firmly sticking to the pan, that’s a clear indication they’re not quite ready to be turned. Potatoes will naturally release from the pan once they’ve developed a sufficient golden-brown crust and are properly caramelized on that side. If they stick, simply give them a few more minutes to roast undisturbed. Patience during this stage is key to achieving that perfect, effortless release and uniform golden-brown deliciousness without tearing the crust.
Storage Tips: To keep your leftover potato wedges tasting their very best, ensure they are completely cooled to room temperature before transferring them to an airtight container. This crucial step prevents moisture buildup inside the container, which can lead to sogginess, a less appealing texture, or even an “off” flavor. Store the sealed container in the refrigerator for up to 5 days. For reheating instructions, refer to the “Storing and Reheating Leftovers” section above.
Nutrition Information
Calories: 281kcal |
Carbohydrates: 43g |
Protein: 5g |
Fat: 11g |
Saturated Fat: 2g |
Polyunsaturated Fat: 1g |
Monounsaturated Fat: 8g |
Sodium: 594mg |
Potassium: 979mg |
Fiber: 3g |
Sugar: 1g |
Vitamin A: 4IU |
Vitamin C: 13mg |
Calcium: 33mg |
Iron: 2mg
Nutrition information is automatically calculated and should only be used as an approximation. It may vary based on specific brands, preparation methods, and ingredient adjustments. Please consult a qualified nutritionist for precise dietary advice.