
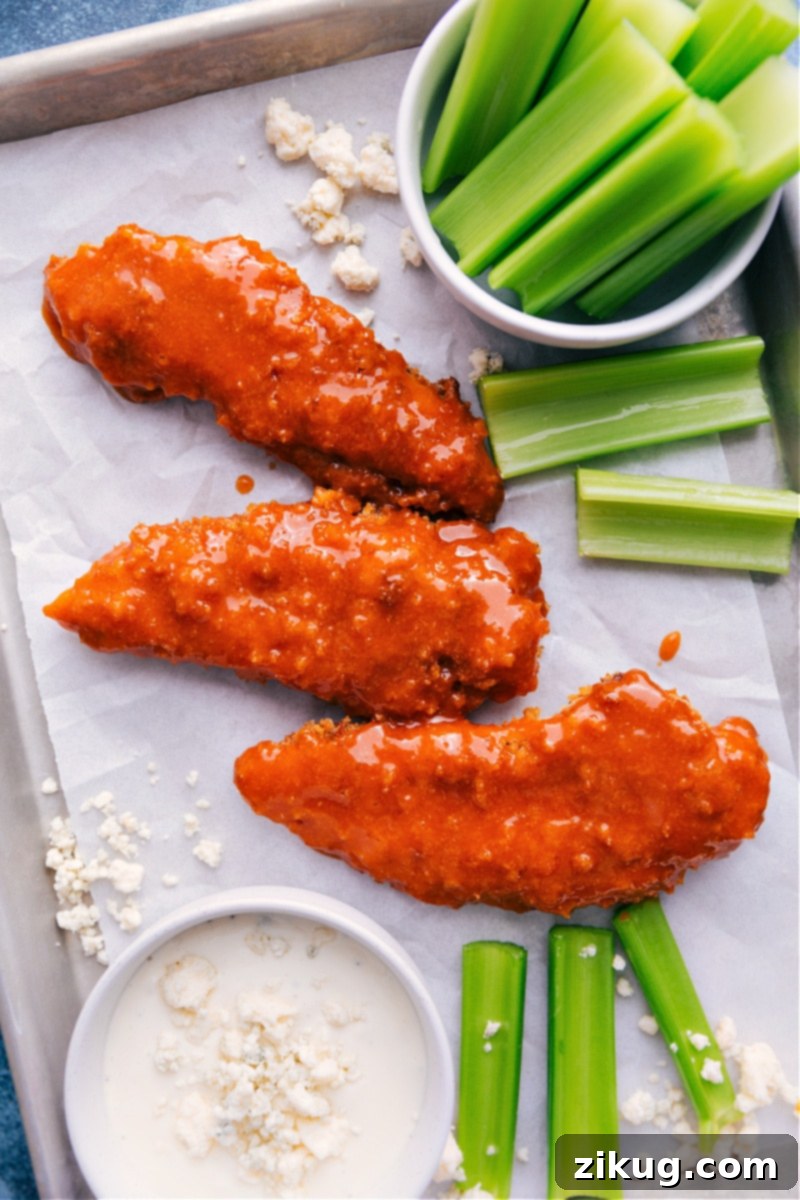
Get ready to revolutionize your snack and dinner game with these incredible Buffalo Chicken Tenders! Baked to crispy perfection, each bite delivers a punch of flavor and that signature spicy kick. Forget the deep fryer – our secret techniques ensure an unbelievably crunchy exterior every time. Dunk them generously in your favorite creamy blue cheese or cooling ranch dressing, and prepare to be utterly hooked. This isn’t just a recipe; it’s an experience waiting to happen, perfect for gatherings, weeknight meals, or a cozy night in.
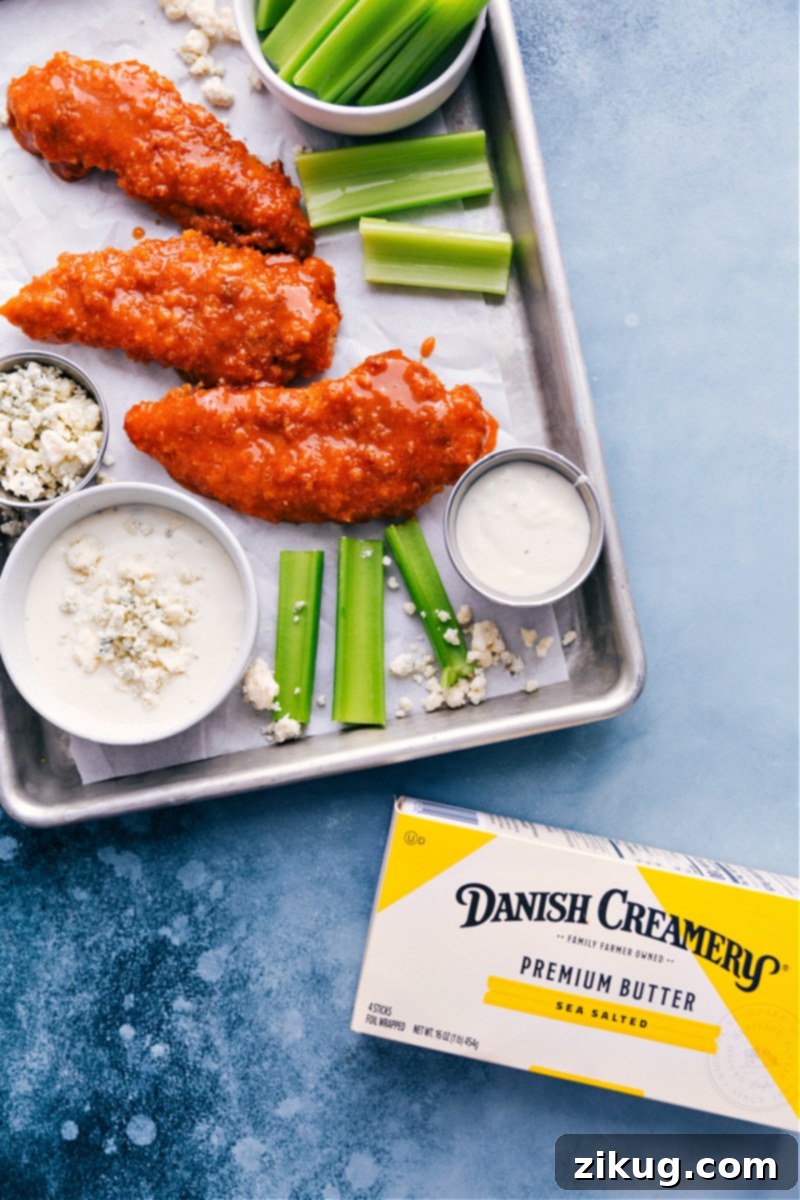
Achieving Unmatched Crispy Perfection: Baked Buffalo Chicken Tenders Recipe
Many struggle to achieve truly crispy chicken tenders without the mess and added fat of deep frying. But with these baked Buffalo Chicken Tenders, you’ll be amazed at the crunchy texture and explosive flavor, all from your oven! We’ve unlocked the secrets to perfectly golden, ultra-crispy tenders that rival any fried version. It’s all about a few simple, yet incredibly effective, preparation tricks that elevate these tenders from good to absolutely unforgettable. Here’s exactly how we achieve that coveted crunch:
- Embrace Panko Breadcrumbs: Unlike regular breadcrumbs, panko is specifically designed for superior crispiness. These Japanese-style breadcrumbs are larger, flakier, and lighter, creating an airy, crunchy coating that absorbs less oil, resulting in a cleaner, crispier bite. It’s the foundation of our crispy success.
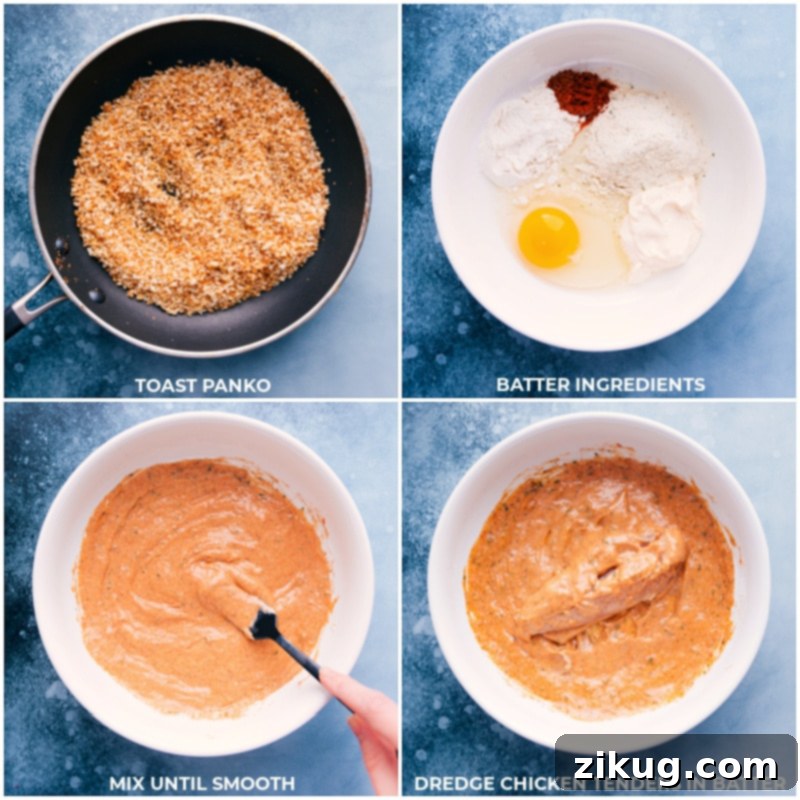
- Pre-Brown the Panko for Extra Crunch: This step is a game-changer! Toasting the panko breadcrumbs in a skillet with a touch of butter before coating the chicken adds a rich, nutty depth of flavor and enhances their natural crispiness. This preliminary browning ensures they are already golden and crunchy even before they hit the oven, contributing significantly to the final texture and appearance.
- A Strategic Spray of Cooking Oil: A light, even coat of cooking spray over the breaded chicken tenders serves multiple crucial purposes. Firstly, it helps prevent the panko from sticking to the baking sheet. More importantly, it mimics the effect of frying by providing a thin layer of fat that encourages browning and allows the panko to crisp up beautifully and uniformly in the hot oven.
- Bake on a Wire Rack: This is perhaps the most critical technique for achieving all-around crispiness. Placing the breaded chicken tenders on an oven-safe wire rack set over a baking sheet allows hot air to circulate completely around each piece. This ensures that the bottom of the tenders gets just as crispy as the top, preventing a soggy underside and delivering a consistently crunchy texture from every angle.
Effortless Guide: How To Make These Baked Buffalo Chicken Tenders
Crafting these perfectly crispy Buffalo chicken tenders is surprisingly straightforward, making them an ideal choice for a quick yet satisfying meal or appetizer. Follow these simple steps for a truly delicious result:
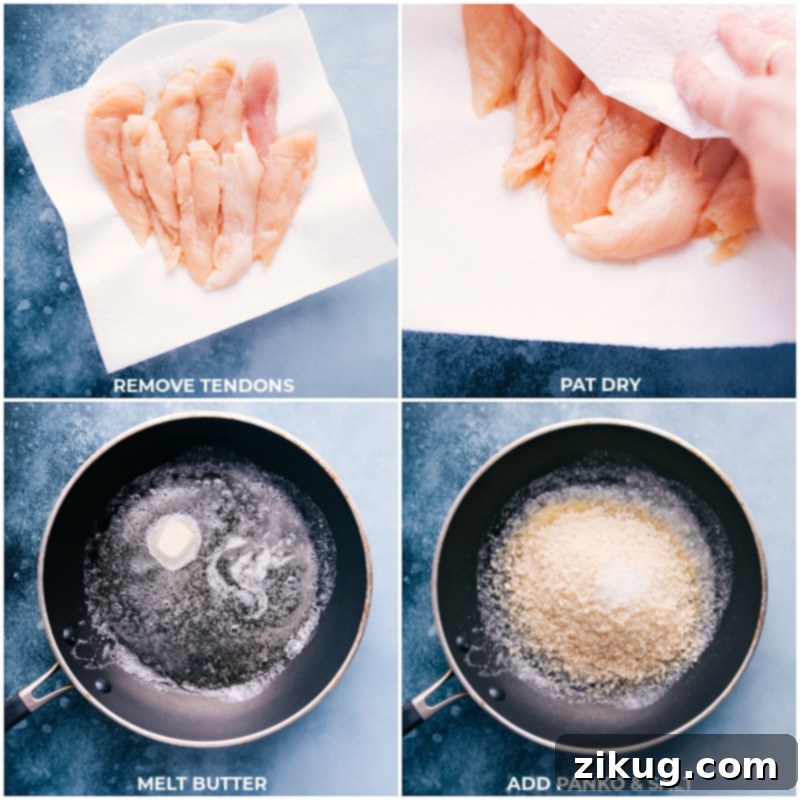
- Prepare Your Chicken: Begin with fresh chicken tenders, or if using chicken breasts, slice them into thin, uniform strips, aiming for about 3-4 pieces per breast. This ensures even cooking. Remember to pat them thoroughly dry with paper towels to help the batter adhere better and promote crispiness. Don’t forget to remove any tough tendons for the best eating experience.
- Batter, Bread, and Bake: Once your chicken is prepped, you’ll create a simple batter for adhesion, then dredge each tender in our specially prepared crispy panko mixture. Arrange them on your baking setup and send them into the preheated oven. The magic happens as they bake, transforming into golden, crunchy morsels.
- Sauce and Serve: While your tenders are baking to perfection, quickly whisk together the irresistible Buffalo sauce. This allows the flavors to meld beautifully. As soon as the tenders emerge from the oven, hot and crisp, toss them gently in the spicy Buffalo sauce just before serving. This ensures maximum flavor coating while maintaining as much crunch as possible.
Essential Tools for Achieving the Crispiest Baked Chicken
While the techniques are crucial, having the right kitchen tools can significantly enhance your success in making truly crispy baked chicken tenders. These two items are your best friends in the quest for golden, crunchy perfection:
- Oven-Safe Wire Rack: As mentioned, this is a non-negotiable for superior crispiness. An oven-safe cooling rack placed on top of a standard sheet pan creates an elevated surface. This elevation allows hot air to circulate freely around the entire chicken tender, ensuring all sides cook evenly and crisp up beautifully. Without it, the bottom of your tenders would steam against the pan, resulting in a less-than-desirable soggy texture. It’s a small investment that yields huge crispy dividends.
- High-Quality Cooking Spray (Olive Oil Recommended): A fine mist of olive oil spray over your breaded tenders is vital. This light coating helps the panko brown to a deep golden hue and contributes to that satisfying crisp texture, much like a quick shallow fry, but with far less oil. It also acts as a barrier, preventing the breading from sticking to the rack or pan, making for easy flipping and cleanup. Ensure an even coating for uniform crispiness.
- Reliable Food Thermometer: While not pictured, a digital food thermometer is an invaluable tool for any home cook, especially when dealing with chicken. It takes the guesswork out of cooking times, ensuring your chicken tenders are cooked through to a safe internal temperature of 165°F (74°C) without becoming overcooked and dry. Perfectly cooked chicken is juicy on the inside and crispy on the outside.
Mastering the Flavor: Buffalo Chicken Tenders Recipe Notes
To ensure your Buffalo Chicken Tenders are perfectly balanced in flavor and heat, consider these important notes:
- Adjusting Spiciness: The traditional Buffalo sauce recipe tends to be quite spicy, delivering a robust kick. We incorporate brown sugar and butter into our sauce to mellow out some of that intense heat, creating a more balanced and palatable flavor profile. If you prefer a milder sauce, feel free to increase the amounts of butter or brown sugar to your taste. Serving these tenders with a cooling dip like blue cheese or ranch dressing also significantly helps to temper the spice for those who are sensitive to heat, making them enjoyable for a wider audience.
- Mindful Saltiness: The ranch seasoning mix used in the chicken batter is already packed with savory saltiness. Because of this, we consciously avoid adding extra salt directly to the chicken tenders themselves. This prevents over-salting, allowing the complex flavors of the ranch and paprika to shine. However, a light sprinkle of salt on the toasted panko and into the finished Buffalo sauce helps to elevate and harmonize all the flavors, ensuring every component is perfectly seasoned without being overpowering. Always taste as you go and adjust according to your preference.
- Freshness is Key: For the best results, use fresh chicken tenders. If using frozen, ensure they are fully thawed and patted very dry before beginning the breading process. Excess moisture is the enemy of crispiness!
Speedy & Crispy: Air Fryer Buffalo Chicken Tenders Recipe
For those who love the convenience and speed of an air fryer, these Buffalo chicken tenders adapt beautifully, achieving a fantastic crisp without missing a beat. The air fryer circulates hot air rapidly, mimicking the effects of deep frying with minimal oil, making it an excellent alternative for perfectly cooked tenders. Here’s how to get them just right in your air fryer:
- Preheat and Arrange: Begin by preheating your air fryer to 400°F (200°C). Arrange the breaded chicken tenders in a single layer within the air fryer basket. It’s crucial not to overcrowd the basket; if necessary, cook in batches to ensure even airflow and crisping. Overlapping tenders will lead to steamed, rather than crispy, results.
- Cook to Perfection: Air fry for 5-8 minutes on the first side. Then, carefully flip each tender, give the newly exposed side a light spray of cooking oil to promote browning, and continue to cook for another 5-8 minutes. The goal is a beautiful golden-brown exterior and an internal temperature of 160°F (71°C). Don’t worry, carryover heat will safely bring them up to 165°F (74°C) as they rest for a few minutes outside the air fryer.
Important Air Frying Considerations: Remember that cooking times can vary depending on the specific model and wattage of your air fryer, as well as the thickness and size of your chicken tenders. Smaller, thinner tenders will cook faster than larger, thicker ones. Always use a reliable food thermometer to check the internal temperature, especially for chicken, to ensure it’s fully cooked and to prevent any risk of overcooking, which can lead to dry, tough chicken. A little patience and a thermometer will guarantee juicy, perfectly crispy air-fried Buffalo chicken tenders every time.
Delicious Pairings: Serving Ideas For Buffalo Chicken Tenders
These spicy and crispy Buffalo chicken tenders are incredibly versatile and pair wonderfully with a variety of sides, whether you’re serving them as a hearty appetizer or a complete meal. My absolute favorite way to serve them is with classic cooling crudités like crisp celery sticks and crunchy carrot sticks. These fresh veggies provide a delightful contrast in texture and help to cut through the richness and spice of the tenders.
No Buffalo chicken is complete without the perfect dipping sauce! My top choices are undoubtedly a rich, chunky blue cheese dressing or a creamy, zesty ranch. For store-bought options, I highly recommend checking the refrigerated produce section of your grocery store. You’ll often find fresher, higher-quality dressings there compared to the shelf-stable bottled varieties in the condiment aisle, offering a more vibrant and authentic flavor experience.
If you’re making these amazing tenders for dinner, consider rounding out the meal with some delicious and healthy vegetable sides. They complement the bold flavors beautifully:
- Roasted Broccoli: Simple, flavorful, and a great way to add greens.
- Oven-Roasted Parmesan Asparagus: Elegant and savory, a perfect match.
- Roasted Green Beans: Tender-crisp and earthy, a classic side.
For a lighter, refreshing accompaniment, a crisp salad is always a fantastic choice. Here are some of my go-to options:
- Classic Caesar Salad: Its tangy, creamy dressing provides a lovely counterpoint to the Buffalo spice.
- Spiralized Cucumber Salad with Olive Garden Dressing Copycat: A unique and refreshing twist.
- Healthy Italian Salad: Bright and zesty, it cleanses the palate wonderfully.
Experiment with your favorites to create the ultimate Buffalo chicken tender feast!
Storage and Make-Ahead Tips
Best Practices for Leftover Buffalo Chicken Tenders
While these Buffalo Chicken Tenders are undeniably delicious, their crispiness is at its peak immediately after being coated in the warm Buffalo sauce. To maximize that satisfying crunch, I highly recommend only coating the amount of tenders you plan to eat fresh. For instance, I usually toss half of the baked tenders in sauce, enjoy those, and then coat the remaining half just before a second serving or for another meal.
Unfortunately, once stored, the tenders tend to lose their characteristic crispiness as the sauce moisture softens the breading. For this reason, it’s always best to cook and serve only what you anticipate consuming in one sitting to fully appreciate their crispy texture.
However, if you’re looking to get a head start on meal prep, you can absolutely prepare the chicken tenders up to the point of breading. The key is to wait to coat them in the panko breadcrumbs until just before you’re ready to bake them. Storing pre-breaded raw chicken can cause the breading to become soggy and less crispy when cooked. So, prepare your chicken, make your batter, and brown your panko, but combine them at the last minute for the freshest, crispiest results.
Explore More Irresistible Crispy Chicken Recipes
If you’ve fallen in love with the satisfying crunch of these Buffalo Chicken Tenders, you’ll be thrilled to discover these other fantastic crispy chicken creations that are sure to become new family favorites:
- Coconut Crusted Chicken with a creamy honey mustard dipping sauce for a sweet and savory delight.
- Sheet Pan Garlic Parmesan Chicken and Zucchini featuring a wonderfully crispy Parmesan coating, all cooked on a single pan for easy cleanup.
- Crispy Chicken Salad elevated with a homemade honey BBQ dressing, perfect for a hearty and satisfying lunch.
- Applebee’s Copycat Crispy Chicken Salad, a restaurant-quality meal you can recreate at home.
- Homemade Orange Chicken, a delicious copycat recipe that rivals your favorite takeout!
Print Recipe
Easy Crispy Baked Buffalo Chicken Tenders
Chelsea Lords
25
20
45
4 servings
Video
(Video placeholder: An instructional video demonstrating the recipe would appear here.)
Equipment
-
Large sheet pan (15″ x 21″)
-
Oven-safe Cooling rack (optional, but highly recommended for crispiness)
-
Frying pan (for toasting panko)
Ingredients
- 1 pound chicken tenderloins (tendons removed)
- 1-1/2 cups panko breadcrumbs (see note 1)
- 2 tablespoons unsalted butter
- Cooking spray
- 1 large egg
- 3 tablespoons mayo
- 2 tablespoons all-purpose flour
- 1 teaspoon paprika
- 1 (1-ounce) packet ranch seasoning mix
- 4 tablespoons unsalted butter (melted)
- 1/2 cup hot sauce (I like Frank’s Original RedHot Sauce for authentic flavor)
- 1 to 2 tablespoon(s) light brown sugar (adjust to taste for sweetness/spiciness balance)
- 1 teaspoon garlic powder
- Ranch dressing or blue cheese dressing, for serving (see note 2)
- Celery and carrot sticks (for serving, optional)
Instructions
-
Preheat your oven to 400°F (200°C). Prepare a large sheet pan by generously greasing it with cooking spray. If you have an oven-safe metal cooling rack, place it on top of the sheet pan and also generously grease it. This optional step significantly aids in even baking and ensures maximum crispiness. Pat each chicken tender very dry with a paper towel and remove any tough tendons with a sharp paring knife.
-
In a large frying pan, melt 2 tablespoons of unsalted butter over medium-high heat. Once the butter is fully melted and shimmering, add the panko breadcrumbs. Season with salt to taste (a quarter teaspoon is usually sufficient). Stir constantly with a spatula or wooden spoon until the panko is lightly and evenly browned to a beautiful golden color. Immediately transfer the toasted panko to a wide, shallow dish to cool slightly.
-
In a separate medium-sized bowl, combine all the batter ingredients: egg, mayo, flour, paprika, and ranch seasoning mix. Whisk thoroughly until the mixture is smooth and well combined, with no lumps.
-
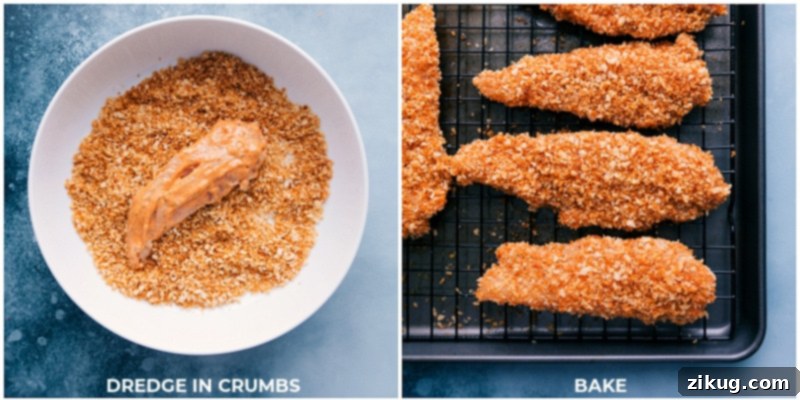
Take each chicken tender and generously coat it in the prepared batter, ensuring it’s fully covered. Then, dredge the battered tender through the toasted panko breadcrumbs, pressing firmly so that the panko adheres well to all sides. Place the breaded tenders on the prepared sheet pan, spaced apart on the cooling rack. If there are any leftover crumbs, gently press them onto the chicken. Liberally spray the tops of the tenders with cooking spray. (You’ll spray the other side after flipping).
-
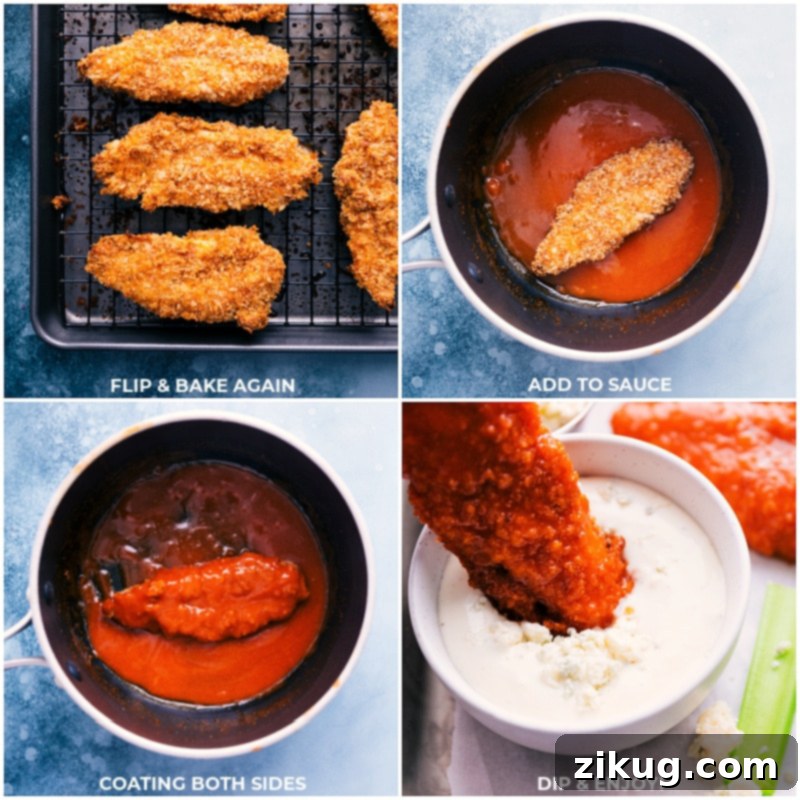
Place the sheet pan in the center of your preheated oven and bake for 10 minutes. After 10 minutes, carefully remove the pan and gently flip each tender to the other side, taking care not to lose too much breading. Generously spray the newly exposed tops with cooking spray. Return to the oven and bake for another 5-10 minutes, or until the chicken reaches an internal temperature of 160°F (71°C) when measured with a food thermometer. Remember that carryover heat will bring the temperature up to a safe 165°F (74°C). Remove from the oven, and if desired, sprinkle a light dash of salt on top.
-
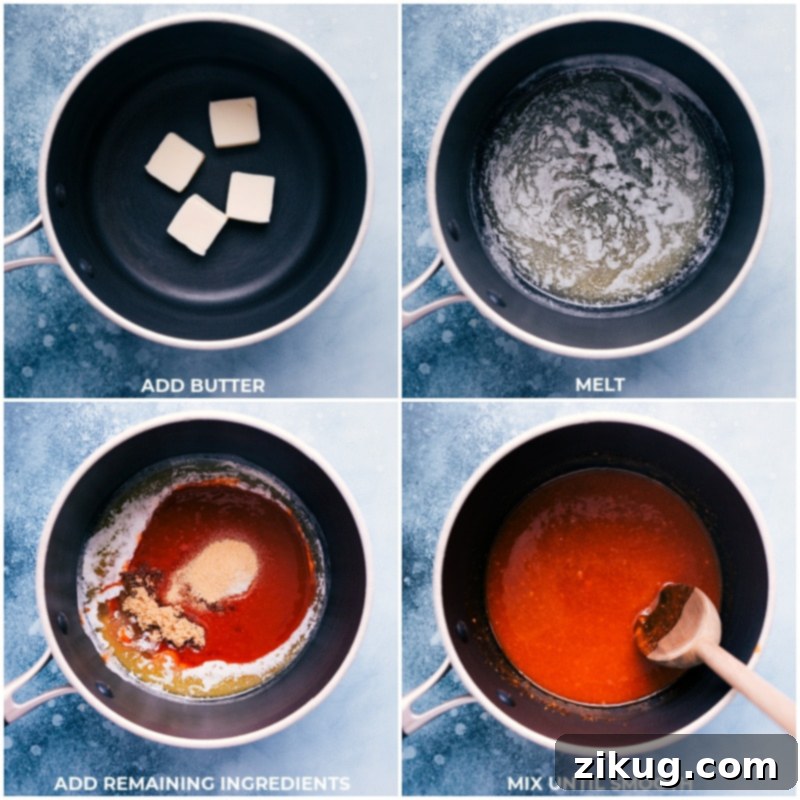
While the chicken is baking, prepare the Buffalo sauce. In a small pot or saucepan, melt the butter over medium heat on the stovetop. Once completely melted, add the hot sauce, light brown sugar, and garlic powder. Whisk all the ingredients together until the sauce is smooth and thoroughly combined. Taste the sauce and season with salt (a quarter teaspoon is a good starting point). If you prefer a sweeter sauce, add an additional half to full tablespoon of brown sugar. Remove the pot from the heat.
-
Once the chicken tenders are baked, transfer them to a large bowl. Pour the prepared Buffalo sauce over them and toss gently until each tender is evenly coated. To maintain optimal crispiness, I usually coat half of the tenders first, enjoy them, and then coat the remaining half just before they are served. Serve immediately, accompanied by creamy ranch or chunky blue cheese dressing for dipping, and a side of crisp celery and carrot sticks. Enjoy your crispy, flavorful Buffalo chicken tenders!
-
Air Fryer Instructions: If using an air fryer, preheat it to 400°F (200°C). Place the breaded tenders in the air fryer basket in a single, even layer (you may need to cook in batches to avoid overcrowding). Air fry for 5–8 minutes, then flip the tenders, spray the other side with cooking spray, and continue to cook for another 5–8 minutes or until they are golden brown and reach an internal temperature of 160°F (71°C). (Carryover heat will bring them to 165°F / 74°C).
Recipe Notes
Note 2: For an optimal serving experience, these tenders are wonderfully complemented by crisp cut carrots and celery. A high-quality blue cheese or ranch dressing makes for the perfect dip. When selecting dressings or sauces from the store, look for freshly made options typically found in the chilled produce section. These often offer a fresher flavor profile and superior texture compared to shelf-stable, bottled alternatives.
Nutrition Note: The provided nutrition information for these Buffalo Chicken Tenders accounts for all ingredients used in the recipe, including the entire amount of Buffalo sauce. However, it does not include any optional dipping sauces (like ranch or blue cheese) or additional side dishes that may be served with the tenders. Please consider these additions when calculating your total nutritional intake.
Storage: To preserve the delightful crispiness of these chicken tenders, it’s best to enjoy them freshly prepared. The coating tends to soften significantly when stored, making them less crispy upon reheating. Therefore, we highly recommend cooking only the portion you plan to consume on the day of preparation. For meal prep, you can bread the tenders in advance but wait to cook them until just before serving.
Nutrition Information (Estimated)
Nutrition information is automatically calculated and is an approximation only. It may vary based on specific ingredients and preparation methods.