
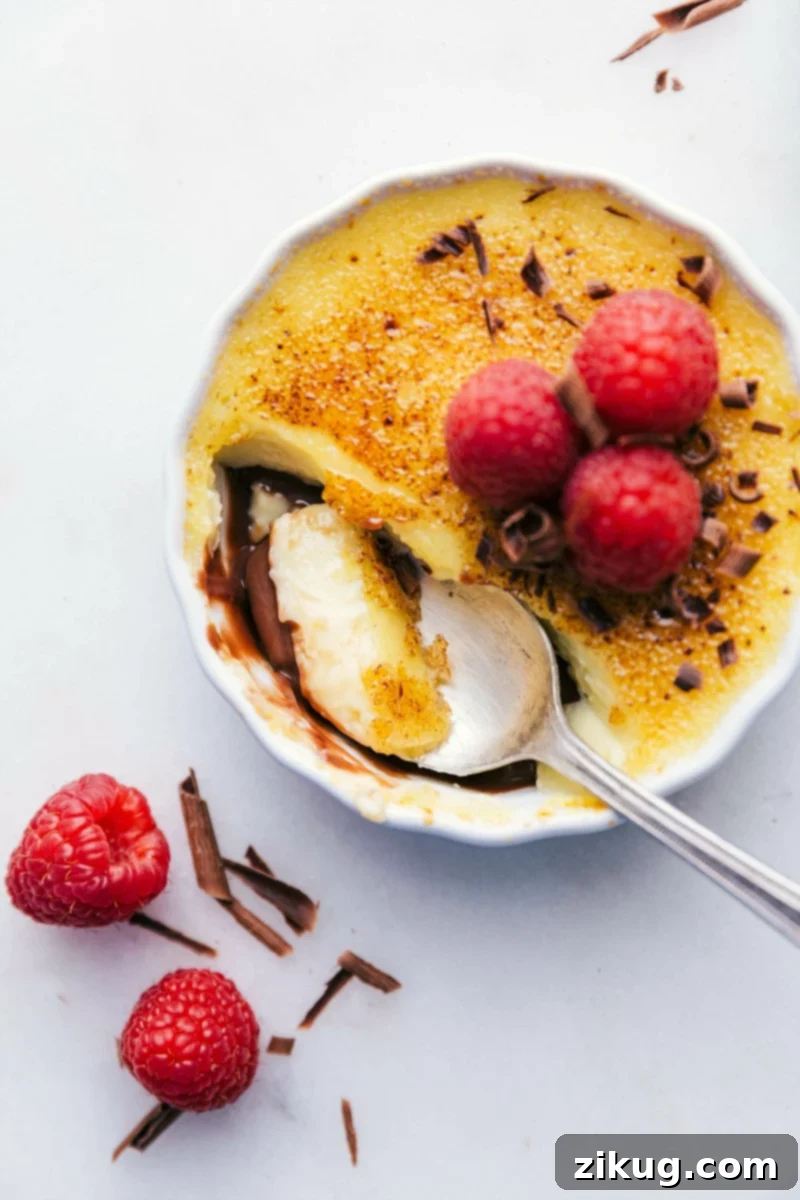
Tuxedo Crème Brûlée offers an exquisite culinary experience, marrying a rich chocolate ganache base with creamy vanilla custard and a perfectly caramelized sugar topping. Garnished with fresh berries and delicate chocolate curls, this dessert transforms the traditional into an unforgettable treat.
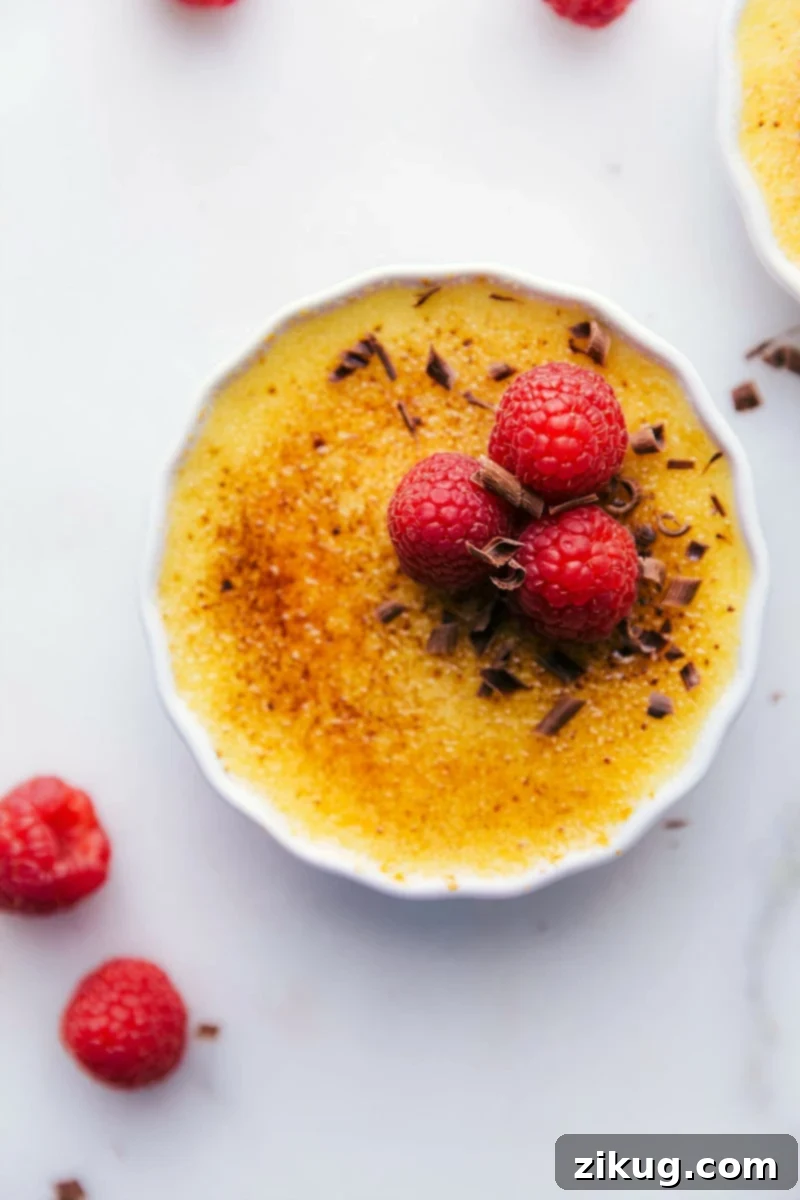
One of life’s simplest pleasures is indulging in a classic crème brûlée. It’s a dessert that consistently ranks high on my list of favorites, and I’m delighted to say my mother-in-law shares this passion. When she recently stayed with us after Elizabeth’s arrival, I knew it was the perfect occasion to whip up a few batches of this delightful custard.
During her stay, she mentioned a particularly memorable crème brûlée she had enjoyed at a restaurant. What made it stand out? It featured a layer of chocolate on top, sans the traditional crispy sugar. As a dedicated chocolate enthusiast, I was immediately captivated by the idea. However, the quintessential crunchy caramelized topping is, for me, the very soul of this dessert! So, I devised a plan: incorporate the luscious chocolate layer at the bottom, beneath the creamy custard, and preserve the iconic burnt sugar crust. The result? Pure bliss! We are unequivocally hooked. My current delightful dilemma: should I serve this sensational Tuxedo Crème Brûlée or a classic plain version for our next Valentine’s Day celebration?
What is a Tuxedo Crème Brûlée? A Decadent Twist on a Classic
The term “Tuxedo” in dessert often signifies an elegant combination of dark and light elements, typically chocolate and vanilla. A Tuxedo Crème Brûlée perfectly embodies this concept. It’s a sophisticated interpretation of the traditional French dessert, elevated by the addition of a rich, dark chocolate ganache as its foundation. This luxurious base is then topped with a smooth, velvety layer of classic vanilla bean custard. The entire creation is crowned with the signature crisp, caramelized sugar topping, achieved using a kitchen torch or oven broiler.
Unlike its conventional counterpart, which solely relies on the delicate balance of vanilla and cream, the Tuxedo Crème Brûlée introduces a decadent depth of flavor. The bittersweet notes of the chocolate ganache beautifully complement the sweet, subtle vanilla of the custard, creating a multi-layered taste experience that is both familiar and exciting. It’s a dessert that promises an impressive presentation and an even more satisfying taste, making it ideal for special occasions or when you simply want to treat yourself to something truly extraordinary.
Crafting the Perfect Homemade Crème Brûlée
Making crème brûlée from scratch might seem intimidating, but with the right techniques and a little patience, it’s a wonderfully rewarding process. The core components of a successful homemade crème brûlée involve creating a rich custard base, baking it gently to a perfect set, and then caramelizing the sugar topping right before serving to achieve that iconic crack. For those who appreciate the pure, unadulterated flavor of vanilla, a traditional crème brûlée recipe is an excellent starting point. However, if you’re a devout chocolate aficionado, this tuxedo version is likely to steal your heart. Ultimately, the best choice is always the one that tantalizes your taste buds most!
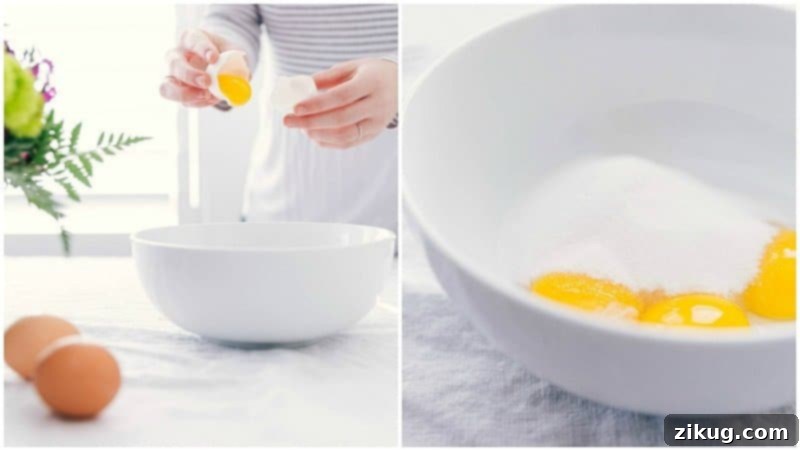
Step-by-Step Guide: How to Make Tuxedo Crème Brûlée
Creating this stunning Tuxedo Crème Brûlée is a delightful process that unfolds in a few key stages. Each step is crucial for achieving the perfect balance of flavors and textures.
- Prepare Your Ramekins for Success: The vessel for your crème brûlée is more important than you might think. I’ve experimented with various sizes, including 4-ounce, 5-ounce, and 6-ounce ramekins, and found that all work well. However, my personal preference leans towards the 5-ounce ramekins. They provide the ideal thickness for the custard, ensuring a luxurious mouthfeel and a satisfying crunch from the caramelized sugar topping.
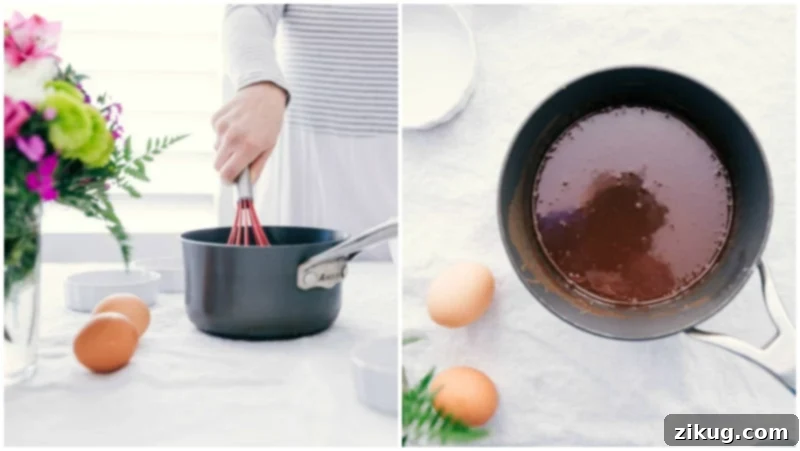
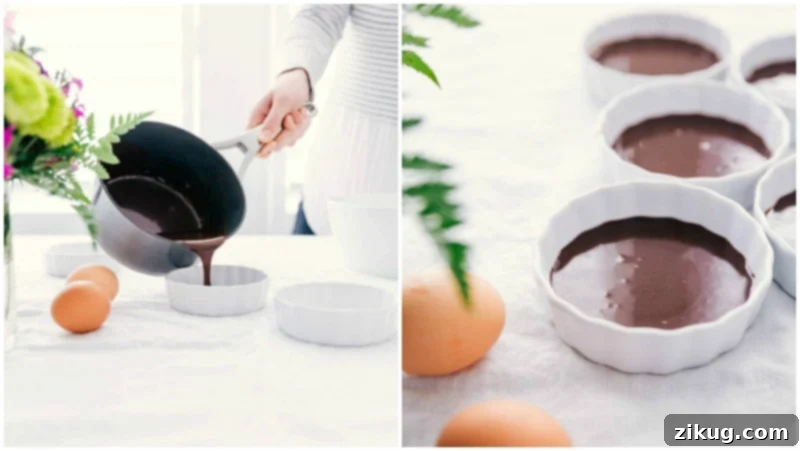
- Craft the Luxurious Chocolate Ganache Base: This is where the “Tuxedo” truly begins! Making the ganache is surprisingly simple. Begin by gently heating heavy cream until it’s just about to simmer. Remove it from the heat and stir in finely chopped chocolate (milk, dark, or semi-sweet, depending on your preference) and a pinch of kosher salt. Continue stirring until the chocolate is completely melted and the mixture is smooth and glossy. Divide this decadent ganache evenly among your prepared ramekins, filling them about a quarter of the way. Place the ramekins in the freezer for at least an hour to allow the ganache to firm up properly before adding the custard layer.
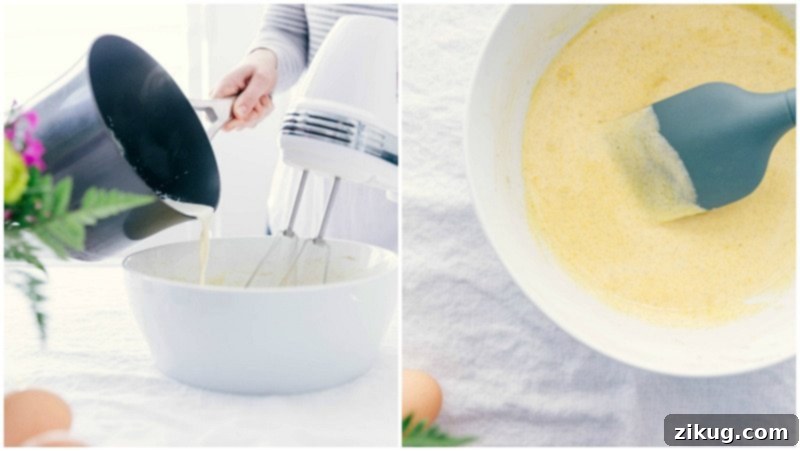
- Whip Up the Silky Vanilla Custard Filling: The heart of any crème brûlée is its creamy custard. In a large bowl, whisk together egg yolks, the fragrant seeds scraped from a vanilla bean (or vanilla extract), and granulated sugar until the mixture becomes light in color and creamy in texture. Separately, heat the remaining heavy cream in a small pot with the scraped vanilla bean pod (if using) and a dash of salt until it’s simmering gently. This is the stage to temper your egg mixture: slowly pour about a quarter of the hot cream into the egg yolk mixture while continuously whisking. This gradual addition prevents the eggs from scrambling. Once tempered, pour the entire egg mixture back into the remaining hot cream and stir until thoroughly combined. Remember to remove the vanilla bean pod at this point.
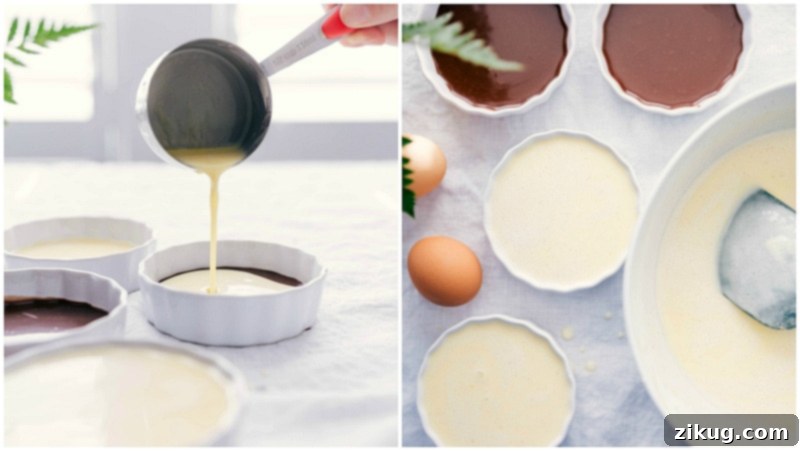
- Bake the Custard to Perfection in a Water Bath: The secret to a perfectly smooth and evenly cooked custard is a water bath, also known as a bain-marie. Retrieve your chocolate-filled ramekins from the freezer and arrange them in a larger 9×13-inch baking pan. Carefully pour the prepared vanilla custard mixture evenly over the chilled chocolate ganache in each ramekin. Next, fill the larger baking pan with boiling water, ensuring the water level comes halfway up the sides of the ramekins. This water bath creates a gentle, moist cooking environment, preventing the custard from cracking or cooking too quickly. Bake for approximately 30-35 minutes, or until the centers of the custards show only a slight jiggle when gently shaken.
- Chill for Optimal Texture: Patience is a virtue, especially when it comes to crème brûlée! Once baked, remove the ramekins from the water bath and let them cool completely at room temperature. Then, transfer them to the refrigerator and chill for a minimum of 3-4 hours. This crucial step allows the custard to fully set and develop its rich, smooth texture. You can even prepare these desserts 4-5 days in advance and store them in the fridge before the final caramelization.
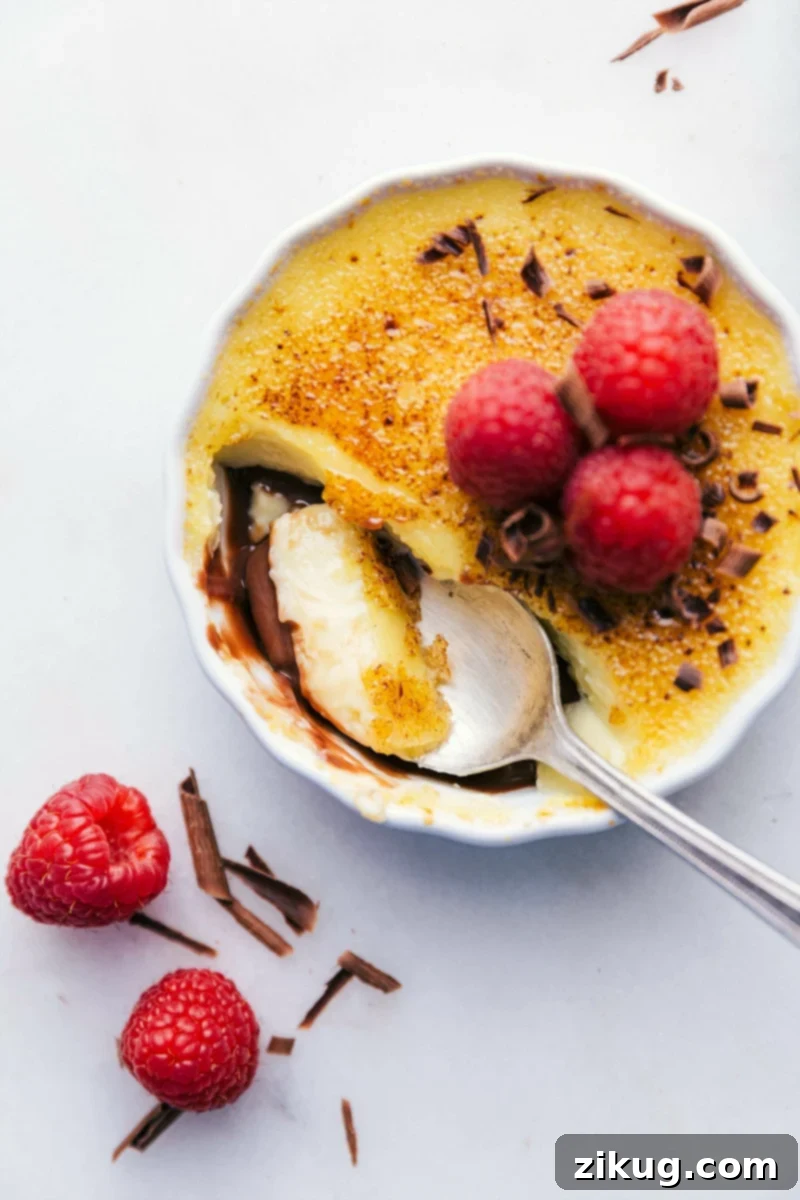
- Caramelize the Iconic Topping: The grand finale! Just before serving, sprinkle a generous, even layer of superfine sugar over the top of each chilled custard. The best way to achieve the signature crisp, glass-like topping is with a kitchen torch. Hold the torch about 6 centimeters (about 2.5 inches) away from the sugar and move it continuously in a circular motion until the sugar melts, bubbles, and transforms into a beautiful amber crust. Be vigilant to avoid burning the sugar or melting the custard beneath. Let the caramelized topping cool for about a minute to harden completely. Once the crust is perfectly set, adorn your Tuxedo Crème Brûlées with fresh berries and chocolate curls for an exquisite presentation. Enjoy them immediately to savor the contrasting textures!
Essential Tips for Crème Brûlée Perfection
Achieving a restaurant-quality Tuxedo Crème Brûlée at home is entirely possible with a few insider tips and tricks:
- Embrace Room Temperature Ingredients: This is a golden rule for many baking endeavors, and especially for custards. Ensure your eggs are at room temperature before you begin. This prevents them from “cooking” prematurely or seizing when the warm heavy cream is added, leading to a perfectly smooth and lump-free custard.
- PRO TIP: Separate your eggs when they are cold, as the yolks are firmer and less likely to break. Then, let the separated egg yolks sit out until they reach room temperature.
- Resist Overbeating the Mixture: When preparing the egg and sugar mixture, beat it until it’s light and creamy. As soon as you start to see small bubbles forming, you’ve mixed enough. Overmixing introduces too much air into the cream mixture, which can result in a foamy or porous custard texture rather than the desired silky smoothness.
- Season Thoughtfully: A small but significant addition of salt to both the ganache and custard mixtures works wonders. Salt acts as a flavor enhancer, intensifying the sweetness and richness of the chocolate and vanilla, creating a more complex and satisfying taste profile.
- Always Use a Water Bath for Baking: As mentioned in the steps, the water bath (bain-marie) is not optional for crème brûlée. This technique ensures that the custard bakes gently and evenly through indirect heat, preventing the edges from overcooking or becoming rubbery, and keeping the center beautifully smooth and soft. A proper water bath helps achieve that coveted delicate texture.
- Master the Kitchen Torch for the Perfect Top: While an oven broiler can be used in a pinch, a kitchen torch is truly your best friend for caramelizing the sugar topping. It offers precise control, allowing you to create that iconic, perfectly hard-sugar crust without heating the custard beneath. Hold the torch approximately 6 centimeters (about 2.5 inches) away from the sugar and move it steadily. Don’t linger in one spot for too long to prevent burning. Remember that the sugar will continue to crystalize and harden for a second or two after you remove the flame, so stop torching just before you think it’s perfectly done.
- If you appreciate a hint of bitterness to offset the sweetness, you can torch the sugar a bit longer to achieve a darker, more deeply caramelized (but not burnt!) crust.
Quick Tip
French 101: Crème brûlée translates from French as ‘burnt cream.’ This name directly references the dessert’s signature caramelized sugar topping, which is “burnt” (or torched) to a hard, brittle crust.
More Decadent Desserts To Explore:
If you’ve enjoyed the sophisticated flavors of Tuxedo Crème Brûlée, you might be keen to discover other delightful dessert creations. Here are a few reader favorites and personal recommendations from my kitchen to yours:
- Snickerdoodles (A truly beloved classic, these soft, chewy cookies dusted with cinnamon sugar are always a crowd-pleaser!)
- Carmelitas (Layers of buttery oat crust, gooey caramel, and rich chocolate chips combine for an irresistible bar.)
- 7 Layer Bars (An incredibly easy and satisfying dessert featuring condensed milk, coconut, chocolate, butterscotch, and nuts on a graham cracker base.)
- Bread Pudding Recipe (Comfort food at its finest, with custardy bread soaked in a sweet sauce—perfect for using up stale bread.)
- Coconut Oil Chocolate Chip Cookies (A wholesome twist on a classic, these cookies are chewy, delicious, and surprisingly light.)

Saved
Pin
Tuxedo Crème Brûlée
Tuxedo Crème Brûlée pairs chocolate ganache, custard, and caramelized sugar, topped with berries and chocolate curls.
Equipment
-
Medium pan
-
6 ramekins
-
Large pot
-
9 x 13-inch baking pan
-
Kitchen torch or oven broiler
Ingredients
Chocolate Ganache Layer
- 6 ounces chocolate milk, dark, or semi-sweet—whatever you prefer!
- 1/2 cup heavy cream
- 1/8 teaspoon kosher salt
Top Layer
- 1 full vanilla bean I like Madagascar bourbon vanilla beans; or 1 tablespoon vanilla extract
- 1/4 teaspoon salt
- 2 cups heavy cream
- 5 large egg yolks must be at room temperature
- 3/4 cup superfine sugar divided
- 6 cups water
- Fresh berries optional, for serving
Instructions
For the chocolate ganache:
-
Coarsely chop the chocolate. In a medium pan over medium heat, add the cream and bring to just before a boil (don’t boil). Reduce heat to the lowest temperature. Add chocolate and salt and whisk to combine until chocolate has melted and the mixture becomes smooth and shiny. Remove from heat.
-
Divide chocolate ganache evenly among all 6 ramekins so they are a little less than 1/4 of the way full. Place the ramekins in the freezer and freeze 1 hour.
For the custard layer:
-
Split the vanilla bean down the center. Scrape out all the seeds and place in a large bowl. Take the vanilla bean pod and place it in a small pot with salt and heavy cream.
-
Preheat oven to 300°F. Heat heavy cream mixture just until the cream is simmering. Do not boil! Remove from stovetop and set aside to slightly cool. Remove the vanilla bean pod. (If using vanilla extract, stir it in here.)
-
In the bowl with the vanilla bean seeds, add the egg yolks (I like to save the whites for omelets!) and 1/2 cup sugar. Beat until the mixture is light, about 2–3 minutes. Meanwhile, place 6 cups water in a large pot and heat to boiling.
-
Add about 1/4 of the cream mixture into the egg and sugar mixture. Mix until combined. Pour the (now-tempered) egg and sugar mixture into the remaining heavy cream mixture. Stir until combined.
-
Remove the chocolate-filled ramekins from freezer and place them in a metal 9×13 baking pan. Pour prepared mixture evenly into ramekins. (You should use all the mixture among the 6 dishes.)
-
Fill baking pan with boiling water halfway up the sides of the ramekins. Bake 30–35 minutes or until the centers are barely set (very slight jiggle). Cool completely at room temperature, then refrigerate 3–4 hours before serving. These can be refrigerated 4–5 days before use.
-
When ready to serve, sprinkle remaining 1/4 cup superfine sugar on top of the custards. I find it helpful to use a little more sugar than needed to swirl the dish around and make sure the top is evenly coated with sugar (then just pour the extra sugar onto the next ramekin). Use a kitchen torch to heat the tops until the sugar melts and browns (or even slightly blackens) a bit. Top with fresh berries and enjoy immediately.
-
Alternatively, to use your oven, move the oven rack to the top position and heat oven to a high broil. Once oven is heated, add the custards topped with superfine sugar to a tray. Place the tray on the top shelf. It only takes 1–3 minutes, so watch closely to avoid burned crèmes brûlées.
Recipe Notes
Nutrition
Nutrition information is automatically calculated, so should only be used as an approximation.
In conclusion, the Tuxedo Crème Brûlée is more than just a dessert; it’s a testament to how small innovations can transform a beloved classic into something truly extraordinary. The harmonious blend of a rich chocolate ganache, a silky vanilla custard, and the iconic crack of caramelized sugar creates a multi-sensory experience that is both sophisticated and deeply satisfying. Whether you’re aiming to impress guests at a dinner party or simply looking to indulge your own sweet tooth with a gourmet treat, this recipe offers a surprisingly approachable path to creating a show-stopping dessert. So, gather your ingredients, follow these detailed steps, and prepare to delight in the elegant simplicity and profound flavors of your very own homemade Tuxedo Crème Brûlée. It’s an experience chocolate lovers and crème brûlée purists alike will cherish!