
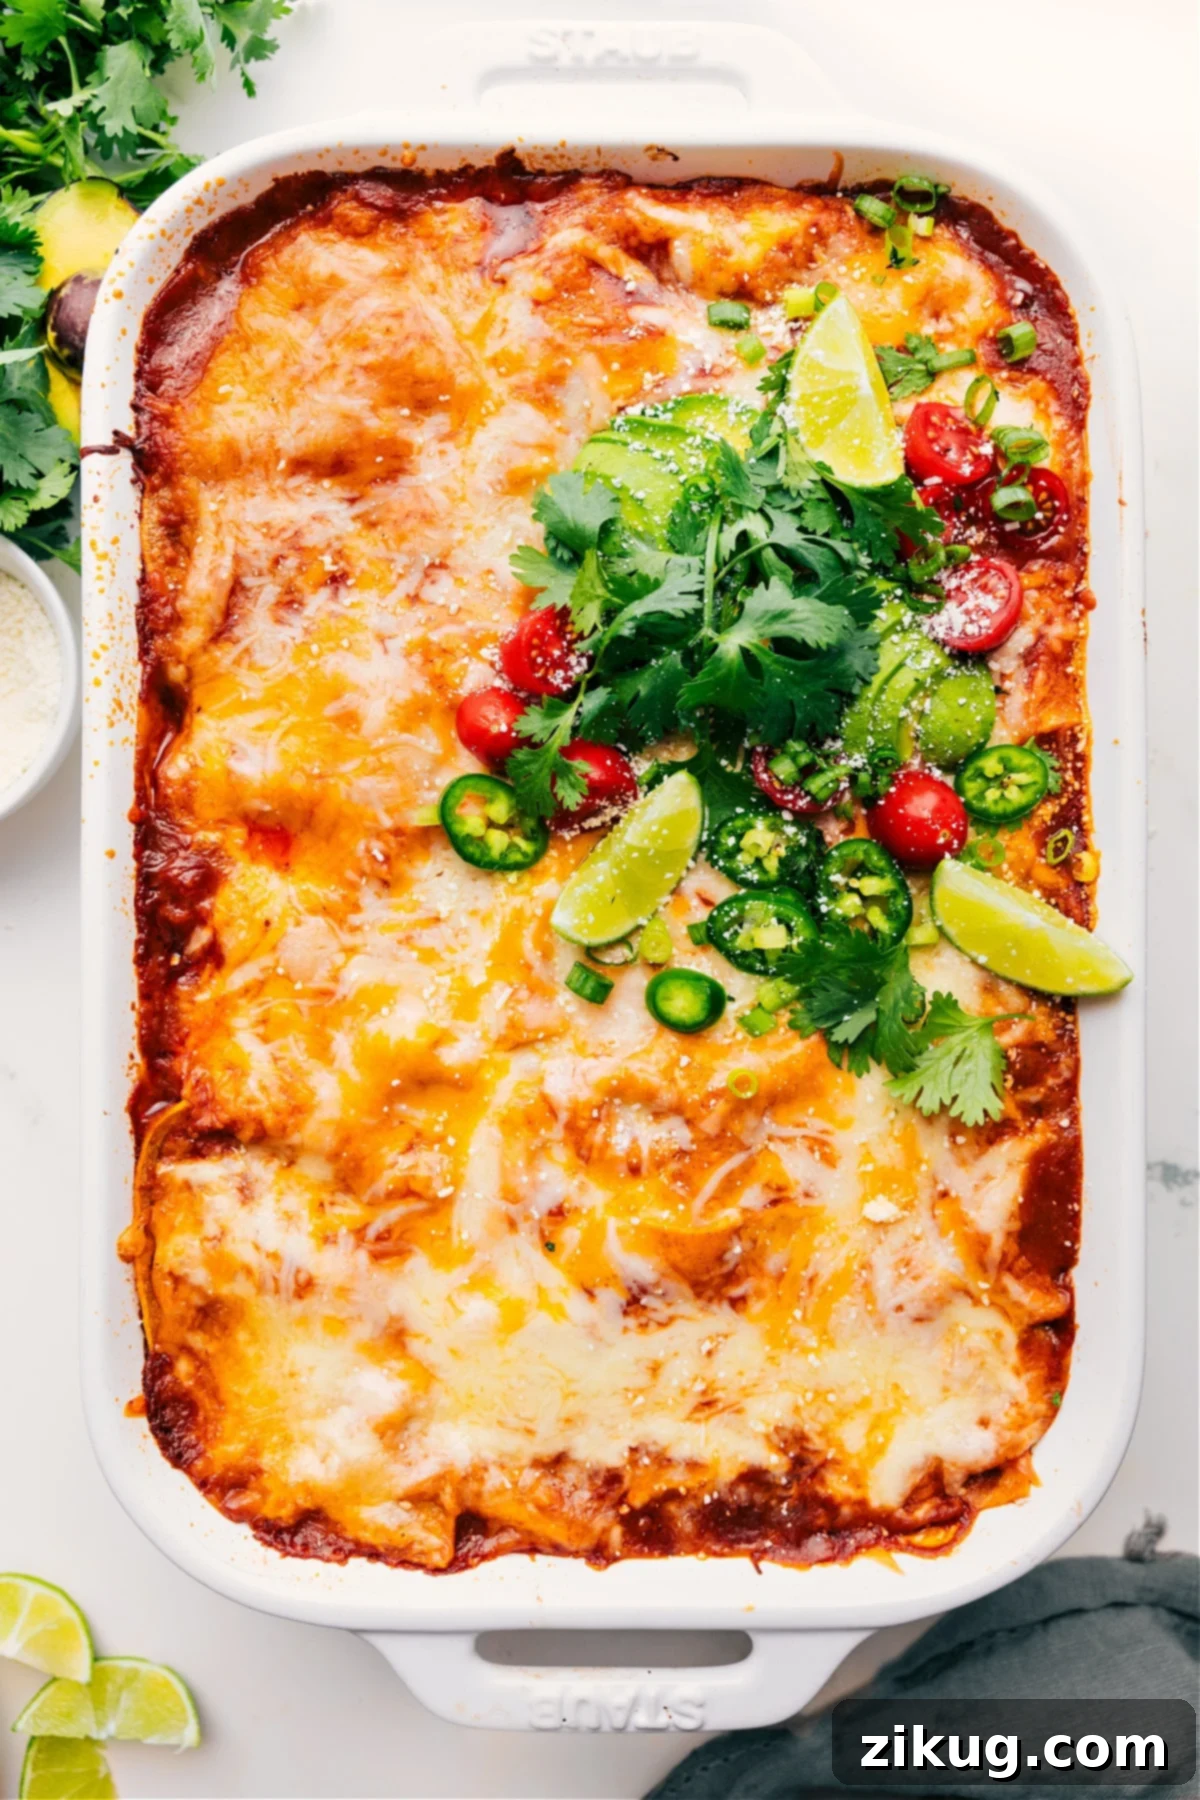
Chicken Enchilada Casserole is a true culinary delight – saucy, incredibly flavorful, and deeply satisfying! This beloved dish features harmonious layers of soft tortillas generously coated in rich enchilada sauce, a robust and savory chicken and bean filling, and a blanket of melted cheese, all baked to golden, bubbly perfection. It’s the ultimate comfort food that brings warmth and joy to any table, effortlessly combining the vibrant flavors of Mexican cuisine with the hearty appeal of a classic American casserole.
Elevate your meal by pairing this delightful casserole with refreshing Roasted Vegetables for a balanced side, or a crisp Mandarin Orange Salad to add a bright, zesty contrast. Whichever you choose, this enchilada casserole promises to be the star of your dinner table.
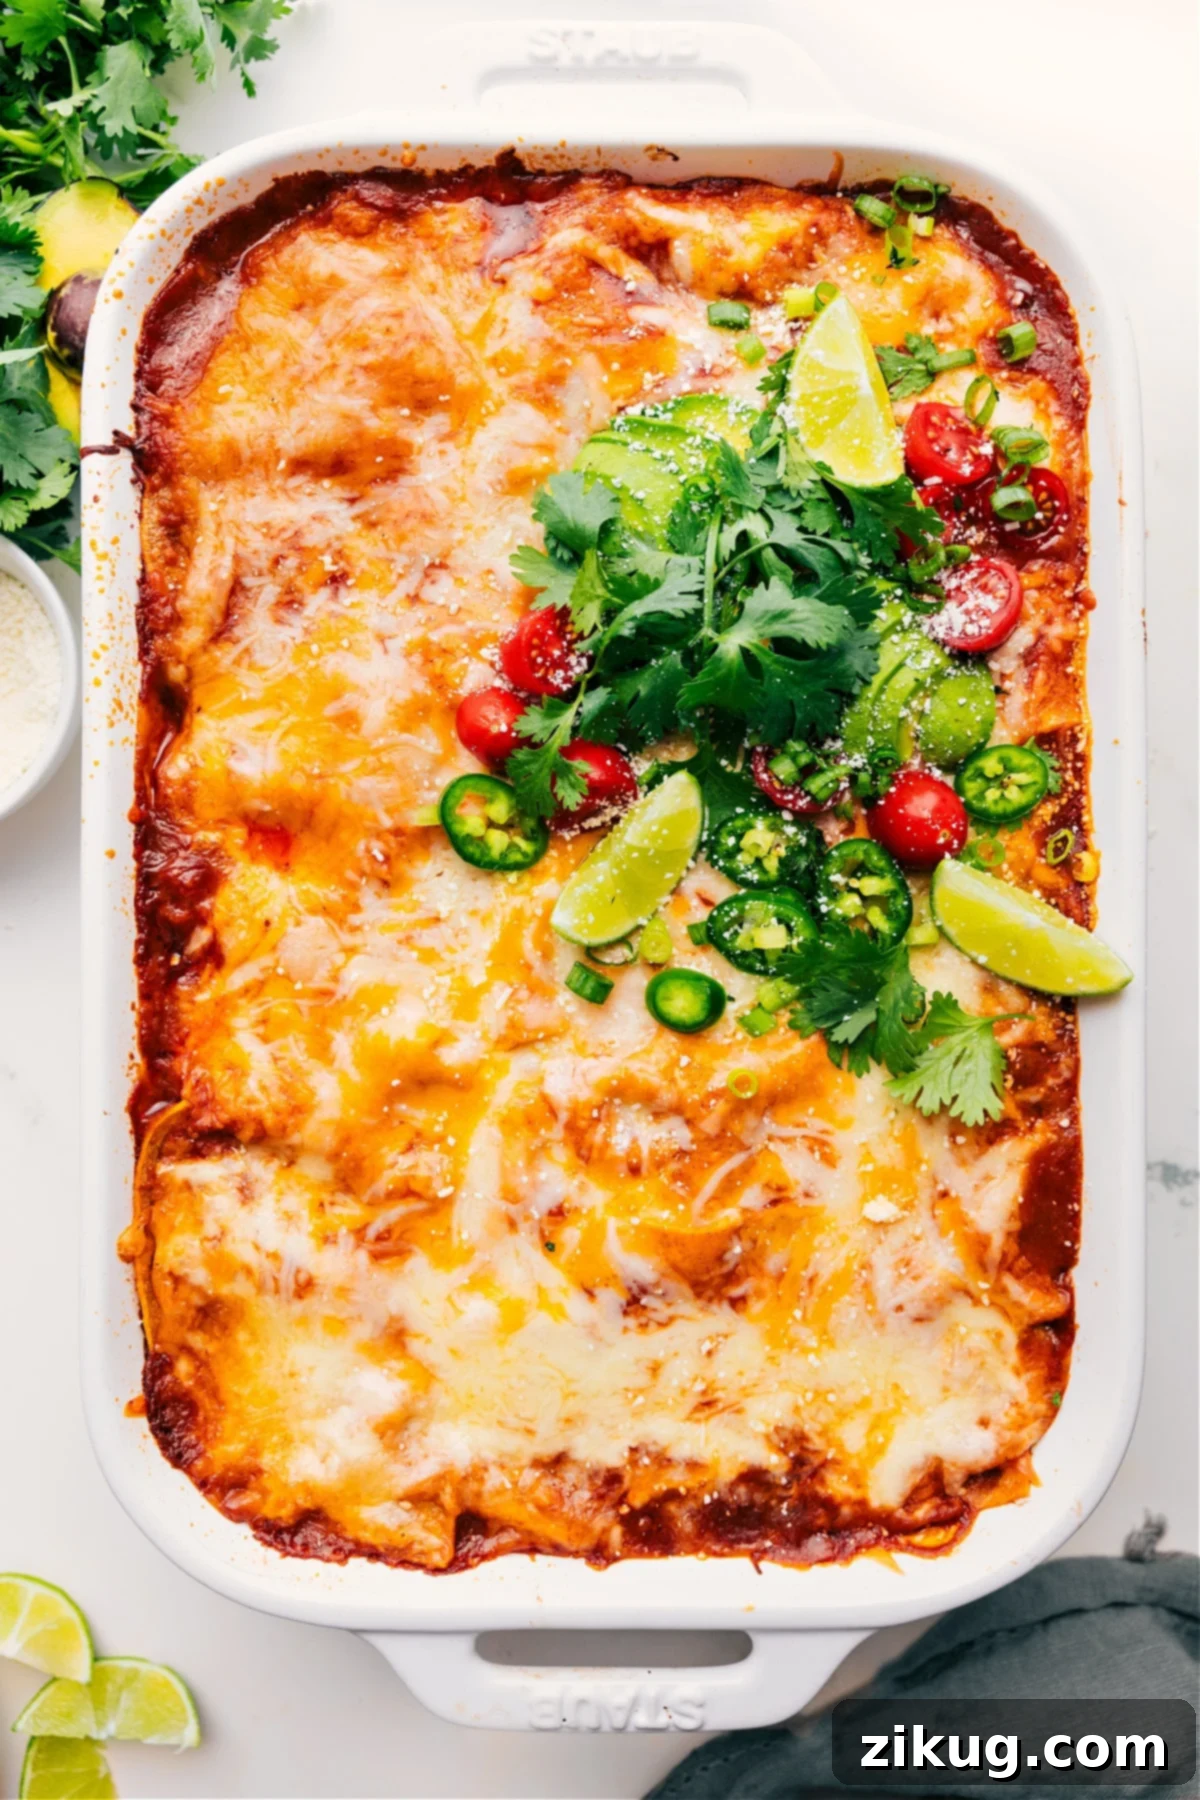
The Irresistible Charm of Chicken Enchilada Casserole
While traditional chicken enchiladas hold a special place in my heart, I must admit, this casserole version captures my affection even more deeply. There’s an undeniable magic in the way each ingredient melds together within the confines of a baking dish. This recipe achieves the quintessential balance: the perfect ratio of tender tortilla to succulent filling and gooey cheese, ensuring an explosion of flavor in every single forkful. It’s a dish so profoundly satisfying, so rich in taste and texture, that it easily becomes a recurring favorite.
I genuinely believe I could enjoy this incredible casserole almost every night without tiring of its deliciousness – well, perhaps unless a plate of savory Chicken Gyros were also gracing the table, offering a delightful dilemma!
Beyond its incredible taste, this chicken enchilada casserole is a practical marvel. It’s the quintessential meal for sharing, whether you’re bringing comfort to a family in need or offering a thoughtful gesture to a friend celebrating a new baby. Its comforting nature and substantial filling make it a universally loved dish. Plus, it’s remarkably freezer-friendly, offering a convenient solution for meal prepping or unexpected guests. I’ll delve into more details on how to freeze and reheat this culinary gem later in the article, ensuring you can enjoy its goodness whenever the craving strikes.
Why Choose a Casserole Over Rolled Enchiladas?
Many prefer the casserole format for several compelling reasons. Firstly, it’s significantly easier and quicker to assemble. Gone is the meticulous process of rolling individual tortillas; instead, you simply layer the ingredients, saving precious time in the kitchen. This makes it an ideal choice for busy weeknights or when you’re feeding a crowd. Secondly, a casserole often yields a more even distribution of flavors and textures, with every slice offering a perfect cross-section of saucy tortillas, hearty filling, and ample cheese. The edges get wonderfully crispy, while the center remains delightfully soft and gooey. Lastly, casseroles are inherently more forgiving; imperfections in layering disappear under a blanket of cheese, resulting in a dish that looks as inviting as it tastes.
Essential Ingredients for Your Chicken Enchilada Casserole
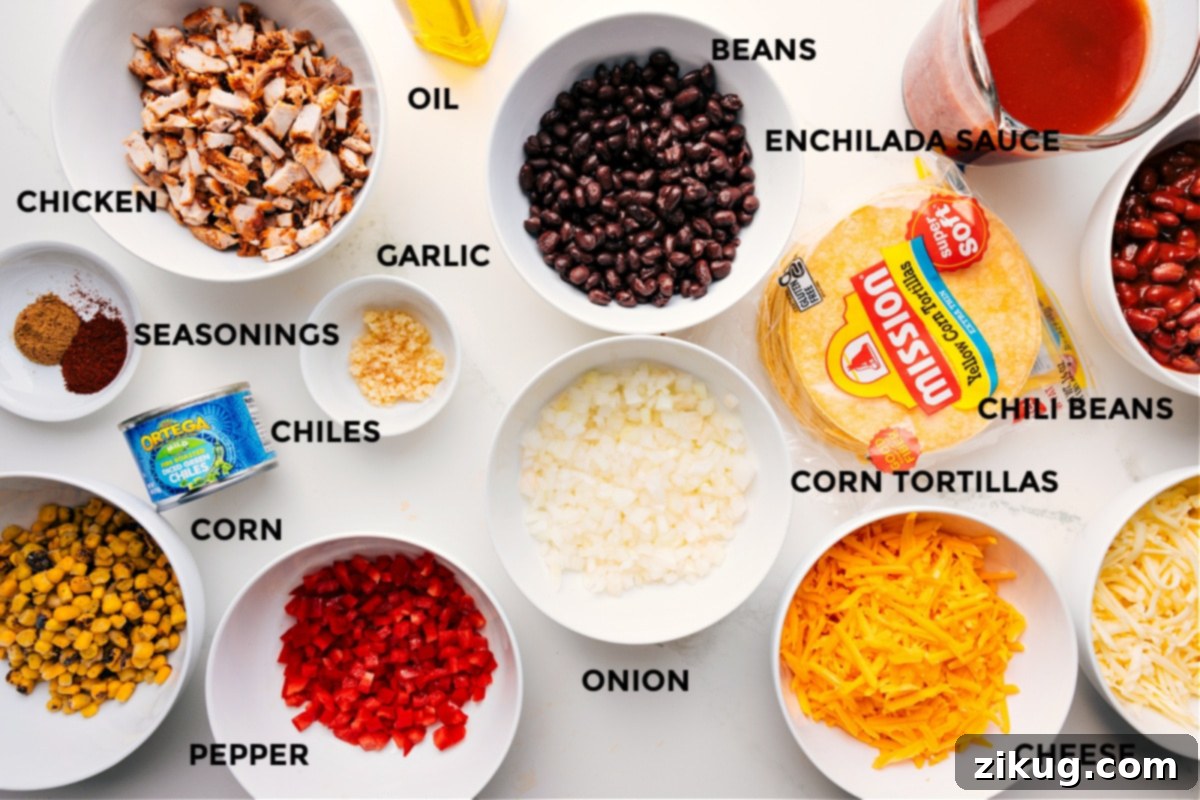
Crafting this flavorful chicken enchilada casserole begins with selecting fresh, high-quality ingredients. Each component plays a crucial role in building the rich, savory profile that makes this dish so irresistible. Here’s a closer look at what you’ll need and why each ingredient is essential:
- Olive Oil: A fundamental cooking fat, olive oil is used to sauté your aromatic vegetables. It not only prevents sticking but also helps to soften the onion and bell pepper, coaxing out their natural sweetness and creating a foundational layer of flavor for the filling.
- Onion, Bell Pepper, & Garlic: This classic trio forms the aromatic base of our enchilada filling. Sautéing them until tender and fragrant releases their complex flavors, adding depth and a subtle sweetness that complements the other ingredients beautifully. Diced yellow onion and red bell pepper bring both color and a pleasant crunch, while minced garlic infuses the mixture with its signature pungency.
- Chili Powder & Cumin: These two spices are non-negotiable for authentic enchilada flavor. When gently cooked with the vegetables, their robust and earthy notes are intensified, permeating the entire filling with that classic Tex-Mex warmth. They are the heart and soul of the seasoning blend.
- Green Chiles: Don’t drain them! The liquid from a can of green chiles adds an extra layer of mild heat and savory depth to the filling, enhancing the overall moisture and flavor. They contribute a characteristic tang that brightens the dish.
- Black & Chili Beans: For a truly hearty filling, a combination of beans is key. Rinse your black beans thoroughly before adding them to remove excess sodium and improve texture. For the chili beans, simply dump the entire can into the mix, as their flavorful sauce is an integral part of the filling’s richness. If chili beans are unavailable, pinto beans are a great substitute.
- Frozen Corn: Convenient and delicious, frozen corn adds a burst of sweetness and texture. There’s no need to thaw it; simply add it directly to the pan with the other ingredients. Its slight crispness provides a wonderful contrast to the softer components.
- Rotisserie Chicken: The secret to a quick and incredibly flavorful chicken enchilada casserole! Using pre-cooked rotisserie chicken saves significant prep time. Ensure it’s finely chopped or shredded for even distribution throughout the filling, guaranteeing a bite of tender chicken in every forkful.
- Enchilada Sauce: The lifeblood of any enchilada dish. Choose your favorite brand of mild red enchilada sauce. Its vibrant flavor and rich consistency bind all the elements together, providing moisture and that signature enchilada taste. You can also opt for a homemade version for an even fresher flavor.
- Corn Tortillas: The traditional choice for enchiladas, corn tortillas provide a distinct texture and flavor. Halving them before layering makes them fit neatly into your baking dish, ensuring an even base for your delicious filling. For those who prefer a different texture, flour tortillas are a viable alternative.
- Cheddar & Monterey Jack Cheese: A generous blend of freshly shredded sharp Cheddar and creamy Monterey Jack cheese creates the ultimate gooey, melty topping. Freshly shredded cheese melts far more smoothly than pre-shredded varieties, enhancing the casserole’s luxurious texture.
- Toppings (Optional, but highly recommended): Don’t underestimate the power of fresh toppings! While the casserole bakes, prep your desired garnishes like fresh cilantro, diced avocado, chopped tomatoes, a squeeze of lime juice, or a dollop of sour cream. These additions provide a pop of color, freshness, and a delightful textural contrast.
Crafting Your Perfect Chicken Enchilada Casserole: A Step-by-Step Guide
Creating this delicious Chicken Enchilada Casserole is a straightforward and rewarding process. Follow these simple steps to bring this comforting dish to life:
- Prepare Your Workspace and Oven: Begin by preheating your oven to a steady 375°F (190°C). This ensures your oven is at the optimal temperature when the casserole is ready to bake. Lightly grease a 9×13-inch baking pan with cooking spray or a thin layer of olive oil. This step is crucial for preventing the casserole from sticking and ensuring easy serving. Set the prepared pan aside for later.
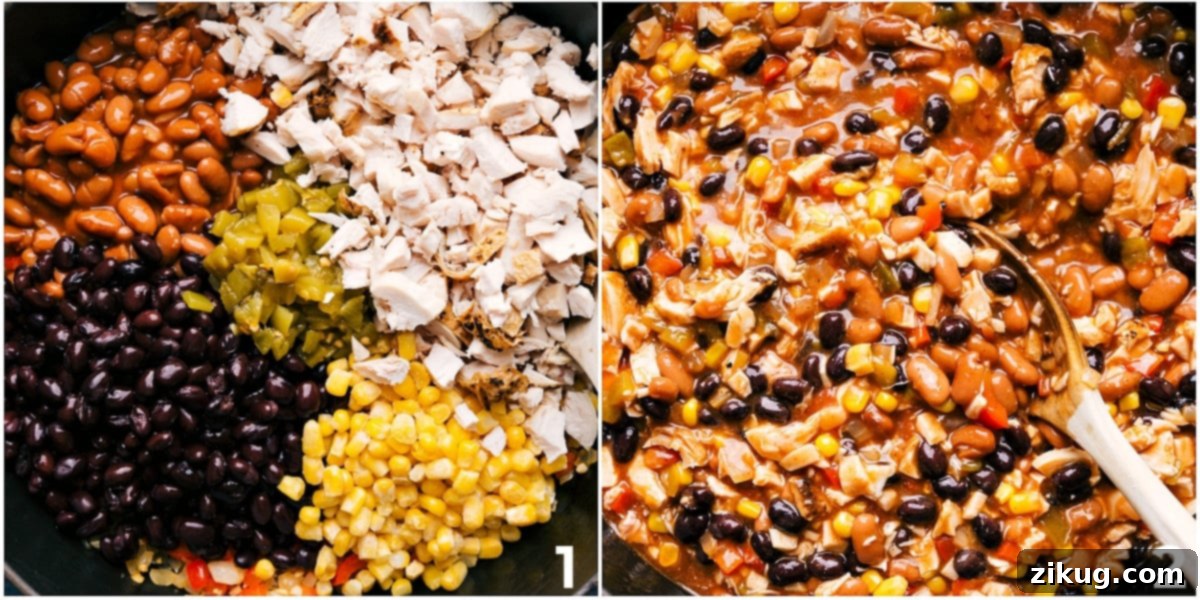
- Sauté the Aromatics and Build the Filling: In a large skillet or Dutch oven, heat one tablespoon of olive oil over medium heat until it shimmers. Add the diced yellow onion and red bell pepper, and sauté for 5-6 minutes, stirring occasionally, until they become tender and translucent. Next, add the minced garlic and continue to cook for another 30 seconds until fragrant, being careful not to burn it. Stir in the ground chili powder and ground cumin, cooking for another 30 seconds to toast the spices and enhance their flavor. Reduce the heat to low. Incorporate the undrained can of diced green chiles, rinsed black beans, chili beans (undrained), frozen corn, and chopped rotisserie chicken. Pour in 2 cups of the mild red enchilada sauce. Stir all ingredients gently until they are well combined and warmed through. Taste the filling and adjust seasoning with salt and pepper as needed. Remove the skillet from the heat.
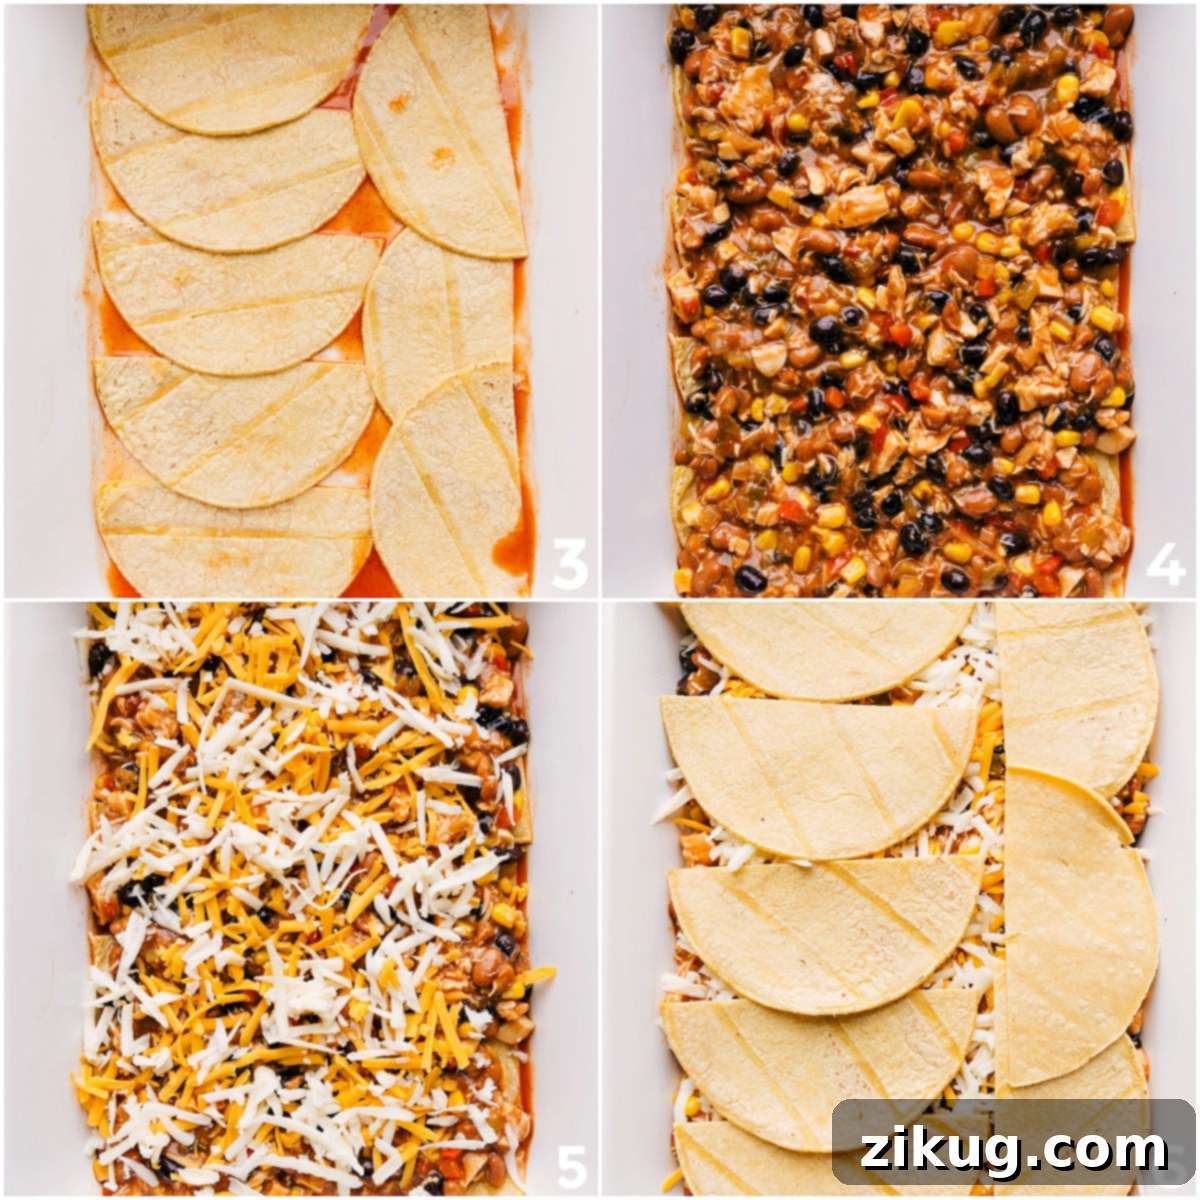
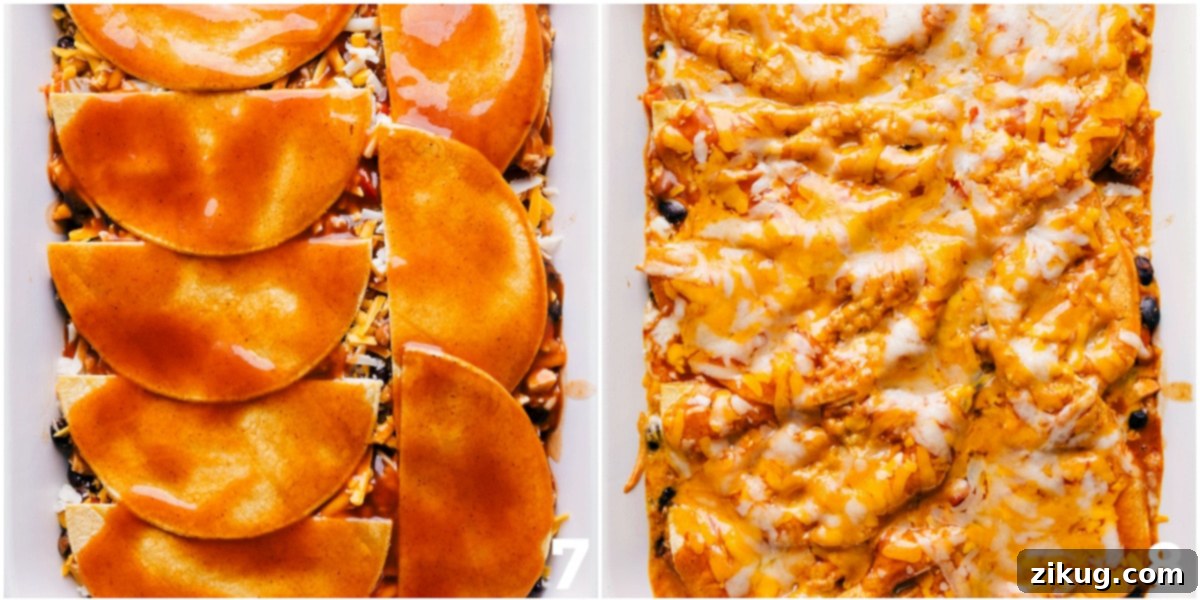
- Master the Art of Layering: This is where the casserole truly comes together. Start by pouring approximately 1/2 cup of the remaining enchilada sauce into the bottom of your prepared 9×13-inch pan, spreading it evenly. Arrange 8 tortilla halves over the sauce to create the first layer. Spoon about one-third of your flavorful chicken and bean mixture evenly over the tortillas. Sprinkle with 1/2 cup of shredded sharp Cheddar cheese and 1/2 cup of shredded Monterey Jack cheese. Repeat this layering process: add another 8 tortilla halves, followed by another one-third of the chicken mixture, then 1/2 cup each of Cheddar and Monterey Jack cheese. For the third layer, add 8 more tortilla halves, the remaining one-third of the chicken mixture, and another 1/2 cup each of Cheddar and Monterey Jack cheese. Finally, top with the last layer of 8 tortilla halves, pour over the final 1/2 cup of enchilada sauce, and sprinkle with the remaining 1/2 cup of Cheddar cheese and 1/2 cup of Monterey Jack cheese. This creates a beautifully balanced, multi-layered dish.
- Bake to Golden Perfection: Lightly spray one side of a piece of aluminum foil with cooking spray. This prevents the cheese from sticking to the foil during baking. Securely cover the baking dish with the foil, sprayed side down. Bake in the preheated oven for 20 minutes. After 20 minutes, carefully remove the foil and continue baking for another 10-15 minutes, or until the cheese is beautifully melted, gooey, and bubbling around the edges, with a slight golden hue on top.
- Rest and Serve: Once baked, remove the chicken enchilada casserole from the oven. Allow it to rest for 5-10 minutes before cutting and serving. This resting period is crucial as it allows the layers to set, preventing the casserole from falling apart when scooped. Serve with your preferred toppings; I highly recommend a squeeze of fresh lime juice, a generous sprinkle of fresh cilantro, slices of creamy avocado, a few halved cherry tomatoes, and a dollop of cool sour cream. Enjoy this comforting casserole hot!
Quick Tip: Tortilla Swaps
Not a fan of corn tortillas? No problem! Feel free to swap them for an equal number of wheat (flour) tortillas. While the flavor profile will be slightly different, the casserole will still be incredibly delicious and satisfying. Choose what best suits your preference!
Creative Variations to Customize Your Casserole
This Chicken Enchilada Casserole recipe is incredibly versatile, allowing for easy customization to suit different tastes and dietary needs. Don’t hesitate to experiment with these variations to make it uniquely yours:
- Vegetarian Delight: Easily transform this into a hearty vegetarian casserole by swapping out the chopped chicken for an extra can of black beans or a can of drained and rinsed pinto beans. You could also add sautéed mushrooms or zucchini for more vegetable variety and texture.
- Amp Up the Spice: For those who crave extra heat, incorporate a finely diced jalapeño or serrano pepper into the filling along with the other vegetables. Alternatively, opt for a hot enchilada sauce instead of a mild one, or add a pinch of cayenne pepper to the spice blend for a fiery kick.
- Homemade Sauce Advantage: While store-bought enchilada sauce offers convenience, making your homemade enchilada sauce from scratch can elevate the flavor profile even further. It allows you to control the spice level and richness precisely, adding a personal touch that truly shines.
- Cheese Adventures: Experiment with different cheese combinations! For a spicier Chicken Enchilada Casserole, replace some or all of the Monterey Jack with Pepper Jack cheese. A blend of Colby Jack, white Cheddar, or even a Mexican cheese blend can also offer exciting new flavors and textures.
- Add More Veggies: Boost the nutritional content and flavor by adding extra vegetables to the filling. Sautéed bell peppers of different colors, spinach, chopped zucchini, or even roasted sweet potatoes can be fantastic additions.
- Pork or Beef Instead of Chicken: If you’re not a fan of chicken, this casserole works wonderfully with other proteins. Shredded slow-cooked pork (carnitas style) or seasoned ground beef can be excellent substitutes, offering a different but equally delicious experience.
Storage and Freezing Chicken Enchilada Casserole
This Chicken Enchilada Casserole is an excellent candidate for meal prep or making ahead for future busy nights. Its flavors deepen over time, and it reheats beautifully, making it a fantastic freezer-friendly option. Here’s how to store and freeze your casserole effectively:
Freezing Chicken Enchilada Casserole
You can prepare the casserole as directed and either bake it right away for immediate enjoyment or freeze it before baking for a convenient future meal.
- To Freeze (Unbaked): Assemble the casserole in an oven-safe, freezer-friendly container. This could be a disposable aluminum pan or a ceramic dish that can go from freezer to oven. Once assembled, cover the casserole tightly with a layer of plastic wrap, pressing it directly onto the surface to prevent freezer burn. Follow this with a layer of heavy-duty aluminum foil, sealing it securely around the edges of the pan. Properly wrapped, the casserole can be stored in the freezer for up to 3 months. Label with the date for best practice.
- Baking from Frozen: When you’re ready to enjoy your frozen casserole, remove both the plastic wrap and the aluminum foil. Place the still-frozen casserole (in its oven-safe dish) into a preheated oven at 350°F (175°C). Bake for approximately 1 1/2 hours (90 minutes), or until the cheese is thoroughly melted, gooey, and bubbling, and the center of the casserole is heated through. If the top starts to brown too quickly, you can loosely cover it with foil for the last portion of baking.
- To Freeze (Baked): If you have leftover baked casserole, let it cool completely. You can then portion it into individual servings or store the entire remaining casserole. Wrap tightly with plastic wrap and then foil. Freeze for up to 3 months. To reheat, thaw in the refrigerator overnight and then bake at 350°F (175°C) until warmed through, or microwave individual portions.
Refrigerating Leftovers
Any leftover baked casserole can be stored in an airtight container in the refrigerator for 3-4 days. To reheat, simply microwave individual servings or warm in an oven at 300°F (150°C) until heated through.
Explore More Easy and Delicious Chicken Recipes
If you loved this Chicken Enchilada Casserole, you’ll surely appreciate these other fuss-free and flavorful chicken dishes, perfect for any occasion:
- Pesto Chicken Salad: A delightful and fresh choice, perfect for a quick and satisfying lunch or light dinner, offering bright, herby flavors.
- Quinoa Enchilada Bake: A wholesome and savory dish featuring quinoa, sweet potatoes, and all your favorite enchilada flavors, great for a healthier twist.
- Rotisserie Chicken Tacos: Incredibly fast and easy, these tacos come together in about 20 minutes, making them a perfect solution for spontaneous weeknight meals.
- Chicken Gnocchi Soup: A comforting and creamy Olive Garden copycat recipe, this soup is hearty and incredibly satisfying on a chilly evening.
- One-Skillet Chicken Enchilada Pasta: Cheesy, delicious, and incredibly convenient, this pasta dish combines the best of enchilada flavors with the ease of a one-skillet meal.

Chicken Enchilada Casserole
By Chelsea Lords
With layers of corn tortillas smothered in rich enchilada sauce, filled with tasty chicken and beans, and topped with a generous amount of cheese, this Chicken Enchilada Casserole is saucy, delicious, and a guaranteed family favorite!
- Prep Time: 30 minutes
- Cook Time: 30 minutes
- Resting Time: 5 minutes
- Total Time: 1 hour 5 minutes
- Servings: 6 servings
Pin Recipe |
Print Recipe
Equipment
- 9 x 13-inch baking pan
- Large pan/skillet
- Aluminum foil
Ingredients
- 1 tablespoon olive oil
- 1 cup diced yellow onion
- 1 cup diced red bell pepper
- 2 teaspoons minced garlic
- 1 teaspoon ground chili powder
- 1 teaspoon ground cumin
- 1 (4-ounce) can green chiles, undrained
- 1 (15-ounce) can black beans, drained and rinsed
- 1 (15-ounce) can chili beans (see Note 1)
- 1 cup frozen corn
- 3 cups chopped rotisserie chicken
- 3 cups mild red enchilada sauce, divided
- 16 corn tortillas, halved
- 2 cups shredded sharp Cheddar cheese
- 2 cups shredded Monterey Jack cheese
- Salt and pepper, to taste
- Toppings as desired (see Note 2)
Instructions
- Preheat oven to 375°F (190°C). Spray a 9×13-inch pan with cooking spray and set aside.
- Heat the olive oil in a large pan over medium heat. Once oil is shimmering, add in diced yellow onion and diced red pepper. Stir for 5–6 minutes or until softened. Add garlic and stir for 30 seconds; reduce heat if it starts to burn. Add chili powder and ground cumin. Stir for another 30 seconds or until fragrant. Reduce heat to low. Add diced green chilies (undrained), black beans (drained and rinsed), chili beans (undrained), frozen corn, chopped rotisserie chicken, and 2 cups mild enchilada sauce. Season to taste with salt and pepper. Stir gently until combined and warmed through, then remove from the heat.
- Pour 1/2 cup of the remaining enchilada sauce in the prepared 9×13-inch pan. Add 8 tortilla halves to cover the bottom of the pan. Spoon 1/3 of the chicken sauce on top. Add 1/2 cup shredded sharp Cheddar cheese and 1/2 cup shredded Monterey Jack cheese. Add another 8 tortilla halves on top. Layer another 1/3 of the chicken mixture, 1/2 cup more Cheddar cheese and 1/2 cup more Monterey Jack cheese. Add a final layer of 8 tortilla halves, the remaining 1/3 of chicken mixture, another 1/2 cup Cheddar cheese, and another 1/2 cup Monterey Jack cheese. Finish by adding one more layer of tortilla halves, the final 1/2 cup enchilada sauce, and the final 1/2 cup Cheddar cheese and 1/2 cup Monterey Jack cheese.
- Lightly spray a piece of aluminum foil with cooking spray and secure over the dish. Bake for 20 minutes. Remove the foil and bake for 10-15 more minutes or until cheese is melty and gooey on top and lightly golden.
- Remove casserole from the oven and let stand for 5–10 minutes before cutting into it. Serve casserole with toppings of choice; I like a splash of fresh lime juice, a sprinkle of fresh cilantro, fresh sliced avocado, a few cherry tomatoes, and some sour cream. Enjoy hot.
Recipe Notes
- Note 1: I love chili beans in this recipe because they’re slow simmered in a flavorful sauce and add even more depth to the filling. However, feel free to substitute with regular drained and rinsed pinto beans. Ranch-style beans are also a very similar alternative to chili beans.
- Note 2: Suggested toppings include fresh cilantro, diced red onion, thinly sliced green onion, and diced avocado. A dollop of sour cream or Greek yogurt, and a squeeze of fresh lime juice also add a wonderful finish.
- Storage: Prepare according to the directions and either bake immediately or freeze unbaked in an oven-safe, freezer-friendly container. Cover tightly with plastic wrap (pressing onto the surface) and then aluminum foil. To bake from frozen, remove the plastic and foil, then bake at 350°F (175°C) for 1-1/2 hours (90 minutes) or until the cheese is melted and the center is warm and bubbly.
Nutrition Information (Approximate per serving)
Serving: 1 serving | Calories: 625 kcal | Carbohydrates: 55.8g | Protein: 36.5g | Fat: 33.2g | Cholesterol: 98mg | Sodium: 710.4mg | Fiber: 15.4g | Sugar: 7g
Nutrition information is automatically calculated and should only be used as an approximation.
Love this recipe? Share your thoughts below!