
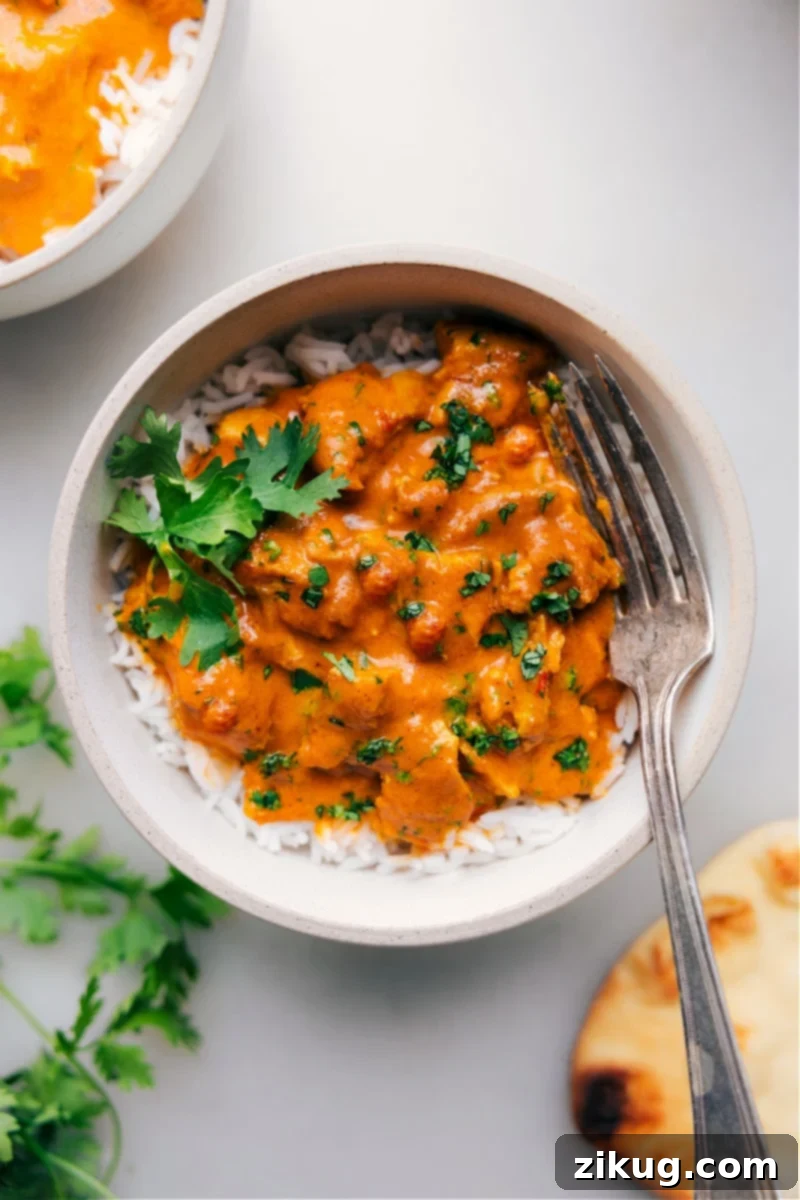
Instant Pot Butter Chicken offers a delightful culinary experience, presenting a dish that is rich, incredibly creamy, and bursting with aromatic spices. Each succulent piece of tender chicken is infused with deep, complex flavors, making it an irresistible meal. Traditionally served over fluffy rice with warm naan bread for scooping up every last drop of the exquisite sauce, this recipe transforms a classic Indian favorite into a quick and easy weeknight marvel, all thanks to the magic of your Instant Pot.
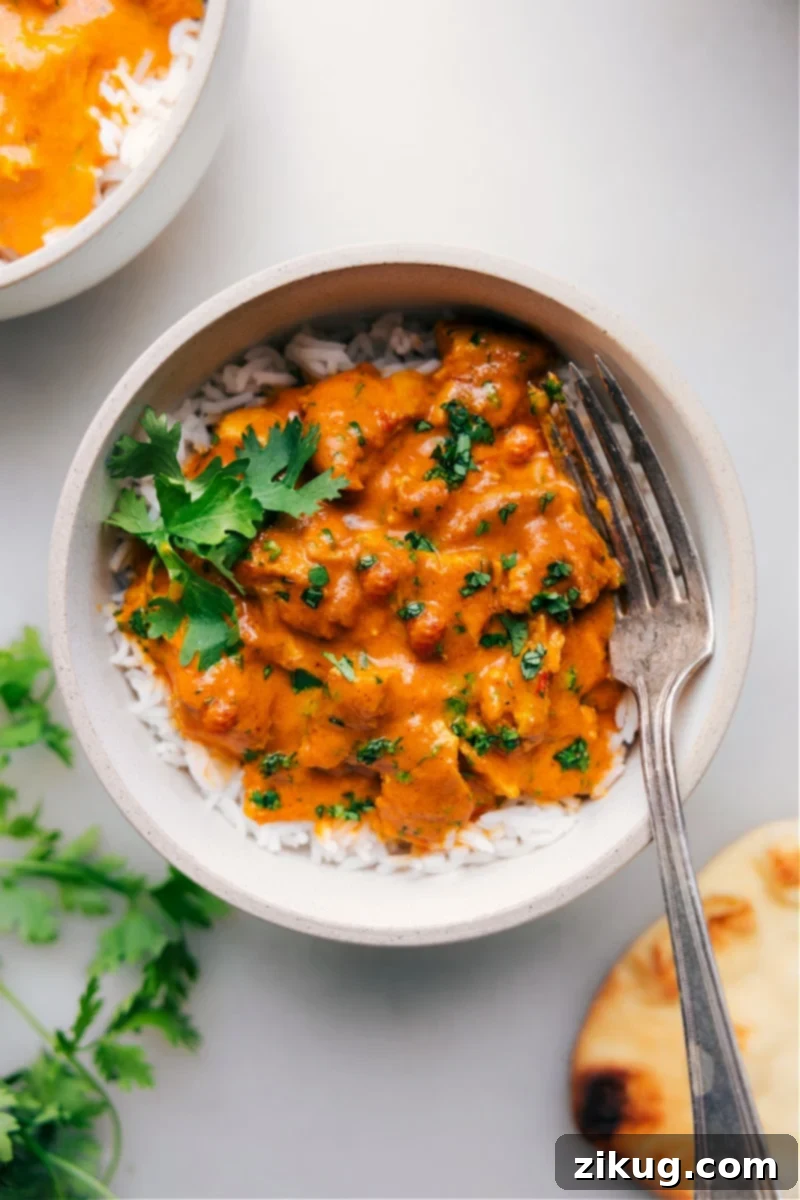

A Beloved Family Favorite
This Butter Chicken is So Good, It Feels Like Cheating!
For my last birthday, my family surprised me with a reservation at an Indian restaurant I had been eager to try. Every dish was simply *amazing*, but the butter chicken stood out as the undisputed star of the meal. Even my usually picky children devoured it with gusto, extracting a promise from me to recreate its magic at home very soon. While I’ve always cherished my go-to Butter Chicken recipe and these incredibly delicious Butter Chicken Meatballs, I recognized the need for a quicker, more convenient version to fit into our busy weeknight schedule.
That’s where Instant Pot Butter Chicken comes in. This recipe is astonishingly simple to prepare yet yields a profoundly delicious, restaurant-quality dish. It’s ready in approximately 30 minutes from start to finish (including pressure build-up and release), with minimal active cooking time, allowing the pressure cooker to do most of the heavy lifting. The result is a truly restaurant-quality butter chicken that will impress everyone at your table, without the lengthy cooking process often associated with such flavorful dishes.
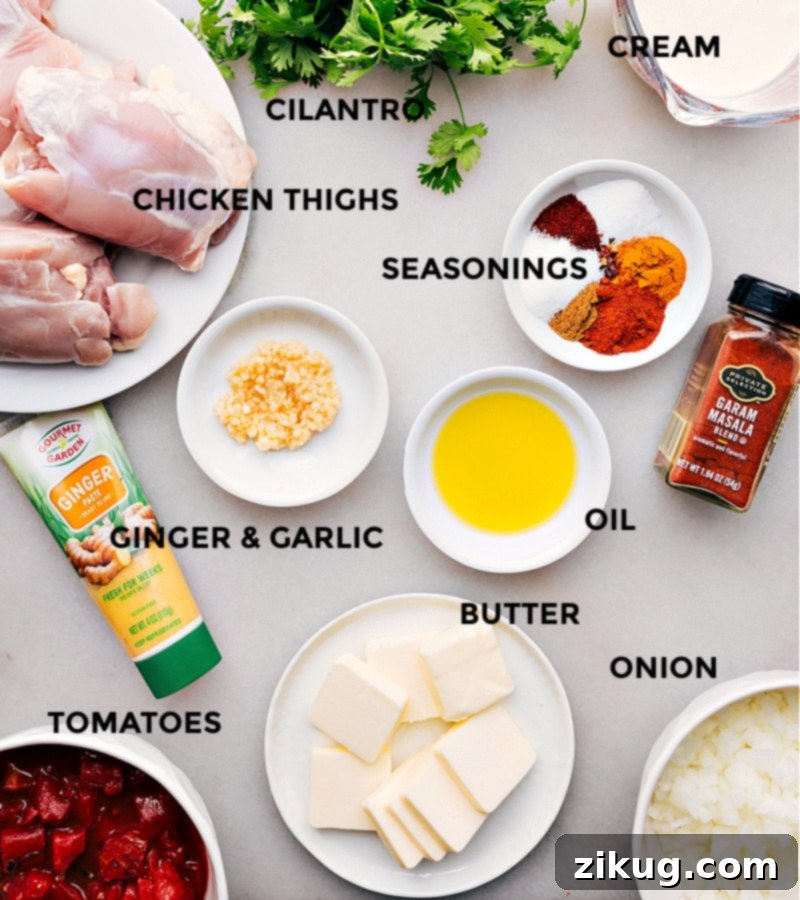
Essential Ingredients for Perfect Instant Pot Butter Chicken
Crafting the perfect Instant Pot Butter Chicken begins with selecting the right ingredients. Each component plays a vital role in building the layered flavors and achieving that signature creamy texture. Here’s a closer look at what you’ll need and why:
| Ingredient | Notes & Swaps for Best Results |
|---|---|
| Chicken Thighs | Boneless, skinless chicken thighs are highly recommended for their inherent juiciness and tenderness, which prevents them from drying out during pressure cooking. While chicken breasts can be used, they tend to be a little drier and may not absorb the flavors quite as well. |
| Garlic & Ginger | Freshly minced garlic and ginger offer the most vibrant, aromatic base. However, for ultimate convenience on busy nights, pre-made ginger paste and garlic paste (often found in tubes in the produce section of grocery stores) are fantastic lifesavers and work wonderfully. |
| Spices (Garam Masala, Cumin, Chili Powder, Turmeric, Paprika) | This blend is the heart and soul of butter chicken. Do not skip the garam masala; it’s the quintessential spice blend that gives this dish its authentic, warm, and distinctive flavor profile. Cumin adds an earthy depth, turmeric provides vibrant color and subtle bitterness, and paprika contributes a mild, smoky sweetness. Adjust chili powder to your preference for less heat. |
| Crushed Tomatoes | Crushed tomatoes form the smooth, rich base of our sauce. They break down easily during pressure cooking, creating a velvety consistency. If you only have diced tomatoes, they will work but may require a bit more blending at the end to achieve a perfectly smooth sauce. |
| Unsalted Butter | True to its name, butter is a key ingredient. Adding unsalted butter at the end allows it to emulsify beautifully into the sauce, contributing to its luxurious richness and silken texture. |
| Heavy Cream | Heavy cream is essential for that signature creamy, decadent finish. It mellows the spices and adds a smooth mouthfeel. For a dairy-free alternative, full-fat coconut milk can be used, which will impart a subtle coconut flavor but still offer a rich consistency. |
| Sugar | A small pinch of sugar (or honey) is often added to balance the acidity of the tomatoes and enhance the overall sweetness and complexity of the sauce. It’s optional, so feel free to reduce or omit it if you prefer a less sweet profile. |
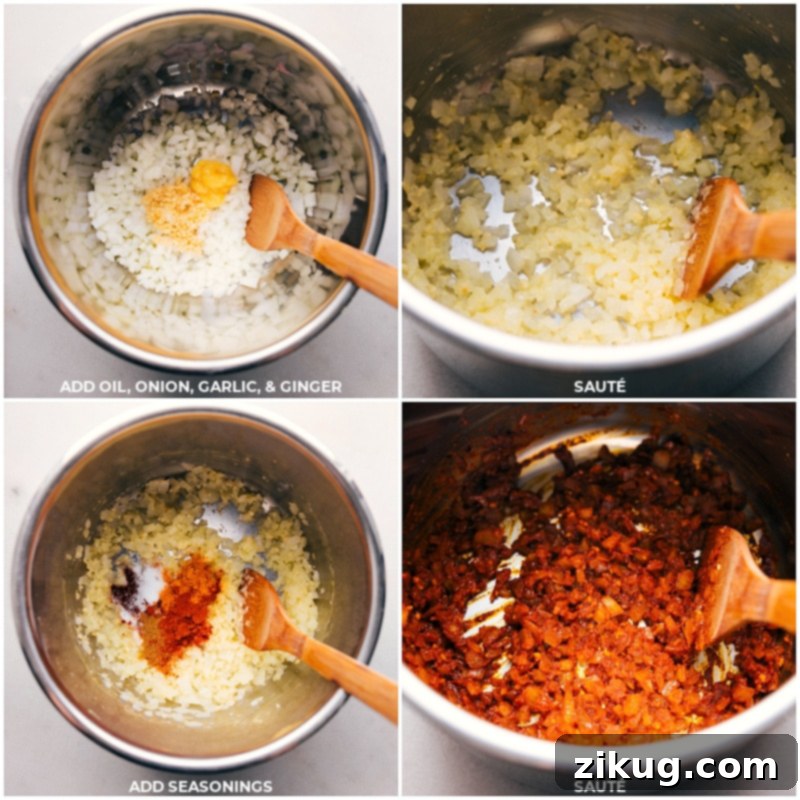
How to Master Instant Pot Butter Chicken: A Step-by-Step Guide
Making restaurant-quality butter chicken at home has never been easier, thanks to the Instant Pot. Follow these straightforward steps to achieve a perfectly tender chicken in a luscious, spice-infused sauce:
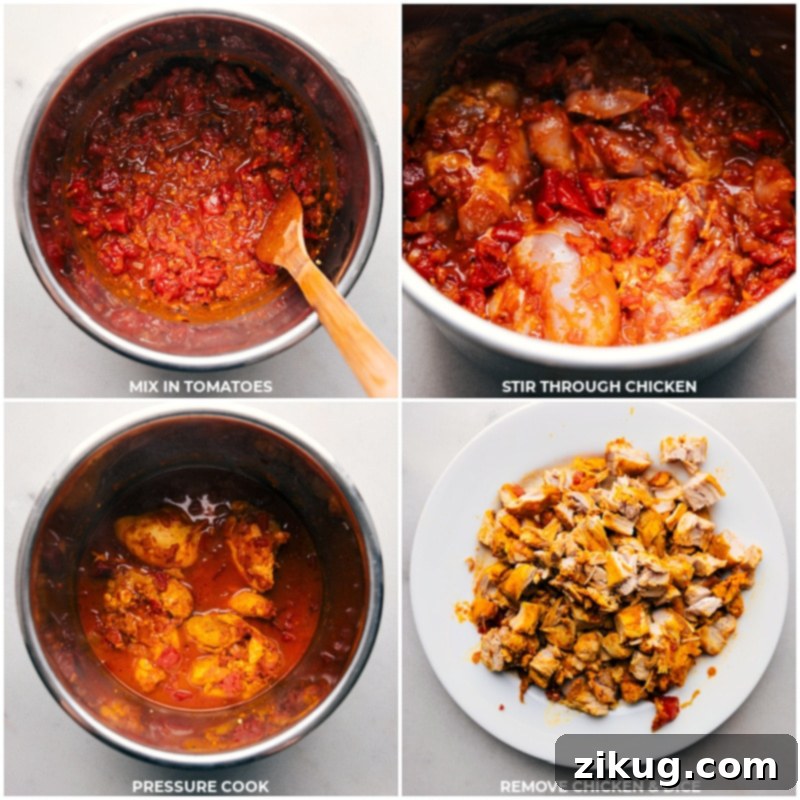
- Sauté the Aromatics and Spices: Begin by setting your Instant Pot to the “sauté” function. Once hot, add your chosen oil (coconut or olive oil) and cook the diced onion until it starts to turn translucent and golden, usually 3-6 minutes. Then, add the minced garlic and ginger, stirring constantly for about a minute until fragrant. This step is crucial for building the foundational flavors. Now, stir in all the ground spices (smoked paprika, cumin, turmeric, salt, and most of the garam masala, reserving 1 teaspoon for later) and red pepper flakes if using. Cook for another 1-3 minutes, stirring continuously, allowing the spices to bloom and release their intoxicating aromas. Be careful not to burn them.
- Deglaze the Pot with Tomatoes: Pour in the crushed tomatoes and immediately use a wooden spoon or spatula to scrape up any browned bits stuck to the bottom of the pot. This vital step is called deglazing and not only adds immense flavor but also prevents a “burn” warning on your Instant Pot. Ensure the bottom is completely clean.
- Add the Chicken: Gently nestle the boneless, skinless chicken thighs into the sauce in an even layer. There’s no need to add any additional liquid; the chicken and tomatoes will release enough moisture during pressure cooking.
- Pressure Cook to Perfection: Secure the lid on your Instant Pot and ensure the sealing valve is set to “sealing.” Cook on high pressure (manual mode) for 8-10 minutes. Once the cooking cycle is complete, allow the pressure to release naturally for 5 minutes. This natural release helps keep the chicken incredibly tender and juicy. After 5 minutes, carefully perform a quick release of any remaining pressure by shifting the steam release handle to “venting.”
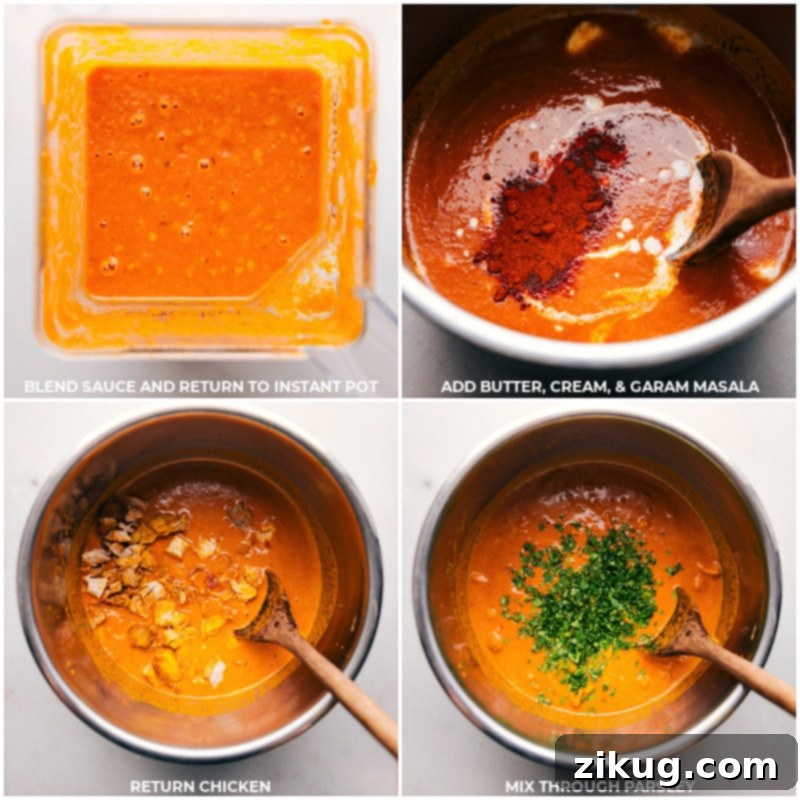
- Blend the Silky Sauce: Once the pressure is fully released, remove the lid. Carefully take out the cooked chicken and set it aside to chop into bite-sized pieces later. Using an immersion blender directly in the pot, purée the sauce until it is completely smooth and creamy. If you don’t have an immersion blender, carefully transfer the sauce to a regular blender and process until smooth (see important blending tips below).
- Finish with Richness and Flavor: Return the blended sauce to the pot if you used a regular blender. Stir in the unsalted butter, the reserved 1 teaspoon of garam masala, and the heavy cream. Mix thoroughly until all ingredients are combined and the sauce achieves a beautiful, velvety consistency. If needed, you can use the “sauté” function for a minute or two to help melt the butter completely or to slightly thicken the sauce to your desired consistency. Finally, mix the chopped chicken back into the sauce, stir in the fresh cilantro, and adjust seasonings to taste. Serve hot with your favorite accompaniments.
Quick Tip: Blending Hot Liquids Safely
Be extremely cautious when blending hot sauce or any hot liquids. Heat causes liquids to expand, which can lead to spills or even explosions. Let the sauce cool a bit before blending. If using a regular blender, fill the pitcher only halfway, start on the lowest setting, and gradually increase speed. Always remove the small cap from the lid (the vent) and cover the opening with a kitchen towel to allow steam to escape while preventing splatters. Open the lid gently after blending to avoid sudden steam release.
Essential Tips for Instant Pot Beginners
The Instant Pot is a game-changer for quick and flavorful meals, but mastering it takes a few key understandings. If you’re new to pressure cooking, keep these tips in mind for a smooth experience:
- Factor in Total Time: Remember that the displayed “cooking time” on Instant Pot recipes doesn’t include the time it takes for the pot to build pressure or release it. Always add an extra 10-15 minutes (or more, depending on volume) for pressure build-up and whatever natural or quick release time is specified in the recipe.
- Pot Size Matters: For most family-sized meals and optimal cooking performance, a six-quart Instant Pot model is highly recommended. It offers enough capacity without being too large for everyday use.
- Always Check Seals: Before starting any pressure cooking cycle, ensure that the sealing ring is properly seated within the lid and that the steam release valve is correctly positioned to “sealing.” A loose or improperly placed seal will prevent the pot from coming to pressure.
- Prevent Burn Notices with Enough Liquid: The Instant Pot needs sufficient liquid to create steam and build pressure. If there isn’t enough liquid, or if thick sauces are directly at the bottom, you might get a “burn” warning. Always follow recipe instructions for liquid amounts and deglaze thoroughly as instructed.
- Utilize the ‘Sauté’ Function for Flavor: Don’t skip the sauté step! Browning meats or sautéing aromatics (like onions, garlic, and ginger) before pressure cooking develops a deeper, richer flavor profile that significantly enhances the final dish. It’s an often-underestimated step that truly boosts taste.
- Avoid Overfilling: Never fill your Instant Pot past the “MAX fill” line, which is usually two-thirds full for most foods and half full for foods that expand (like beans or grains). Overfilling can lead to improper cooking or dangerous pressure build-up.
Quick Tip: Safe Pressure Release
For quick release, always shift the steam release handle from ‘Sealing’ to ‘Venting’ with caution. Stand back and use a long-handled spoon or a kitchen towel to protect your hand from the burst of hot steam. Avoid placing your face or hands directly over the valve.
Storage & Leftovers
Freezing and Leftovers: Maximizing Your Meal
- Believe it or not, butter chicken often tastes even better the next day as the flavors have more time to meld and deepen.
- Refrigerate any leftovers promptly in an airtight container for up to 3-5 days. This ensures freshness and safety.
- To reheat, gently warm the butter chicken on the stovetop over low to medium heat. If the sauce has thickened too much in the fridge, you can adjust its consistency by stirring in a splash of water, chicken broth, or a bit more cream until it reaches your desired texture.
- For longer storage, butter chicken freezes beautifully. Transfer cooled butter chicken to freezer-safe containers or bags and freeze for up to 2-3 months. Thaw frozen butter chicken overnight in the refrigerator before reheating. Reheat slowly on low heat to prevent the cream from curdling, stirring occasionally.
Explore More Instant Pot & Pressure Cooker Recipes:
Soups And Stews
Instant Pot Chicken and Dumplings
Pasta And Pizza
Instant Pot Mac and Cheese
Dinner
Instant Pot Beef Stew Recipe
Slow Cooker
Crockpot Pinto Beans! (or Instant Pot)
Recipe adapted from TwoSleevers

Instant Pot Butter Chicken
Chelsea Lords
10 minutes
8 minutes
5 minutes
23 minutes
4 servings
Equipment
-
Instant Pot 6-quart
-
Blender
Ingredients
- 1 tablespoon coconut oil or olive oil
- 1 large yellow onion diced, 1-1/2 cups
- 1 tablespoon ginger paste see note 1
- 1 tablespoon minced garlic
- 1-1/4 teaspoons smoked paprika
- 1-1/4 teaspoons ground cumin
- 1-1/4 teaspoons ground turmeric
- 1-1/4 teaspoons salt
- 2-1/4 teaspoons garam masala divided, see note 2
- 1/8 teaspoon red pepper flakes optional
- 1 teaspoon sugar optional
- 1 (14.5-ounce) can tomatoes crushed or diced
- 2 pounds boneless, skinless chicken thighs see note 3
- 8 tablespoons unsalted butter sliced into tablespoons
- 1/2 cup heavy cream
- 1/3 cup finely chopped cilantro optional
- Naan warmed, for serving, see note 4
- Cooked rice for serving
Instructions
-
Set Instant Pot to “sauté” mode. Once hot, add oil, followed by onion, garlic, and ginger. Sauté until golden (3–6 mins). Add all spices, holding back 1 tsp garam masala for later. Cook, stirring constantly, for 1–3 minutes until fragrant. Add tomatoes, stirring and scraping the bottom to avoid burn warnings.
-
Mix chicken with sauce; then press into an even layer (not bunched up).
-
Secure lid and cook on high pressure (manual mode) for 8 mins. Once done, allow the pressure to release naturally for 5 minutes, then manually release the remaining pressure. Take off lid.
-
Carefully remove the chicken and chop it into bite-sized pieces. Use an immersion blender (or transfer to regular blender) to purée the sauce until smooth (see note 5).
-
Return blended sauce to the pot (if you used a regular blender). Add butter, reserved 1 tsp garam masala, and the cream. Stir until the ingredients are combined and the sauce is smooth.(Use the “sauté” function if needed to melt the butter or thicken the sauce.)
-
Mix chicken back in, add cilantro, and adjust seasoning to taste. Serve with rice and naan.
Recipe Notes
Note 2: Garam masala is a critical component for the authentic flavor of butter chicken. It’s best to divide the amount: add 1-1/4 teaspoons at the beginning when sautéing the aromatics to build a base, and incorporate the remaining 1 teaspoon at the very end to preserve its fresh, aromatic notes.
Note 3: Chicken thighs are preferred in this recipe because they are significantly juicier and more forgiving than chicken breasts when pressure cooked. Chicken breasts can sometimes become a bit rubbery, tough, or dry under high pressure.
Note 4: This dish pairs wonderfully with various rice types. Feel free to choose any rice you prefer, even microwaveable options for extra ease on busy nights. Naan bread is highly recommended for dipping into the rich, flavorful sauce.
- Warming Naan: For perfectly warm and pliable naan, lightly spray it with cooking oil and “grill” it on your stovetop over medium heat until it develops slight char marks, flipping once. Keep the warmed naan wrapped in a clean kitchen towel to maintain its warmth and softness. Alternatively, you can heat it in a skillet, toaster, or microwave (under a damp towel).
Note 5: As mentioned earlier, exercise extreme care when blending hot liquids. Allow the sauce to cool slightly, and blend slowly to prevent overflow. If using a standard blender, remember to remove the cap and cover the lid with a towel to release steam safely.
Nutrition Note: The nutrition information provided is specifically for the main butter chicken dish only and does not include any additional calories or nutrients from naan bread or rice.
Storage: Store any leftover butter chicken in an airtight container in the refrigerator for 3–5 days. When reheating on the stovetop, you can adjust the sauce thickness by adding a splash of water or cream if it has thickened too much. This dish can also be frozen for longer storage; simply thaw it in the fridge overnight and reheat on low heat to prevent the cream from curdling.
Nutrition
Nutrition information is automatically calculated, so should only be used as an approximation.
Like this? Leave a comment below!
Perfect Pairings: What to Serve with Instant Pot Butter Chicken
Instant Pot Butter Chicken is a complete and satisfying meal on its own, but pairing it with complementary sides can elevate the dining experience. Here are some classic and fresh options:
- Basmati Rice: A timeless choice, fragrant and fluffy Basmati rice provides the perfect neutral canvas to soak up every drop of the rich, creamy butter chicken sauce. Its long grains and distinct aroma make it a superior choice for Indian cuisine.
- Naan, Roti, or Paratha: These traditional Indian breads are practically essential! Their soft, chewy texture is ideal for scooping up the luscious sauce, ensuring no delicious bit is left behind. Warm them up just before serving for the best experience.
- Simple Garden Salad or Creamy Cucumber Salad: To cut through the richness of the butter chicken, a fresh, crisp salad offers a wonderful contrast. A light garden salad with a vinaigrette or a cooling, creamy cucumber salad can balance the palate beautifully.
- Raita: This refreshing yogurt-based side dish is fantastic for balancing any spice. Made with plain yogurt and often mixed with grated cucumber, mint, and a touch of cumin, raita provides a cool, tangy counterpoint. (You can find our favorite easy raita recipe on our Daal recipe post.)
- Roasted Vegetables: Add a pop of color, texture, and additional nutrients to your meal with a side of roasted vegetables. Bell peppers, zucchini, carrots, or cauliflower roasted with a touch of olive oil and Indian spices can be a delightful accompaniment.