
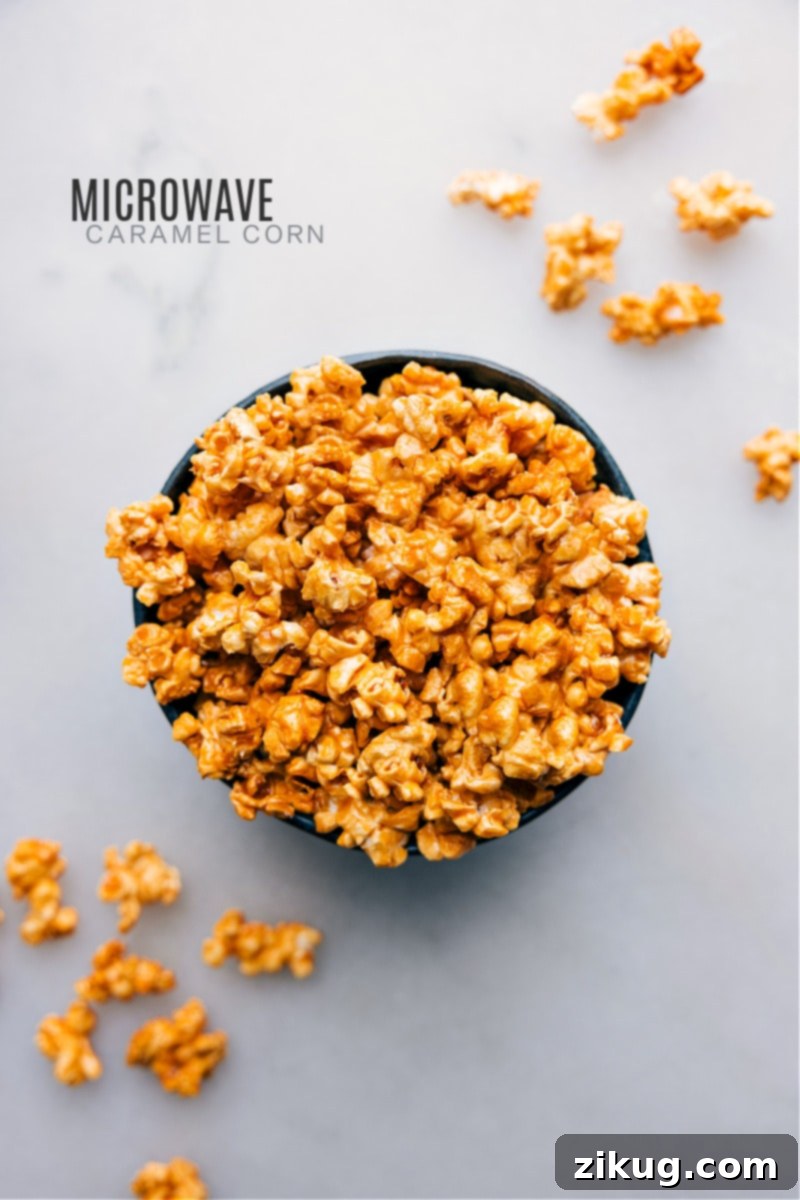
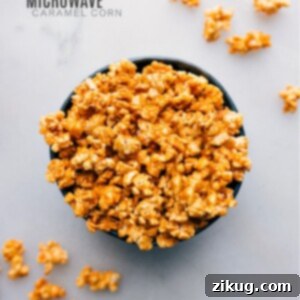
Transform your snack time with our incredibly quick and easy Microwave Caramel Corn! Achieve that coveted perfect salty-sweet crunch in mere minutes, completely eliminating the need for constant stove-top monitoring. This delightful treat is a game-changer for anyone craving homemade caramel corn without the traditional fuss.
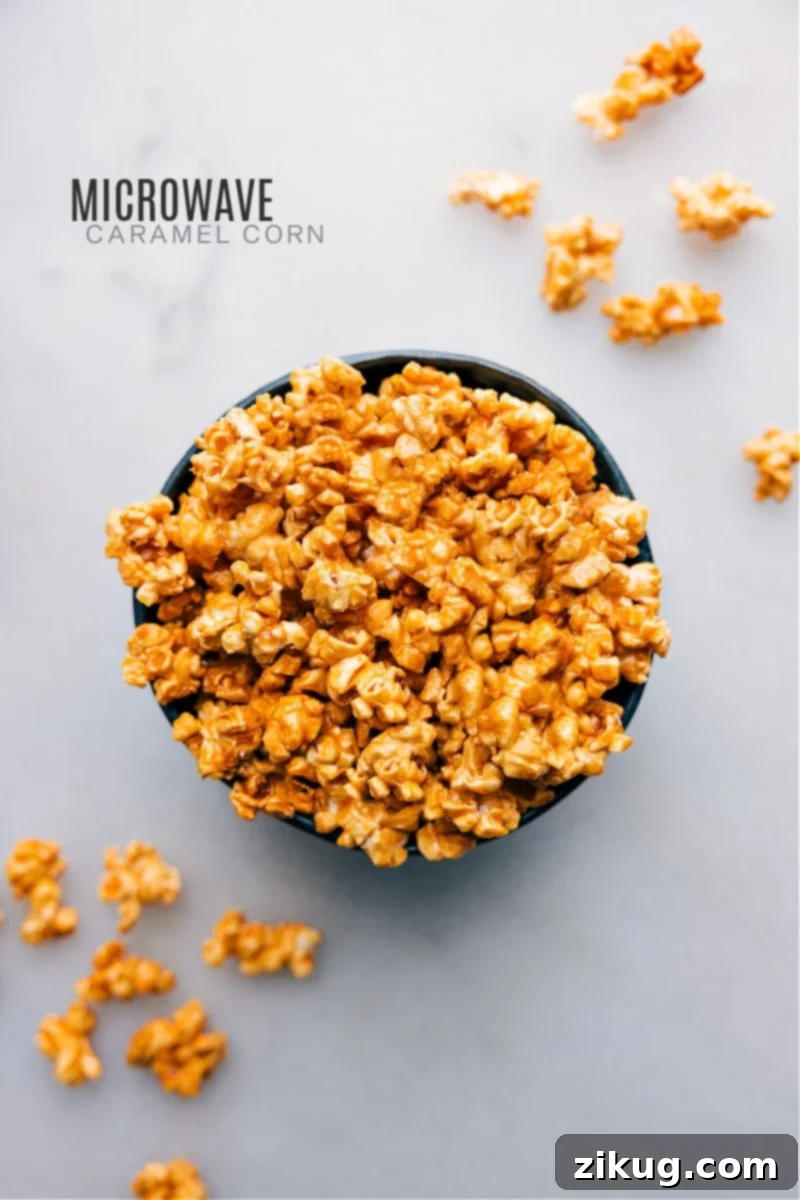

From the Author
Sweet, Salty, and Super Quick: Your Go-To Caramel Corn Solution!
There’s something truly magical about caramel corn. It hits all the right notes: a symphony of sweet and salty, with a satisfying chewiness and a delightful crunch that’s hard to beat. For years, my classic Caramel Corn recipe has been a cherished favorite, known for its deep flavor and perfect texture. It’s a recipe that truly delivers next-level goodness, taking a bit of time and precision to master the stove-top caramel.
However, life often calls for speed and simplicity. Whether you’re juggling a busy schedule, hosting an impromptu movie night, or have eager little helpers in the kitchen, sometimes the traditional method just isn’t feasible. That’s precisely when this revolutionary microwave caramel corn recipe steps in! Yes, you read that correctly – gourmet-quality caramel corn, crafted right in your microwave oven.
Prepare to be utterly amazed by this brilliant dessert hack. You’ll whip up a batch of incredibly delicious, homemade sweet-and-salty caramel corn in under 20 minutes, from start to finish. The best part? Cleanup is shockingly minimal, making this the ideal treat for any occasion where time is of the essence but flavor is non-negotiable. Say goodbye to sticky pots and pans, and hello to effortless indulgence!
Essential Ingredients for Perfect Microwave Caramel Corn
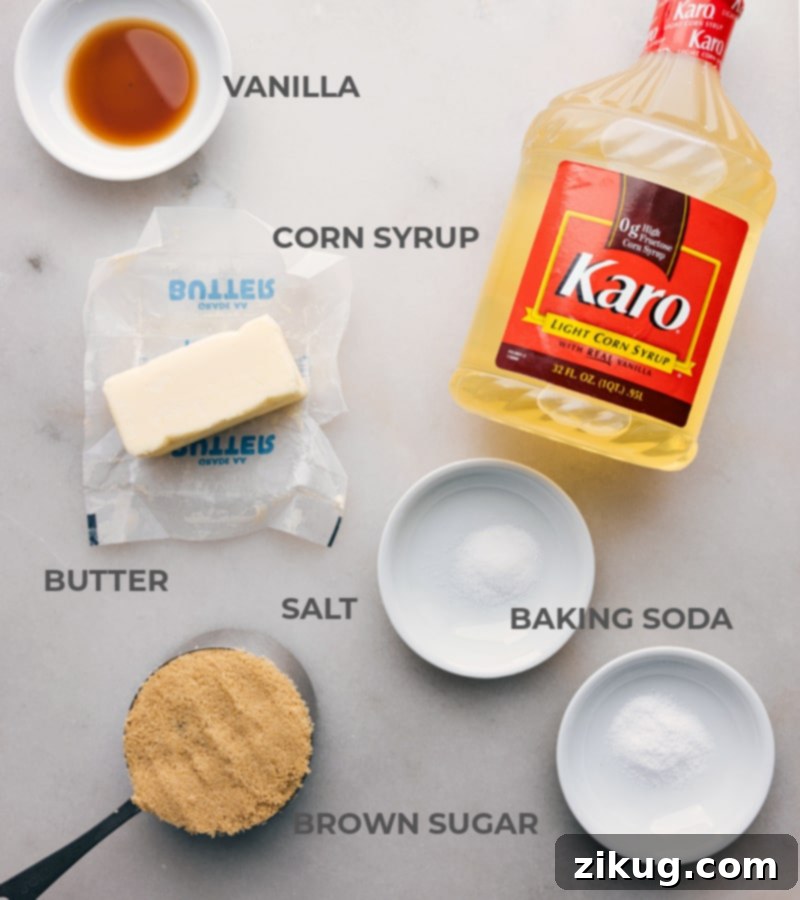
Crafting the perfect batch of microwave caramel corn relies on a few key ingredients, each playing a crucial role in achieving that desirable salty-sweet crunch. Here’s a closer look at what you’ll need and why:
- Popcorn: The foundation of our delicious snack! The type of popcorn you choose can significantly impact the final result. We’ll delve deeper into your best options in the next section to ensure every kernel is perfectly coated.
- Unsalted Butter: We opt for unsalted butter to give you complete control over the saltiness of your caramel coating. This allows for precise seasoning. If you only have salted butter on hand, it’s perfectly fine to use; just be sure to either omit or significantly reduce the additional salt called for in the recipe to prevent it from becoming overly salty.
- Corn Syrup: This often-misunderstood ingredient is vital for the caramel’s texture. Corn syrup helps prevent the sugar from crystallizing, which can lead to a grainy or brittle caramel. Instead, it ensures a smooth, glossy, and pliable caramel syrup that coats each piece of popcorn beautifully, creating that signature chewy-crisp texture.
- Light Brown Sugar: This provides the rich, deep caramel flavor we all love. Light brown sugar contains molasses, which contributes to the caramel’s complexity and its characteristic golden hue. When measuring, remember to lightly pack it into your measuring cup for accuracy. If you only have dark brown sugar, you can certainly use it, but be aware that it will impart a more robust, deeper molasses flavor to your caramel corn.
- Salt: A pinch of salt is crucial for balancing the intense sweetness of the caramel, elevating the overall flavor profile. It creates that irresistible salty-sweet contrast that makes caramel corn so addictive. If your popcorn is already pre-salted (especially if you’re using pre-popped or heavily seasoned microwave popcorn), you might want to consider omitting this additional salt or reducing it to taste.
- Baking Soda: This unassuming ingredient is the secret to achieving perfectly crunchy, rather than rock-hard, caramel corn. When baking soda reacts with the heated sugar and corn syrup, it creates tiny air bubbles within the caramel mixture. These bubbles lighten the caramel’s texture, ensuring that once it cools, the coating is delightfully crisp and easy to bite into, rather than excessively dense or sticky.
- Vanilla Extract: Vanilla is a flavor enhancer that adds a wonderful depth and aromatic complexity to the caramel. It rounds out the sweetness and provides a warm, comforting note. Always opt for a good quality pure vanilla extract for the best flavor results. Artificial vanilla can often leave an unpleasant “off” or chemical aftertaste, detracting from the homemade goodness of your caramel corn.
Choosing the Best Popcorn for Your Microwave Caramel Corn
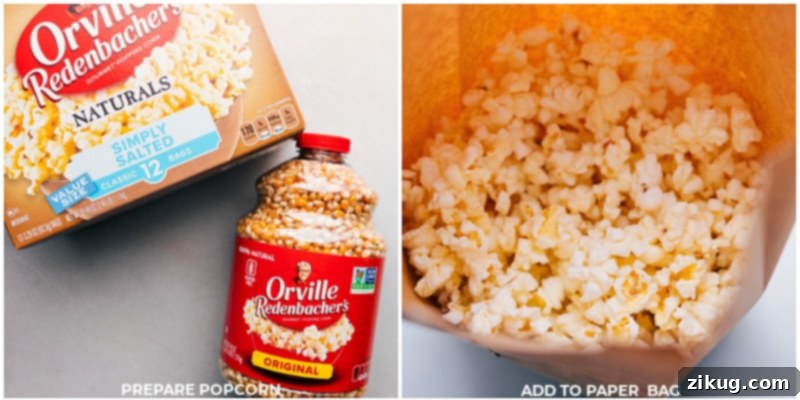
The type of popcorn you select is fundamental to the success and flavor of your microwave caramel corn. To ensure you achieve the best possible texture and taste, it’s important to start with the right foundation. Here are a few popular options and tips for each:
- If you purchase already popped popcorn, this recipe comes together in record time, shaving off a few precious minutes from your preparation. However, convenience often comes at a price, and pre-popped varieties can be quite a bit more expensive than popping your own kernels. If choosing this route, opt for a plain or lightly salted variety to better control the final flavor.
- If using microwave popcorn packets, aim for brands with minimal seasonings. Avoid the heavily buttered, “movie-theater style” options, as their intense flavors and oils can interfere with the caramel coating. Popcorn servings can vary widely by brand, typically ranging from 8 to 12 cups per bag. To be on the safe side and ensure you have enough for this recipe, plan on popping two bags. Our favorite packet popcorn for this recipe is a simple, lightly salted variety.
- For a cost-effective and fresh alternative, you can easily make microwave popcorn from your own kernels. This method gives you maximum control over ingredients. To do this, place ¼ cup of popcorn kernels and a teaspoon of vegetable oil in a standard brown paper lunch bag. Fold the top of the bag over twice to secure it. Microwave on high for approximately 2 ½ to 3 minutes, or until the popping sounds slow significantly to about one pop every 2 seconds. Be careful not to overcook, as burned popcorn can quickly fill your kitchen with an unpleasant odor. You will need to prepare four such bags to yield the required amount of popped corn for this recipe.
- Finally, if you prefer the traditional method, you can also make popcorn on the stove using about 1 cup of kernels. While this recipe is designed for microwave convenience, stove-top popcorn works just as well. You might end up with a bit of extra popcorn, but we’re confident it won’t go to waste – someone will surely be eager to help you finish it!
Quick Tip: Perfecting Your Popcorn Base
When measuring out your popped popcorn, a quart measuring cup (equal to 4 cups) can be surprisingly helpful for easy scooping and accurate measurement. A critical step often overlooked is the removal of any un-popped kernels, also known as “old maids.” These hard kernels can be a real nuisance in a batch of caramel corn. An easy and effective way to remove them is to sift the popcorn. Simply place a wire cooking rack (like a cooling rack) over a large bowl, pour the popped popcorn over the rack, and gently jostle it. The smaller, un-popped kernels will fall through the rack into the bowl below, leaving you with a perfectly fluffy and kernel-free popcorn base.
The Indispensable Large Brown Paper Bag for Microwave Caramel Corn
For this incredibly convenient microwave caramel corn recipe, a seemingly humble but essential piece of equipment is a large brown paper grocery bag. Yes, the kind you might get from the supermarket! This bag isn’t just a container; it’s a crucial part of the cooking process, allowing the caramel to evenly coat the popcorn while also providing a safe environment for microwave heating and vigorous shaking.
Depending on your location, finding these large brown paper bags can sometimes be a bit of a challenge due to changing retail practices. Therefore, it’s a smart idea to plan ahead: if you happen to come across them during your grocery runs, save a bag (or a few!) specifically for this recipe. They’re worth stocking up on!
If you find yourself unable to locate a traditional large brown paper grocery bag, don’t despair! We have a couple of excellent alternative options to ensure you can still enjoy this delightful treat:
- Order them online: In our increasingly digital world, almost anything is available at your fingertips. You can readily purchase packs of large kraft brown paper bags from online retailers. While this might mean buying a larger quantity (e.g., a pack of 50), trust us, you’ll be glad to have them on hand for future batches. Once you experience the convenience and deliciousness of Microwave Caramel Corn, we bet you’ll want a dedicated stash of these bags for many more sweet adventures!
- Utilize giant brown paper lunch sacks: If the standard grocery bag proves elusive, giant brown paper lunch sacks can serve as a fantastic substitute. However, due to their smaller capacity, you’ll need to adjust the recipe accordingly. If you choose this method, be sure to halve the entire recipe. These smaller paper sacks work exceptionally well with reduced quantities, ensuring your caramel corn still turns out perfectly coated and crispy without overflowing.
Mastering Microwave Caramel Corn: Essential Tips for Success
While this recipe is incredibly straightforward, a few key tips will ensure your Microwave Caramel Corn turns out perfectly crunchy, evenly coated, and absolutely irresistible every single time. Pay attention to these details for a truly successful sweet treat:
- Safety First and Always: Working with hot caramel requires caution. Be extremely careful when opening the brown paper bag after each microwave burst, as the steam trapped inside will be intensely hot and can cause burns. Similarly, the caramel sauce itself will reach very high temperatures during preparation. Always handle bowls and bags with oven mitts or thick towels, and supervise children closely if they are helping.
- Thorough Caramel Mixing is Key: When combining the butter, corn syrup, brown sugar, and salt for your caramel syrup, ensure you mix the ingredients thoroughly before and after each microwave interval. This consistent stirring helps to dissolve the sugar evenly, prevents scorching, and ensures a homogenous, smooth caramel base. Don’t rush this step; proper mixing leads to superior caramel.
- Choose a Generous Bowl Size: When it’s time to add the baking soda and vanilla extract to your hot sugar mixture, be prepared for a significant reaction. The mixture will foam up surprisingly high and rapidly due to the baking soda. Using a sufficiently large, deep, microwave-safe bowl will prevent any messy overflows and keep your kitchen clean.
- Vigorous Shaking for Even Coating: Once the caramel is poured over the popcorn in the paper bag, vigorous shaking is absolutely paramount! This isn’t a gentle stir; it’s a full-on shake to ensure every single kernel gets thoroughly coated with that delicious caramel. Shake well after the initial pour and again after each subsequent microwaving burst. The more thoroughly you shake, the more uniform and delicious your caramel corn will be.
- Work Swiftly with the Caramel: Caramel has a tendency to harden as it cools, so speed is of the essence when pouring the hot caramel sauce over your popcorn. Don’t hesitate or delay; pour quickly and then immediately seal the bag and start shaking. Coating the popcorn as evenly as possible while the caramel is still hot and fluid is crucial for optimal coverage and texture.
- Patient Cooling for Perfect Crunch: It’s incredibly tempting to dive into a warm batch of freshly coated caramel corn, but patience is a virtue here. Allow the popcorn to cool and harden properly on your prepared sheet pan before serving. This cooling period is essential for the caramel to set fully, achieving that desired crispy, crunchy texture. Rushing this step will result in sticky, soft caramel corn, which is still tasty, but not the ideal experience.
Quick Tip: Caramel or CarmEL?
Ever wondered about the correct spelling of this delightful candy coating? It’s “caramel”! “Carmel” is the proper name of various cities or locations, like Carmel, Indiana, or Mount Carmel. While regional pronunciations vary widely – some say “CAR-muhl,” others “CARE-uh-mel” – once you know the correct spelling, it logically follows that pronouncing it “care-a-mel” aligns best with its written form. Either way, it tastes delicious!
Unleash Your Creativity: Exciting Variations for Microwave Caramel Corn
Once you’ve mastered the basic Microwave Caramel Corn recipe, feel empowered to unleash your inner chef and experiment with a myriad of exciting flavors! The beauty of this recipe lies in its versatility, making it a perfect canvas for your culinary imagination. A simple sprinkle of cinnamon can add a comforting, warming twist, while a decadent drizzle of melted chocolate over the cooled popcorn elevates it to an extra-indulgent dessert. Don’t be afraid to personalize your batch!
- Cinnamon Sugar Caramel Corn: For a delightful spiced twist, simply mix in a teaspoon of ground cinnamon with your brown sugar before preparing the caramel. This infuses the caramel with a warm, aromatic flavor. Alternatively, for an even sweeter and more cinnamon-forward experience, you can adapt the topping quantities from my popular Cinnamon Roll Popcorn recipe.
- Decadent Chocolate Drizzle: Once your caramel corn has completely cooled and set, take it up a notch with a luscious chocolate drizzle. Melt your favorite dark, milk, or white chocolate (or a combination!) and generously drizzle it over the caramel corn. For an extra layer of gourmet flavor, consider sprinkling a touch of flaky sea salt on top of the wet chocolate – the sweet and salty combination is truly divine, reminiscent of my Chocolate Popcorn.
- Peanut Butter Caramel Popcorn: For the ultimate nutty indulgence, incorporate 2 tablespoons of smooth peanut butter directly into your caramel mixture during the melting process. Stir it in until fully combined and smooth. After coating, you can also sprinkle some chopped roasted peanuts over the top of the popcorn for an added layer of crunch and rich peanut flavor.
- Maple Pecan Caramel Corn: Elevate your caramel corn with the rich, autumnal flavors of maple and pecan. Simply substitute the corn syrup with an equal amount of pure maple syrup. Before the final microwaving steps, sprinkle a generous amount of chopped pecans over the popcorn. The nuts will toast slightly and infuse their flavor into the caramel.
- Tropical Coconut Almond Delight: For a taste of the tropics, add ¼ cup of shredded coconut to your popped popcorn before pouring over the caramel. After spreading the coated popcorn onto your baking sheet to cool, sprinkle it generously with chopped almonds. This combination offers a delightful texture and an exotic flavor profile.
- S’mores Caramel Corn: Recreate the campfire classic in your kitchen! Once the caramel corn has cooled and set, mix in mini marshmallows, broken graham cracker pieces, and chocolate chunks. This variation is particularly fantastic for kids’ parties or as a fun, nostalgic treat.
Explore More Delicious & Easy Dessert Recipes:
Desserts
Irresistible Muddy Buddy Bars
Desserts
Homemade Buncha Crunch
Bars
Easy Lemon Icebox Cake (Only 4 Ingredients!)
Desserts
Dreamy Chocolate Chip Dip
Print Recipe
☆
☆
☆
☆
☆
Microwave Caramel Corn
Chelsea Lords
20 minutes
20 minutes
16 cups
Video Tutorial
Equipment You’ll Need
-
Large sheet pan (15″ x 21″) plus wax paper, parchment paper, or foil
-
1 Large brown paper grocery bag or 2 smaller ones, see note 1 below for alternatives
-
Large microwave-safe bowl
Ingredients for Microwave Caramel Corn
- 16 cups popped popcorn (from microwave bags or 1 cup kernels—see note 2 below)
- 8 tablespoons unsalted butter (1/2 cup)
- 1/4 cup corn syrup (light or dark)
- 1 cup light brown sugar (lightly packed)
- 1/2 teaspoon salt
- 1/2 teaspoon baking soda
- 1 teaspoon vanilla extract
Step-by-Step Instructions
-
Prepare your cooling surface: Line a very large sheet pan (approximately 15″ x 21″) with either foil, wax paper, or parchment paper. This will be where your caramel corn cools and hardens, preventing sticking. Set this aside for later.
-
Pop the popcorn: Prepare your popcorn using your preferred method (refer to “What Popcorn To Use” section and note 2 for detailed options). Once popped, carefully measure out 16 cups of fluffy popcorn. This is a crucial step: take care to remove all unpopped kernels (“old maids”) to ensure a pleasant eating experience. Transfer the cleaned, popped popcorn into a large brown paper grocery bag.
-
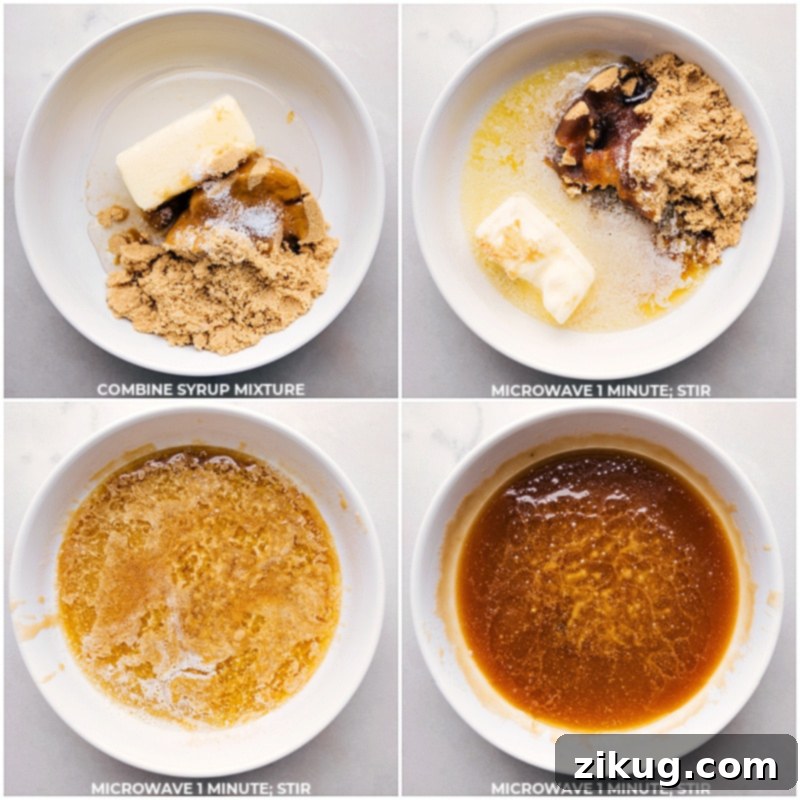
Make the caramel base: In a fairly large, microwave-safe bowl, combine the unsalted butter, corn syrup, light brown sugar, and salt. Microwave this mixture on high for 3 minutes. Stop and stir thoroughly after each minute to ensure even heating and proper melting of the sugar. By the end of this step, you should have a thick, smooth, and well-combined caramel mixture.
-
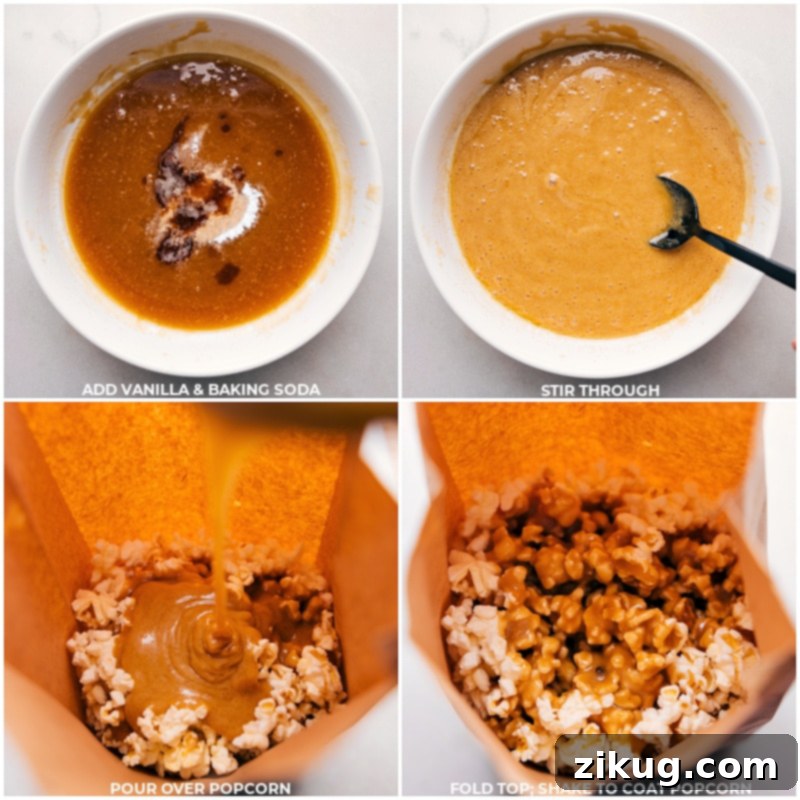
Activate the caramel: In a small, separate bowl, combine the baking soda and vanilla extract. Give this a quick stir, then pour this mixture immediately over the hot butter, sugar, and syrup mixture in the larger bowl. Stir briskly. You will notice the caramel foaming up significantly; this is the baking soda reacting, which is vital for creating that perfectly crunchy, non-sticky texture. Make sure your bowl is large enough to accommodate this foam!
-
Coat the popcorn: Working quickly, pour the entire foaming caramel mixture over the popcorn in the large brown paper bag. Immediately fold the top of the bag over at least twice to securely seal it. Now, shake the bag very well and vigorously to evenly distribute the hot caramel syrup over all the popcorn kernels. Ensure every piece is coated!
-
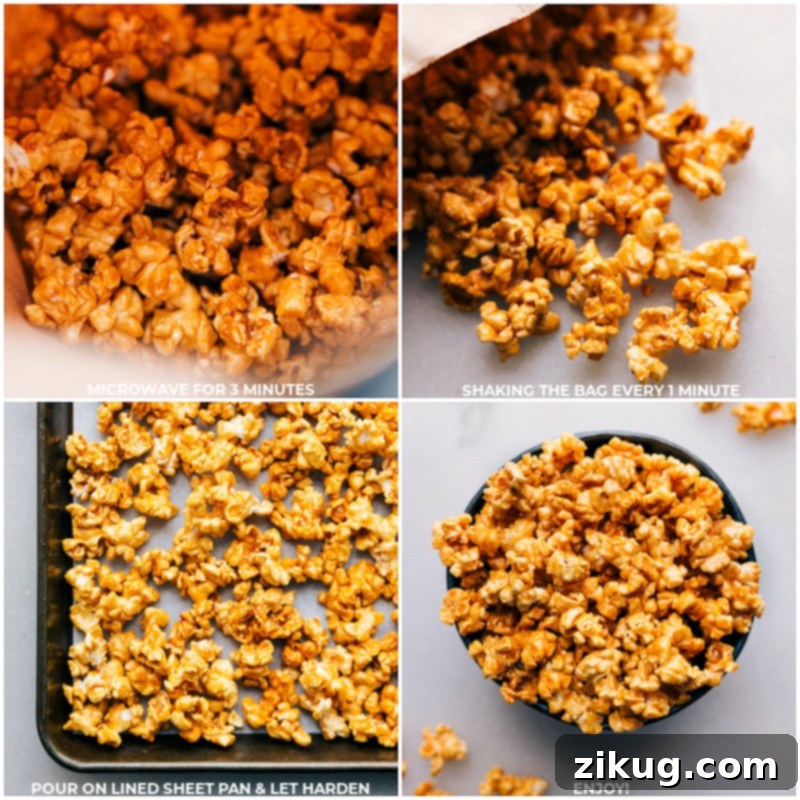
Microwave and shake again: Place the sealed paper bag (with the top still folded over) into the microwave. Heat on high for 1 minute. Carefully remove the bag (remembering it will be hot!) and shake it very well again to redistribute the caramel. Repeat this step two more times: microwave for 1 minute, remove, and shake thoroughly. This results in a total of three one-minute microwave blasts, with two vigorous shakes in between each. This process helps the caramel adhere and dry properly.
-
Cool and enjoy: Once the final microwave and shake cycle is complete, carefully empty the caramel-coated popcorn onto your foil-lined baking sheet. Spread it out loosely over the entire surface, intentionally leaving some clusters grouped together for varied texture. Allow the caramel corn to cool completely until it firms up and dries to a crisp, non-sticky consistency. This may take 15-30 minutes. Once fully cooled, break apart any large clusters and enjoy your perfectly crunchy, homemade Microwave Caramel Corn!
Important Recipe Notes
Note 2: Popcorn Preparation Options: Here are a few flexible options for getting your 16 cups of popped popcorn:
- If purchasing already popped popcorn, you’ll save a bit of time, but it tends to be more expensive. Choose a plain or very lightly salted variety.
- If using microwave popcorn packets, avoid heavily buttered or seasoned types. Two bags are typically sufficient to yield 16 cups, but check the package for exact serving sizes (they range from 8-12 cups). Our favorite is Orville Redenbacher’s Naturals Simply Salted.
- To make microwave popcorn from your own kernels: Place ¼ cup kernels and 1 teaspoon vegetable oil in a standard brown paper lunch bag, fold the top twice to seal. Microwave on high for 2.5 to 3 minutes, or until popping slows to one pop every 2 seconds. Make sure not to overcook! You’ll need to prepare four such bags for this recipe.
- For stove-top popcorn, use about 1 cup of kernels. This might yield a bit more than 16 cups, but it’s always better to have extra delicious popcorn!
Storage Tips: To keep your Microwave Caramel Corn fresh and crunchy, store any leftovers in an airtight container at room temperature for up to 3 days. For longer preservation, you can freeze it in a sealed freezer bag for up to 3 months. Thaw at room temperature before enjoying.
Nutritional Information
Nutrition information is automatically calculated and is an estimate. Please use it only as an approximation and consult a professional for precise dietary advice.
Loved this recipe? Share your thoughts below!