
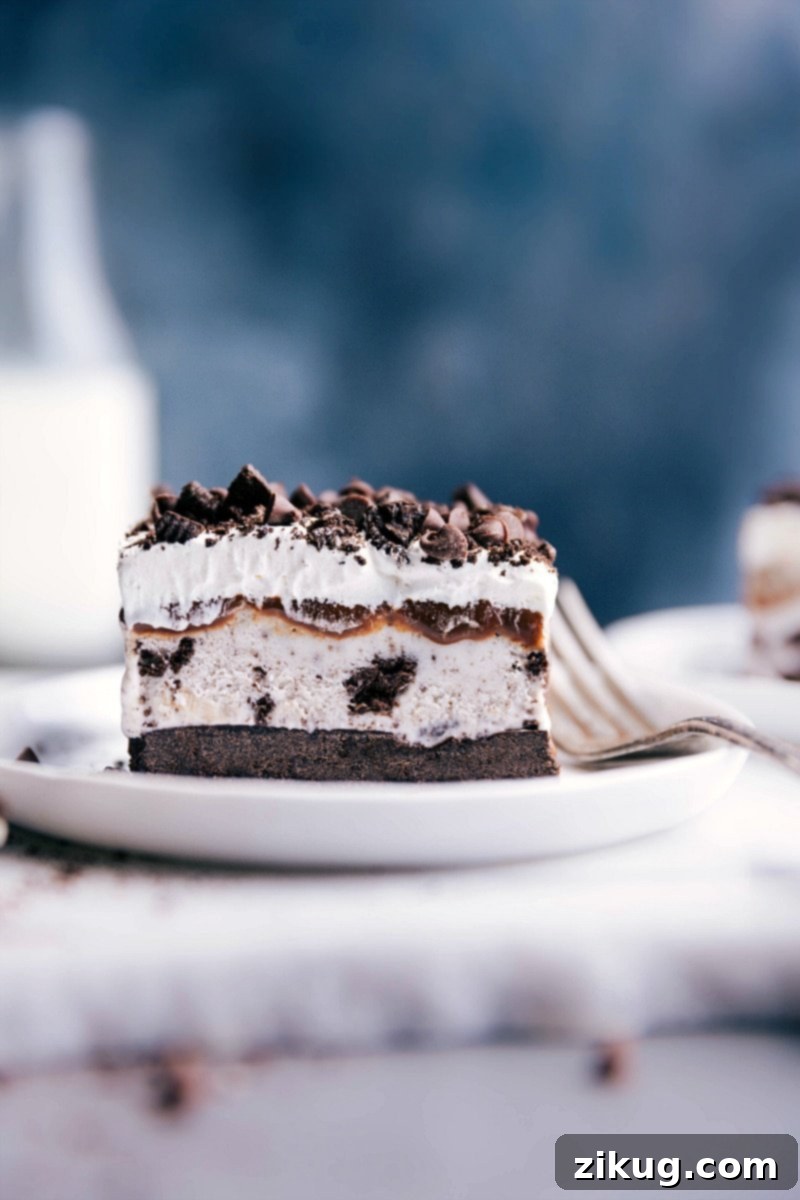
Indulge in the ultimate summer treat with this incredibly rich, sweet, and utterly delicious Oreo Ice Cream Cake Recipe. Featuring a decadent Oreo crust, layers of creamy cookies and cream ice cream, luscious hot fudge, and a cloud-like whipped topping, this dessert is designed to impress and delight. Perfect for any celebration or a refreshing cool-down, this homemade ice cream cake is surprisingly simple to make with just a few key ingredients, promising a taste experience that truly rivals any store-bought version.
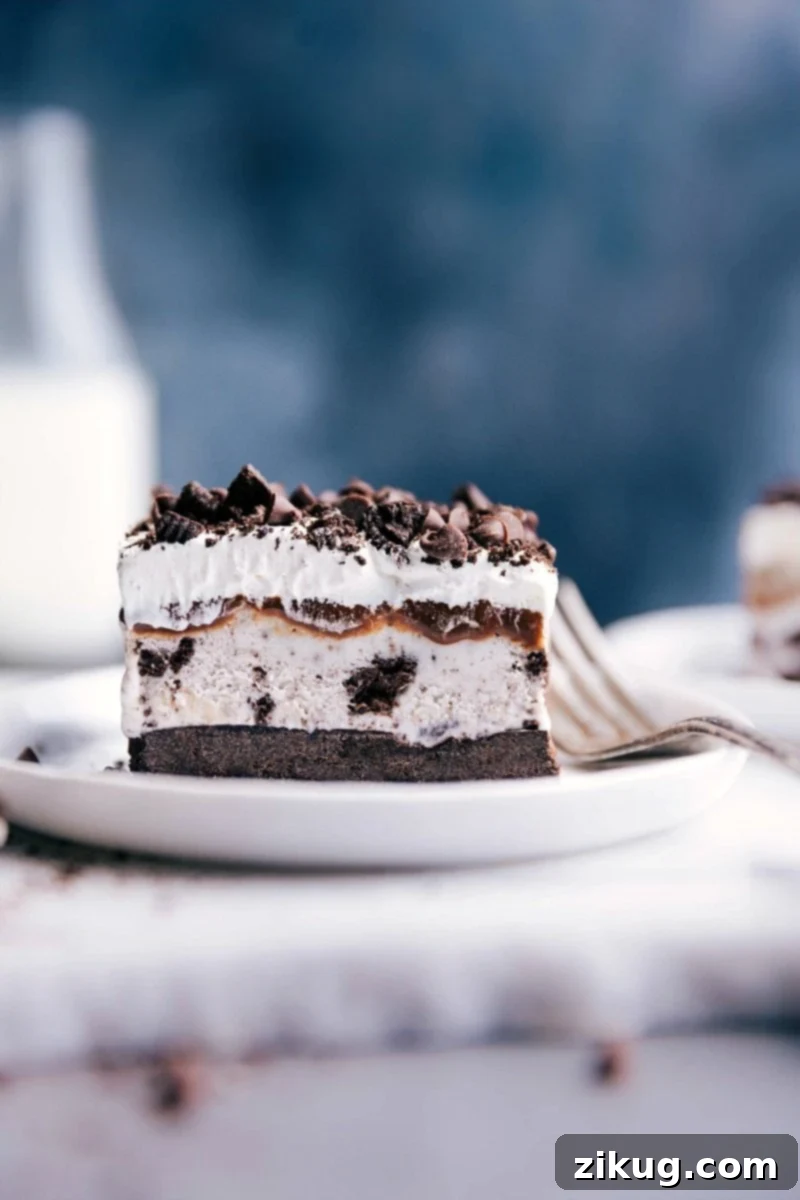

Why This 5-Ingredient Oreo Ice Cream Cake is an Absolute Must-Try!
As a passionate advocate for all things ice cream, I’ve had the pleasure of sharing numerous frozen dessert creations over the years, from rich brownie crust bars to unique Samoa cookie-inspired treats, and even a wonderfully simple three-ingredient ice cream pie. My love for ice cream runs deep, and it’s a passion I inherited from my mom, who is legendary among our family and friends for her incredible ice cream desserts.
This particular Oreo Ice Cream Cake holds a special place in my heart – it’s a recipe my mom perfected and made frequently. It’s a symphony of chocolate and Oreos, making it the ultimate indulgent cool-down treat for any occasion. What truly makes this recipe exceptional is its simplicity: it requires just **five core ingredients** to create a dessert that, in my humble opinion, completely surpasses any Baskin-Robbins Oreo Ice Cream Cake. Prepare to be amazed by how easily you can create such an epic and satisfying dessert!
Essential Ingredients for Your Homemade Oreo Ice Cream Cake
Crafting this delightful Oreo ice cream cake is surprisingly straightforward, thanks to a concise list of readily available ingredients. Each component plays a crucial role in creating the perfect balance of flavors and textures.
- Oreos: These iconic chocolate sandwich cookies are the star of the show! They form the crunchy base of our cake and can also be used as a decorative garnish for an extra touch of Oreo goodness. You’ll use them whole, no need to scrape out the cream filling, making preparation even easier.
- Unsalted Butter: When melted and mixed with the crushed Oreos, butter creates a firm, flavorful crust that holds its shape beautifully. Using unsalted butter allows you to control the overall saltiness of the dessert.
- Cookies and Cream Ice Cream: The heart of this dessert! Choose a high-quality brand you love, as its flavor will shine through. Many people recommend Tillamook® and Turkey Hill® for their rich, creamy texture and generous cookie chunks. For those curious about different options, a popular article once ranked 15 different brands to help you find your perfect scoop.
- Hot Fudge Sauce: A luscious layer of hot fudge adds a rich, gooey chocolate dimension that perfectly complements the cookies and cream. While a good store-bought hot fudge works wonders, you can also elevate this cake with a homemade hot fudge sauce for an extra touch of decadence.
- Whipped Topping (Cool Whip or Homemade): This light and airy topping provides a delightful contrast to the rich ice cream and fudge. Classic Cool Whip is a convenient choice, but for a truly gourmet finish, consider using TruWhip® or even making your own homemade whipped cream (recipe included in the notes below!).
Quick Prep Tip
Don’t waste time separating the cookie halves or scraping off the white frosting! For the crust, simply crush the entire Oreo cookie, cream filling and all. This saves precious time and adds to the overall flavor of your delicious crust.
Expert Tips for Crafting the Perfect Oreo Ice Cream Cake
Achieving a show-stopping Oreo ice cream cake is easy with these helpful tips and tricks. Follow these guidelines to ensure your dessert turns out perfectly firm, beautifully layered, and utterly delicious.
- Cool Butter Before Mixing: After melting your butter, allow it to cool slightly before combining it with the crushed Oreos. This prevents the butter from melting the cookie crumbs too much and helps create a more cohesive and less greasy crust.
- Finely Crush Oreos for the Crust: While larger chunks of Oreos in the crust will still taste great, a finer crumb ensures cleaner, more attractive slices. For the best results, use a powerful blender or a food processor to pulverize the cookies into fine crumbs. This helps the crust compact properly and prevents crumbling when cut.
- Experiment with Different Oreo and Ice Cream Flavors: Don’t be afraid to get creative! While classic Oreos and cookies and cream ice cream are fantastic, consider variations like Golden Oreos with vanilla ice cream, Mint Oreos with mint chocolate chip ice cream, or even peanut butter Oreos with peanut butter ice cream for a unique twist. The possibilities are endless!
- Use Parchment Paper for Easy Removal: Lining your 9×13-inch pan with parchment paper, leaving a slight overhang on the sides, is a game-changer. This simple step makes it incredibly easy to lift the entire cake out of the pan once it’s frozen solid, ensuring perfect, intact slices every time.
- Allow to Stand Before Cutting: For the cleanest cuts and best texture, let your frozen cake stand at room temperature for about 5 minutes before slicing. This slight softening makes it easier to cut through the layers without cracking.
- Use a Hot, Sharp Knife: The secret to perfectly clean slices of ice cream cake is a hot, sharp knife. Run a sharp knife under hot water for a few seconds, then wipe it dry before each cut. This technique helps the blade glide smoothly through the frozen layers.
- Return Leftovers to the Freezer Promptly: To maintain its integrity and delicious texture, any leftover Oreo ice cream cake should be returned to the freezer immediately after serving.
Storage Guidelines
Handling Leftovers
Proper storage is key to enjoying your homemade Oreo Ice Cream Cake for as long as possible. For best results, place any leftover slices or the remaining cake in an airtight container or wrap it tightly in several layers of plastic wrap and then foil. This prevents freezer burn and keeps unwanted odors out. While the cake is best enjoyed within a few days for optimal texture, it will keep well in the freezer for up to a month. Be mindful that the whipped topping, if not homemade with stabilizers, can sometimes become slightly icy upon thawing and refreezing, so aim to enjoy the cake relatively soon after preparation.
More Irresistible Ice Cream Treats to Explore:
Desserts
Cookie Dough Ice Cream Bars
Desserts
Churro Ice Cream Sandwiches
Desserts
Homemade Gelato Recipe
Desserts
Mint Ice Cream Bars
Print Recipe
Easy Oreo Ice Cream Cake Recipe
Chelsea Lords
This Oreo Ice Cream Cake Recipe is a sweet and delicious triumph, featuring a thick Oreo crust, creamy cookies-and-cream ice cream, a rich layer of hot fudge, and a dreamy whipped topping finish!
20 minutes
3 hours
3 hours 20 minutes
24 bars
Equipment
-
9 x 13-inch baking pan
-
Parchment paper
-
Blender or food processor
Ingredients
- 36 regular Oreos (no need to separate creme filling from cookie; plus 3–4 additional Oreos if desired for topping)
- 7 tablespoons unsalted butter (melted and slightly cooled)
- 1 (12 to 14-ounce) container hot fudge topping
- 1-1/2 (48-ounce) containers cookies and cream ice cream (approximately 72 ounces total ice cream, just over 1/2 gallon)
- 1 (8-ounce) container whipped cream (such as Cool Whip, completely thawed; see Note 1 below for homemade whipped cream option)
Instructions
-
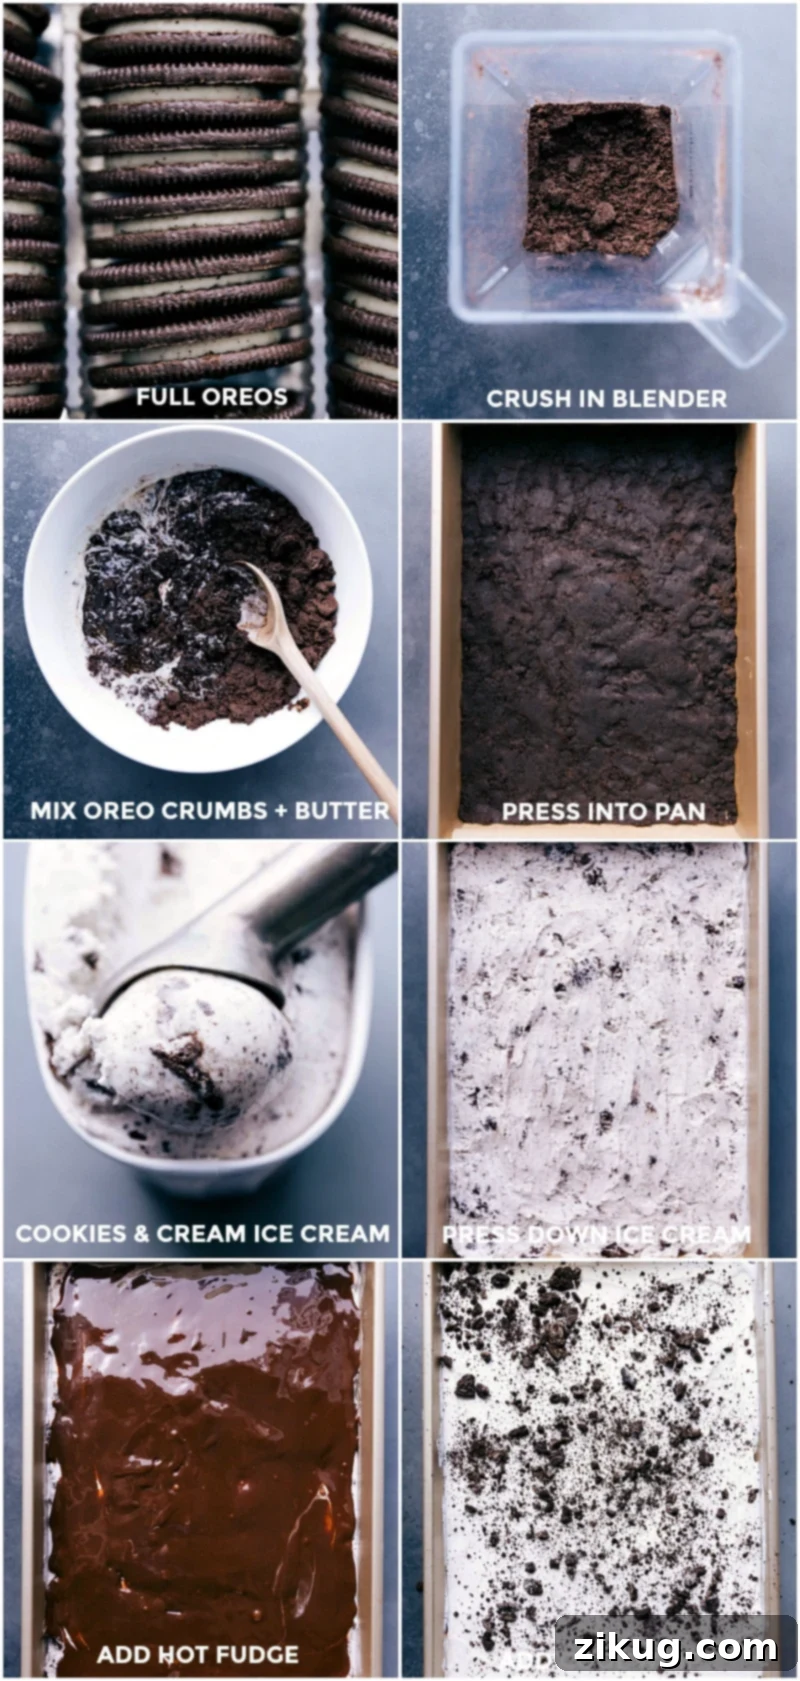
Begin by preparing your baking pan. Line a standard 9×13-inch baking pan with parchment paper. Ensure you leave a generous overhang on the sides, as this will make lifting the finished ice cream cake out of the pan significantly easier. Set the prepared pan aside for now.
-
Next, prepare the Oreo crust. In a powerful blender or food processor, add the 36 regular Oreos (remember, there’s no need to remove the cream filling!). Blend or pulse until the cookies are reduced to fine crumbs. It’s important to reblend any larger chunks to ensure a consistently fine crumb, which will help the crust cut cleanly later. Once the Oreos are finely crushed, transfer them to a mixing bowl and pour in the melted and slightly cooled unsalted butter. Stir the mixture thoroughly until a thick, uniform dough forms. Press this cookie mixture firmly and evenly into the bottom of your prepared 9×13-inch pan. For a perfectly compacted crust, use the bottom of a 1-cup measuring cup or a flat-bottomed glass to press down firmly. There’s no need to press the crust up the sides of the pan.
-
Now for the ice cream layer. Take your cookies and cream ice cream out of the freezer and let it soften slightly for about 5-10 minutes, making it easier to scoop. Scoop large portions of the softened ice cream directly over the prepared Oreo crust. Using a silicone spatula or the back of a spoon, gently but firmly press down the ice cream and smooth it out into an even layer, ensuring it covers the entire crust. Cover the pan tightly with aluminum foil or plastic wrap and place it in the freezer for 1–2 hours, or until the ice cream layer is completely firm.
-
Once the ice cream layer is firm, it’s time for the hot fudge. Open the entire jar (12 to 14-ounce) of hot fudge topping and spoon it evenly over the frozen ice cream layer. Using a clean spatula, carefully spread the fudge into a smooth, even layer across the entire surface. This step might require a little patience as the fudge can be thick, but it will eventually spread out. Once spread, cover the pan again and return it to the freezer for another 1 hour to allow the fudge layer to set.
-
For the final layer, take your completely thawed whipped topping (Cool Whip or homemade) and, using a spatula, spread it smoothly and evenly over the set hot fudge layer. If you desire, take the 3–4 extra Oreos and crush them (either by hand, in a bag with a rolling pin, or with a quick pulse in a blender/food processor), then sprinkle these crumbs generously over the top of the whipped topping for an added decorative touch and texture. Cover the cake once more and return it to the freezer to firm up for at least 20–30 minutes, or preferably overnight for the best results.
-
When you’re ready to serve, remove the cake from the freezer and let it stand at room temperature for approximately 5 minutes. This brief softening period will make cutting much easier. Use the parchment paper overhang to carefully lift the entire frozen cake out of the pan. For clean, sharp slices, use a hot, sharp knife (simply run it under hot water, then dry it thoroughly with a towel before each cut). Slice into desired bar sizes and serve immediately. Any remaining bars should be returned to the freezer promptly. Enjoy your magnificent homemade Oreo Ice Cream Cake!
Recipe Notes and Expert Advice
Note 1: Homemade Whipped Cream Alternative
While Cool Whip offers convenience, making your own whipped cream provides a fresh, luxurious taste that can elevate your Oreo Ice Cream Cake. Here’s how:
- 1 cup heavy cream (cold)
- 1/2 cup powdered sugar
- 1/2 teaspoon vanilla extract
In the bowl of a stand mixer fitted with a whisk attachment (or using a hand mixer), combine the cold heavy cream, powdered sugar, and vanilla extract. Beat on low speed to combine the ingredients, then gradually increase the speed to high. Continue whipping until firm peaks form, which typically takes about 2–4 minutes. Be careful not to over-whip, as it can turn into butter. Once firm, gently spread this freshly made whipped cream over your ice cream layer with a spatula until it’s smooth and even.
Storage Tips: Return any leftovers of your Oreo Ice Cream Cake promptly to the freezer. For optimal texture and to prevent freezer burn, wrap individual slices or the remaining block tightly in plastic wrap, then enclose in an airtight container or a layer of aluminum foil. The whipped topping, especially if it’s a store-bought variety or homemade without gelatin, doesn’t always thaw and refreeze perfectly (it can become a bit icy). For the best experience, try to finish the cake within a few days of making it.
Nutrition Information
Serving: 24 servings | Calories: 283 kcal | Carbohydrates: 33.1g | Protein: 3.4g | Fat: 15.4g | Cholesterol: 40mg | Sodium: 137mg | Fiber: 0.8g | Sugar: 22.9g
Nutrition information is automatically calculated and should only be used as an approximation. Actual values may vary based on specific brands and preparation methods.
Frequently Asked Questions About Oreo Ice Cream Cake
- Can I make this Oreo Ice Cream Cake ahead of time?
- Absolutely! This is one of the best make-ahead desserts. You can prepare the entire cake up to a week in advance and store it tightly wrapped in the freezer. Just remember to let it soften for 5-10 minutes before slicing and serving.
- What if I don’t have a food processor or blender? How can I crush the Oreos?
- No problem! Place the Oreos in a large Ziploc bag, seal it, and use a rolling pin or the bottom of a heavy pan to crush them into fine crumbs. It might take a little more effort, but the result will be just as delicious.
- Can I use a different type of ice cream?
- Yes, definitely! While cookies and cream ice cream is a classic choice that complements the Oreo crust perfectly, feel free to experiment. Vanilla, chocolate, mint chocolate chip, or even strawberry ice cream would all make fantastic variations. Just ensure the ice cream is slightly softened before spreading for an even layer.
- Is it possible to make this cake gluten-free?
- Yes, you can easily adapt this recipe to be gluten-free. Simply use gluten-free Oreo-style cookies for the crust and ensure your chosen cookies and cream ice cream and hot fudge topping are also certified gluten-free. Many brands offer excellent gluten-free alternatives now!
- How do I prevent the cake from becoming too icy?
- The key is to minimize the time the ice cream is out of the freezer and to wrap the cake very tightly. When working with the ice cream and fudge layers, try to work quickly. Once assembled, ensure the cake is covered with both plastic wrap and foil to prevent air exposure and freezer burn, which can lead to ice crystals forming.
There you have it – a simple yet spectacular Oreo Ice Cream Cake recipe that is guaranteed to become a family favorite! Whether you’re a seasoned baker or a beginner, the ease and deliciousness of this dessert will undoubtedly impress. Its creamy textures, rich chocolate flavors, and iconic Oreo crunch make it an unforgettable treat. So go ahead, whip up this amazing cake, and get ready to enjoy a slice of pure happiness. Don’t forget to share your creations and any variations you try in the comments below!