
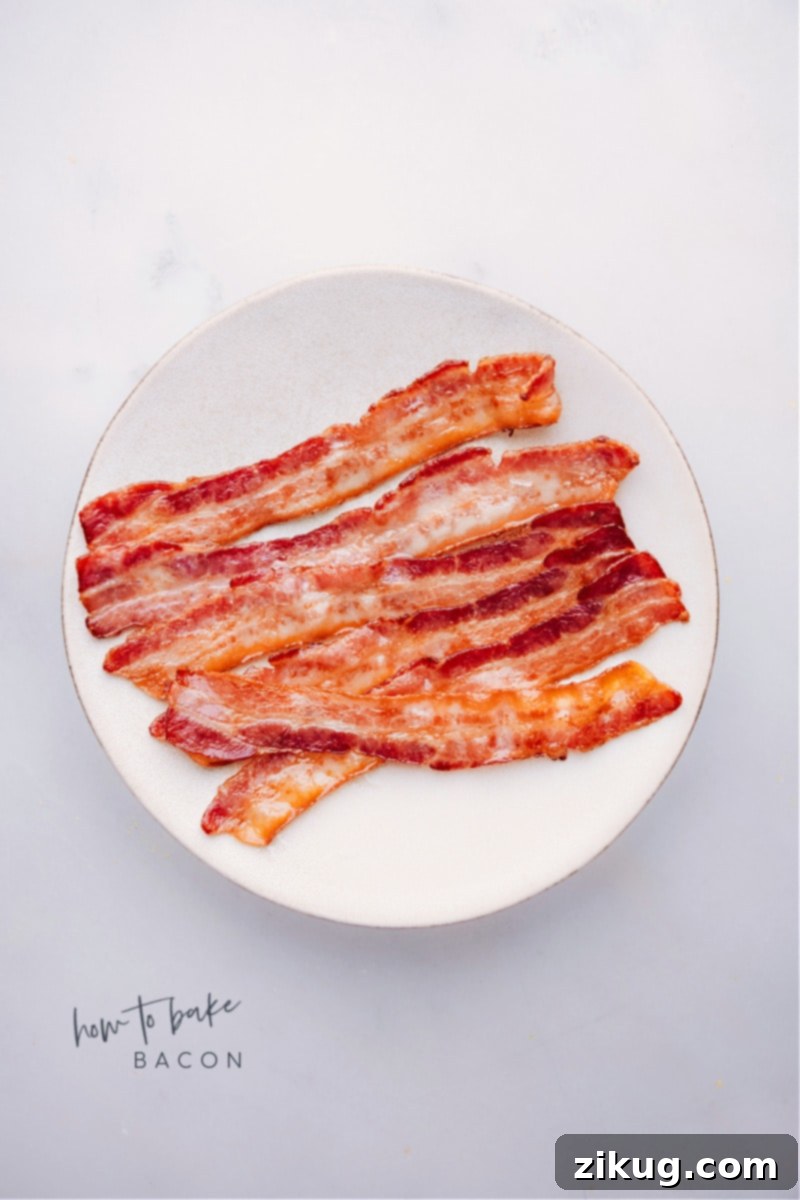
How To Bake Bacon is the secret to achieving consistently crispy, perfectly cooked strips without the splatter and constant attention of traditional frying. This simple, hands-off oven method guarantees flawless results every time, making it a favorite for home cooks aiming for convenience and quality. If you’re looking for a cleaner, more efficient way to prepare one of the world’s most beloved breakfast foods, you’ve come to the right place!
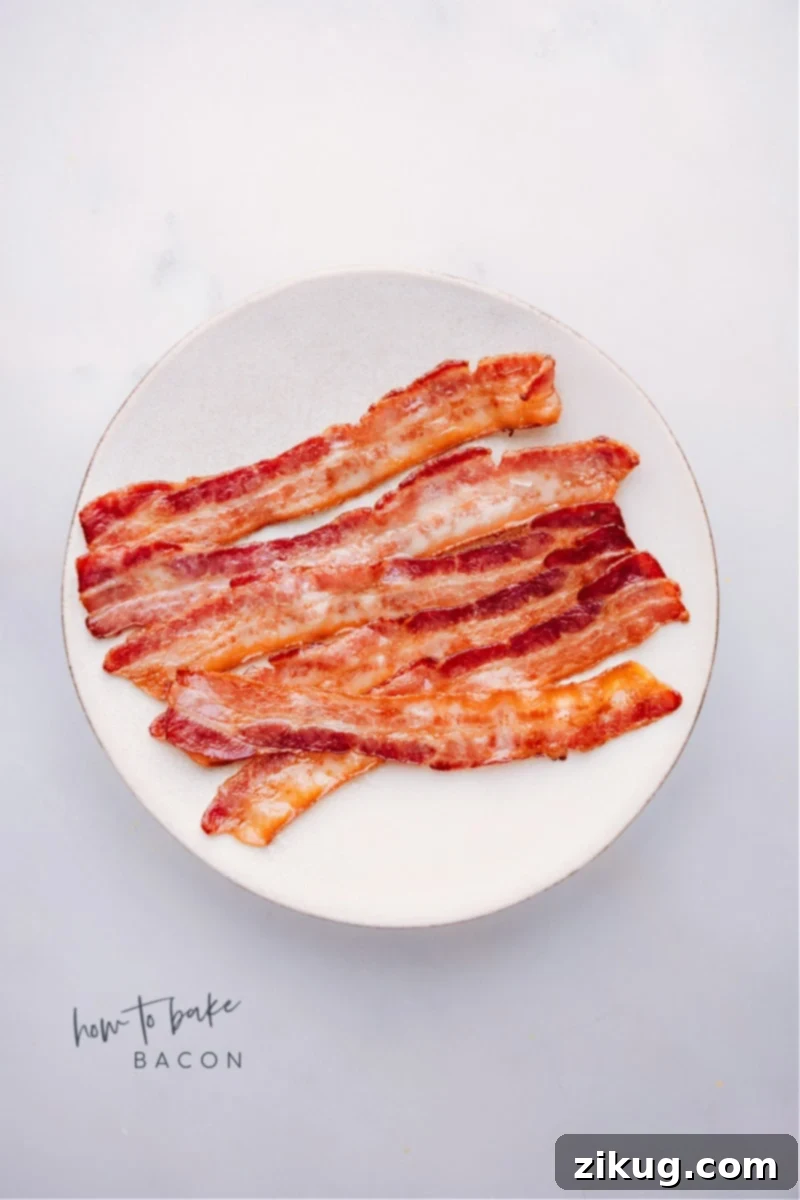
Why Baking Bacon is Superior to Frying
While the sizzle of stovetop bacon is nostalgic, baking offers numerous advantages that make it a far more appealing option for many home chefs. From cleaner kitchens to superior texture, once you try oven-baked bacon, you might never go back to frying.
- Unmatched Evenness and Crispiness: Baking bacon in the oven ensures uniform cooking from end to end. Unlike a skillet where hot spots can lead to unevenly cooked strips, the circulating heat in an oven crisps every part of the bacon simultaneously. Placing the bacon on a wire rack allows air to circulate around each strip, facilitating even cooking and promoting exceptional crispness, as the fat drips away rather than pooling around the bacon.
- Significantly Less Greasy Results: When bacon is fried directly in a pan, it often sits and cooks in its own rendered fat, which can lead to soggy, greasy strips. The baking method, particularly when using a cooling rack, allows the excess fat to drip down into the pan below. This separation results in bacon that is remarkably crispier and considerably less greasy, offering a more enjoyable texture and flavor.
- A Truly Hands-Off Cooking Experience: One of the biggest appeals of baking bacon is its minimal demand on your time and attention. Once the bacon is in the oven, you’re free to prepare other components of your meal – whether it’s whipping up eggs, making pancakes, or prepping a salad. There’s no need to stand over a hot stove, constantly flipping and monitoring, which makes busy mornings or meal prepping much more manageable.
- Effortless Cleanup: Let’s face it, frying bacon can create a significant mess with grease splattering across your stovetop and countertops. Baking bacon, especially when you line your baking sheet with aluminum foil, drastically reduces cleanup. The fat drips onto the foil, which can simply be discarded after the pan has cooled, leaving you with minimal mess to tackle.
By opting for the oven, you’re choosing a method that prioritizes consistency, health (less grease!), convenience, and cleanliness, elevating your bacon experience to a whole new level.
How To Bake Bacon: A Step-by-Step Guide for Perfect Crispy Strips
Baking bacon to perfection is incredibly simple when you follow a few key steps and tips. This method ensures delicious, uniformly cooked, and wonderfully crispy bacon every single time. Here’s how to do it:
- Preheat Your Oven to 400°F (200°C): This is a crucial first step. Ensuring your oven is fully preheated before placing the bacon inside allows for immediate, consistent cooking. A cold oven will result in uneven cooking and potentially chewy, rather than crispy, bacon.
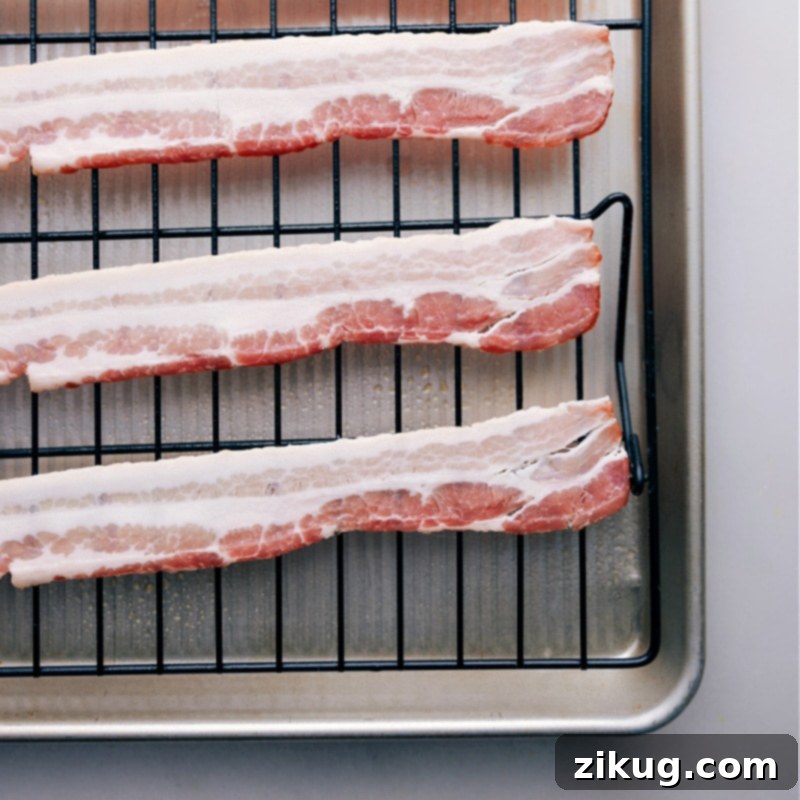
- Choose the Right Bakeware: Use an extra-large sheet pan with raised sides. This design is essential for containing the rendered bacon grease, preventing it from spilling over and causing a smoky mess inside your oven or on your kitchen floor. Line the pan thoroughly with aluminum foil for even easier cleanup – you’ll thank yourself later!
- Utilize an Oven-Safe Cooling Rack: A heavy-duty metal cooling rack is your best friend when baking bacon. Placing the bacon directly on the rack (which sits inside the rimmed sheet pan) allows the hot air to circulate completely around each strip. More importantly, it lets the excess fat drip away, preventing the bacon from frying in its own grease and ensuring that highly coveted crispy texture. Look for a rack that fits snugly within your sheet pan.
- Lightly Grease the Cooling Rack: Before arranging your bacon, give the cooling rack a light spray with cooking oil or a quick wipe with a paper towel dampened with a neutral oil. This tiny step is vital in preventing the bacon from sticking to the rack as it cooks and crisps, making it much easier to remove once done.
- Arrange Bacon Slices in a Single Layer: Carefully lay out your bacon slices on the greased cooling rack, making sure they do not overlap or touch. Spacing is key! When bacon slices are separated, each one gets direct exposure to the oven’s heat, guaranteeing that every piece cooks evenly and achieves maximum crispness. Overcrowding will steam the bacon rather than crisp it.
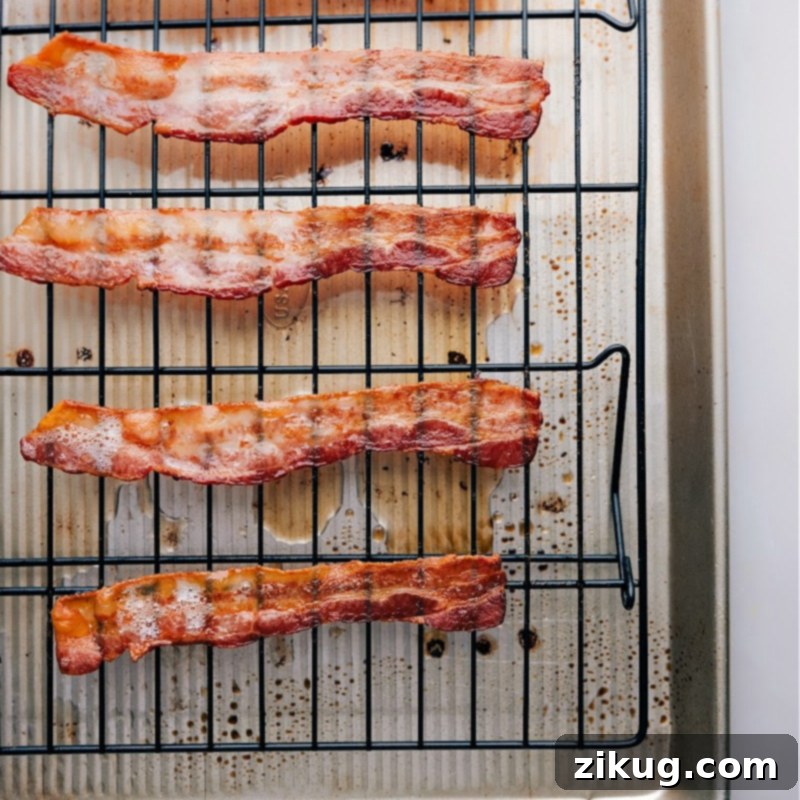
- Bake Until Golden and Crisp: The baking time can vary depending on the thickness of your bacon slices and your oven’s calibration. Generally, bacon will be perfectly cooked in 15 to 20 minutes at 400°F (200°C). Thin-cut bacon might be ready in 12-15 minutes, while thick-cut bacon could take 20-25 minutes. Keep a close eye on your bacon during the last few minutes, as it can go from perfectly done to burnt very quickly. Look for a beautiful golden-brown color and a firm, crisp texture.
- Drain Excess Grease After Baking: Once the bacon reaches your desired crispiness, carefully remove the sheet pan from the oven. Immediately transfer the cooked bacon strips to a plate lined with several layers of paper towels. Use another paper towel to gently blot any remaining surface grease from the top of the bacon. This final draining step contributes to maximum crispness and a less greasy feel.
- Allow to Cool Slightly: For the ultimate crispness, let the bacon cool for a minute or two on the paper-towel-lined plate. It will continue to crisp up as it cools.
Following these detailed steps will ensure you produce perfect, crispy oven-baked bacon every time, making it a stress-free addition to any meal.
Creative Ways to Use Your Perfectly Baked Bacon
Once you master the art of baking bacon, a world of culinary possibilities opens up. Beyond its traditional role as a breakfast side, baked bacon’s consistent crispness and rich flavor make it a versatile ingredient for countless dishes. Here are some fantastic ways to incorporate your beautifully baked bacon into your meals:
- Elevate Breakfast Dishes: Naturally, baked bacon is a stellar addition to any breakfast spread. Serve whole strips alongside eggs (like these delicious Scrambled Eggs), in breakfast burritos, or as the star of a hearty breakfast sandwich. For a delightful sweet and savory twist, crumble it over fluffy Pancakes or crispy Waffles.
- Add Savory Depth to Salads: Transform any salad into a more satisfying meal with the smoky, salty crunch of baked bacon. Crumble it generously over a classic Wedge Salad, a robust Caesar Salad, or a vibrant Herbalicious Quinoa Salad. It’s also excellent in Cobb salads or warm spinach salads.
- Enhance Sandwiches and Wraps: Bacon is a timeless sandwich enhancer. Use full strips in a quintessential BLT, or layer it into a turkey or chicken sandwich for an extra burst of flavor and texture. We especially love it in this savory Turkey Wrap for a satisfying lunch.
- Boost Flavor in Pasta Dishes: Baked bacon can introduce a rich, umami depth to your favorite pasta recipes. Dice it into small pieces (lardons) and toss it into a creamy Fettuccine Alfredo or a comforting Chicken Alfredo. It’s also a fantastic base for classic Carbonara or sprinkled over mac and cheese.
- Garnish Creamy Soups: A sprinkle of crumbled baked bacon on top of a rich, creamy soup adds not only flavor but also a delightful textural contrast. Try it on our luscious Cauliflower Soup Recipe, a hearty Broccoli Soup, or even a classic potato soup.
- Versatile Appetizer Ingredient: Baked bacon can be the star of many appetizers. Think bacon-wrapped dates or scallops, candied bacon strips for a sweet and savory bite, or finely crumbled bacon mixed into deviled eggs or cheese balls.
- Savory Topping for Burgers and Pizzas: Take your homemade burgers or pizzas to the next level by adding crispy baked bacon as a topping. Its smoky flavor pairs perfectly with beef, chicken, and a variety of pizza combinations.
- Stirred into Dips and Spreads: Finely chopped baked bacon can be mixed into creamy dips like spinach and artichoke dip, or spreads like pimento cheese, adding a smoky, salty kick that everyone will love.
With its consistent texture and rich flavor, oven-baked bacon is an incredibly versatile ingredient that can add a special touch to almost any dish. Get creative and enjoy the delicious possibilities!
Storage and Reheating Baked Bacon
Proper storage ensures your delicious baked bacon stays fresh and ready for future use, while smart reheating methods bring back its desirable crispness.
How to Store Baked Bacon:
- Ensure Bacon is Fully Cooled: Before storing, it is crucial that the baked bacon has cooled completely to room temperature. Storing warm bacon can create condensation, leading to soggy strips and potential spoilage.
- Use an Airtight Container: Place the cooled bacon in an airtight container. Options include plastic or glass containers with tight-fitting lids, or heavy-duty resealable bags. For best results, consider layering the bacon with paper towels between slices or layers to absorb any residual moisture and prevent sticking.
- Refrigerate or Freeze for Longevity:
- Refrigeration: If you plan to use the bacon within 3-5 days, store it in the refrigerator.
- Freezing: For longer storage, up to 1-2 months, you can freeze baked bacon. To prevent slices from sticking together, you can freeze them individually on a baking sheet before transferring them to an airtight freezer bag or container. This allows you to grab just a few slices as needed.
How to Reheat Baked Bacon:
Reheating is key to regaining that perfect crisp texture. Here are the best methods:
- In the Oven (Recommended for Crispness): For bacon that tastes freshly cooked, reheat it in the oven. Preheat your oven to 350°F (175°C). Place the bacon in a single layer on a baking sheet (preferably on a wire rack if you have one). Bake for 5-10 minutes, or until heated through and re-crisped to your liking. This method is ideal for larger batches and yields the best results.
- In the Microwave (Quick and Convenient): For a quick reheat, especially for a few slices, the microwave is a good option. Place the bacon on a microwave-safe plate lined with paper towels. Heat in 15-30 second intervals, checking for desired warmth and crispness. Be aware that microwave reheating often results in slightly less crispy bacon compared to the oven.
- In an Air Fryer (Fast and Crispy): If you have an air fryer, it’s an excellent tool for reheating bacon quickly and making it extra crispy. Preheat your air fryer to 350-375°F (175-190°C). Arrange bacon in a single layer in the air fryer basket and cook for 3-5 minutes, flipping halfway, until hot and crispy.
Properly stored and reheated, your oven-baked bacon will remain a convenient and delicious addition to any meal!
Delicious Recipes to Pair with Your Baked Bacon:
Looking for more ways to incorporate that irresistible crispy bacon into your meals? These recipes are perfect companions:
- Arugula Salad with a white balsamic vinaigrette: Add crumbled bacon for a salty, smoky counterpoint to the peppery greens.
- Cheesy Potatoes: Sprinkle generous amounts of finely chopped bacon over the crunchy topping for an extra layer of flavor and texture.
- Big Mac In A Bowl: Incorporate crispy bacon bits for added protein and that classic burger joint taste.
- Biscuits and Gravy: Mix diced baked bacon directly into your homemade sausage gravy for a deeply savory and rich experience.
- Potato Leek Soup: Garnish individual bowls with crumbled bacon just before serving for a gourmet touch and satisfying crunch.
5 from 1 vote
How To Bake Bacon
By Chelsea Lords
Bacon lovers, this one’s for you! Skip the stovetop mess—learn How to Bake Bacon for perfectly crispy bacon slices every time. Here’s your step-by-step guide!
Prep Time: 5 minutes
Cook Time: 18 minutes
Total Time: 23 minutes
Servings: 8 slices of bacon
Print Recipe
Video
(Recipe video content is unavailable due to script removal and cannot be displayed in this static HTML format. Please refer to the written instructions.)
Equipment
- Rimmed sheet pan
- Cooling rack
- Aluminum foil
Ingredients
- Cooking spray
- 8 slices bacon (see note 1 below for optimal thickness)
Instructions
- Preheat your oven to 400°F (200°C).
- Take an extra-large sheet pan with raised sides and line it well with aluminum foil for easy cleanup. Place a metal cooling rack on top of the foil-lined tray. Lightly grease the cooling rack with cooking spray to prevent sticking.
- Arrange bacon slices in an even single layer on top of the cooling rack, ensuring they are not touching each other. This allows for even cooking and optimal crispness.
- Bake the bacon in the preheated oven for 15–20 minutes, or until it reaches your desired level of golden brown and crispness. The exact cooking time may vary based on the thickness of your bacon slices, so keep a close eye on them, especially towards the end.
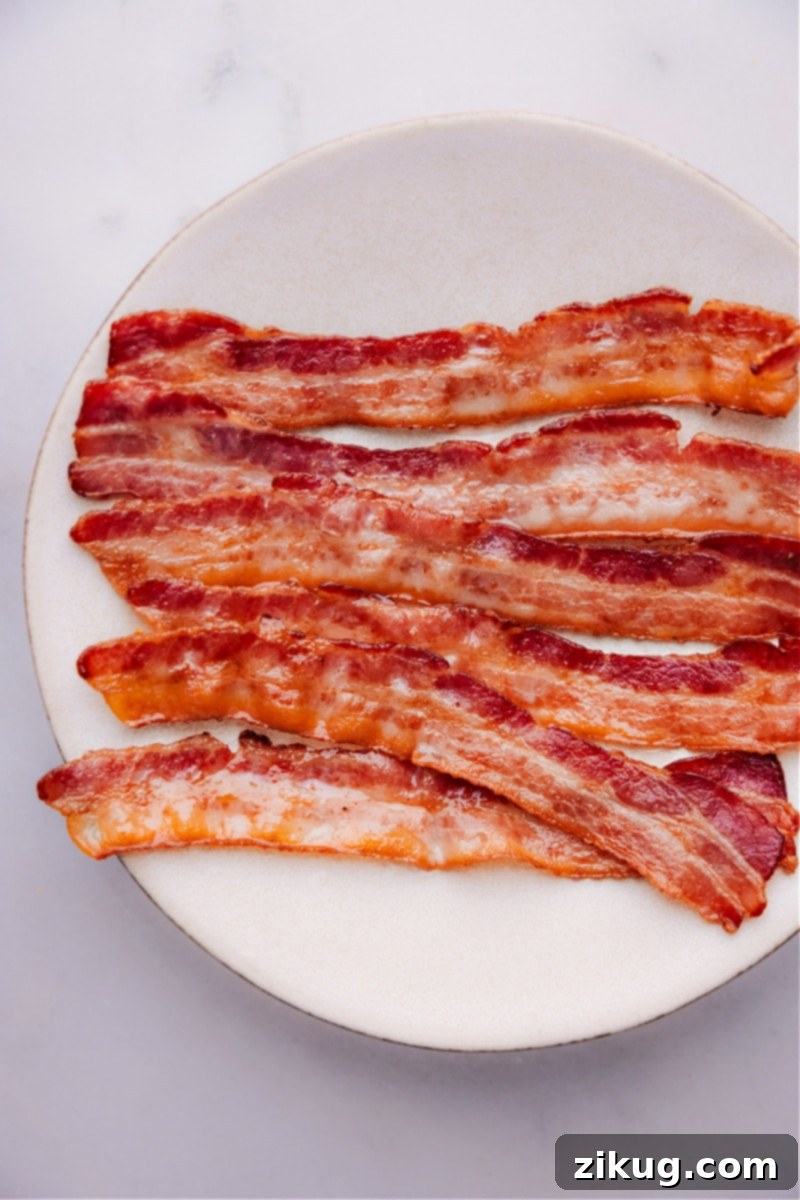
- Carefully remove the sheet pan from the oven. Using tongs, transfer the cooked bacon from the rack to a plate lined with several layers of paper towels. Blot any excess grease off the bacon with another paper towel to remove any remaining fat.
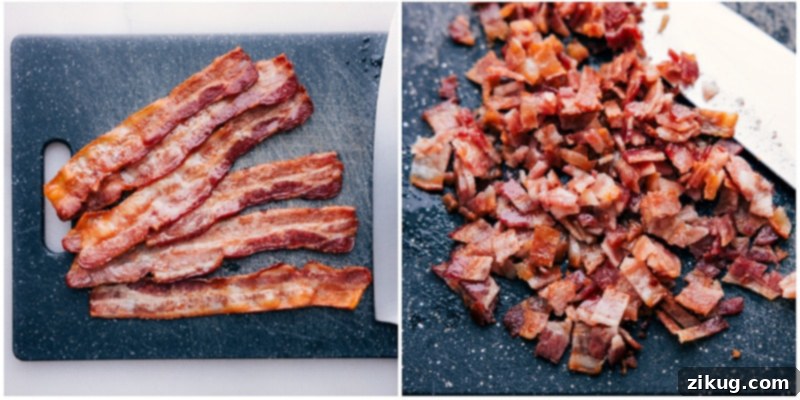
- Serve the bacon whole, or dice it into smaller pieces to use as an ingredient in your favorite recipes.
- For cleanup, you can simply wad up the foil with the rendered grease and discard it, or carefully transfer the cooled grease to a mason jar. This saved bacon grease can be stored in the fridge and used to add flavor to many other dishes – it’s absolutely delicious!
Recipe Notes
Note 1: This timing is optimized for bacon slices that are approximately 1 ounce each. You can certainly cook more or fewer slices, depending on how many you can fit in a single, non-overlapping layer on your cooling rack. For reference, I typically fit 8 slices on my standard rack.
Storage: Allow cooked bacon to cool completely before storing it in an airtight container in the refrigerator for up to 3-5 days. For longer storage, bacon can be frozen for 1-2 months.
Reheating: Reheat refrigerated bacon in the oven at 350°F (175°C) for 5-10 minutes until crispy, or in the microwave in 15-30 second intervals until heated through. An air fryer at 350-375°F (175-190°C) for 3-5 minutes also works wonderfully for re-crisping.
Nutrition
Serving: 1 serving | Calories: 117 kcal | Carbohydrates: 0.4g | Protein: 3.5g | Fat: 11.1g | Cholesterol: 18.5mg | Sodium: 185.4mg
Nutrition information is automatically calculated and should be used as an approximation only. Actual values may vary based on ingredients and preparation methods.
Like this recipe? Leave a comment below!