
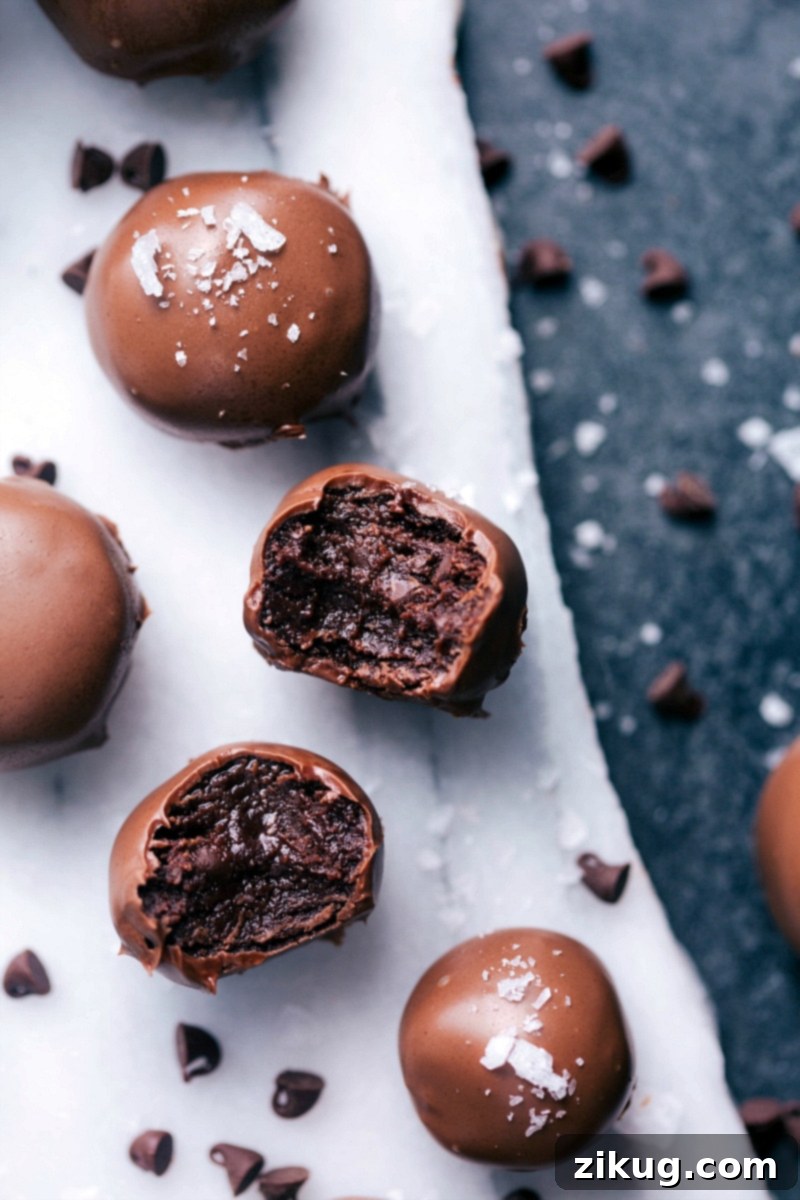
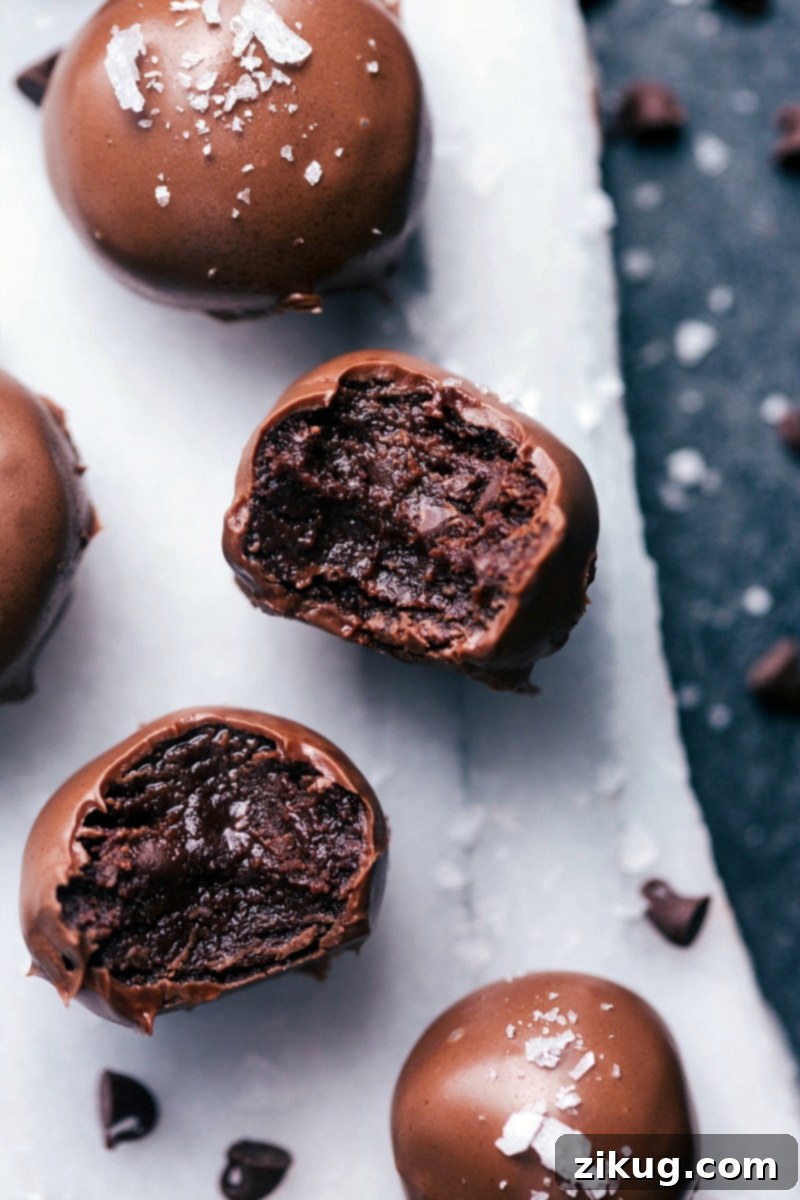
Indulge in the rich, deeply fudgy, and utterly decadent experience of these **No Bake Brownie Bites**! Perfect for chocolate lovers, these truffle-like treats boast a soft, melt-in-your-mouth filling, lovingly dipped in smooth melted chocolate. For an irresistible sweet and salty twist, consider a sprinkle of flaky sea salt.
If you’re as passionate about brownies as we are, explore more of our delightful recipes! Don’t miss our classic Homemade Brownie Recipe, the irresistible Peanut Butter Brownie Bites, or our refreshing Brownie Oreo Ice Cream Bars.
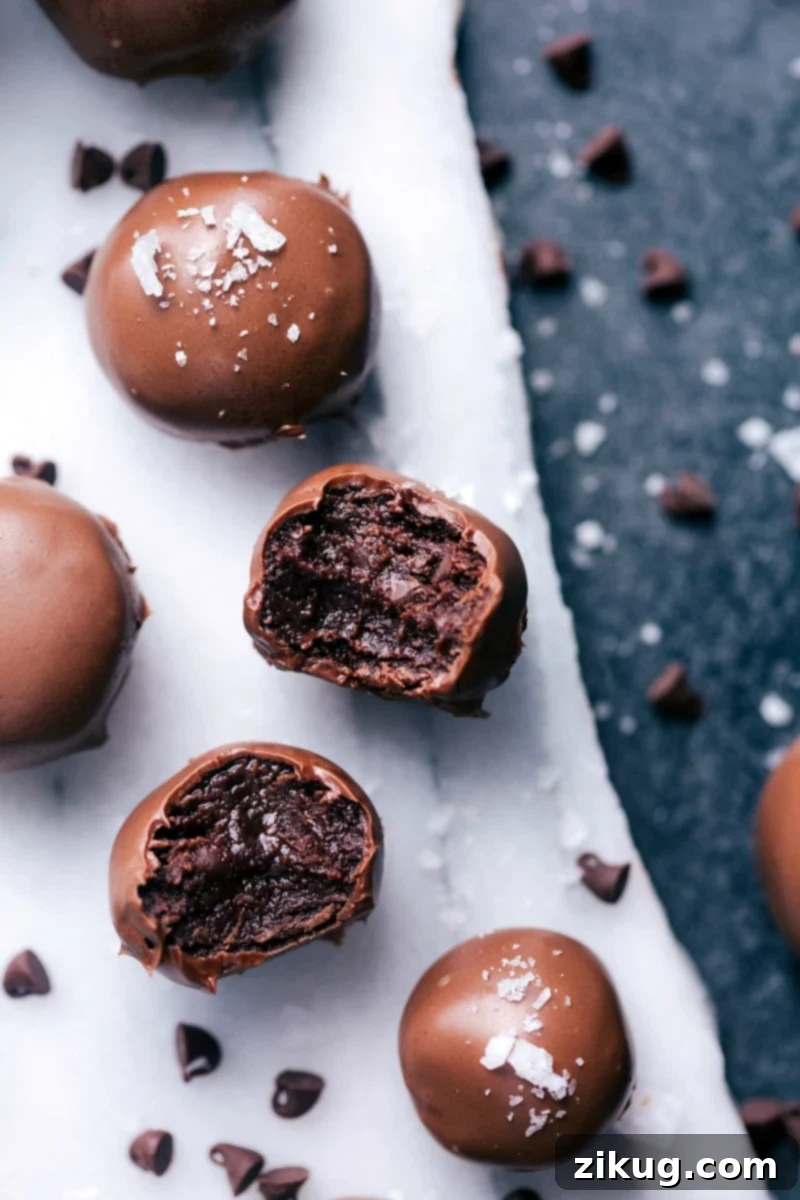
The Ultimate No-Bake Brownie Bites: Fudgy Perfection Without the Oven
Growing up, brownies were a staple in our home, thanks to my amazing mom who spread so much happiness with every batch. My favorite part? Sneaking spoonfuls of raw brownie batter before they ever made it into the oven. While that childhood habit was undeniably delicious, it also came with the slight risk of consuming raw flour and uncooked eggs.
Fast forward to today, and I’ve perfected a recipe that captures all the indulgent joy of raw brownie batter without any of the food safety concerns. These **edible brownie bites** are completely egg-free, and I’ll guide you through the simple process of heat-treating the flour, ensuring every bite is safe and supremely satisfying. You can now enjoy that nostalgic, rich, fudgy taste of brownie batter in a perfectly portioned, truffle-like treat.
These incredible little nuggets are intensely rich and packed with deep chocolate flavor – truly a brownie lover’s dream! They’re quick to prepare, require no baking, and deliver an unparalleled fudgy texture that will leave you craving more. Whether you’re a seasoned baker or a kitchen novice, these no-bake brownie bites offer a foolproof way to satisfy your chocolate cravings.
Why Choose No-Bake Brownie Bites?
- Effortlessly Delicious: Skip the oven and the lengthy baking process. These bites come together quickly for instant gratification.
- Safe to Eat Raw: With our heat-treated flour method, you can enjoy the pure, unadulterated taste of brownie batter without worry.
- Perfectly Portioned: Each bite-sized truffle is a mini explosion of chocolatey goodness, ideal for sharing or savoring solo.
- Versatile Treat: Great for parties, potlucks, gifts, or a simple weeknight dessert.
- Intensely Fudgy: The texture is unbelievably soft, dense, and rich, mirroring the best parts of a classic brownie.
Essential Ingredients for Fudgy No-Bake Brownie Bites
Crafting these delectable no-bake brownie bites requires a few key ingredients, each playing a crucial role in achieving that signature fudgy texture and intense chocolate flavor. Here’s a closer look at what you’ll need and why:
- Chocolate Chips & Unsalted Butter: This dynamic duo forms the luxurious, fudgy foundation of our brownie bites. Melting them together creates a silky-smooth, intensely chocolatey base. While semi-sweet chocolate chips are my personal preference for a balanced sweetness, feel free to use your favorite type – milk chocolate for extra sweetness or dark chocolate for a richer, more bitter profile. Using unsalted butter allows you to control the overall saltiness of the recipe.
- Granulated Sugar & Light Brown Sugar: A combination of both sugars ensures the perfect balance of sweetness and texture. Granulated sugar provides a clean sweetness, while light brown sugar adds a subtle caramel note and contributes to the chewy, moist consistency that makes these bites so addictive. Be sure to pack the brown sugar firmly into your measuring cup for accurate results.
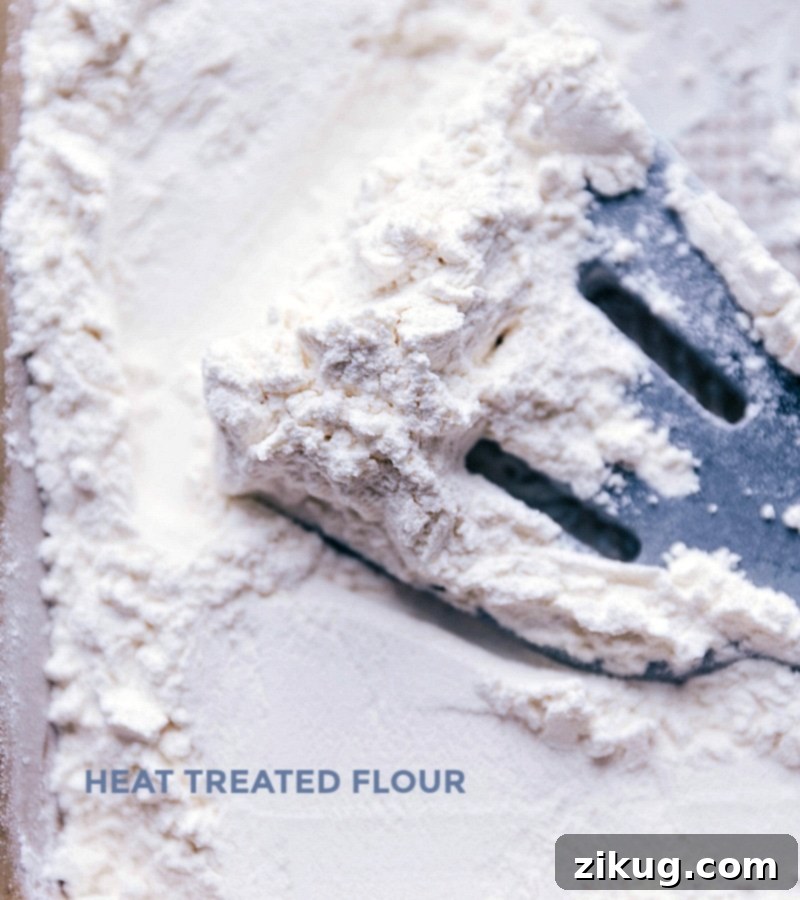
- Heat-Treated All-Purpose Flour: This is the star ingredient that makes our brownie bites safe to eat raw. Flour can sometimes contain bacteria, so heat-treating it eliminates any potential risks without altering its function in the recipe. It provides the necessary structure and body to the bites. Crucially, allow the flour to cool completely before incorporating it into the wet ingredients to prevent clumping and maintain the desired consistency.
- Dutch-Process Cocoa Powder: For a truly rich, deep chocolate flavor and a beautifully dark color, Dutch-process cocoa powder is essential. Unlike natural cocoa, Dutch-process cocoa has been treated with an alkali, which neutralizes its acidity, resulting in a smoother, less bitter taste and a more intense chocolate experience. Hershey’s “Special Dark” cocoa is an excellent, readily available option.
- Salt: Don’t underestimate the power of a pinch of salt! It enhances all the other flavors, especially the chocolate, and balances the sweetness, preventing the bites from tasting cloyingly sweet. A small amount truly goes a long way.
- Heavy Cream & Vanilla Extract: These liquid components introduce moisture, contributing to the luxurious richness and helping to bind all the ingredients into a cohesive, pliable dough. Heavy cream provides a creamy mouthfeel, while pure vanilla extract elevates the overall flavor profile with its warm, aromatic notes, complementing the chocolate beautifully.
- Mini Chocolate Chips: Folded into the brownie dough, these tiny chips provide delightful bursts of extra chocolatey goodness in every bite, adding to the texture and richness.
- Milk Chocolate Chips & Coconut Oil (for Dipping): For the outer coating, milk chocolate chips offer a sweet contrast to the rich interior. Coconut oil is added to thin the melted chocolate, making it smooth and easy to dip the brownie bites. It also helps the chocolate set with a lovely sheen. If the dipping chocolate becomes too thick, a tiny bit more coconut oil can be added gradually.
Safety First: How to Heat Treat Flour for Edible Raw Dough
Ensuring your No-Bake Brownie Bites are perfectly safe to eat raw is paramount. This involves a simple yet crucial step: heat-treating your all-purpose flour to eliminate any potential bacteria. Here are three effective methods:
- Purchase Pre-Treated Flour: The easiest option is to buy flour that has already been heat-treated. Check the packaging for labels indicating “heat-treated” or “safe for raw consumption.” This saves you a step and ensures food safety.
- Microwave Method:
This is a quick and convenient method. Place the desired amount of flour (I recommend treating a little extra, like 1.5 cups for this recipe, in case some gets overcooked) into a microwave-safe bowl. Microwave the flour on high power in 30-second intervals, stirring thoroughly after each burst. This even distribution of heat is essential to prevent burning and ensure all parts of the flour reach the target temperature. Use an instant-read thermometer to check the temperature in several spots. Continue microwaving and stirring until the flour consistently reaches **165°F (74°C)** throughout. Once it hits this temperature, it’s safe. Allow it to cool completely before using.
- Oven Method:
For a slightly larger batch or if you prefer using your oven, preheat it to **300°F (150°C)**. Spread your flour (again, treating a bit extra is a good idea) evenly in a thin layer on a large, rimmed baking sheet lined with parchment paper or a silicone baking mat. Bake the flour, stirring it every 1.5 to 2 minutes to promote even heating. After each stir, use an instant-read thermometer to check the temperature in multiple spots. Remove the flour from the oven as soon as it reaches **165°F (74°C)**. It’s crucial not to overcook it, as this can alter the taste. Let it cool completely to room temperature before proceeding with your recipe.
Important Food Safety Note
While heat-treating flour is highly recommended for food safety, especially with evolving knowledge about foodborne illnesses, it ultimately remains your choice. This step ensures that any naturally occurring bacteria in raw flour are neutralized, making your edible dough safe to enjoy without any worries.
Expert Tips for Perfectly Heat-Treated Flour
To ensure your heat-treated flour performs beautifully in your no-bake brownie bites, keep these pointers in mind:
- Cool Completely: This is non-negotiable! Hot flour will melt your butter and chocolate, creating a greasy, unworkable dough. After heat-treating, spread the flour thinly on a clean surface or plate to expedite cooling. For faster cooling, you can even place it in the fridge or freezer for a few minutes, stirring occasionally.
- Address Clumps: After cooling, the flour might form some small clumps. Gently break these up with your fingers. Discard any stubborn, hard clumps that won’t easily break apart, as they might be overcooked.
- Avoid Scraped Flour: Do not scrape up any flour that might have stuck firmly to the bottom or sides of your pan during heat treatment. This flour is likely burnt or overcooked and can impart an “off” or bitter taste to your brownie batter.
- Inspect Color and Scent: Properly heat-treated flour should look and smell just like regular, raw flour – light, fluffy, and white. If you notice any discolored flour (brown or light brown spots) or a burnt smell, discard those portions. Using discolored flour will negatively affect the flavor of your bites.
- Make Extra and Store: It’s always a good idea to heat treat a little more flour than the recipe calls for, just in case some portions burn or clump. Any leftover heat-treated flour can be stored in an airtight container at room temperature for future edible dough creations, such as edible cookie dough or even edible peanut butter cookie dough.
Step-by-Step Guide: Crafting Your No-Bake Brownie Bites
Creating these rich and fudgy no-bake brownie bites is a straightforward and enjoyable process. Follow these simple steps for perfectly indulgent treats:
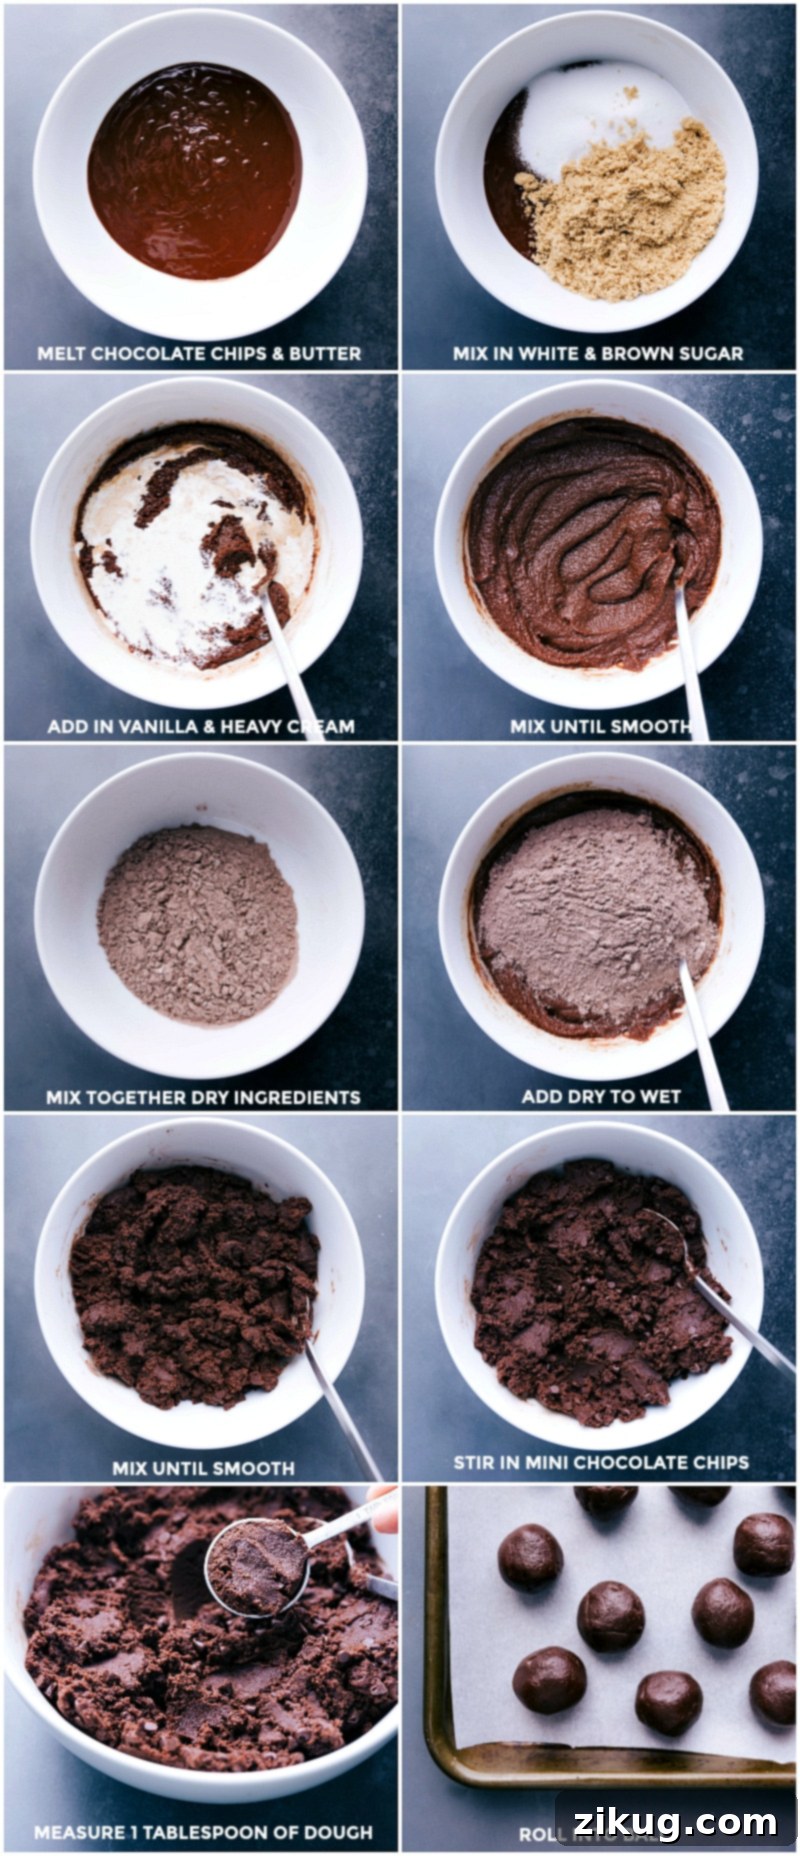
- Prepare Your Flour: First, ensure your all-purpose flour is heat-treated and completely cooled. (Refer to the “How to Heat Treat Flour” section for detailed instructions.) Once cooled, gently spoon the flour into a measuring cup and level it off with a knife, avoiding compacting it. Combine the cooled, leveled flour with Dutch-process cocoa powder and salt in a medium bowl, stirring well. Set aside.
- Melt Chocolate & Butter: In a microwave-safe bowl, combine the semi-sweet chocolate chips and cubed unsalted butter. Microwave in 30-second bursts, stirring for about 15 seconds after each interval, until the mixture is fully melted and beautifully smooth. This typically takes around 1.5 minutes in most microwaves.
- Mix Wet Ingredients: Transfer the melted chocolate-butter mixture to the bowl of a stand mixer fitted with a paddle attachment, or use a hand mixer. Add the granulated sugar and light brown sugar. Beat on medium speed for about 2 minutes until the mixture is completely smooth and well combined. Next, pour in the heavy cream and vanilla extract, and continue beating for another 1-2 minutes until the mixture is lightened in color and smooth.
- Combine Dry & Wet Ingredients: Gradually add the reserved dry ingredients (heat-treated flour, cocoa powder, salt) to the wet mixture. Beat on low speed until just combined, being careful not to overmix. Scrape down the sides of the bowl with a spatula to ensure all ingredients are incorporated. Then, gently fold in the mini chocolate chips using a spatula. The dough should be pliable. If it’s too wet, add 1-2 tablespoons more heat-treated flour; if too dry, add 1-2 tablespoons more heavy cream.
- Form and Chill the Bites: Use a 1-tablespoon measuring spoon or a small cookie scoop to portion out the brownie batter. Roll each portion into a smooth, even-sized ball. You should yield approximately 35 delicious bites. Arrange them on a plate or baking sheet, cover, and chill in the refrigerator for at least 15 minutes. This helps them firm up and makes dipping easier.
- Prepare for Dipping: While the brownie bites are chilling, line a large sheet pan with a silicone baking mat or parchment paper. In another microwave-safe bowl, combine the milk chocolate chips (or your preferred dipping chocolate) and coconut oil.
- Melt Dipping Chocolate: Microwave the dipping chocolate mixture in 20-second bursts. Crucially, stir for about 30 seconds between each burst. Chocolate continues to melt from residual heat, so thorough stirring outside the microwave prevents burning and ensures a smooth consistency.
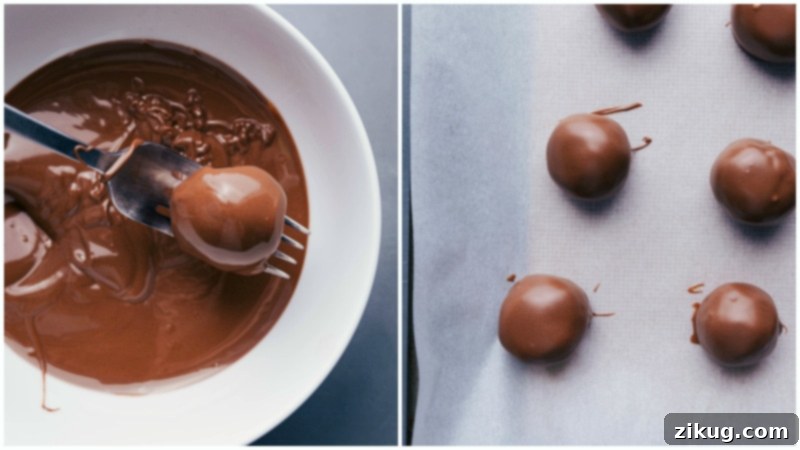
- Dip the Brownie Bites: Once the dipping chocolate is completely melted and smooth, it’s time to coat your chilled brownie truffles. For best results, insert a fork into a brownie bite, dip it into the melted chocolate, and then use a spoon to pour extra chocolate over the top to ensure full coverage. Gently tap the fork against the edge of the bowl to allow any excess chocolate to drip off. Carefully slide the coated truffle off the fork onto your prepared sheet pan using a table knife. If the chocolate becomes too thick for dipping, add a tiny increment (1/2 teaspoon) of coconut oil at a time, stirring well, until it reaches the desired fluidity.
- Set and Enjoy: Allow the dipped brownie bites to set completely at room temperature, which can take a few hours, or expedite the process by placing them in the refrigerator for about 30 minutes. Once set, they are ready to devour! These bites are best enjoyed on the same day for optimal freshness, but they will keep well for 3-4 days. I particularly love them chilled straight from the fridge for an extra fudgy experience!
Brownie Bite Perfection: Pro Tips and Flavor Variations
To elevate your no-bake brownie bites from great to extraordinary, consider these expert tips and exciting flavor variations:
Achieving the Perfect Brownie Bite Consistency
- Dutch-Process Cocoa is Key: Always opt for **Dutch-process cocoa** over natural or regular cocoa powder. Dutch-process cocoa delivers a darker, richer, and less acidic chocolate flavor, making these bites intensely indulgent. Natural cocoa can result in a drier batter and a less vibrant chocolate taste. Brands like Hershey’s® “Special Dark” cocoa powder are widely available and work wonderfully.
- Beat for Smoothness: Don’t skip the beating steps for the wet ingredients. Thoroughly beating the chocolate-butter mixture with the sugars, cream, and vanilla helps dissolve the sugar, significantly reducing any potential graininess in the final product. Chilling the rolled brownie bites also contributes to a smoother, more unified texture.
- Precise Flour Measurement: Accurate flour measurement is critical. Too much flour can lead to dry, crumbly bites, diminishing their fudgy appeal. Instead of scooping directly with the measuring cup, spoon the heat-treated flour into the cup, then level it off gently with the flat side of a knife. This method prevents over-packing and ensures you have just the right amount.
- Adjusting Dough Consistency: If your dough feels too sticky or wet after mixing, add 1-2 extra tablespoons of cooled, heat-treated flour until it reaches a manageable, rollable consistency. Conversely, if it’s too dry and crumbly, gradually add 1-2 extra tablespoons of heavy cream until it comes together beautifully.
Flawless Chocolate Dipping Techniques
- Quality Chocolate Matters: For the best dipping experience and a smooth, glossy coating, invest in good-quality chocolate chips. Brands like Ghirardelli® or Guittard® melt beautifully and taste superior.
- Use Proper Bowls: Always microwave chocolate chips in sturdy, heat-safe bowls, such as ceramic or glass. Avoid plastic or melamine bowls, as they can retain heat unevenly and potentially scorch the chocolate.
- Melt Gently, Stir Vigorously: Chocolate is delicate. Microwave in short bursts (20-30 seconds), stirring well for at least 30 seconds between each burst. A lot of melting occurs from the residual heat, so patient stirring prevents burning and promotes a silky-smooth consistency.
- Thinning the Chocolate: If your melted chocolate is too thick for easy dipping, add a tiny amount of coconut oil (1/4 to 1/2 teaspoon at a time), stirring thoroughly after each addition. Be cautious not to add too much, as excessive oil can make the coating too thin and prevent it from adhering properly to the truffles. Shortening can also be used as a substitute for coconut oil.
- Setting the Coating: For a quicker set, transfer the dipped brownie bites to the refrigerator for about 15-30 minutes. This helps the chocolate harden and prevents smudging.
Exciting Flavor Variations
- Salty-Sweet Perfection: As mentioned, a sprinkle of flaky sea salt on top of the wet chocolate coating is a game-changer, enhancing the chocolate’s depth and creating a delightful contrast.
- Nutty Crunch: Fold in finely chopped nuts like walnuts, pecans, or almonds into the brownie batter for added texture and a rich, earthy flavor.
- Minty Fresh: Add a few drops of peppermint extract to the brownie batter or a touch to the melted dipping chocolate for a refreshing mint-chocolate experience.
- Zesty Orange: Grate some orange zest into the batter to brighten the chocolate flavor with a subtle citrusy note.
- Coffee Kick: A teaspoon of instant espresso powder dissolved in the heavy cream can deepen and intensify the chocolate flavor without making it taste like coffee.
- White Chocolate Drizzle: After the dark chocolate coating has set, drizzle some melted white chocolate over the bites for an elegant finish and another layer of flavor.
- Toasted Coconut: Mix toasted shredded coconut into the batter or sprinkle it on top of the wet chocolate coating for a tropical twist.
Storage and Serving Suggestions
To keep your No-Bake Brownie Bites fresh and delicious, proper storage is key:
- Room Temperature: Store leftover brownie bites in an airtight container at room temperature for up to 3 days. They maintain their soft, fudgy texture well.
- Refrigeration: For a firmer, more chilled treat, store them in an airtight container in the refrigerator for up to a week. Many find them even more enjoyable straight from the fridge due to their extra fudginess.
- Freezing (Uncoated Recommended): If you plan to make a large batch or want to prepare them ahead of time, the brownie bites freeze beautifully. For best results when freezing, I recommend freezing the brownie dough balls *before* dipping them in chocolate. Arrange the un-dipped balls on a parchment-lined baking sheet and freeze until solid. Then, transfer them to a freezer-safe airtight container or bag for up to 2-3 months. When ready to serve, thaw them slightly, then dip in melted chocolate as per the recipe. You can also freeze the coated bites, but the chocolate coating might develop a slight bloom (white streaks) due to temperature changes, although they will still be perfectly delicious.
Serving Ideas
- Elegant Dessert Platter: Arrange the brownie bites on a platter with fresh berries, a dusting of cocoa powder, or a side of whipped cream for a sophisticated presentation.
- Coffee Companion: These rich bites pair wonderfully with a hot cup of coffee, espresso, or a glass of cold milk.
- Gift Giving: Package them in pretty boxes or bags tied with a ribbon for a thoughtful homemade gift.
- Ice Cream Topping: Crumble a few bites over your favorite vanilla or chocolate ice cream for an instant sundae upgrade.
Discover More Delicious Brownie-Inspired Treats:
If these No-Bake Brownie Bites have sparked your love for all things brownie, you’ll adore these other irresistible creations:
- Brownie Trifle: Layers of rich brownie, creamy vanilla custard, and fresh berries for an impressive dessert.
- Mint Brownies: A refreshing twist featuring a cool mint frosting and a decadent chocolate ganache topping.
- Cosmic Brownies: Recreate this beloved childhood classic with fudgy brownies, thick fudge frosting, and colorful candy sprinkles.
- Miniature Brownie Bites: Small but mighty, these provide a fudgy interior that melts in your mouth.
- Mini Brownie Bites with Rolos: Individual brownie cups baked with a soft, gooey Rolo caramel candy center.
Frequently Asked Questions About No-Bake Brownie Bites
Here are answers to some common questions about making these delicious no-bake treats:
- Can I use regular cocoa powder instead of Dutch-process?
While you technically can, I strongly recommend Dutch-process cocoa powder for these bites. Regular (natural) cocoa powder is more acidic and can result in a drier, less flavorful brownie batter. Dutch-process cocoa provides a richer, darker chocolate flavor and a smoother texture that is essential for the fudgy quality of these no-bake treats.
- Is it really necessary to heat treat the flour?
Yes, for food safety, it is highly recommended. Raw flour can contain bacteria like E. coli. Heat treating the flour, either in the microwave or oven, kills these potential pathogens, making the brownie batter safe for raw consumption. It’s a quick and easy step that provides peace of mind.
- My chocolate seized when melting, what happened?
Chocolate can seize (become thick and clumpy) if it comes into contact with even a tiny bit of water or if it’s overheated too quickly. Make sure your bowl and utensils are completely dry. When microwaving, use short bursts and stir frequently to avoid overheating. If it seizes, sometimes adding a teaspoon of vegetable oil or shortening and stirring vigorously can save it, but it might not be as smooth.
- Can I omit the chocolate coating?
Absolutely! The brownie bites are delicious on their own without the chocolate coating. They will still be rich, fudgy, and delightful. You can roll them in cocoa powder, powdered sugar, or finely chopped nuts instead for a different finish.
- How long do these No-Bake Brownie Bites last?
When stored in an airtight container, they will last at room temperature for up to 3 days or in the refrigerator for up to a week. For longer storage, refer to the freezing instructions in the “Storage and Serving Suggestions” section.
- Can I use a different type of sugar?
The combination of granulated and brown sugar is important for both sweetness and texture. Substituting entirely with one type of sugar may alter the final consistency and flavor. However, if you’re experimenting, keep in mind that brown sugar adds more moisture and chewiness.
No Bake Brownie Bites Recipe
Yields: 35 no bake brownie bites
Prep Time: 45 minutes
Cook Time: 10 minutes (for flour treatment and melting chocolate)
Setting Time: 2 hours
Total Time: 2 hours 55 minutes
Equipment:
- Stand mixer or hand mixer
- Large sheet pan (15″ x 21″)
- Silicone baking mat or parchment paper
- Microwave-safe bowls
- Instant-read thermometer (for heat-treating flour)
Ingredients:
For the Brownie Bites:
- 1 cup all-purpose flour (heat treated – see Note 1 for instructions)
- 1/4 cup Dutch-process cocoa powder (see Note 2)
- 1/2 teaspoon salt
- 1 cup semi-sweet chocolate chips
- 6 tablespoons unsalted butter, cut into 1 tablespoon pieces
- 1/2 cup granulated sugar
- 3/4 cup light brown sugar, packed
- 1/4 cup heavy cream
- 1 teaspoon vanilla extract
- 1/2 cup mini chocolate chips
For Dipping:
- 2 cups milk chocolate chips (or semi-sweet, dark, or white chocolate – see Note 3)
- 2 teaspoons coconut oil (or shortening)
- Optional: Flaky sea salt for sprinkling
Instructions:
- Heat Treat & Prep Flour: Follow instructions in “How to Heat Treat Flour” section (Microwave or Oven method) until flour reaches 165°F (74°C). Let the flour cool completely to room temperature. Do not use any burnt or clumpy flour. Spoon the cooled flour into a measuring cup and level the top with a knife; do not pack it.
- Combine Dry Ingredients: Once flour has cooled and measured, add it along with cocoa powder and salt to a medium bowl. Stir to combine thoroughly and set aside.
- Melt Chocolate & Butter: In a microwave-safe bowl, combine semi-sweet chocolate chips and unsalted butter. Microwave in 30-second increments, stirring for 15 seconds between each increment, until fully melted and smooth (approx. 1 min 30 seconds).
- Mix Wet Ingredients: In a stand mixer (or using a hand mixer), combine the melted chocolate-butter mixture, granulated sugar, and brown sugar. Beat on medium speed for 2 minutes until completely smooth. Add heavy cream and vanilla extract, then beat for another 1–2 minutes until smooth and slightly lighter.
- Form Brownie Dough: Add the prepared dry ingredients to the wet mixture. Beat until just combined, being careful not to overmix. Scrape the sides of the bowl as needed. Fold the mini chocolate chips into the batter with a spatula. If the dough is too wet, add 1–2 more tablespoons heat-treated flour. If too dry, add 1–2 more tablespoons heavy cream.
- Shape & Chill: Use a 1-tablespoon measuring spoon to portion out the brownie batter. Roll each portion into an even-sized ball. You should get approximately 35 balls. Place them on a plate or sheet pan, cover, and chill in the fridge for 15 minutes.
- Prepare Dipping Station: Line a large sheet pan with a silicone liner or parchment paper. In a separate microwave-safe bowl, combine the milk chocolate chips for dipping and the coconut oil.
- Melt Dipping Chocolate: Heat the dipping chocolate mixture in bursts of 20 seconds, stirring for 30 seconds between each burst. Continue until the chocolate is completely melted and smooth. Stirring frequently prevents burning.
- Dip Brownie Bites: Dip each chilled brownie truffle into the melted chocolate. Use a fork to hold the truffle and a spoon to pour chocolate over it, ensuring it’s fully coated. Gently tap the fork against the edge of the bowl to remove excess chocolate. Slide the coated truffle onto the prepared sheet pan using a table knife. If the chocolate becomes too thick, add a tiny bit more coconut oil (in very small increments) to thin it slightly. Optionally, sprinkle with flaky sea salt immediately after dipping.
- Set & Serve: Let the coated truffles fully set at room temperature or in the refrigerator. They are best enjoyed the same day but will last 3–4 days in an airtight container. Freezing is best done before coating in chocolate. Enjoy these fudgy delights!
Recipe Notes:
Note 1: Heat Treating Flour
- Microwave method: Add 1.5 cups of all-purpose flour to a microwave-safe bowl. Microwave on high in 30-second bursts, stirring well between each. Test with a thermometer; ensure it reaches 165°F (74°C) throughout. Cool completely.
- Oven method: Preheat oven to 300°F (150°C). Spread 1.5 cups of flour thinly on a parchment-lined baking sheet. Bake, stirring every 1.5-2 minutes. Test with a thermometer until it reaches 165°F (74°C). Cool completely.
Note 2: Dutch-Process Cocoa
Ensure you use Dutch-process cocoa powder (like Hershey’s® Special Dark) for richer flavor and smoother texture. Natural or plain cocoa powder will yield a drier, less flavorful result.
Note 3: Dipping Chocolate Choice
While milk chocolate is delicious and makes these bites very sweet, any variety of good-quality chocolate chips (semi-sweet, dark, or white) will work for dipping. Better quality chocolate melts more smoothly and is easier to work with.
Storage:
Store leftover brownie bites in an airtight container at room temperature for up to 3 days or in the fridge for up to a week. For longer storage, freeze un-dipped balls, then thaw and coat as needed.
Nutrition:
Nutrition information is an approximation based on the ingredients listed and should be used as a general guide.
- Serving: 1 serving
- Calories: 177 kcal
- Carbohydrates: 25g
- Protein: 2g
- Fat: 8g
- Saturated Fat: 5g
- Polyunsaturated Fat: 1g
- Monounsaturated Fat: 2g
- Trans Fat: 1g
- Cholesterol: 11mg
- Sodium: 41mg
- Potassium: 80mg
- Fiber: 1g
- Sugar: 17g
- Vitamin A: 99IU
- Vitamin C: 1mg
- Calcium: 17mg
- Iron: 1mg
Like this recipe? We’d love to hear from you! Leave a comment below with your thoughts or variations!