
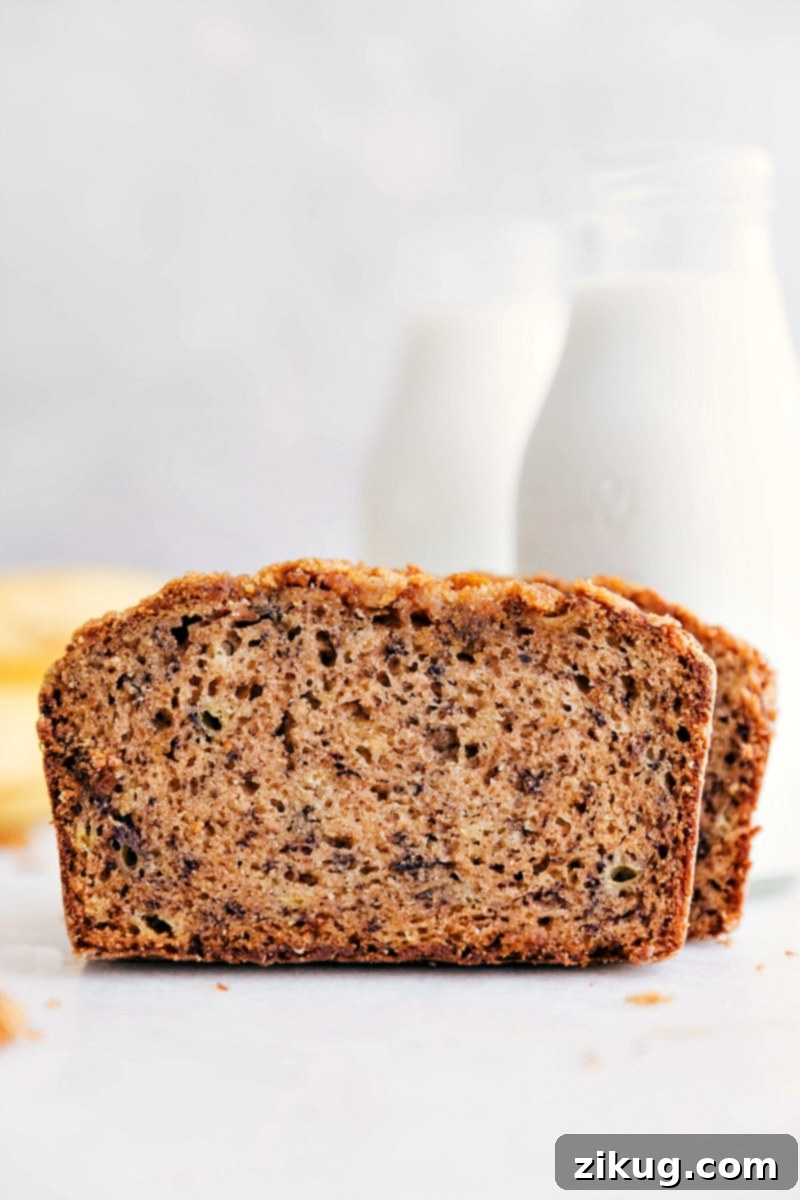
Welcome to your new go-to recipe for the most incredibly moist and flavorful Easy Banana Bread you’ll ever bake! This beloved classic is more than just a recipe; it’s a warm hug in a slice, a comforting aroma that fills your home, and an absolutely irresistible treat that quickly becomes a family favorite. If you’ve ever found yourself with a bunch of ripe bananas on your counter, looking for their next delicious destiny, look no further. This recipe is specifically crafted to transform those speckled beauties into a golden, tender loaf that’s perfect for breakfast, a snack, or even a simple dessert.
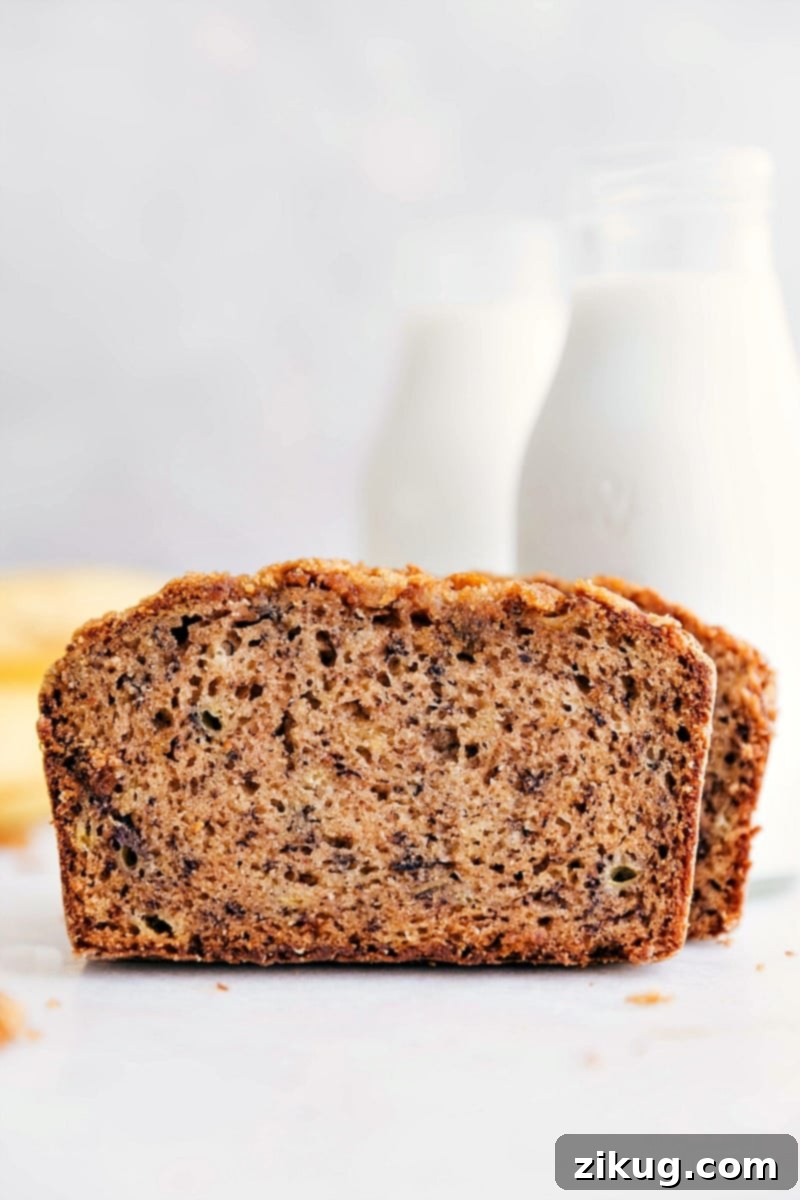

author’s note
Turn Those Overripe Bananas Into a Slice of Heaven!
I firmly believe that having a reliable, go-to recipe for homemade banana bread is an absolute essential in any kitchen! There’s a special kind of magic that happens when those bananas on your counter start developing their beautiful, freckly spots. It’s not a sign to discard them; rather, it’s nature’s perfect invitation to pull out this simple banana bread recipe. Let’s be honest – you probably bought them with the intention of letting them ripen for exactly this purpose, didn’t you?
In just about an hour, your home will be enveloped in the most mouthwatering, comforting scent of sweet banana bread baking. And just minutes after it emerges from the oven, you’ll be savoring a warm, impossibly moist slice of perfectly spiced goodness. This truly is the best way to honor those forgotten, overripe bananas. Each bite is a testament to the fact that some of the best culinary creations come from the simplest ingredients, transformed with a little love and a great recipe. Seriously, is there anything better you can do with those wonderfully speckled, extra-sweet bananas? I truly don’t think so!
Why Overripe Bananas Are Best for the Best Banana Bread
The secret to incredibly moist and flavorful banana bread lies squarely in the ripeness of your bananas. As bananas mature, their starches convert into natural sugars, making them significantly sweeter. This enhanced sweetness means you can often use less added sugar in your recipe, resulting in a naturally delicious loaf. Furthermore, very ripe bananas are softer and easier to mash, which contributes to the bread’s superior moisture and dense, tender texture. Aim for bananas that are heavily speckled with brown or even mostly brown—the darker, the better, as long as they aren’t completely black and moldy. These are the unsung heroes of the best banana bread.
Essential Equipment for Your Homemade Banana Bread
While this is an easy banana bread recipe, having the right tools makes the process even smoother:
- 9 x 5-inch Loaf Pan: The standard size for a perfect banana bread loaf. Metal pans generally yield a better crust.
- Stand Mixer or Hand Mixer: Essential for thoroughly creaming the sugars and eggs, which contributes to the bread’s light texture. A whisk attachment is ideal.
- Large Mixing Bowls (2): One for wet ingredients, one for dry, ensuring proper mixing.
- Spatula: Crucial for gently folding in dry ingredients to prevent overmixing.
- Wire Cooling Rack: Allows air circulation for even cooling, preventing a soggy bottom.
How To Make This Easy Banana Bread Recipe: A Detailed Guide
Crafting the perfect loaf of banana bread is simpler than you might think. Follow these detailed steps to ensure a consistently moist and flavorful result every time. The full, printable recipe is provided below, but these tips will guide you through the process for success.
- Preheat Oven & Prepare Pan: Begin by preheating your oven to 325°F (160°C) and positioning an oven rack in the center. This moderate temperature ensures even baking and prevents the bread from browning too quickly on the outside before the inside is cooked. Lightly grease and flour a 9×5-inch loaf pan. This step is vital to prevent sticking and ensure your beautiful loaf releases easily after baking. You can also line it with parchment paper for extra assurance, leaving an overhang on the longer sides to create “handles” for lifting.
- Mash Bananas & Melt Butter: Peel your very ripe bananas and place them in a small bowl. Use a fork or a potato masher to thoroughly mash them until mostly smooth, with a few small lumps remaining for texture if desired. Aim for about 1½ cups of mashed banana, which usually comes from 3-4 medium overripe bananas. Separately, melt the unsalted butter and set it aside to cool slightly. It’s important that the butter isn’t hot when added to the egg mixture, as it could scramble the eggs.
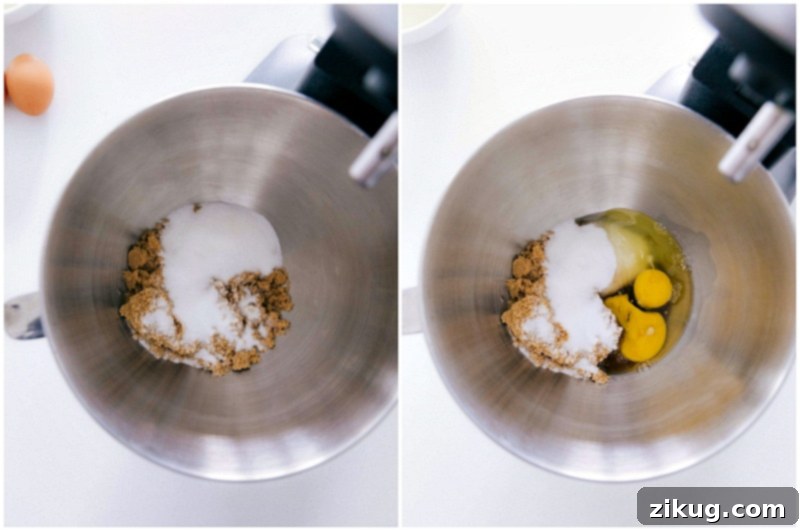
- Cream Sugars & Eggs: In a large mixing bowl, using a stand mixer fitted with the whisk attachment (or a hand mixer), combine the light brown sugar, granulated sugar, and eggs. Beat these ingredients together on medium speed for about 3-5 minutes until the mixture becomes pale in color and visibly fluffy. This creaming process incorporates air, which contributes to the bread’s tender crumb and helps it rise beautifully.
- Mix Wet Ingredients: Reduce the mixer speed to low. Slowly drizzle in the canola or vegetable oil, followed by the slightly cooled melted butter. Once incorporated, add the mashed bananas, vanilla Greek yogurt (or sour cream for extra richness and moisture), and vanilla extract. Continue mixing on low speed only until these wet ingredients are just combined. Avoid overmixing at this stage to maintain a delicate texture.
- Combine Dry Ingredients: In a separate large bowl, whisk together the all-purpose flour, baking soda, ground cinnamon, and salt. Sifting these ingredients together (or at least whisking thoroughly) is a crucial step. It ensures that all the dry ingredients are evenly distributed, preventing pockets of unmixed flour or leavening agents, and also aerates the flour for a lighter texture.
- Gently Combine Wet & Dry: Add all the sifted dry ingredients to the wet mixture. This is where patience pays off! Using a rubber spatula (not the mixer), gently fold the dry ingredients into the wet until *just combined*. Stop mixing as soon as you no longer see any dry streaks of flour. Overmixing develops the gluten in the flour, leading to a tough, dense, and chewy banana bread, rather than the desired moist and tender loaf.
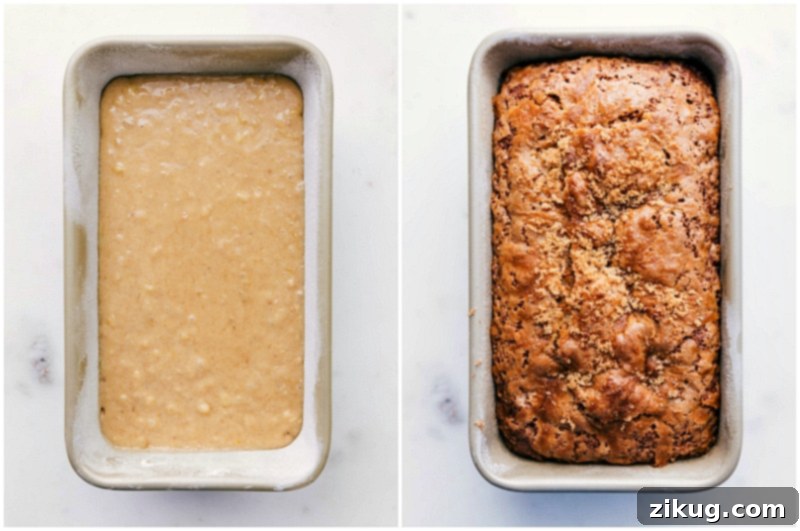
- Pour & Optional Topping: Pour the carefully mixed batter into your prepared loaf pan. If you desire a slightly sweet, caramelized crust, sprinkle the optional topping (2 tablespoons of brown sugar mixed with 1 tablespoon of granulated sugar) evenly over the top of the bread. This adds a delightful crunch and extra flavor.
- Bake to Perfection: Place the loaf pan on a sheet pan before putting it into the oven. This catches any potential drips and provides an extra layer of insulation for more even baking. Bake for 50-70 minutes. The wide variance in baking time depends on factors like your specific oven’s calibration, the type of loaf pan used (metal vs. glass), and humidity. The bread is ready when the top is lightly golden brown, it springs back when gently pressed, and a wooden toothpick inserted into the center (check left, center, and right) comes out clean or with a few moist crumbs attached. Avoid a toothpick that comes out wet with raw batter.
- Cool & Slice: Once baked, remove the banana bread from the oven and allow it to cool in the pan on a wire rack for 8-10 minutes. This allows the bread to set and prevents it from falling apart when removed. After this initial cooling, invert the loaf onto the cooling rack to finish cooling completely. While it’s tempting, slicing into hot banana bread can result in a gummy texture. Once fully cooled, slice it with a sharp serrated knife for clean, perfect slices.
Easy Banana Bread Recipe: Add-Ins & Creative Variations
While this classic banana bread recipe is perfect on its own, it also serves as a fantastic base for creative additions. Want to elevate your loaf and add another layer of flavor and texture? Try one of these popular variations:
- Chocolate Chips: Stir in 1 cup of your favorite chocolate chips (dark, semi-sweet, milk, or even white chocolate) with the dry ingredients. For an interesting texture, try mixing regular-sized chips with mini chocolate chips. The chocolate melts beautifully, creating pockets of gooey sweetness throughout the bread.
- Nuts: Add 1 cup of chopped walnuts, pecans, or almonds to the dry mix for a delightful crunch and earthy flavor. Toasting the nuts lightly before adding them can enhance their flavor even further.
- Dried Fruits: Toss in 1 cup of dried cranberries, raisins, chopped dates, or apricots with the dry ingredients. These add a chewy texture and bursts of concentrated fruity sweetness.
- Flaked Coconut: For a tropical twist, mix in 1 cup of sweetened or unsweetened flaked coconut with the dry ingredients. It adds a lovely aroma and subtle chewiness.
- Extra Spices: Beyond cinnamon, consider adding a pinch of nutmeg, allspice, or ground ginger (1/4 to 1/2 teaspoon) for a more complex spice profile.
- Streusel Topping: For an extra special touch, prepare a simple streusel topping. Combine 1/4 cup flour, 2 tablespoons brown sugar, 1/4 teaspoon cinnamon, and 2 tablespoons cold butter (cut into small pieces). Mix with your fingers until crumbly, then sprinkle over the batter before baking.
- Cream Cheese Swirl: For an indulgent version, prepare a simple cream cheese mixture (4 oz softened cream cheese, 1/4 cup sugar, 1 egg yolk, 1/2 tsp vanilla extract). Pour half the banana bread batter into the pan, dollop spoonfuls of the cream cheese mixture, then top with the remaining banana bread batter. Swirl gently with a knife.
Storage Tips for Your Moist Banana Bread
- Keeping it Fresh (Room Temperature): To maintain its delicious moisture and flavor, wrap your banana bread tightly in plastic wrap or aluminum foil, or store it in an airtight container. It will stay fresh and delightful at room temperature for up to 3 days.
- Extended Freshness (Refrigeration): If you wish for your banana bread to last longer, transfer it to the refrigerator after the first day. Again, ensure it’s well-wrapped or in an airtight container to prevent it from drying out. It will keep for up to a week in the fridge. For a warm, comforting experience, simply heat individual slices in the microwave for a few seconds before eating.
- Freezing for Later: Banana bread freezes beautifully! Once the bread has cooled completely (this is crucial to prevent ice crystals), wrap the entire loaf or individual slices tightly in plastic wrap, then an additional layer of aluminum foil. Place the wrapped bread in a sealed freezer-safe container or freezer bag. It will stay good in the freezer for up to 3 months. When you’re ready to enjoy, thaw slices quickly at room temperature or gently warm them in the microwave or oven.
Troubleshooting Common Banana Bread Problems
Even with an easy banana bread recipe, sometimes things don’t go exactly as planned. Here are solutions to common baking issues:
- Dry Banana Bread: The most common culprit is overmixing the batter or overbaking. Remember to mix only until no dry streaks of flour remain. Also, check for doneness at the earliest recommended time, as oven temperatures can vary. Using extra ripe bananas and ingredients at room temperature helps maintain moisture.
- Banana Bread Sank in the Middle: This often happens if the bread isn’t fully cooked when removed from the oven, or if there’s too much leavening agent. Ensure your baking soda is fresh and measure carefully. Always perform the toothpick test in the center of the loaf. Opening the oven door too early or too frequently can also cause temperature fluctuations that lead to sinking.
- Unevenly Baked Bread: Hot spots in your oven can lead to one side baking faster than the other. Placing the loaf pan on a baking sheet can help buffer intense heat. Also, consider rotating the pan halfway through baking, but do so quickly to avoid significant temperature drops.
- Gummy Texture: This usually indicates the bread was underbaked or cut while still hot. Allow the bread to cool completely before slicing for the best texture.
More Delicious Baked Goods You’ll Love:
Desserts
Pumpkin Bread Recipe
Desserts
Zucchini Bread Recipe
Desserts
Chocolate Muffin Recipe
Desserts
Healthy Chocolate Chip Cookie Recipe
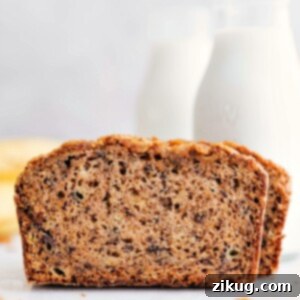
Easy Banana Bread Recipe
Chelsea Lords
20 minutes
1 hour
1 hour
20 minutes
12
slices
Equipment
-
9 x 5-inch bread pan
-
Stand mixer fitted with whisk attachment
Ingredients
-
3/4 cup light brown sugar firmly packed -
1/2 cup granulated sugar -
2 large eggs at room temperature -
1/4 cup canola oil or vegetable oil -
1/4 cup unsalted butter melted and slightly cooled -
1-1/2 cups mashed banana 3–4 overripe bananas -
2 tablespoons vanilla Greek yogurt full-fat, or use sour cream -
1-1/2 teaspoons vanilla extract -
1-2/3 cups all-purpose flour -
1 teaspoon baking soda -
1/2 teaspoon ground cinnamon -
1/2 teaspoon salt -
Optional topping 2 tablespoons brown sugar plus 1 tablespoon granulated sugar
Instructions
-
Preheat oven to 325°F (160°C) and arrange the rack in the center. Lightly grease and flour a 9×5-inch loaf pan. Remove the peels and place the bananas in a small bowl. Thoroughly mash the bananas with a fork. Melt the unsalted butter and allow it to cool to room temperature.
-
Use a stand mixer fitted with the whisk attachment to beat together the brown sugar, granulated sugar, and eggs on medium speed until pale and fluffy, about 3–5 minutes.
-
Switch the mixer speed to low and slowly drizzle in the oil, then drizzle in the butter (ensuring it’s cooled down from being melted). Add the mashed bananas, yogurt, and vanilla extract. Continue to mix at low speed until just combined.
-
In another large bowl, whisk together the flour, baking soda, cinnamon, and salt.
-
Add all the dry ingredients to the wet ingredients. Using a spatula (do not use the mixer), gently fold in the dry ingredients until just combined. Avoid overmixing; fold only until you no longer see any dry streaks of flour.
-
Pour the batter into the prepared loaf pan. If desired, sprinkle the optional topping (2 tablespoons of brown sugar and 1 tablespoon granulated sugar) evenly over the top of the bread.
-
Place the bread on a sheet pan. Bake for 50–70 minutes (this wide variance depends on your specific pan, actual oven heat, humidity, etc.), until lightly golden brown on top, the bread springs back when you gently press it, and a toothpick, when inserted in the center, comes out clean or with moist crumbs.
-
Remove the bread from the oven and allow it to cool in the pan for 8–10 minutes. Then, invert it onto a cooling rack to finish cooling completely before slicing with a sharp serrated knife.
Recipe Notes
Nutrition
Serving:
1
serving
|
Calories:
263
kcal
|
Carbohydrates:
42
g
|
Protein:
3
g
|
Fat:
10
g
|
Saturated Fat:
3
g
|
Trans Fat:
1
g
|
Cholesterol:
41
mg
|
Sodium:
206
mg
|
Potassium:
155
mg
|
Fiber:
1
g
|
Sugar:
25
g
|
Vitamin A:
182
IU
|
Vitamin C:
2
mg
|
Calcium:
25
mg
|
Iron:
1
mg
Nutrition information is automatically calculated, so should only be used as an approximation.
Love this recipe? Leave a comment below!
Easy Banana Bread Recipe FAQs
If your bananas aren’t quite ripe enough for baking this delicious banana bread, don’t worry! You can accelerate the ripening process. One quick method is to place them on a baking tray and bake them at 350°F (175°C) for 6-12 minutes, or until their peels turn dark brown or black. This process softens the bananas and converts their starches to sugars, making them perfect for your loaf. Alternatively, you can place them in a paper bag with an apple or tomato; the ethylene gas they release will help ripen the bananas faster over 1-2 days at room temperature.
I personally find a warm slice of banana bread utterly delightful by itself, perhaps with a cup of coffee or tea. However, if you’re serving it as part of a brunch spread or want to elevate the experience, it pairs beautifully with many things! It would go exceptionally well alongside this Bread Pudding recipe for a sweet ensemble, or complement a savory dish like this simple Ham and Cheese Quiche for a balanced meal. For more diverse ideas, here are some other fantastic suggestions for what to pair with this versatile bread, from a dollop of whipped cream to fresh fruit salad.
Achieving that perfectly moist banana bread every time involves a few key elements:
– Use Very Ripe Bananas: This is arguably the most crucial factor. Bananas with abundant dark spots (not bruises, but a deep brown, almost black skin) are sweeter and contain more moisture, contributing directly to a tender, moist crumb. Avoid using bananas that are actively dripping liquid, as they might be past their prime.
– Do Not Overmix the Batter: Follow the mixing steps precisely. Once you combine the wet and dry ingredients, mix only until the flour streaks have just disappeared. Overmixing develops the gluten in the flour, which leads to a tough, dry, and dense bread texture. A gentle hand and a spatula are your best friends here.
– Avoid Overbaking: Overbaking is a common cause of dry banana bread. Start checking for doneness at the earliest recommended time in the recipe (around 50 minutes for this recipe). The bread is ready when a toothpick inserted into the center (check multiple spots: left, center, and right) comes out clean or with a few moist crumbs attached. If it comes out with wet batter, continue baking in short intervals. The top should also be golden brown, and the bread should spring back when lightly pressed. A slightly underbaked banana bread is far better than an overbaked one in terms of moisture!
There you have it – the ultimate guide to making the most delicious, moist, and easy banana bread. This recipe is more than just instructions; it’s an invitation to fill your kitchen with warmth and your taste buds with joy. Whether you’re a seasoned baker or just starting out, this simple banana bread will impress every time. So grab those ripe bananas, gather your ingredients, and get ready to bake a loaf that will surely become a cherished family tradition. Happy baking!