
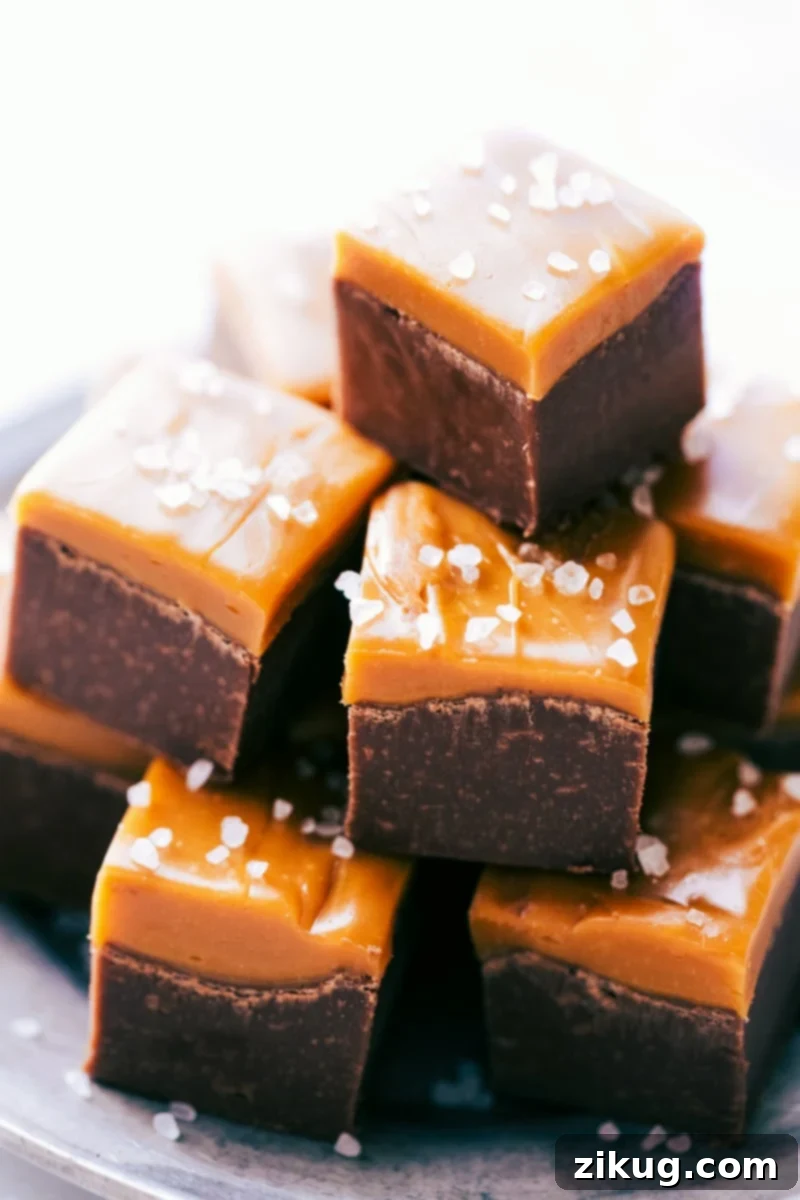
Unleash the magic of homemade treats with this incredibly **easy Microwave Fudge Recipe**, crafted with just five simple ingredients and prepared entirely in your microwave. Say goodbye to complicated stovetop methods or the need for an oven – pure deliciousness is just a few zaps away!
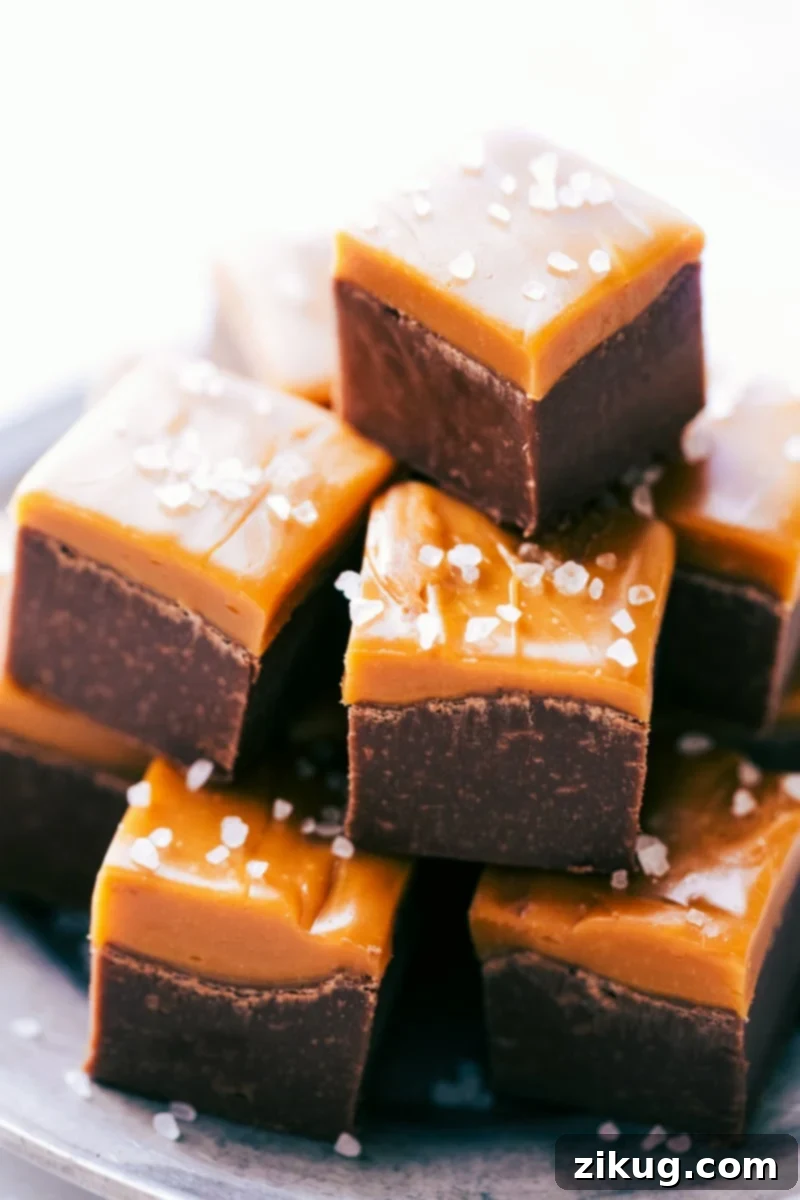

author’s note
Stir, Zap, Done: The Easiest Microwave Fudge You’ll Ever Make!
There’s a special kind of warmth that comes with holiday traditions, and for my family, making this microwave fudge has always been at the heart of our festive celebrations. Every Christmas, I recall my mom whipping up batch after batch, and as kids, we were always eager to lend a hand. What made it so perfect for little helpers? Its incredible simplicity! With just five core ingredients, it was a treat even the youngest could assist with, making it a truly memorable and engaging activity for everyone.
Beyond its ease, this fudge was, and still is, absolutely irresistible. Its rich, creamy texture and decadent chocolate flavor quickly made it one of my all-time favorite holiday confections. As I grew older, this simple recipe transformed from a childhood delight into a cherished tradition I now share with my own children. The joy of seeing their faces light up as they help stir and spread the mixture, knowing that they are part of something so special, is truly priceless.
The holidays just wouldn’t feel complete without the aroma of this homemade fudge filling our kitchen. It’s a testament to how effortless and delicious a treat can be. If you’re looking for a hassle-free, utterly delicious way to kick off your holiday season, or simply craving a quick chocolate fix, this Microwave Fudge recipe is an absolute must-try. It’s so straightforward, even a novice baker can achieve perfect results every time. Get ready to create delightful memories and a truly sensational dessert!
Essential Ingredients for the Best Microwave Fudge
Crafting perfect microwave fudge begins with selecting the right ingredients. The beauty of this recipe lies in its simplicity, requiring just a handful of staples you likely already have in your pantry. Here’s a closer look at what you’ll need and some helpful tips for each component:
| Ingredient | Swaps & Tips for Perfect Fudge |
|---|---|
| Unsalted Butter | Using unsalted butter gives you control over the overall saltiness of your fudge. If you only have salted butter, feel free to use it but omit any additional salt called for in the recipe to prevent it from becoming too savory. |
| Milk Chocolate Chips | For that classic, rich, and sweet fudge flavor, milk chocolate chips are ideal. However, don’t hesitate to experiment! Semi-sweet or dark chocolate chips will result in a less sweet, more intense chocolate flavor. White chocolate chips can also be used for a creamy vanilla-based fudge, but note that white chocolate fudge may require a slightly longer chilling time and is best cut while still very cold to maintain its shape. |
| Sweetened Condensed Milk | This is the magical ingredient that provides the creamy texture and sweet foundation for your fudge. It is absolutely crucial to use sweetened condensed milk and not evaporated milk. The two are not interchangeable in this recipe, as sweetened condensed milk is much thicker and contains a high sugar content essential for setting the fudge properly. For the best results, always opt for full-fat sweetened condensed milk, as it helps the fudge set firmly and provides a richer mouthfeel. |
| Vanilla Extract | Vanilla extract adds a beautiful depth of flavor that complements the chocolate perfectly. For a delightful twist, consider swapping it for other extracts. Almond extract can give a subtle nutty note, while peppermint extract is fantastic for a festive, minty fudge (start with 1 teaspoon and adjust to taste, as peppermint can be potent). |
| Fine Sea Salt | A tiny pinch of fine sea salt helps to balance the sweetness of the fudge and enhances the chocolate flavor, making it taste even richer. If you’re using salted butter or adding salty mix-ins like salted nuts or pretzels, you can confidently skip this extra salt. |
| Soft Caramels + Heavy Cream | This duo is specifically for the optional caramel layer, adding an extra dimension of decadence. Any brand of soft, individually wrapped caramels will work wonderfully. The heavy cream is vital for melting the caramels into a smooth, pourable sauce that won’t become too stiff. A small pinch of sea salt can be added to the melted caramel for a sophisticated salted caramel flavor that pairs exquisitely with the chocolate fudge. |
Simple Steps to Make Your Delicious Microwave Fudge
Making this irresistible microwave fudge is astonishingly straightforward. Follow these easy steps to create a perfect batch every time, with minimal effort and maximum reward!
- Prepare Your Pan: Begin by lining an 8×8-inch baking pan with parchment paper or aluminum foil. Make sure to leave an overhang on all sides; this will create “handles” that make lifting the set fudge out of the pan incredibly easy.
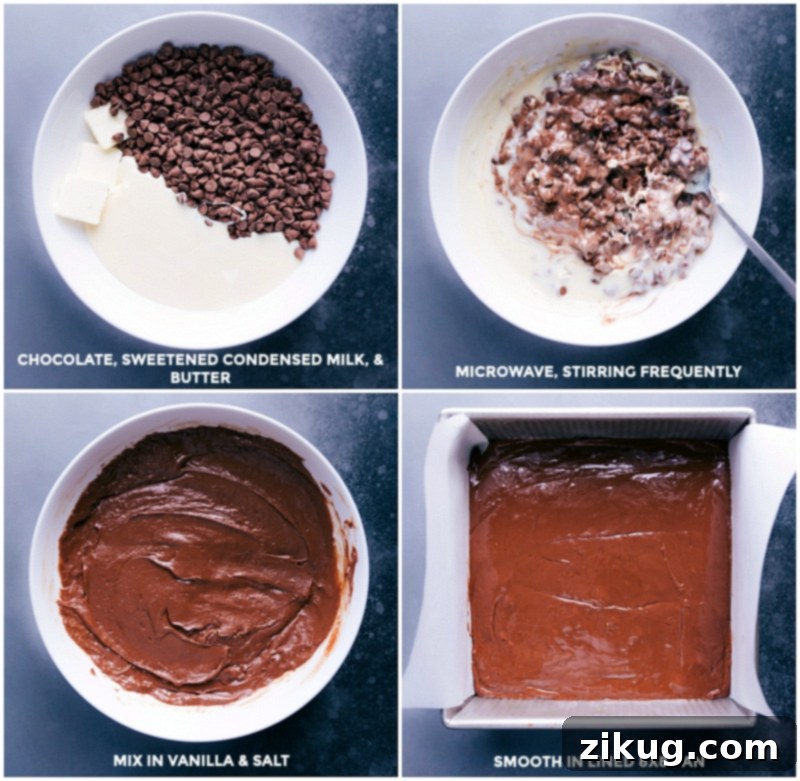
- Melt the Fudge Base: In a large, microwave-safe bowl, combine the unsalted butter (cut into tablespoons for faster melting), milk chocolate chips, and sweetened condensed milk. Microwave the mixture in 30-second intervals. After each interval, remove the bowl and stir vigorously for 20-25 seconds. It’s crucial to be patient here and stir thoroughly after each zap, as the residual heat continues the melting process and prevents the chocolate from burning or seizing. Continue this process until the mixture is completely smooth and glossy. Once melted, stir in the vanilla extract and fine sea salt until fully incorporated.
- Set the Fudge: Pour the smooth chocolate fudge mixture into your prepared 8×8-inch pan. Using a spatula lightly sprayed with nonstick cooking spray, gently spread the fudge into an even layer, ensuring it touches all sides of the pan and has a beautifully smooth top. Place the pan in the refrigerator to begin chilling while you prepare the caramel layer (if adding).
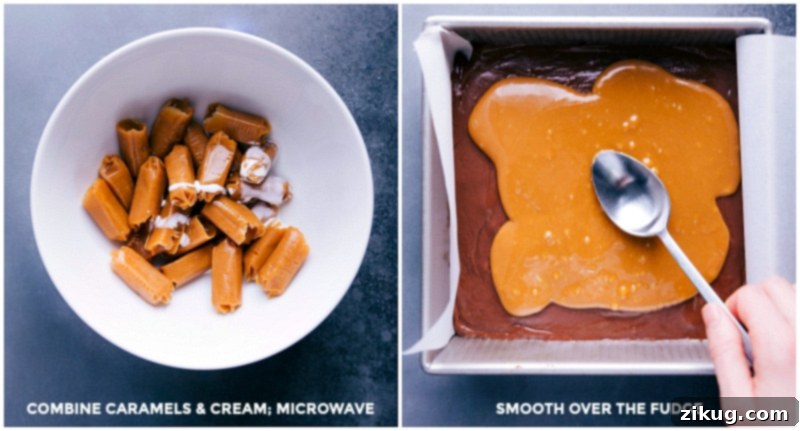
- Prepare the Caramel Layer (Optional): In a separate small, microwave-safe bowl, combine the unwrapped soft caramels and one tablespoon of heavy cream. Microwave for 10 seconds, then remove and stir for 20 seconds. Repeat these 10-second microwave bursts followed by 20 seconds of stirring until the caramels are completely melted and smooth. If the mixture is still too thick, add another tablespoon of heavy cream and continue microwaving in short bursts until it reaches a smooth, pourable consistency. Remember to melt slowly and stir frequently to avoid scorching the caramel, which can make it hard and brittle.
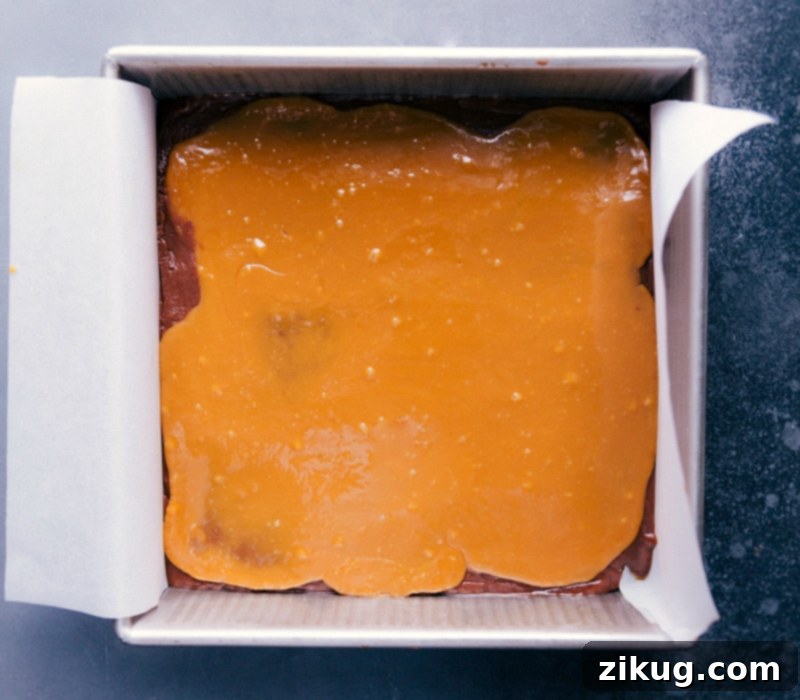
- Combine and Chill: Once the caramel is smooth, carefully spread it evenly over the chilled chocolate fudge layer in the pan. Use a nonstick-sprayed spoon or spatula to gently smooth and distribute the caramel across the entire surface. If desired, sprinkle a pinch of flaky sea salt over the caramel for a delightful salted caramel touch. Cover the pan tightly with plastic wrap and return it to the refrigerator. For best results and a perfectly set fudge, chill overnight or for at least 8 hours.
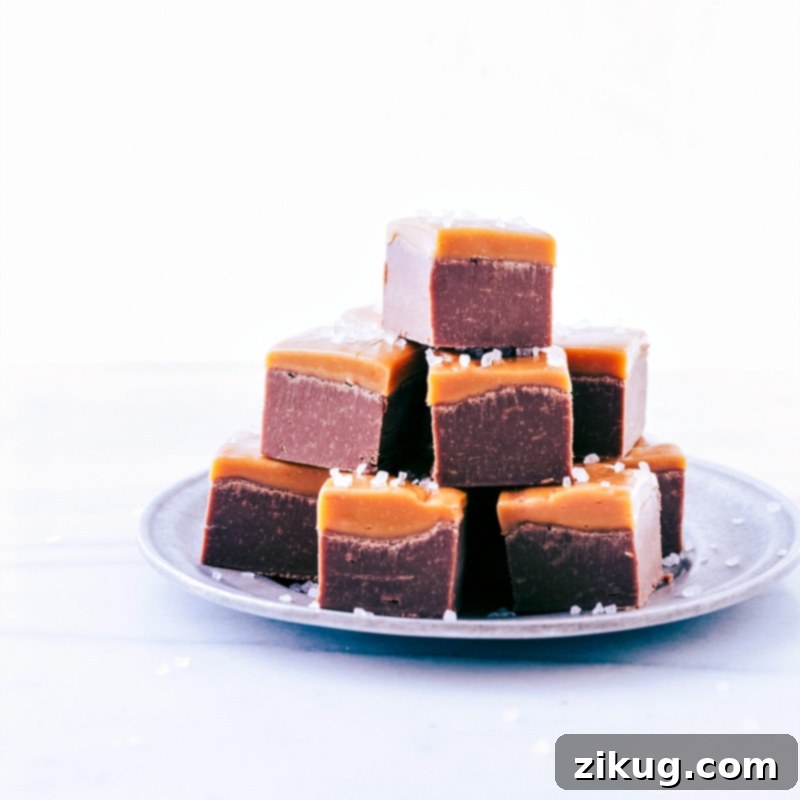
- Cut and Serve: After the fudge has thoroughly chilled and set, use the parchment paper overhang to lift the entire block of fudge out of the pan. Place it on a cutting board. To achieve clean, neat slices, run a sharp knife under hot water, dry it quickly, and then slice the fudge into desired pieces. Repeat warming and drying the knife as needed between cuts. Enjoy your homemade microwave fudge!
Expert Tips for Microwave Fudge Success
While this microwave fudge recipe is incredibly simple, a few expert tips can elevate your results from good to absolutely perfect:
- Opt for Glass Bowls: Always use a glass microwave-safe bowl when melting your ingredients. Plastic bowls can retain odors and sometimes leach chemicals into food, and they might not heat as evenly, leading to hotspots and potential burning. Glass provides more consistent and safer heating.
- Microwave with Caution: The key to perfectly melted, smooth fudge is patience and careful monitoring. Always heat in short bursts, typically 30-second intervals for the chocolate base and 10-second intervals for the caramel. Crucially, stir for 20-30 seconds *after* each microwave burst. The residual heat in the bowl and ingredients continues the melting process, preventing scorching and ensuring a silky-smooth texture without overheating.
- Line Your Pan Properly: Don’t skip the parchment paper or foil lining! This simple step is a game-changer for easy removal. Leaving a generous overhang creates convenient handles, allowing you to lift the entire block of set fudge out of the pan effortlessly, minimizing mess and frustration.
- Achieve an Even Spread: For a professional-looking finish, spray your spatula with a little nonstick cooking spray before spreading the fudge and caramel layers. This prevents the sticky mixture from adhering to the spatula, allowing you to create perfectly smooth and even layers across the pan.
- Master the Clean Cut: To get those beautiful, clean-edged fudge squares, use a sharp knife. For even better results, run the knife under hot water for a few seconds and then quickly wipe it dry before each cut. The warm blade slices through the fudge cleanly without dragging or sticking, ensuring every piece looks as good as it tastes.
- Quality Chocolate Matters: The type of chocolate you use significantly impacts the final flavor. While standard chocolate chips work, opting for higher-quality brands like Ghirardelli® or Guittard® can elevate your fudge with a richer, more complex chocolate flavor.
- Full-Fat for Firmness: When it comes to sweetened condensed milk, always choose the full-fat variety. The fat content is essential for helping the fudge set up properly and achieve that desirable firm-yet-creamy consistency.
Storage Guidelines
- Room Temperature: If your kitchen is cool (below 70°F/21°C), this microwave fudge can be stored in an airtight container at room temperature for up to 1 week. However, for optimal freshness and texture, refrigeration is recommended.
- Refrigerate: For longer-lasting freshness and a firmer texture, store the fudge in an airtight container in the refrigerator for 2–3 weeks. Chilled fudge tends to be easier to cut and less prone to stickiness.
- Freeze: To extend its shelf life even further, wrap individual pieces of fudge tightly in wax paper, then place them in a freezer-safe airtight container or heavy-duty freezer bag. It can be frozen for up to 3 months. When ready to enjoy, simply let the frozen fudge thaw at room temperature for a few hours until softened to your desired consistency.
Why This Microwave Fudge Will Become Your Go-To Recipe
This microwave fudge isn’t just a recipe; it’s a solution for quick, delicious, and stress-free dessert making. Here’s why it stands out:
- Effortless Preparation: Forget the traditional candy thermometer, constant stirring over a hot stove, and worrying about exact temperatures. This recipe eliminates all those complexities. Just a few simple zaps in the microwave and stirs are all it takes.
- Speedy Delight: From start to finish, the active preparation time is incredibly short, making it perfect for last-minute treats, unexpected guests, or satisfying a sudden sweet craving without a long wait.
- Kid-Friendly Fun: Its simplicity makes it a fantastic project for children. They can safely participate in stirring ingredients and spreading the fudge, fostering a love for baking from an early age. It’s a wonderful way to create family memories in the kitchen.
- Customizable to Your Taste: While delicious on its own, this fudge is a versatile canvas for your creativity. Easily switch up chocolate types, add different extracts, or incorporate various mix-ins to create endless flavor combinations.
- Perfect for Any Occasion: Whether it’s a holiday party, a casual get-together, a homemade gift, or just a treat for yourself, this fudge fits every scenario. Its rich, decadent nature always impresses.
Embrace the ease and deliciousness of this microwave fudge and discover why it has become a cherished staple in so many homes, mine included!
More Irresistible Holiday Treats to Explore
Desserts
No Bake Peppermint Cheesecake
Desserts
Festive Santa Cookies
Quick And Easy
Easy Christmas Snack Mix
Quick And Easy
Homemade Christmas Oreo Pops
Pin
Microwave Fudge (The Ultimate Easy Recipe)
Video Tutorial
Equipment You’ll Need
-
8 x 8-inch Baking Pan
-
Parchment Paper or aluminum foil for easy lifting
-
Large microwave-safe bowl (glass recommended)
-
Spatula
Ingredients for Quick Microwave Fudge
- 4 tablespoons unsalted butter
- 3 cups milk chocolate chips (see note 1 for variations)
- 1 (14-ounce) can sweetened condensed milk (full-fat for best results)
- 2 teaspoons vanilla extract (can swap for other extracts)
- 1/4 teaspoon fine sea salt (omit if using salted butter or salty mix-ins)
-
For the Caramel Layer (Optional):
- 5.7 ounces soft caramels (unwrapped, approximately 1 standard bag)
- 1 tablespoon heavy cream (may need an additional tablespoon)
- Flaky sea salt (optional, for topping the caramel layer)
Step-by-Step Instructions
-
Prepare Pan: Line an 8×8-inch baking pan with parchment paper or aluminum foil, ensuring a generous overhang on all sides. This overhang will serve as handles for easy removal of the fudge. Cut your unsalted butter into tablespoons to facilitate faster, more even melting.
-
Melt Fudge Base: In a large, microwave-safe glass bowl, combine the butter, chocolate chips, and sweetened condensed milk. Microwave the mixture in short 20-30 second intervals. After each interval, remove the bowl and stir thoroughly for about 20-30 seconds. Continue this process, microwaving and stirring, until the mixture is completely smooth, glossy, and free of any lumps. Be patient and stir often; this prevents burning and ensures a perfectly creamy fudge. Once melted, stir in the vanilla extract and fine sea salt until fully incorporated.
-
Pour and Chill: Pour the warm, smooth fudge mixture into your prepared 8×8-inch pan. Lightly spray a spatula with cooking spray and use it to spread the fudge into an even, smooth layer that covers the entire bottom of the pan. Place the pan in the refrigerator while you prepare the caramel, or proceed directly to chilling if omitting caramel.
-
Prepare Caramel (Optional): In a separate, small microwave-safe bowl, combine the unwrapped soft caramels and 1 tablespoon of heavy cream. Microwave for 10 seconds, then stir for 20 seconds. Repeat this process (10 seconds microwave, 20 seconds stir) until the caramels are completely melted and smooth. If the caramel seems too thick, add an additional tablespoon of heavy cream and continue microwaving and stirring. Melting the caramel slowly and stirring frequently is key to preventing it from burning or becoming hard.
-
Add Caramel Layer: Carefully spread the melted caramel evenly over the chilled chocolate fudge layer. Use a nonstick-sprayed spoon or spatula to gently smooth and spread the caramel across the entire surface. If desired, sprinkle flaky sea salt over the caramel for a delicious salted caramel effect.
-
Final Chill: Cover the pan tightly with plastic wrap and refrigerate. For optimal firmness and ease of cutting, allow the fudge to harden and set up overnight, or for a minimum of 8 hours.
-
Cut and Serve: Once completely set, use the parchment paper overhang to lift the entire block of fudge from the pan. Place it on a clean cutting board. To achieve perfectly clean and neat pieces, run a sharp knife under hot water, quickly dry it, and then slice the fudge into your desired small squares. Re-warm and dry the knife as needed between cuts to maintain clean edges. Enjoy your homemade, effortless microwave fudge!
Recipe Notes & Tips
Storage Tips: Store your delightful Microwave Fudge in the refrigerator within an airtight container. It’s best enjoyed cold within 2-3 days, when its texture is at its peak, and it will remain fresh for up to 2 weeks. Avoid leaving the fudge out at room temperature for extended periods, as this can cause it to dry out and become less firm.
Nutrition Information
Nutrition information is automatically calculated and is provided as an estimate only. It should not be considered a substitute for professional nutritional advice.
Flavorful Variations for Your Microwave Fudge
Endless Ways to Customize Your Microwave Fudge Recipe
One of the best aspects of this microwave fudge recipe is its incredible versatility. Once you’ve mastered the basic technique, you can easily customize it to create an array of delicious flavors. Here are some fantastic ideas to get you started:
- White Chocolate Dream: For a delightful change, simply swap the milk chocolate chips for white chocolate chips. This will create a creamy, vanilla-flavored fudge that’s perfect on its own or as a base for colorful additions like sprinkles or dried cranberries. Remember that white chocolate can be a bit more delicate to melt, so be extra gentle with your microwave intervals and stirring.
- Cool Peppermint Twist: Infuse your fudge with a refreshing holiday spirit by using 1 teaspoon of peppermint extract instead of vanilla. For an even more festive touch, fold in crushed candy canes or peppermint candies after the fudge has melted and before chilling. For a deeper dive, check out our Milk Chocolate Mint Swirled Fudge recipe.
- Oreo Cookie Crunch: Transform your fudge into a cookies-and-cream delight by adding about 2 cups of chopped Oreo cookies to the melted fudge mixture. Stir them in gently until just combined before spreading into the pan. The contrast of the creamy fudge and crunchy cookies is simply divine. You can also explore our dedicated Oreo Fudge recipe for more cookie-inspired ideas.
- Classic Rocky Road: For a timeless treat, stir in 3 cups of mini marshmallows and 1 cup of salted peanuts (or your favorite nuts) into the melted chocolate fudge. The combination of sweet, chewy, and crunchy textures is incredibly satisfying. If you love this concept, you might also enjoy our S’mores Fudge for another twist on classic comfort.
- Nutty Indulgence: Enhance the texture and flavor by folding in 1 to 1.5 cups of chopped nuts such as walnuts, pecans, or almonds. Toasting them lightly beforehand can bring out even more flavor.
- Dried Fruit Delight: For a more sophisticated flavor, add 1 cup of dried cranberries, cherries, or apricots to the melted fudge. These add a pleasant chewiness and a burst of fruity tang that complements the rich chocolate.
- Spicy Kick: For an adventurous palate, add 1/2 teaspoon of cayenne pepper or chili powder to the melted fudge. This creates a Mexican hot chocolate-inspired flavor that’s unexpectedly delicious.
- Coffee Lover’s Dream: Stir in 1-2 teaspoons of instant espresso powder or coffee granules with the vanilla extract to deepen the chocolate flavor and add a subtle coffee note.
Feel free to mix and match these ideas, or invent your own! The possibilities are truly endless when it comes to customizing this simple microwave fudge.
Frequently Asked Questions (FAQ)
Here are some common questions about making and enjoying microwave fudge:
- Can I use chocolate bars instead of chips? Yes, you can! Chop good quality chocolate bars into small, uniform pieces (about the size of chocolate chips) to ensure even melting. The quality of your chocolate will significantly impact the final taste, so opt for a brand you enjoy eating on its own.
- Why is my fudge grainy or crumbly? This usually happens if the sugar crystallizes, often due to overheating or not stirring enough during the melting process. Make sure to stir well after each microwave interval to dissolve sugar crystals and prevent burning.
- Why isn’t my fudge setting? The most common reasons for fudge not setting are using evaporated milk instead of sweetened condensed milk, or not using full-fat sweetened condensed milk. Ensure you’re using the correct ingredients and allowing ample chill time (at least 8 hours, preferably overnight) in the refrigerator.
- Can I double the recipe? Yes, you can double the recipe. However, you might need a larger microwave-safe bowl and a bigger pan (like a 9×13-inch). Adjust microwave times accordingly, stirring more frequently in shorter bursts to ensure everything melts evenly without scorching. It’s often easier to make two separate batches if you’re concerned about consistent heating.
- How do I make clean cuts? For perfectly neat squares, use a very sharp knife. Running the knife under hot water and quickly drying it before each cut will help it glide through the fudge without sticking.
- Can I add toppings to this fudge? Absolutely! Beyond the optional caramel layer, you can press chopped nuts, sprinkles, mini chocolate chips, or crushed cookies onto the top of the fudge immediately after spreading it into the pan and before chilling. Flaky sea salt is always a fantastic addition for a gourmet touch.
We hope these tips help you create the most delightful and easy microwave fudge!
Conclusion: Your Easiest Path to Homemade Fudge
This microwave fudge recipe truly redefines ease and deliciousness, offering a foolproof way to create a classic treat without any of the usual fuss. Whether you’re making it for festive gatherings, thoughtful gifts, or simply a sweet indulgence for yourself, its rich flavor and creamy texture are sure to be a hit. So grab your ingredients, head to the microwave, and prepare to delight in the simplest, most satisfying homemade fudge you’ve ever experienced!