
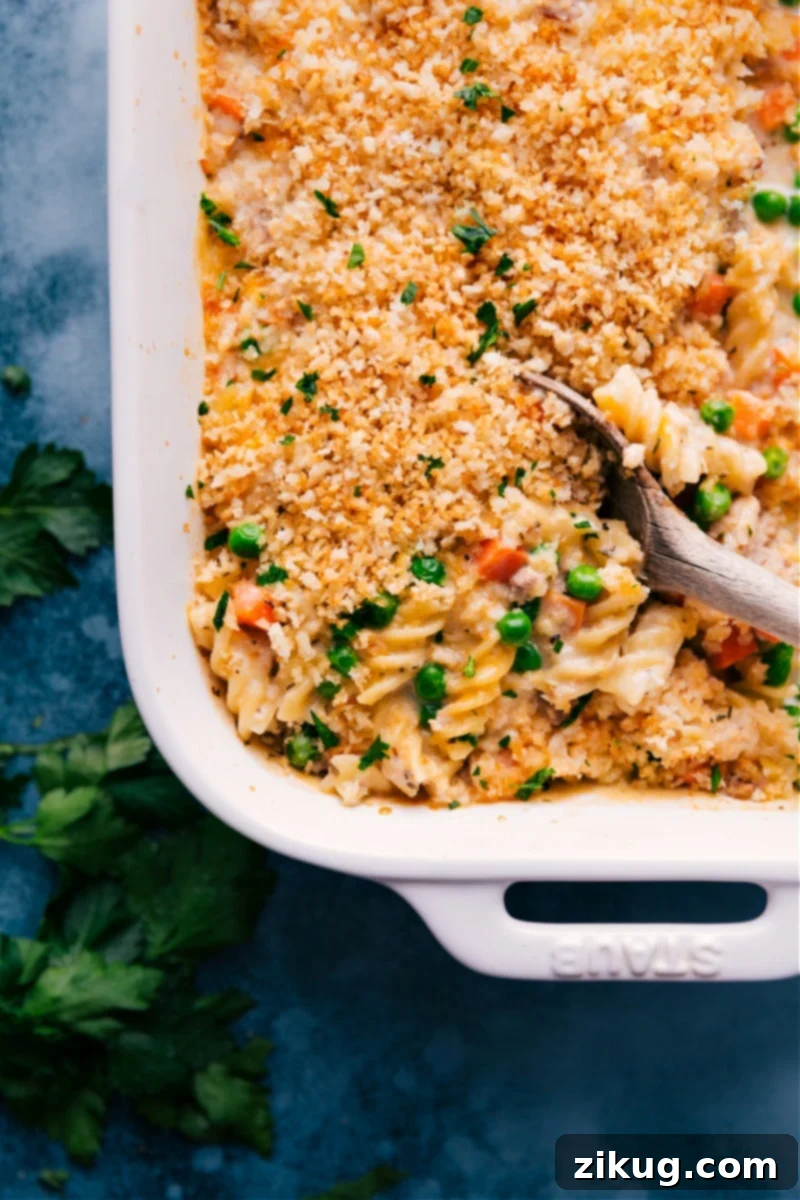
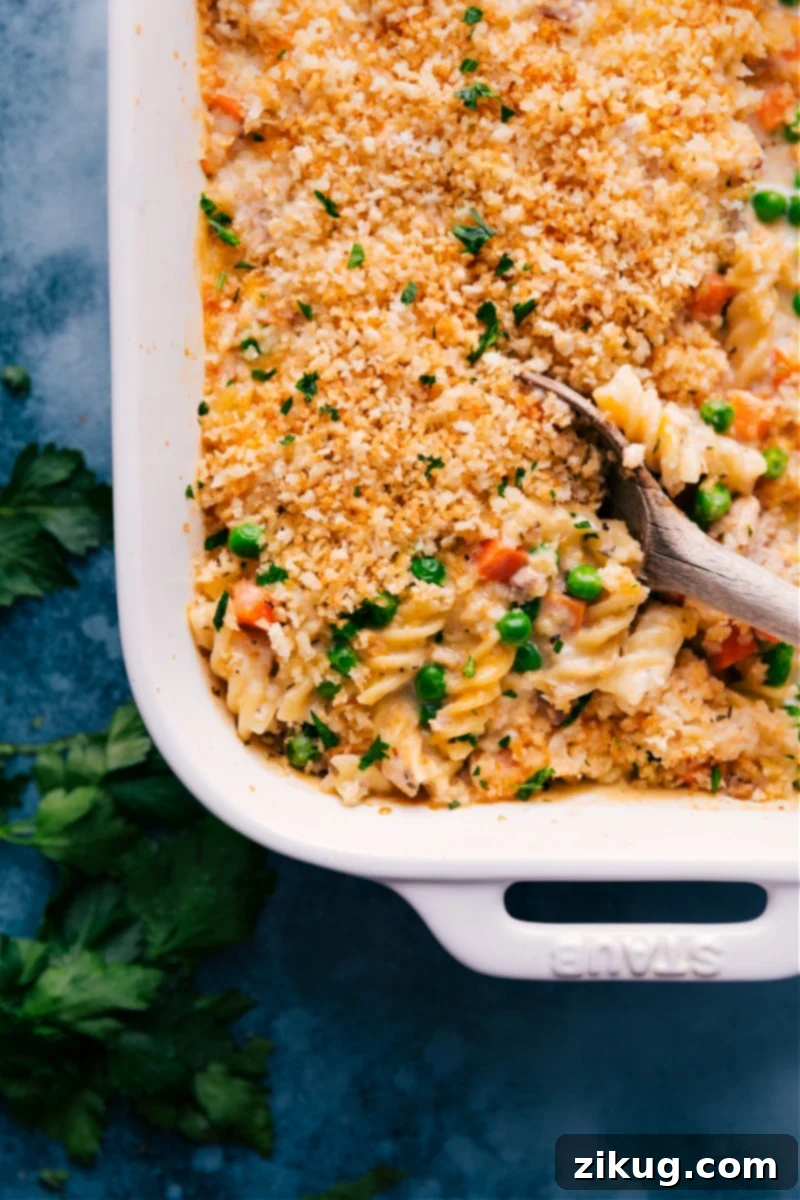
This incredibly easy One-Pan Tuna Casserole Recipe redefines weeknight cooking. Forget multiple pots and complicated steps; simply combine dry pasta, quality tuna, vibrant vegetables, and a handful of pantry staples in a single baking dish. Then, let your oven work its magic as it transforms these humble ingredients into a rich, creamy, and utterly satisfying meal that your whole family will adore.

Author’s Note
Cooking Doesn’t Get Simpler Than This!
I’m always on the hunt for recipes that deliver maximum flavor with minimal effort, especially when it comes to comforting family dinners. You might recall my previous culinary adventures where uncooked ingredients miraculously transformed into perfectly cooked dishes right in the oven. There was the incredibly fluffy and flavorful Herb Rice, born from just raw rice and herbs in a baking dish, and the ultra-tender, saucy Chicken Parmesan Pasta, created by simply combining uncooked pasta, chicken, and marinara in one pan.
Today, I’m thrilled to apply that same magical “one-pan, no-boil” concept to create what I believe is the absolute easiest and most delicious tuna noodle casserole you’ll ever make. It feels like culinary alchemy, watching raw pasta transform into a creamy, perfectly cooked meal without any pre-boiling. But rest assured, this isn’t a situation where you sacrifice taste for convenience. This tuna casserole is, first and foremost, downright delicious, and its amazing simplicity is just a wonderful bonus.
Quick Tuna Delights
Are you a fan of canned tuna as much as we are? It’s a pantry powerhouse! If you’re looking for more delicious ways to incorporate tuna into your meals, explore some of our other cherished recipes: try our incredibly easy and cheesy Tuna Melts, indulge in a bowl of creamy Tuna Macaroni Salad, or whip up our best-ever Tuna Salad for a classic lunch option. Tuna is truly versatile and always delivers on flavor!
Essential Ingredients for Your Creamy Tuna Casserole
Crafting the perfect tuna casserole starts with selecting the right ingredients. This recipe is designed to be flexible, allowing for delicious swaps while maintaining its signature creamy texture and comforting flavor.
| Ingredient | Swaps or Tips for Best Results |
|---|---|
| Rotini Pasta | For optimal results, choose a short, sturdy pasta shape with a typical 9 to 11-minute boil time. Rotini’s spirals are fantastic for clinging to the creamy sauce. Other great options include penne, elbow macaroni, or cavatappi. If using a pasta that might hide flour (like tiny shapes), whisk the flour with a bit of chicken stock first. |
| Canned Tuna | For an elevated flavor profile and richer texture, opt for tuna packed in olive oil. Albacore tuna is often preferred for its milder taste. Remember to drain the tuna very well before adding it to prevent a watery casserole. Canned chicken can be a suitable substitute if you’re out of tuna or prefer a different protein. |
| Chicken Stock | Good quality chicken stock is key here, as it forms the flavorful base of our sauce. Stock typically offers a deeper, more robust flavor than broth. If you only have broth on hand, it will work, but you might need to adjust the salt content at the end to achieve the desired seasoning. |
| Whole Milk | To achieve that luxuriously creamy texture characteristic of a classic tuna casserole, whole milk is highly recommended. While 2% or 1% milk can be used, expect a slightly thinner consistency. Skim milk and non-dairy milk alternatives are generally not suitable for this recipe, as they can affect both the texture and the way the sauce thickens. For best results, measure out your milk and let it come closer to room temperature before adding it; it will heat more evenly in the oven. |
| All-Purpose Flour | The flour acts as a thickening agent, creating the rich, creamy sauce as the casserole bakes. It’s crucial to sprinkle it evenly over the pasta at the specified step. If you decide to use a different pasta shape that might prevent even distribution, a good trick is to whisk the flour with a small amount of chicken stock beforehand to create a slurry, then stir it into the pasta mixture. |
| Frozen Peas and Carrots | This classic combination adds color, sweetness, and nutrition. You can easily customize this to your preference! Any 12 ounces of your favorite frozen vegetables will work perfectly. Consider frozen corn, mixed vegetables, or even just peas. Add them directly from the freezer; no need to thaw. |
| Sharp Cheddar Cheese | Freshly grated cheese melts significantly smoother and offers superior flavor compared to pre-shredded varieties, which often contain anti-caking agents. Sharp or extra-sharp cheddar will give your casserole a wonderful tang and depth. For a slightly different twist, try a blend of half sharp cheddar and half Monterey Jack. A food processor makes grating cheese a breeze! |
| Panko Breadcrumbs + Butter | A crispy topping is optional but highly recommended for added texture. Panko breadcrumbs provide an excellent crunch. For the best flavor, mix the panko with melted butter and a pinch of salt. Alternatively, crushed potato chips offer a nostalgic and salty crunch that’s equally delicious. |
| Seasonings (Thyme, Onion Powder, Garlic Powder, Ground Mustard, Salt & Pepper) | These seasonings form the backbone of the casserole’s flavor. Dried thyme or a good quality Italian seasoning blend both work well. Don’t underestimate the power of salt and pepper; since the pasta isn’t boiled in salted water, proper seasoning at the end is vital for a well-balanced taste. Ground mustard adds a subtle, savory depth that enhances the cheese and tuna without being overpowering. |
How To Make This One-Pan Tuna Casserole Recipe
Get ready for the simplest tuna casserole experience yet! This method streamlines the cooking process, ensuring a delicious outcome with minimal cleanup. Follow these easy steps to create a comforting meal that tastes like it took hours, but only required minutes of hands-on time.
- Prepare Oven & Pan: Begin by preheating your oven to a cozy 400°F (200°C). Generously grease a standard 9×13-inch baking dish with cooking spray to prevent sticking and ensure easy cleanup. Drain your canned tuna thoroughly and set it aside for later.
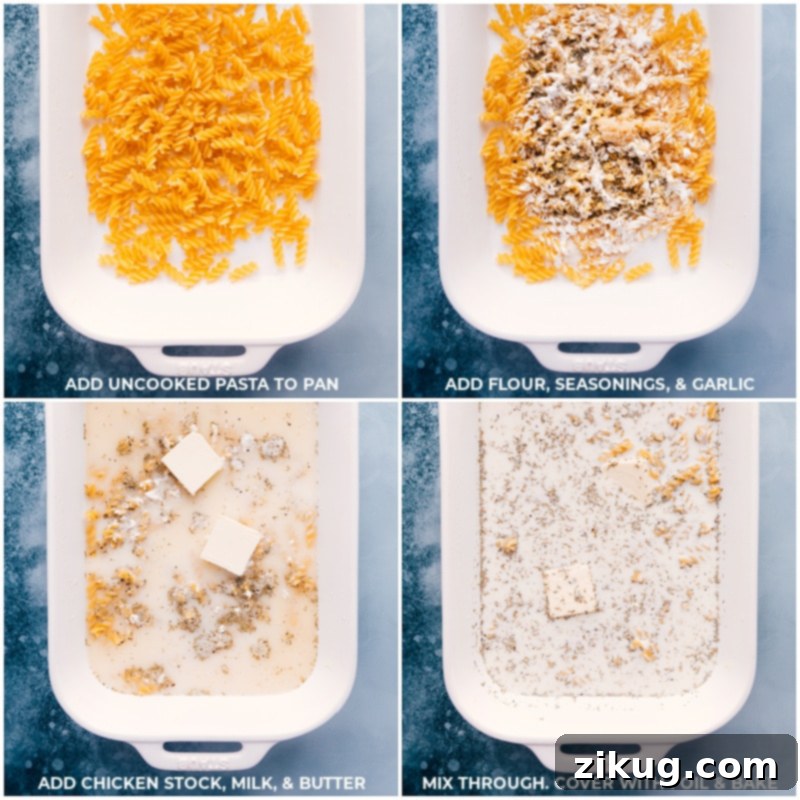
- Assemble the Base: In your prepared baking dish, layer the uncooked rotini pasta first. Evenly sprinkle the flour over the pasta, followed by the dried thyme (or Italian seasoning), onion powder, garlic powder, and ground mustard. Season generously with salt and pepper to taste – remember, the pasta isn’t boiled in salted water, so don’t be shy! Next, add the minced garlic, pour in the chicken stock and milk, and dot the top with small pieces of unsalted butter. Stir all these ingredients together very well, ensuring the pasta is submerged and the flour is fully incorporated. Cover the dish tightly with aluminum foil and bake for an initial 20 minutes.
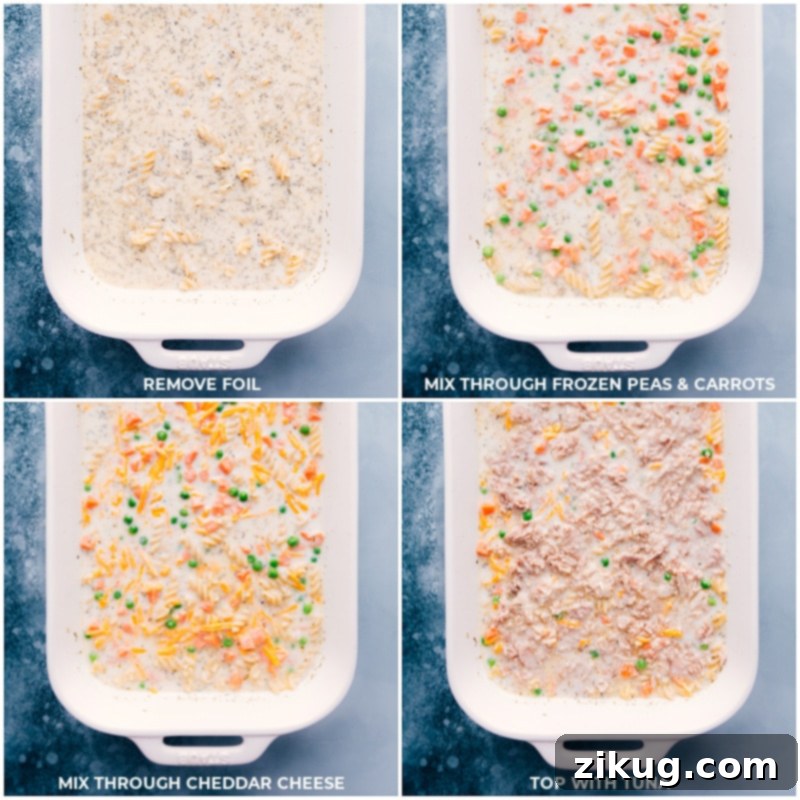
- Incorporate Stir-ins: Carefully remove the baking dish from the oven and take off the foil. Give the mixture a good stir to redistribute the ingredients and prevent any sticking. Now, add your frozen peas and carrots (or your chosen frozen vegetables) directly to the dish and stir again until well combined. Add 1 cup of the shredded sharp cheddar cheese and stir it into the creamy pasta mixture.
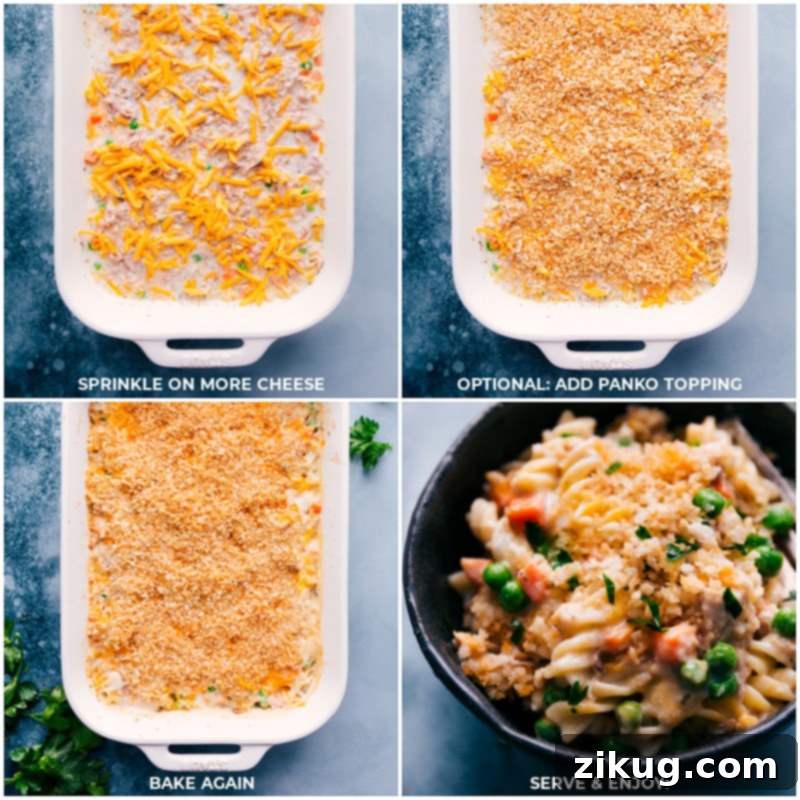
- Add Tuna & Final Topping: Gently flake the drained tuna over the top of the pasta and vegetable mixture, spreading it in an even layer. Lightly press the tuna into the mixture – there’s no need to stir it in completely at this stage. Sprinkle the remaining 1/2 cup of shredded cheddar cheese over the entire casserole. If you’re using the optional panko topping, spread it evenly over the cheese.
- Finish Baking: Return the uncovered baking dish to the oven and continue to bake for another 15-20 minutes, or until the pasta is tender, the sauce is bubbly and creamy, and the topping is golden brown and crispy. Be careful not to over-bake, as this can cause the sauce to dry out. Once baked to perfection, remove the casserole from the oven and let it rest for about 5 minutes. This allows the sauce to set slightly and thickens it further. Serve immediately with a fresh garden salad or a crisp Caesar salad for a complete and satisfying meal.
Flavor Boosting Tip
If, after tasting, you find your casserole lacks a certain something, it’s most likely missing more salt and/or pepper. Since the pasta is cooked directly in the sauce without prior salting, it needs ample seasoning. Don’t hesitate to add more to taste! For an extra burst of freshness and aroma, consider garnishing your Classic Tuna Casserole with fresh herbs like finely chopped Italian parsley or chives just before serving. These simple additions can significantly elevate the overall flavor profile.
Expert Tips for Your Best One-Pan Tuna Casserole
Making a truly exceptional one-pan tuna casserole is simple with a few insider tricks. These tips will help you maximize flavor, ensure perfect texture, and customize the dish to your liking.
- Season Generously and Wisely: Because this recipe skips the pre-cooked onion for speed, the written seasonings (thyme, onion powder, garlic powder, ground mustard, salt, and pepper) are crucial for building a flavorful base. Don’t be afraid to adjust salt and pepper to your preference after baking. If thyme isn’t your favorite, a high-quality Italian seasoning blend can be swapped in equal measure for a different aromatic profile.
- Choose the Right Tuna: The type of tuna you use significantly impacts the final taste. For the richest, most satisfying flavor, always opt for tuna packed in olive oil. Brands like Genova® Albacore are excellent choices, offering a fresh, mild, and distinctly rich taste that elevates the entire casserole. Ensure it’s very well-drained to avoid a watery sauce.
- Get Creative with Toppings: While panko breadcrumbs mixed with butter provide a delightful crunch, don’t limit yourself! A fantastic alternative is to use about 1 cup of crushed potato chips (classic plain or even cheddar-flavored) for a nostalgic and incredibly savory topping. Simply crush them directly over the casserole before the final bake.
- Vegetable Versatility: The classic peas and carrots add color and a touch of sweetness, but this recipe is incredibly forgiving. Feel free to use any 12 ounces of your favorite small frozen vegetables. Frozen corn kernels, diced bell peppers, or even a mixed vegetable medley can be excellent additions. Add them frozen; they’ll cook perfectly in the oven.
- Freshly Grated Cheese is Best: This is a non-negotiable tip for a truly creamy and smooth cheese sauce. Pre-shredded cheeses often contain anti-caking agents that can make them melt unevenly and result in a slightly grainy texture. Grating your own sharp or extra-sharp Cheddar cheese ensures a silky, rich melt and delivers a more pronounced flavor. A food processor can make quick work of grating a large block of cheese.
- Don’t Overbake: While it’s tempting to keep baking until everything looks super browned, overbaking can lead to dry pasta and a sauce that’s absorbed too much liquid. Watch for the pasta to be tender and the topping lightly golden, then remove it from the oven to retain its creamy lusciousness.
Storage & Freezing Recommendations
Can You Freeze This Tuna Casserole Recipe?
Leftover Tuna Casserole can be a lifesaver for future meals! Store it in an airtight container in the refrigerator, and it will keep beautifully for 3-4 days. It’s important to note that as the casserole sits, the pasta will continue to absorb liquid, causing the dish to thicken and become less creamy over time. When reheating, you might want to add a splash of milk or stock to bring back some moisture. For detailed instructions on how to reheat casseroles effectively in the oven or microwave without drying them out, consult our helpful guide.
Unfortunately, due to its significant dairy content (milk and cheese), this particular tuna casserole recipe is not an ideal candidate for freezing and thawing. When dairy-rich dishes are frozen and then thawed, the milk solids tend to separate, leading to an undesirable grainy texture and a distinct separation of liquids. Additionally, the pasta often absorbs excessive moisture during thawing and reheating, resulting in a mushy consistency. For best results, enjoy this casserole fresh or as refrigerated leftovers within a few days.
More Simple & Satisfying Recipes:
Dinner
Broccoli Pasta (SO Easy!)
Pasta And Pizza
Chicken Orzo Recipe (One Pot!)
Dinner
Fish Stick Tacos
Pasta And Pizza
Margherita French Bread Pizza
Tuna Casserole
Chelsea Lords
15
40
55
4 servings
Video
Equipment
-
9 x 13-inch baking pan
-
Aluminum foil
Ingredients
- Cooking spray
- 2 (5-ounce) cans tuna well drained
- 2-1/2 cups rotini pasta see note 1
- 1/4 cup flour
- 1 teaspoon dried thyme or Italian seasoning
- 1/2 teaspoon onion powder
- 1/2 teaspoon garlic powder
- 1/2 teaspoon ground mustard
- Salt and pepper
- 1-1/2 cups chicken stock or broth, see note 2
- 2 cups milk see note 3
- 1-1/2 teaspoons minced garlic
- 2 tablespoons unsalted butter
- 1 (12-ounce) bag frozen peas and carrots or frozen corn, see note 4
- 1-1/2 cups shredded sharp Cheddar cheese divided
- 1 cup panko breadcrumbs plus 2 tablespoons butter, optional topping, see note 5 for instructions
Instructions
-
Measure out milk and set aside for now. Preheat oven to 400°F (200°C). Generously grease a 9×13-inch baking pan with cooking spray. Drain tuna and set aside.
-
Add the following ingredients in this order to the pan: uncooked pasta, flour sprinkled evenly on top, thyme, mustard, onion powder, garlic powder, salt/pepper to taste (I add 1 teaspoon salt and 3/4 teaspoon pepper), minced garlic, stock/broth, milk, and butter (cut into 2 pieces). Stir well. Cover pan with foil and bake 20 minutes.
-
Remove foil and stir ingredients together well. Add frozen peas and carrots. Stir through. Add 1 cup Cheddar and stir through again. Place tuna on top of ingredients in an even layer. Gently press into the mixture (no need to stir in it). Sprinkle remaining 1/2 cup Cheddar on top. If adding panko topping (see note 5), add on top in an even layer. Return pan to the oven, uncovered, and bake another 15–20 minutes or until pasta is tender and the top is golden brown (don’t over-bake or the sauce will dry out). Remove from oven and let stand 5 minutes. Enjoy immediately!
Recipe Notes
Note 2: The better the chicken stock, the more flavor this dish will have. I love and use Swanson’s chicken stock. If using chicken broth, you may need a bit more seasoning.
Note 3: For prepping milk, remove from the fridge, measure, and set aside before starting to cook. Room-temperature milk will heat quicker! This is intended to be a creamy recipe, and the lower-fat milk choices won’t achieve the right texture. That said, you can use 1% or 2% (for a less creamy dish). Unfortunately, skim milk or dairy milk alternatives don’t work the same in this recipe.
Note 4: Use 12 ounces of whatever frozen veggie you like best—all peas, peas and carrots, all corn, or peas and corn.
Note 5: Optional panko topping: Melt 2 tablespoons butter in a large pan over medium-high heat. Once melted, add in panko and salt to taste; I add a heaping 1/4 teaspoon. Stir constantly until lightly browned, then sprinkle over the casserole. Don’t want to use stovetop/pan? Just melt butter in the microwave and mix panko through with heaping 1/4 teaspoon salt.
Storage: Leftover Tuna Casserole keeps well in an airtight container in the fridge for 3–4 days. It does thicken and become less creamy as it sits (pasta continues to absorb surrounding liquid). Because of the dairy in this casserole, it isn’t a great candidate for freezing and thawing. The milk solids will separate as it thaws, resulting in a grainy texture with some separation, and the pasta bloats and becomes mushy.
Nutrition
Serving:
1serving
|
Calories:
514kcal
|
Carbohydrates:
49.4g
|
Protein:
32.1g
|
Fat:
21.1g
|
Cholesterol:
76.3mg
|
Sodium:
535.3mg
|
Fiber:
2.5g
|
Sugar:
9.5g
Nutrition information is automatically calculated, so should only be used as an approximation.
Like this? Leave a comment below!
No-Boil Tuna Noodle Casserole Recipe FAQs
Here are some common questions and helpful answers to ensure your tuna casserole turns out perfect every time.
Tuna typically comes in two main types: light tuna (often skipjack) or white tuna (albacore). Albacore is generally milder in flavor and has a firmer texture, which many prefer for casseroles. Tuna is also packed in water, oil, or olive oil. For the richest flavor and a smoother, more succulent texture in your casserole, we highly recommend using tuna packed in olive oil. Always drain it very well before adding it to your dish.
Several factors can contribute to a dry tuna casserole:
–Baking Dish Size: Using a baking dish that is too large for the amount of ingredients can cause the liquid to spread thinly and evaporate too quickly. Stick to a 9×13-inch pan for this recipe.
–Insufficient Liquid: Ensure you’ve accurately measured the chicken stock and milk. Any reduction in liquid can lead to dryness, especially since the pasta absorbs a lot during baking.
–Over-baking: This is a common culprit. Baking the casserole for too long, even by just a few minutes, can cause all the precious liquid to evaporate or be absorbed by the pasta, leaving you with a dry dish. Keep an eye on it towards the end of the baking time, looking for tender pasta and a golden top, then remove promptly.
This specific one-pan tuna casserole recipe is absolutely intended to be eaten warm, fresh out of the oven! The creamy sauce, tender pasta, and melted cheese are at their peak when hot. That being said, many people enjoy cold leftovers, particularly if you appreciate the firmer, more set texture. It’s truly a matter of personal preference once it’s cooled!
If you find your casserole has ended up a bit dry or you simply prefer it extra moist, there are a few quick fixes:
–Drizzle with Cream or Butter: Before serving, a light drizzle of warm milk, heavy cream, or melted butter over individual servings can instantly add moisture and richness.
–Add Stock or Milk: When reheating leftovers, stir in a tablespoon or two of chicken stock or milk to help rehydrate the pasta and loosen the sauce.
–A Squeeze of Lemon: A small squeeze of fresh lemon juice not only adds a lovely bright counterpoint to the tuna but also can make the dish feel “moister” due to its acidity.
–Extra Cheese Sauce: If you have time, quickly whip up a simple béchamel sauce or cheese sauce on the stovetop and stir it into the casserole before serving or reheating.
Absolutely! This one-pan tuna casserole is highly adaptable. Consider adding sautéed mushrooms or finely diced celery to the mix for extra texture and flavor. A pinch of red pepper flakes can introduce a subtle heat, or you can stir in some grated Parmesan cheese along with the cheddar for a deeper umami note. Feel free to experiment with different frozen vegetables like broccoli florets or diced bell peppers. Just ensure any additions are in small pieces so they cook through evenly with the pasta.
The key to perfectly cooked pasta in this no-boil method lies in several factors:
–Correct Liquid Ratio: The recipe’s specified amounts of chicken stock and milk are carefully balanced to provide enough liquid for the pasta to absorb and cook. Do not alter these amounts.
–Tight Seal: Covering the baking dish with foil for the initial baking period creates a steamy environment, crucial for hydrating the pasta evenly.
–Pasta Choice: Using a short pasta like rotini, with a standard cook time (9-11 minutes), ensures it bakes through appropriately.
–Even Stirring: Stirring halfway through baking helps prevent pasta from sticking together and ensures even exposure to the liquid for consistent cooking.
There you have it – the ultimate guide to creating a luscious, creamy, and effortlessly easy one-pan tuna casserole. This recipe truly is a game-changer for busy weeknights, offering all the comforting flavors of a classic dish without the fuss. We hope this expanded version, rich in tips and details, inspires you to whip up this family favorite soon. Don’t forget to share your experience and any creative twists you try in the comments below!